Author Topic: '71cb500 FOR SALE  (Read 7997 times)

0 Members and 1 Guest are viewing this topic.

Offline Bob3050

  • Hot Shot
  • ***
  • Posts: 390
Re: '71 cb500k: Update with new parts and pictures
« Reply #25 on: November 09, 2011, 01:36:40 PM »
Davis96:
I don't know the brand name but there is a company making bleed valves with a built in check valve. In the open position the fluid will pass through as normal but when you release pressure the check valve prevents air from being drawn back into the cylinder. So you simply run a clear tube from the bleed valve, pump away until you see no more air bubbles, then tighten the bleed valve. I'm sure someone on here must know the brand. And I believe they were reasonably priced.
Bob

Offline davis96

  • Hot Shot
  • ***
  • Posts: 387
Re: '71 cb500k: Update with new parts and pictures
« Reply #26 on: November 09, 2011, 02:16:58 PM »
Davis96:
I don't know the brand name but there is a company making bleed valves with a built in check valve. In the open position the fluid will pass through as normal but when you release pressure the check valve prevents air from being drawn back into the cylinder. So you simply run a clear tube from the bleed valve, pump away until you see no more air bubbles, then tighten the bleed valve. I'm sure someone on here must know the brand. And I believe they were reasonably priced.
Bob

Hey Bob that sounds like a good solution for me, are the valves you refer to the same as "speed bleed" valves I've seen around? I thought those might save me some headaches... I also toyed with the idea of linking the two calipers, leaving only one bleeder to deal with. But I'll probably end up just going with the speed bleeders.
'74 CB350F - sold
'71 CB500K

Offline Bob3050

  • Hot Shot
  • ***
  • Posts: 390
Re: '71 cb500k: Update with new parts and pictures
« Reply #27 on: November 09, 2011, 02:33:49 PM »
Davis96:
    Yes! Speed bleeders was the name I couldn't remember.
Bob

Offline wedoo2

  • Hot Shot
  • ***
  • Posts: 441
Re: '71 cb500k: Update with new parts and pictures
« Reply #28 on: November 09, 2011, 02:58:04 PM »
Talking about a Mityvac.  Get em at Sears, or maybe a million of other places.
Some days the sun is too loud.

Offline HonderCB

  • Hot Shot
  • ***
  • Posts: 411
Re: '71 cb500k: Wizard Sleeve
« Reply #29 on: November 10, 2011, 11:34:52 AM »
damn...that's real clean style...totally dig...that appliance epoxy looks great...looks way better to me than modern basecoat/clearcoat...in the the pics it looks like an old laquer job...where do you get it?
I get it from Home Depot, its less than 4 dollars a can. It took less than 2 cans to do the tank and side covers, with about 5 coats each. I've found that it helps to heat up the can either in warm water or sitting it out in the sun for a few minutes, and really shake the #$%* out of it, that way there is more pressure in the can making for a finer mist and a much better result. Light coat, 5-10 minutes flash time, then another coat etc etc til the part you're painting is as glossy and fresh as you want it to be.
The paint is great because you don't need to prime the parts and once you spray it it lays down thick and glassy; and best of all after it cures (it takes a week to cure fully) it is tough as nails.

When you say it lays down thick, do you mean liek think enough to fill in any minor imperfections in an inexperienced body-mans work?  i really like this idea, but my bondo-ing aint so hot lol
-Scott, just a F'er from Illinois-

77' CB750F
81' CB650C - SOLD

Offline davis96

  • Hot Shot
  • ***
  • Posts: 387
Re: '71 cb500k: Update with new parts and pictures
« Reply #30 on: November 10, 2011, 01:54:59 PM »
damn...that's real clean style...totally dig...that appliance epoxy looks great...looks way better to me than modern basecoat/clearcoat...in the the pics it looks like an old laquer job...where do you get it?
I get it from Home Depot, its less than 4 dollars a can. It took less than 2 cans to do the tank and side covers, with about 5 coats each. I've found that it helps to heat up the can either in warm water or sitting it out in the sun for a few minutes, and really shake the #$%* out of it, that way there is more pressure in the can making for a finer mist and a much better result. Light coat, 5-10 minutes flash time, then another coat etc etc til the part you're painting is as glossy and fresh as you want it to be.
The paint is great because you don't need to prime the parts and once you spray it it lays down thick and glassy; and best of all after it cures (it takes a week to cure fully) it is tough as nails.

When you say it lays down thick, do you mean liek think enough to fill in any minor imperfections in an inexperienced body-mans work?  i really like this idea, but my bondo-ing aint so hot lol
Yea to a certain extent. Itll fill in scratches, but if the bodywork is wavy, the gloss of the paint might make it more obvious
'74 CB350F - sold
'71 CB500K

Offline davis96

  • Hot Shot
  • ***
  • Posts: 387
Re: '71 cb500k: Update with new parts and pictures
« Reply #31 on: November 10, 2011, 06:21:16 PM »
Dual discs almost ready to roll:
'74 CB350F - sold
'71 CB500K

Offline HonderCB

  • Hot Shot
  • ***
  • Posts: 411
Re: '71 cb500k: Update with new parts and pictures
« Reply #32 on: November 11, 2011, 09:00:31 AM »

Yea to a certain extent. Itll fill in scratches, but if the bodywork is wavy, the gloss of the paint might make it more obvious
[/quote]

Sweet, thanks
-Scott, just a F'er from Illinois-

77' CB750F
81' CB650C - SOLD

Offline davis96

  • Hot Shot
  • ***
  • Posts: 387
Re: '71 cb500k: Update with new parts and pictures
« Reply #33 on: November 14, 2011, 07:19:20 PM »
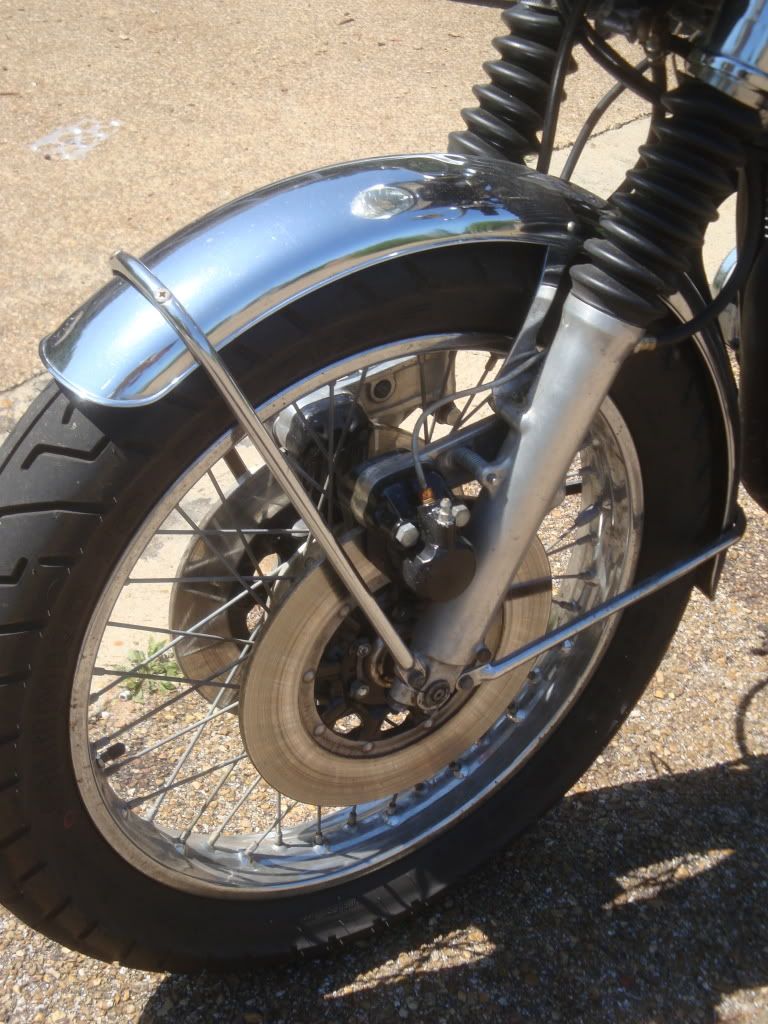
Finally got the dual-disc brakes set up, after a little bit of fine-tuning on the angle of the caliper and bleeding the lines that will be one step closer.


Also got my 115 jets from Dime City Cycles in the mail, so once I set the air screws she'll theoretically be ready to run. (fingers crossed)
'74 CB350F - sold
'71 CB500K

Offline davis96

  • Hot Shot
  • ***
  • Posts: 387
Re: '71 cb500k slow cheap build: Dual disc conversion complete!
« Reply #34 on: January 11, 2012, 04:44:03 PM »
So I got pretty busy with school and this project was put on hold somewhat... But now the bike is basically done, just waiting for some decent weather to get out and do some tuning.

You might notice I also moved the rear fender a few inches back


I found some cheap clip-ons on ebay for practically nothing, and found a way to mount them while preserving the headlight ears by flipping the triple tree upside down. As a result I had to wire and relocate a couple of these LEDs which for the only two idiot lights that matter (neutral and oil pressure).


Still under $1000 spent; now I'm just ready ready to get the hassle of registering without a title over with and get to riding.
« Last Edit: January 11, 2012, 04:49:35 PM by davis96 »
'74 CB350F - sold
'71 CB500K

Offline lucky

  • Really Old Timer ...
  • *******
  • Posts: 6,717
Re: '71 cb500k: Wizard Sleeve
« Reply #35 on: January 12, 2012, 06:58:34 AM »
damn...that's real clean style...totally dig...that appliance epoxy looks great...looks way better to me than modern basecoat/clearcoat...in the the pics it looks like an old laquer job...where do you get it?
I get it from Home Depot, its less than 4 dollars a can. It took less than 2 cans to do the tank and side covers, with about 5 coats each. I've found that it helps to heat up the can either in warm water or sitting it out in the sun for a few minutes, and really shake the #$%* out of it, that way there is more pressure in the can making for a finer mist and a much better result. Light coat, 5-10 minutes flash time, then another coat etc etc til the part you're painting is as glossy and fresh as you want it to be.
The paint is great because you don't need to prime the parts and once you spray it it lays down thick and glassy; and best of all after it cures (it takes a week to cure fully) it is tough as nails.

When you say it lays down thick, do you mean liek think enough to fill in any minor imperfections in an inexperienced body-mans work?  i really like this idea, but my bondo-ing aint so hot lol

 A professional painter told me that to Bondo a tank you need to cover the entire tank with a layer of bond, not just suspected low spots. He said then you shave it down (sure form), while  the Bondo is still soft. Then after it is hard you do the sanding.
Then the paint goes on smooth because the surface is all the same texture. Not shiny in some areas and bondo in low spots.

Offline davis96

  • Hot Shot
  • ***
  • Posts: 387
Re: '71 cb500k slow cheap build: new pics (1/11)
« Reply #36 on: January 12, 2012, 01:37:14 PM »
damn...that's real clean style...totally dig...that appliance epoxy looks great...looks way better to me than modern basecoat/clearcoat...in the the pics it looks like an old laquer job...where do you get it?
I get it from Home Depot, its less than 4 dollars a can. It took less than 2 cans to do the tank and side covers, with about 5 coats each. I've found that it helps to heat up the can either in warm water or sitting it out in the sun for a few minutes, and really shake the #$%* out of it, that way there is more pressure in the can making for a finer mist and a much better result. Light coat, 5-10 minutes flash time, then another coat etc etc til the part you're painting is as glossy and fresh as you want it to be.
The paint is great because you don't need to prime the parts and once you spray it it lays down thick and glassy; and best of all after it cures (it takes a week to cure fully) it is tough as nails.

When you say it lays down thick, do you mean liek think enough to fill in any minor imperfections in an inexperienced body-mans work?  i really like this idea, but my bondo-ing aint so hot lol

 A professional painter told me that to Bondo a tank you need to cover the entire tank with a layer of bond, not just suspected low spots. He said then you shave it down (sure form), while  the Bondo is still soft. Then after it is hard you do the sanding.
Then the paint goes on smooth because the surface is all the same texture. Not shiny in some areas and bondo in low spots.

Its all subjective, everybody has a different technique. But no, the paint won't help bad body work, if the bodywork is wavy, the paint will emphasize that. The thickness only really helps with scratches and the like..
'74 CB350F - sold
'71 CB500K

Offline davis96

  • Hot Shot
  • ***
  • Posts: 387
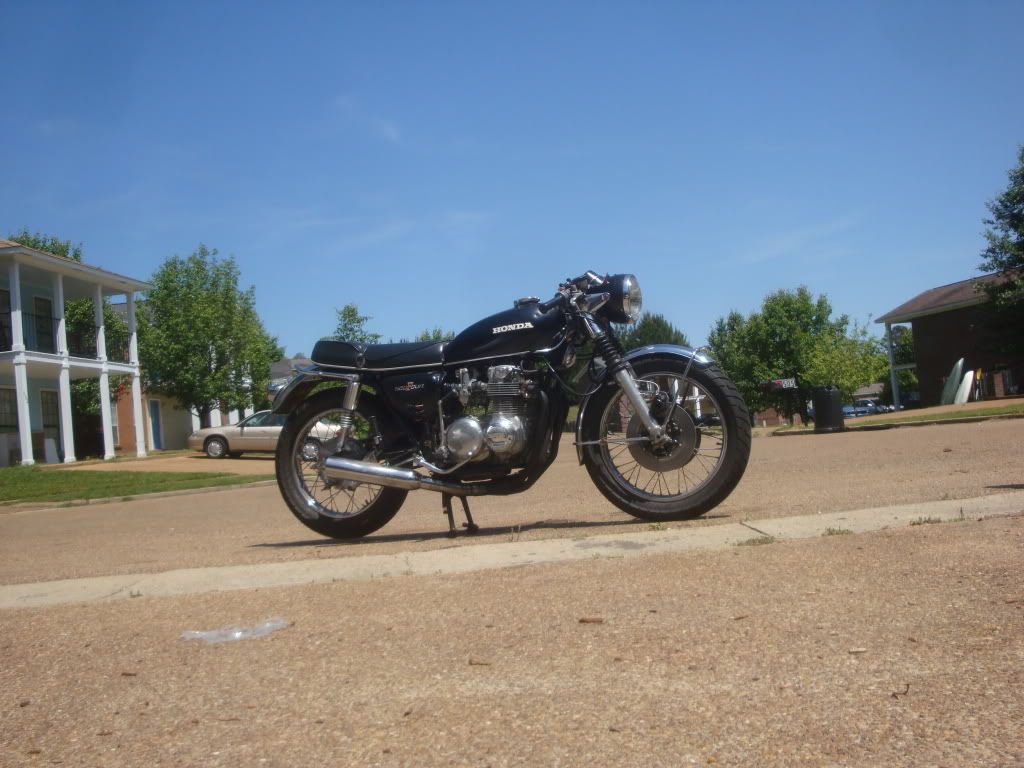
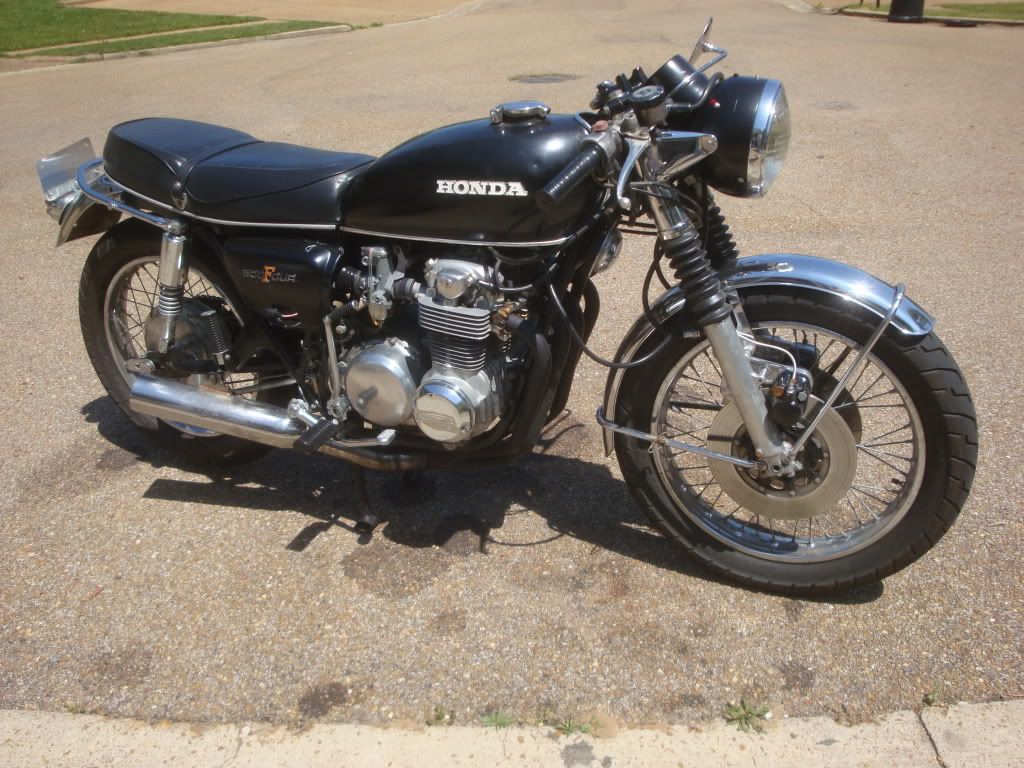
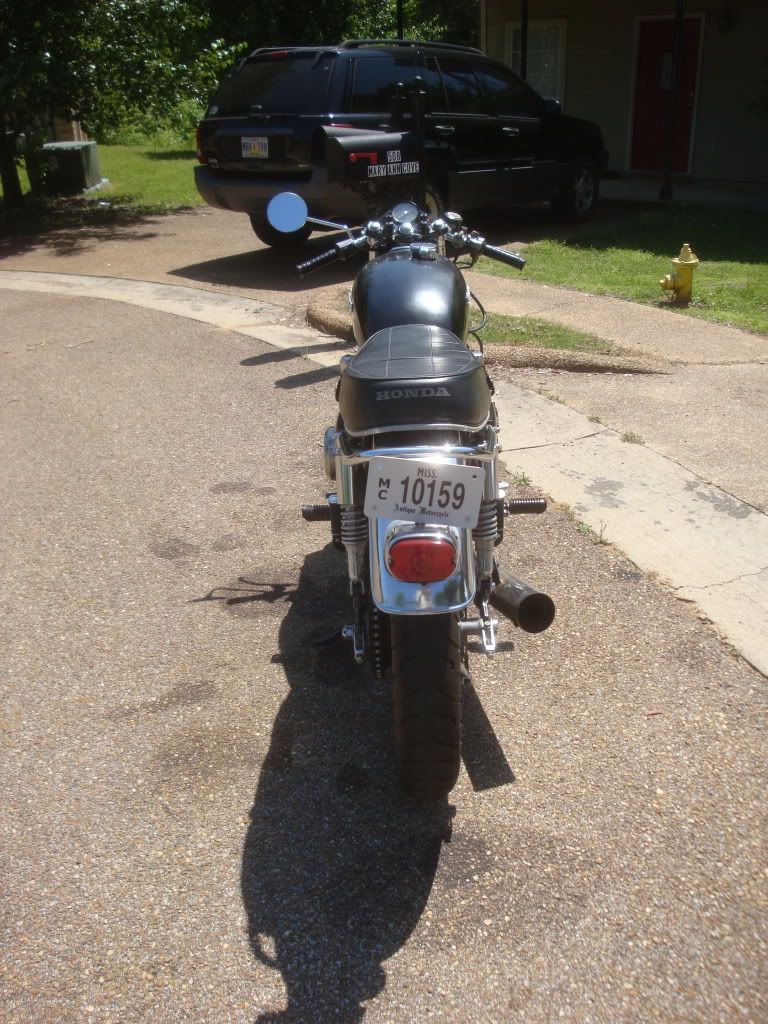
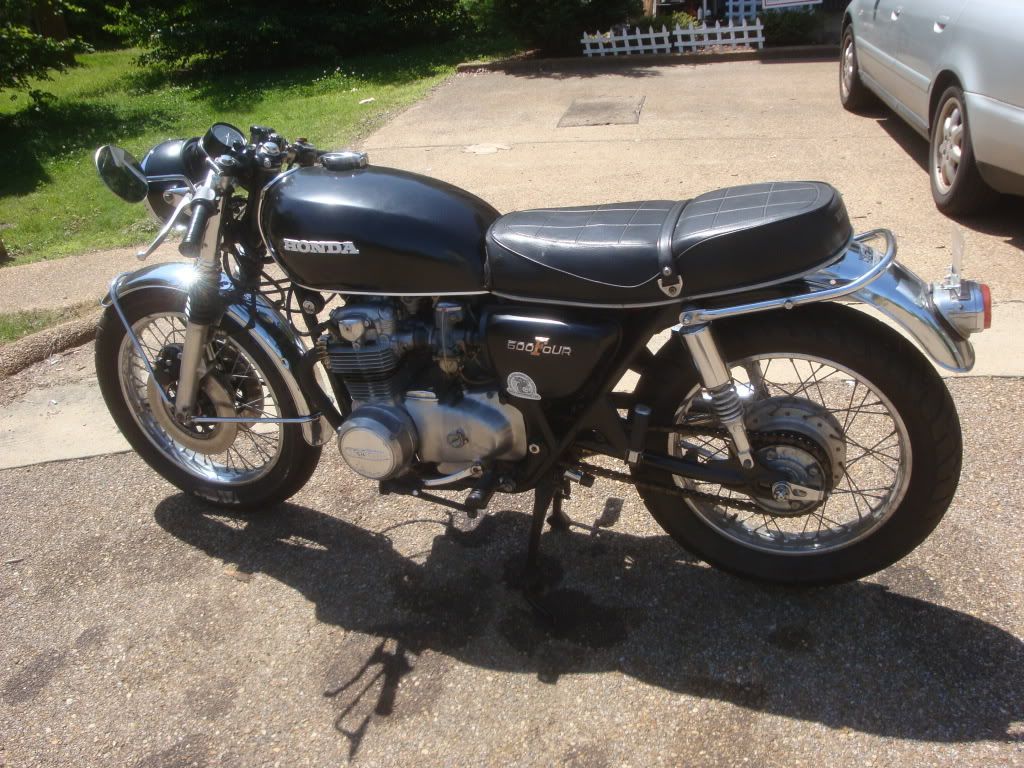
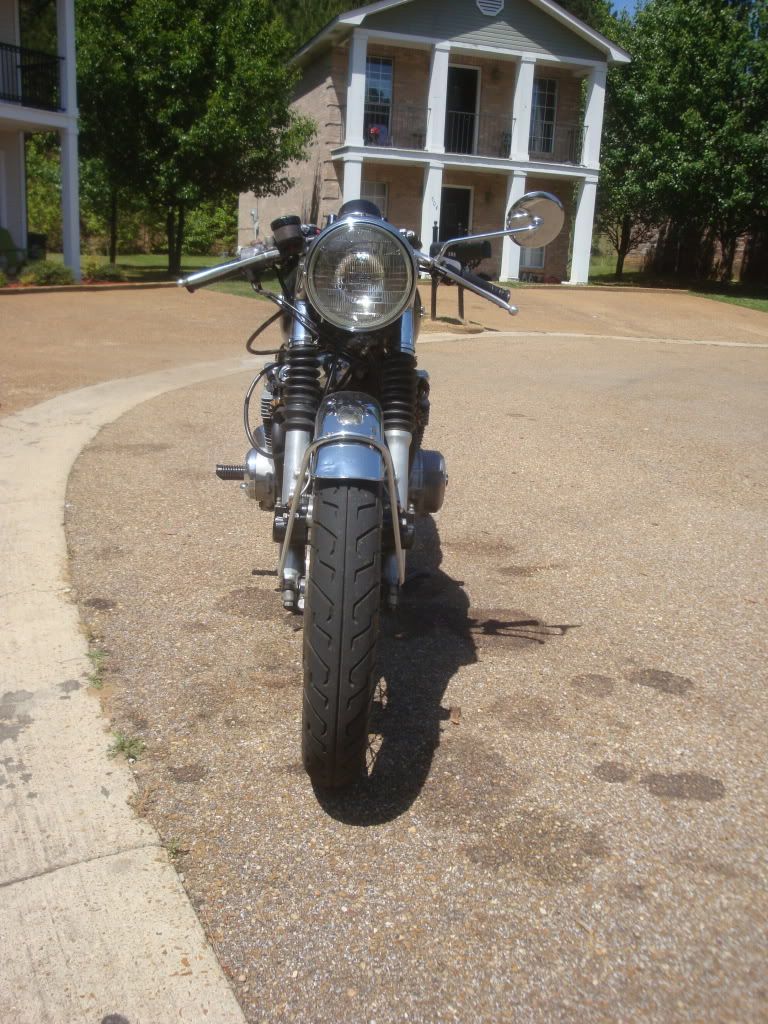
It's been a while since I posted, but for good reason. The bike is running great (if a little rich), and I've literally ridden it everywhere I've gone for the past few months. My car gets very little use if any these days, and I love it. Soon as I get the fuel mix right and fix the bike's incontinence problem so it doesn't piss all over the ground every time I stop, I'll be content.

What's new:
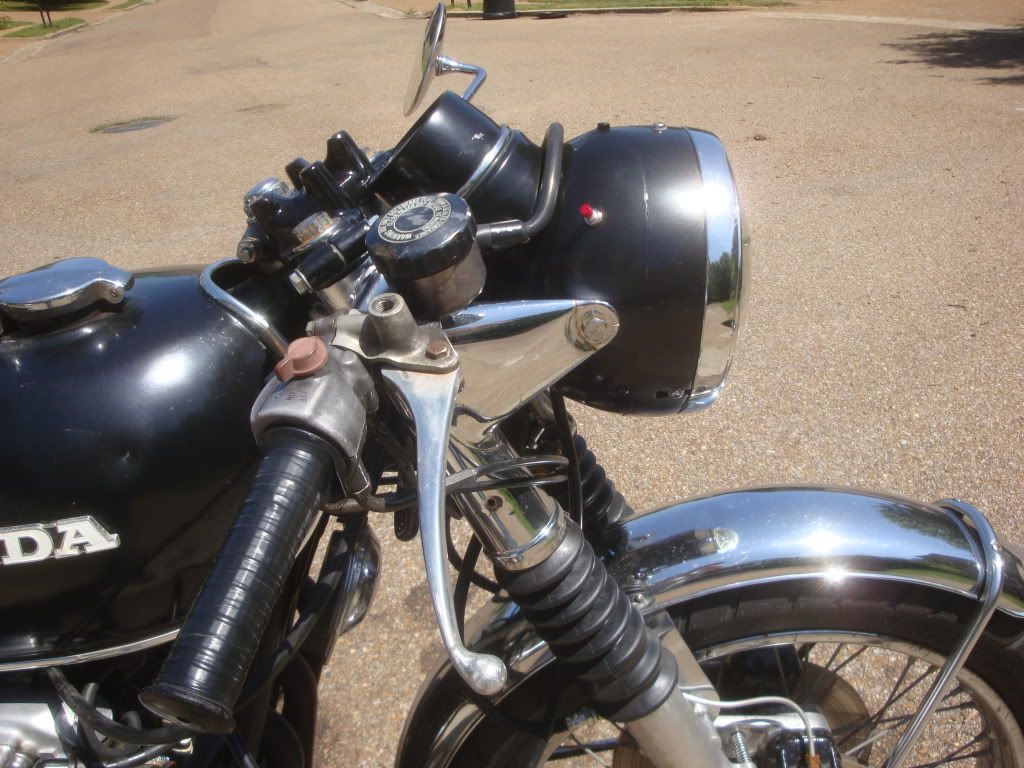
- Integrated the tach into the headlight bucket, along with a stretch of the bucket to make some room inside
- ground off the gauge mount tabs on the top triple tree so the headlight/tach can have full range of movement and doesn't hit anything.
- Rigged up an admittedly hack-ish "P.O." type start switch in the headlight bucket, since mine went out. Believe me I tried everything to fix that fragile little switch, but I threw in the towel and went with a radioshack momentary switch
- Made an iPhone mount from the old handlebar dash/light thingy... Never seen this done before but it seemed like a good idea. Since I don't have a speedo anymore I just use a speedometer app on my phone while I'm out riding
- Pulled apart an $8 bluetooth headset, extended wires to external headphones and mic integrated into the crappy snowmobile helmet I ride with. Its cool that if I get a call, my phone is right there so I can see who it is and answer it, as well as listen to music


'74 CB350F - sold
'71 CB500K