Author Topic: 1975 cb550 Project SENCHA - bike has found new home  (Read 81093 times)

0 Members and 2 Guests are viewing this topic.

Offline dave500

  • Really Old Timer ...
  • *******
  • Posts: 17,033
  • WHAT?no gravy?
Re: 1975 cb550 Project SENCHA - ENGINE - TOP END - piston/cylinder
« Reply #75 on: August 09, 2012, 12:54:35 AM »
you can smooth it out with wet and dry paper,find some plate glass and surface the inlets on wet and dry laid on the glass,slightly chamfer those oil feed holes at the end of the head.

Offline goldarrow

  • one day, i'll be an
  • Old Timer
  • ******
  • Posts: 3,361
Re: 1975 cb550 Project SENCHA - ENGINE - TOP END - piston/cylinder
« Reply #76 on: August 09, 2012, 06:25:27 PM »
thanks dave, after some reading and responses from other posts, i chose the cheapest route for now by sanding and polishing with wet/dry sandpaper.  and here's how it looks.  smoother but still pitted.  should i polish some more?


here are some pics of camshaft bearing surfaces


more camshaft bearing surfaces


and one more camshaft bearing surfaces


too much negativity on this engine lately, so let's see something more positive and motives
my side covers that i painted couple of weeks ago....and i'm liking them
Life Is Full Of Challenges - And My Backyard Is Full Of SOHC4's

CB550 K0
CB750 K0, K2, K23 JDM, K45, K5
And the little ones z50r, xr50r, st90


750k5 http://forums.sohc4.net/index.php?topic=114817.0

Offline dave500

  • Really Old Timer ...
  • *******
  • Posts: 17,033
  • WHAT?no gravy?
Re: 1975 cb550 Project SENCHA - ENGINE - TOP END - piston/cylinder
« Reply #77 on: August 10, 2012, 12:42:05 AM »
that combustion chamber will be fine now,dont wet or dry those cam bearing surfaces at all,youll be using new seals on the valve guides so pop those old ones off,youll be lapping the valves next,youve kept them all in order and marked so they go back into their original positions?give the stems a quick polish by hand aswell,get the guides cleaned right out by pulling rag through them over and over untill it comes through clean,i use small guage steel wire with a hook and rag wrapped over it spun gently in a drill to lightly polish the guides.

Offline goldarrow

  • one day, i'll be an
  • Old Timer
  • ******
  • Posts: 3,361
1975 cb550 Project SENCHA - ENGINE - TOP END - piston/cylinder
« Reply #78 on: August 10, 2012, 03:53:01 PM »
So finally gaskets kit came in


and off I went to autozone and bought this permatex sealant DO NOT USE THIS


Use it sparingly from reading other posts

Will also clean the valve guides before put everything back
« Last Edit: March 07, 2013, 02:03:21 PM by goldarrow »
Life Is Full Of Challenges - And My Backyard Is Full Of SOHC4's

CB550 K0
CB750 K0, K2, K23 JDM, K45, K5
And the little ones z50r, xr50r, st90


750k5 http://forums.sohc4.net/index.php?topic=114817.0

Offline goldarrow

  • one day, i'll be an
  • Old Timer
  • ******
  • Posts: 3,361
1975 cb550 Project SENCHA - ENGINE - TOP END - piston/cylinder
« Reply #79 on: August 11, 2012, 04:26:44 PM »
Piston rings close up pics. Going to install in order from left to right


to piston grooves top to bottom.

Reusing piston pin clips? My local Honda ran out of stock.

Also bought 6 of these $6/ea.


Also yamabond 4 semi drying liquid gasket for the rubber pucks
« Last Edit: August 11, 2012, 05:26:35 PM by goldarrow »
Life Is Full Of Challenges - And My Backyard Is Full Of SOHC4's

CB550 K0
CB750 K0, K2, K23 JDM, K45, K5
And the little ones z50r, xr50r, st90


750k5 http://forums.sohc4.net/index.php?topic=114817.0

Offline dave500

  • Really Old Timer ...
  • *******
  • Posts: 17,033
  • WHAT?no gravy?
Re: 1975 cb550 Project SENCHA - ENGINE - TOP END - piston/cylinder
« Reply #80 on: August 11, 2012, 10:57:56 PM »
ive reused the piston wrist pin clips over before,its not best practise but if you dont distort them on removal theyll be fine,look close at the flat surfaces of the rings,any mark on them faces upwards,you have them in order,,the chrome one is the top ring,dont apply any sealant on the head or barrell gasket.

Offline goldarrow

  • one day, i'll be an
  • Old Timer
  • ******
  • Posts: 3,361
1975 cb550 Project SENCHA - ENGINE - TOP END - piston/cylinder
« Reply #81 on: August 13, 2012, 08:38:46 AM »
Over the weekend, got some time to assembling few pieces on the motor...

Checked to make sure the two oil jets/nozzle are not clogged up, blown off with compressor and clean with

Also chamfer the two oil holes as instructed


Installed base cylinder rings, laid the gasket down, face up....the edge of the gasket sticks out of the barrel when installed, should I trim it down?

This picture the gasket seems to sticking out a lot because the barrel is not full seated to the base case as I was just finished putting back on the cam tensioner


Another problem is the top gasket, oil hole on the gasket is off the hole, should I also trim this down?
Left oil hole


Right oil hole


The gasket holes for cylinder bores are all good
Life Is Full Of Challenges - And My Backyard Is Full Of SOHC4's

CB550 K0
CB750 K0, K2, K23 JDM, K45, K5
And the little ones z50r, xr50r, st90


750k5 http://forums.sohc4.net/index.php?topic=114817.0

Offline goldarrow

  • one day, i'll be an
  • Old Timer
  • ******
  • Posts: 3,361
1975 cb550 Project SENCHA - ENGINE - TOP END - piston/cylinder
« Reply #82 on: August 13, 2012, 05:19:38 PM »
Fixed up gasket problem above. Oil rings sit the way they should now...

And cleaned up the valves...


They look clean?


Lapping the valves next
Life Is Full Of Challenges - And My Backyard Is Full Of SOHC4's

CB550 K0
CB750 K0, K2, K23 JDM, K45, K5
And the little ones z50r, xr50r, st90


750k5 http://forums.sohc4.net/index.php?topic=114817.0

Offline Mcwilliams570

  • Hot Shot
  • ***
  • Posts: 646
Re: 1975 cb550 Project SENCHA - ENGINE - TOP END - piston/cylinder
« Reply #83 on: August 13, 2012, 06:40:38 PM »
Looking good so far man keep it up..

Matt
My CB550 project http://forums.sohc4.net/index.php?topic=101182.0

Project UFB Cb550 http://forums.sohc4.net/index.php?topic=112143.0

Like a 10 dollar hooker on Friday night its going to be ridden.

1974 cb550
1975 cb550
2005 vmax
2009 vmax-sold
1981 gl500i

Offline goldarrow

  • one day, i'll be an
  • Old Timer
  • ******
  • Posts: 3,361
Re: 1975 cb550 Project SENCHA - ENGINE - TOP END - piston/cylinder
« Reply #84 on: August 15, 2012, 06:17:22 PM »
thank matt, the engine is going up...slowly but surely....

past couple of days, head and valves clean and lapped.  i'll be honest here, never again if there is another chance, will send this off to the Pros to do the head and valves job.  bought the compound, bought the valve grinding stick but didn't work the way it should, so i used my finger instead, very slow process and probably did a half @$$ed job on it. 

here's how to head looks with the valves cleaned and put in, before installing the springs
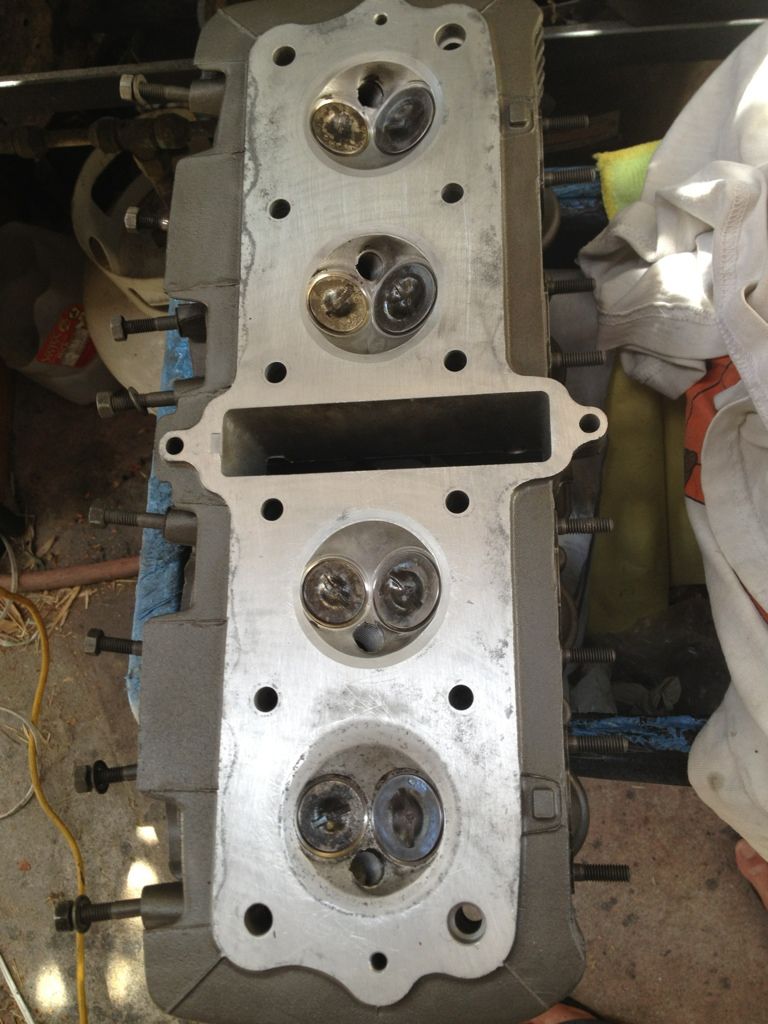

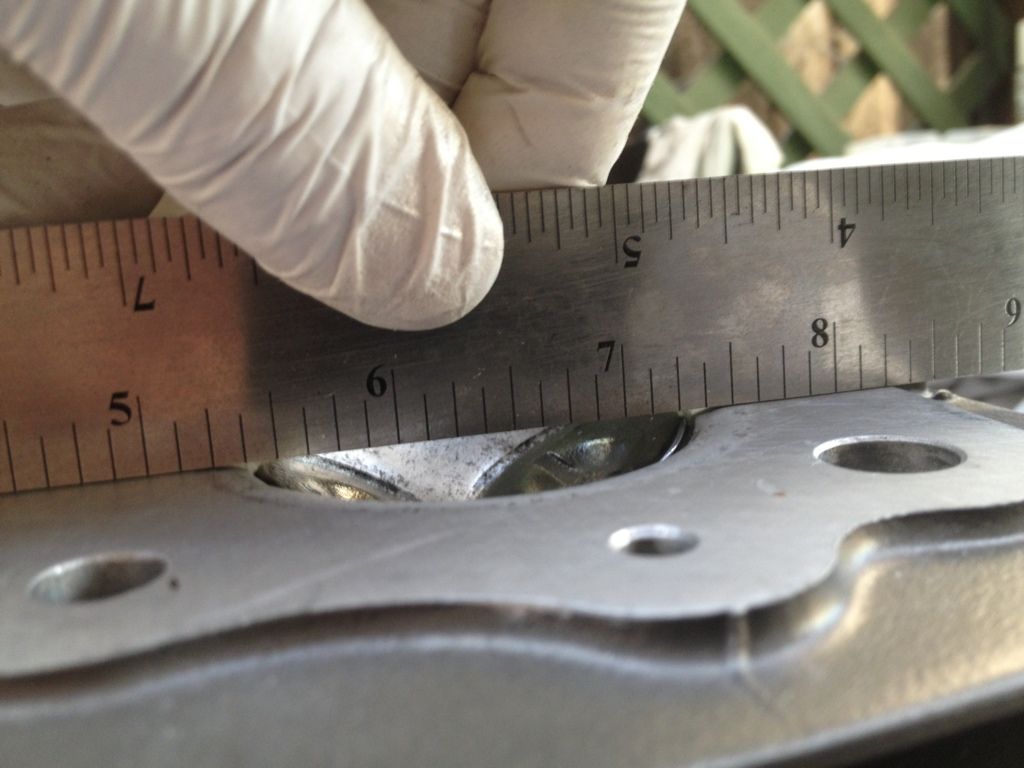
used metal ruler across the head surface pretty much all axis to make sure no surprises as far as warping and valves clearance

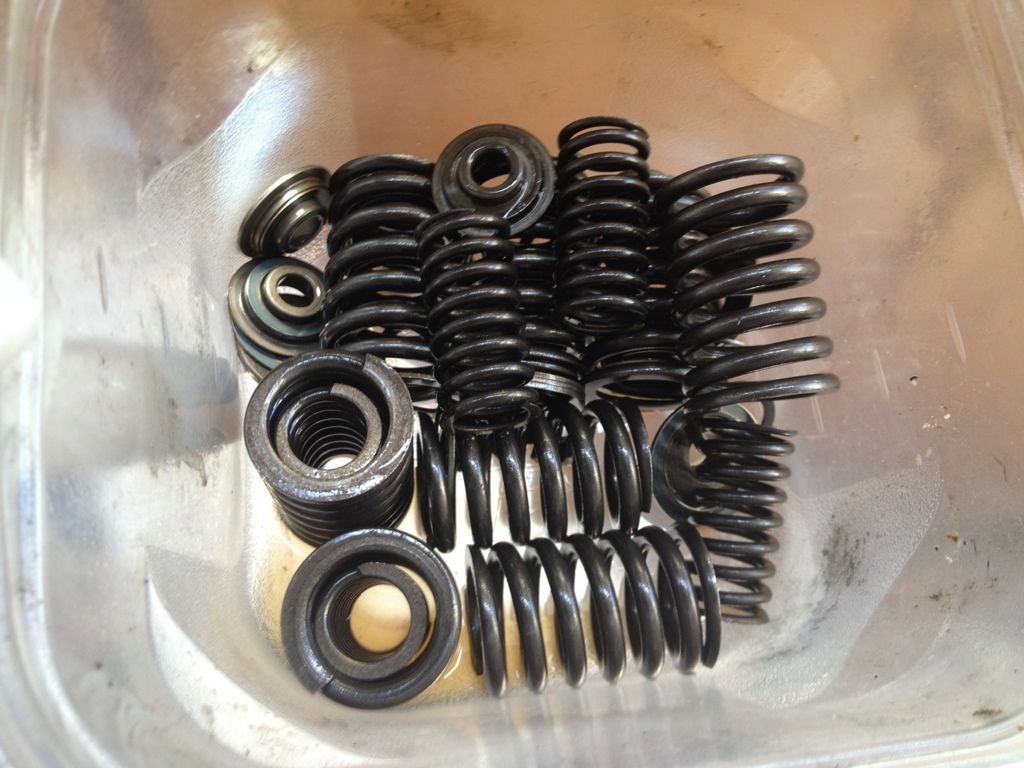
here's i think i made a mistake here that i throw all springs hardware together when disassembling.  so all i could do was just pair them up

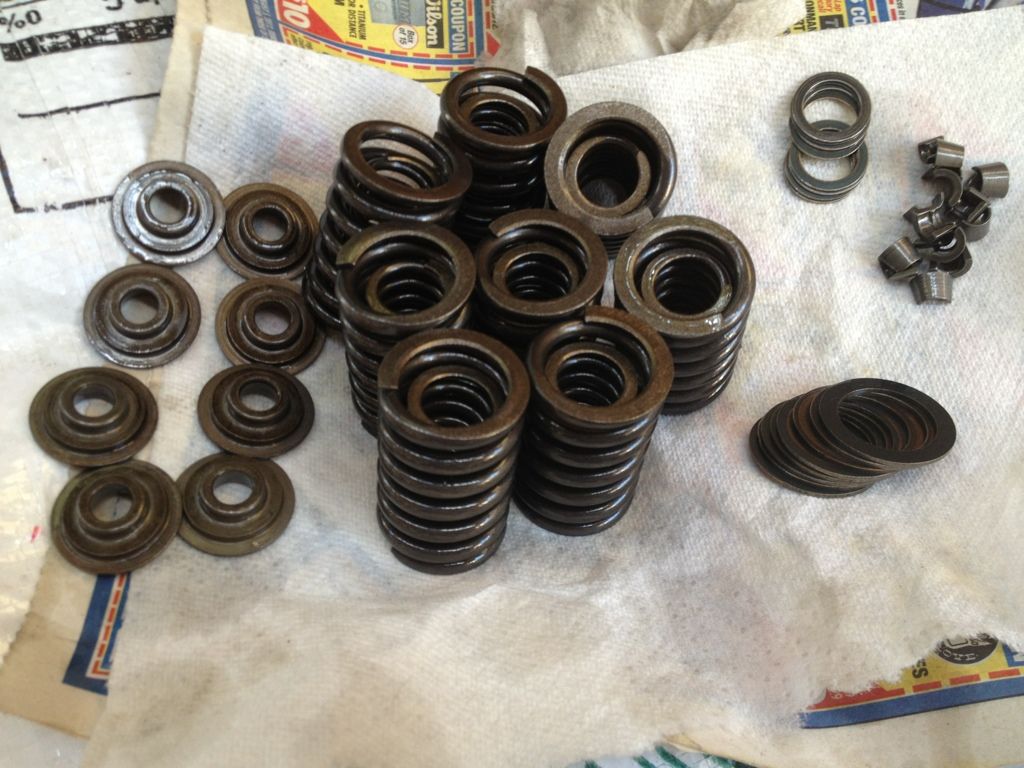
and sort them out to make sure all pieces are there and complete

i believe this tool is for oxygen censor socket for use on cars, got this from garage sale for a buck, couple of months back, and surely it came in handy.  better if it was welded to the C clamp though. 
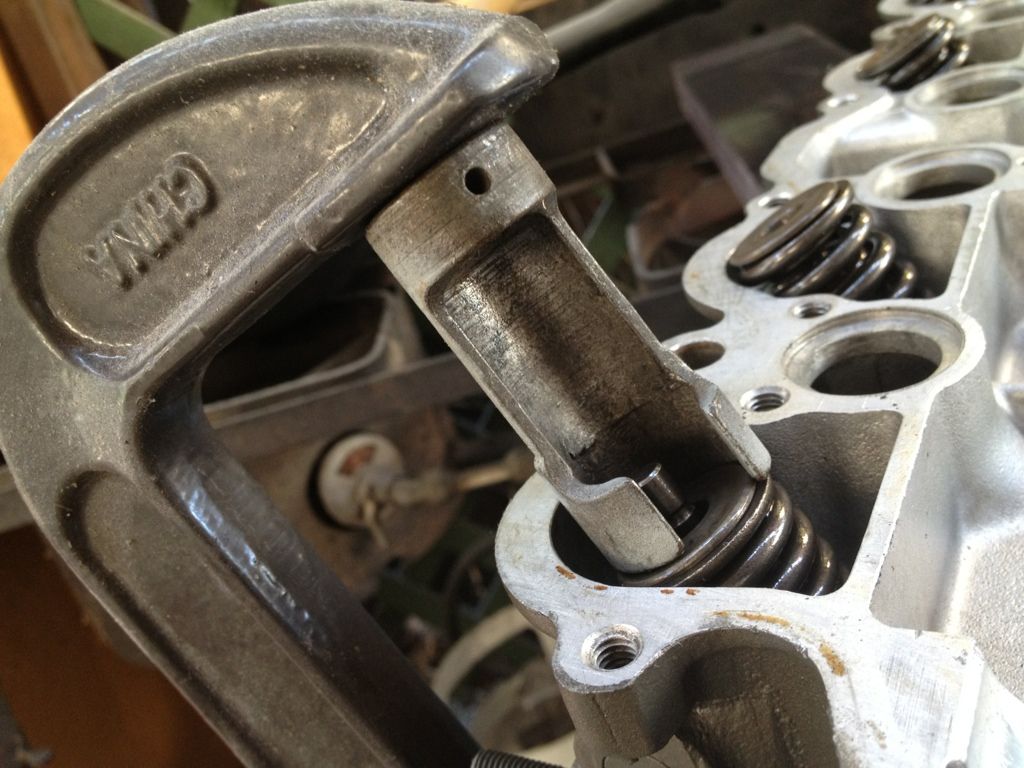

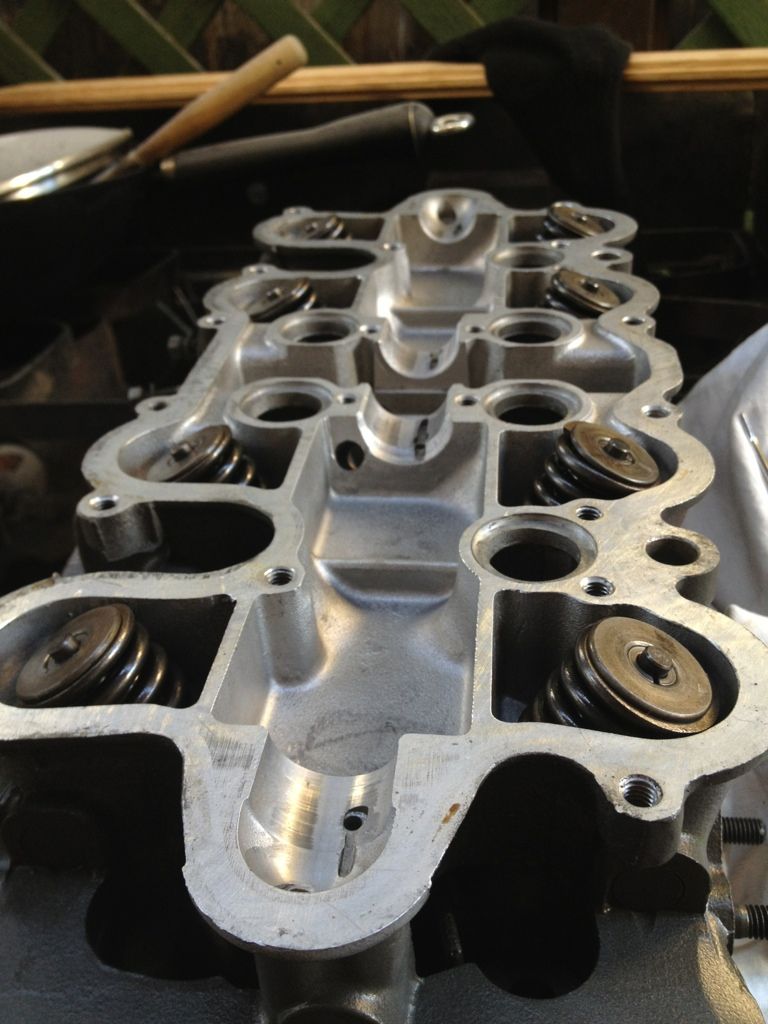
and finally after almost 3 hours, got all of the 8 valves and valves springs installed, if the tool above was welded on the the clamp, work would have been much quicker
Life Is Full Of Challenges - And My Backyard Is Full Of SOHC4's

CB550 K0
CB750 K0, K2, K23 JDM, K45, K5
And the little ones z50r, xr50r, st90


750k5 http://forums.sohc4.net/index.php?topic=114817.0

Offline rb550four

  • Master
  • *****
  • Posts: 2,473
  • I'm nobody's slave and nobody's master
Re: 1975 cb550 Project SENCHA - ENGINE - TOP END - HEAD, VALVES, CAMSHAFT
« Reply #85 on: August 15, 2012, 08:07:37 PM »
Looks like it's coming alone nicely. I like the two piece clamp, that must have been allot of fun holy cow! and ya didn't loose an eye. That's great!
  You don't want to do that again.... Oh No , poor youngest son gets no 550? Just kidding ,it is easier the second time , and even easier the 3rd time. Really, the cleaning turns out to be the hardest part.
Again, Looking good!
A few Honda 500's, a few Honda 550's, a few Honda 650's, '72 cb 450, a couple 500/550/650 hybrids, and 2001 750. 
  550 Snowbike -Somebody had to do it.
  http://forums.sohc4.net/index.php/topic,101678.0.html             
http://forums.sohc4.net/index.php/topic,137317.msg1550907.html#msg1550907

Offline goldarrow

  • one day, i'll be an
  • Old Timer
  • ******
  • Posts: 3,361
Re: 1975 cb550 Project SENCHA - ENGINE - TOP END - HEAD, VALVES, CAMSHAFT
« Reply #86 on: August 15, 2012, 10:29:05 PM »
Looks like it's coming alone nicely. I like the two piece clamp, that must have been allot of fun holy cow! and ya didn't loose an eye. That's great!
  You don't want to do that again.... Oh No , poor youngest son gets no 550? Just kidding ,it is easier the second time , and even easier the 3rd time. Really, the cleaning turns out to be the hardest part.
Again, Looking good!

yes, the two piece clamp was a lot of fun!  that's why it took me almost 3 hours to assemble 8 valves.  almost lose some of those cotter pieces! but defintely didn't lose any eyes. 

wont' be doing this again, that's for sure, but just wish i have welding machine though.  just to get these welded at local shop would have cost me at least $20 bill. 

the youngest son will still get his 550 :)   and more than likely i will have to add a third 550 to the family as my wifey is about 12 weeks preggo!
Life Is Full Of Challenges - And My Backyard Is Full Of SOHC4's

CB550 K0
CB750 K0, K2, K23 JDM, K45, K5
And the little ones z50r, xr50r, st90


750k5 http://forums.sohc4.net/index.php?topic=114817.0

Offline dave500

  • Really Old Timer ...
  • *******
  • Posts: 17,033
  • WHAT?no gravy?
mixing the springs and keepers etc is ok,just be sure you have both the large and small steel washer under each spring,lightly rap with a soft punch the tip of the valve down in an opening the valve action not hitting the cap at all,this makes sure the keeprs are settled,better for one to let go at this stage than on the start up.

when you refit and torque the head down ignore the torque settings for those two 6 mm bolts at the front and rear of the head,they are 13 and 14 in the sequence,just nip them at first then torque the head in two stages and nip them again,after the final torque just nip them once more,youll strip them otherwise,make sure the blind hole is clean on that front one aswell,i use a little cement on the gasket at those pointy ends around those bolts aswell.
« Last Edit: August 16, 2012, 01:26:38 AM by dave500 »

Offline goldarrow

  • one day, i'll be an
  • Old Timer
  • ******
  • Posts: 3,361
1975 cb550 Project SENCHA - ENGINE - TOP END - HEAD, VALVES - CAMSHAFT next
« Reply #88 on: August 16, 2012, 12:51:23 PM »
Thanks Dave.

Just to make sure I understand correctly.  Installing the gasket dry and only apply small amount of sealant on gasket around bolt 13 and 14?

Life Is Full Of Challenges - And My Backyard Is Full Of SOHC4's

CB550 K0
CB750 K0, K2, K23 JDM, K45, K5
And the little ones z50r, xr50r, st90


750k5 http://forums.sohc4.net/index.php?topic=114817.0

Offline dave500

  • Really Old Timer ...
  • *******
  • Posts: 17,033
  • WHAT?no gravy?
yep thats right ,the main studs and nuts hold the head down and seal the compression,those little end ones just snug those projections for the chain clearance,you dont want a weeping oil leak here or stripped threads either,dont use silicone use a hard setting compound like loctite #4 .,have the pan off and make sure the tensioner goes into its little locating well.

Offline goldarrow

  • one day, i'll be an
  • Old Timer
  • ******
  • Posts: 3,361
1975 cb550 Project SENCHA - ENGINE - TOP END - HEAD, VALVES - CAMSHAFT next
« Reply #90 on: August 16, 2012, 01:09:36 PM »
Yamabond semi drying #4 be ok for this?
Life Is Full Of Challenges - And My Backyard Is Full Of SOHC4's

CB550 K0
CB750 K0, K2, K23 JDM, K45, K5
And the little ones z50r, xr50r, st90


750k5 http://forums.sohc4.net/index.php?topic=114817.0

Offline dave500

  • Really Old Timer ...
  • *******
  • Posts: 17,033
  • WHAT?no gravy?
thatll be fine.

Offline rb550four

  • Master
  • *****
  • Posts: 2,473
  • I'm nobody's slave and nobody's master
12 weeks preggo, congratulations ! Must have done that before the 550, there's no time for fooling around during a rebuild ::)


just kidding
A few Honda 500's, a few Honda 550's, a few Honda 650's, '72 cb 450, a couple 500/550/650 hybrids, and 2001 750. 
  550 Snowbike -Somebody had to do it.
  http://forums.sohc4.net/index.php/topic,101678.0.html             
http://forums.sohc4.net/index.php/topic,137317.msg1550907.html#msg1550907

Offline Mcwilliams570

  • Hot Shot
  • ***
  • Posts: 646
Looks like it's coming alone nicely. I like the two piece clamp, that must have been allot of fun holy cow! and ya didn't loose an eye. That's great!
  You don't want to do that again.... Oh No , poor youngest son gets no 550? Just kidding ,it is easier the second time , and even easier the 3rd time. Really, the cleaning turns out to be the hardest part.
Again, Looking good!

yes, the two piece clamp was a lot of fun!  that's why it took me almost 3 hours to assemble 8 valves.  almost lose some of those cotter pieces! but defintely didn't lose any eyes. 

wont' be doing this again, that's for sure, but just wish i have welding machine though.  just to get these welded at local shop would have cost me at least $20 bill. 

the youngest son will still get his 550 :)   and more than likely i will have to add a third 550 to the family as my wifey is about 12 weeks preggo!

Grats man we are 19 weeks and just found out we are having a girl :) I am 43 is our first one I am so excited...

Matt
My CB550 project http://forums.sohc4.net/index.php?topic=101182.0

Project UFB Cb550 http://forums.sohc4.net/index.php?topic=112143.0

Like a 10 dollar hooker on Friday night its going to be ridden.

1974 cb550
1975 cb550
2005 vmax
2009 vmax-sold
1981 gl500i

Offline goldarrow

  • one day, i'll be an
  • Old Timer
  • ******
  • Posts: 3,361
12 weeks preggo, congratulations ! Must have done that before the 550, there's no time for fooling around during a rebuild ::)

just kidding

it must have been during the time when i didn't touch the bike for a month, month of procastinating.   ???  shouldn't have done it... :-[


Grats man we are 19 weeks and just found out we are having a girl :) I am 43 is our first one I am so excited...

Matt

i know how you feel Matt, pretty excited on the first, then excitement fades away on this third one, unless if it was a baby girl.

anyways, i got worn out from work, so took a break this afternoon.  didn't want to button up the engine and mess things up when i'm tired.  so, instead i did this to my tappet covers


i kind of like it the way they look, brushed aluminum looking, well they are brushed aluminum lol.  used my brass wire wheel on a drill and went at them for a few minutes.    if they turn out not matching with the color scheme of the bike, then i would still have some room to mirror polish them.
Life Is Full Of Challenges - And My Backyard Is Full Of SOHC4's

CB550 K0
CB750 K0, K2, K23 JDM, K45, K5
And the little ones z50r, xr50r, st90


750k5 http://forums.sohc4.net/index.php?topic=114817.0

Offline dave500

  • Really Old Timer ...
  • *******
  • Posts: 17,033
  • WHAT?no gravy?
theyll go dull after a while,you managed to get them off intact without rounding them at all,thats the best used set ive seen well done!
a cheap 17mm six point socket can be ground to remove the ramp and give a better solid bite on those caps,the caps have a bit of a taperd hex?
« Last Edit: August 16, 2012, 11:48:33 PM by dave500 »

Offline dave500

  • Really Old Timer ...
  • *******
  • Posts: 17,033
  • WHAT?no gravy?
when you have the head bare,have a look at how the intakes align inside,if they look like this you can buzz the head or intake whichever it needs to make it a slightly better finish,ive seen some bad mismatches,so without actually trying to port the head just match up that area.

edit,ive just seen you have the head back together,have a look though if they are as bad as this itll be worth removing the valves again to tidy the port openings up,itll be a good experience in valve assembly again,dont forget some poor bastards do this over and over for a day job!
« Last Edit: August 17, 2012, 09:46:30 PM by dave500 »

Offline goldarrow

  • one day, i'll be an
  • Old Timer
  • ******
  • Posts: 3,361
theyll go dull after a while,you managed to get them off intact without rounding them at all,thats the best used set ive seen well done!
a cheap 17mm six point socket can be ground to remove the ramp and give a better solid bite on those caps,the caps have a bit of a taperd hex?


If they go dull, I may just keep them this way brushed, then paint them later. No Dave, I'm not a pro yet and I did actually boogered some of the tappets. I bought a full head cover to relace rocker arms and luckily some tappets were good so I swapped them out for the better ones
« Last Edit: August 17, 2012, 10:01:37 PM by goldarrow »
Life Is Full Of Challenges - And My Backyard Is Full Of SOHC4's

CB550 K0
CB750 K0, K2, K23 JDM, K45, K5
And the little ones z50r, xr50r, st90


750k5 http://forums.sohc4.net/index.php?topic=114817.0

Offline goldarrow

  • one day, i'll be an
  • Old Timer
  • ******
  • Posts: 3,361
when you have the head bare,have a look at how the intakes align inside,if they look like this you can buzz the head or intake whichever it needs to make it a slightly better finish,ive seen some bad mismatches,so without actually trying to port the head just match up that area.

edit,ive just seen you have the head back together,have a look though if they are as bad as this itll be worth removing the valves again to tidy the port openings up,itll be a good experience in valve assembly again,dont forget some poor bastards do this over and over for a day job!

I was actually looking at those intake ports also, but don't recall seeing mine were as bad as your pic.  Will check again tomorrow.

On a side note, was busy this afternoon and didn't work on the engine, went to pick up another bike which I shouldn't have, but i think it was worth the trip. Check it out  http://forums.sohc4.net/index.php?topic=111550.0
Life Is Full Of Challenges - And My Backyard Is Full Of SOHC4's

CB550 K0
CB750 K0, K2, K23 JDM, K45, K5
And the little ones z50r, xr50r, st90


750k5 http://forums.sohc4.net/index.php?topic=114817.0

Offline Stev-o

  • Ain't no
  • Really Old Timer ...
  • *******
  • Posts: 34,421
  • Central Texas
So what's next since you have another project now?
'74 "Big Bang" Honda 750K [836].....'76 Honda 550F.....K3 Park Racer!......and a Bomber!............plus plus plus.........