Author Topic: CB550 Cafe, Phase Two!  (Read 10038 times)

0 Members and 1 Guest are viewing this topic.

Offline sinister902

  • Hot Shot
  • ***
  • Posts: 512
    • Anger Street Kustoms
CB550 Cafe, Phase Two!
« on: June 11, 2012, 05:04:31 AM »
I started messing with this bike something like 5yrs ago, Documented by this thread:

http://forums.sohc4.net/index.php?topic=35734.msg1007539#msg1007539

This year I decided to tear down and make some changes to the bike, as I have felt some things needed adjusting while I have enjoyed putting miles on it the past two seasons without messing with it.

Well, I read the 650/750 hybrid motor thread, and decided THATS what I ultimately want to do. I scored a cb650 motor for $300 on ebay, 750 cylinders for $50 on ebay, the 836cc kit for $110, and then locally on craigslist I replied to a listing asking for XS650 parts as I had a bunch of spares....

I scored an AWESOME deal trading some parts for some parts, and ended up with the correct cb750 front rotors for the dual disc front end (I am currently using two cb550 rotors which are 1/2" too small in diameter) as well as a set of pre-1975 CB750 carbs!!!! the carbs are perfect for the hybrid motor I'll be building in the spring using the cb650 cases and cb750 liners with an 836cc overbore kit meant for the cb750.


In addition to this, I have ordered bar a few parts from amazon.com

-bar end mirrors
-motion pro push/pull throttle set (low profile to ditch the bulky stock stuff)
-dirtbike clutch lever/perch (also to eliminate the bulk of stock)
-mini 12v gel battery and hardwired charging system (to hide all electronics under the tail and have a plug-in port to connect to a charger/tender)
-grips
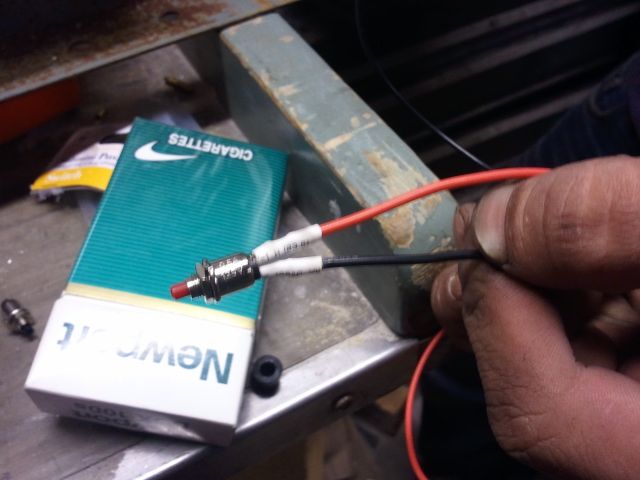
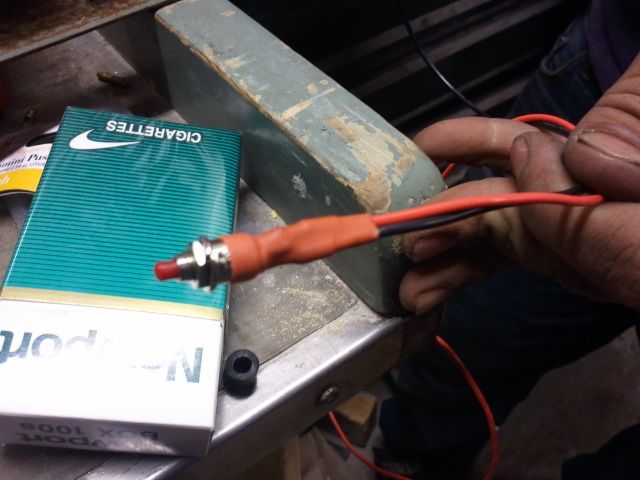
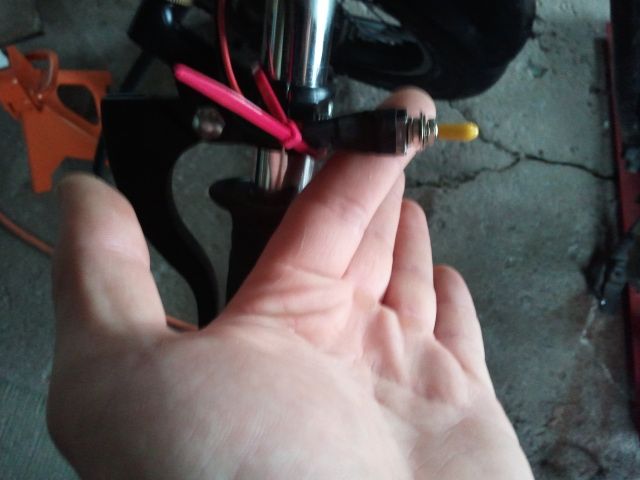
-mini-swtiches (going to replace the stock bar-mounted switches with my own setup using mini waterproof toggle switches and a push-button mini switch for starter and horn)


$113 shipped from CA. made it here in 3 days.

the rest of the parts I ordered have all come in!


You can see how much the new throttle and clutch setups clean up the bars and minimize everything.....just what I was hoping for! I'm on lunch right now and started swapping the rear suspension but already ran into a minor snafu with needing different bolts. no big deal I'll hit up the depot later or something. Stay tuned!

well, I started tearing the bike down yesterday and started stripping all the paint and body filler off the tank to address the gas leak at the seam.


besides that I figured out that the shock mounts are slightly different and I'm gonna have to do some minor mods to the mounts to use them (no big deal)

didn't get as much done as I had hoped but o well, I'll wrench some more this week and next weekend

Back at it wrenching today......

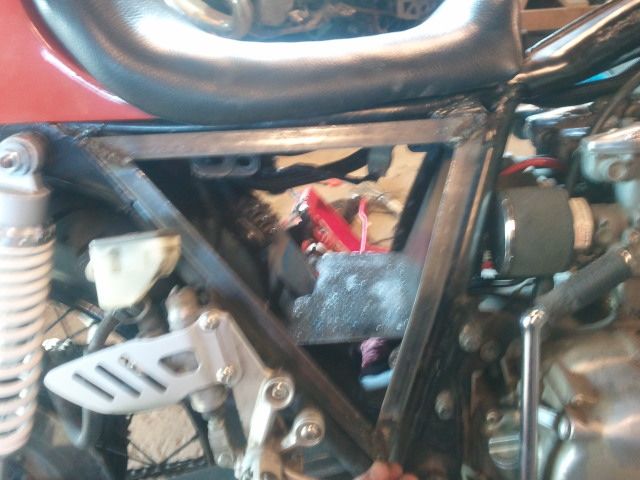
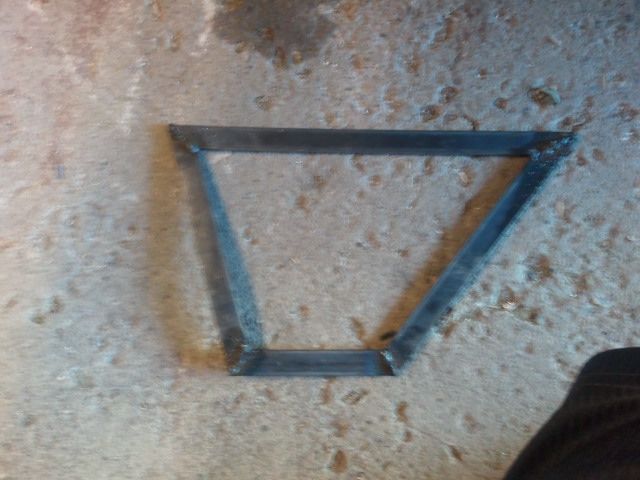
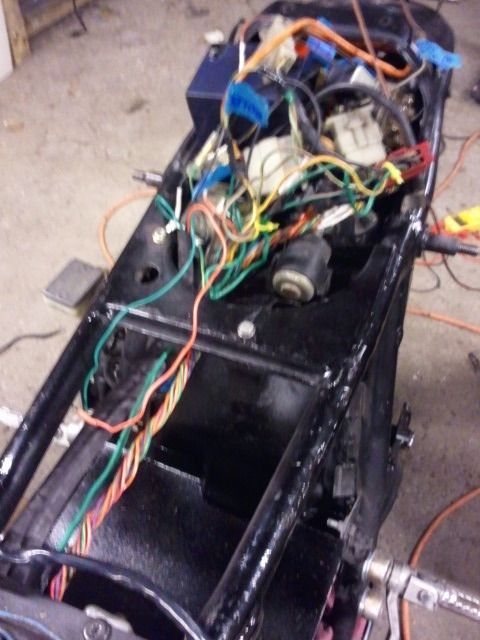
Made up an electronics tray to get all of the ugly stuff hidden under the seat bump.


cut up the original electrics tray to use the mounts for all the goodies, then welded them to my tray


you can see the mini-battery I picked up in the pics, everything tucks away nicely


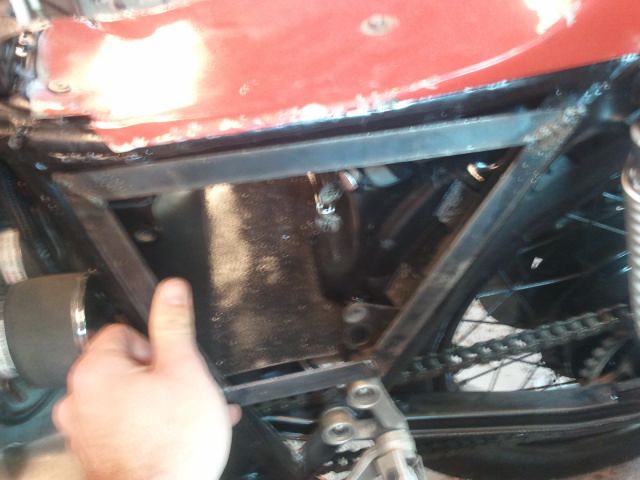
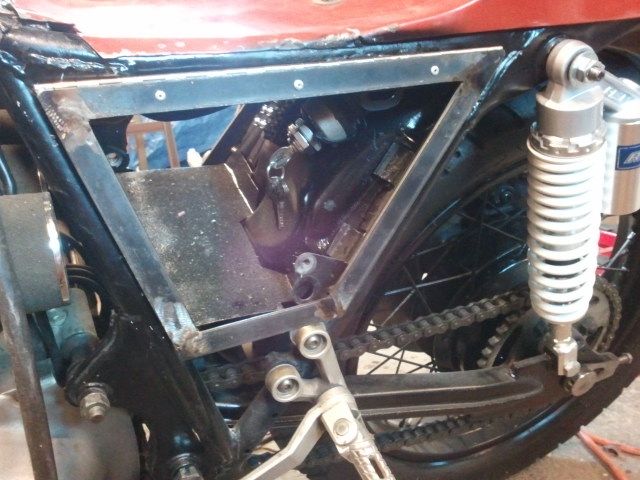
The plan is to run without the stock sidecovers, I'm going to make somewhat of a compartment in the triangle area to put stuff in like my wallet, keys, phone, a little toolkit I'll put together, and a baseball cap to keep the helmet hair under check. I'm going to make mesh style sidecovers from scratch for the sides in the triangle portions to dress things up


for the sidecovers I want to do something like this:


I also painted the swingarm black, I wasnt feeling the silver anymore. I'll also be painting the wheels black.

I have some serious wiring to do as the harness is badly modified by previous owners. I still have to make new clip-ons, figure out switches for lights and horn and starter button, and then measure to order shorter cables for clutch and throttle. UGH, I hate realizing how much is still left. I need to finish it and put some miles on it before june to iron out any potential issues before I ride to mid-ohio vintage motorcycle days in July.


The tank had sprung a leak along the seam, even though it had been lined with KREEM two years prior....so I stripped it for repair


Got a whole bunch done tonight. I stopped taking pictures because Pirite showed up with his DSLR and snapped a bunch of pics as I worked.

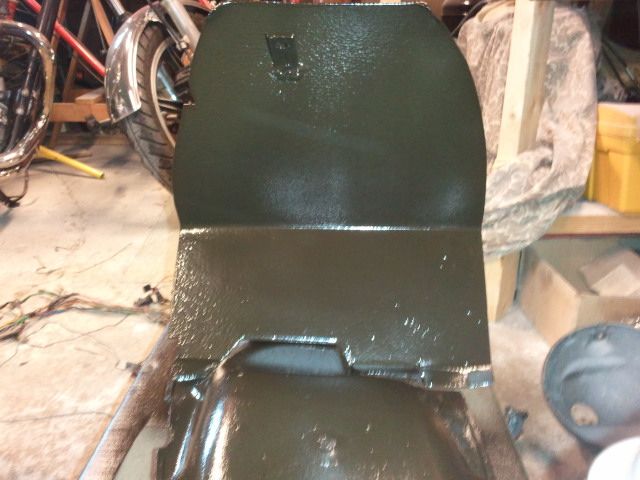
I started out by making some cardboard templates......I wanted to make a compartment where the battery and electronics used to go so I'd have a place for a toolkit, hat, storage for my phone/wallet, etc. especially since I plan on taking a 700mile trip on it in july. As you can see, I re-used the stock plastic inner fender to start with.....trimed to clear the electrics tray I made previously.


At this point Pirite showed up and took over picture-taking (and provided me with a tasty mini-cigar).....he will be bringing a chord over tomorrow to load them up....


EDIT: Pirite's pics....


MMM, cherry......eases the mind while fabricating stuff and things

I made a WAY nicer shift linkage using some heim joints and I threaded the ends of a peice of rod to accept the heims, then put a small zig-zag bend in it to clear the shift lever and an engine mount bolt.....came out pretty damn nice.


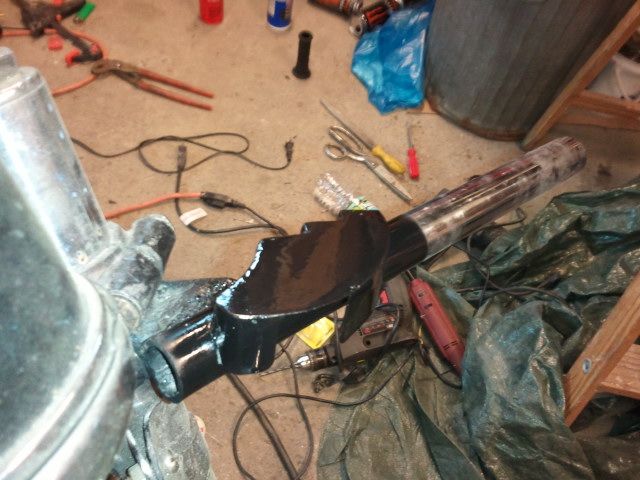
Then I pulled the wiring harness, broke down some of the front end to get going making a new set of clip-ons to solve some gas tank clearance issues I was having, and cleaned the rear wheel and painted that black.

Planning on getting the rear end back on the bike tomorrow with the new shocks, and then cleaning/painting the front wheel black and making the new bars.

After that all I have to do is repair/repaint the tank, make a new wiring harness, and order up shorter throttle and clutch cables.

I'll update with more pics tomorrow....

Got a bunch more done after work today. Got the shock mounts modified to fit the swingarm mount points, re-assembled the rear end, mounted the new shocks, re-made clip-on bars, and painted the front wheel.


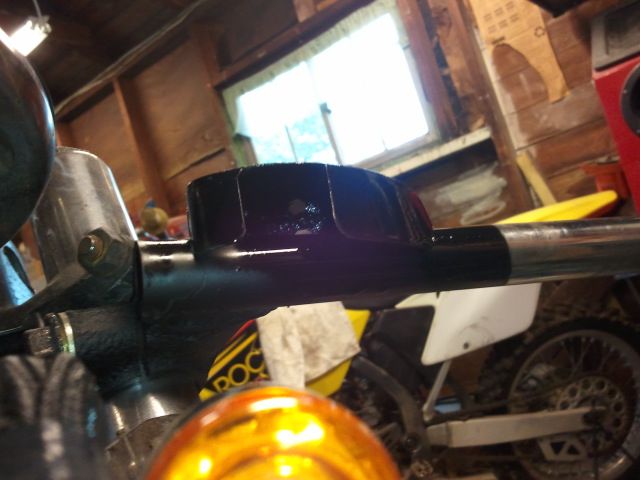
For the bars, the reason I re-did them was the direction the pinch bolt was pointed caused it to contact the tank before I was full lock, and it dinged my tank on both sides. I re-positiond the clamp portion so that the pinch bolt points toward the headlight on the front side of the forks so the lowest-profile part of the clamp is on the tank side.

Here's some pictures of the shift linkage I made up yesterday


I'm still waiting for Luke (pirite) to swing by so I can upload the pics he took yesterday to put in my previous post. bare with me on those lol.

All I have left to do is build a wiring harness and paint the tank. should be done over the next week or two


Offline sinister902

  • Hot Shot
  • ***
  • Posts: 512
    • Anger Street Kustoms
Re: CB550 Cafe, Phase Two!
« Reply #1 on: June 11, 2012, 05:12:37 AM »
Re-assembled the front wheel this morning, tossed on the new bars and top triple clamp, and then yanked the wiring harness. I stripped off all the old loom/wrap/tape and got it all removed from the headlight bucket so I can start figuring out how to route wires for the new harness.
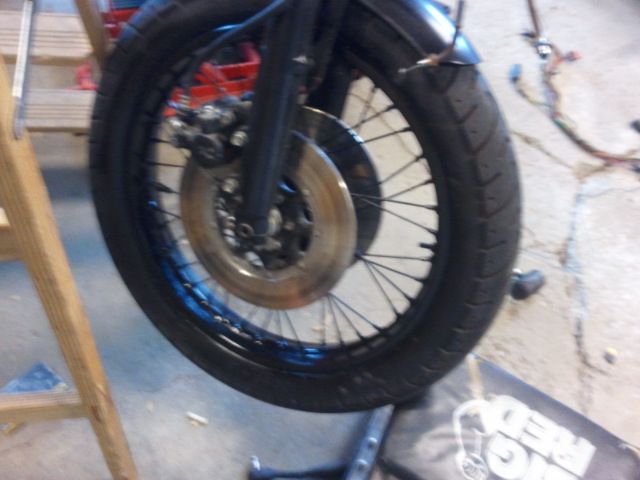
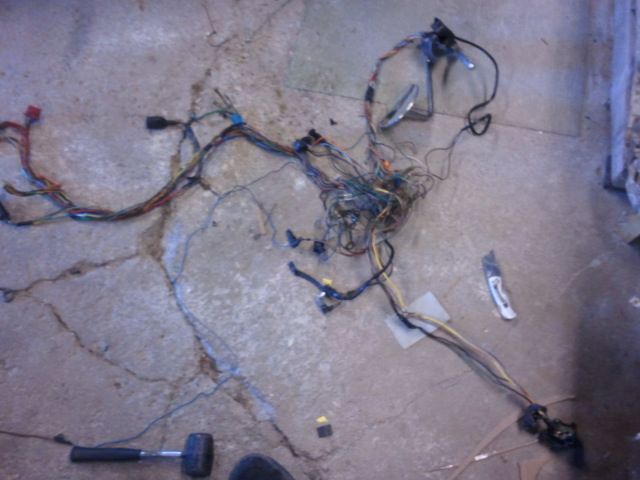
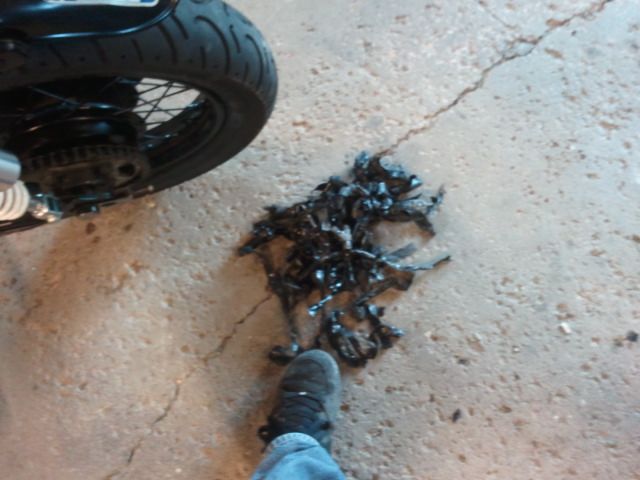


MOAR PROGRESS!

Removed my "glovebox" and sprayed it in rubberized undercoating
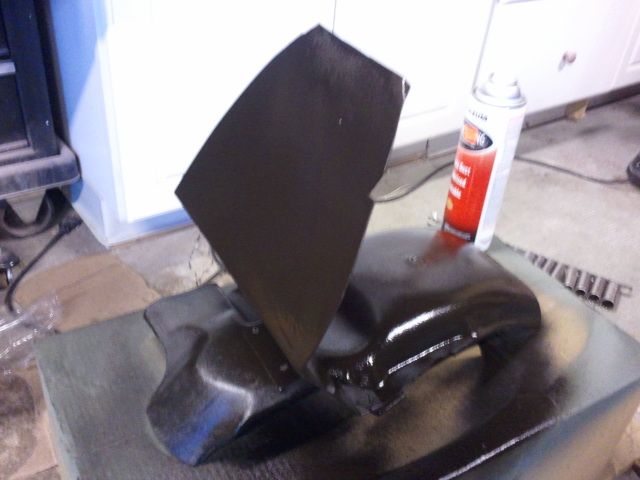


Did the same for the electronics tray after trimming in a notch for the wiring harness to pass through under the seat
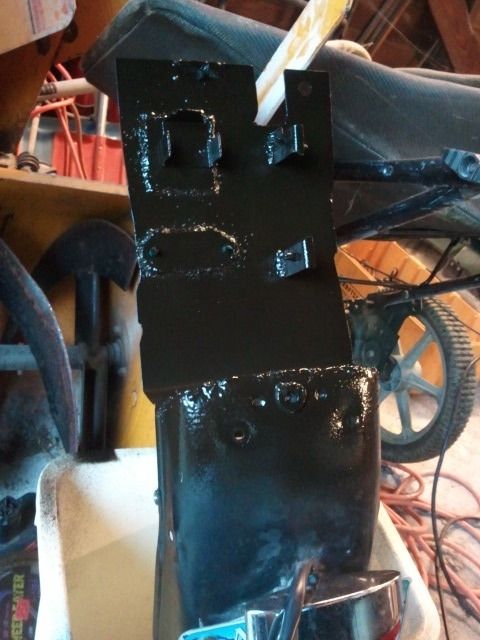


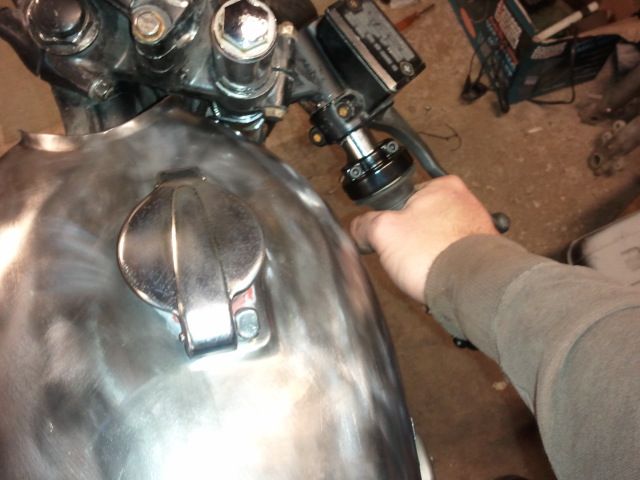
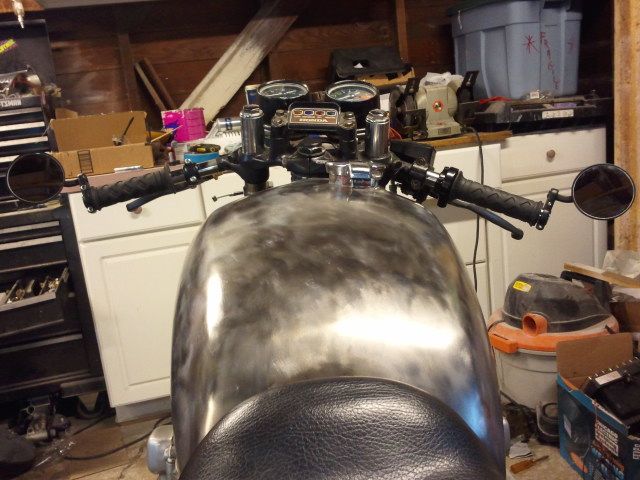
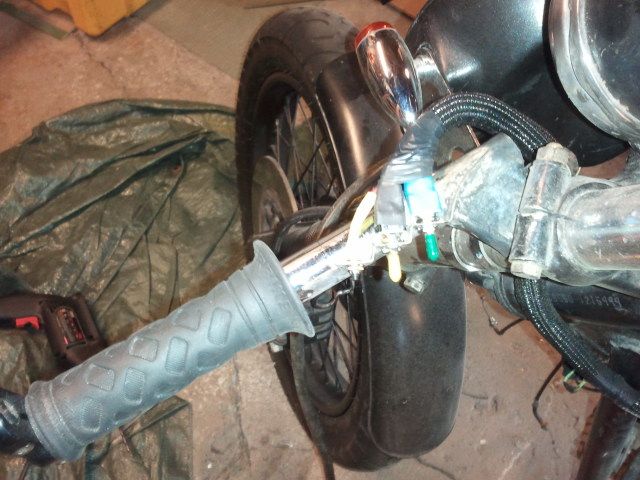
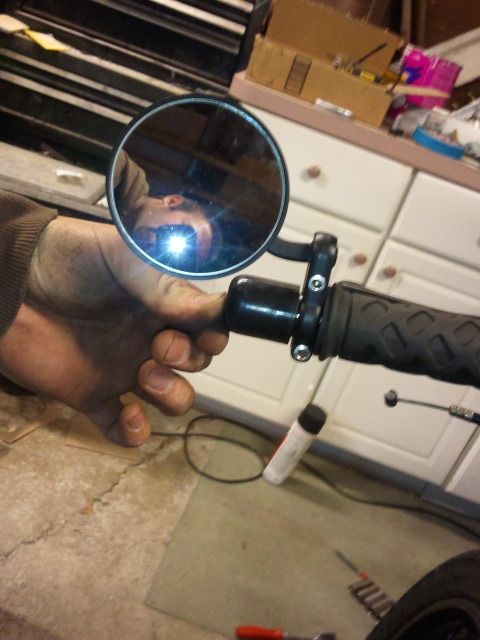
Then I mounted up the new bars to test fit the new mirrors and controls
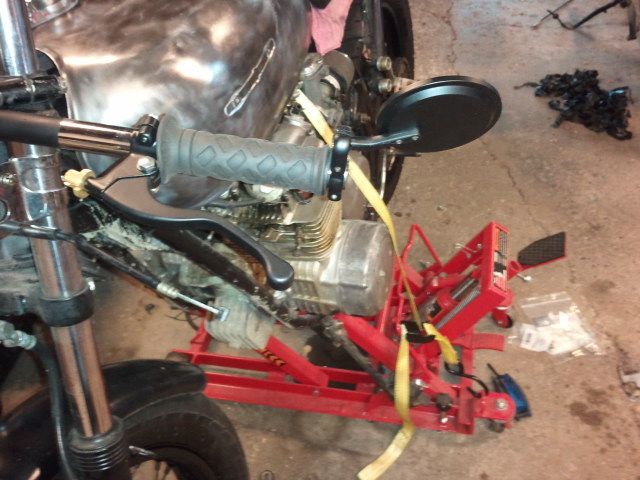


As you can see, I mounted the mirror clamped on the end of the bar, so that I can still use weighted bar ends
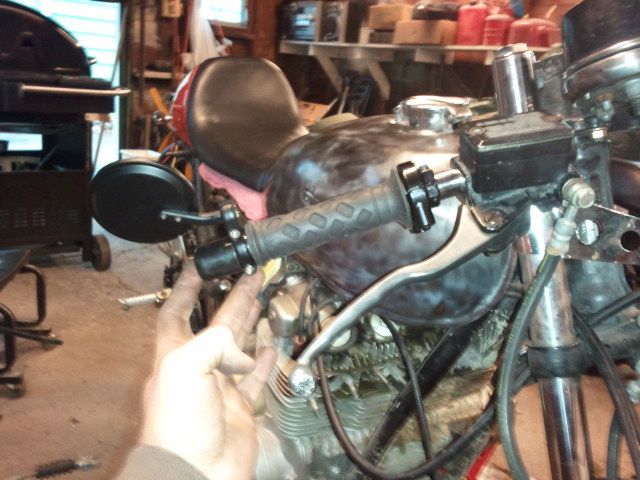


They clear the tank now and I have room for my hands at full lock either direction
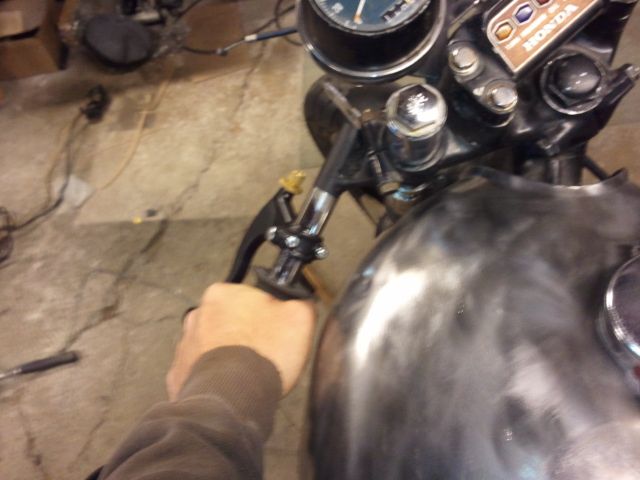


I'm not totally sold on the bar location at this point, it might just be the fact that the fork tubes are a little over an inch too long (due to being from a CB750 and this is a CB550) making the top of the triple area looking quite bulky. I dunno, looks wierd to me. There are write-ups on how to shorten the tubes inside and shorten the springs (or just order some Progressive springs meant for the 550 and swap 'em) but I don't know if I want more down-time.

I also picked up a tap & die set and chased the buggered threads for the rear shock mounts and a few other stripped studs on the frame but pics of that would have been silly.

whats left:

-measure/order shorter throttle cables, clutch cable, and brake line from the master to the distribution block for the front brakes.

-wiring

-repair and repaint the tank

-fab mesh sidecovers

-assemble and ride!

so just when I thought I was done working on this thing for the night, I get a call from Pirite......offering to come mess with the wiring harness for a bit....how does one say no to such a thing?

so we started trying to sort out the harnes......

"what the #$%* is this cluster#$%* of #$%*ery" -Luke (Pirite)......couldn't have said it better.
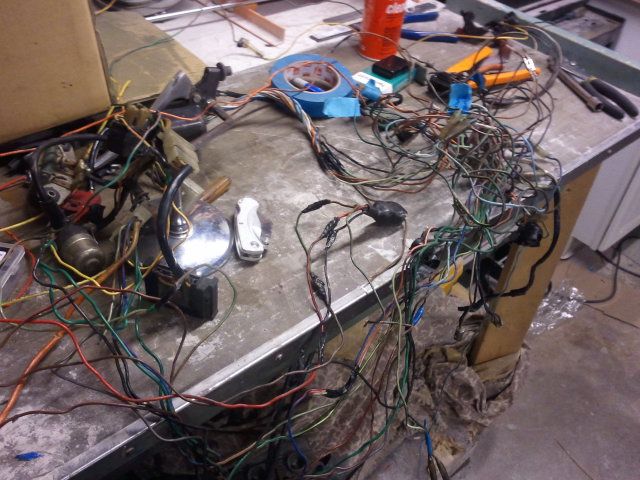


45mins later.....
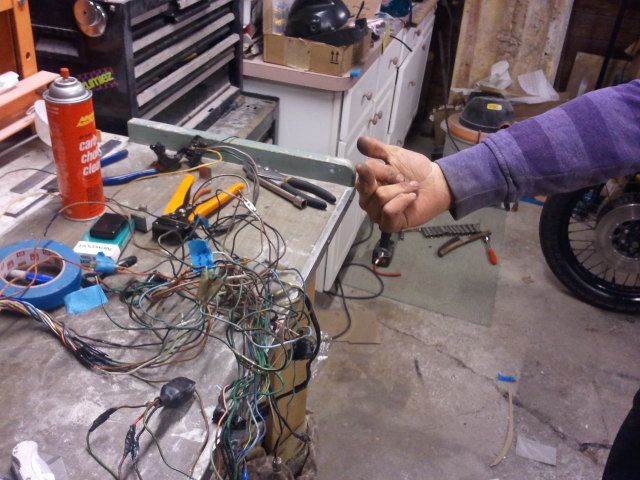


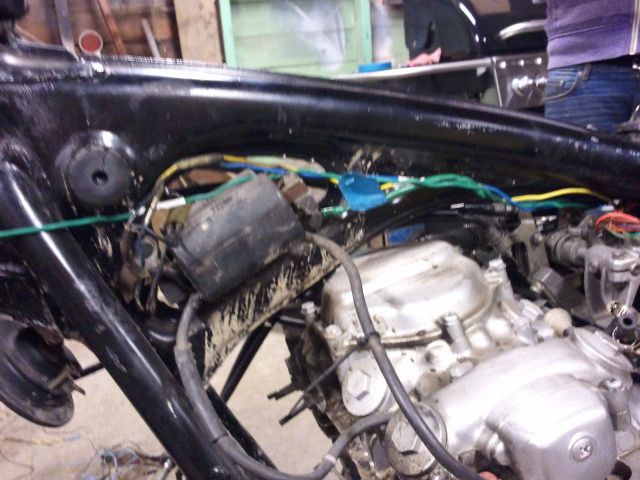
2hrs in.....got all the useless crap chopped out, and the rest bundled and tagged so we can attack it one connector at a time.
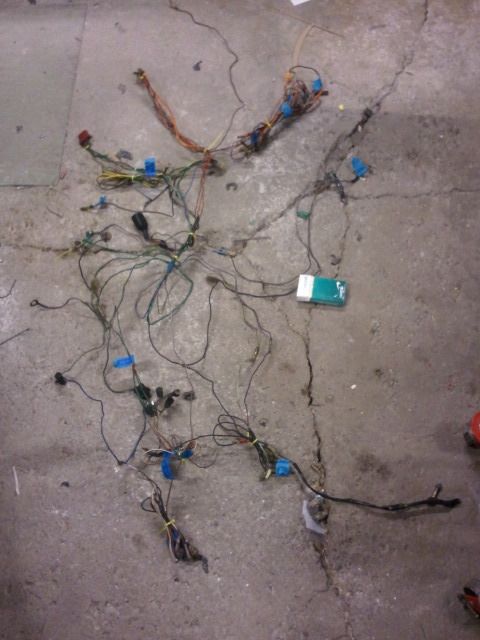


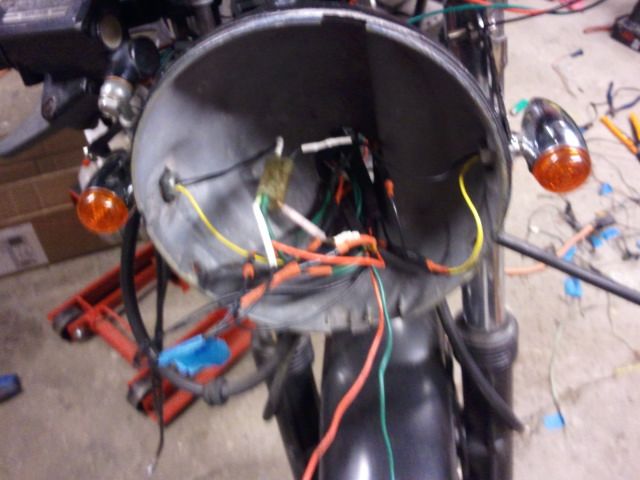
Luke stopped by again and we tag-teamed the #$%* out of the wiring and got a solid chunk of the new harness constructed. only took a handful of pics but its FAR less wires than before and the headlight bucket now has about 80% less wires in it.

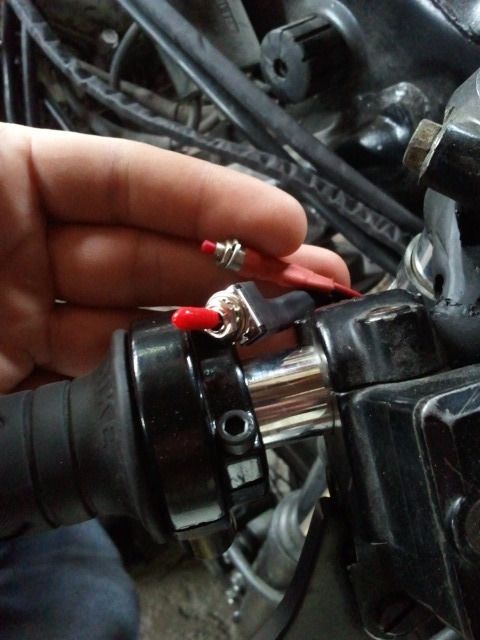
Some mini-switch setup
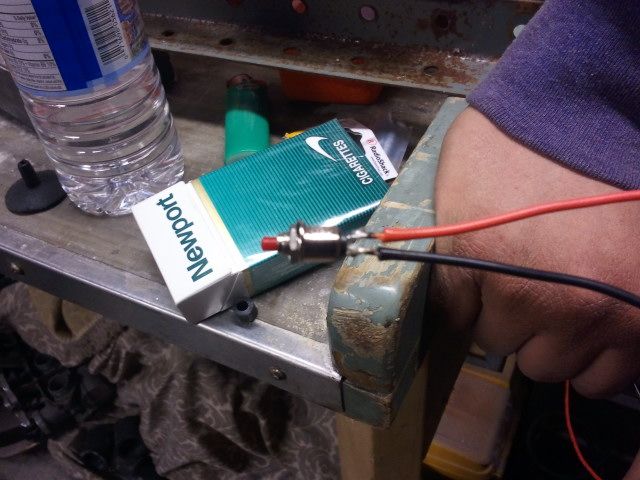


bucket, now with 80% MOAR LESS WIREZZZZZZZ

MOAR WIRING!

first off, shoutout to Pirite.....HUGE thanks for the many hours of skilled help here.

tackled a bunch more. the harness is not like 90% done. all that is left is a couple grounds and the headlight switch wiring.


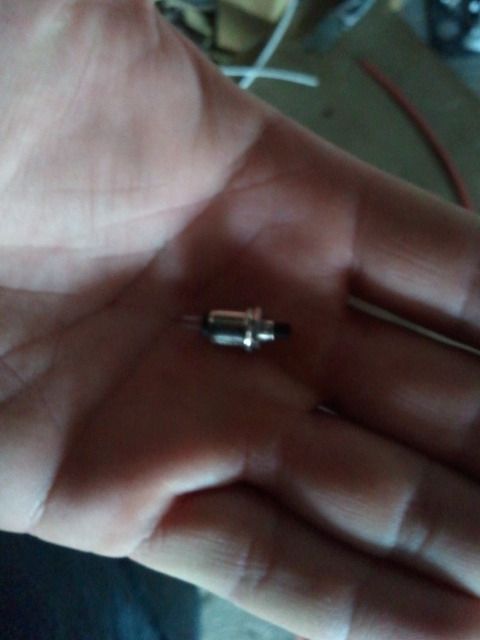
how small my new switches are (still have to make some type of housing to hold switches...)


AND, this is what has been REMOVED:
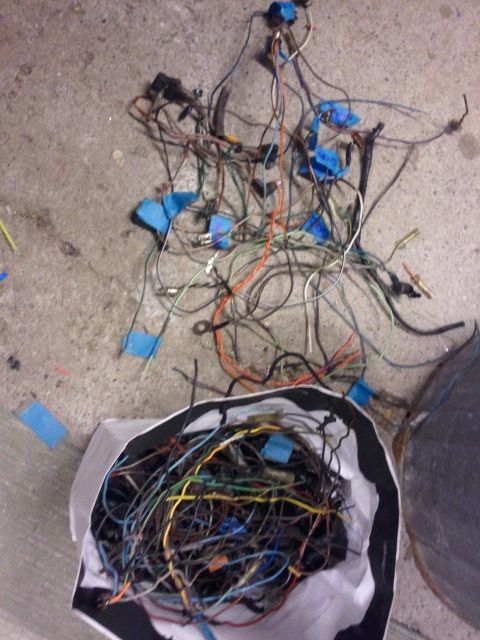


will probably take a breather and get back at the wiring next week. Just got the estimate back from MotionPro, and my cables are going to run me $110 + shipping. WAH

Not a huge update, but I replaced the horn (old one stopped working) and JB-welded the seam of the tanks where it was weeping a little leak that was driving me nuts.
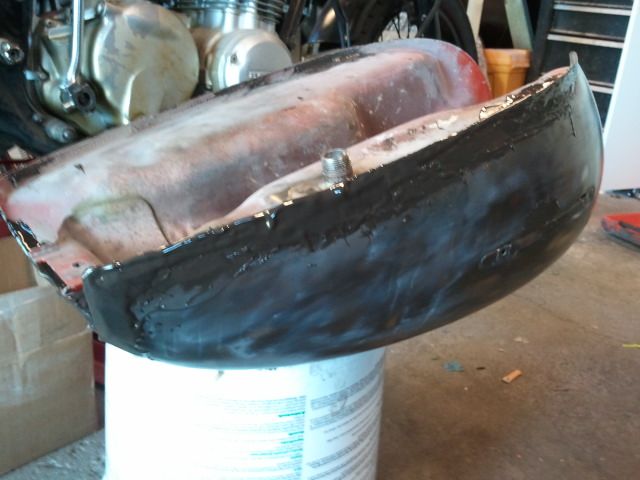
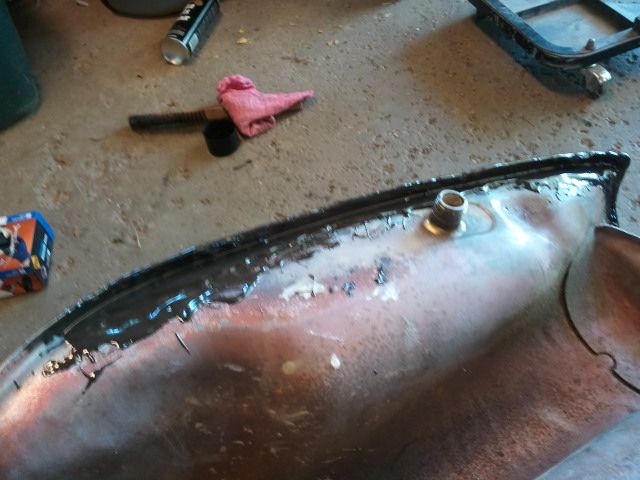


I can't seem to find some nice looming material locally to put my new harness in.....I hate that black corrugated plastic #$%* they sell at all of the parts stores.

I remember seeing a few times a mesh fabric-like material that you folded over the wires and just taped the ends......is that available locally that anyone knows of? I'm about 90% done with wiring, once this tank is finished up and painted its practically ready to ride. Just have to fab up some kind of switch mounts for the bars.

Well, progress has slowed down, mostly because the wiring is playing some tricks on us. Had to quit wiring until I can borrow the clymer manual from Checko as it has the wiring schematics in it and I need to double check some of my wires.....
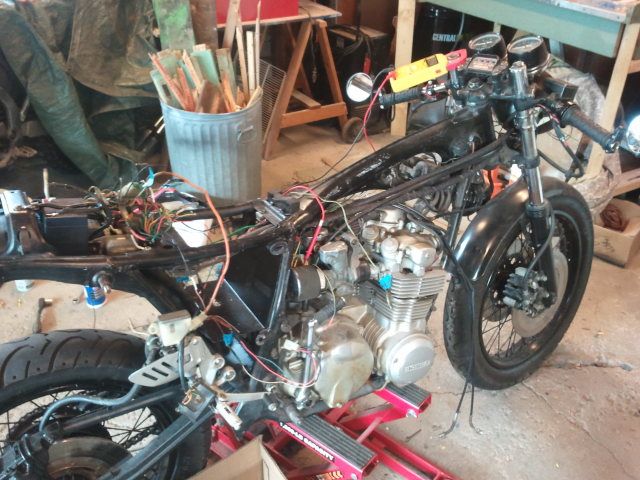


I sanded down the JB Weld on the tank and sprayed it in etching primer. Just have to do some body filler on it now and then that'll be ready for paint. Just have to build side covers, build switch panels for the new switches up on the bars, and finish wiring.

I've been pretty aggravated working on it lately.....the wiring is going exactly the way I didnt want it to.....a pain in the ass with #$%* not making sense to me. Really feeling worried that I might not get it finished in time to ride down to Vintage Motorcycle days.....I didnt want to be turning the last bolt the week I'm supposed to put 600miles on it

Well beleive it or not, I finished wiring before I ran out of swear words!

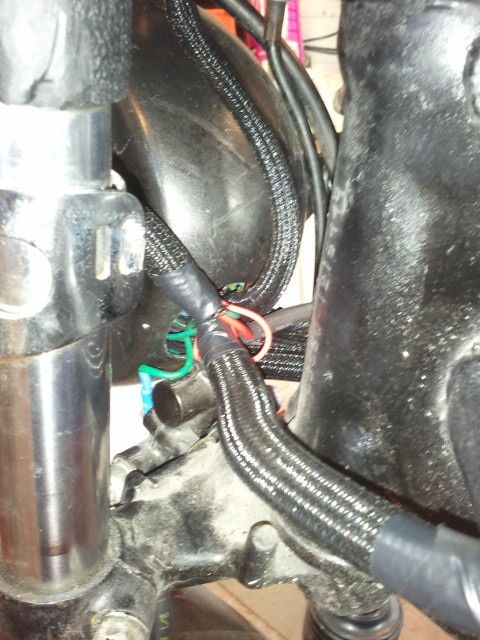
got everything loomed up nice, just have to build housings for the switches up on the bars and finish the tank.....oh, and order $200 worth of cables and steel braided brake lines.
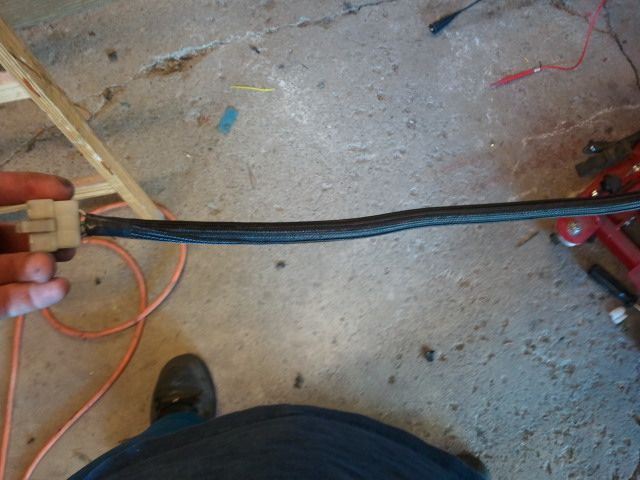


found out you can get the PAINLESS wiring mesh loom from K-S Auto on River rd. so I took a trip and got a bunch, looks awesome and is super nice to work with for maybe 20% more invested over that #$%*ty corrugated plastic bull#$%* you can get at autozone and the like
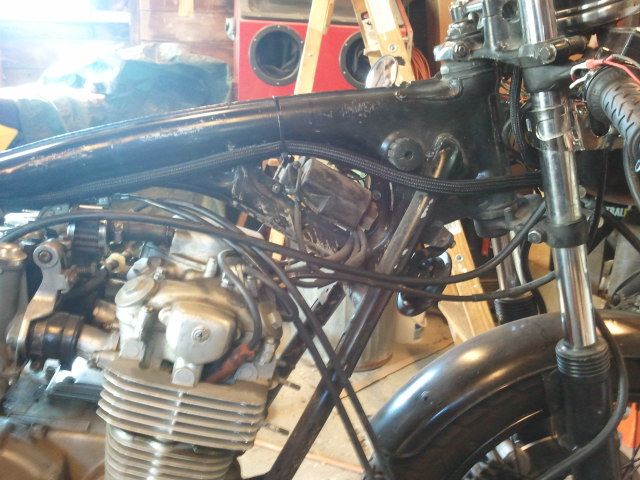
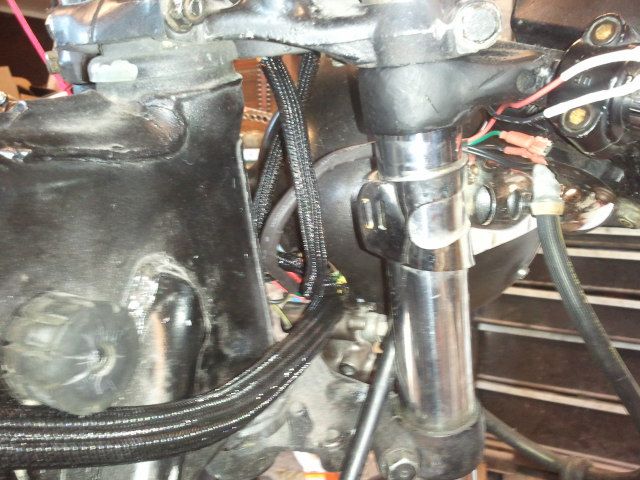
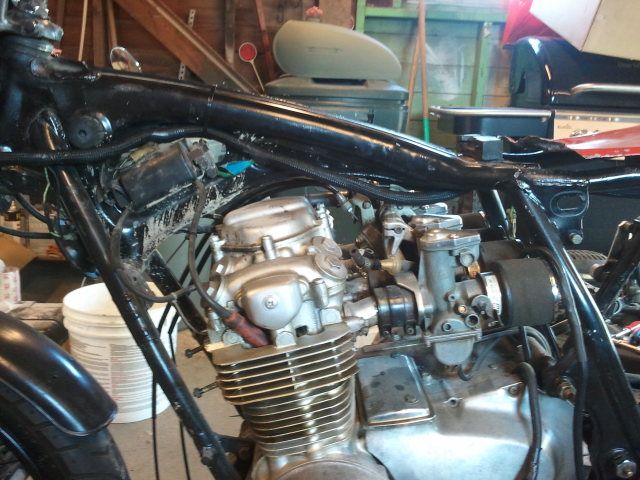
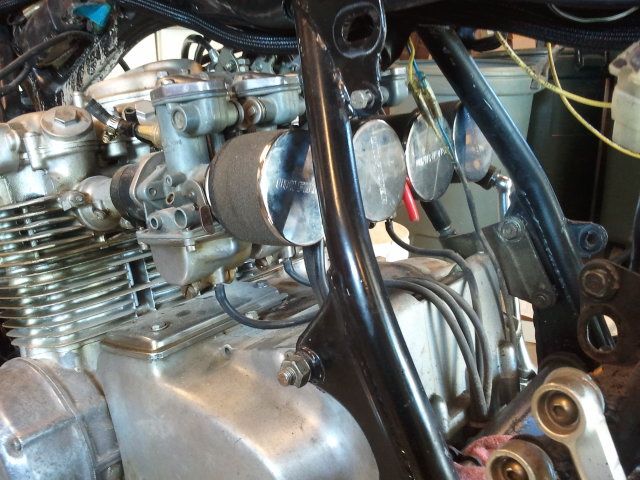


probably going to finish the tank and build the bar controls sometime over the next week, hope to be riding by next weekend if I can get the tank painted in time.

mocked it up back together for the most part.....decently pleased with the results, need to finish bodywork on the tank and make switch housings and side covers. Might get through all that this week MAYBE.
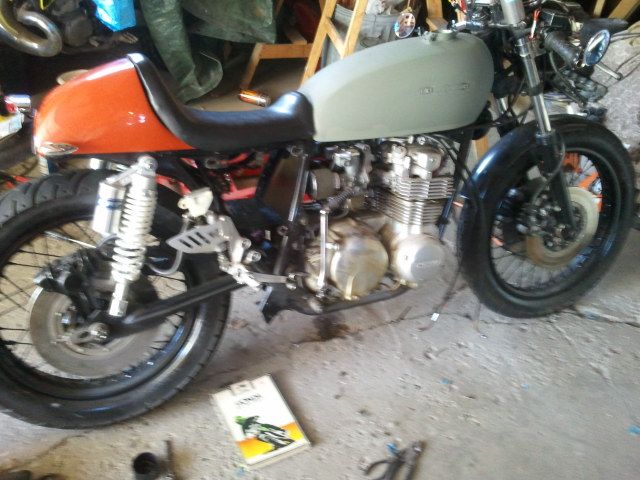
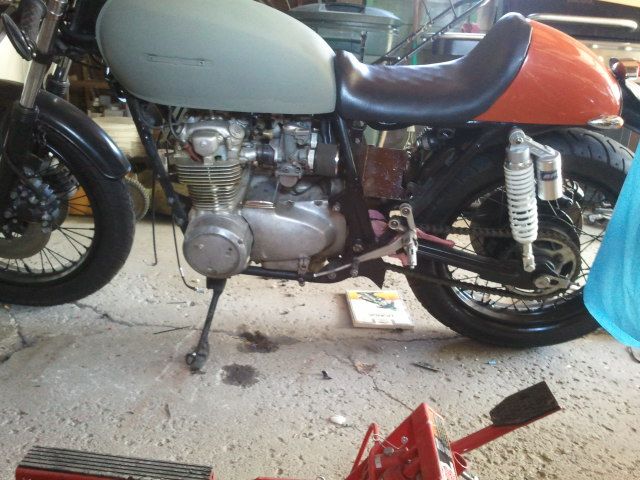


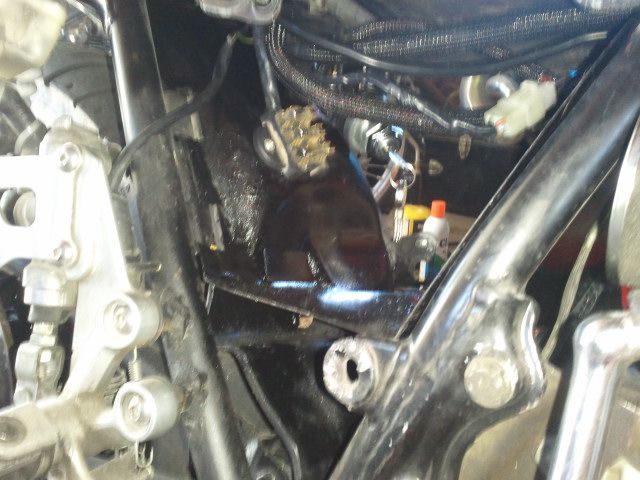
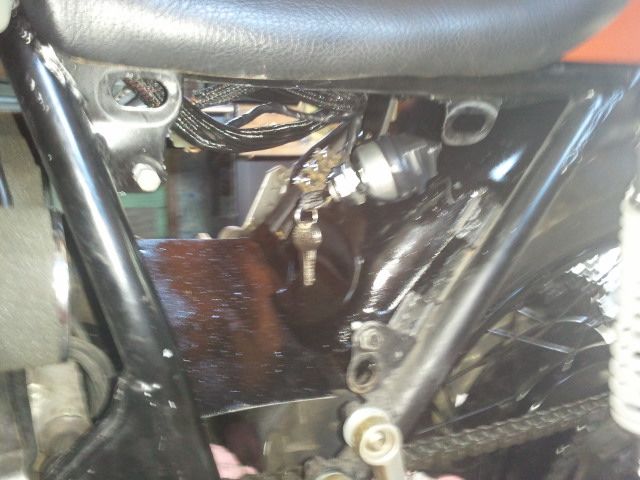
Got the key/ignition switch and the fuses mounted inside the "glove box", just have to get the wires that run just under the seat tucked up somehow and I'll be ok with that setup


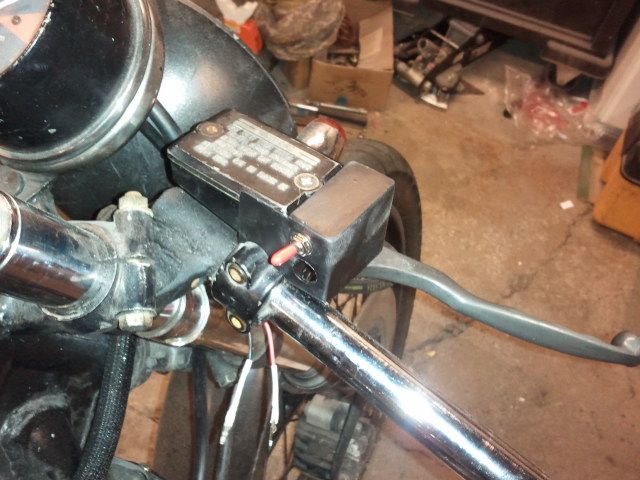
OK, so I think I've got ideas for the switch housings that I won't completely hate.

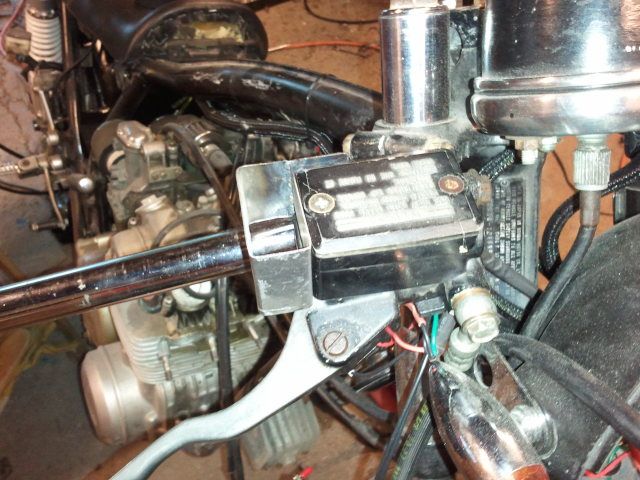
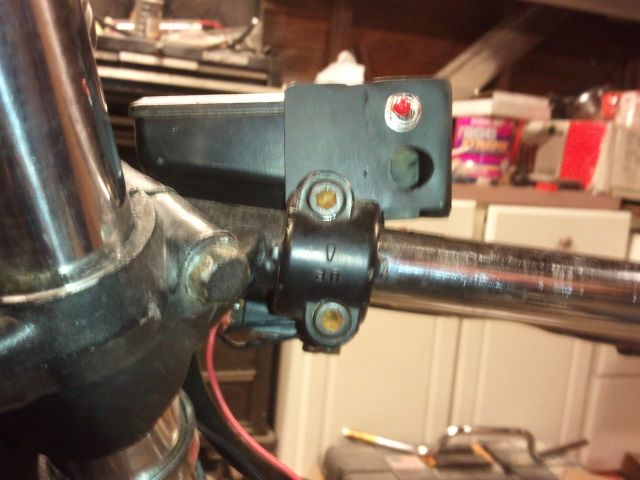
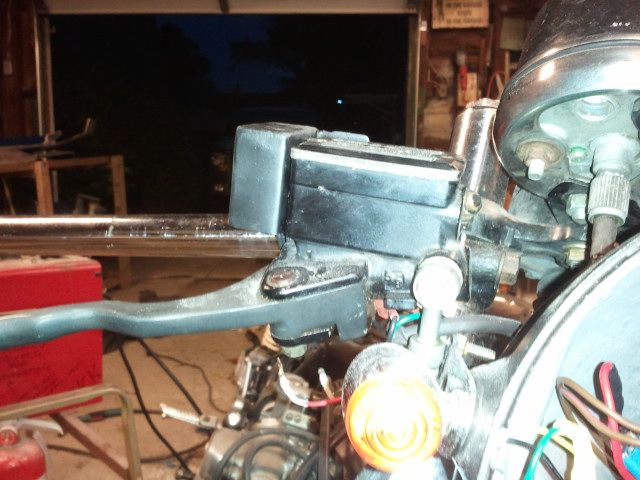
for the right hand side, I think I'm just going to mimic the shape of the brake master cylinder as if it's being extended, and mount the switches into it. If you look at the pitures from when I was fabbing the round housing, you can see the squarish shape of the master, I'll just "extrude" that shape and have a little tab sneak between the part that clamps onto the bar to hold the housing.

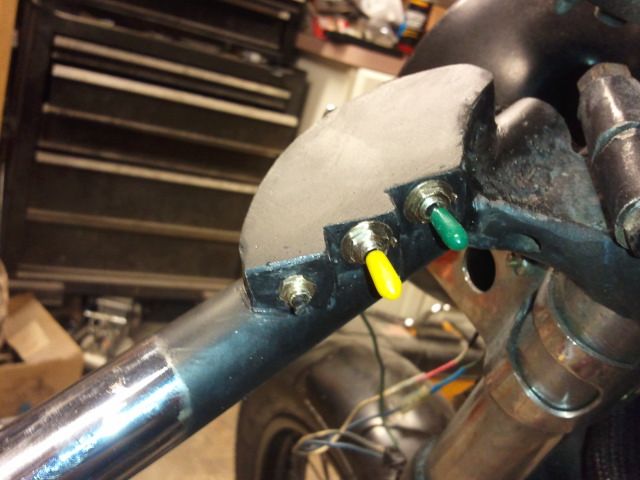
for the left side, I think this is the only non-bulky non-stupid way I can make a switch housing. It's going to be sort of a pain in the ass to make, but it ends up setting up the switches all aiming towards my thumb so it should be comfortable to use, and it should look like part of the bar when it's done. This will get the backsides of each switch aiming towards the point of exit for the wires, so I won't have as much clearance issues like I did trying to cram the wires inside that round housing I made that is now useless. In this rendering, I didnt make the clutch lever because that would have taken longer than this whole 3D image took to build in CAD.


the black is the grip, the silver is the bar.

The red would be one continuous strip of 22g steel I have kicking around that I can bend the "steps" into and the blue would be a "cap" I'd make to go over the red peice once it's welded onto the bar and blended it with some files to make it all look one piece. The green would be the wiring loom coming out of the housing.

Took my 3D housing and translated into a template to cut out.
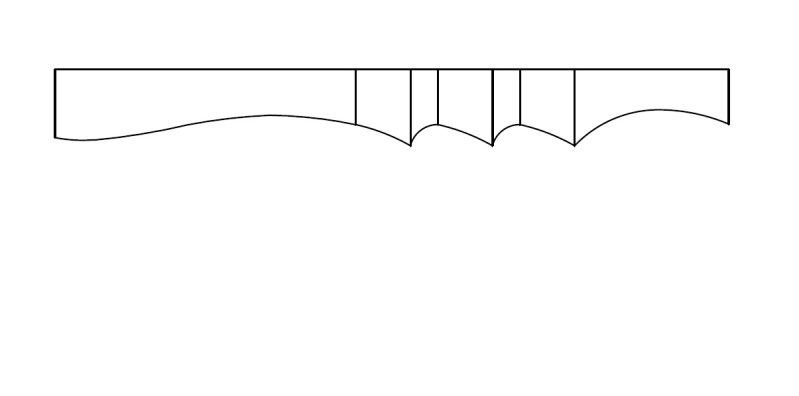


Printed it out at 1:1, I think I'll have to revise it a bit because looking at it on paper the backsides of the switches might have a wider bas than the 1/2" I made the "steps" at for them to mount into.

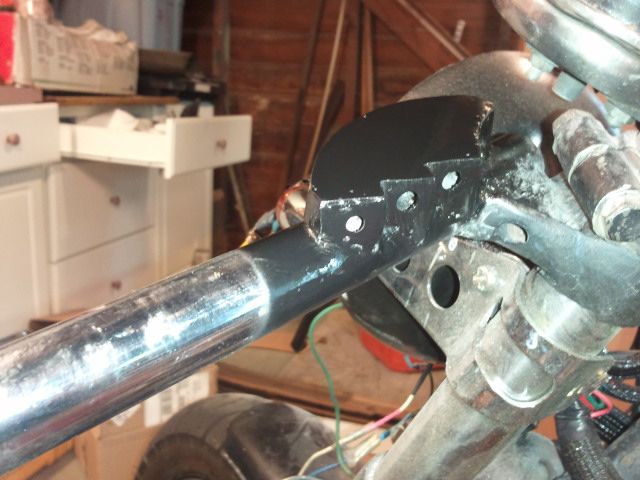
Switch panels are compeleted, and I am OK with how they have turned out.

Template I made from CAD was very close, but needed some massaging once I cut it out and bent it up.....here's the process:
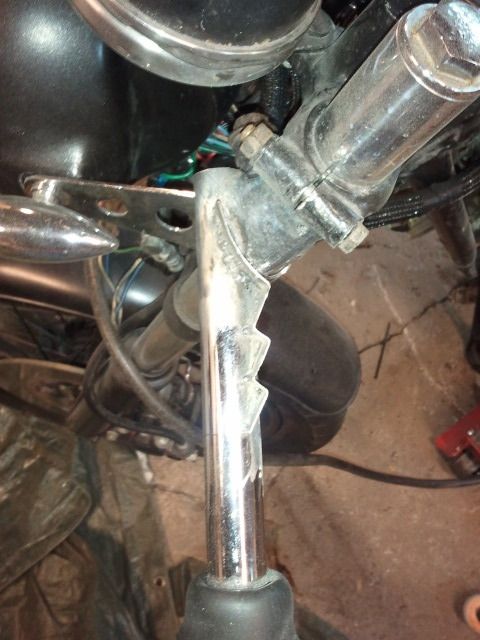
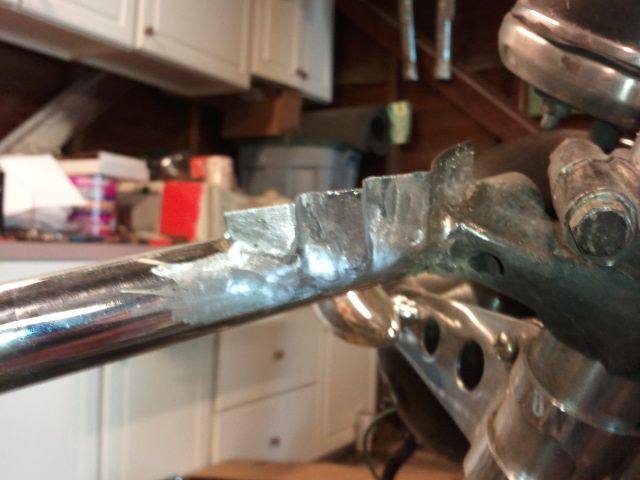
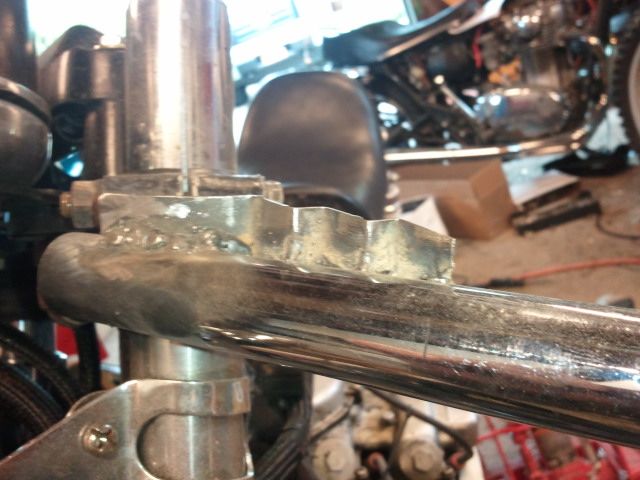


mocked up switches
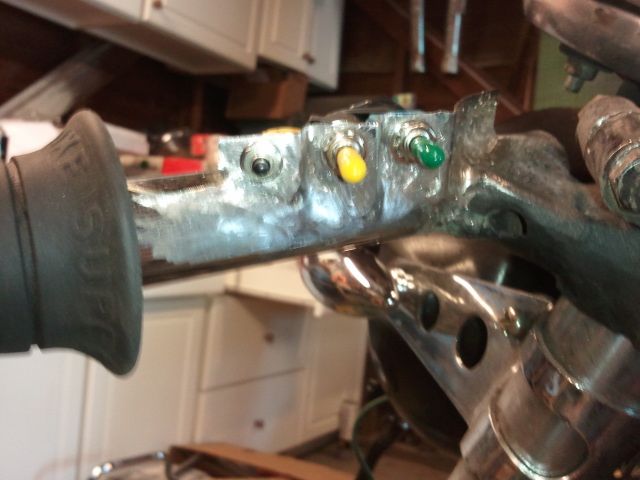


after I made the side and front, I made a cap. I left the bottom open so I can install and remove the switches as needed.
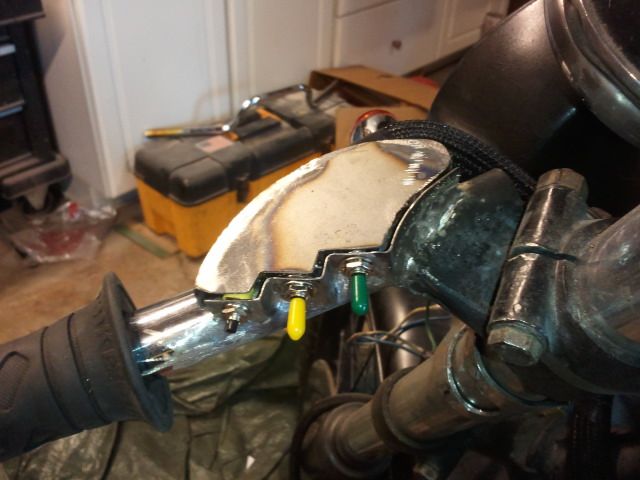
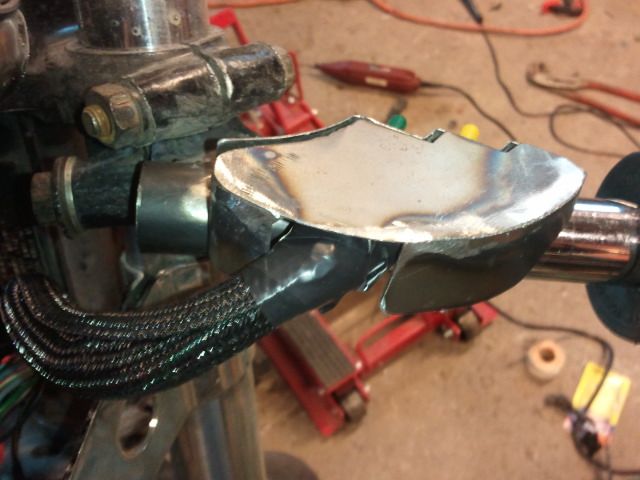


ground it all down smooth and painted black


Other side was much simpler

made a box chanel with a flange out of one peice bent around
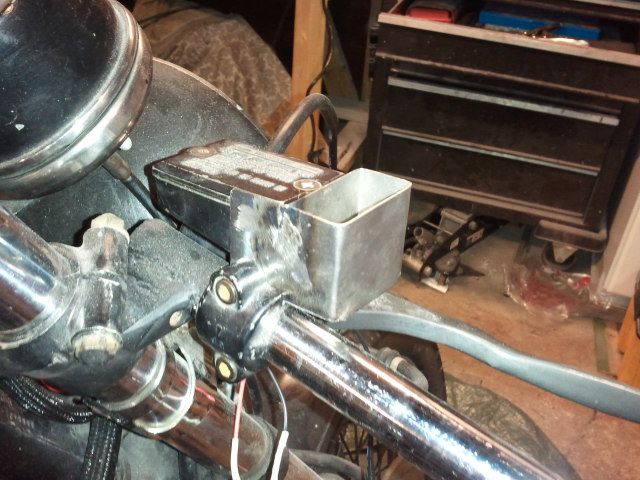


capped it off, ground smooth, painted black
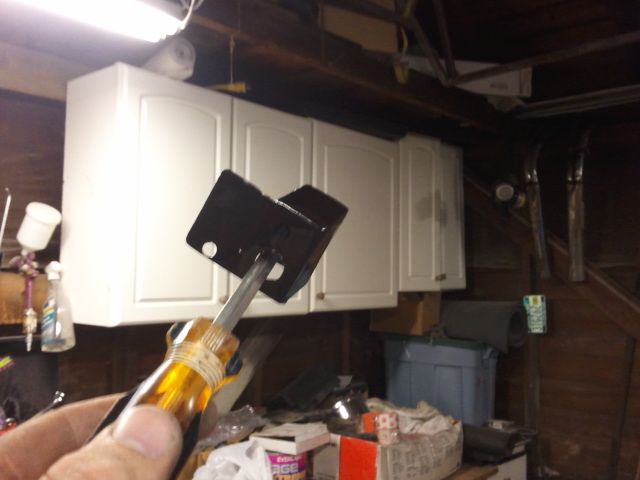


What's left to do:
-Make side covers
-paint tank
-replace start button that I ruined by being a Tard
-swap power and ground wires on signals, wired them backwards by mistake and they don't blink (LED's are directional unlike incandescent bulbs)

Got the exhaust back on, grips back on, mirrors back on, seat permanently mounted, and connected all the stock cables......
 
I really wanted to get shorter cables and brake hoses on, but the cables are custom order and $150 for the three cables I need, and they probably won't make it here in time for Vintage Motorcycle Days even if I order them at this point.
 
Tank is in sealer, ready for paint. Probably going to take it over to my parents house and paint it this weekend because my stepdad has a mini-paintbooth in the basement from when he was building his airplane.

I might jump on making the frames for the sidecovers, replace the start button, and swap the signal wires tonight if I can find some motivation.....

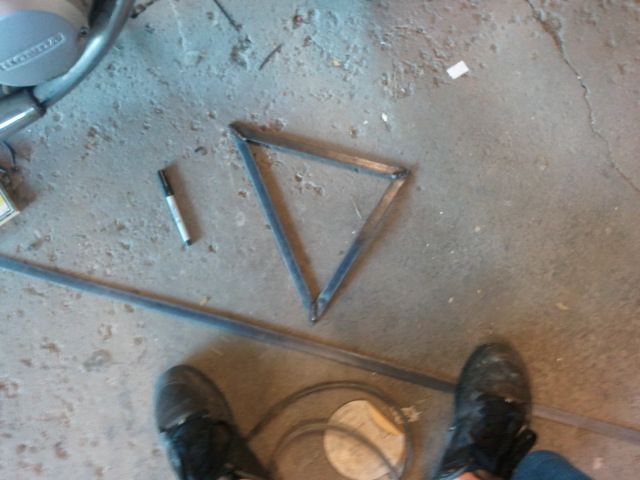
Made the sidecover frames yesterday....


I used a piano hinge on the left side so I can open it up and use the storage space
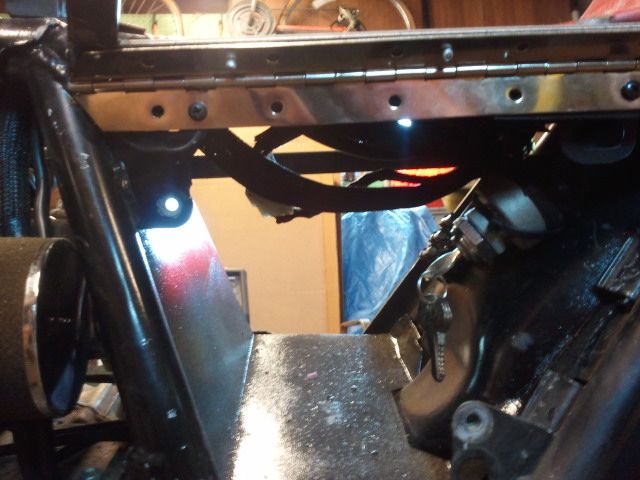


But then I started running through some of the electrics....and new problem. No spark, regardless of the position I have the kill switch in....fantastic. I #$%*ing hate wiring!

Gotta get some help from my friend Pirite again, have to track this down ASAP. 38 days 'til Vintage Motorcycle Days. I'm getting super nervous the bike won't make it...

Offline sinister902

  • Hot Shot
  • ***
  • Posts: 512
    • Anger Street Kustoms
Re: CB550 Cafe, Phase Two!
« Reply #2 on: June 23, 2012, 12:00:46 PM »
thanks to an incredibly generous freebie from a member of a local car forum I belong to, I just came in from painting the tank.

after two coats of base


after two coats of clear


Pretty pleased with the result...this is only the second time I've sprayed something non-rattlecan lol.... Clear has two runs in it that I'll have to wetsand out, but they aren't really bad so I'm not concerned. should come out pretty nice after wetsand and buff job.

got too much going the rest of the weekend to mess with it more, but I'll probably take it for a ride monday or tuesday and see how she feels with these new shocks and bars.....then if all's well I'll pickup some mesh for the sidecovers and finish those off, then it's done for the season. (because let's be serious, I'll probably change a bunch more next year again haha)

Offline sinister902

  • Hot Shot
  • ***
  • Posts: 512
    • Anger Street Kustoms
Re: CB550 Cafe, Phase Two!
« Reply #3 on: June 30, 2012, 01:12:48 PM »
Even though there doesn't seem to be anyone watching this build/refresh, I've done a little more work:

Since I'm almost done with this year's mods...... I've started planning for the winter already lol

Overnight parts from Japan (not really, but somehow this #$%* got here in 4 days lol)


this is the 836cc big bore kit meant for CB750's. The plan is to use the 650 motor shown a page or two back, with cylinder liners from a cb750, then these pistons. The 650 cases need to be bored a little to accept the 750 liners, then the 750 liners need to be shortened a little and bored for the 836 kit, and the 836 pistons need the shoulder modified a little bit for proper squish clearance. end result with be 740cc and about 11:1 compression, yeilding between 80-100hp depending on carb and exhaust setup. Should be pretty gnarly. I just have to order a headgasket meant for the 650 motor at the larger bore and drop everything off with specs for machining. Total cost for the engine build parts included should be somewhere in the $800-1000 range when done.

YEAH. #$%*'s done for this year...... threw the tank on, put some gas in it, and fired the pitch up.....diagnosed/fixed the blinkers-not-blinking issue, and discovered I buggered the horn switch.... so I have to replace the horn switch and start button. All that's left besides that is the side cover mesh. Super stoked. Took it for a spin, and holy #$%* what a difference these bars and shocks have made....TOTALLY different riding dynamic now. Much more comfortable than before, yet the stiff shocks/springs being about a half inch higher makes turn-in feel way more awesome....I have even more confidence in the handling on this thing. Pretty happy right now. Snapped a few pics:


Probably riding it to Tea Leaf Cafe for a local meet next tuesday if the weather is nice.

wetsanded the runs out of the clear and buffed the tank down to perfection.

after sanding:


after first cut with polish:


after the whole tank has been cut twice with polish


after sealer wax:


Then it was time to throw the emblems back on.....but they looked beat to hell. I don't mind a little bit of wear, so I chose to blast them with black and sand the tops of the letters

Before:


During:


After:


Installed:


:)

See you at Vintage Motorcycle Days!

Offline Stev-o

  • Ain't no
  • Really Old Timer ...
  • *******
  • Posts: 34,437
  • Central Texas
Re: CB550 Cafe, Phase Two!
« Reply #4 on: July 01, 2012, 10:45:09 AM »
Bike looks real good, especially the paint on the tank and emblems.
Is that the big bore kit from eBay for $110?  If yes, I plan to buy one too.
'74 "Big Bang" Honda 750K [836].....'76 Honda 550F.....K3 Park Racer!......and a Bomber!............plus plus plus.........

Offline sinister902

  • Hot Shot
  • ***
  • Posts: 512
    • Anger Street Kustoms
Re: CB550 Cafe, Phase Two!
« Reply #5 on: July 02, 2012, 05:18:00 AM »
yeah that's the $100 kit from ebay. I haven't opened anything up just yet as I don't plan to get into building the other motor until winter. I'll probably list the headgasket up for sale since it's for a 750 and I need one for a 650. I'm real happy with the way the paint came out....next year I'm hoping to just to the motor, clean up some tabs on the frame, and polish up some stuff. Debating on doing a hoop at the rear of the frame to lose the rear fender and all that stuff and re-do the seat to accomodate that......we'll see.

Offline Stev-o

  • Ain't no
  • Really Old Timer ...
  • *******
  • Posts: 34,437
  • Central Texas
Re: CB550 Cafe, Phase Two!
« Reply #6 on: July 02, 2012, 07:04:34 AM »
Sounds good. That event at Mid Ohio will great, I hope to make it next year.  Think you'll be able to get the bike on the track? The guys in WI recently did it at Road America at a similar vintage event.

BTW, my K5 project cafe is from NY, the Hondas seem to be plentiful up there and hard to find around here.
'74 "Big Bang" Honda 750K [836].....'76 Honda 550F.....K3 Park Racer!......and a Bomber!............plus plus plus.........

Offline sinister902

  • Hot Shot
  • ***
  • Posts: 512
    • Anger Street Kustoms
Re: CB550 Cafe, Phase Two!
« Reply #7 on: July 02, 2012, 01:08:37 PM »
I don't plan on getting on track with it..... I've never done any track riding with this bike, just some country roads in a spirited manor....... The honda's certainly ARE plentiful up here.....though they are either $2000 and in fantastic shape, or brutally beaten and left to rot on the side of a barn for $300-500. Mine was of the $300 flavor.

Offline Stev-o

  • Ain't no
  • Really Old Timer ...
  • *******
  • Posts: 34,437
  • Central Texas
Re: CB550 Cafe, Phase Two!
« Reply #8 on: July 02, 2012, 03:28:53 PM »
The ones I picked up are the $300 variety as well.

You should look into getting your bike on the track, not to race, just a "ride around".  It would be a blast riding on a real racetrack and Mid Ohio certainly is that.
'74 "Big Bang" Honda 750K [836].....'76 Honda 550F.....K3 Park Racer!......and a Bomber!............plus plus plus.........

Offline kerryb

  • Not a very
  • Expert
  • ****
  • Posts: 1,155
  • 78 750k 74 cb550k, '83GL1100 FXSTC, 1979 Wilmac
Re: CB550 Cafe, Phase Two!
« Reply #9 on: July 02, 2012, 04:04:23 PM »
I like what you've done to your bike this time around.  I plan to borrow your clip on bar technique, that's very functional.  I may want to buy that spare head gasket for my new engine project with an oil leak.  Who is invited to the tea leaf cafe meet?  Is that for bikes or car club members?
intrigued by the wail...seduced by the scream.

Offline sinister902

  • Hot Shot
  • ***
  • Posts: 512
    • Anger Street Kustoms
Re: CB550 Cafe, Phase Two!
« Reply #10 on: July 02, 2012, 06:14:07 PM »
kerryb, it's a local meet hosted by NYspeed.com, a car forum.....but it seems I've inspired quite a few fellow members there as now there's about 4 or 5 other guys doing cafe builds now.....you're more than welcome to join us over there! it's in Amherst.....I'll probably be there around 9pm (it's a rather late shindig). The Bubble Tea is FANTASTIC there!

It's in a plaza at the corner of Maple and Sweet Home.....

Offline seanbarney41

  • not really that much younger than an
  • Really Old Timer ...
  • *******
  • Posts: 10,880
Re: CB550 Cafe, Phase Two!
« Reply #11 on: July 03, 2012, 04:21:15 AM »
cool bike...looks quite functional and it's always nice to see guys not tearing things down to the frame resulting in some crazy overwhelming 10 year mega project that probably will never see the street again anyway
If it works good, it looks good...

Offline sinister902

  • Hot Shot
  • ***
  • Posts: 512
    • Anger Street Kustoms
Re: CB550 Cafe, Phase Two!
« Reply #12 on: July 03, 2012, 05:31:01 AM »
Thanks seanbarney41, that's exactly what I was after......I hate not riding....so each year I update a couple things or change a few things in mini-stages instead of going super nuts spending five grand and taking 5 yrs to build it start to finish. I'm already planning next year's teardown haha

Offline seanbarney41

  • not really that much younger than an
  • Really Old Timer ...
  • *******
  • Posts: 10,880
Re: CB550 Cafe, Phase Two!
« Reply #13 on: July 03, 2012, 10:17:00 AM »
yep, that's how I like to do things too...you're doing nice work to boot
If it works good, it looks good...

Offline fastbroshi

  • Puppet
  • Old Timer
  • ******
  • Posts: 2,645
Re: CB550 Cafe, Phase Two!
« Reply #14 on: July 04, 2012, 01:11:01 AM »
I see you've added a 750F rear end; was it basically the swingarm et al?  Also, are you 4'11"?  Those rearsets are really high.
Just call me Timmaaaaay!!!

Offline sinister902

  • Hot Shot
  • ***
  • Posts: 512
    • Anger Street Kustoms
Re: CB550 Cafe, Phase Two!
« Reply #15 on: July 04, 2012, 06:22:54 AM »
front AND rear end are both 750f. the rearsets are a little high, I've moved them 4 times now. I can't seem to find a position I like them in. I moved them up because I almost ripped my foot off in a corner riding NORMAL.....I have a size14 foot, so I moved them up to get my feet as far away from the ground as possible. I've been known to surprise the #$%* out of my modern sportbike riding friends on spirited rides.....they are always surprised when they look over their shoulder and I'm no farther behind then they are from the guy in front of them :)

Offline rb550four

  • Master
  • *****
  • Posts: 2,473
  • I'm nobody's slave and nobody's master
Re: CB550 Cafe, Phase Two!
« Reply #16 on: July 05, 2012, 07:40:00 PM »
What an innovative build especially the the clip on bar and electrics...nice job.
A few Honda 500's, a few Honda 550's, a few Honda 650's, '72 cb 450, a couple 500/550/650 hybrids, and 2001 750. 
  550 Snowbike -Somebody had to do it.
  http://forums.sohc4.net/index.php/topic,101678.0.html             
http://forums.sohc4.net/index.php/topic,137317.msg1550907.html#msg1550907

Offline sinister902

  • Hot Shot
  • ***
  • Posts: 512
    • Anger Street Kustoms
Re: CB550 Cafe, Phase Two!
« Reply #17 on: July 06, 2012, 10:55:45 AM »
Thanks everyone. At this point, the only parts of the bike that are original are the headlight bucket and the frame. The original motor was no good, the tank was rotten, and the rest of the parts are commondeered off other bikes haha.

front and rear ends are complete swaps from a '78 CB750F
rearsets are '99 GSXR600
tank was an ebay score
engine was purchased from a fellow member here on SOHC4
bars are old bent drag bars cut up and welded to a cut-up lower stock tree


I've really enjoyed this bike as a creative outlet.....each year I go back and refine a few things. I figure this way I'm riding it every year instead of multi-year downtime, and maybe in another 2yrs it'll be exactly how I want and done up to the max.

Offline sinister902

  • Hot Shot
  • ***
  • Posts: 512
    • Anger Street Kustoms
Re: CB550 Cafe, Phase Two!
« Reply #18 on: July 07, 2012, 10:43:08 AM »
So the perforated mesh I ordered FINALLY came in yesterday, so this morning I got up and decided today is going to be a wrench-day.

Cut out the mesh and welded it to the backs of the frames I previously made:


Then, for the right-hand side I welded a few bolts to the back of it where the original side-cover had tabs that snapped through rubber grommets, and put a washer and nut on the inside to hold it in place.


The other side is hinged and mounted already, so all that's left to do is buy a thumb latch(and install it) like this guy:


I'm pretty happy with the result. In fact, I'm thinking about leaving them raw and just clear-coating over them as-is so they don't rust, I kind of like the industrial look they've got

do you think I should paint them? maybe just paint the outline/frame?

Offline Mcwilliams570

  • Hot Shot
  • ***
  • Posts: 646
Re: CB550 Cafe, Phase Two!
« Reply #19 on: July 07, 2012, 10:51:12 AM »
A really nice bike. Lots of neat stuff you have done to it. Paint the frame of the side covers black and see how you like it can always get it off..

Matt
My CB550 project http://forums.sohc4.net/index.php?topic=101182.0

Project UFB Cb550 http://forums.sohc4.net/index.php?topic=112143.0

Like a 10 dollar hooker on Friday night its going to be ridden.

1974 cb550
1975 cb550
2005 vmax
2009 vmax-sold
1981 gl500i

Offline Stev-o

  • Ain't no
  • Really Old Timer ...
  • *******
  • Posts: 34,437
  • Central Texas
Re: CB550 Cafe, Phase Two!
« Reply #20 on: July 07, 2012, 11:27:31 AM »
The side covers look great. I vote for painting the side cover frames black. And clearcoat perforated metal, but not high gloss.

Nice job!
'74 "Big Bang" Honda 750K [836].....'76 Honda 550F.....K3 Park Racer!......and a Bomber!............plus plus plus.........

Offline Gman

  • Hot Shot
  • ***
  • Posts: 307
Re: CB550 Cafe, Phase Two!
« Reply #21 on: July 11, 2012, 07:35:30 AM »
A really nice bike. Lots of neat stuff you have done to it. Paint the frame of the side covers black and see how you like it can always get it off..

Matt

+1
The black would frame the perf section nicely to make it stand out, methinks.  Love the idea!

Cheers,
G
'76 CB550K
Stock airbox, MotoGPWerks 4-1, HondaMan ignition, Lesters

Offline sinister902

  • Hot Shot
  • ***
  • Posts: 512
    • Anger Street Kustoms
Re: CB550 Cafe, Phase Two!
« Reply #22 on: February 27, 2013, 07:23:38 PM »
Well, it's been a long time since I updated this....but I'm working into phase 3 now.....fried the rings in the motor on the 70mi trip from my buddies place in ohio to Vintage Motorcycle Days and haven't ridden it since. I bought new rings and a gasket kit and plan to rebuild the motor and then list the 550 motor for sale.

I've been hoarding the parts for the 650/836cc kit hybrid motor that I'd really like to get into and swap in sometime this summer if I can pull it off....but I also recently scored an inverted fork front end from a suzuki TL1000r and am in the process of sorting out how I'm going to get it on the bike....


not sure if the triples will work, but it's a damn good start on getting modern suspension and brakes on the bike. Might have to make up a bunch of gussets for the frame as research shows other guys have twisted the frames taking advantage of the modern stuff. Probably won't have any more updates here for awhile, I've gotta get my XS650 bobber build buttoned up and the car finished up first. Mostly just wanted to share the joy of my most recent ebay score lol.

did some preliminary measurements....

neck-to-fork offset on the TL front end is 30mm center to center, while the CB550 is 44.5mm center to center.

CB550 forks are 35mm diameter in the trees, TL is 42mm at top triple and 55mm at the bottom triple.

all together, I have 1.875" of clearance between the two calipers. I have not yet determined if I can use my current wheel due to the spoke clearance.

some more measuring.....

the stem diameter for both stems is 30mm. SCORE. I have read up on other front end swaps, and it appears that I can use an XS650 bottom neck bearing as the top bearing if I want to keep the TL1000r stem. The stem on the TL1000r seems to be about a half inch shorter than that of my stock one....which MAY pose a problem.

Newman sent me a breakdown of measurements for all suzuki inverted front end dimensions....but either the table is incorrect on the diameter of the forks at the top triple, or the front end I got on ebay is NOT a TL1000r front end.

table says 55mm dia. at the lower tree and 50mm at the top tree....while I've got 55mm at the bottom and 42mm at the top. I measured 30mm offset, table shows 32 (I was probably off the 2mm honestly)

Axle diameter on the cb550 is 15mm while the TL1000r is 25mm....newman showed me how he's made his own axles to work on both his cb550 and his shovelhead build....which is probably the route I'll take to remedy that situation.

on another note....wheels.....

I mentioned I have 1.875" roughly between calipers....this is between 4.25" and 6.25" from center of axle.....on my stock spoked wheel I have I think 1.9" width from outside-outside of the spokes....I MIGHT be able to shave a 1/16" off each caliper housing for clearance...but without actually going through with making the axle and test-mounting the wheel I have no idea if I'll be able to make the stock wheel work.....I had plans to go wider on the wheels all around, from 1.85 front/2.15 rear to 2.5f/3.0r.....which may change the spoke layout, and who knows if it will change in my favor or not.

other options are to go with supermoto 17" rims, but with custom spokes and the 17"rims I'll spend about $600 on wheels.....and even still the spokes MAY have clearance issues. plus the hassle of lacing them up and true'ing them and then new tires and, and, and....

OR I've been scoping out alloy options, and I'm sort of digging the look of these harley sportster 19x2.5/18x3 wheels.....


these are GUARANTEED to clear the calipers....and I can easily either make custom axles or swap bearings to get what I want out of them, and make adaptors for proper-sized rotors.

back to the triples issues.....I'm thinking more and more about just whipping up custom aluminum triple clamps and pressing the stock cb550 stem into them....I will get the correct offset, be able to use upgraded stock-sized bearings off-the-shelf, and the stem will be the correct length. The 1/2" difference shouldn't give me much trouble since the current lower triple on the inverted front end is offset from where the tubes clamp in by almost that 1/2" :


Thoughts anyone?

Offline metalhead0283

  • Enthusiast
  • **
  • Posts: 113
  • speed on brother hell aint half full
Re: CB550 Cafe, Phase Two!
« Reply #23 on: February 27, 2013, 07:52:45 PM »
you might be able to find neck bearings that will work with a larger or smaller inside diameter depend on the size of the stem n drop right in...also length of the stem though n the taper on the stem effecting where the bearings land...i was gonna do a cbr front end on mine but didnt wanna eat up all my money doing the front end...you gonna run 130 front an back for tire size or what ya doing?
77 xs650  81 xs650  76 cb550f  2010 triumph street triple

Offline metalhead0283

  • Enthusiast
  • **
  • Posts: 113
  • speed on brother hell aint half full
Re: CB550 Cafe, Phase Two!
« Reply #24 on: February 27, 2013, 07:55:08 PM »
but if ya got lil money to burn i like your idea of custom triple clamps with the stock stem pressed in
77 xs650  81 xs650  76 cb550f  2010 triumph street triple

Offline sinister902

  • Hot Shot
  • ***
  • Posts: 512
    • Anger Street Kustoms
Re: CB550 Cafe, Phase Two!
« Reply #25 on: February 27, 2013, 08:12:20 PM »
my idea for the triple clamps is to buy two pieces of aluminum block from speedymetals.com

can probably make both triples on my drillpress for about $100 or less. I can contact allballs racing for bearings I'm sure. going to probably run a 120 front and 140 rear to keep the ratio similar to stock sizes front vs. rear

I've got a cb750supersport rear swingarm and wheel/disc brake on the bike too....

Offline chris mcshifty

  • Enthusiast
  • **
  • Posts: 107
Re: CB550 Cafe, Phase Two!
« Reply #26 on: February 28, 2013, 12:04:57 AM »
Cool build

Offline sinister902

  • Hot Shot
  • ***
  • Posts: 512
    • Anger Street Kustoms
Re: CB550 Cafe, Phase Two!
« Reply #27 on: March 08, 2013, 07:21:52 PM »
well, after many attempts at scoring what I wanted/needed on ebay, this is what I ended up with for the modern front end....and coincidentally decided to upgrade the rear too


TL1000S front end, Sportster 19x2.15" front wheel, sportster 18x2.5" rear wheel, GSXR600 rotors, R6 rear caliper and rearset. will have to make a custom brake-stay for the rear, some spacers for the caliper to make it play nice with the axle, and custom spacers for the rear sprocket and front calipers (which will also serve to correct the difference in bolt patterns)

Offline jtran000

  • Full Member
  • *
  • Posts: 93
Re: CB550 Cafe, Phase Two!
« Reply #28 on: August 08, 2013, 10:16:51 PM »
lovin this build so far!  so much information however i wish i have your fab skills.  I have access to my companies r&d department but i don't know how to use their machines haha.  i love how you build piece by piece in order to keep the bike running.  I fell into the trap of trying to do everything at one time and i realize i won't be able to ride till next year.  keep the updates coming!

Offline sinister902

  • Hot Shot
  • ***
  • Posts: 512
    • Anger Street Kustoms
Re: CB550 Cafe, Phase Two!
« Reply #29 on: August 09, 2013, 07:21:06 AM »
thanks Jtran, I'm in that boat with it now lol. I pulled the low compression 550 motor out and sold it at Vintage Motorcycle days along with the carbs so I'm back to a roller and square one. I happened to use that money to score an xs750 knee-dent tank, cb750 boxed swingarm, aftermaret 7:1 tach for the 650 hybrid motor, and a zx6r monoshock ;)

I'll start a new thread when I get into it....but when I got home I was so excited I had to mock up the tank, wheels, and front end....


Offline GV1390

  • Hot Shot
  • ***
  • Posts: 586
  • Express Gratitude.
Re: CB550 Cafe, Phase Two!
« Reply #30 on: January 29, 2015, 05:44:14 AM »
Bump.

:)
93' GSX-R1100, 78' CB550, 71' CL350, 71’ CB500 & 02' ZRX1200R.

Offline sinister902

  • Hot Shot
  • ***
  • Posts: 512
    • Anger Street Kustoms
Re: CB550 Cafe, Phase Two!
« Reply #31 on: January 30, 2015, 06:08:22 AM »
Bump.

:)

jerk. lol.

it's still a pile of parts in my basement. I ended up using the xs750 tank on an actual xs750 cafe racer build I'm nearing finishing....but I bought a cb350f tank for this build that I think I'll use....unless I get something cooler by the time I get around to pulling this bike off the back-burner again.