Author Topic: CB750 K2 restomod to "originalish" condition // Forkbrace added ! ! !  (Read 57854 times)

0 Members and 1 Guest are viewing this topic.

Offline tango911

  • Expert
  • ****
  • Posts: 1,012
Your doing a great job.   Learning to paint is hard.  mainly with the tank and side covers.
CURRENT STABLE:
1969 Honda Dream 305 (black)
1974 Mach III kawi 500 smoker
K2 (project)
K2 Original fixer up
K0 original fixer up
2006 CRF250R

Offline Viktor.J

  • Breaking in the forum
  • Hot Shot
  • ***
  • Posts: 530
Sand it smooth, wipe down with acetone (it is meant to dry with no residue), make sure it is completely evaporated before painting and giver.

IW

But wont the acetone dissolve the other paint, and the primer ? I might try to sand it down, then dip a small little "cotton stick" into acetone, let it dry a little then gently repaint that area.
But the "non active pad" I dont'know, just doesnt feel right to remove the paint and primer with acetone :( but maybe that's the only way...


It is no wonder painters charge a hefty sum, it is not as easy as it seems.
But you are doing a heck of a good job
Keep it up.


Cromoly.


OC, I knew it's hard but it feels like there so many ways to do it, and I don't want to mess up. And since I don't have any 
experience with VHT paintings I don't know how to do for the best result :)
Thanks !


Your doing a great job.   Learning to paint is hard.  mainly with the tank and side covers.
I bet, would never paint the tank and sidecovers by myself :) but these parts with tricky geometry and cooling fins etc. its hard the get the paint everywhere without getting to much on one place :) 
Please ! Take a look and give me feedback in my project thread, its much needed :)
http://forums.sohc4.net/index.php?topic=112745.0

Honda CB750 K2

Offline Viktor.J

  • Breaking in the forum
  • Hot Shot
  • ***
  • Posts: 530
Well folks, today I finished polishing the cylinder head cover ! puh, what a PITA !
But I'm happy with the result ! I also painted the other brake parts, ans will provide a update on that subject when I get back home !

Now whats left is reading and trying to find the courage to pull the motor out :S scary #$%* !

Anyway here's the cylinder head cover !


Please ! Take a look and give me feedback in my project thread, its much needed :)
http://forums.sohc4.net/index.php?topic=112745.0

Honda CB750 K2

Offline deafcaferacer

  • "I'm sorry officer, I can't hear you!"
  • Hot Shot
  • ***
  • Posts: 297
Looks pretty good!
'73 CB750k engine, hubs, and a '76 tank, on 'a 78 frame. Go figure.

Offline iron_worker

  • Master
  • *****
  • Posts: 2,081
Looks great I say!

Paint thinner or varsol won't remove dried paint.

IW

Offline Stev-o

  • Ain't no
  • Really Old Timer ...
  • *******
  • Posts: 34,315
  • Central Texas
Looks great!
'74 "Big Bang" Honda 750K [836].....'76 Honda 550F.....K3 Park Racer!......and a Bomber!............plus plus plus.........

Offline Viktor.J

  • Breaking in the forum
  • Hot Shot
  • ***
  • Posts: 530
Thanks for the kind words guys, hopefully it will look great on the bike ! :D
Please ! Take a look and give me feedback in my project thread, its much needed :)
http://forums.sohc4.net/index.php?topic=112745.0

Honda CB750 K2

Offline Viktor.J

  • Breaking in the forum
  • Hot Shot
  • ***
  • Posts: 530
Well yesterday I finished some painting. And as you know from my thread on the other part of the forum, I'm not that satisfied with the VHT paint. But you try some and you learn some.

The area under the A-caliper where I managed to scar pretty bad worked out quite fine. It's visible but then I rather have some "marks" then sand the whole primer and other color layer down. Now it looks more like a casting defect or such.


I've also finally got the cash to order, WHAT I HOPE. Is the last part for me to get the bike back on the road. That is

From a racing dealer in Sweden
3x steelbraded brakehoses, with tansparent plastic overhaul. 189$ thats what we pay for this #$%* here .... :(
1x Motul 5.1 brake fluid
4x Primer/EBC kevlar brake pads
X x Banjobolts
1x bleeding kit

From DSS
Order information
4 x 90165300023 - BOLT.SETTING *D
2 x 45110300003 - CAP BLEED SCREW *B
3 x 9410818000 - WASHER A8,TONGUED *M
1 x 15410426010 - Oil filter
2 x 45117341700 - Brake caliper adjuster bolt
2 x 94001062000SP - Brake caliper adjuster bolt nut

From a "hobby paint suplier"
1x 14ml gloss black enamel paint (for the stator cover)
1x 14 ml gloss white enamel paint (for the tank badge)

And least last week I bought some Castrol T4 10W-40 (If i remember correct) semi-synthetic.


Hopefully I have all I need to Re-assembly the brakes, make them fully functional.
Pour out the old oil, lift out the engine, clean the oilsump, change oilfilter, Change all the engine alu covers, but the engine back, and then new oil.


Please ! Take a look and give me feedback in my project thread, its much needed :)
http://forums.sohc4.net/index.php?topic=112745.0

Honda CB750 K2

Offline Viktor.J

  • Breaking in the forum
  • Hot Shot
  • ***
  • Posts: 530
Im still waiting for my parts so there isn't really much happening here.

But yesterday I scored a new pair of handlebars on German ebay. I don't really know the brand but they look like Dunstall so there's something similar.
Anyway its clip-ons that's attaches to the top-tree. And I thought that it might work since I want to keep the stock front and (maybe) clip-ons. I'm afraid that they have a little to aggressive angle (if they are like the Dunstall) but maybe I can fabricate some new mountings in school. Or sell them if i don't like them, i Got them for like 50$, shipped, so that's fine I guess.

Here they are :)
Please ! Take a look and give me feedback in my project thread, its much needed :)
http://forums.sohc4.net/index.php?topic=112745.0

Honda CB750 K2

Offline CROMOLY

  • Full Member
  • *
  • Posts: 60
Hi Victor,
Verry nice loking head cover, it is the next step for me,
And good score on the clip ons.


Cromoly.
Wish it was made out of Lego

Offline Mugen_Stumpo

  • Hot Shot
  • ***
  • Posts: 287
the cli-on looks like marving... it's an italian brand...

looks great, just hurry up and mount them...

do you polished the valve cover by hand?!

Offline Viktor.J

  • Breaking in the forum
  • Hot Shot
  • ***
  • Posts: 530
Hi Victor,
Verry nice loking head cover, it is the next step for me,
And good score on the clip ons.

Cromoly.

Thanks, the head cover is a pain in the ass but eventually you get there. The biggest problem though is that you have to remove the engine... :(

the cli-on looks like marving... it's an italian brand...

looks great, just hurry up and mount them...

do you polished the valve cover by hand?!

Im actually interested in finding the maker to the clip-ons but so far no luck. Never heard of marving, I did a quick search but did not find anything, do you have any more info ?
I don't know if I will keep them, the MC may interfere with the gauges and Im afraid that im too long and need rearsets and .... well it all adds up you know :)

Yes, I polished all the cover by hand, can't really see any other way to do it. By hand I mean that I sanded them down by hand from 320 emory cloth - 320 paper down to 1200 grit paper and then cutting polish followed by gloss polish with a bench grinder. 
Please ! Take a look and give me feedback in my project thread, its much needed :)
http://forums.sohc4.net/index.php?topic=112745.0

Honda CB750 K2

Offline Viktor.J

  • Breaking in the forum
  • Hot Shot
  • ***
  • Posts: 530
While waiting on my parts there isn't much I can do. Specially since the bike is 200 km away from my current apartment.
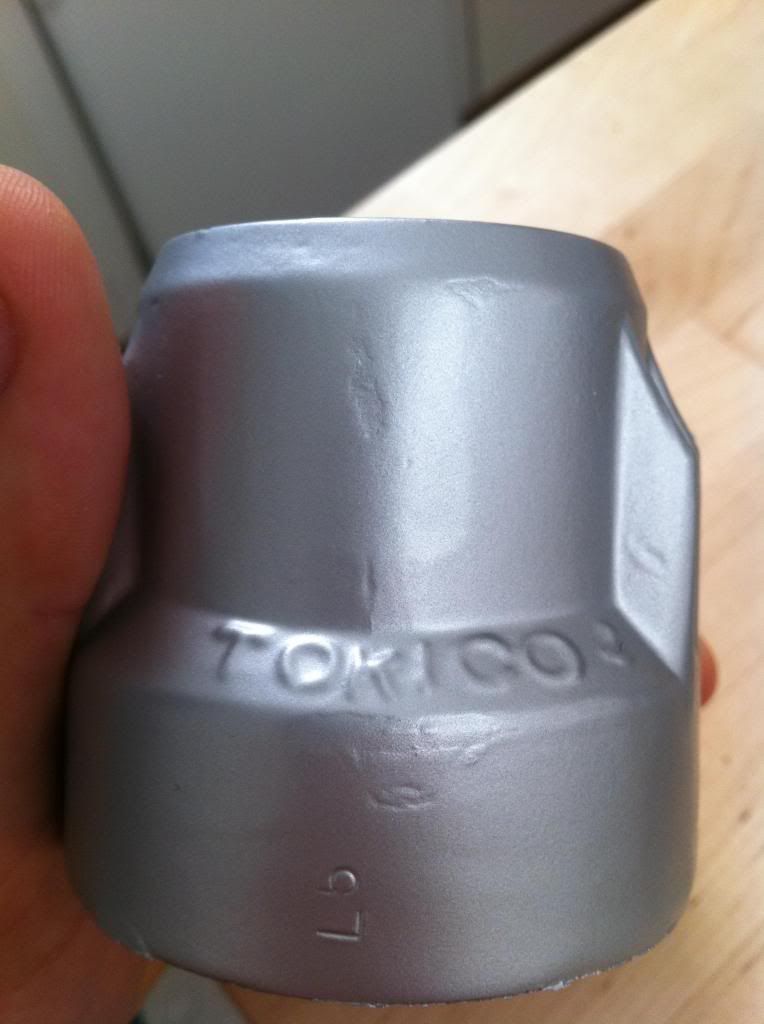
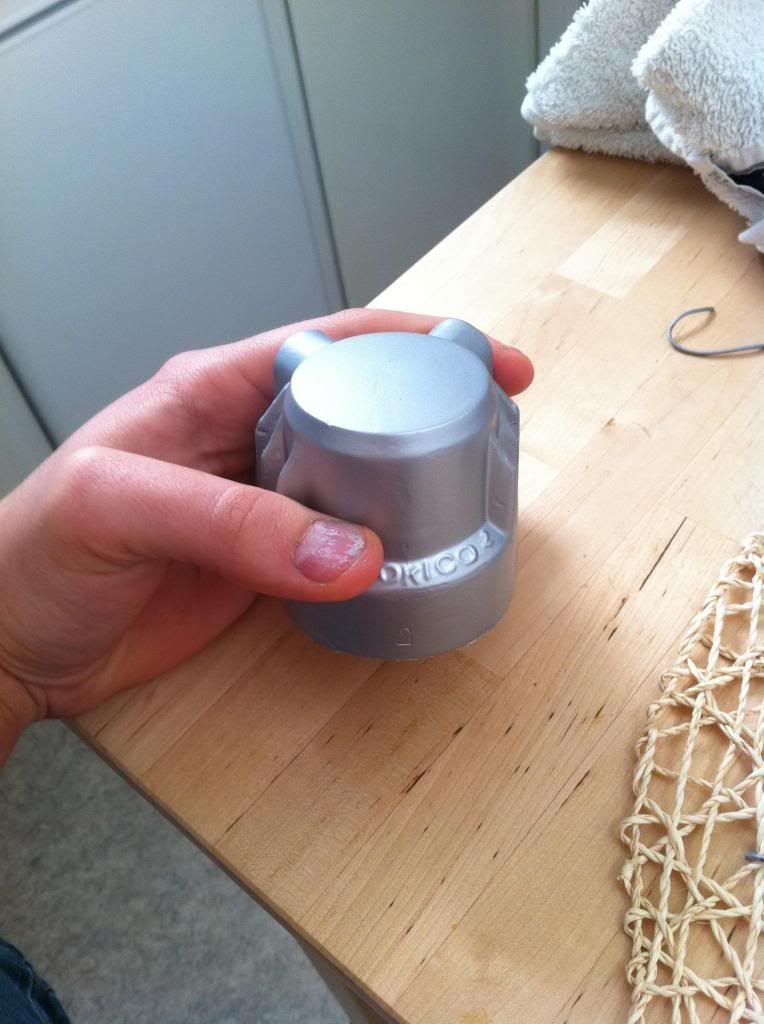
Alltough the cylinder head cover is polished I forgot to polish the valve covers. And since i don't want to re-polish the cylinder head I made a little "she-part" for the covers.

The reason is to have something to "grab" on while I sand and specially later on when I polish the valve covers. Since we (school) didn't have correct thread sizes I uses a "epoxy hardener". First time I used it and it's quite a neat quick-fix. After machining the "handle" and drilled the internals I formed a tube-shape and applied the epoxy on the inside walls of the handle and then another tube-shape around the threads of the valve cover, then merged the cap down the handle and forcing the two "epoxy"-tubes to mix.

It worked well and now I have a handle to easier grip and polish the covers :D

assembled.


epoxy threads...


so long....
 
Please ! Take a look and give me feedback in my project thread, its much needed :)
http://forums.sohc4.net/index.php?topic=112745.0

Honda CB750 K2

Offline Viktor.J

  • Breaking in the forum
  • Hot Shot
  • ***
  • Posts: 530
Re: CB750 K2 restoration to "originalish" condition //
« Reply #138 on: March 20, 2013, 12:48:38 PM »
Hey guys, I need some professional help from you  :-*

I would like to identify these clip-ons. I got them today and bought them from German Ebay. Both of them have " HABERMANN LST 6/50" stamped on them.

I took a bunch of pictures, hopefully someone recognize them ?


Please ! Take a look and give me feedback in my project thread, its much needed :)
http://forums.sohc4.net/index.php?topic=112745.0

Honda CB750 K2

Offline wowbagger

  • Not much of an
  • Expert
  • ****
  • Posts: 853
Just guessing but they might be from here: http://www.habermann-performance.com/

Offline Viktor.J

  • Breaking in the forum
  • Hot Shot
  • ***
  • Posts: 530
Just guessing but they might be from here: http://www.habermann-performance.com/

Your think your guess is wrong my friend. I found a old PDF from like 73 with drawings of the clip-ons. the drawings was made by a Winifried habermann and he would be like 65-75 years now, and those Habermann performence doesn't look to be made by a gandpa :) AND they have no news, no bikes, nothing lather then 1997. But I've emailed them trying to get a straight answer.
Please ! Take a look and give me feedback in my project thread, its much needed :)
http://forums.sohc4.net/index.php?topic=112745.0

Honda CB750 K2

Offline Viktor.J

  • Breaking in the forum
  • Hot Shot
  • ***
  • Posts: 530
Today I finished polishing my valve inspection caps. Everything went well and I now see myself as "D.O.N.E" with the polishing :D

As a test I polished one valve cap that I wasn't going to use without sanding it... the result was surprisingly good. Not as good as when sanded down to 1200 grit, but really good due to the effort :)

2 of the caps broke when I removed them so I will take 2 from the valve cover that sits on it now.
Spot the black sheep :)


Not that much of a difference :) but man these pictures don't do justice !


« Last Edit: March 22, 2013, 09:04:04 AM by Viktor.J »
Please ! Take a look and give me feedback in my project thread, its much needed :)
http://forums.sohc4.net/index.php?topic=112745.0

Honda CB750 K2

Offline Viktor.J

  • Breaking in the forum
  • Hot Shot
  • ***
  • Posts: 530
I was a retard regarding the clip-ons. Thats whats happens when your bike is 200KM away.


So far I've got everything I ordered :)
So this weekend I'll go home and try to remove the engine and mount the engine covers and do some "touching up"-paint.


I also ordered some protection gears. I Know you have other regulations in US then Sweden and many of the cool helmets like biltwell or bell custom 500 are not allowed due to lack of safety. So this is the helmet I'll be using, that's the best combination of looks/safety/money/able to try fit.


Not gonna use those "intern glasses alot".

http://www.fc-moto.de/epages/fcm.sf/en_IE/?ObjectPath=/Shops/10207048/Products/Blauer-Pilot-Button-White/SubProducts/Blauer-Pilot-Button-White-0001


And back protector, as I understood like only "race bike" riders use these in the US ? In Sweden everyone does, haha safety-nerds !

http://www.revzilla.com/motorcycle/tryonic-see-back-protector
« Last Edit: March 26, 2013, 12:55:02 AM by Viktor.J »
Please ! Take a look and give me feedback in my project thread, its much needed :)
http://forums.sohc4.net/index.php?topic=112745.0

Honda CB750 K2

Offline Viktor.J

  • Breaking in the forum
  • Hot Shot
  • ***
  • Posts: 530
This weekend I went home (to my bike) and the plan was to assembly the front end, change fork seals, and all the engine covers.

Things didn't really go my way. I found out that the "C-clamp" on my top tree/top yoke was broken and I need to find a welder or a new one :( ยจ
I also forgot to bring the engine gaskets, therefor I didn't lift out the engine.
Since I need to go back next weekend I didn't put on the new fork ears etc.


I changed the fork seal and assembled the front end with newly painted calipers and drilled rotors. IT was a bit tricky to align the right caliper holder but since I earlier machined down some material and already maid some spacers I just added/removed small spacers and finally got it good enough.
 I think It looks really great the only downside is that the paint on the rotors cracked as I torqued the disc-bolts :(

Work in progress, not the best garage  :P


The new front


Please ! Take a look and give me feedback in my project thread, its much needed :)
http://forums.sohc4.net/index.php?topic=112745.0

Honda CB750 K2

Offline Stev-o

  • Ain't no
  • Really Old Timer ...
  • *******
  • Posts: 34,315
  • Central Texas
New front end looks great!   Did you find triple top?
'74 "Big Bang" Honda 750K [836].....'76 Honda 550F.....K3 Park Racer!......and a Bomber!............plus plus plus.........

Offline Viktor.J

  • Breaking in the forum
  • Hot Shot
  • ***
  • Posts: 530
New front end looks great!   Did you find triple top?

Thanks Steve !
No I did not. Apparently US prices are higher then Europe. Can be due to not that many bikes here was K3-K5, to Sweden all the bikes between 72-75 was K2 models :)
But it looks like I'm gonna try to get it welded... We have a teacher at the universe that apparently should be really good at welding so I figure I'm gonna go talk to him see what he says..
Please ! Take a look and give me feedback in my project thread, its much needed :)
http://forums.sohc4.net/index.php?topic=112745.0

Honda CB750 K2

Offline Viktor.J

  • Breaking in the forum
  • Hot Shot
  • ***
  • Posts: 530
The last days I've been painting the Honda Logo on the generator cover and restoring my tank emblem. I think everything worked fine, I used emerald paint.

Stator cover went good, only flaw is that It now has a lot of fat fingerprints on the polished surface :)


The tank emblem is harder to tell the final result for now. I didn't have time to remove the white painted over the edges of the letters. I'm going to use a fine paper and sand the white paint down leaving the aluminium edges. The white spots in the black background isn't actually me, I think PO tried to enhance the finish somewhere over the years, you can double check with the before picture :D

Before


After (for now !!!)
« Last Edit: April 01, 2013, 11:04:29 AM by Viktor.J »
Please ! Take a look and give me feedback in my project thread, its much needed :)
http://forums.sohc4.net/index.php?topic=112745.0

Honda CB750 K2

Offline Viktor.J

  • Breaking in the forum
  • Hot Shot
  • ***
  • Posts: 530
This weekend I continued with the engine removal, and since I have to remove the top tree I also removed all the fronts electric since they are routed inside the unicorn top :(

After I removed the carbs, that sat like hell I tried to clean them and do a little visual inspection. I but plastic over the intake and outtake of the carbs and then sprayed it with degreaser, nothing overkil.
Before

After


Inspected the bottom (dont know the english translation), I think it looked OK. But to be honest I dont know what to look for. 110 jeted anyway :D


I then continued with the tear down and engine removal. I first tried to lift the frame over with the rear wheel of but that wasn't happening at all !
I removed the rear wheel and much much easier !
http://i1164.photobucket.com/albums/q574/Bilobijelo/bild22_zpsb0346fa7.jpg

New valve cover ( top head cover), its verry greasy here from the greasy hands mounting it :)


I then went to remove the generator cover, and PO had really been a stupid f*ck, look at these screw heads, it took me like 2 hours to get them. I hamered down a torx, and then put all of my bodyweight and some preassure =100 kg+ and gently turned. On the 3-4 attempt I got it.


I also had some trouble fitting the coil in the new generator cover. but after some gently tapping and then slowly turning  those screws in a circular/diagonal pattern finally got it in place.

Engine with the new covers, and these are totally greased and look a little dull !


Since PO also broke the Top tree Ill try to fix someone who can weld it. But to bee on the safe side I also bought a cb750 K3-K6 top tree which I till modify for my gauges.

Ill have to go home next weekend again and then I hopefully have a top tree and are able to mount everything and get it starting somehow good enough to get it down to a shop where they will tune and sync the carbs.
« Last Edit: April 09, 2013, 12:00:12 AM by Viktor.J »
Please ! Take a look and give me feedback in my project thread, its much needed :)
http://forums.sohc4.net/index.php?topic=112745.0

Honda CB750 K2

Offline iron_worker

  • Master
  • *****
  • Posts: 2,081
Gotta enjoy the work of PO's. haha

Those carbs look pretty clean on the inside. However, the place where they really need cleaning is the emulsion tube of the slow jet and the main jet holder. With the bowl off and upside down in those pics like you show it's only a screwdriver and a wrench away from being pulled out.

IW

Offline Viktor.J

  • Breaking in the forum
  • Hot Shot
  • ***
  • Posts: 530
Gotta enjoy the work of PO's. haha

Those carbs look pretty clean on the inside. However, the place where they really need cleaning is the emulsion tube of the slow jet and the main jet holder. With the bowl off and upside down in those pics like you show it's only a screwdriver and a wrench away from being pulled out.

IW

Haha yeah, 40 years old but it only takes one moron to mess up :D
Ok, I first had the ambition to clean the carbs. but then I started to read a bit more on the forum and "if it aint broken then don't fix it"-mantra made me stay away from the carbs !
BUT I still have them of the bike, so I guess I could do some light cleaning. Do you know any link to a good carb clean thread? do-how? I started searching on the forum but kind of want the "real deal" when it comes to the carbs :D

Thanks for the input IW !
Please ! Take a look and give me feedback in my project thread, its much needed :)
http://forums.sohc4.net/index.php?topic=112745.0

Honda CB750 K2