Author Topic: Yolanda 2.0 new pretty carbs  (Read 117119 times)

0 Members and 1 Guest are viewing this topic.

Offline cheftuskey121

  • Super Newbie
  • Expert
  • ****
  • Posts: 1,305
Re: First Bike: Yolanda the Honda CB750 K1 (frame painting!)
« Reply #125 on: January 29, 2013, 07:29:53 PM »
thanks guys, I have a circlip plier set coming from harbor freight :D as well as 500 varied cotter pins,  and a bag of soda. my card can handle that for now....in recent news I found out my master cylinder may be done. the bolt was seized so I boiled it in some water and got it loosened, then began disassembly. I got the ring out and the rubber, but then comes the dreaded tiny circlip that everybody talks about being the worst thing ever. I tried to get it out with a sharp pick and broke the tip of the pic. then i broke one of the tangs off the circlip, so now I can only get to one tang, and I can't seem to do anything with it with varying angles and tips. I can get it to rotate, but thats it. I can't scoop it up or get any leverage, so there is this tiny circlip completely stopping me from working. looking at new MCs because I think I may have to get one.

also I baked my front hub, oil filter cover, and caliper swingarm, and that VHT paint seems pretty bulletproof. I love it so far

Offline Stev-o

  • Ain't no
  • Really Old Timer ...
  • *******
  • Posts: 34,400
  • Central Texas
Re: First Bike: Yolanda the Honda CB750 K1 (frame painting!)
« Reply #126 on: January 29, 2013, 07:36:42 PM »
Master cylinders arent worth rebuilding when a new one can be bought for $45...


http://www.davidsilverspares.com/CB750K1-FOUR-1971/part_123911/
'74 "Big Bang" Honda 750K [836].....'76 Honda 550F.....K3 Park Racer!......and a Bomber!............plus plus plus.........

Offline cheftuskey121

  • Super Newbie
  • Expert
  • ****
  • Posts: 1,305
Re: First Bike: Yolanda the Honda CB750 K1 (frame painting!)
« Reply #127 on: January 29, 2013, 08:01:21 PM »
I got that mother cussing circlip out! finesse, angled pick, and luck made it happen. wow stev-o thanks for the link. I keep forgetting to check. I am more than likely buying a new one but I'll keep the original around just in case, and at this point its ready to be rebuilt so that better than throwing it away!

Offline Dream750

  • Hot Shot
  • ***
  • Posts: 583
Re: First Bike: Yolanda the Honda CB750 K1 (frame painting!)
« Reply #128 on: January 29, 2013, 09:00:32 PM »
The Honda MC rebuild kit is part number: 45530-377-305 and will cost around $35.00

Offline cheftuskey121

  • Super Newbie
  • Expert
  • ****
  • Posts: 1,305
Re: First Bike: Yolanda the Honda CB750 K1 (frame painting!)
« Reply #129 on: January 31, 2013, 06:01:09 PM »
update time, the rear wheel is finally taken apart. took me long enough. the rear tire made me work too.

here was my hand bearing press tool. worked wonderfully


and here is the finished (other than the rear rubber bushing) swingarm


here is my finished oil filter cover. love the color! baked these parts in the oven at 200 like recommended. really hardened the finish. its actually more durable than the eastwood frame paint...oh well


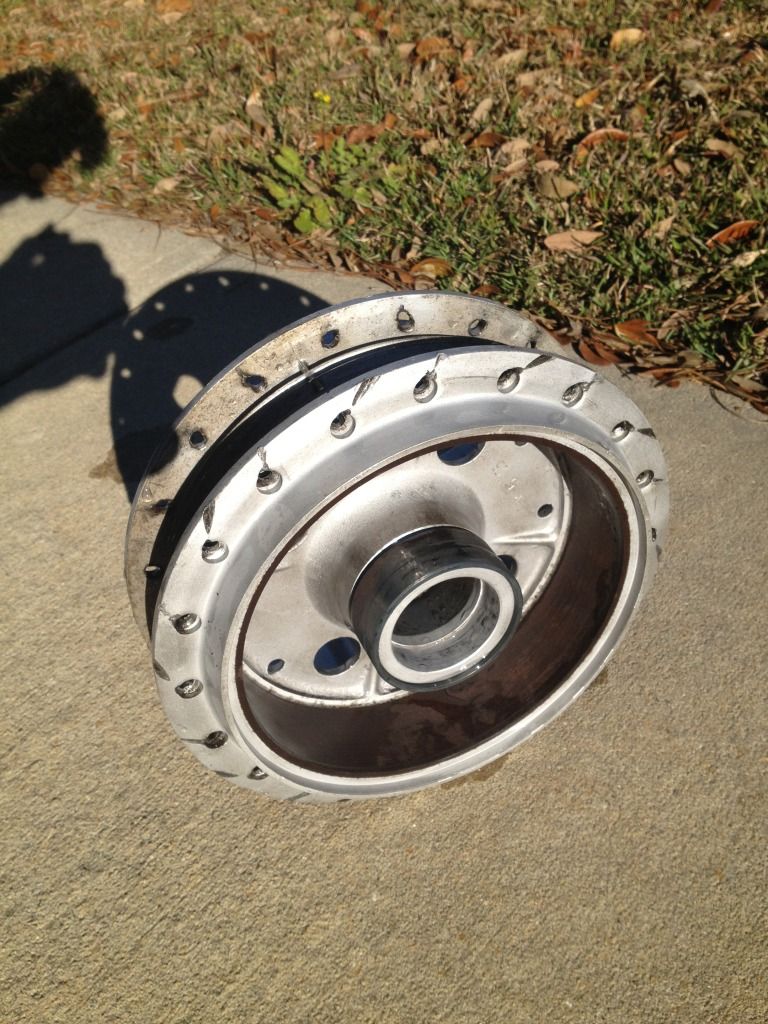
finished front hub. not perfect but WAY better than before


here was that pesky M/C. at 9 oclock is the one remaining good tab and at 6 oclock is the broken tab.....I thought for sure I wasn't getting it out.


I did though, luck ;)


I still am going to buy a new M/C but I wanted the satisfaction of doing it myself and not being defeated


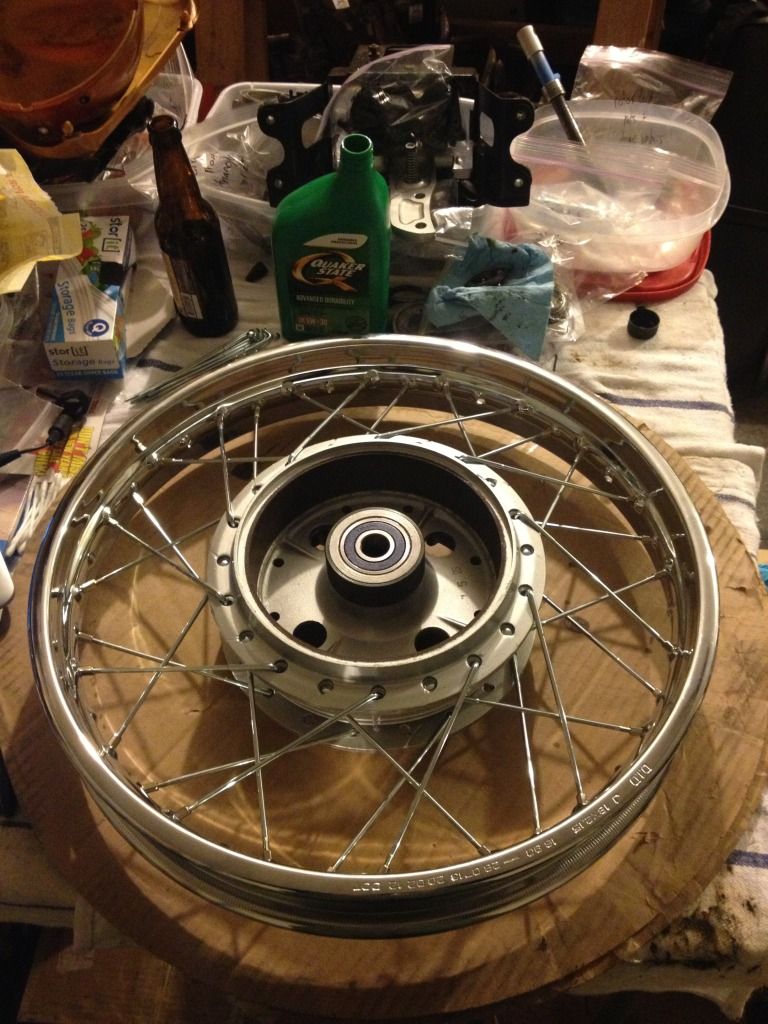
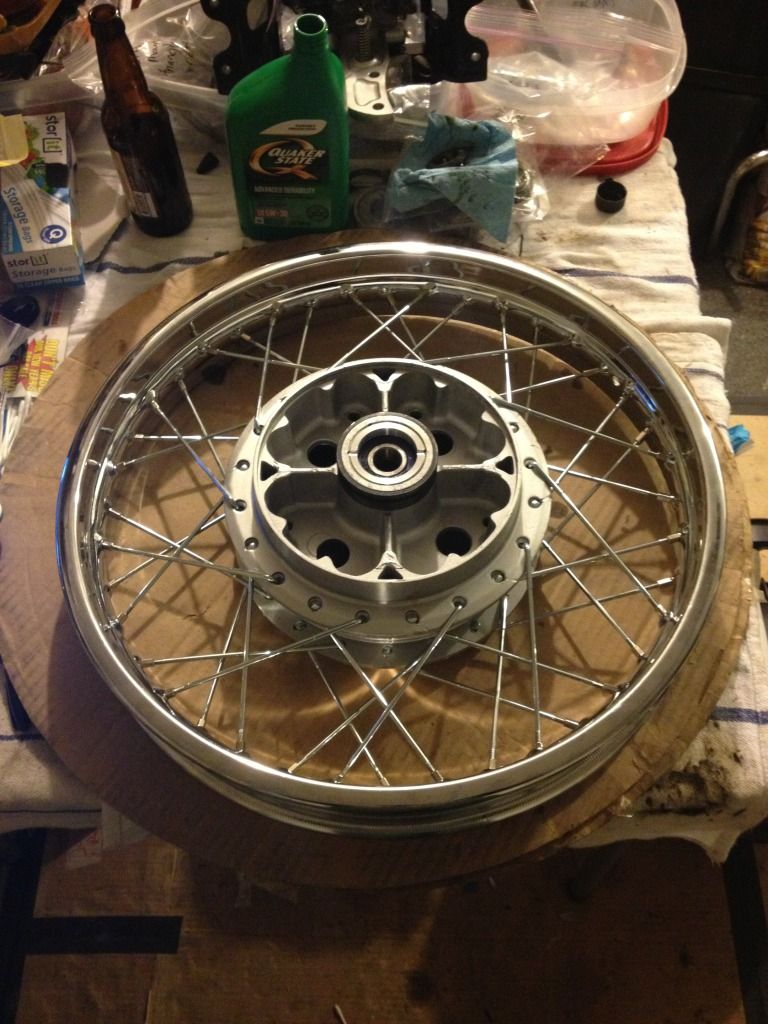
oh how you stare at me new shiny rims


followed the tutorial here on the FAQ for wheels and tires, once I got the hang of it was pretty simple. I took a bunch of pics prior to see how to start, and its essentially the hub straight to the rim, then 3 like-sided spaces over. if you spoked wheels you know what I mean.


onto the rear wheel! this first bearing retained was a bear! I used my makeshift woodplank with properly spaced bolts to get it off but the retainer ring almost felt cross threaded as it was coming out. I checked it was not boogered up on the hub plate, but the retainer is not going back in there safely, I have both rear retainers new, as well as a new front one. random question, do I have to punch them when i put the new ones in?


my dampers have seen better days, I unfortunately did not check to see how valuable they were so I ripped them out a little willie nillie, breaking off a lot of the tabs. its ok, I ordered new ones from honda. live and learn, better new right?


next came this little gem of a bearing retainer. again I prepped it with some pb blaster and got it measured just right and drilled new holes in my plank so the little bolts would line up to the holes in the retainer. nothing. nothing. and nothing. started stripping out the square holes in the retainer. even applied some heat. old gunk caught on fire, haha. nothing crazy, I was able to blow it out.


very stubborn, I new I had a new retainer ready to go so I figured I would drill new holes into the retainer for my bolts to fit into even better, I guessed I had enough material around the ring to do this a few times ;) well I drilled the holes and got an even better idea. the bolts went through the plank and then screwed them directly into the retainer ring. that way no energy is wasted from side to side movement. still took a good bit of force but it came out and spun. I had a pretty big smile when it was all done. without outside-of-the-box thinking I see on this site I might never have thought of it!


I also cleaned and painted the rear hub today, more in just  bit. I had some soda left to do the hub, but not either of the hub sides. oh well, another day when the sod comes in
« Last Edit: January 31, 2013, 06:16:48 PM by cheftuskey121 »

Offline edhaeuser

  • Hot Shot
  • ***
  • Posts: 321
Re: First Bike: Yolanda the Honda CB750 K1
« Reply #130 on: January 31, 2013, 08:14:51 PM »
Nice work!  I've got a lot to do if I am going to catch up to you.

Ed

Offline Garystratos201

  • I have never been a
  • Hot Shot
  • ***
  • Posts: 419
Re: First Bike: Yolanda the Honda CB750 K1
« Reply #131 on: February 01, 2013, 05:10:24 AM »
Nice job on the rims. I just love shiny new chrome.............Gary
Visit my build project;
http://forums.sohc4.net/index.php?topic=111620.0

Current ride; Bass boat.... 2005 Ranger 521VX,250 hp Mercury Verado, super charged and direct fuel injected. Not a bass on the lake can out run me !!!

Offline cheftuskey121

  • Super Newbie
  • Expert
  • ****
  • Posts: 1,305
Re: First Bike: Yolanda the Honda CB750 K1
« Reply #132 on: February 04, 2013, 03:50:29 PM »
I love it too Gary! so I'm going to have to figure out what to do about my pipes....the headers are pretty rusty, but only right at the first bend then the rest of the pipes are fine. its going to stick out like a sore thumb when its done, and it might bug me enough to get desperate and drop $1300++ on new pipes. we'll see.

Offline cheftuskey121

  • Super Newbie
  • Expert
  • ****
  • Posts: 1,305
Re: First Bike: Yolanda the Honda CB750 K1
« Reply #133 on: February 04, 2013, 04:46:47 PM »
alright update time. I have been moving pretty slow, but have got some more stuff done!

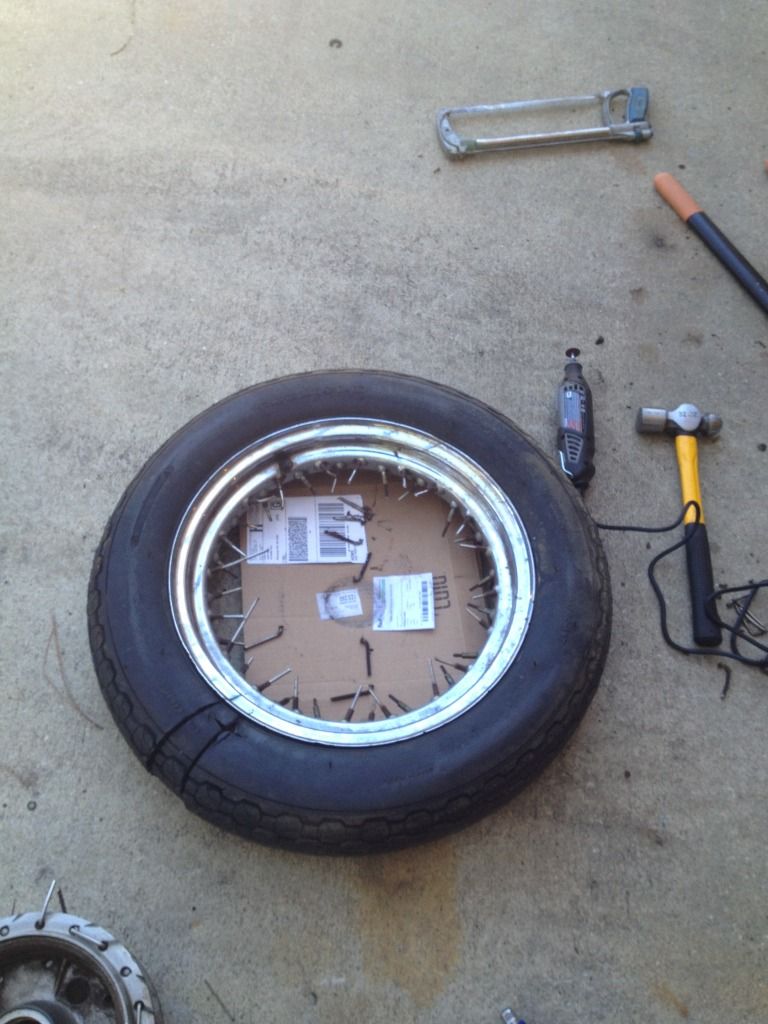
so...for the life of me I could not get the rear tire off of the rim. stinking deep set. I tried with tire irons, cut the tire with a dremel, even cut a complete wedge out, I just could not reach in and cut the bead even with little snippers. I tried cutting the bead through the edge of the rim with the dremel. nothing, but now the rim is useless...no going back now ;) I finally threw my hands up and cut all the spokes off. I only wanted the freaking hub.
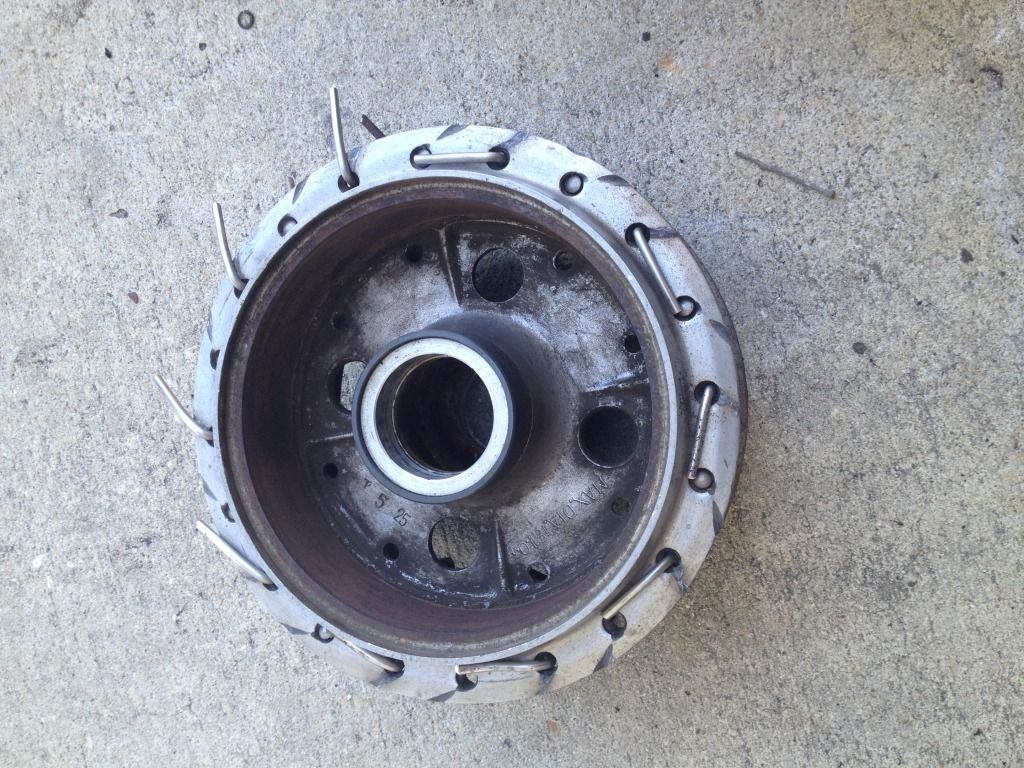


next came some more soda blasting.
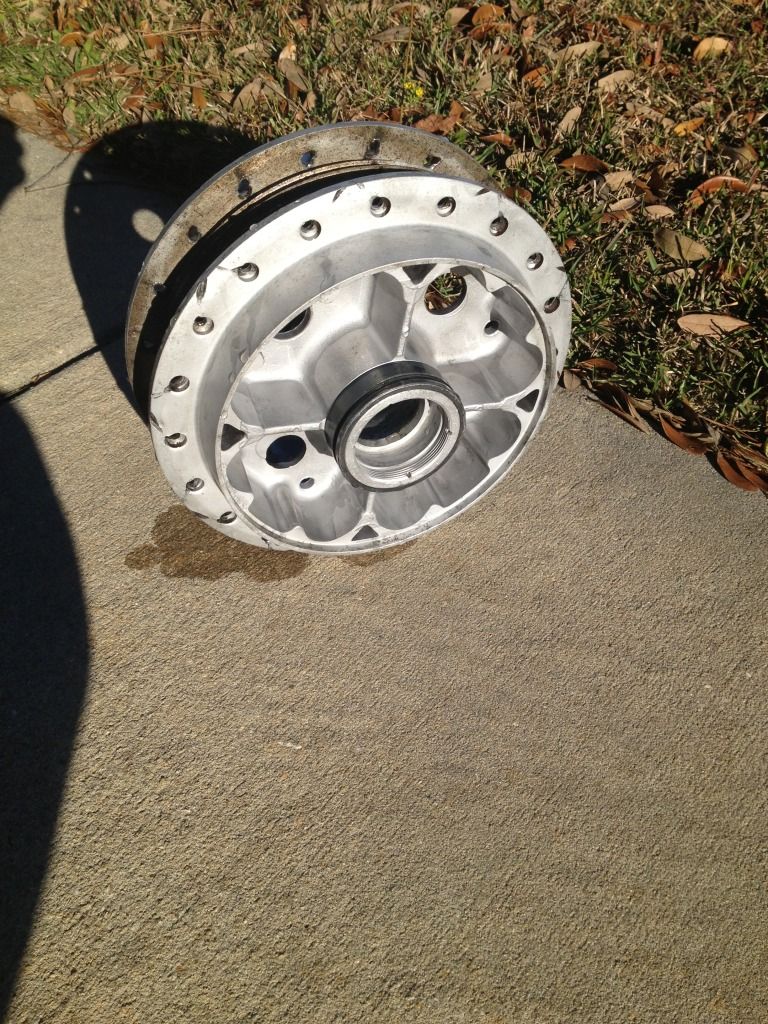


follow that with a painting session
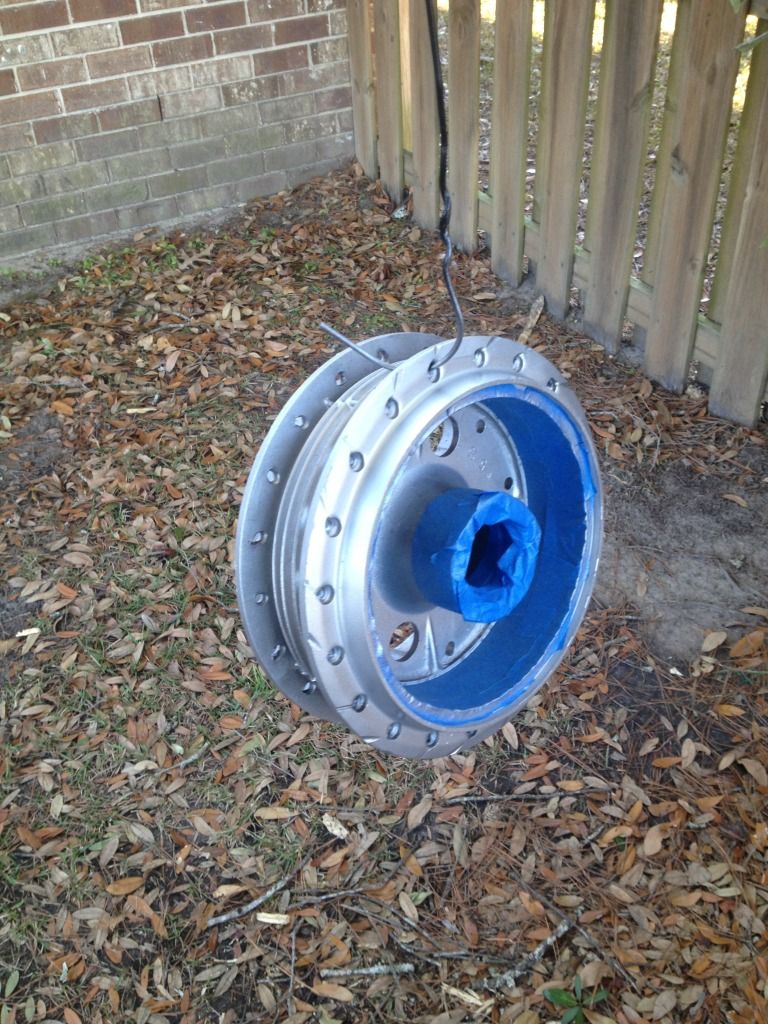


I know these aren't correct but it beats them being brownish black like before
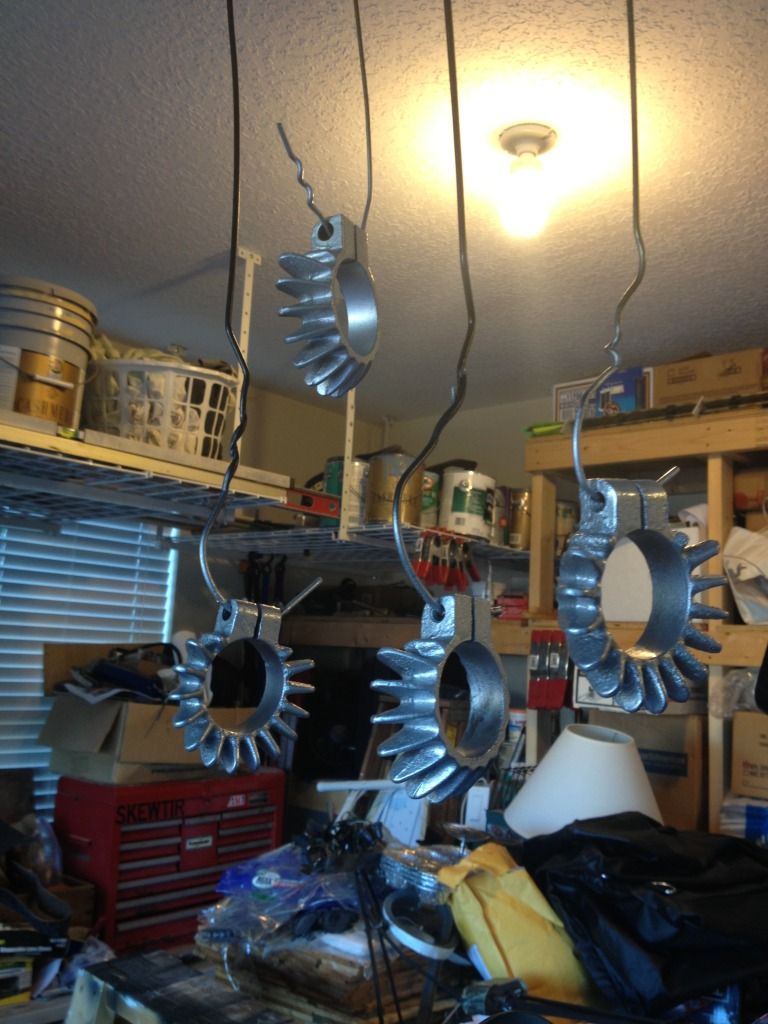


here they are baked and finished waiting
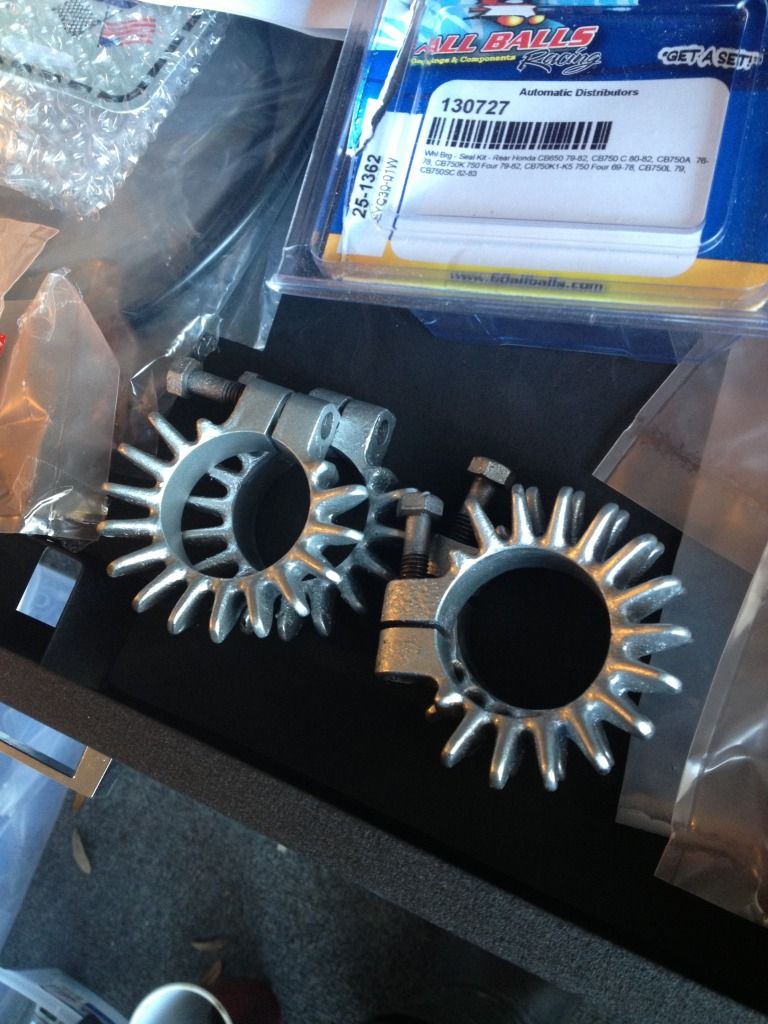


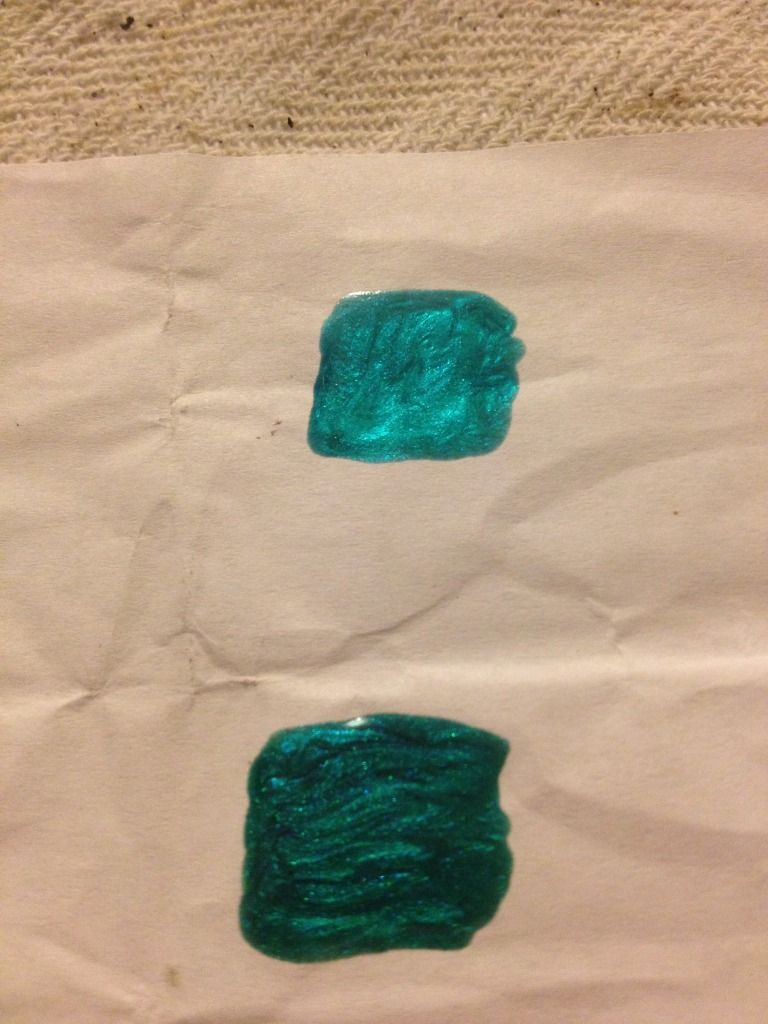
been chatting with 66autocolor.com about loading 2k paint in a can for me. been talking about honda candy blue-green. they gave me two pages of colors to stare at. made my eye balls glaze over and after a few hours I could barely tell the difference anymore. so I went and found some nail polish that I liked. it may not BE candy blue green but its the color I am after. sent them a sample (top) and a reference color for what I consider "too dark" (bottom). can't wait to hear back and see if they can match it closely


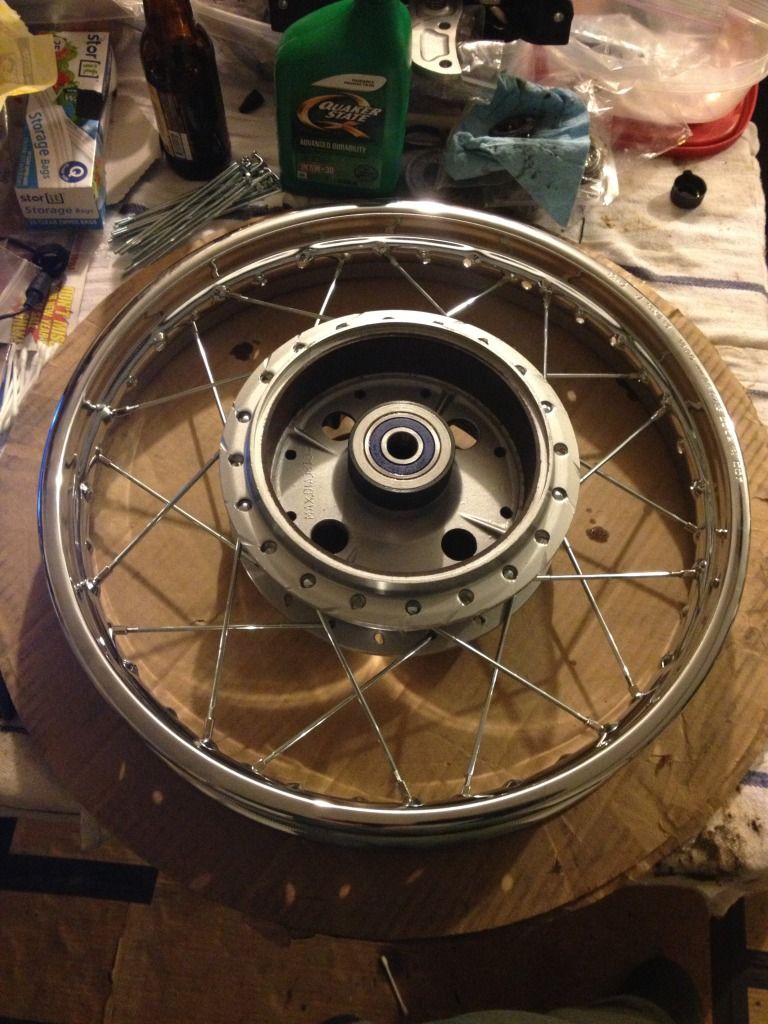
baked the rear hub, drum plate, and sprocket plate, here's lacing up the rear rim/hub


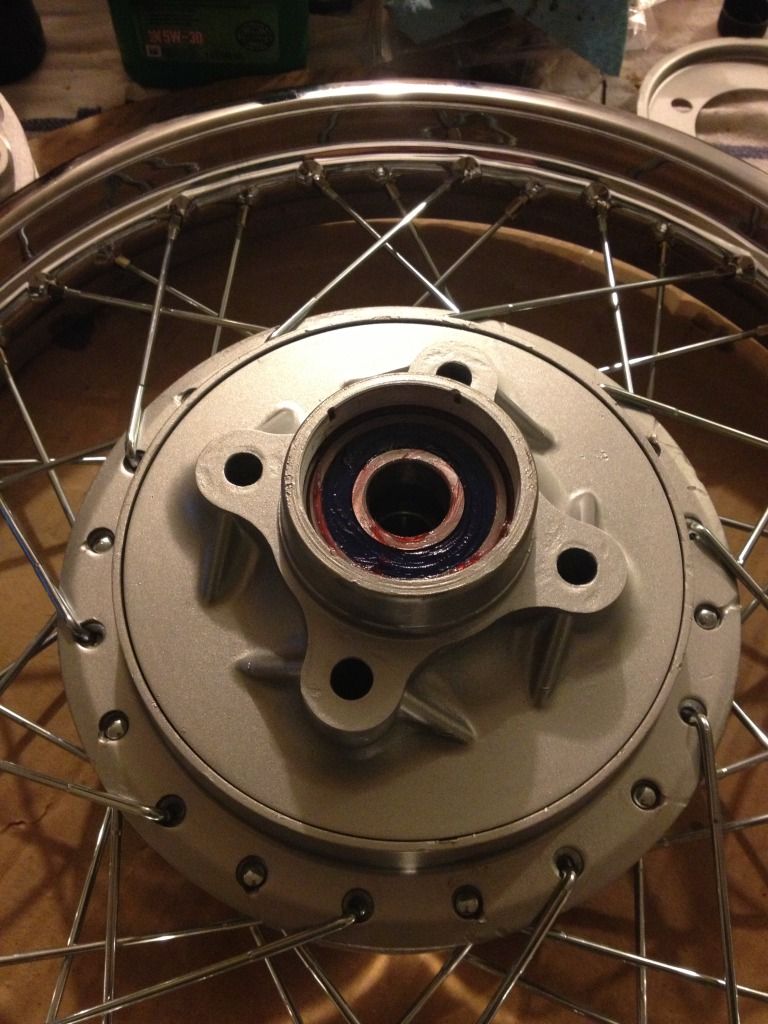
both rear hub bearings pressed, used the old bearings to set in the new allballs bearings. freeze the bearings, heat the hub race with a torch, some grease. boom. also did the sprocket cover bearing too.


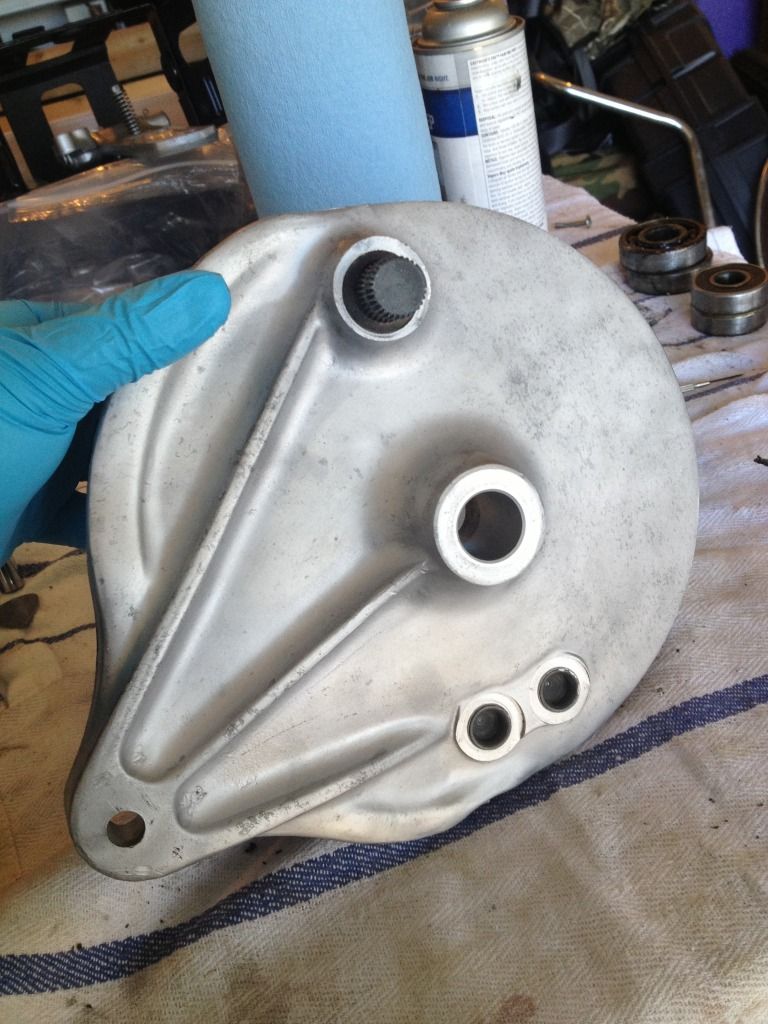
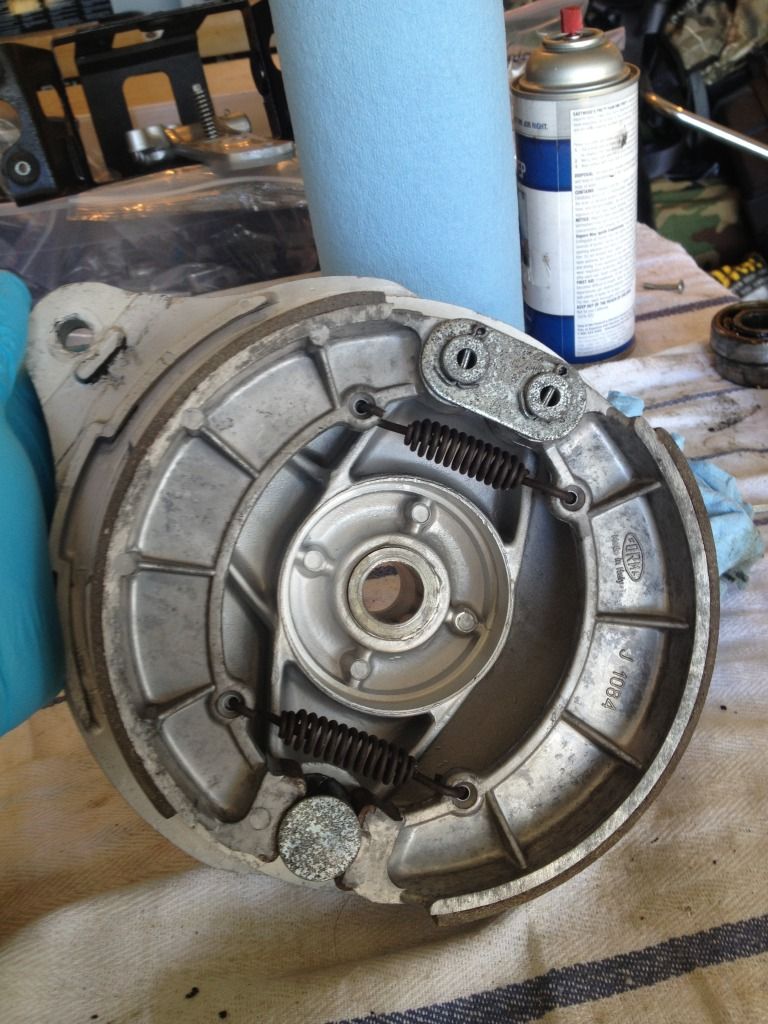
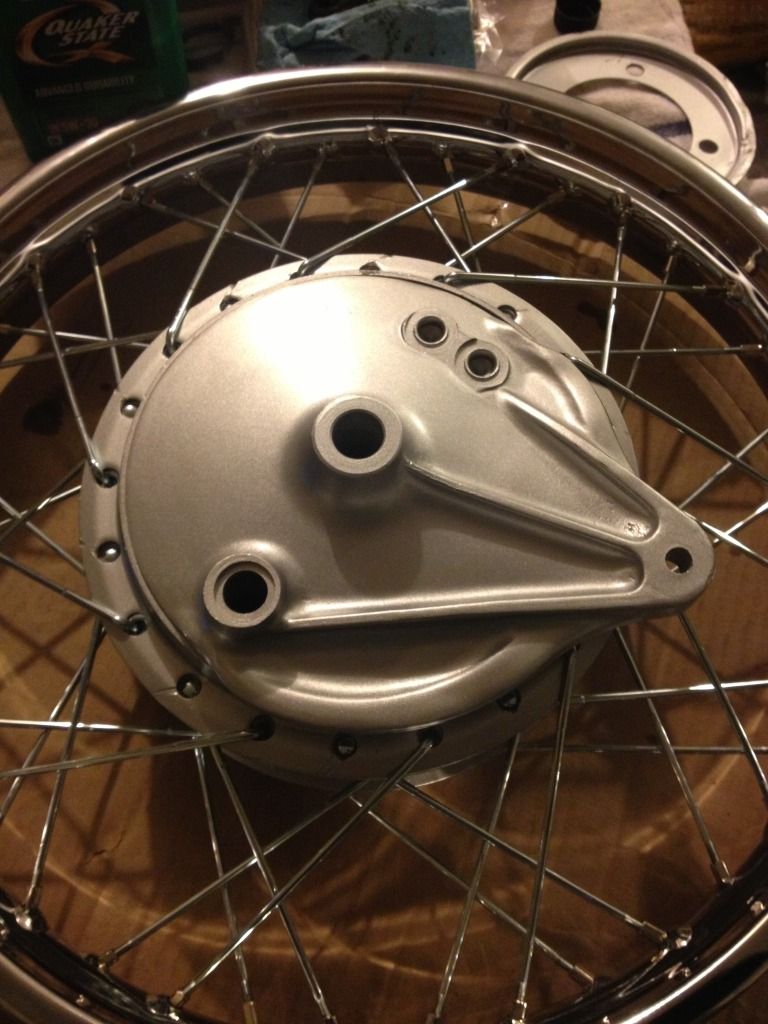
fresh painted brake hub cover. shoes are on the way from cb750supply.com


ok, now for the hardest thing to date (things keep getting more difficult for me). changing out the rear swingarm bushings. I finally understood what ironworker was talking about when he did his. I could not replicate it exactly because I could not find a bolt long enough and with long enough thread to fit the 27mm socket I was using, so I tried something else. I think given normal wear circumstances this idea would have been golden but the outer bushing races seemed to be welded onto the swingarm.
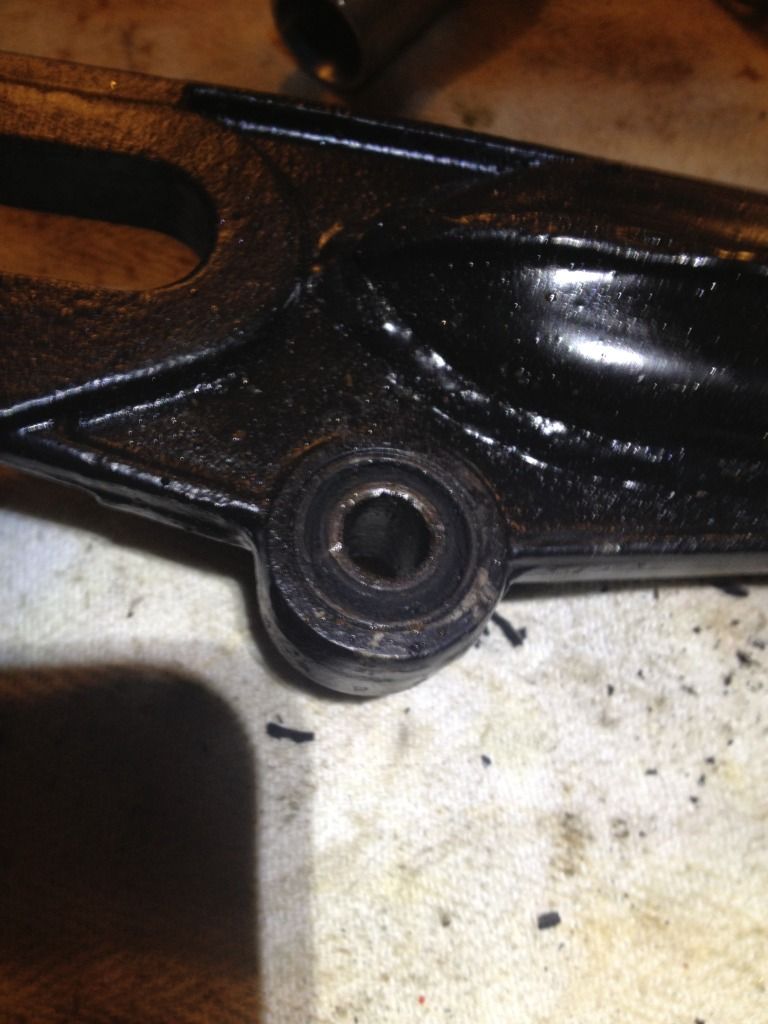


I took a 2.5 c-clamp and placed the round head on the bushing (it was small enough to fit inside the swingarm. then the other end clamped onto a 27mm socket (facing inward to catch the bushing) and started putting pressure. it started to push the bushing but it was only the center race and rubber. I twisted and twisted until the metal c-clamp cracked. I could not believe. keep in mind I have been applying liberal amounts of pb blaster. so then I tried something else. I burned the crap out of the bushing with a torch, essentially melted the rubber into oblivion and the small race fell out. oh great what now? still having no clue what I am doing or the outcome to be, i am thinking I've ruined things and need to get a new swingarm. so I started cutting into the outer race with a dremel cutting disk. taking the best care I could to avoid cutting INTO the swingarm. I worked my way around and made little 3-4mm segments of the race, then I beat down on them with my trusty 'harder than diamonds' screwdriver and hammer to fold the little segments down inwards. this all took longer and was way harder than I am describing. I have never beat on anything this hard before. I was sweating bullets. thank goodness the race was softer than the swingarm other wise I WOULD be needing a new one.

I was able to bend down the segments into tabs and then insert a socket into the bushing area that butted up against the 'wall o tabs' I just made. gave it two huge whacks of the hammer and out came the bushing. surprisingly little damage to the swingarm

I don't have pictures of the process because emotions were running too high to stop and take pics
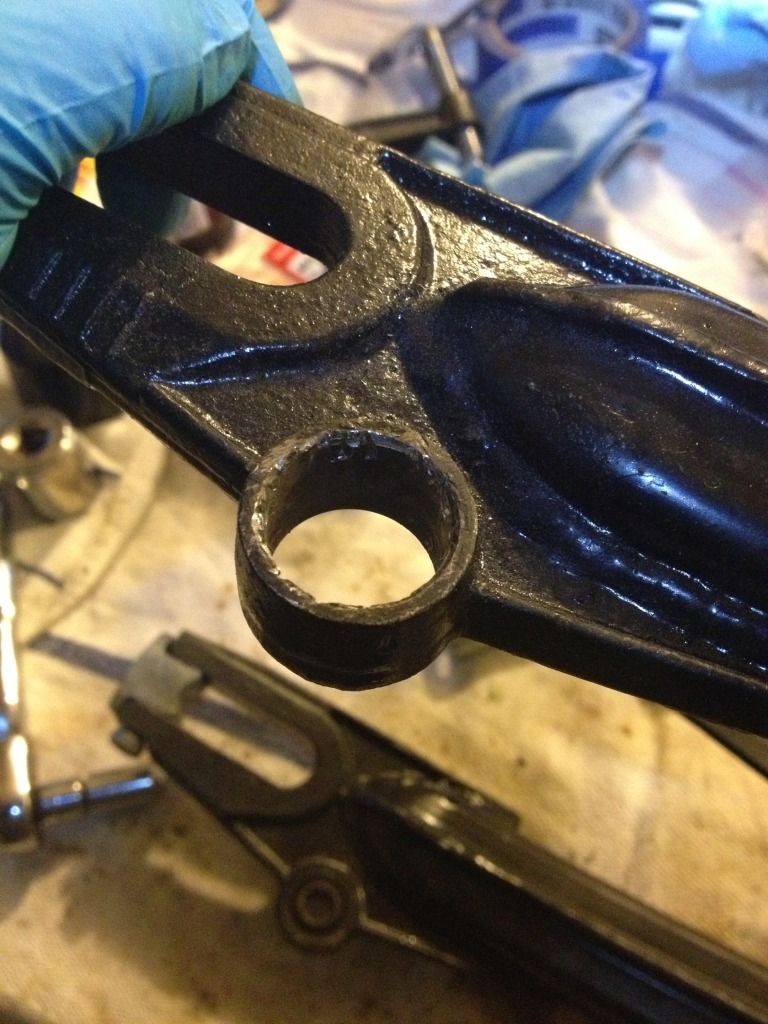
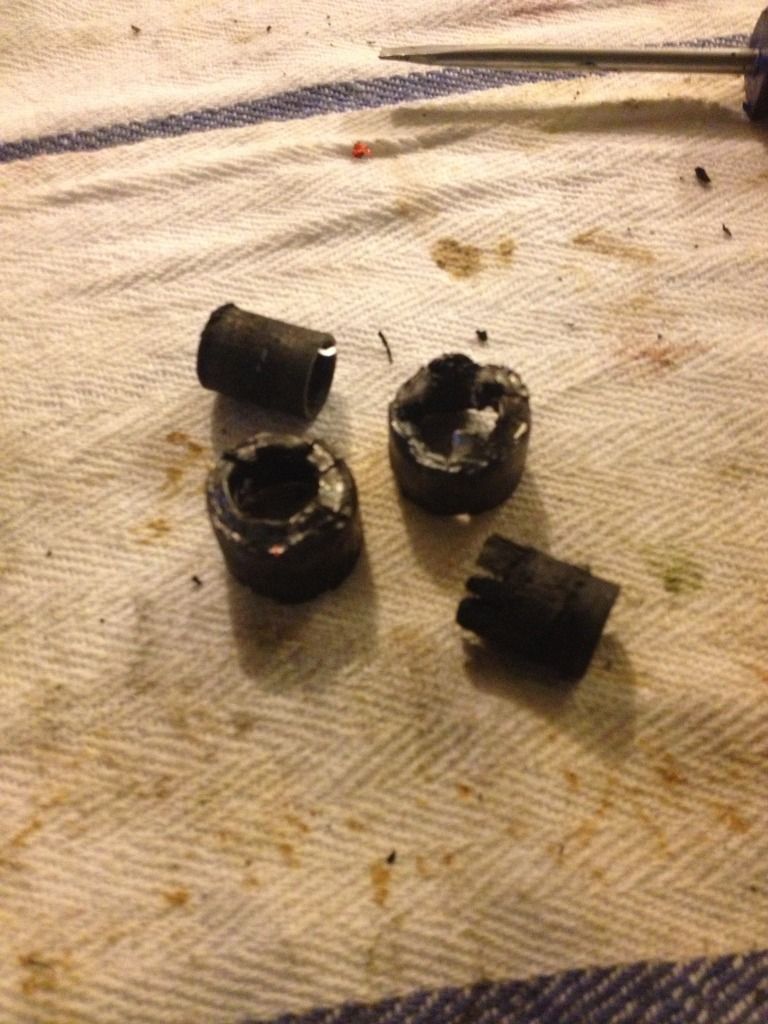


I got the other one out with the exact same hard, nail-biting process. so I go to press the new bushings in using a bigger c-clamp and it won't budge. I took the 120 grit sanding tube from the dremel to the inside tube of the swingarm. just cleaned it up and removed a small amount of material. then I was able to press the bushings in(still with a lot of force thankfully). so I didnt ruin the tubes after all and new bushings are set in. I NEVER EVER want to do this again. actually this whole swingarm has been a pain. if you are reading this and even thinking about it....SEND YOU SWINGARM TO HONDAMAN! I was going to but wanted to do it myself. way too much frustration and work and when I get it all back together it may not even be great (Ive never done this before, Im sure hondaman has one hundreds!). crossing fingers for when its time to get it all together.

today I got my upper and lower tapered bearing races in
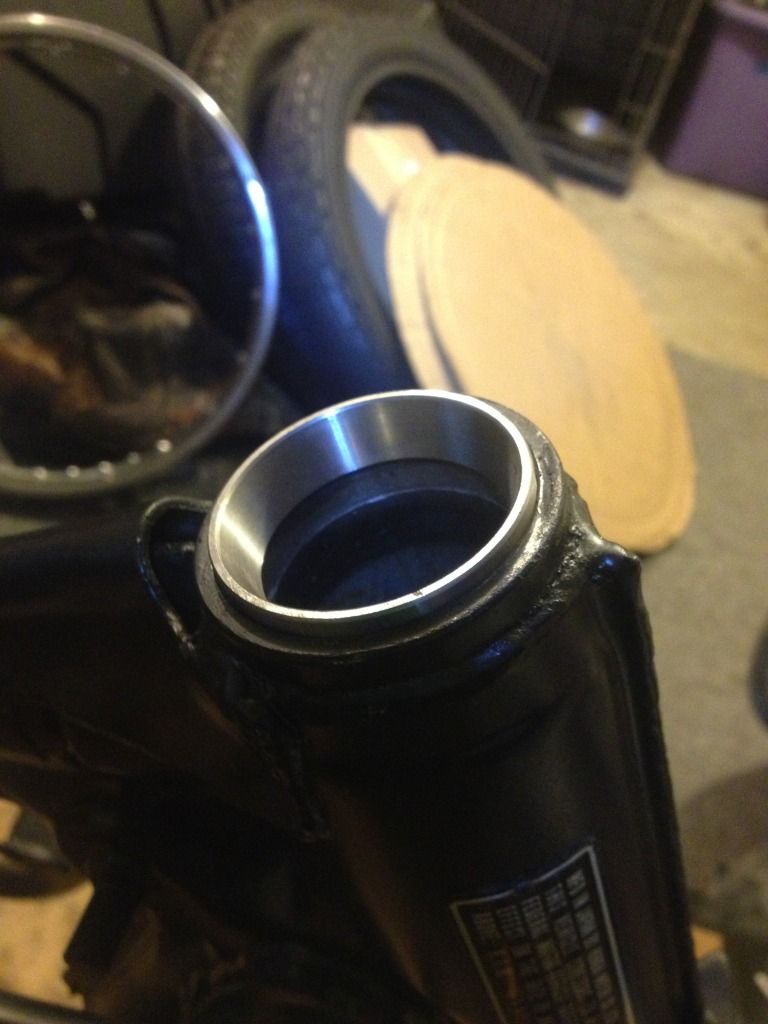


then I got the lower bearing on the stem. wow did I have to beat that in! froze the stem and heated the bearing. then hammered the bottom of the stem upside down into a pvc pipe with the large washer in between the pvc and bearing. that did not get it all the way seated for me. I found a spark plug pipe wrench that had to be 30+mm. slid that over the stem and on top of the large washer on top of the bearing and carefully beat down on the edge of the pipe )it stuck out enough) and rotated it to seat the bearing down properly, worked like a charm and nothing warped.

 I found that 22 page thread on tapered bearings and one on page there was a great walkthrough and it helped me a lot. basically for me I used the thin washer supplied with the allballs kit on the bottom stem, then use NO seal on the top bearing so it will sit properly in the large spanner nut when you tighten it down. I am not done with my forks so I can't put those on yet, but we will see if all is well. I have faith.
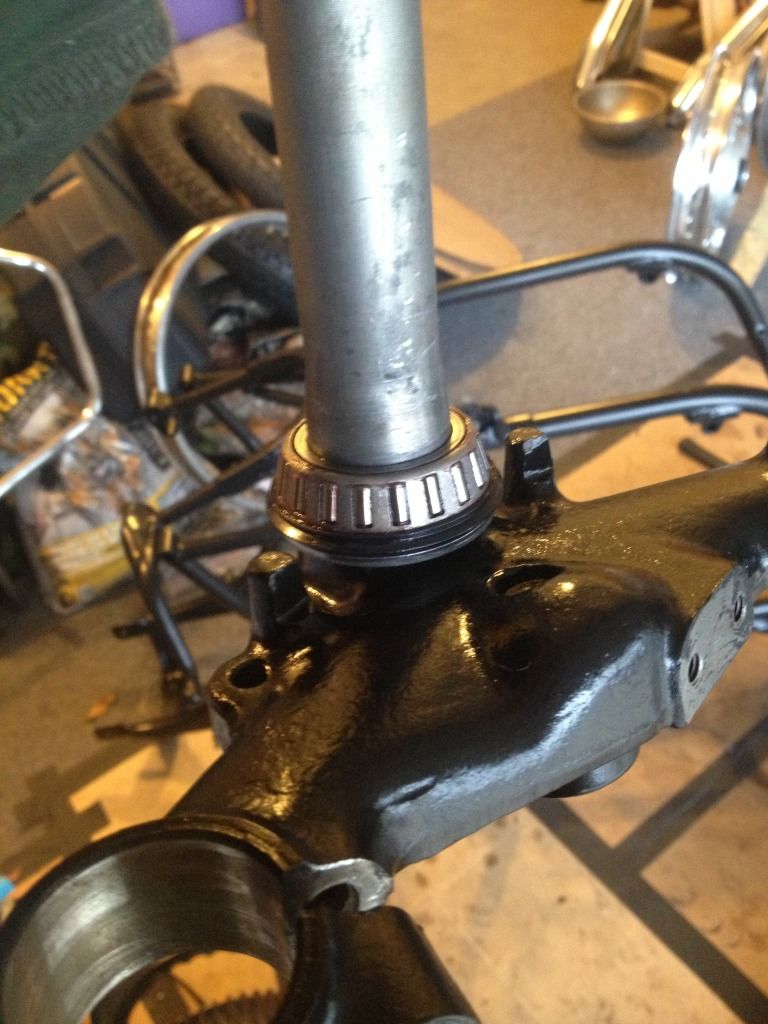


tightened down the spanner nut and put the triple tree top on. looks nice! I forgot to tape off the insides of the tubes where the forks go through...DOH! so I just got done removing the paint there with a wire wheel on my dremel.
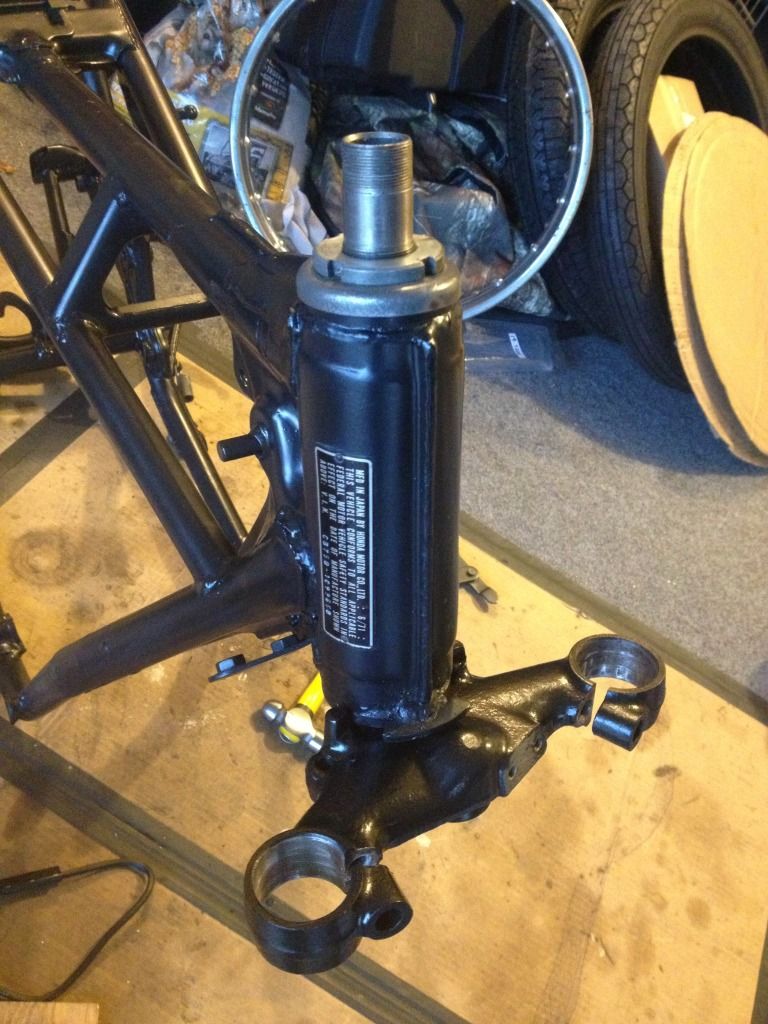


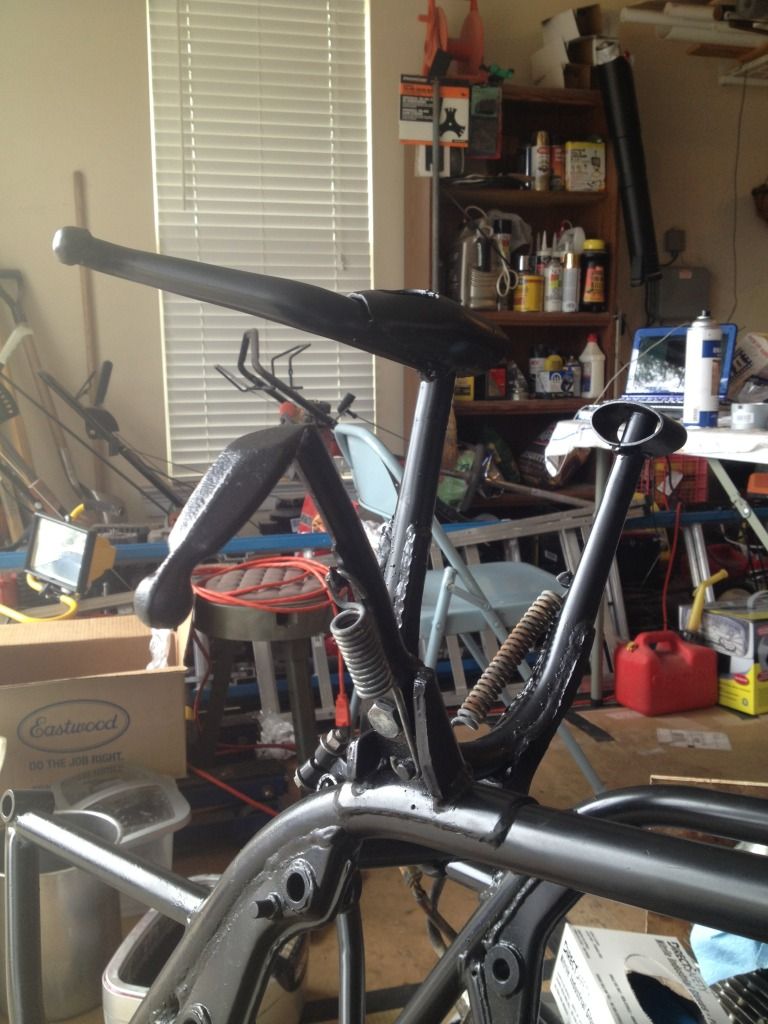
put the center stand and side stand on. that penny trick was a life saver. I was able to put the center stand way too easily, then remove the coins and bam, insta-tight. I also painted the center stand spring black, because the rust was an eyesore. kind of an after thought on my part. oops, but it looks better now.


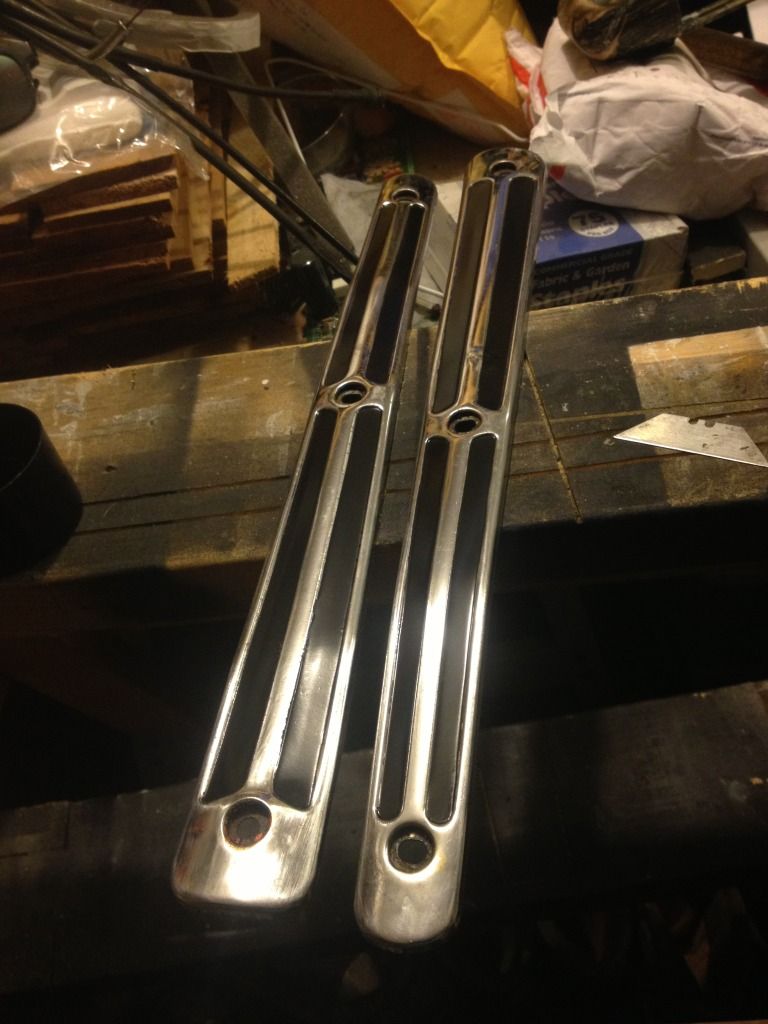
spent a good amount of time cleaning these up! there were painted solid black, and under the black was a nice red......ugh. put some klean strip on there to take out some bulk and soften the paint up. then cleaned that off and used a razor blade to carefully and slowly scrape off both layers of paint.
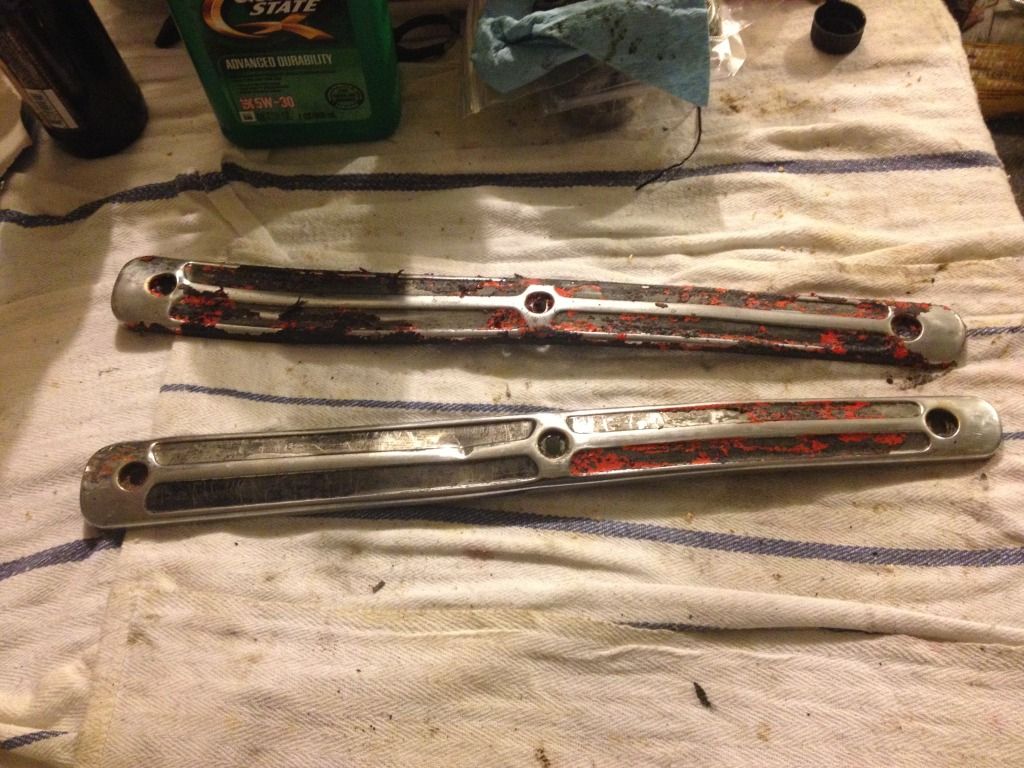


hit it with some cleaner so paint would stick and did a coat of rust encapsulator on the backside (was rusty) and taped off the top divots and hit that with the encapsulator as a primer. then shot it with the chassis black
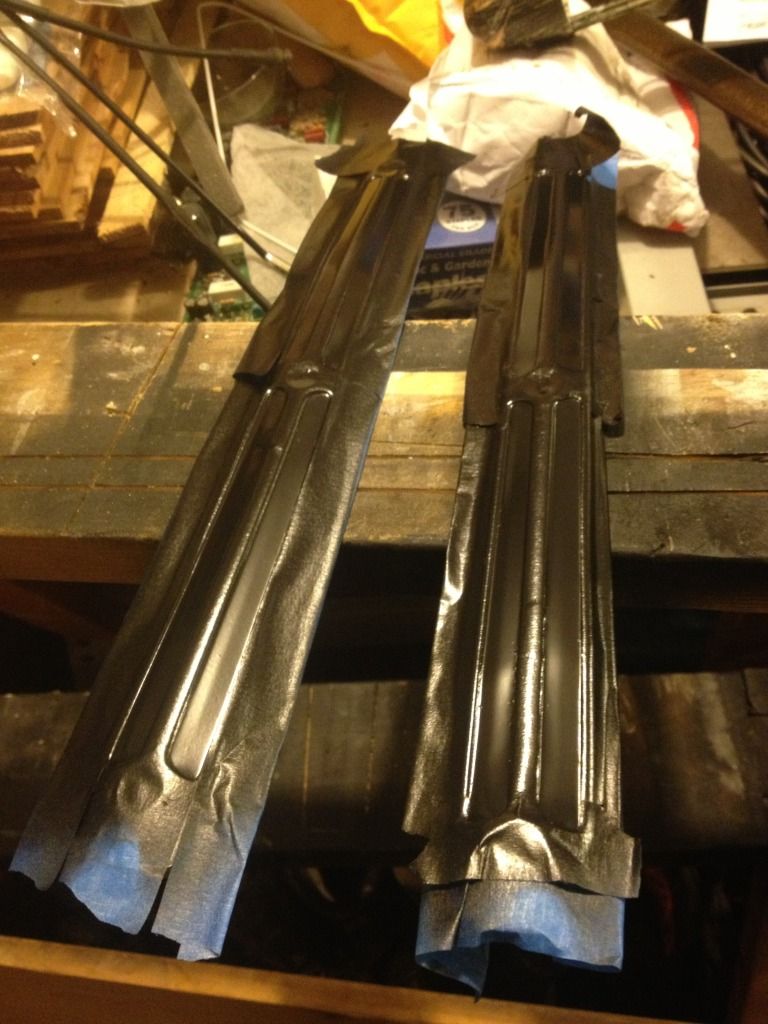


they are not perfect per se but at least 10x better. very please with the result!


now I am tightening up the rear rim, I am not going to true the rims but I am getting the spokes evenly tightened. I have tuned many drums so this is actually pretty easy. I'm trying to find a shopp around here to true them. depending on price the shop charges I'll have them mount and balance the tires too.

question: you true the rim to the hub, THEN you balance the tire, but is that with the rotor/sprocket/brake shoes and hub on? you balance when the wheel is fully assembled or what?

thanks for reading the wall-o-text!
« Last Edit: February 04, 2013, 04:51:44 PM by cheftuskey121 »

Offline edhaeuser

  • Hot Shot
  • ***
  • Posts: 321
Re: First Bike: Yolanda the Honda CB750 K1
« Reply #134 on: February 04, 2013, 07:31:04 PM »
Oh boy, I know what you mean about those rubber shock mount bushings.  I tried the bolt and socket method and no go.  Then I drove up to the farm I grew up on and used the 30 ton press.  Even with that, it was a challenge.  When the bushing broke loose, it sounded like the swing arm broke!

Offline Tews19

  • I am no
  • Really Old Timer ...
  • *******
  • Posts: 6,465
Re: First Bike: Yolanda the Honda CB750 K1
« Reply #135 on: February 04, 2013, 07:57:03 PM »
Great work Justin! I never knew the bushing were that difficult to remove. My PC removed them when he did my swing arm and my moms husband is a cnc guy. I brought him my swing arm and 2 min later they were in. Next I will see how he does it.

What size rim is your rear?
1969 Honda CB750... Basket case
1970 Honda CB750 survivor.

Offline cheftuskey121

  • Super Newbie
  • Expert
  • ****
  • Posts: 1,305
Re: First Bike: Yolanda the Honda CB750 K1
« Reply #136 on: February 04, 2013, 08:12:46 PM »
Oh boy, I know what you mean about those rubber shock mount bushings.  I tried the bolt and socket method and no go.  Then I drove up to the farm I grew up on and used the 30 ton press.  Even with that, it was a challenge.  When the bushing broke loose, it sounded like the swing arm broke!

30 tons??? ok I don't feel crazy anymore. haha. I never want to do that again.

Offline cheftuskey121

  • Super Newbie
  • Expert
  • ****
  • Posts: 1,305
Re: First Bike: Yolanda the Honda CB750 K1
« Reply #137 on: February 04, 2013, 08:18:43 PM »
Great work Justin! I never knew the bushing were that difficult to remove. My PC removed them when he did my swing arm and my moms husband is a cnc guy. I brought him my swing arm and 2 min later they were in. Next I will see how he does it.

What size rim is your rear?

thanks Nick! its an 18" rear. I want to go back to stock first. I think I am still going to use the lowering brackets, we'll see when I get there. I am still about $1000 away I think. trying to take it slowly. I am also delaying the inevitable....the engine. I REALLY want to change the bolts out to hex head, but I know if I take the covers off that means new gaskets....then curiosity is going to get me I know. I just don't think the engine needs servicing. it was pointed out that the engine case is newer meaning it was cracked into for some kind of work. decisions decisions. I REALLY have no idea whats going on in there. I can't believe I've made it this far!  I did my taxes early and am getting my return in 2 days! but most of it has been preloaded on my billmelater account through paypal so I really need to pay that off ;) I'm not a fan of debt. in fact after I get my refund I will finish paying off my student loans and be debt free! very excited about that.

Offline cheftuskey121

  • Super Newbie
  • Expert
  • ****
  • Posts: 1,305
Re: First Bike: Yolanda the Honda CB750 K1
« Reply #138 on: February 05, 2013, 09:01:16 AM »

Offline iron_worker

  • Master
  • *****
  • Posts: 2,081
Re: First Bike: Yolanda the Honda CB750 K1
« Reply #139 on: February 05, 2013, 09:31:05 AM »
Wow you're really flying along. I think you may have just surpassed me.

IW

Offline Viktor.J

  • Breaking in the forum
  • Hot Shot
  • ***
  • Posts: 530
Re: First Bike: Yolanda the Honda CB750 K1
« Reply #140 on: February 05, 2013, 09:36:13 AM »
Great work with the painting, especially the exhaust heat shield, really good "save" there !!
Please ! Take a look and give me feedback in my project thread, its much needed :)
http://forums.sohc4.net/index.php?topic=112745.0

Honda CB750 K2

Offline cheftuskey121

  • Super Newbie
  • Expert
  • ****
  • Posts: 1,305
Re: First Bike: Yolanda the Honda CB750 K1
« Reply #141 on: February 05, 2013, 10:00:06 AM »
thanks victor! I just painted the gauges. wasn't going to, but then I have all this new paint and it would stick out, so I caved and taped them off and painted, they look great. I am going to be cleaning/degreasing the engine today. finally get to use that motorcycle lift my buddy let me borrow. does anyone have direct access to where I can get the hex head bots for the engine, like a complete kit? if not I can search, if nothing else this is a written reminder for myself.

Offline KennyRedman

  • Hot Shot
  • ***
  • Posts: 380
  • 1976 CB550F, Indiana
Re: First Bike: Yolanda the Honda CB750 K1
« Reply #142 on: February 05, 2013, 11:00:23 AM »
thanks victor! I just painted the gauges. wasn't going to, but then I have all this new paint and it would stick out, so I caved and taped them off and painted, they look great. I am going to be cleaning/degreasing the engine today. finally get to use that motorcycle lift my buddy let me borrow. does anyone have direct access to where I can get the hex head bots for the engine, like a complete kit? if not I can search, if nothing else this is a written reminder for myself.

I bought these:
http://alloyboltz.com/catalog/product_info.php?products_id=2153&osCsid=rgnt6q6kv9gujomrivojqpdqu3

They're all divided up and labeled in separate plastic baggies.

Offline cheftuskey121

  • Super Newbie
  • Expert
  • ****
  • Posts: 1,305
Re: First Bike: Yolanda the Honda CB750 K1
« Reply #143 on: February 05, 2013, 05:04:29 PM »
thanks for the link, that was for a 550 though. I checked for the 750 and there is a "chopper" kit and a "regular" kit. i think they cover different areas so I will probably get both. can't be too safe, I want all the bolts!

update time

I repainted the gauges, because it would be silly to have fresh paint on everything but those

here you can see the old paint. taped off. you know its easy to cut tape edges when you have a fresh blade...ha


primed


painted and dried. they look much better. its the small things


no more waiting for it to magically work on itself, its engine time! here is a hose, don't know what its for but I'm making a note of its location!


points plate removal. I am pretty positive I am going with a pamco with new coils, cables, and spark plugs. I don't want to mess with points


points wire engine clip


so here is where I started. so glad I still have that motorcycle stand from my buddy. it was hard enough getting it onto the stand by myself I can't imagine how I would tackle this thing without it! dirty


starting to get a little cleaner. I don't really know the best way to do this, but I am using eastwood's "pre" paint prep. its a fantastic crud cutter, I am getting high as a kite from it but man does it work better than the "gunk" engine cleaner I bought. combine that with a large hand brush and toothbrush and I was able to get most of the grime off. took awhile though. was able to tip the engine forward to get underneath too


I started removing covers. pb blasted all the bolts then hit them with the torch. tapped each one with a small hammer, then went away with the impact hammer. didnt have anything strip out. just when you think you have all the oil out, there is more to come out with the covers ;)
clutch cover removed


secondary cover? removed


small sprocket cover removed. this sprocket needs replacing


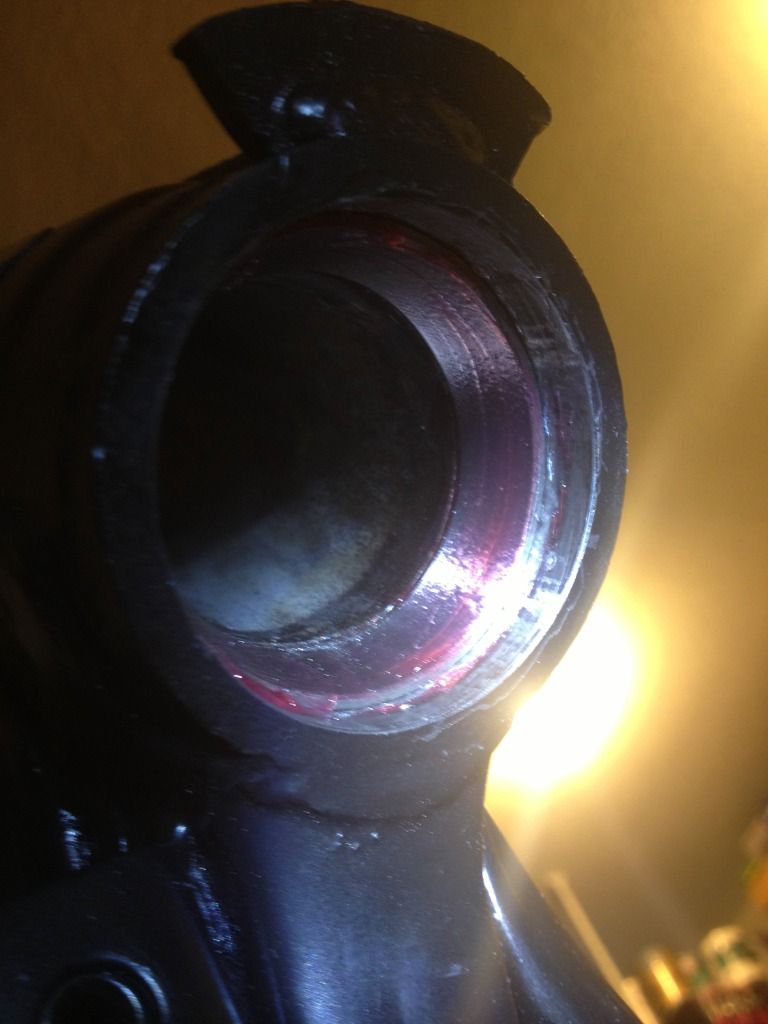
also someone threw a chain because there is a patch of something here. I think I accidentally made a small hole in it and I am pretty sure I can see into the lower case. whats the best way to refix this? fine mesh and jbweld? obviously aluminum welding is troublesome. I hope this isn't the end of the world.


I don't know what this cover is called but I removed it. then wiped the connectors clean and labeled the male and female ends with matching numbers.


getting into the stator/alternator cover


a small connector (starter-stator) cog/pin/washer came out and is in a baggie, I saw it in the fiche located under the starter section. forgot to take a picture but it looks fine, just was free from the casings so I bagged it.

sprocket cover bolt length reminder. I still have to take pictures of the other covers with their bolts so I know where each bolt goes because they are all different lengths. maybe I'll draw a picture to help. want to make it easy when I get my new bolts.


so the PLAN is to clean things up, take the field coil out of the cover and find someone to polish my covers. I still have to pull the head cover? off so that can be polished. I just really do NOT want to polish them myself. honestly I don't even know if I NEED them polished but I am going for a stock look. I don't think I would mind painting them though like I am going to do the cases. I still have to soda blast the whole engine so I'm not really sure the order of things. if I need to reassemble and blast it, then take it apart, or what. I don't know what I'm trying to accomplish here but I know that when I pull the head cover off I am going to want to poke around. its a double edged sword because I don't really want to mess with things. I just want the engine cleaned and painted. I'm kind of taking it moment by moment. I already need new gaskets for the things I've taken off and need to patch up that spot from the chain damage.

Offline Stev-o

  • Ain't no
  • Really Old Timer ...
  • *******
  • Posts: 34,400
  • Central Texas
Re: First Bike: Yolanda the Honda CB750 K1
« Reply #144 on: February 05, 2013, 05:43:51 PM »
If the case doesn't leak, you're good. JB Weld it if necessary. The cover you don't know the name of is what I call the shifter cover. I love polished covers, but it is not a stock look. Look in Services Wanted, 73Nancy polishes. 

Here is a reasonably priced screw kit.  But I normally get mine from a local specialty bolt co for real cheap. They are 6mm of various lengths.

http://cgi.ebay.com/ws/eBayISAPI.dll?ViewItem&vxp=mtr&item=261156594952
'74 "Big Bang" Honda 750K [836].....'76 Honda 550F.....K3 Park Racer!......and a Bomber!............plus plus plus.........

Offline cheftuskey121

  • Super Newbie
  • Expert
  • ****
  • Posts: 1,305
Re: First Bike: Yolanda the Honda CB750 K1
« Reply #145 on: February 05, 2013, 05:53:04 PM »
thanks stev-o! I don't want them high gloss polished. if it wouldn't be too weird I  kinda would rather paint them the with the VHT nu cast aluminum paint i've been using so far. love the look of it but I don't know if the covers would look too bland without the machine polish look to them. the only things polished would be the clutch and points cover, that might look odd.

Offline Tews19

  • I am no
  • Really Old Timer ...
  • *******
  • Posts: 6,465
Re: First Bike: Yolanda the Honda CB750 K1
« Reply #146 on: February 05, 2013, 06:50:07 PM »
Jeeze! You dive in head first! As stev-o stated if it doesn't leak, let the patch work be. 
In the pic of the speedo, do you have a stock pile of Mac n cheese behind it?
1969 Honda CB750... Basket case
1970 Honda CB750 survivor.

Offline Dream750

  • Hot Shot
  • ***
  • Posts: 583
Re: First Bike: Yolanda the Honda CB750 K1
« Reply #147 on: February 05, 2013, 07:00:45 PM »
Chef, that rubber line connects to the fitting on the rear of your oil tank, so don't forget to hook it back up or it will make an oily mess from hell. :o

Offline cheftuskey121

  • Super Newbie
  • Expert
  • ****
  • Posts: 1,305
Re: First Bike: Yolanda the Honda CB750 K1
« Reply #148 on: February 05, 2013, 07:35:25 PM »
Jeeze! You dive in head first! As stev-o stated if it doesn't leak, let the patch work be. 
In the pic of the speedo, do you have a stock pile of Mac n cheese behind it?

haha yes Nick, its a blessing and a curse! I currently have the top cover off and am going to be reading through hondamans book to see what and how to inspect. curiosity always gets me. new gaskets all around! haha and yes that IS a stockpile of mac n cheese. good eye. gotta have it just in case you know....I am really hungry!

Offline cheftuskey121

  • Super Newbie
  • Expert
  • ****
  • Posts: 1,305
Re: First Bike: Yolanda the Honda CB750 K1
« Reply #149 on: February 05, 2013, 07:36:05 PM »
Chef, that rubber line connects to the fitting on the rear of your oil tank, so don't forget to hook it back up or it will make an oily mess from hell. :o

aha! I knew it was something like that. that would just be terrible! thanks dream