Author Topic: CB550K0 Build - 450T Tank mods  (Read 56104 times)

0 Members and 1 Guest are viewing this topic.

Offline streak09

  • Enthusiast
  • **
  • Posts: 203
  • I don't know what im doing, but I'll do it anyway
CB550K0 Build - 450T Tank mods
« on: January 22, 2013, 07:35:01 PM »
Hello everyone! I picked up a '74 CB550 this past fall and thought I would keep a project thread for some heads up and input from others! Kinda new to this forum, but I have noticed there is tons of info and great people here!

Little bit about me...

I have a little bit of experience with restoring and cleaning up older bikes. I fully restored a '65 Honda S90 and have cleaned up a '69 CT70. Im also mid-project on a CB360, but thats a long term project of mine. I just recently picked up another CT70 to tinker on. So as you can see, Ive mainly worked with smaller bikes. Im a sucker for deals, so thats how I ended up with my small collection. None were running when picked up, but now I have 5 running bikes and more projects than I know what to do with. I dont have a whole lot of time (or money for that matter  ???) because Im a college student just finishing up my ME degree this semester. But, I love to tinker with these older bikes, so I do whenever I get the chance. Enough about me though... on to the bike!

Like I said, I picked this up this past fall and Im liking it more and more.


Its pretty rough (PO did some shady stuff to it) but im kinda diggin the rough look. Im thinking about a brat style-ish thing  :P. Dont have a clear picture of what I want it to look like yet, but Ill work on getting it running strong and work on the looks later. Im not looking to sink a lot of money in it. Just want a mean looking/running bike.

Ive messed with wiring a bit and got a new battery. The PO had some toggle switches mounted on the breather covers for the starter and lights. I cleaned up the connections and put a new ground wire connector because the old one was just loose wire wrapped around the - battery terminal (Yikes!  :o)

The next thing I need to do is get some baffles in the headers. Im in a relatively close neighborhood neighborhood and open pipes is way too loud for me to comfortably work on it. Im planning on taking it to get 1/2" tube welded onto the headers, and Ill put some baffles in them to quiet it down a bit. The engine could probably use some back pressure anyways...

Well im tired of typing and you guys are probably tired of listening to me ramble... so peace! Until next time 

P.S. Any recommendations or ideas are welcome (I may not use them, but I definitely wanna hear em!)
« Last Edit: November 16, 2015, 10:05:23 AM by streak09 »

Offline Bankerdanny

  • Eventually I will be old enough in reality to be
  • Really Old Timer ...
  • *******
  • Posts: 7,626
  • Endeavor to persevere
Re: CB550K0 Build
« Reply #1 on: January 23, 2013, 08:51:01 AM »
Hmm, interesting. Going for the military look.

Looks like a great base for a project. I'll look forward to seeing what you do with it.
"The problem with quotes on the Internet is that you never know if they're true" - Abraham Lincoln

Current: '76 CB750F. Previous:  '75 CB550F, 2007 Yamaha Vino 125 Scooter, '75 Harley FXE Superglide, '77 GL1000, '77 CB550k, '68 Suzuki K10 80, '68 Yamaha YR2, '69 BMW R69S, '71 Honda SL175, '02 Royal Enfield Bullet 500, '89 Yamaha FJ1200

Offline DustyRags

  • I'm not skilled, I'm just a
  • Hot Shot
  • ***
  • Posts: 720
  • Just try it and see what happens
Re: CB550K0 Build
« Reply #2 on: January 23, 2013, 09:36:55 AM »
Oh man, I'm a sucker for military rats! Following this for sure!

It looks like the sign says low compression on #1 cylinder- that right? Sounds like a top-end rebuild if nothing else. Otherwise, I say ride it like you stole it!
1976 CB550K- sold
2005 Kawasaki Vulcan 500- sold
2000 CB750 Nighthawk - sold
1975 XL350 - crashed
2004 Suzuki Vstrom 650 - sold

Offline streak09

  • Enthusiast
  • **
  • Posts: 203
  • I don't know what im doing, but I'll do it anyway
Re: CB550K0 Build
« Reply #3 on: January 24, 2013, 08:54:59 PM »
It does say low compression on #1. I have yet to confirm this though. I have started it and it idles rather nicely one warm. I dont even know if I feel like doing a top end rebuild, thats how cheap im feeling  ::). But... I usually say that then end up saying "what the hell, who needs money!? Ive got an old honda!". Its been said, and it will be said again and again.

I dont know if I will stay with the military look, but im definitely not gonna put shiny crap all over it either. Im thinking about going with bare metal tank? Maybe ?

Otherwise, I say ride it like you stole it!

I kinda feel like I did steal it, i talked him down a little on the price. For a running titled bike, it doesnt get much better than that around here! The best part is that I wasnt even looking at it. I was taking a little joy ride around on my S90 and stumbled upon it. He had a '78 hondamatic that I almost jumped on too, but just wasnt doing much for me.

Hopefully ill have some progress for you guys soon!

Offline DustyRags

  • I'm not skilled, I'm just a
  • Hot Shot
  • ***
  • Posts: 720
  • Just try it and see what happens
Re: CB550K0 Build
« Reply #4 on: January 24, 2013, 10:49:25 PM »
Nice. I did a bare metal tank on my last build, and added an off-center black stripe to balance out the filler cap. Looked sharp as hell with the brushed steel, but had to keep scrubbing the rust off with steel wool  ;D

Pic here- click around a bit for the whole rebuild. There's about a gajillion photos in that album: https://plus.google.com/photos/115997492860839025975/albums/5776027138295284753/5788838746742502034
1976 CB550K- sold
2005 Kawasaki Vulcan 500- sold
2000 CB750 Nighthawk - sold
1975 XL350 - crashed
2004 Suzuki Vstrom 650 - sold

Offline streak09

  • Enthusiast
  • **
  • Posts: 203
  • I don't know what im doing, but I'll do it anyway
Re: CB550K0 Build
« Reply #5 on: January 28, 2013, 10:05:33 AM »
Looks good DustyRags!

Hopefully this week I can get the headers off and start on quieting them down a bit. Im also looking for some carb  to airbox boots. The two outside ones are ripped pretty bad. Let me know if anyone has some!

While im thinking about it, I have a question about the wiring. I think the wire that runs from the starter to batter is 16 or 18 gauge wire. Am I right thinking this should be a heavier gauge? The starter will turn over, but doesnt have a lot of umph to it. So im thinking that this thin wire cant carry the current it needs to. Will bumping up the gauge help things out? Or am I off in this. I havent looked real closely at it yet, but would like some feelings so I know what to do when I do get into it.


Offline DustyRags

  • I'm not skilled, I'm just a
  • Hot Shot
  • ***
  • Posts: 720
  • Just try it and see what happens
Re: CB550K0 Build
« Reply #6 on: January 28, 2013, 10:25:04 AM »
First things first- how's your battery? Fully charged? That's the bit that got me fouled up before- if you can hear it struggling, you're probably dealing with a very dead battery.

As for the headers- I found a video a while back put together by a Harley shop that was all about back pressure, open pipes vs baffles vs mufflers, etc- they suggested getting some thumb screws in the pipe to quiet it down and give it some more back pressure. If you're looking for a quick, easy, cheap fix while you get the rest of it sorted out, that might work.

You know, these guys:

1976 CB550K- sold
2005 Kawasaki Vulcan 500- sold
2000 CB750 Nighthawk - sold
1975 XL350 - crashed
2004 Suzuki Vstrom 650 - sold

Offline streak09

  • Enthusiast
  • **
  • Posts: 203
  • I don't know what im doing, but I'll do it anyway
Re: CB550K0 Build
« Reply #7 on: January 28, 2013, 08:22:47 PM »
Brand new battery with a full charge at 12.7V.

Im interested in that exhaust quieting method you mentioned. Searched around for it but no luck, do you a link?

Offline DustyRags

  • I'm not skilled, I'm just a
  • Hot Shot
  • ***
  • Posts: 720
  • Just try it and see what happens
Re: CB550K0 Build
« Reply #8 on: January 29, 2013, 09:55:39 AM »
I can't find the video right now (I'm at work, so shouldn't be doing too much googling here), but I did find an article that had basically the same info: http://www.nightrider.com/biketech/exhaust.htm
1976 CB550K- sold
2005 Kawasaki Vulcan 500- sold
2000 CB750 Nighthawk - sold
1975 XL350 - crashed
2004 Suzuki Vstrom 650 - sold

Offline streak09

  • Enthusiast
  • **
  • Posts: 203
  • I don't know what im doing, but I'll do it anyway
Re: CB550K0 Build
« Reply #9 on: January 29, 2013, 07:24:50 PM »
Ahhh, I got ya now. I will definitely give that a shot. Lollipops is what people refer to them as I think. Couldn't hurt to try, ill probably have less than $5 in it! Im sure the bike needs  some back pressure, so it should help. Considering the pipes are only 1" diameter, it should muffle the sound reasonably well. Good thought DustyRags  8).

Anybody have any experience with these?

Offline streak09

  • Enthusiast
  • **
  • Posts: 203
  • I don't know what im doing, but I'll do it anyway
Re: CB550K0 Build
« Reply #10 on: February 02, 2013, 09:40:14 PM »
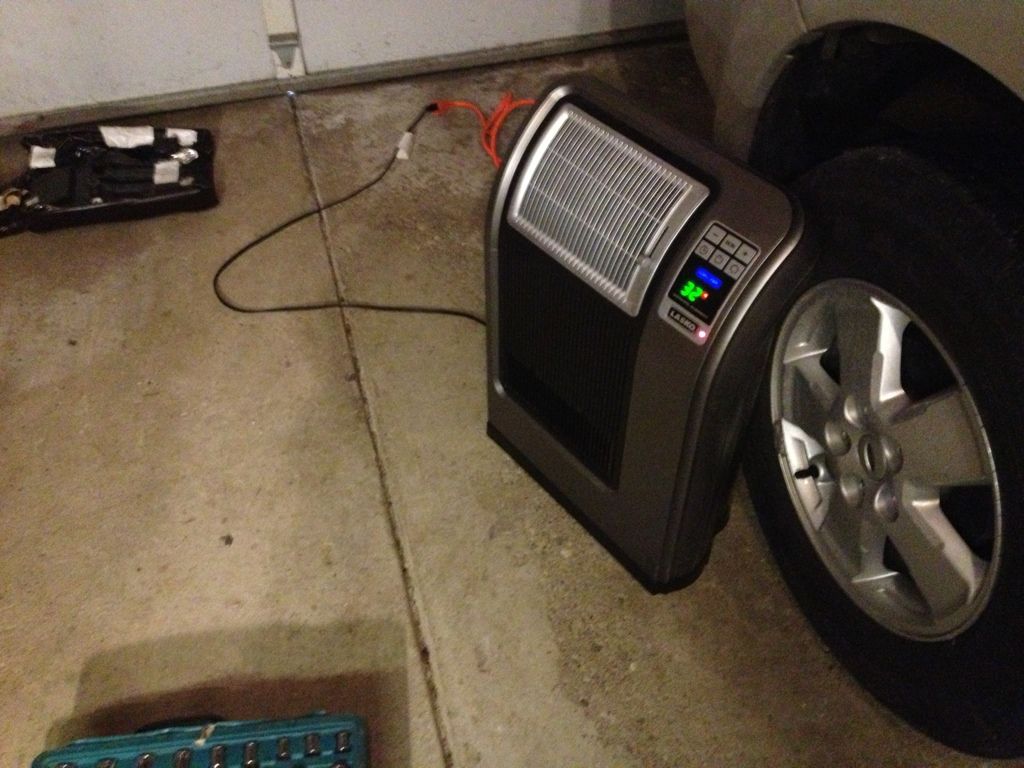
So I went out today and braved the cold and snow to work on the bike for a bit.
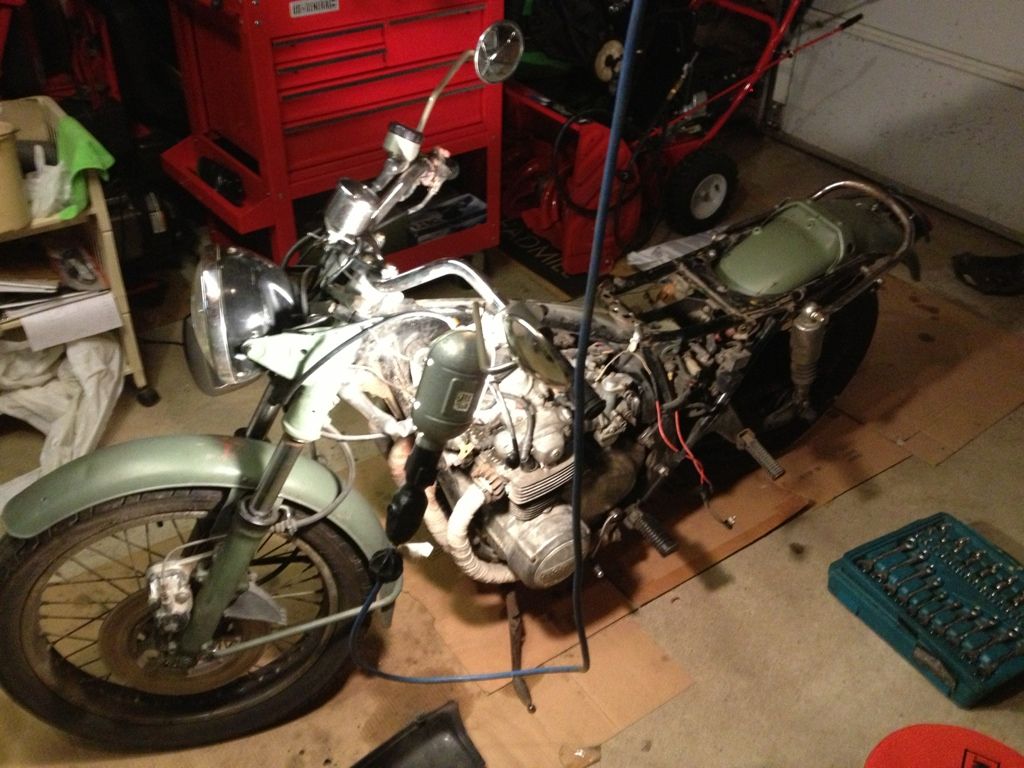


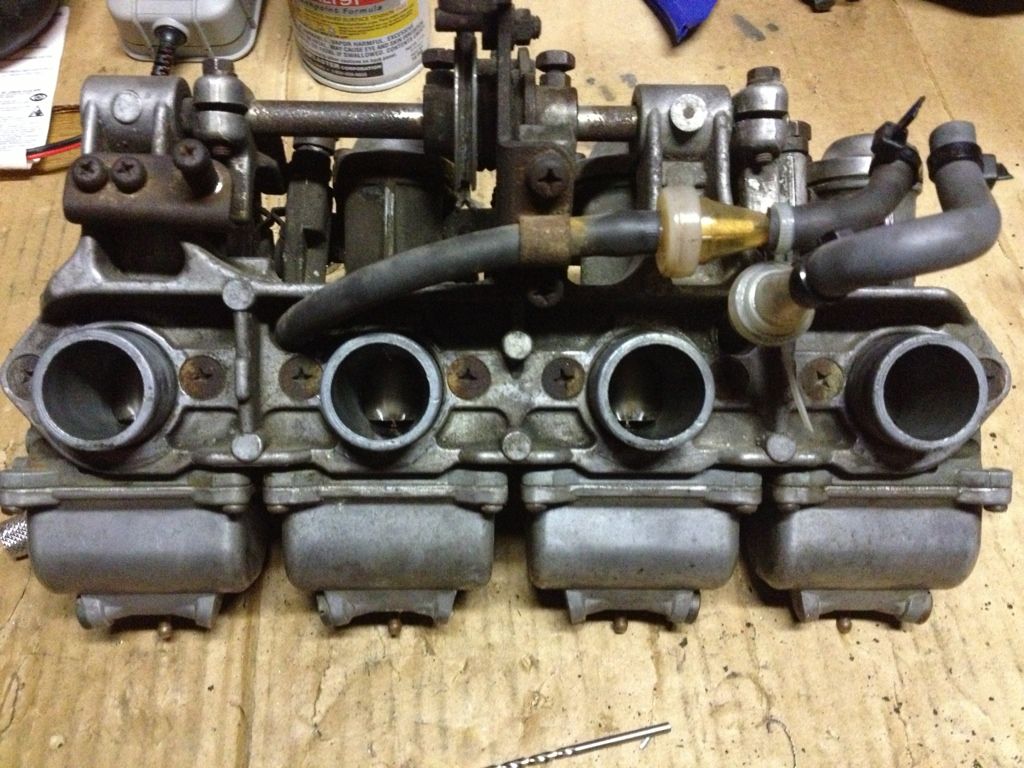
I removed the rear fender, tank and the electrical "box" behind the left cover along with the battery box. The wiring is pretty much hacked to pieces, so Ill probably remove all the unneeded wires and run new for what I need. I also decided to pull the carbs and airbox out. What a pain!  :o  Like I said, I will definitely need new carb to airbox boots.
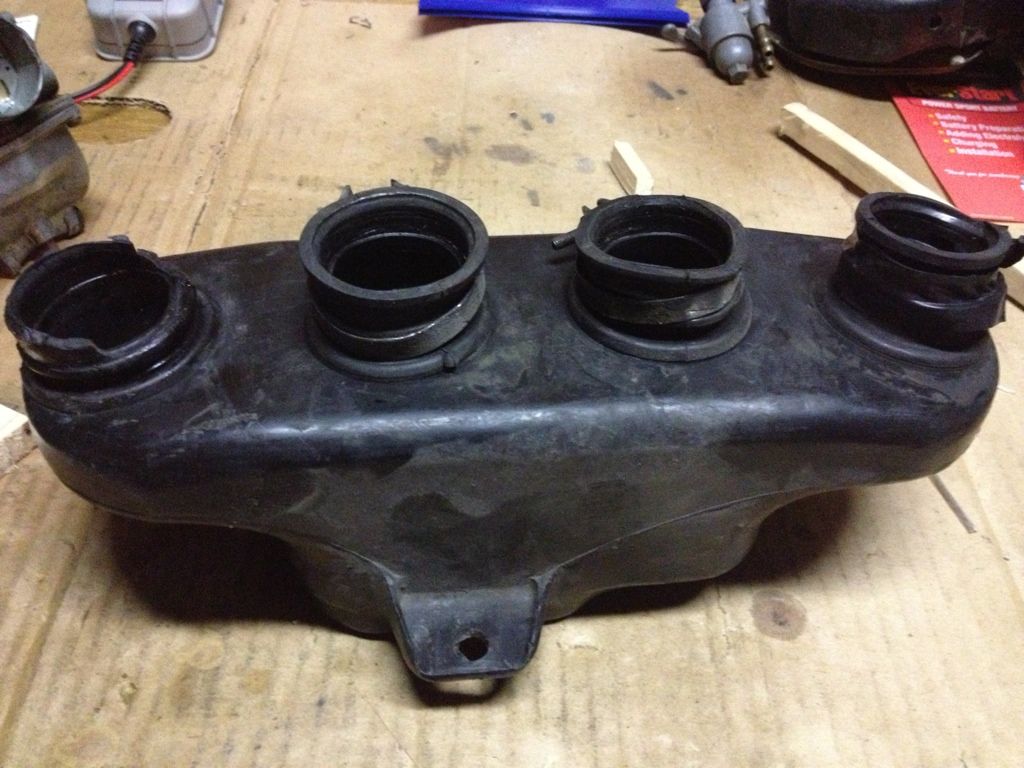


I heard someone around here is selling new ones for a decent price, anyone know? Im thinking about taking the stock filter and filter box off to clean up the space behind the carbs. My plan is to fit a PVC flange to the airbox, and stick a short PVC tube to the flange so I can attach a K&N filter on there. I like the look of pod filters, but I heard they run like crap, so I thought this would be a good compromise.

The carbs look a little rough on the outside, but I took the bowls off and they look great inside! Coool  8). I think I may do a pinesol soak anyways though, clean up the outsides a bit. I also bench synced them while I was at it. Put the slides at just a hair under 1/8" raised, thats what Ive heard is a good starting spot.


Ill have to pick up some vacuum tubes from Dime City or somewhere else so I can vacuum sync when I get it running again.

After that I pulled the exhaust off to find no copper crush gaskets between the head and header!  ??? I just got 8 in today, so fresh ones will be going on when it goes back together. I pulled them off to put the "lollipop" baffles in. Hopefully this will give me some back pressure and deaden the sound just enough where I can feel somewhat comfortable tuning it in my driveway without bothering the neighbors too much.
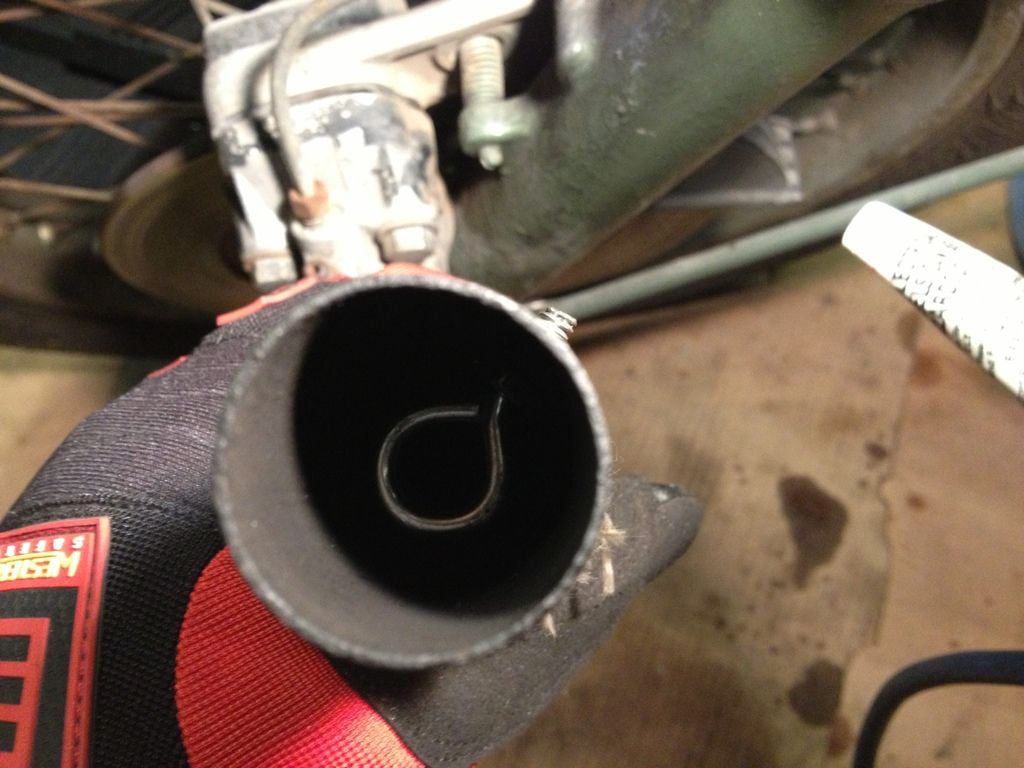


So thats what I got done today. Hopefully I can find a good source for the carb to airbox boots. Thats really the main thing that I need.

Speak up if Im doing something stupid  ;D, or if you have any ideas/input!

Oh, and if anyone has a copy of pages 7 & 8 from the shop manual that would be awesome. Seems like every copy out there is missing those pages, and it happens to be the carb pages (as if they aren't tricky enough with a guide).

Offline DustyRags

  • I'm not skilled, I'm just a
  • Hot Shot
  • ***
  • Posts: 720
  • Just try it and see what happens
Re: CB550K0 Build
« Reply #11 on: February 03, 2013, 09:23:00 AM »
From the photo it looks to me like you used eye hookes- hollow loops- instead of thumb screws. Those will add almost no back pressure, you want the solid paddle. If I'm seeing that wrong, disregard.

I have no experience with pod filters, etc, but considering how all the experts on here howl whenever someone gets rid of the airbox, I recommend doing some more reading on that. Apparently getting the jetting right is a #$%* and a half, and nothing mucks with that more than pulling off the stock air box. I'd say get it running well on the stock box, and then screw around with the air intake when you know it'll work. Should be able to throw some tap on those things to seal them up, if they're that bad.

I'm waiting for someone to whip out a 3D printer and start making those old rubber parts again :P
1976 CB550K- sold
2005 Kawasaki Vulcan 500- sold
2000 CB750 Nighthawk - sold
1975 XL350 - crashed
2004 Suzuki Vstrom 650 - sold

Offline CafeDawg

  • Not All Those Who Wander Are Lost!
  • Hot Shot
  • ***
  • Posts: 277
  • Gone to the Dogs
Re: CB550K0 Build
« Reply #12 on: February 03, 2013, 10:07:42 AM »
Always ebay and David Silver Spares carries them too I believe
http://www.ebay.com/sch/i.html?_nkw=honda+cb550+air+box+boots+&_trksid=p5197.c0.m1950

Respect
CD
Respect & Understanding. U get what U give!
1976 CB550 basket case cafe rebuild
http://forums.sohc4.net/index.php?topic=106235.0
1978 CB750F evolving, daily rider
http://forums.sohc4.net/index.php?topic=89745.0

Offline streak09

  • Enthusiast
  • **
  • Posts: 203
  • I don't know what im doing, but I'll do it anyway
Re: CB550K0 Build
« Reply #13 on: February 03, 2013, 11:09:55 AM »
Well, as far as the lollipops go, I had JB welded some washers on the eye bolts to give some more constriction. However, I needed to cut some threads further into the bolt for the eyelet to sit in the center of the pipes. Well, I used some PB blaster for some lubricant when cutting the threads and apparently PB Blaster dissolves JB weld  ??? . So the washers basically fell off. When doing some research on the lollipops, I found that many people just use the eye bolts (usually on much larger diameter pipes), so ill give it a shot, and if I need some more back pressure ill stick the washers back on. Oh, and I didnt use thumbscrews because Lowes sucks and had football shaped thumbscrews. I swear, every time I go into that place I come out saying I will never go there again. Their selection and organization is almost like they deter you from getting what you need. I realize, that when I go in their Im usually looking for something slightly obscure, but geesh.

As for the airbox... I did a little research on that too. As I see it, most of the reason that pod filters dont work so well is because they all dont necessarily have the same air flow/pressure. Also, the factory airbox is designed to pull from the same air source, ensuring equal pressure is going into each carb. Another thing the airbox accomplishes is straightening out the air. When you have pod filters, there isn't much straightening going on because its directly from the filter to carb. Like I said, this is just the way I see it and from what Ive read. So basically, I am minimally changing the factory set-up. Just swapping out air filters essentially. Ill give it a shot and see what happens!

Anybody have a good place to stash the stock battery to conceal it a bit with the side covers off? Im planning on making an electronics box to fit under the seat, but I really dont want to spend 100+ bucks on a antigravity or similar battery.

Cafedawg, thanks for the link and info. David Silvers may be the way to go. Ive never ordered from them, but seems like they have a lot of stuff and are pretty reputable.   

Offline DustyRags

  • I'm not skilled, I'm just a
  • Hot Shot
  • ***
  • Posts: 720
  • Just try it and see what happens
Re: CB550K0 Build
« Reply #14 on: February 04, 2013, 08:11:11 AM »
Cool, looks like you're on the right track! Good luck, have fun and keep us posted!
1976 CB550K- sold
2005 Kawasaki Vulcan 500- sold
2000 CB750 Nighthawk - sold
1975 XL350 - crashed
2004 Suzuki Vstrom 650 - sold

Offline streak09

  • Enthusiast
  • **
  • Posts: 203
  • I don't know what im doing, but I'll do it anyway
Re: CB550K0 Build
« Reply #15 on: February 15, 2013, 07:05:28 AM »
So I got a little bit of time to work on the bike yesterday. I'm trying to figure out how to get all the electronics under the seat. I would like to replace the regulator and rectifier for a single unit regulator rectifier. Over at the Honda twins site people have used a john Deere regulator/rectifier. Is it possible to use something like that for the CB550? I've seen people mention Oregon electronics site, but the price is a little steep for me right now. There has to be a similar one out there that will fit the bill for cheaper. I didnt know squat about the charging system so some assistance would be awesome  ;D. I was looking at one like this, but I have no clue how many pins I need for my application, or amps for that matter.


http://www.newegg.com/Product/Product.aspx?Item=9SIA1BY0KU4473&nm_mc=KNC-GoogleMKP&cm_mmc=KNC-GoogleMKP-_-pla-_-Batteries+%26+Accessories+-+Replacement-_-9SIA1BY0KU4473


I would think 15A would be plenty, but again, I dont know squat on this stuff.

Helllllppppp  :o

Offline Vinhead1957

  • Expert
  • ****
  • Posts: 1,196
Re: CB550K0 Build
« Reply #16 on: February 15, 2013, 09:39:49 AM »
The good thing about the Oregon regulator/rectifier is that it is plug and play no hassle!   94 bucks

Offline streak09

  • Enthusiast
  • **
  • Posts: 203
  • I don't know what im doing, but I'll do it anyway
Re: CB550K0 Build
« Reply #17 on: February 16, 2013, 08:51:08 AM »
The no hassle for the Oregon setup is nice, but I just cant spend that on a such a simple part right now. After some digging I found some info here on the forum.

http://forums.sohc4.net/index.php?topic=12465.0

Its not a single unit, but 20 bucks sure beats the heck out of anything else out there! Even though its not a single unit, I think it will still save space, and will work much better than the stock parts. I found the voltage regulator for $15.99 at Oreillys. I but cant decide on which rectifier to use, the single 3 phase unit or just hook up 2 of the singles.

With the savings from this setup, I should be able to pick up new carb/airbox boots.

Hopefully the cold weather will go away so I can get some real work done!

Offline streak09

  • Enthusiast
  • **
  • Posts: 203
  • I don't know what im doing, but I'll do it anyway
Re: CB550K0 Build
« Reply #18 on: February 26, 2013, 06:39:52 AM »
Well today I plan on working on the wiring. I think I'm going to leave the stock regulator, but replace the rectifier. So ill be working on that and making an electronics tray to sit under the seat.

I've searched a bit to see how I can remove the safety unit, but haven't found anything definite. Can anyone point me in the right direction?

Offline Vinhead1957

  • Expert
  • ****
  • Posts: 1,196
Re: CB550K0 Build
« Reply #19 on: February 26, 2013, 09:31:19 AM »
If you want to bypass it, the solid dark green is jumpered to the green red striped.
« Last Edit: February 26, 2013, 12:43:53 PM by Vinhead1957 »

Offline streak09

  • Enthusiast
  • **
  • Posts: 203
  • I don't know what im doing, but I'll do it anyway
Re: CB550K0 Build
« Reply #20 on: February 26, 2013, 10:55:37 AM »
Awesome! So this will allow me to completely remove the safety unit? Im trying to save space so this will help a lot!

Offline Vinhead1957

  • Expert
  • ****
  • Posts: 1,196
Re: CB550K0 Build
« Reply #21 on: February 26, 2013, 12:47:03 PM »
I currently have one but I am carrying a jumper in case I have to bypass. I was having intermittent problems with the start button led right to it and I replaced it.

Offline streak09

  • Enthusiast
  • **
  • Posts: 203
  • I don't know what im doing, but I'll do it anyway
Re: CB550K0 Build
« Reply #22 on: February 26, 2013, 02:16:27 PM »
Well I started making an electronics pan for under the seat. I think it will work. I may change it, but its a good start. This is the first time Ive really fabricated anything (if you can call it fabricating  :P). If everything goes well, I should have enough room for everything, given I can completely remove the safety box.


Should be able to get some more work done tomorrow!

Offline streak09

  • Enthusiast
  • **
  • Posts: 203
  • I don't know what im doing, but I'll do it anyway
Re: CB550K0 Build
« Reply #23 on: February 27, 2013, 05:40:48 PM »
I spent all day working on the electronics. Got most of it re-routed and sorted out to fit under the seat. I still need to hook the starter relay up, but it fits and looks like its going to work out fairly well.


Should have carb boots coming in from David Silver Spares here soon so maybe I can get it back together to start her up.

Also got some stuff in from DCC the other day.


Offline DustyRags

  • I'm not skilled, I'm just a
  • Hot Shot
  • ***
  • Posts: 720
  • Just try it and see what happens
Re: CB550K0 Build
« Reply #24 on: February 28, 2013, 09:23:15 AM »
That looks like a carb sync kit. Going with a pro kit or making your own?
1976 CB550K- sold
2005 Kawasaki Vulcan 500- sold
2000 CB750 Nighthawk - sold
1975 XL350 - crashed
2004 Suzuki Vstrom 650 - sold