Author Topic: Kickstater assembly  (Read 1236 times)

0 Members and 1 Guest are viewing this topic.

Offline AlekStooge

  • Expert
  • ****
  • Posts: 786
  • can't afford cheap stuff
Kickstater assembly
« on: October 26, 2016, 08:39:45 AM »
I'm assembling my kick start on a 1978 CB 550K. I can't get the ratchet (part 20) to disengage from the pinion (part 18). I have all the parts in order but the mechanism is reversed when I push the kick starter through the two separate. They are supposed to engage at the point. I have already posted this on my build thread and nobody could figure it out yet. http://forums.sohc4.net/index.php/topic,158001.100.html

Here is the parts list
http://www.cmsnl.com/honda-cb550k-1978-usa_model7222/partslist/E++15.html#results

Here is a video (yes I know the spring is not attached that does not change anything when it is)
Here is a photo with the spring attached, does not change anything.


Furthermore, I searched the web for the solution I found a blogger that had the same problem. He fixed by hooking one end of the spring around the tang on the shaft outside if the case (seem bottom photo in the link). When I look at mine it is hooked.
http://hondacb550f.blogspot.com/2010/05/important-info-when-working-on-cb550.html

Please help, thank you

Offline DaveBarbier

  • Really Old Timer ...
  • *******
  • Posts: 5,620
Re: Kickstater assembly
« Reply #1 on: October 26, 2016, 08:07:53 PM »
Is it possible you have the springs swapped?

If you push the toothed drum away from the gear it springs right back, right?

Offline DaveBarbier

  • Really Old Timer ...
  • *******
  • Posts: 5,620
Re: Kickstater assembly
« Reply #2 on: October 26, 2016, 08:10:31 PM »
Can you make another video but with the outside spring hooked like it's supposed to be? Show that in the video. Put the kicker on too so you can rotate it.

Offline philgresty

  • Full Member
  • *
  • Posts: 36
Re: Kickstater assembly
« Reply #3 on: October 27, 2016, 01:57:17 AM »
you have just assembled it wrong is all, the ratchet needs to be rotated round more to hook into the piece at the end if that makes any sense?  I had the same problem where it slipped round after a heavy kickstart, reassembled it and problem was gone.

Offline philgresty

  • Full Member
  • *
  • Posts: 36
Re: Kickstater assembly
« Reply #4 on: October 27, 2016, 02:07:21 AM »
try the ratchet 180degrees from where you have it there, the triangle shape on the side is not acting upon anything, it should, that is how it moves in when the kickstart is pushed down.

Offline wowbagger

  • Not much of an
  • Expert
  • ****
  • Posts: 853
Re: Kickstater assembly
« Reply #5 on: October 27, 2016, 05:10:46 AM »
try the ratchet 180degrees from where you have it there, the triangle shape on the side is not acting upon anything, it should, that is how it moves in when the kickstart is pushed down.

Yup, this exactly. I did the same thing on my CB500 when I first reassembled it. Rotate the ratchet down so the triangle will sit in the groove in the guide plate (part #23 in the fiche) and you should be good to go.

Offline AlekStooge

  • Expert
  • ****
  • Posts: 786
  • can't afford cheap stuff
Re: Kickstater assembly
« Reply #6 on: October 28, 2016, 05:13:01 PM »
try the ratchet 180degrees from where you have it there, the triangle shape on the side is not acting upon anything, it should, that is how it moves in when the kickstart is pushed down.

When I originally that I had the rachet 180 with the triangle facing down. The problem with was the plate guide would not slide onto the shaft completly. The stopper on the plate guide would hit the triangle and prevent it from sliding on. I'll make a video when I get home Dave. I bumped into someone who owns like 14 CB's tell me he had the same problem and his plate guide was cracked.          Yes I thought the springs were in the wrong order at first too. Larger one is closer to the case wall.

Offline AlekStooge

  • Expert
  • ****
  • Posts: 786
  • can't afford cheap stuff
Re: Kickstater assembly
« Reply #7 on: October 28, 2016, 09:23:20 PM »
Can you make another video but with the outside spring hooked like it's supposed to be? Show that in the video. Put the kicker on too so you can rotate it.


The next three photos are of the ratchet being flipped 180. As you can see the plate guide can't be put on.


Offline DaveBarbier

  • Really Old Timer ...
  • *******
  • Posts: 5,620
Re: Kickstater assembly
« Reply #8 on: October 29, 2016, 04:39:12 AM »
I don't know dude, I can't be any more help unless I have a kickstarter in my hand. I highly doubt anything's broken. I'm all but certain it's assembly error.

Offline bwaller

  • Really Old Timer ...
  • *******
  • Posts: 7,485
Re: Kickstater assembly
« Reply #9 on: October 29, 2016, 06:36:52 AM »
People are simply trying to help by suggesting options. Obviously the ratchet is 180d off in your vid. The ratchet cam is supposed to slide into the bracket on the return stroke to "disengage" the meshed ratchet & pinion.


First here is a shaft disassembled
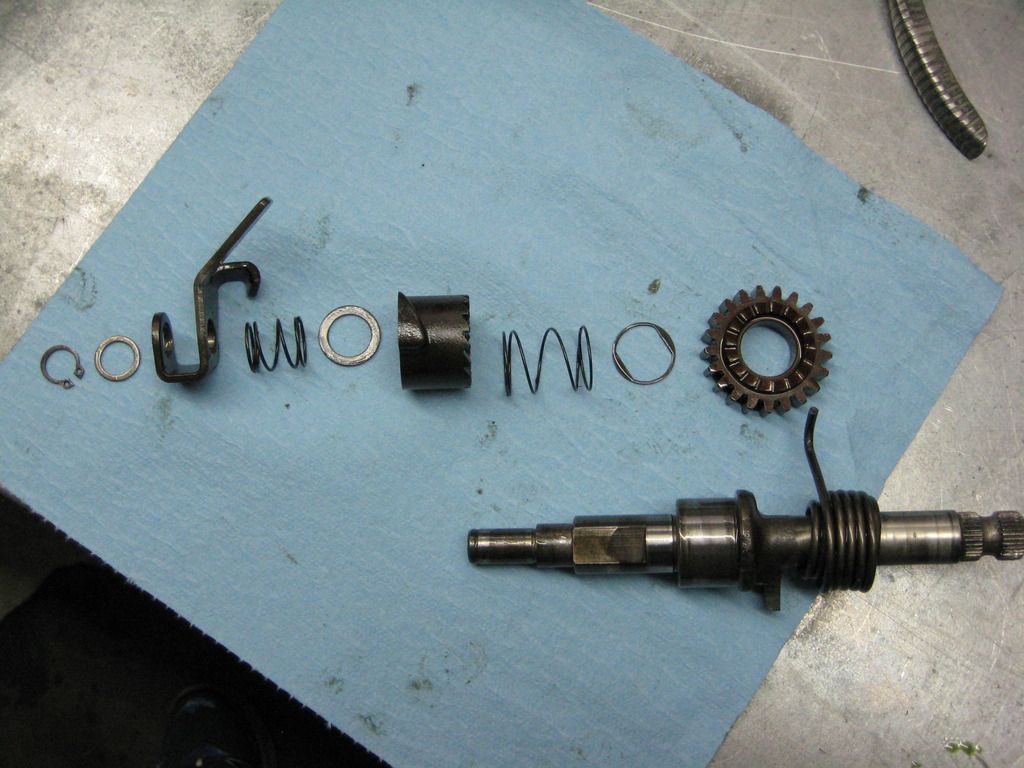


Now hopefully you have the shaft "located" correctly with the stopper lug contacting the boss on the case. With the shaft in the correct orientation you can see the spring needs to be rotated 90 degrees to tension before attaching in the right spot on the case.
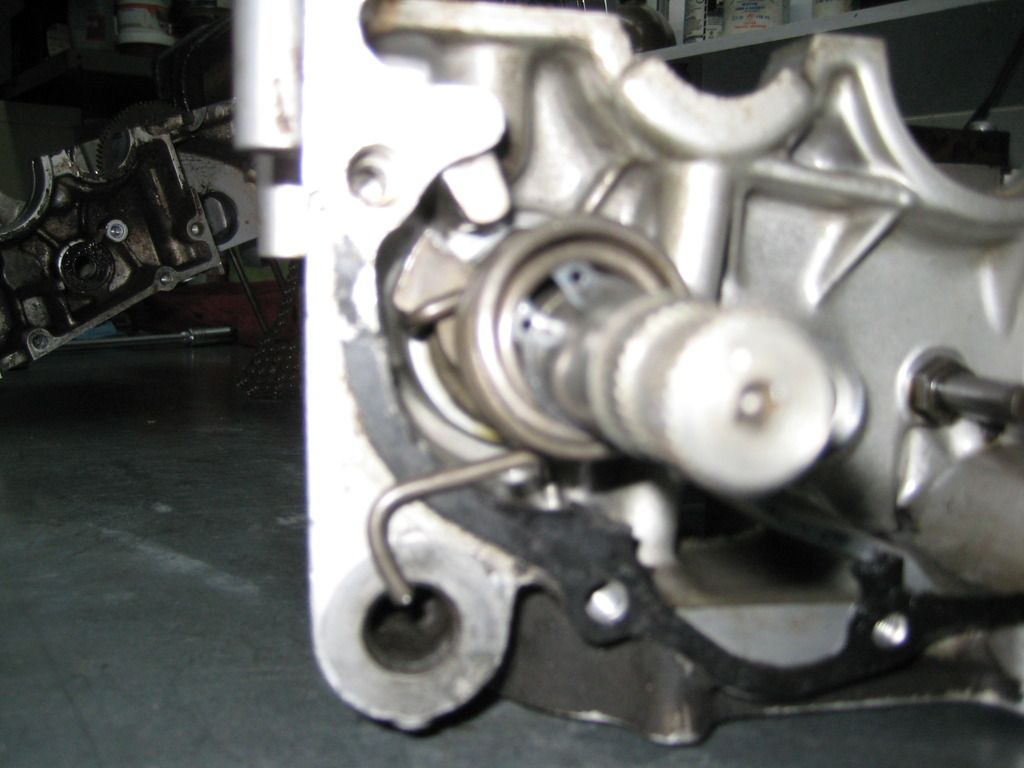


Now see the ratchet cam rotated into the "u" shape of the bracket disengaging ratchet & pinion.
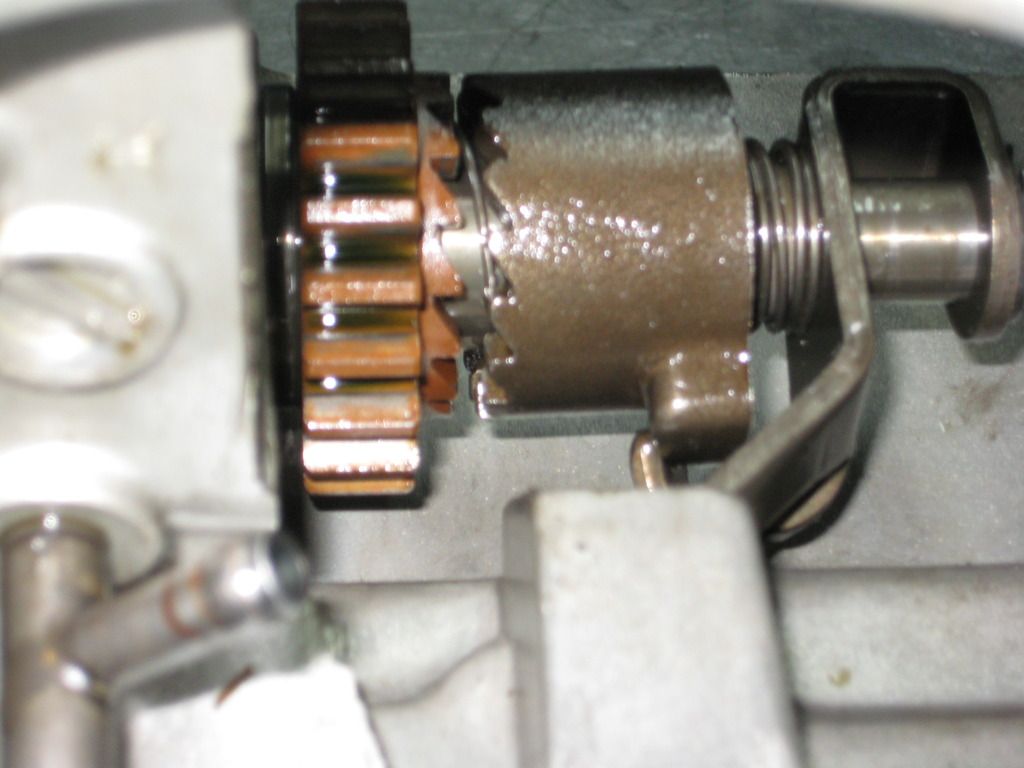


This shows the cam just before it runs into the bracket but while the two are still meshed.
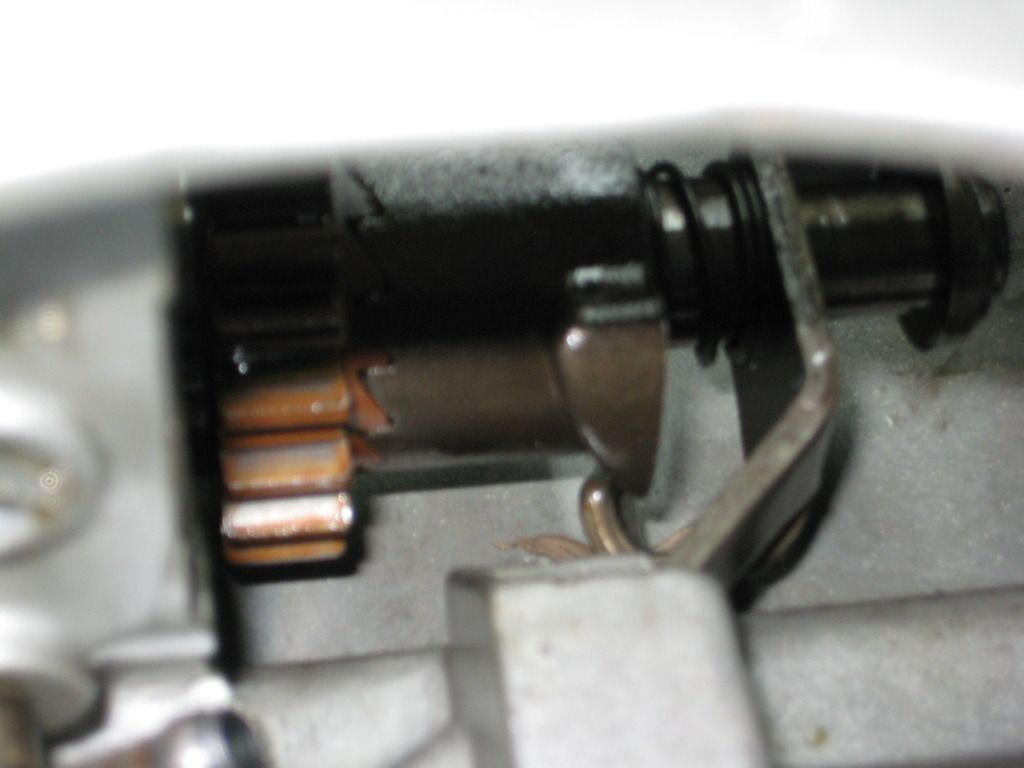


Remember you want the ratchet & pinion engaged when you kick (rotate) the shaft down, but on the "return" stroke when the main spring is returning the shaft the ratchet cam enters the bracket "U" disengaging the ratchet from the pinion. No offense here Alek the design works....but you keep showing us how it will not the way you have it assembled. Try something different.

Offline AlekStooge

  • Expert
  • ****
  • Posts: 786
  • can't afford cheap stuff
Re: Kickstater assembly
« Reply #10 on: October 30, 2016, 01:24:48 PM »
Alright I got!

The problem was I had to unhook the spring and turn the shaft slight forward so when I flip the racket pinion 180 from what I originally had it the triangle on the ratchet does not interfere with putting the plate guide on. Just that slight movement forward made the difference. If someone mentioned twisting the shaft forward I didn't understand them.

I appreciate everyone's suggestions. Thanks 

Offline bwaller

  • Really Old Timer ...
  • *******
  • Posts: 7,485
Re: Kickstater assembly
« Reply #11 on: October 30, 2016, 01:43:42 PM »
Well done, all is good.