Author Topic: Garage_guy_Chris's 74 CB750 "K"onfused.  (Read 4083 times)

0 Members and 1 Guest are viewing this topic.

Offline Garage_guy_chris

  • Hot Shot
  • ***
  • Posts: 730
Garage_guy_Chris's 74 CB750 "K"onfused.
« on: April 26, 2015, 10:56:07 PM »
Well I have been putting this off for far too long so i might as well get going on it. This tale all started during a conversation at work with a co-worker about how i wanted a new bike project.  My friend is a Ducati collector with a few honda's thrown in the mix. Anyways somehow he ended up with this bike and offered it to me for what I thought was a good price of $700 ( I wish I knew then what i know now...) Anyways within a few days i drove up to his place and did the deal and came home with a new project. I thought it would be a quick project i could just add the missing parts to and within a month or two have a great bike to enjoy with the girl friend.


Now at first sight and based on what i was told;
- Fresh 811 engine
- Freshly painted frame
- Guy lost interest and didnt finish.

The First thing the was done was to disassemble the peripherals down and inspect. the first thing i found out is that the forks were not the right forks for a 74' and that they were infact 77/78 CB750K forks and while its actually a bit of a bonus its a realization that parts have been changed around and aren't all original and belong to this bike.


Around this time i was also looking at and into some of these "Custom" one off parts and that is when i found the "front axle of death" at first you don't see the problem but.. both those pens are the same lenth the bore extends about 1/2" down into the smaller section a little work with the vernier caliper reveals a wall thickness of about 0.035" which would have snapped off at the first good pot hole surely causing a loss of control and likely an accident....


So after this i decided to look at everything with a fine tooth comb which revealed more issues. like this goofy steering stop which was barely attached.


now I start questioning the custom triple trees and whole front end setup. what steering geometry has been designed into these parts and why have the forks been spaced out almost 2 inches from stock? I got frustrated dealing with it and decided it would be better to just use stock parts and decided to go with a stock front end which i had recently acquired.


Despite all the problems I thought things were coming along nice, I had acquired all the major missing parts and even managed to mock the bike up and have it looking like a bike.


« Last Edit: April 27, 2015, 12:43:10 AM by Garage_guy_chris »
1971 Cb450 Cafe  (on the road)
1974 Cb750 Restomod (on the road)

Offline Garage_guy_chris

  • Hot Shot
  • ***
  • Posts: 730
Re: Garage_guy_Chris's 74 CB750 "K"onfused.
« Reply #1 on: April 26, 2015, 11:17:58 PM »
Around this time I decided to get into the engine and check its health add the electric starter and try firing up this "fresh 811cc engine"

the first thing i did was I decided to pull the alternator cover and remove the starter block off plug. First thing I notice. Where is the rest of the starter gear? where is the starter clutch? Is that alternator rotor lightened? ; Gone, gone and yes are the answers..


Then shortly after im running back and forth between the bike and the computer and realize this little gem.  Where is the box that surrounds the starter??? While this isnt any real problem it bothers me and my OCD.... Also im a little concerned about the starter being exposed and just the molestation aspect of this modification.


Well despite this i decided to press on and see what can be done with what i have. A week or two later im at the local bike night and witness how easily my buddies 750 kicks over. I even ask him and i try his. it starts effortlessly and like butter. I know for a fact mine is nothing like that, I even go home and try my bike again to confirm and my suspicions are right its alot harder. So i think, "oh its a 811, more compression.... that explains it" but it still doesnt feel right to me so i take out the plugs and again its stiff, add some oil to the cylinders, still stiff.  After much deliberation i decide the prudent course of action is to pull the engine and investigate:


I pulled the cam it looks good, gonna measure it up see what kinda lift and duration it has my initial impression is that its very close to stock.

Now the plot thickens ...I decided to pull the head and cylinders.

Initially things looked really good i found 64mm Yoshimura 812 pistons in it ( i was told it was a 65mm yoshimura 836)


Until I got to cylinder #4
Front of piston


Back of piston


I also found a couple other things...
-1 piece oil rings on #1, #2, #4
-3 piece oil rings on #3 (you can see at left side of last photo)
-Broken oil ring on 2
-all pistons have some scouring front and back beyond what i would consider normal wear.
-2 outer front cylinder studs rusted / corroded severely at base and are going to need replaced no idea how these didnt snap

So now its looking like im gonna be into it alot deeper than i wanted to be im not sure I can afford to fix this now either. Before i do anything i think im splitting the cases and check the bottom end / transmission as im not leaving anything to chance at this point.

My thoughts / idea's:

1. - order up a cruzin image (ebay) cast flat top 836 kit for $120
    - Bore the existing 64mm 812cc to 65mm 836cc
    - Maybe add a new mild cam

2. - Find a replacement Yoshimura 812 (64mm) piston for #4
    - Find replacement rings for all 4 bores
    - Clean up existing cylinders / rebore new cylinders

3. - Get a used stock bore cylinder
    - Order up a Cycle X +0.50mm  or +1.00mm $199
    - Find a stock cam

4. - Get a good used set of cylinders / pistons $???

5. - Find a whole engine and start over ???

After this I dedided i better go the whole way and take the whole engine down and split the cases. I found further damages like scoured bearings and excess gasket sealer everywhere.

Unfortunately I don't have photos.

By this time Im learning a few things about hi-performance 750 engines and realizing this engine was in need of some upgrades:

Notice the stud in the foreground its stock and severely corroded. I decided to upgrade to HD studs, well you can guess what happened next when i attempted to remove the studs..... it took like 10 days of screwing around heating and wrenching to get them out, in the end i had to do the weld-nut-to-stud approach


« Last Edit: April 26, 2015, 11:54:33 PM by Garage_guy_chris »
1971 Cb450 Cafe  (on the road)
1974 Cb750 Restomod (on the road)

Offline Garage_guy_chris

  • Hot Shot
  • ***
  • Posts: 730
Re: Garage_guy_Chris's 74 CB750 "K"onfused.
« Reply #2 on: April 26, 2015, 11:40:58 PM »
Despite all this I still kept my determination to follow through and build this poor bike. So i started learning and gathering information to develop a battle plan on this ill-assembled poor engine. Up to now i have rebuilt a few engines to "stock form" with great success and decided i wanted to grow the knowledge pool and dive into the performance realm. and try my hand at some performance work. It took a lot of research and i started acquiring parts. but the engine got side tracked and I started to work on other things.

Like a rear cush drive, after days of messing around i wrecked two and got the third one out to discover it isn't a 750 cush drive.... I ended up ordering one from i think arizona (rust free) and it came out like butter....


at this point it was once again winter and decided to do some polishing and work on things i could based on what parts I was looking at. the wheels were a good choice so off i went. Polished hubs, new rims and spokes....


They went together really well for a change everything was working out well.

1971 Cb450 Cafe  (on the road)
1974 Cb750 Restomod (on the road)

Offline SOHC4 Cafe Racer Fan

  • Speak up, Whipper-Snapper! I'm a
  • Really Old Timer ...
  • *******
  • Posts: 15,733
  • SOHC/4 Member #1235
Re: Garage_guy_Chris's 74 CB750 "K"onfused.
« Reply #3 on: April 26, 2015, 11:55:48 PM »
I like the idea of a Pops Yoshimura 812. See if you can source a spare piston. If not, the cruzinimage kit is inexpensive.
1975 CB550K1 "Blue" Stockish Restomod (http://forums.sohc4.net/index.php?topic=135005.0)
1975 CB550F1 frame/CB650 engine hybrid "The Hot Mess" (http://forums.sohc4.net/index.php/topic,150220.0.html)
2008 Triumph Thruxton (http://forums.sohc4.net/index.php/topic,190956.0.html)
2014 MV Agusta Brutale Dragster 800
2015 Yamaha FZ-09 (http://forums.sohc4.net/index.php/topic,186861.0.html)

"There are some things nobody needs in this world, and a bright-red, hunch-back, warp-speed 900cc cafe racer is one of them — but I want one anyway, and on some days I actually believe I need one.... Being shot out of a cannon will always be better than being squeezed out of a tube. That is why God made fast motorcycles, Bubba." Hunter S. Thompson, Song of the Sausage Creature, Cycle World, March 1995.  (http://www.latexnet.org/~csmith/sausage.html and https://magazine.cycleworld.com/article/1995/3/1/song-of-the-sausage-creature)

Sold/Emeritus
1973 CB750K2 "Bionic Mongrel" (http://forums.sohc4.net/index.php?topic=132734.0) - Sold
1977 CB750K7 "Nine Lives" Restomod (http://forums.sohc4.net/index.php?topic=50490.0) - Sold
2005 RVT1000RR RC51-SP2 "El Diablo" - Sold
2016+ Triumph Thruxton 1200 R (http://forums.sohc4.net/index.php/topic,170198.0.html) - Sold

Offline Garage_guy_chris

  • Hot Shot
  • ***
  • Posts: 730
Re: Garage_guy_Chris's 74 CB750 "K"onfused.
« Reply #4 on: April 27, 2015, 12:33:40 AM »
I like the idea of a Pops Yoshimura 812. See if you can source a spare piston. If not, the cruzinimage kit is inexpensive.
I did too and I spent a few months looking for a replacement, unfortunately I couldnt come up with one. I have all those pistons put away for safe keeping to help someone else one day or find a replacement to make a set for me.  I found 3/4 of a old NOS Wiseco 811 but after putting a set of 4 pistons together i found i had a very poorly matched set with weights and dimensions to far off to satisfy my OCD level of detail so I did end up opting for a cruzin image 836 which was dead nuts on. All 4 pistons are within 0.0001" and 1 gram   


Now spring is rolling around and im still at odds with the engine, i don't have enough good parts to re-build and certain things like the molested starter box were really bothering me. And in-decision was getting the better of me.

In enters my bikes guardian angel. In May of 2014 i reply to a online classified ad for a "cb750 engine for sale". I call the guy and start telling him about all my issues. He invites me out and suggests he should be able to help and to bring some cash as he has got a few spares. I made arrangements to go and did the 3.5 hour drive to get there. I get there and he shows me the engine it seemed perfect, the old engine was 2350454 and this one was 2351600 just a few off and both what i call pre-dowel K4 engines (before they added the 8 knock pins and dowels to the cylinders and head.)I made a deal and we got to talking. soon enough he opened one of his sheds and it was wall to wall CB750. we started picking and finding other parts i needed then came the next shed and again like 1/2 full of 750 stuff. then the back of a pickup with cap and another 10 750 engines. I left his place broke with my poor subaru wagon doing a butt end squat under the weight of 3 engines and probably 2 bikes in parts. Now at least i had some good serviceable parts to work with and more than enough to get a good engine going. I wish i had photos but i don't think this gent would be too keen on that idea.

Anyways over the next month or so i started organizing parts, inspecting parts learning everything SOHC 750 and formulating a plan. This along with medical problems and a lot of appointments meant progress was very slow but still coming along. By now its getting into the fall and decide if i can get the paint work done i can likely knock off the engine over the winter and emerge from the snow and cold with a new bike.

So I had a few things to finish up, i decided after all the fixes to this "freshly painted frame" had it looking like crap and i had noticed the paint was very chip prone so i decided to start from scratch too. and heck why not add a frame kit
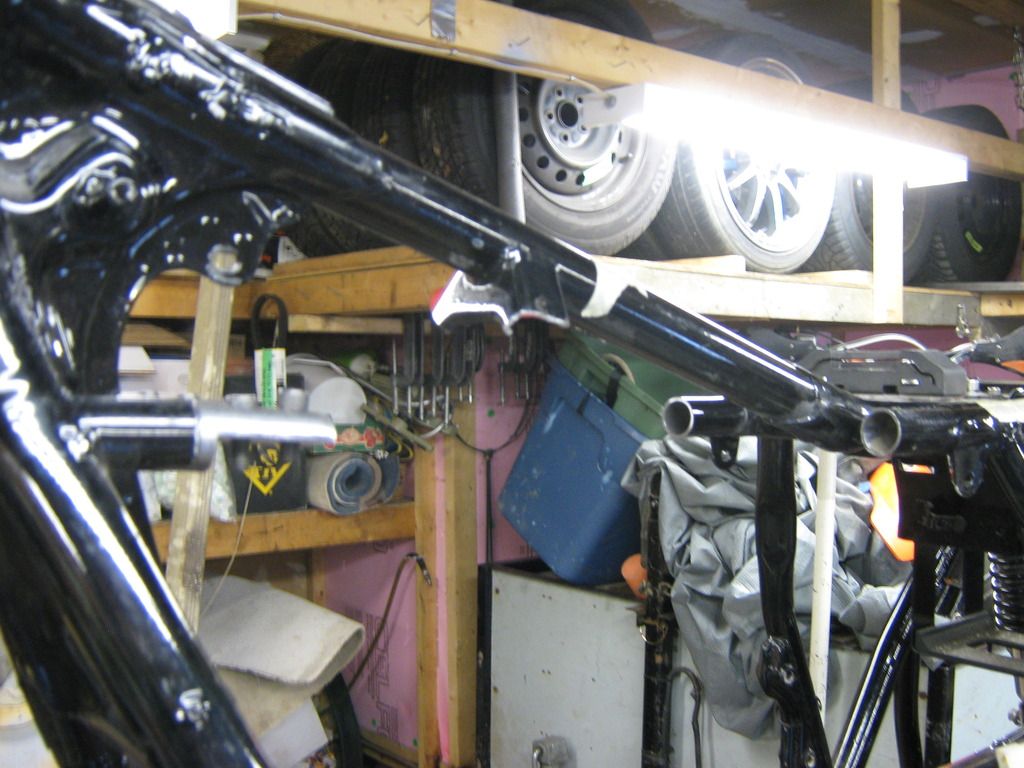
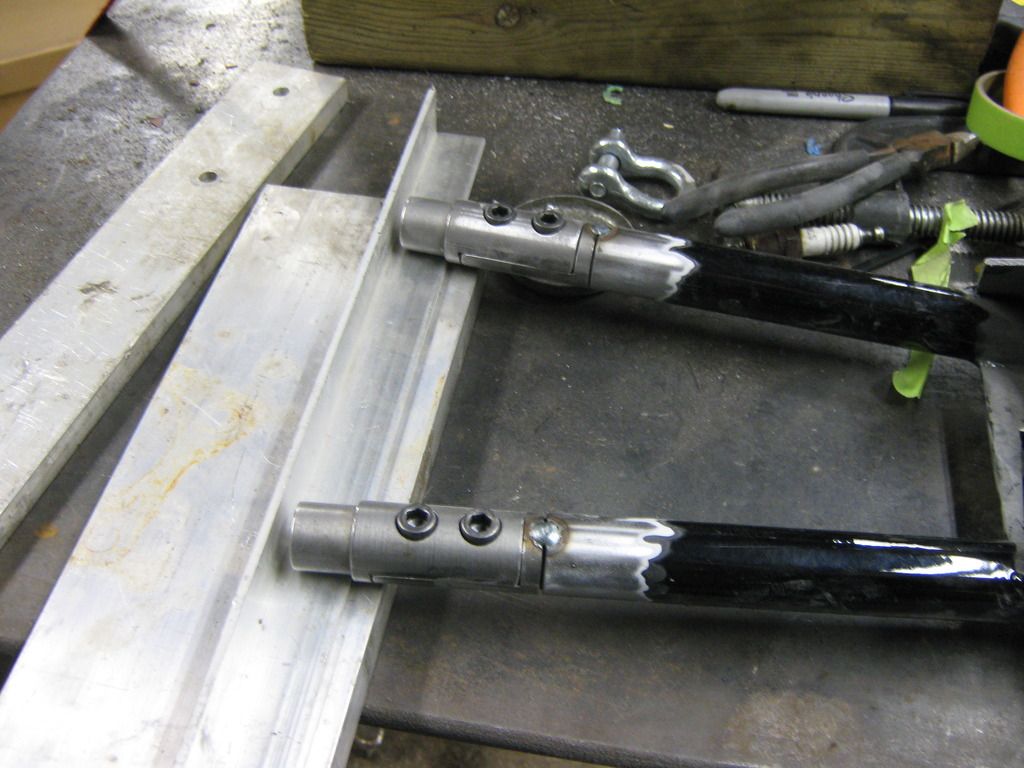
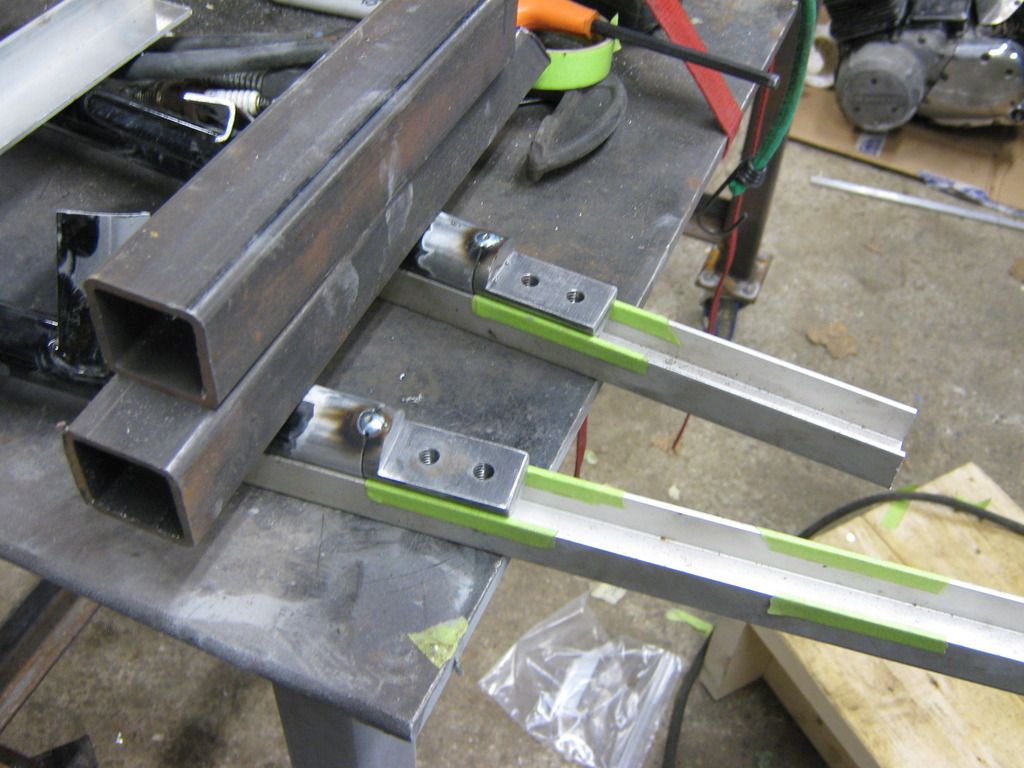
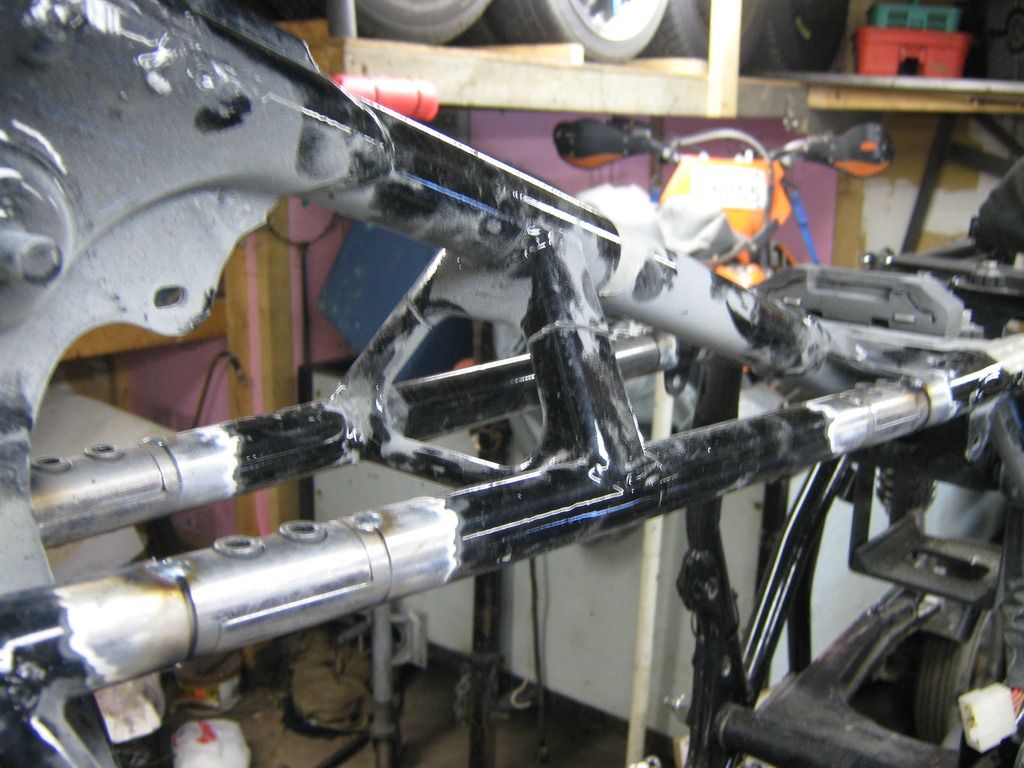


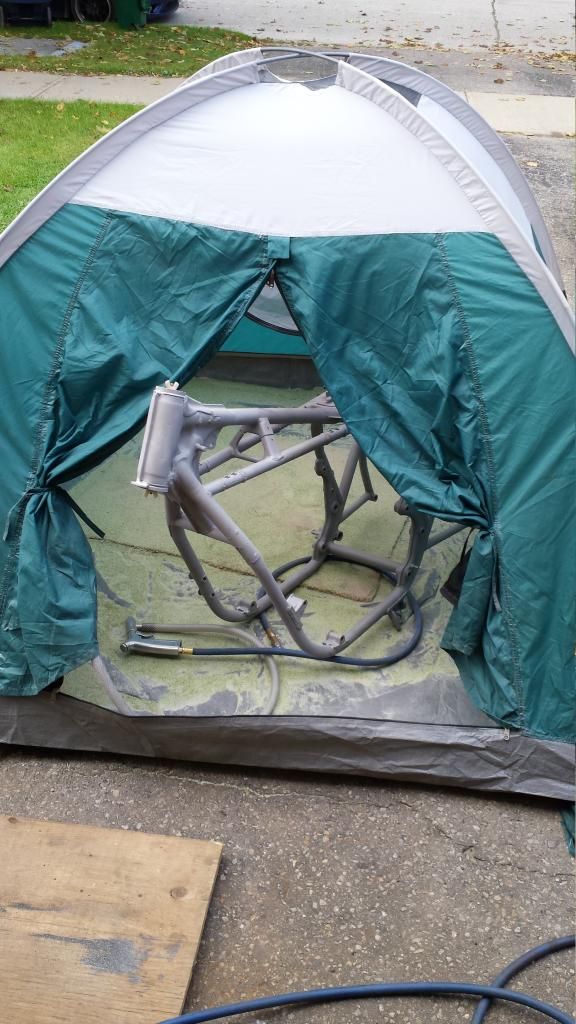
After that came sandblasting, small stuff went into the box, the frame i sent out but after it came back needed a few touch ups so i pitched my little tent to contain and went to work



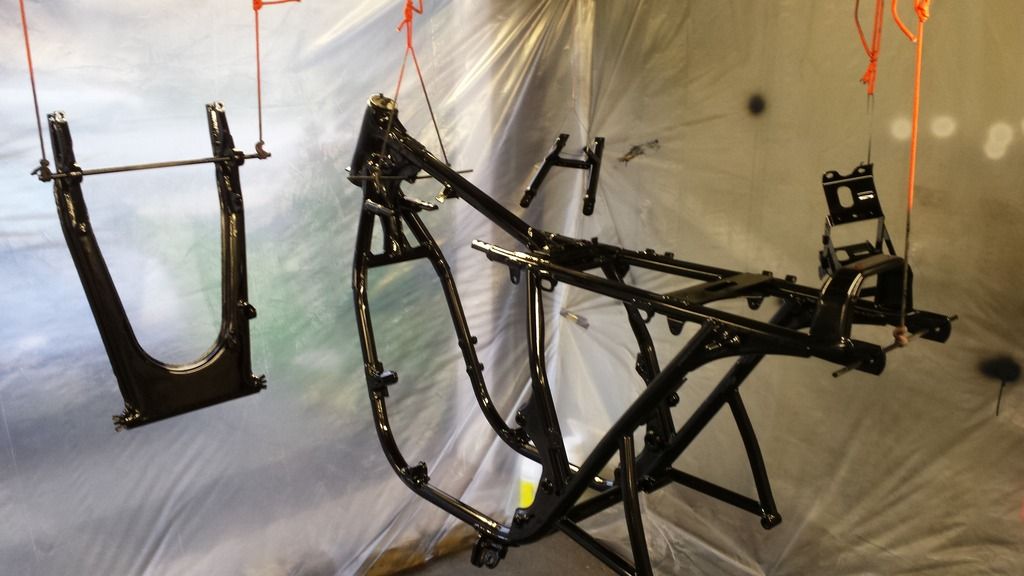
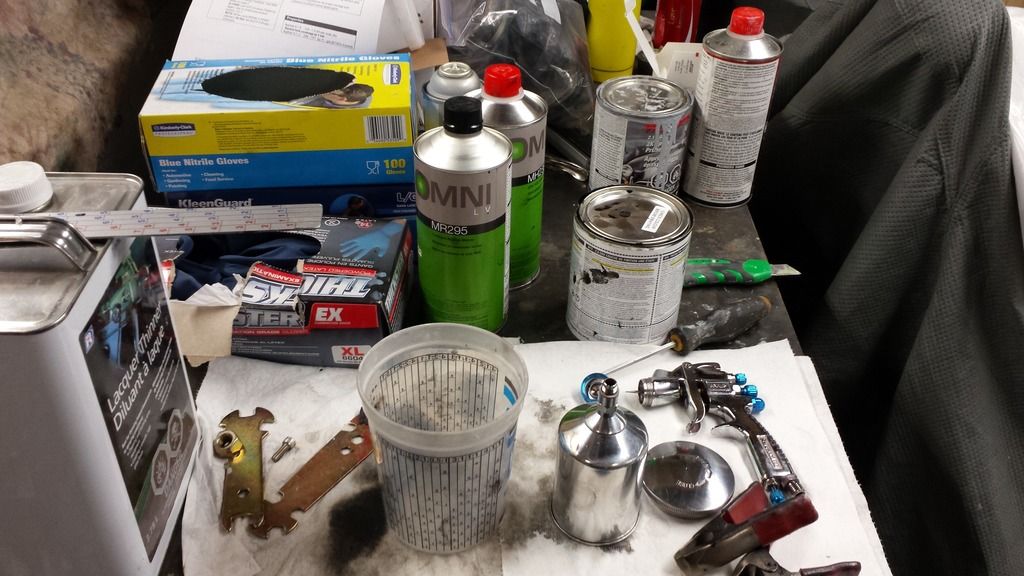
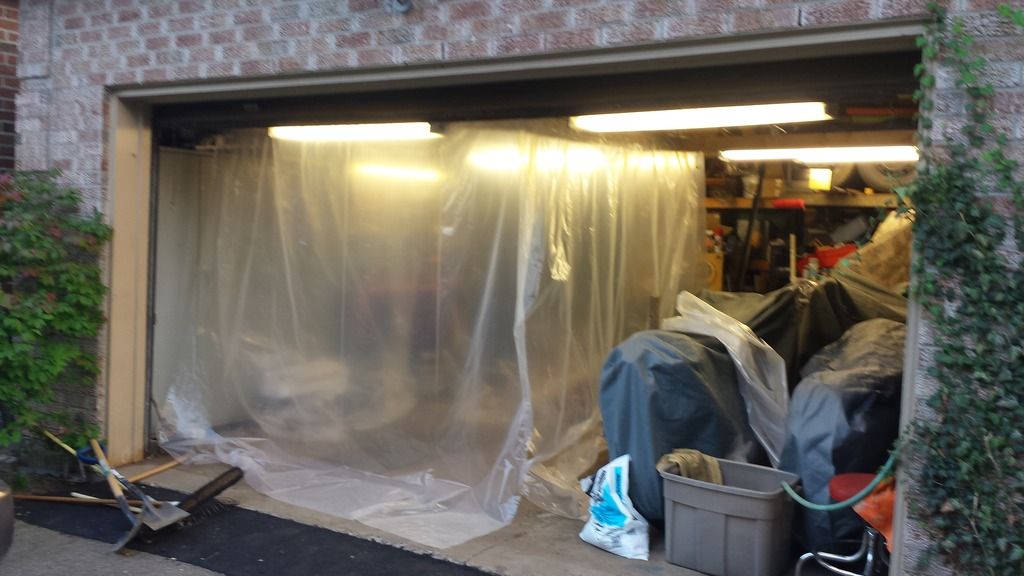
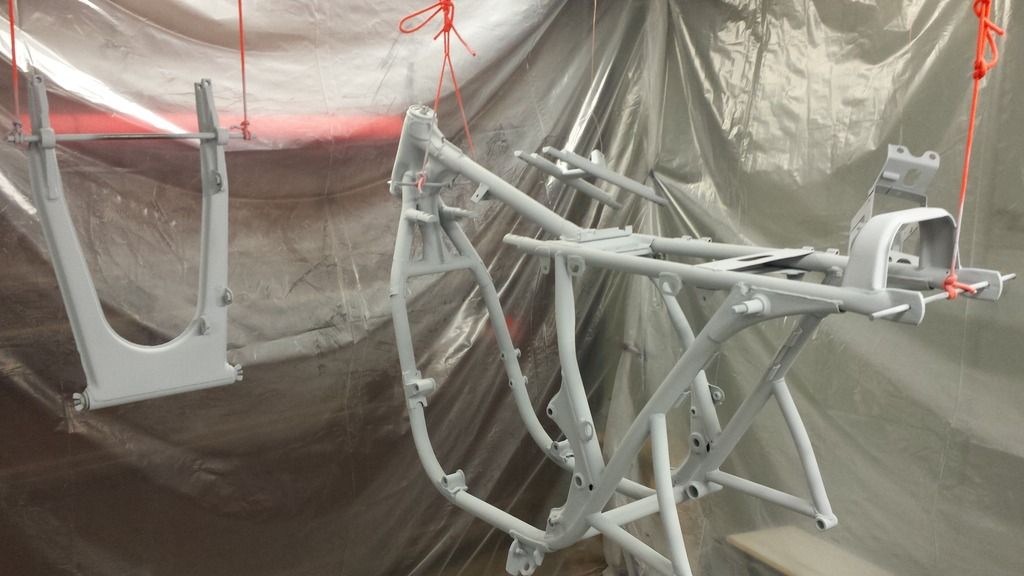
Next came paint, i made a both by draping plastic over the lights in the garage


Pretty soon i had things in 2k epoxy base.


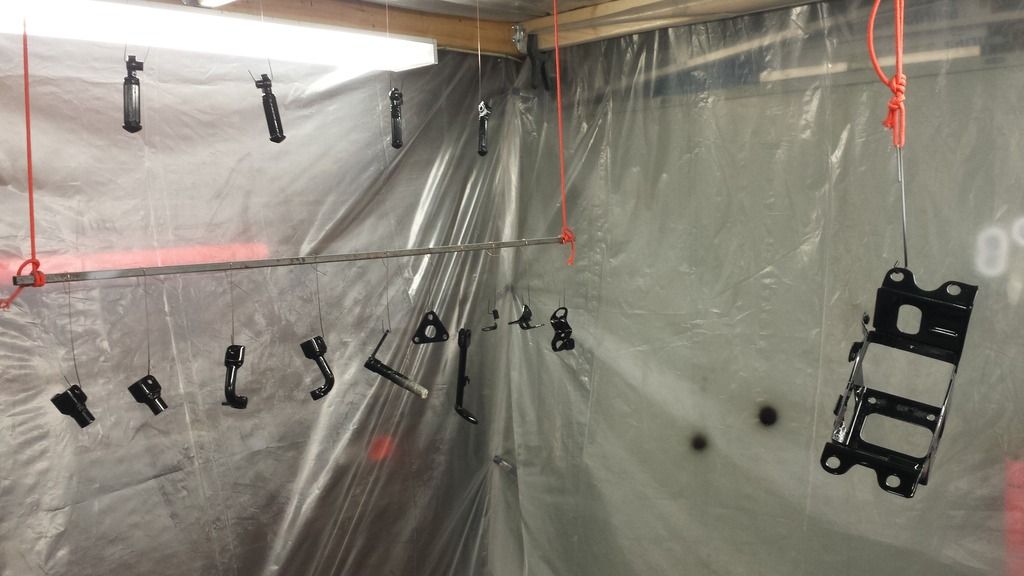
Then came the black 2k single stage bits and frame paint


After came Blue but it was getting cold fast and i really had to hurry and finish and neglected my photo journal. but it will leave a nice surprise to come...


« Last Edit: April 27, 2015, 12:40:23 AM by Garage_guy_chris »
1971 Cb450 Cafe  (on the road)
1974 Cb750 Restomod (on the road)

Offline Tews19

  • I am no
  • Really Old Timer ...
  • *******
  • Posts: 6,465
Re: Garage_guy_Chris's 74 CB750 "K"onfused.
« Reply #5 on: April 27, 2015, 06:05:38 AM »
Subscribed! Looks good.
1969 Honda CB750... Basket case
1970 Honda CB750 survivor.

Offline Garage_guy_chris

  • Hot Shot
  • ***
  • Posts: 730
Re: Garage_guy_Chris's 74 CB750 "K"onfused.
« Reply #6 on: November 10, 2015, 05:13:21 PM »
Well its been a while and i should finish my build thread. it may jump around a bit as i was working on a bunch of stuff at the same time.

So Next on the list as the frame and periphials were coming together. is an engine.  Over the winter i found a nice built head on ebay the price was right and it was gonna save me building one so i pulled the trigger. it turned out to be a nice bit of kit and equipped with some good parts.


Only problem was its ports were still stock so the natural thing to do is to do some porting

I have a fairly nice head that was all rebuilt with stainless manley valves and mystery performance springs and retainers. Additionally Im planning on running a Kenny Harmon D grind on a Ebay Cruzin image 836cc. Problem was the ports were untouched and stock from the factory. I wanted to let Mike do his porting magic but i just cant swing the $$$ right now plus I have always wanted to try doing it myself. anyways i took my time and time it took (about 15 hours total) but here's what was done and some photos,

Basically done as per hondaman's book i wasnt looking to make any drastic changes just clean things up and make it like the best 69 head that came out of the factory.
-removed casting marks and mismatching between molding inserts,
-blended the spigots to the ports
-rounded out the bowls
-blended the ports to the valve seats (virtually no mat'l removed from seats)
-did a little work with burr's, then 80grit cartridge rolls then 120 grit cartridge rolls

this is what i ended up with, I would love to hear any input on it as its my first porting work.

Intake


Exhaust


1971 Cb450 Cafe  (on the road)
1974 Cb750 Restomod (on the road)

Offline Garage_guy_chris

  • Hot Shot
  • ***
  • Posts: 730
Re: Garage_guy_Chris's 74 CB750 "K"onfused.
« Reply #7 on: November 10, 2015, 05:21:50 PM »
After spending some time on making the ports breathe the next thing to do was to de-shround and balance the chambers

Hey guys. Im at the point where i need to finish the head. One of the last things i have to do is to adjust the combustion chambers to match the new 65mm bore by adding a quench band. Hondamans book and other threads on the forum has this procedure pretty clearly illustrated my question is this:

The edge of the intake valve seats are more or less even with the heads surface so do i cut into them to get the quench band or work around the radius of them in the effective area?
The exhaust valve seats are recessed enough i can get the quench band in there without effecting the seats.

I used some dry erase markers to color things so different parts can be easily identified


Here is the layout for the quench band i just used sharpie as i ran out of blueing layout ink flipped the newly bored cylinders onto the head and scribed around the bore. Now i know where the taper needs to start into the combustion chamber


There was some debate over how to deal with the edges of the chambers but it got sorted and i continued

Pewe: thats a sweet looking head, lacking all shrouding, just a dome or Hemi'd head if i know what Im talking about. Your Intake valve seats look sunk deeper into the head aswell

TurboGuzzi: Thanks for the explanation and photos that clears a lot up for me, BTW nice yamaha! I bet a 250/450 supermoto would be so much fun.

Ok this is all gold and incredibly helpful I can't explain how much I appreciate all the help. I'm getting a better understanding of whats going on and what needs to be done. I started by just referencing hondaman's book, I hope he doesn't mind the photo.


After some work and test fitting I ended up at a great spot

Well im finally back at it and building the engine. The pistons ended up pretty much even or slightly over the deck height.  I did the solder test as suggested and ended up with 0.048" - 0.050" with it torqued to 8.0 ft/lbs so it will shrink a few more thou with full torque. ~ 0.043"-0.045" clearance in the quench band. Based on reading this appears to be in a pretty good range.

 I think im just gonna clean up the edge radius and deshroud the chambers, check and match CC's and be done with it.

After formulating the final game plan I got to the work, it took alot of work and concentration but i got there with it

Ok so i got a huge amount done today.

started by highlighting areas that needed attention


Second thing I did was use a small file to round over the sharp edge of the combustion chamber leaving as much quench area as possible.


While working i found more area's that needed attention


After cleaning things up with the dremel and a 1/4" sanding drum


After doing a preliminary on all 4 chambers i CC'd them and found 22.0cc, 22.1cc, 22.5cc, 22.0cc so i did some additional work and got them to 22.3cc - 22.5cc 


after making the adjustments i spent some time doing final cleanups and finishing


Oh and heres the ports i did about a month ago. I didn't go too extreme i just worked till i blended the molding lines out and cleaned up the area's suggested in hondaman's book and on the site.


« Last Edit: November 10, 2015, 05:23:51 PM by Garage_guy_chris »
1971 Cb450 Cafe  (on the road)
1974 Cb750 Restomod (on the road)

Offline Garage_guy_chris

  • Hot Shot
  • ***
  • Posts: 730
Re: Garage_guy_Chris's 74 CB750 "K"onfused.
« Reply #8 on: November 10, 2015, 05:29:11 PM »
Next was to spend some time on the crankshaft and get it ready for a nice new engine. The problem with 40 year old cranks are 40 years of crud in the oil passages

Ok so i took the advice of My Engine Builder and Fun Jimmy and decided to try a cleaning from the journal oil holes. I went through 1.5 cans of brake clean and had it in the parts washer with the pump stream going into the oil holes after a few hours of this there was still chunks of garbage coming out and the fluid was coming out near black, So obviously there was still garbage in there. 

Now after finished and blocked off again with 1/4"-28 x 1/4" set screws my only concern is should this crank be sent to have its balance checked? and possibly rebalanced?

After thinking about it and going over the ball removal in my head for a couple days i decided to go for it and do it properly.

**** This is a real tricky fiddly thing to do, I messed up one worn scoured crank trying this procedure before careful contemplation. The balls are very hard to get to spin, they tend to just get pushed into the oil hole and get wedged which renders them unrecoverable. This happened on the junk crank 3 times and this good one once!!! Luckily on the good  crank the ball did not wedge itself and just got pushed. The fix was I was able to push a little copper telephone wire past the ball and through the sludge and after softening the sludge with brake clean and poking through it a few times. i was able to cover 3 of the journal oiling holes and apply compressed air through the 4th. thus launching the ball and the sludge 20ft across my basement to sploop on the white wall in the finished room.  ****

1. See round ball


2. Grind ball flush with crank


3. Pick an axis. Position punch and turn ball in hole about 45 deg


4. Grind new flat


5. Position punch and turn on same axis again
6. Grind 3rd flat


7.Now position punch to turn 90 deg to the grinding axis


8. Ball falls out

Here is all the garbage that came out after the cleaning through the oiling holes


After the tricky part of getting them out, I drilled the oil holes up to a #3 drill about 3/8" deep. Tapped to 1/4-28 and used 1/4-28 x 1/4 long grub screws. The screws are held in by running into the tapered starter portion of the threads and red loctite

If anyone wants to see photos describing the drilling and tapping I can take a few more.
1971 Cb450 Cafe  (on the road)
1974 Cb750 Restomod (on the road)

Offline Garage_guy_chris

  • Hot Shot
  • ***
  • Posts: 730
Re: Garage_guy_Chris's 74 CB750 "K"onfused.
« Reply #9 on: November 10, 2015, 07:12:38 PM »
After some assembly which i dont have very many picutures of


I got to putting the head on and checking clearances by way of degreeing in my cam


Well today I got the top end assembled and degree'd in the cam i got the specs within 2deg of opening and closing angles  everything went great in that regard.

The problem came  with the valve to piston clearance check.

the first time I put the plasticine on the number 1 piston and opened the valve into it while i was screwing with the degreeing, at first the cam was off almost 10 degrees the result of this was the intake valve lightly kissing the piston with no clearance, and the exhaust gave me about 0.030" clearance

the second time i put the plasticine on the number 2 piston and left the rockers out while i degree'd the cam with the number 1 cylinder / valves. Once it was degree'd in within about 2 deg i put the rockers into the towers for cyl 2 then adjusted the valve lash to 0.005" and rotated it through a few times. Upon dis-assembly I measured my clearances again and got 0.047" on the intake and 0.035" on the exhaust.

My research indicates 0.065" intake and 0.080" exhaust are about as tight as you would want to run.

I also measured my deck height and my pistons are coming higher then the deck by 0.011"

I already have a "thick" head gasket measuring at 0.057"

Im not exactly sure how to proceed here. I came up with 3 ideas:
1. make it taller with either 2 base gaskets or a base gasket > spacer > 2nd base gasket to add like 0.040" of space.
2. Get valve reliefs in pistons cut 0.040" - 0.050" deeper
3. Try milder / stock cam with less duration and lift and i should gain sufficient piston to valve clearance.


Well i decided to try option 3: Try milder / stock cam with less duration and lift and i should gain sufficient piston to valve clearance.

i assembled the engine with an F2 cam , degree'd it using 0.040" lift  observed the following within 2 deg with a non-adjustable sprocket.

intake opens 5 BTDC
intake closes 40 ABDC
exhaust opens 40 BBDC
exhaust closes 5 ATDC

After i checked the plasticine's thickness and found 0.085"- 0.090" which is well within safe limits, so i think in the interest of saving money and getting this project done im gonna go ahead and run the F2 cam and maybe down the road build something beefier like a high compression wiseco 836 or maybe a 915
1971 Cb450 Cafe  (on the road)
1974 Cb750 Restomod (on the road)

Offline Garage_guy_chris

  • Hot Shot
  • ***
  • Posts: 730
Re: Garage_guy_Chris's 74 CB750 "K"onfused.
« Reply #10 on: November 10, 2015, 07:26:17 PM »
All along the last month or two i have been splitting my time doing the outside work on the frame on nice days and inside engine work on yucky days.  Thus far i have managed to get the frame ready for a power plant


Finally the day came... time to put the engine in the frame, thanks to the forum i build the C hook to take it out so it was an easy task made easier with a frame kit.


1971 Cb450 Cafe  (on the road)
1974 Cb750 Restomod (on the road)

Offline Garage_guy_chris

  • Hot Shot
  • ***
  • Posts: 730
Re: Garage_guy_Chris's 74 CB750 "K"onfused.
« Reply #11 on: November 10, 2015, 07:40:11 PM »
Next on the to do list was to get the electrical up and running. the problem was there were so many upgrades i wanted to make it didnt make sense to use a stock harness anymore. So I decided to do what i did on a previous build and use CBR600F4i control switches and a very modified harness. When you do this alot of the logic and functionality stays with the harness and switches its just a matter of making things fit and work with the bike your fitting it too. Again I have been really lazy with photos but i will post what i have.


Next was to finish up the paint on the body work. After all my frame paint last season i managed to get the base coat and clear down on the body work but barely i got shut down with cold weather and didnt get a chance to finish. so here is the final stages

I started with a tank that had been based and cleared. I colour sanded it with 1000 and 2000 grit to knock down the orange peel then i laid down the KO gold stripes after carefully laying it all out


After letting the sticker setup for the recommended time i got back into paint mode and re-cleared the bodywork. In the end it came out looking fantastic

Cookin up a batch of Heisenberg's finest.


and it looks like blue glass....


the paint looks much darker than it really is.  the paint is mazda sky blue mica  PPG code: 41B sky blue pearl


1971 Cb450 Cafe  (on the road)
1974 Cb750 Restomod (on the road)

Offline Garage_guy_chris

  • Hot Shot
  • ***
  • Posts: 730
Re: Garage_guy_Chris's 74 CB750 "K"onfused.
« Reply #12 on: November 10, 2015, 07:44:20 PM »
Next we had assembly again i was lazy with photos. Its already late august and I just wanted it done so i was working at a crazy pace to get it ready


1971 Cb450 Cafe  (on the road)
1974 Cb750 Restomod (on the road)

Offline Garage_guy_chris

  • Hot Shot
  • ***
  • Posts: 730
Re: Garage_guy_Chris's 74 CB750 "K"onfused.
« Reply #13 on: November 10, 2015, 08:13:24 PM »
reserved
1971 Cb450 Cafe  (on the road)
1974 Cb750 Restomod (on the road)

Offline Garage_guy_chris

  • Hot Shot
  • ***
  • Posts: 730
Re: Garage_guy_Chris's 74 CB750 "K"onfused.
« Reply #14 on: November 10, 2015, 08:13:46 PM »
reserved
1971 Cb450 Cafe  (on the road)
1974 Cb750 Restomod (on the road)

Offline Garage_guy_chris

  • Hot Shot
  • ***
  • Posts: 730
Re: Garage_guy_Chris's 74 CB750 "K"onfused.
« Reply #15 on: November 10, 2015, 08:14:01 PM »
reserved
1971 Cb450 Cafe  (on the road)
1974 Cb750 Restomod (on the road)