Author Topic: cb750 engine repaint & polish  (Read 4731 times)

0 Members and 3 Guests are viewing this topic.

Offline luceja

  • Enthusiast
  • **
  • Posts: 169
cb750 engine repaint & polish
« on: October 01, 2014, 09:41:31 am »
Hey all,
I was going through photos of projects I worked on and wanted to put up a mini-thread with some pictures of a CB750 motor repaint and polish, and write up some lessons learned from it, plus put up some nice photos of a sohc4.

A buddy who runs a shop had a CB750 build for a customer, and being a friend of the folks building the bike, I offered to do some pro-bono work and do the aesthetic cleanup of the motor. Anyhow, before anyone chimes in with their opinion of the bike itself, remember, it's a customer build; the people who built the bike did what was requested. (It’s not my bike, so I’m not putting it up to get feedback, just putting project information on the forum!)

The build itself was going for extremely clean, so the dingy paint on the motor would have stood out as incomplete looking. From what I can tell, the existing paint was a rattlecan job, evidenced by black paint over excessive orange gasket sealant, etc.


The motor itself was tight and leak free, so a teardown just for the sake of painting would have been overkill. Personally, I'm a huge advocate of breaking a motor down and painting everything seperate, without hardware on it, and baking everything before assembly, but again, being a build for a customer, that's a lot of shop hours on the books just to avoid having the screws and gaskets painted.

However, I found out that doing a good job of stripping paint from an assembled motor probably takes longer than just breaking the motor down and putting everything in the blasting cabinet. The case of q tips, paper towels, acetone and stripper required to clean the motor was awful. I can say that I will never paint a motor this way again. Buy a gasket kit and break the motor down; you'll have a chance to check the internals anyway. Painting a motor whole is miserable.


As everyone always says, painting is all about prep, and I'm a bit of a perfectionist, but a poorly painted motor is an awful shame.

Masking for paint:


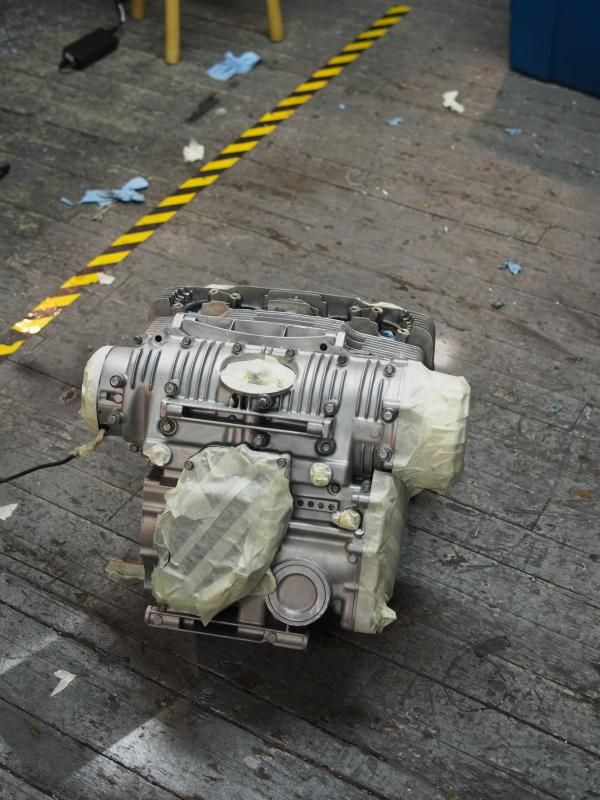
Another major problem with painting a whole motor is doing a good, even job without drips. This is MUCH easier when working with each component (Case halves, cylinders, head). Trying to get into the bottom of the back of the cylinders, or in the space between the lip of the starter cavity and the cylinders, is a PITA.

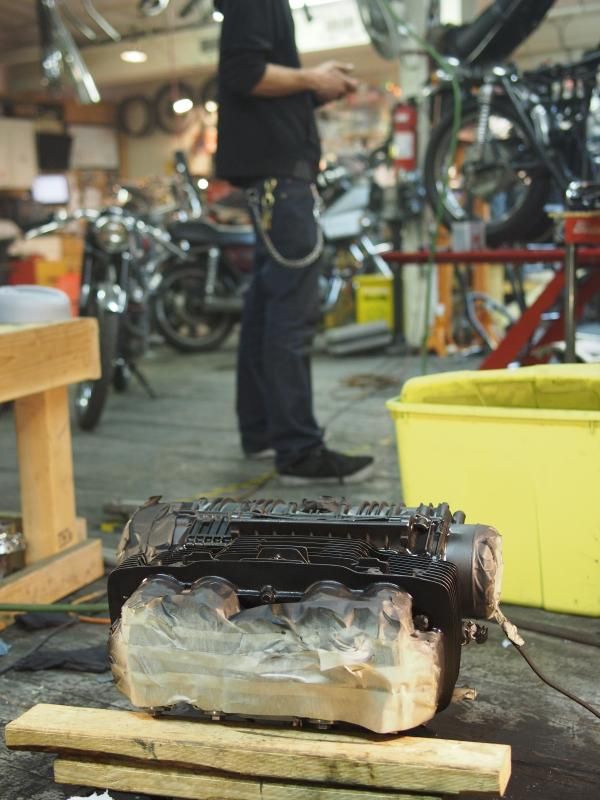
I used PJ1 satin black. I've found some inconsistency between the sheen of various cans, so you'll want to buy a few cans at a time and not mix projects. I've found it to be remarkably gasoline resistant on my own CB550 - plenty of gas has hit the case under the carbs, and the paint is still A-OK.

Anyhow, laying down coats, as instructed on the can:


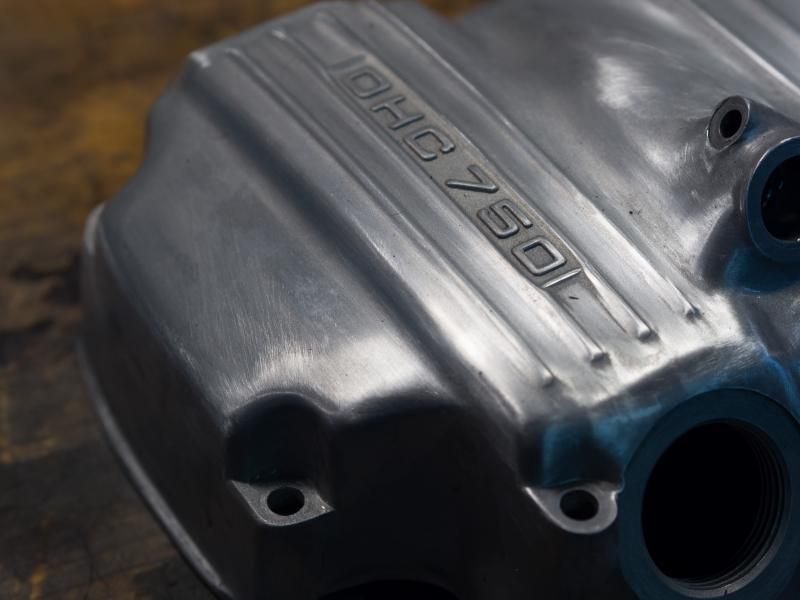
When I stripped the paint off the valve cover, it seems like it was sandblasted. Do 750 valve covers normally look like this without paint?


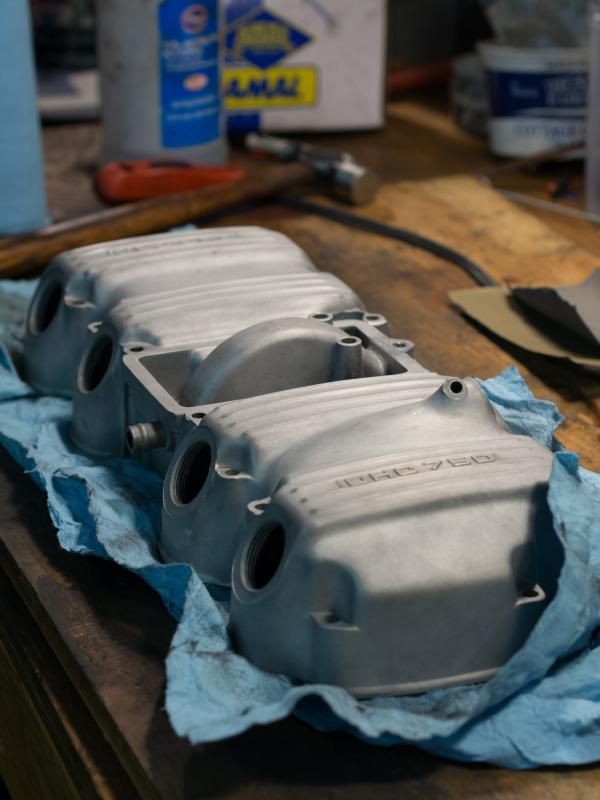
That didn't make a great basis for polishing, so there was quite a bit of scotchbrite and steel wool to bring the surface to being a good basis for the polishing wheel:


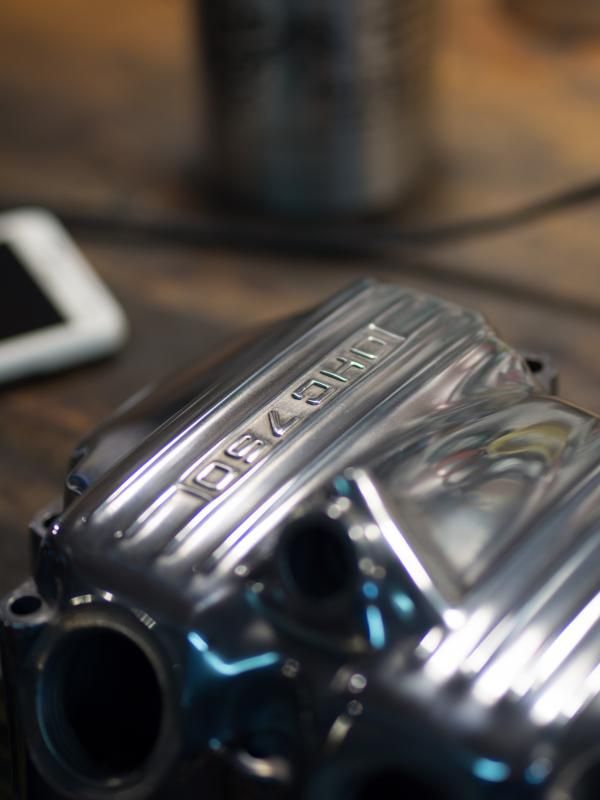
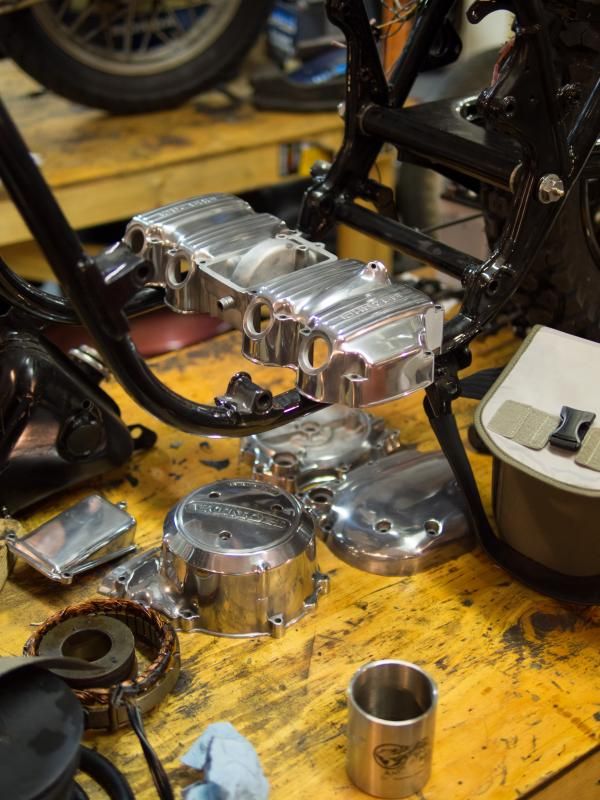
Polishing was done on a bench grinder with a woven wheel with more aggressive compound followed with a flap wheel with a lighter finishing compound:

After polishing:


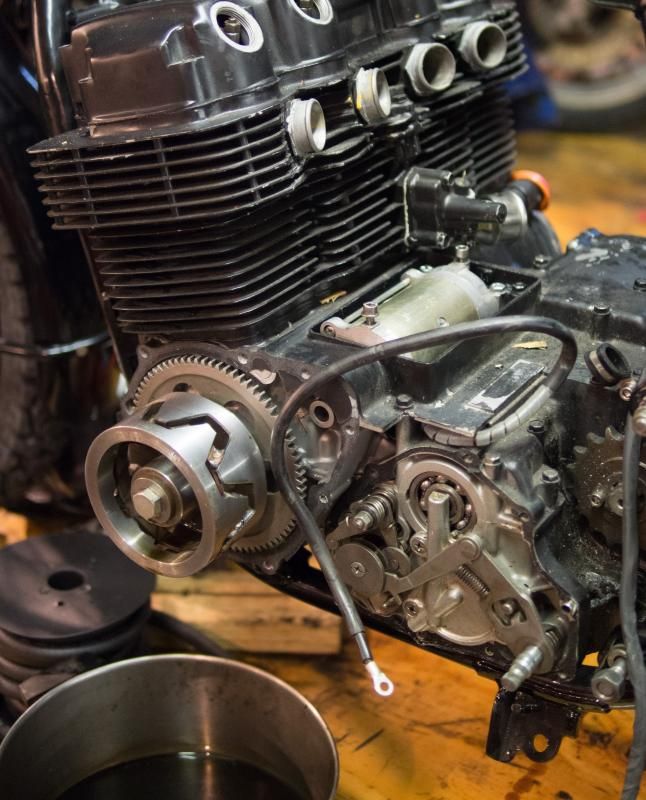
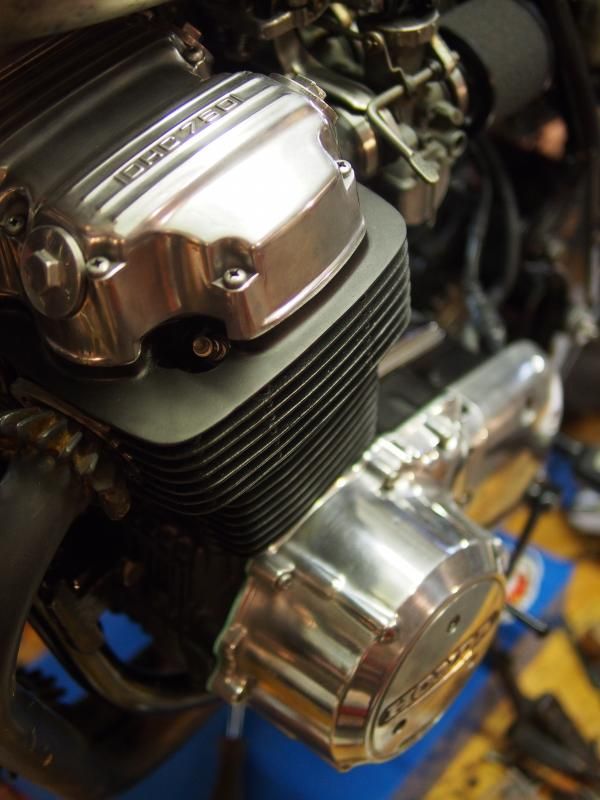
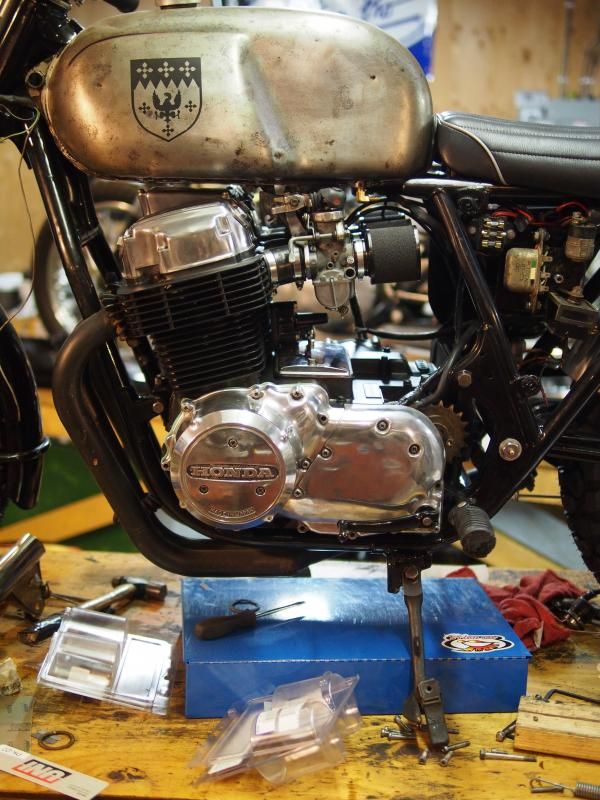
Motor back in the frame:


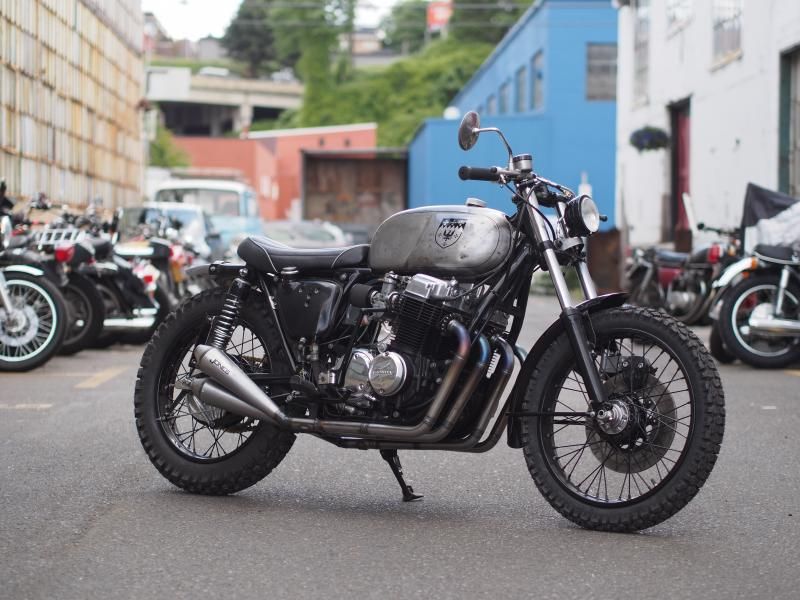
The Jones 4-4 exhaust and sounded unbelievably, absurdly, beautifully deep. Will is an amazing fabricator; he's a figure in our CB160 road race community and did my 160 race bike exhaust too. His welds are no-filler tig welds, just so very, very clean and lovely.


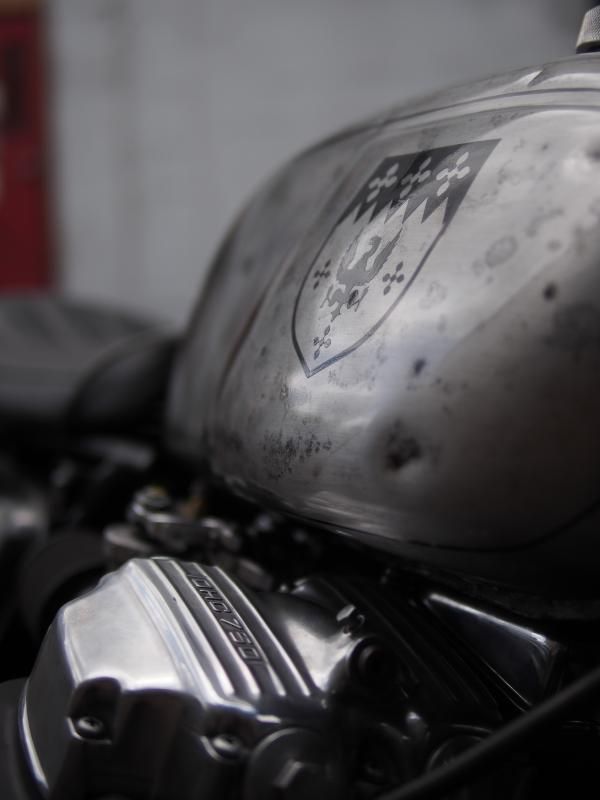
The tank was provided by the customer with his family's crest, and the frame under the tank was modified to accommodate the narrow channel.   I think the seat was an old dirtbike seat? I can’t remember if it was a custom cover.


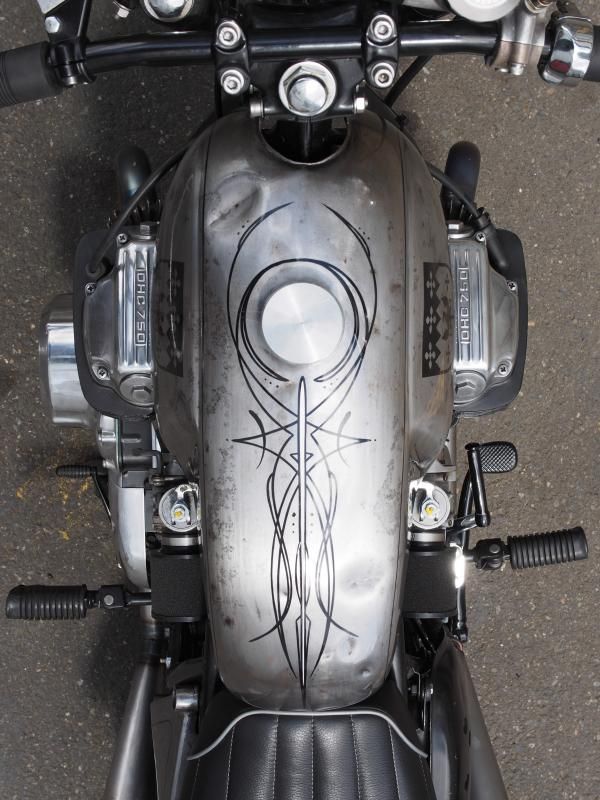
Little metal details and pinstriping by Wolf:


While I’m sure the range wasn’t very big, I did like how the motor was huge coming out from the tank. I suppose if you’re riding it, you’d be quite aware of that big 750:


Anyhow, that’s that. Not a very informative thread, I know, but something to add to the forum that I’ve learned so much from and gotten such inspiration from.

For anyone curious, the build itself was done by Anthony at Bridge City Cycles in Portland, the exhaust was done by Will at Jones Race & Development in Atlanta, lots of the metal fabrication details and the pinstriping was done by Jeff Wolf who is down in Ventura, California, and I just did the motor repaint and polish as a favor, because I'm a glutton for punishment. Takes all kinds, no?
« Last Edit: October 01, 2014, 04:28:59 pm by luceja »
'75 cb400f, '77 cb550f , CB160 road racer, '88 Hawk GT track bike, FZR400 race bike, and a bunch of old hondas in boxes.

Offline albertaboy

  • No way I'm a
  • Hot Shot
  • ***
  • Posts: 396
Re: cb750 engine repaint & polish
« Reply #1 on: October 01, 2014, 01:46:57 pm »
Hey
Good post. I appreciate the effort you've put into it.  Having done this for a customer, he's the one to make happy in the end.   Btw-I like how the narrow tank makes the engine pop. Cheers.
1975 CB750K
No where to go and all day to get there.
My build thread: http://forums.sohc4.net/index.php?topic=131424.0

Offline luceja

  • Enthusiast
  • **
  • Posts: 169
Re: cb750 engine repaint & polish
« Reply #2 on: October 01, 2014, 04:28:39 pm »
Hey
Good post. I appreciate the effort you've put into it.  Having done this for a customer, he's the one to make happy in the end.   Btw-I like how the narrow tank makes the engine pop. Cheers.

Thanks!
'75 cb400f, '77 cb550f , CB160 road racer, '88 Hawk GT track bike, FZR400 race bike, and a bunch of old hondas in boxes.

Offline timbo750

  • Expert
  • ****
  • Posts: 759
Re: cb750 engine repaint & polish
« Reply #3 on: October 02, 2014, 04:55:12 am »
I like the info and the bike. I am going to be painting an engine soon and was considering painting it complete but I really didn't want to split the cases just for painting. From your experience if I remove the head and cylinders will that be enough to make life easier for the painting?

Offline luceja

  • Enthusiast
  • **
  • Posts: 169
Re: cb750 engine repaint & polish
« Reply #4 on: October 02, 2014, 06:31:46 am »
I like the info and the bike. I am going to be painting an engine soon and was considering painting it complete but I really didn't want to split the cases just for painting. From your experience if I remove the head and cylinders will that be enough to make life easier for the painting?

Thanks!

I'd say that removing the top end will definitely make it easier to do a good job, as long as you're comfortable reassembling a top end (or want the learning experience if you haven't done it before), plus It's a good opportunity to measure the pistons/cylinders/rings and have a look at the cam guides. Highest risk would be breaking a ring putting the cylinders on or getting the cam completely wrong - I've seen that happen to other people once or twice. The other issue is that depending on the motor (like a 500 or 550), it can be hard to avoid having an oil leak at the cylinder head and base depending on the quality of the gasket kit you get. I've had a lot of frustration with that. If it's a bike that runs oil to the head through the cylinders, and leaks absolutely no oil now, then cross thy fingers and leave it alone.

For me, I think it's usually also worth opening the bottom end. Assembling the top end is the hard and time consuming part: you're getting the cam out/in, aligning the cam (which is a huge ordeal if you have a slotted sprocket), and resetting all the valves. Going in to the bottom end, you have the opportunity to replace the cam chain and the oil seals, examine the transmission, crank and rods, and clean out gunk hanging around the bottom, etc. Depending on the motor, bottom end assembly ends up being less of a problem: split it open, clean up the case mating surfaces, do whatever you have to do in the bottom end, clean mating surface again, apply hondabond extremely sparingly, put cases back together. The only complication is usually aligning the shift forks with the transmission, which is usually alot easier than getting the cam and sprocket back under the camchain is on top end assembly.

That being said, I've twice ruined a motor by a mistake on bottom end assembly. (Once got a piece of paper towel in the oil gallery, another time forgot a plate that held the shift fork rod in place. Both ended up being pretty catostrophic). But I still like to break them down on repaints - to me, a painted motor says "I've gone through this one, I'll go through it again when it's all ugly again".
'75 cb400f, '77 cb550f , CB160 road racer, '88 Hawk GT track bike, FZR400 race bike, and a bunch of old hondas in boxes.

Offline luceja

  • Enthusiast
  • **
  • Posts: 169
Re: cb750 engine repaint & polish
« Reply #5 on: October 02, 2014, 06:37:52 am »
Also, a random small tip I forgot to mention is this: when masking, I like to use a very small, fine half round or round file instead of a razor blade to trim the masking. Obviously you have to be careful not to damage the edges with the file, but I think it's much, much easier to do a clean job than trying to trim all those inside curves with a razor.

Also, in case someone hasn't heard this tip yet, always use fresh razors when removing gasket residue, and burnish the edge of the blades. This means adding a small curl to the edge by drawing it against something like a round screwdriver shaft. It only takes a second, but this allows you to push against the aluminum more safely without biting into the metal. I probably go through twenty blades per motor at least.
'75 cb400f, '77 cb550f , CB160 road racer, '88 Hawk GT track bike, FZR400 race bike, and a bunch of old hondas in boxes.

Offline timbo750

  • Expert
  • ****
  • Posts: 759
Re: cb750 engine repaint & polish
« Reply #6 on: October 02, 2014, 12:14:47 pm »
Iuceja
Thanks for all that I think I will split the cases check out everything and get the paint right the first time.