Author Topic: Remember to clean under your balls. Oil gallery cleaning / crank tapping.  (Read 7720 times)

0 Members and 1 Guest are viewing this topic.

Offline MidnightLamp

  • Wrenchy wrenchy wrench!
  • Enthusiast
  • **
  • Posts: 190
So, I don't know if this belongs here, but I figured most people don't do this except maybe you guys.

Anyways, one of the cardinal rules I was taught while engine building was to always check for dirt under your balls and clean them well  ;) . Mainly, it's because i've gotten a lot of basket cases, and got knows what gets into the crevices of crankshafts and the oil galleries of stripped cases and cranks. Considering the F2 crank I'll be using in my build is from such basket case (known history, hardly any use...but has been sitting around), I figured I'd get around to cleaning the crank by removing the balls and tapping it for grub screws.

Now, I've searched a bit on here, and found precisely nothing on the topic, but am familiar with the pressed ball type cranks so I figured it'd be a good chance for anyone searching to find some info. I also decided to try it out on my junker K5 crank, which will be my test bed for my orifice fluting and lightening experiments.

Now onto some pictures (note, viewer discretion IS advised. This was from a RUNNING NOT STORED BIKE. keep that in mind when you see the amount of crap that was in there....):

How to remove the balls...take a coarse dremel bit (I use the green/tan el-cheapo ones that are marked as "medium"), and grind the top of the ball flush with the crank. It helps to use the 1" circular grinding wheels as the control with them is very good. I usually remove all the rods from the crank before grinding the balls off. This is because the crank will sit on two of the rods when you try to remove the balls, and it's easier to work with the crank when it's sitting on on the counter weights. When ready to remove, install a rod on the journal that is closest to the ball, with a used set of bearings and plenty of oil as lubricant. You don't have to do this, but it helps to avoid nicking the journal...just in case. Now just hit the edge of the ball with a nailsetter until you can see the ball start to move. Then I use a flat head screwdriver that is sacrificed for the job to tap the ball almost completely over before removal. End result:
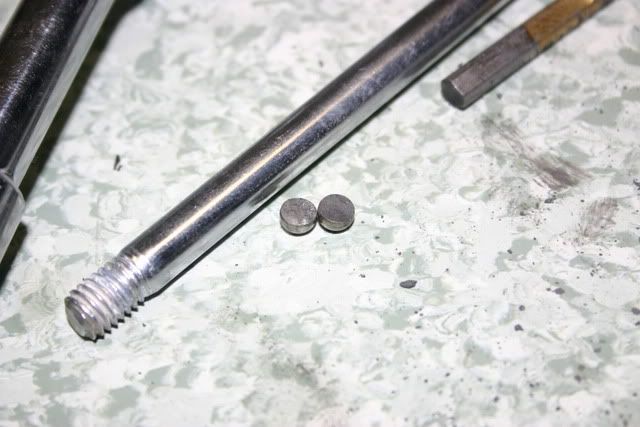

At this point, it should be noted that there is NOT casting/welding covering the oil holes, but is in fact the crap that has accumulated in your crank.
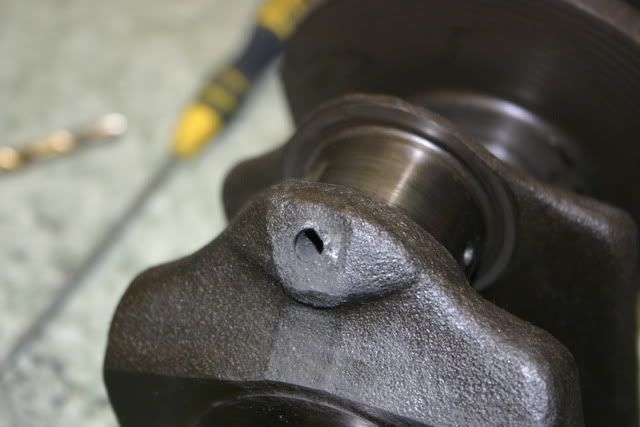

Lookit all that stuff in there!!! Note: The drilled holes connect each rod journal to the nearest main journal diagonally. Cleaning was done using a drill bit first, followed by bore brushes.

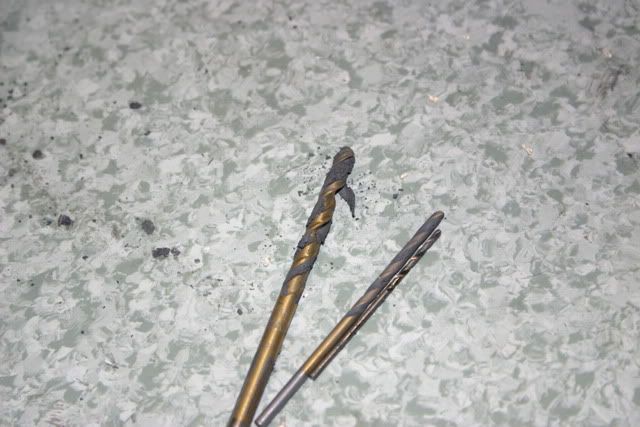

I just got all four out tonight, will be visiting the hardware store for a #3 drill and some 1/4-28 grub screws this week to finish off the job, and will post pics.

Cheers, and hope that helps a bit!

MnL

P.S. Don't try anything in the above mentioned post without thinking first, or without reading on it further. I take no responsibility if you make your crank useless or damage it in any way....
'75 CB750 - Racer
'69 CB350 - Racer
'68 Enfield 350/440(flat top) - Steet
'54 Enfield 350 - Resto
'74 Commando 850 - Restomod
'67 Enfield 750 (TT7) - Resto

Offline MidnightLamp

  • Wrenchy wrenchy wrench!
  • Enthusiast
  • **
  • Posts: 190
Pictures of the tapped holes. Tapped for 1/4"-28 UNF thread, for hardware store oxidized grub screws. Drill used was a 7/32" drill, works well for these threads. Note: These are pictures of two different cranks. Did the K5 crank first as a test, these pics show an F2 crank.


Tapped Holes, sealed. Go slow with the drill when you drill, use some light duty machine oil while drilling, try to follow the direction of the drill pathway. Tighten the grub screw till it bottoms out with the hole, I like it to be flush! Tap the holes carefully, with light oil, going 1/4 - 1/2 turns at a time, and retracting the same amount between each cut.


Tools used: 7/32 drill (tape marked for approximate depth), 1/4-28 tap (tape marked for approximate depth) in a T-handle tap, small drills to push out residue and swarf. Ratchet tap handle used to hand drill through sludge and for swarf removal (can chuck the small drills). If you put the small drills so that just the last 1/8" is in the ratchet tap handle, you can reach through the oilways fully.


Notes:
-Alternator and timing screw must be removed to clean out the #1 and #4 oilways, all holes are straight holes, you'll bottom in a nice convenient location.
-Be bloody careful with your tools or you may nick a journal.
-The sludge is THICK. It felt like clay in both cranks, and gums everything up when removed. Clean it as you go.
-Use a bore brush to clean the galleries thoroughly.
-Good call is to get the crank jetwashed after journals are cleaned.
-Crank is to be balanced when you're done. The removal of sludge actually helps balance the crank, and it weights close to what the grub screw does (per journal). Ask the shop to spin up the crank to quote you on balance (most good shops will do this), to check if balancing is needed as you might be lucky. I went for a full race balance after cleaning.

Cheers!  ;D
« Last Edit: March 02, 2011, 06:29:53 PM by MidnightLamp »
'75 CB750 - Racer
'69 CB350 - Racer
'68 Enfield 350/440(flat top) - Steet
'54 Enfield 350 - Resto
'74 Commando 850 - Restomod
'67 Enfield 750 (TT7) - Resto

Offline MRieck

  • Really Old Timer ...
  • *******
  • Posts: 10,577
  • Big ideas....
Nice job. I'm a big advocate of popping those balls out.
Owner of the "Million Dollar CB"

Offline brandEn

  • Old Timer
  • ******
  • Posts: 3,205
just found this old thread and wanted to bump it...

Offline brandEn

  • Old Timer
  • ******
  • Posts: 3,205
OK I am getting ready to do this. Is this a good method to remove the staked in balls on the crank? If anybody else has a different or better approach I would love to hear it before I start in on mine.

Offline fang

  • Hot Shot
  • ***
  • Posts: 401
    • Food Renegade
This is in my near future also.  Thanks for the pics.
-Fang
Download Nervous Norvus' "The Fang"  HERE.
Tired of eating CRAP!

Offline brandEn

  • Old Timer
  • ******
  • Posts: 3,205
so I ruined my crank trying to remove my balls. haha thats funny! Seriously though I grinded the balls flush with the crank and tried to tap them with a punch to turn them over. All I did was ended up knocking them down inside the oil gallery. I was pissed at myself. I figured it would be a simple task, and it probably is but I did something wrong. Time to search for a new one.

Offline Big Jay

  • Expert
  • ****
  • Posts: 1,252
    • CBRzone
That is usually how you get them out. Grind them past center and they fall out.

Offline MRieck

  • Really Old Timer ...
  • *******
  • Posts: 10,577
  • Big ideas....
That is usually how you get them out. Grind them past center and they fall out.
Use a ball stone
Owner of the "Million Dollar CB"

Offline brandEn

  • Old Timer
  • ******
  • Posts: 3,205
Well when I get another crank I will try the ball stone. I used a pencil grinder and tapered bit but as soon as I knocked the edge of it it went down inside.

Offline Big Jay

  • Expert
  • ****
  • Posts: 1,252
    • CBRzone
Theb residue in the hole from the ball down to the journal is usually as hard as a rock and not going anywhere. On the ones where we replace the balls with screws, we have to drill out the crud as it is so hard.

So the piece of the ball should not have been able to fall down the hole.

Most of the cranks we do we don't bother with doing that as, like I said, that stuff is not going to move on it's own and get into the bearing.  However, some of the cranks we do that go in all out race motors like TQ Midgets, the guys want it done because they will occasionally loose a rod bearing, and they want to be able to take the screws out and flush all the bearing residue out.

Offline KirkBurner

  • Enthusiast
  • **
  • Posts: 139
Re: Remember to clean under your balls. Oil gallery cleaning / crank tapping.
« Reply #11 on: November 29, 2014, 08:45:59 AM »
Im gonna TTT this old post... and kinda ask if this is something that should be done to a crank if thea bearings look like this?

I am a total noob in this area, but I learn fast ;)


Offline bwaller

  • Really Old Timer ...
  • *******
  • Posts: 7,485
Re: Remember to clean under your balls. Oil gallery cleaning / crank tapping.
« Reply #12 on: November 29, 2014, 09:08:29 AM »
What's the journal look like?

Offline KirkBurner

  • Enthusiast
  • **
  • Posts: 139
Re: Remember to clean under your balls. Oil gallery cleaning / crank tapping.
« Reply #13 on: November 29, 2014, 09:13:22 AM »
This is the best picture I have at the moment... workshop is 45 min drive away

Offline kmb69

  • Master
  • *****
  • Posts: 2,041
Re: Remember to clean under your balls. Oil gallery cleaning / crank tapping.
« Reply #14 on: November 29, 2014, 11:20:31 AM »
That crank don't look so good in that pic IMHO.
Much nicer ones available on fleabay for under $100.

Offline MidnightLamp

  • Wrenchy wrenchy wrench!
  • Enthusiast
  • **
  • Posts: 190
Re: Remember to clean under your balls. Oil gallery cleaning / crank tapping.
« Reply #15 on: November 29, 2014, 06:08:04 PM »
Get that thing polished before putting any time into it.  :-\

Hard to get pictures of how worn it is.
'75 CB750 - Racer
'69 CB350 - Racer
'68 Enfield 350/440(flat top) - Steet
'54 Enfield 350 - Resto
'74 Commando 850 - Restomod
'67 Enfield 750 (TT7) - Resto

Offline MRieck

  • Really Old Timer ...
  • *******
  • Posts: 10,577
  • Big ideas....
Re: Remember to clean under your balls. Oil gallery cleaning / crank tapping.
« Reply #16 on: November 29, 2014, 07:23:35 PM »
That crank don't look so good in that pic IMHO.
Much nicer ones available on fleabay for under $100.
What do you know???? Seriously...that is into the crank material (hard iron) to much.
Owner of the "Million Dollar CB"