Author Topic: 1972 CB500 Top-end Rebuild  (Read 4522 times)

0 Members and 1 Guest are viewing this topic.

Offline sammermpc

  • Enthusiast
  • **
  • Posts: 238
1972 CB500 Top-end Rebuild
« on: March 03, 2015, 07:14:01 PM »
Since I picked up my '72 CB500 a couple of years ago, there's been a bit of a leak on the #1 cylinder. Towards the end of the summer riding season, if I let it sit for too long between riding, the spark would foul-up. I'm new, but I figured they were connected. My winter to-do list has been to get it fixed. I bought the Versah-155 gasket kit and a new (old) Craftsman V-Series ratchet, and got cracking.


I know that you can do the head on the frame, but I pulled the motor anyhow, just to see if I could. Wasn't a problem, solo. Thanks so much for the advice here! Someone described putting a 2x12 under the motor (after removing the oil pan) and jacking it up and out with a bottle jack. Thanks for the tip! Worked great!
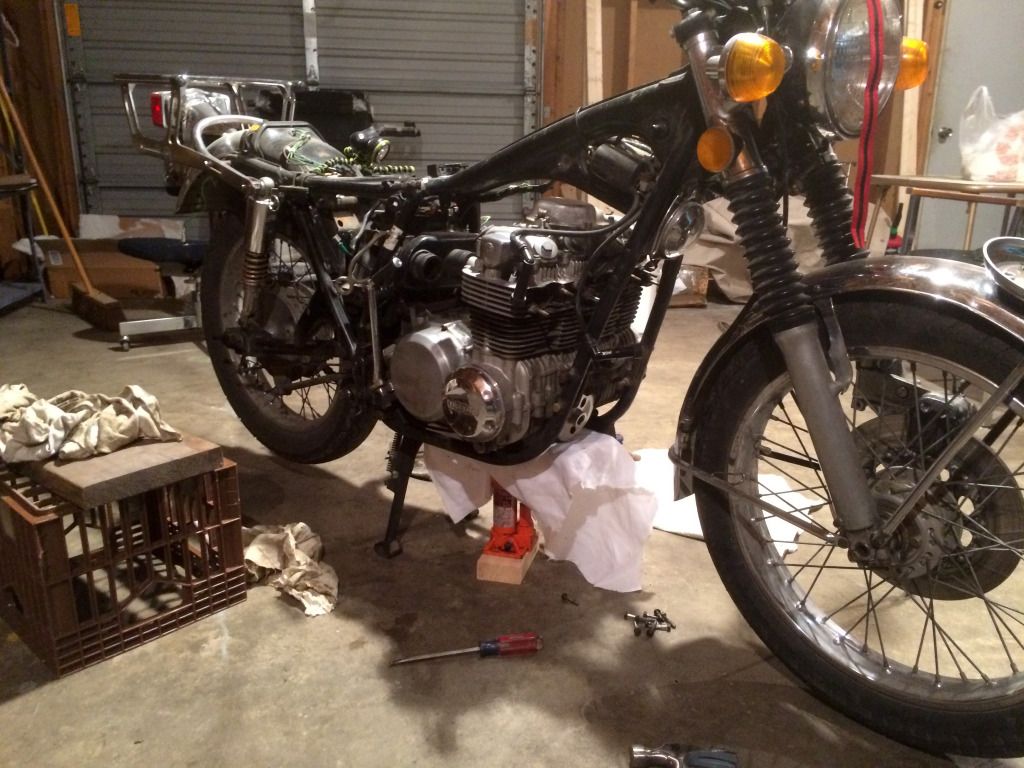
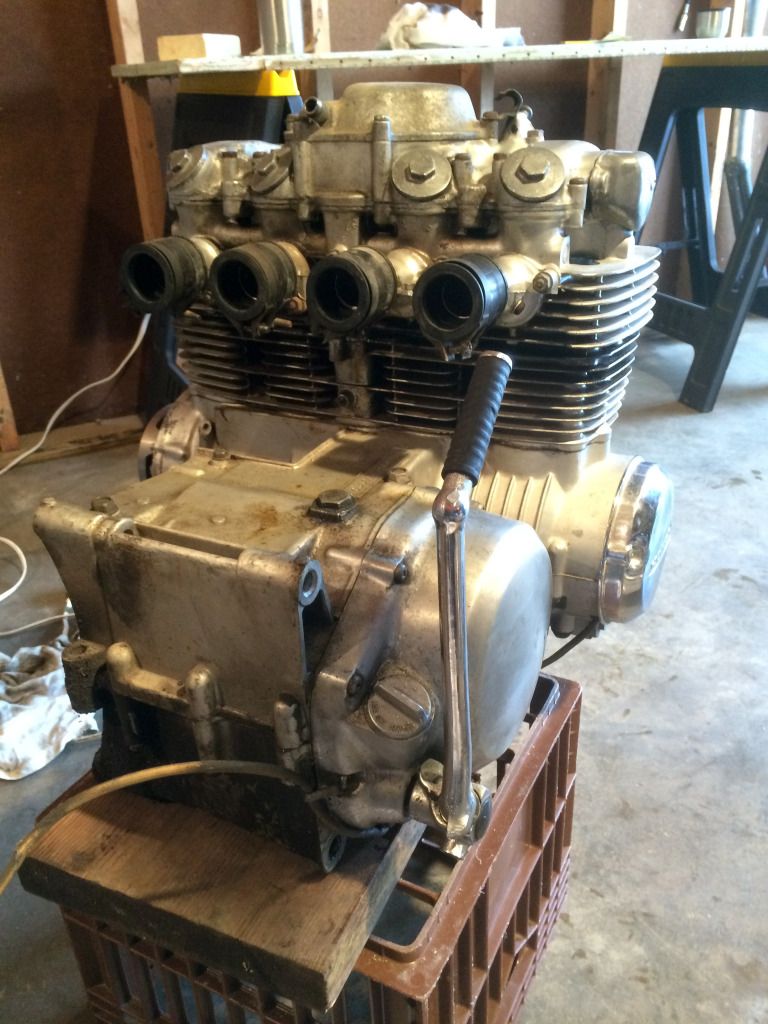

Got it off and settled — had a real tough time with some of the valve cover screws. Some of them seemed almost bonded on—got to use my new dremel cutting slots, so that's a plus!  ;D  Yeah, part of the fun on this go around has been building out my tool collection. Figured since the bug hasn't gone away yet, it's probably here to stay. Looking at torque wrenches now (anything but HF...).
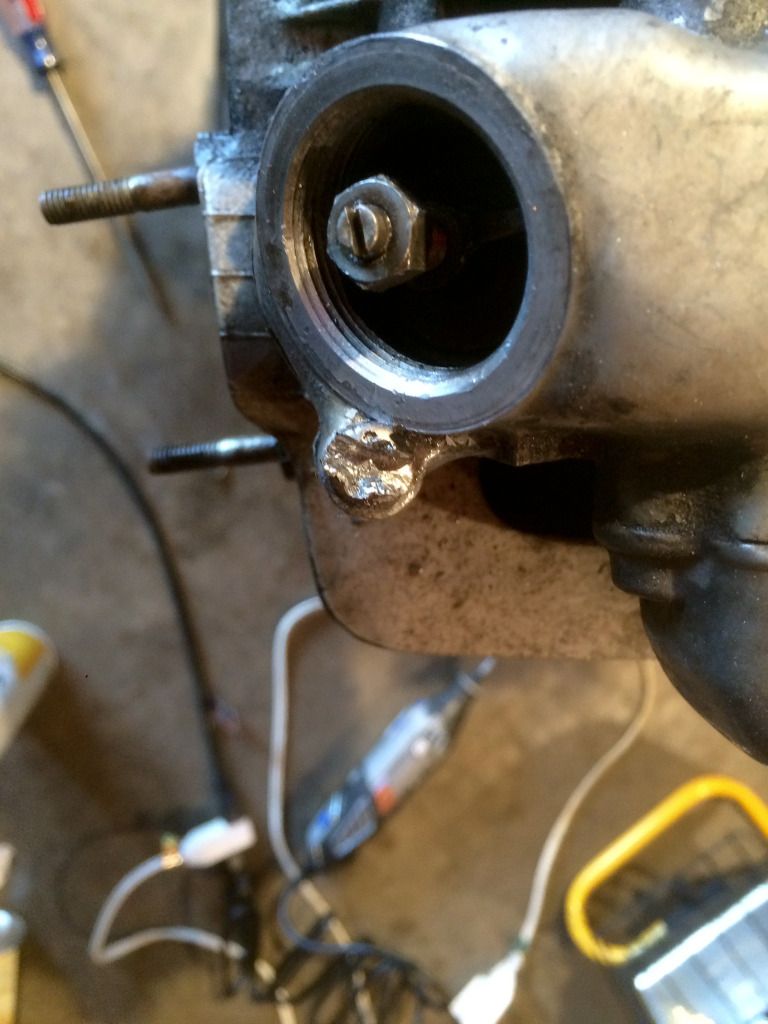


After that, it was all easy! Valve cover came right off — and so did the head. Honestly, I've been embarrassed how long it's taken me to even get the parts straight. You've got the breather cover on the very top, than the head, than the cylinders. To anyone reading this—the jugs are the cylinders, so when folks are talking about jugs, that's what they mean.  Haha. All of the advice is so good, here, but sometimes I don't even know the terms. Learning quick though  :D.


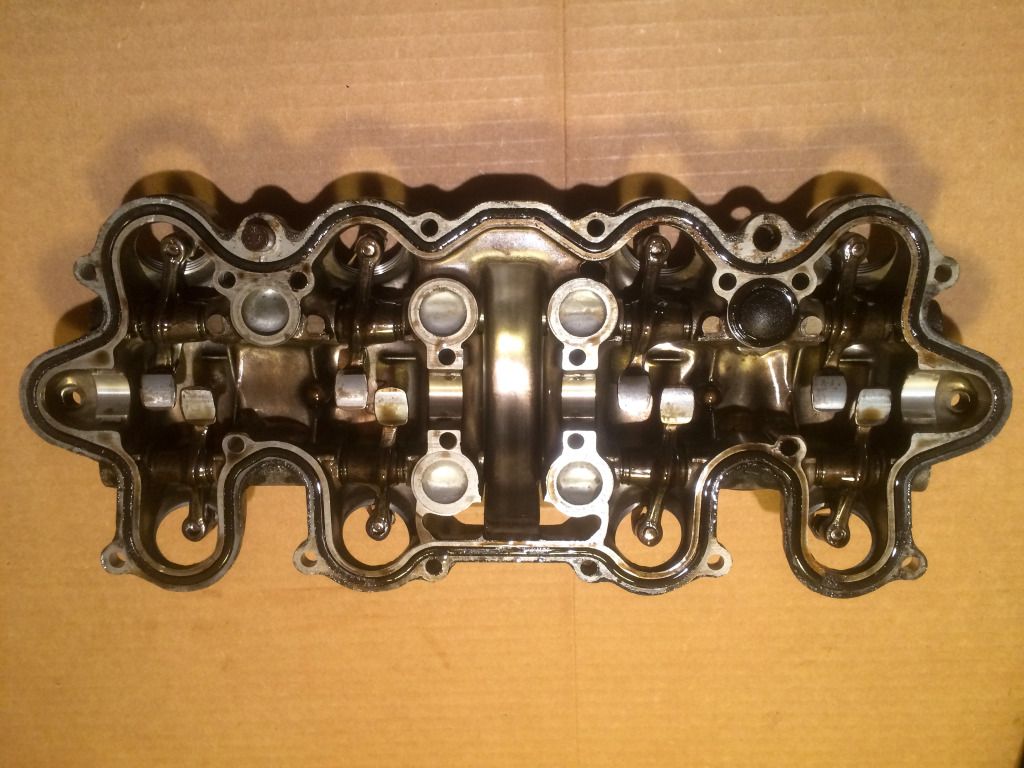
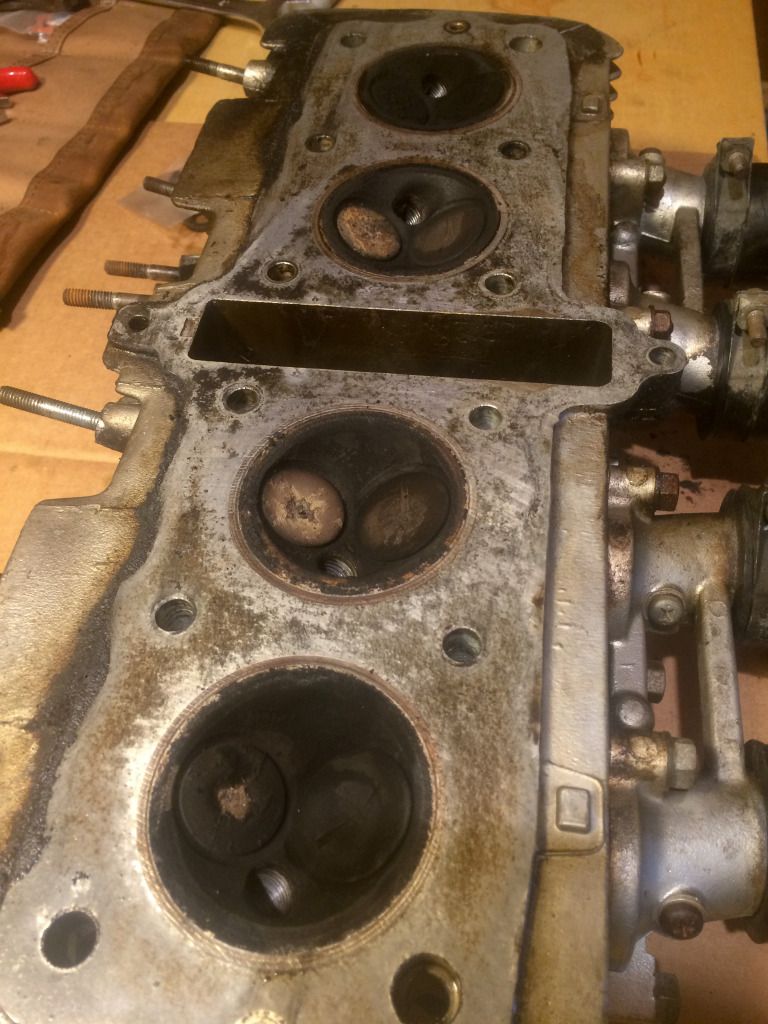
Here's the underside of the valves. They definitely need a good cleaning and all that. I guess I'll need to figure out how to pull em' and lap em'.


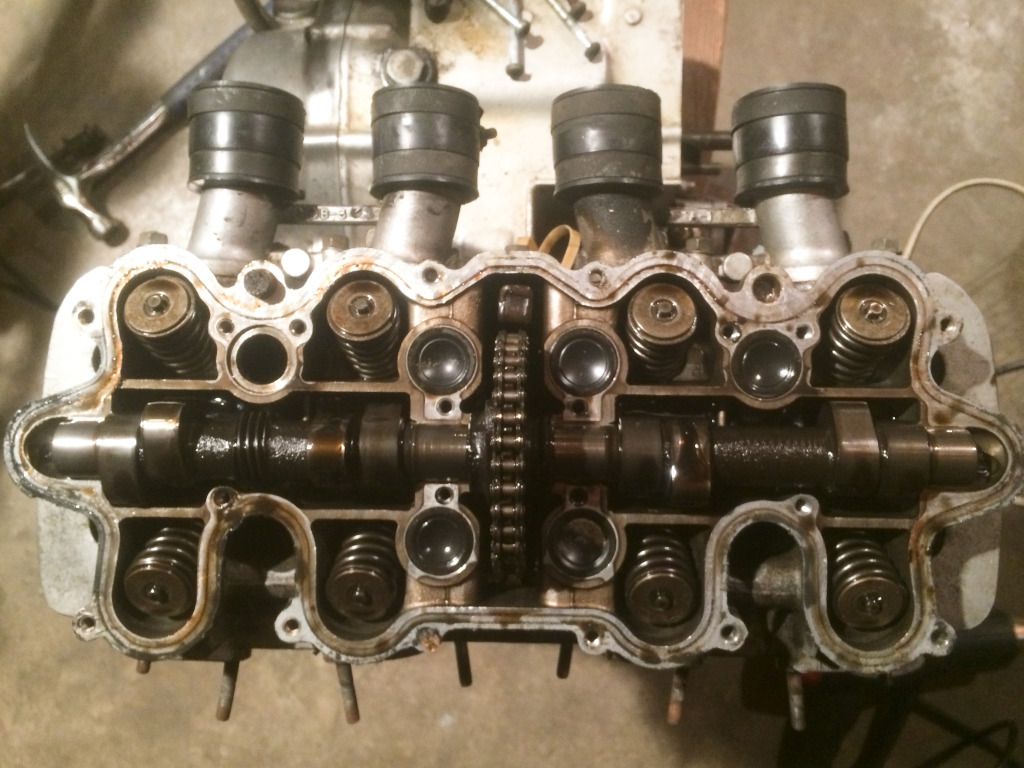
The cam looked pretty good, as did the sprocket and cam chain (I think).

I'd heard that the head could get stuck on there. Not mine. Full of oil & gunk.
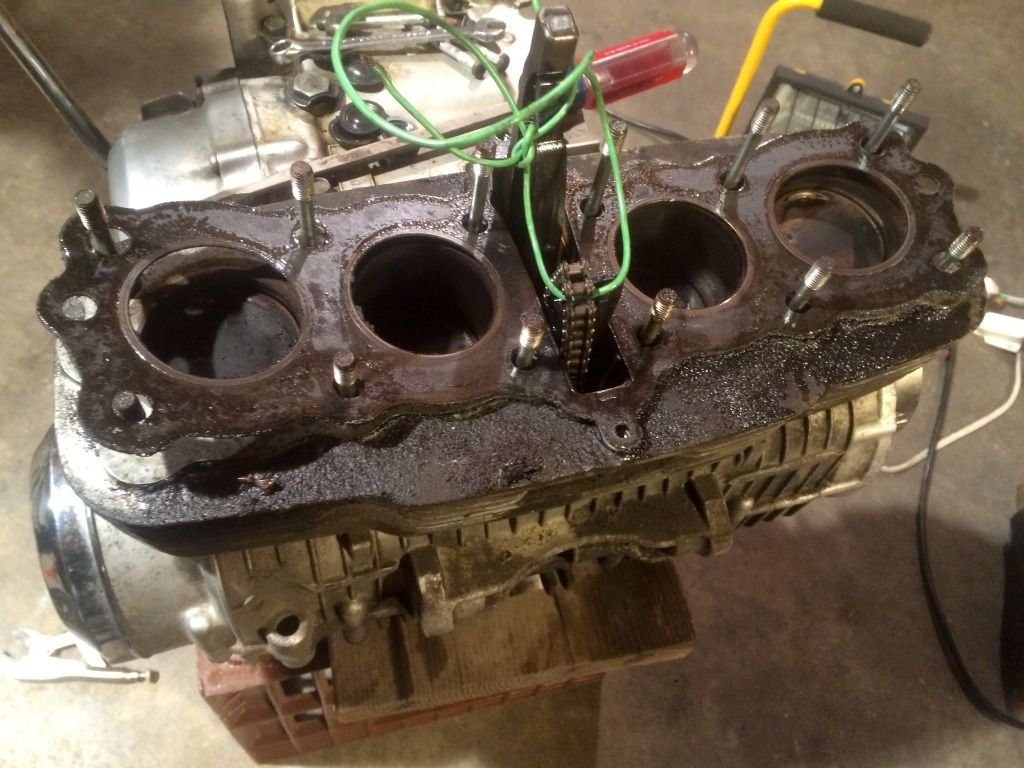


The head popped right off with a bit of force under the cc mark — not bad. I think I'll take the cylinders off too and see how that goes.


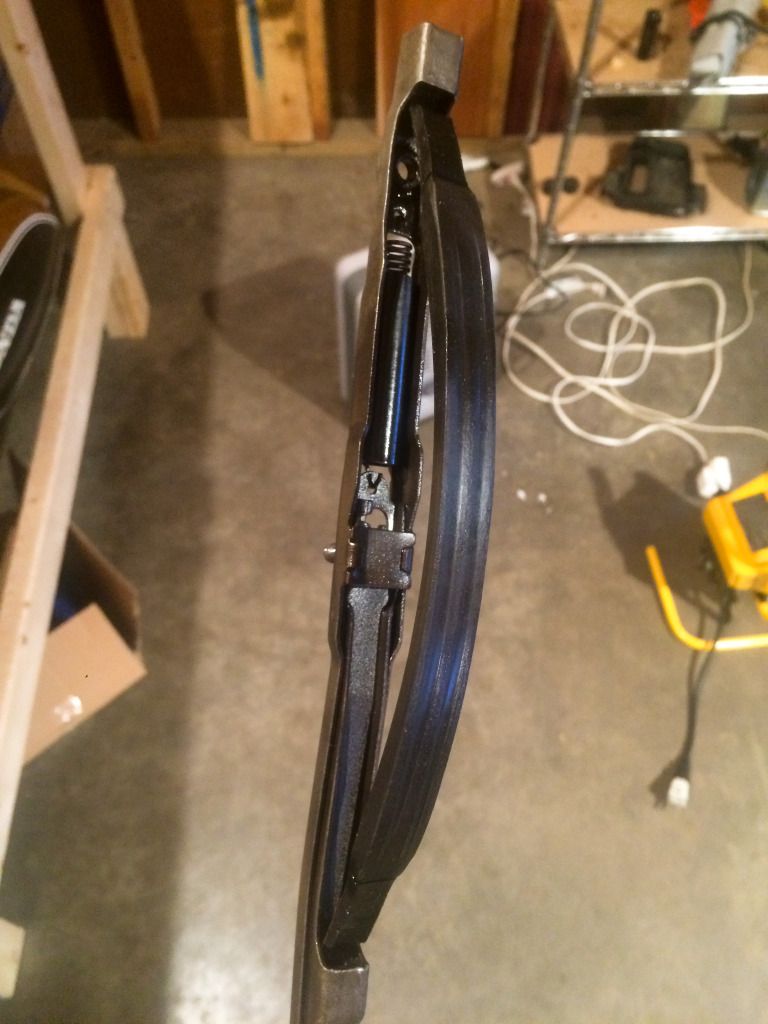
Here's the cam tensioner — seems like it's in good shape. I've read about the tensioner many times, but it's never so clear as when you're holding it right in your hands. Oh, and if anyone is working off of an old Clymer, they tell you to take out the tensioner before removing the head. That's pretty much impossible, I think. Took me a bit to figure that one out.


That about does it! I've been following some really good threads, so I'm looking forward to making this happen! Thanks for all the help and advice out here on the forums. It really makes it all possible!


« Last Edit: March 04, 2015, 05:33:08 AM by sammermpc »
1972 CB500, 1979 CB750F SS (dohc), 1982 Yamaha Maxim XS400

Offline Trad

  • Expert
  • ****
  • Posts: 964
Re: 1972 CB500 Top-end Rebuild
« Reply #1 on: March 03, 2015, 07:32:20 PM »
Nice job so far! Your leak at the head gasket wasn't the cause of your oil fouling on the spark plugs though. Look to the rings/bores and valve guide seals to be the culprit for that. At least you can now kill 2 birds with one stone.
74 CB550 Build: NOS-GUTTED-OEMplus-HOLDTRUE
http://forums.sohc4.net/index.php/topic,130575.0.html

Offline calj737

  • Really Old Timer ...
  • *******
  • Posts: 21,088
  • I refuse...
Re: 1972 CB500 Top-end Rebuild
« Reply #2 on: March 03, 2015, 08:03:47 PM »
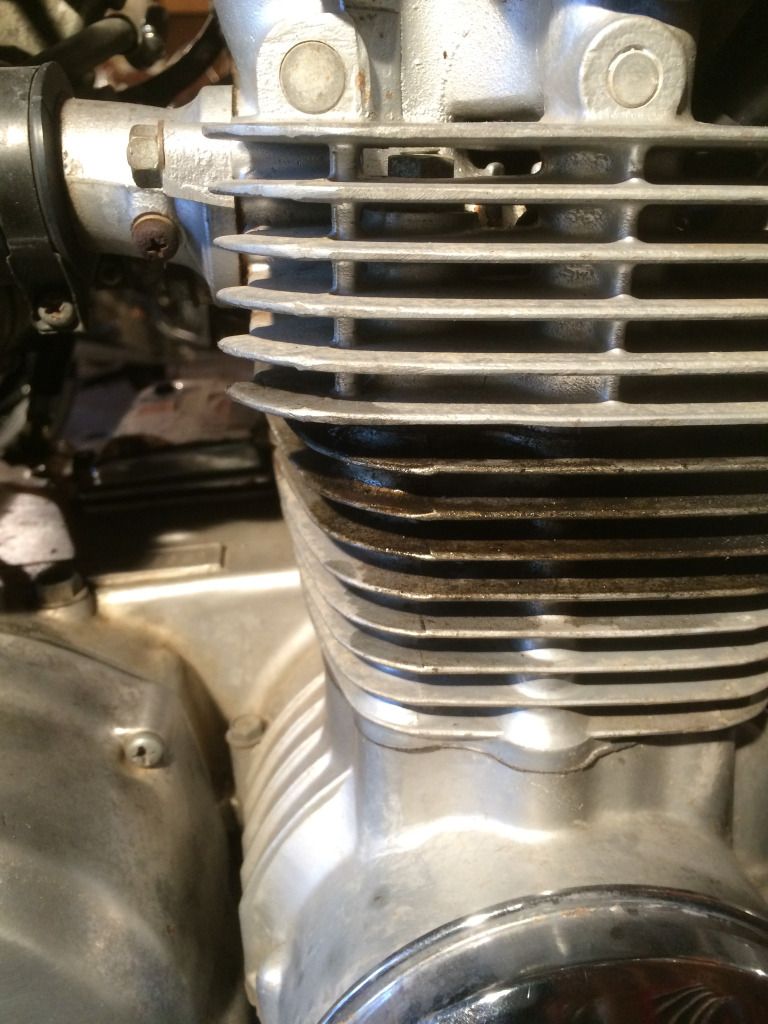
And, the cylinrsrs on the right side (when seated and looking forward) is #4 (as pictured where the leak is). That leak may well be from the puck (the black disk that came loose with the valve cover) as it prevents oil from running down the stud.

As for removing the valves, it takes a valve spring compressor designed for motorcycles. It needs to have a large reach and most you'll find are designed for cars, not bikes.

A helpful hint: when you remove the valve cover, make certain to release the tension on the valves by loosening the nut under the cap. This allows the valves to spring freely in case the rockers are caught on the cam lobe. Failure to do this can bend a valve. So if they valve adjuster is tight, loosen it now before reinstalling. After assembly, you'll need to adjust your valves anyway.
'74 550 Build http://forums.sohc4.net/index.php?topic=126401.0
'73 500 Build http://forums.sohc4.net/index.php?topic=132935.0

"Of all tyrannies, a tyranny sincerely exercised for the good of it's victim may be the most oppressive. It may be better to live under robber barons than under omnipotent moral busybodies. The robber baron's cruelty may sometimes sleep, his cupidity may at some point be satiated, but those who torment us for our own good will torment us without end for they do so with the approval of their own conscience." - C.S. Lewis

Offline goldarrow

  • one day, i'll be an
  • Old Timer
  • ******
  • Posts: 3,361
Re: 1972 CB500 Top-end Rebuild
« Reply #3 on: March 03, 2015, 08:49:09 PM »
Many ways to get valves off the head, here's one
Life Is Full Of Challenges - And My Backyard Is Full Of SOHC4's

CB550 K0
CB750 K0, K2, K23 JDM, K45, K5
And the little ones z50r, xr50r, st90


750k5 http://forums.sohc4.net/index.php?topic=114817.0

Offline sammermpc

  • Enthusiast
  • **
  • Posts: 238
Re: 1972 CB500 Top-end Rebuild
« Reply #4 on: March 04, 2015, 05:43:45 AM »
Quote
A helpful hint: when you remove the valve cover, make certain to release the tension on the valves by loosening the nut under the cap. This allows the valves to spring freely in case the rockers are caught on the cam lobe. Failure to do this can bend a valve. So if they valve adjuster is tight, loosen it now before reinstalling. After assembly, you'll need to adjust your valves anyway.

Awesome! Yeah, thanks. I read that some folks had vent their valves, so I loosened them all the way before I removed them entirely. I will have to adjust them of course. At least that's something I know how to do from the 3k maintenance.

Quote
Many ways to get valves off the head, here's one

Thanks! I'll either buy the tool, or take a close look at them to figure out what kind've rig might work.

One thing I don't know anything about is the pistons themselves. Should I look to replace the rings? Honestly, I don't know a thing about the rings—seeing them for the first time, I was surprised that they "floated," but that makes sense.

I also wanted to look into getting mated surfaces decked and the cylinders honed. Is that reasonable? People generally get the top of the head and the bottom of the valve covers decked, right? Does any old machine shop do that? What should I ask for? Any gotchas?

Another question I had was about cleaning gunk off of the cylinder base. It's really full of crap — and even with rags and whatnot stuffed in the holes, I'm worried about getting junk in the transmission. Any tips?
1972 CB500, 1979 CB750F SS (dohc), 1982 Yamaha Maxim XS400

Offline calj737

  • Really Old Timer ...
  • *******
  • Posts: 21,088
  • I refuse...
Re: 1972 CB500 Top-end Rebuild
« Reply #5 on: March 04, 2015, 05:59:20 AM »
The only way to make a decision about piston and ring replacement is to have the cylinder bores measured (mic'ed) and the piston skirts. This tells you whether they're within spec to each other. As for rings, the end gap (small section where the ring does not touch itself) is also within spec. There must be some free space on the ring for it expand during compression.

If you do have the bores honed, not over-bored, I strongly encourage you to replace the rings. It's not expensive and it will produce the best compression results.

As for milling the head and decking the jugs, this is usually determined by a machinist to restore a purely flat surface. Not always required, and doing so does create other issues. For instance, if you did have the head and cylinders milled, the locating dowels need to be adjusted (depending upon depth of milling) to restore the proper surface-surface tolerance. Also, there are some o-rings in the bores that need to be relieved as well to restore the correct amount of compression on them. And of course, the head gasket thickness could be affected...

I would not anticipate these as being required unless your surfaces were badly out of "flatness". Evidence of such a problem would often show as significant leaks between the surfaces, poor compression, and blow-by out of the cylinder onto the head gasket. But always worth dropping your cylinders, head and pistons to a machine shop to have them accurately measure the surfaces while yo have it apart.

As for debris entering your cases, as long as it's only "soft" gook, then a comprehensive flush of the lower end with kerosene or diesel fuel prior to reassembly is normally sufficient insurance. (Remove the oil pan prior to doing this, or at least open the drain plug, then remove afterwards for full cleaning). Do your best to prevent the junk form entering, but flush afterwards is a great practice if you're not splitting the cases.
'74 550 Build http://forums.sohc4.net/index.php?topic=126401.0
'73 500 Build http://forums.sohc4.net/index.php?topic=132935.0

"Of all tyrannies, a tyranny sincerely exercised for the good of it's victim may be the most oppressive. It may be better to live under robber barons than under omnipotent moral busybodies. The robber baron's cruelty may sometimes sleep, his cupidity may at some point be satiated, but those who torment us for our own good will torment us without end for they do so with the approval of their own conscience." - C.S. Lewis

Offline sammermpc

  • Enthusiast
  • **
  • Posts: 238
Re: 1972 CB500 Top-end Rebuild
« Reply #6 on: March 05, 2015, 09:06:04 PM »
Thanks for the breakdown — super helpful!

Quote
The only way to make a decision about piston and ring replacement is to have the cylinder bores measured (mic'ed) and the piston skirts. This tells you whether they're within spec to each other. As for rings, the end gap (small section where the ring does not touch itself) is also within spec. There must be some free space on the ring for it expand during compression.

OK — that something only a shop can do? The cylinders look pretty good, all told. Once I've got em' all cleaned up, I'll take em' in in. I saw some people soaking everything in Coca Cola or pine sol, so I might start with that (for the valves at least).


Quote
If you do have the bores honed, not over-bored, I strongly encourage you to replace the rings. It's not expensive and it will produce the best compression results.

Yeah — definitely honed. I want to do things right, but I don't want to get ahead of myself I saw that rings come in a variety over-bored sizes. That something you only get after checking measurements? I'm sure there are threads about this — but I'm kind've in uncharted territory for me. I'll post back after I clean all the crap off. Thanks for the tip about the "soft" gunk and the kerosene flush!
1972 CB500, 1979 CB750F SS (dohc), 1982 Yamaha Maxim XS400

Offline calj737

  • Really Old Timer ...
  • *******
  • Posts: 21,088
  • I refuse...
Re: 1972 CB500 Top-end Rebuild
« Reply #7 on: March 06, 2015, 04:16:08 AM »
"You" can measure the pistons and bores if you have the correct tools. You need micrometers, not calipers. Not a common tool for new, backyard mechanics. Measurements are taken in a few places throughout the bore, and inn different positions on the piston.

Ring sizes are matched to piston sizes. Stock 500 piston and bore is 56.5mm. Only order larger rings if you use larger pistons in a larger bored cylinder. Matched set  ;)

Drop your parts off to a shop and ask them to measure them quickly, it's the best and most foolproof means. Any automotive machine shop can do this for you. As for cleaning the parts, whatever works for you. Ultimately, you'd like the piston top to be quite clean and shiny (don't use sandpaper with enough grit to scratch the surface) so you can use ScotchBrite pads (red or grey) to aide in the cleaning. Then a little buffing up afterwards with cloth.
'74 550 Build http://forums.sohc4.net/index.php?topic=126401.0
'73 500 Build http://forums.sohc4.net/index.php?topic=132935.0

"Of all tyrannies, a tyranny sincerely exercised for the good of it's victim may be the most oppressive. It may be better to live under robber barons than under omnipotent moral busybodies. The robber baron's cruelty may sometimes sleep, his cupidity may at some point be satiated, but those who torment us for our own good will torment us without end for they do so with the approval of their own conscience." - C.S. Lewis

Offline sammermpc

  • Enthusiast
  • **
  • Posts: 238
Re: 1972 CB500 Top-end Rebuild
« Reply #8 on: March 16, 2015, 01:04:18 PM »
Haven't made a whole lot of progress, but I do have most everything taken apart, and thought I'd just put up a few pics of the progress that I've been making.

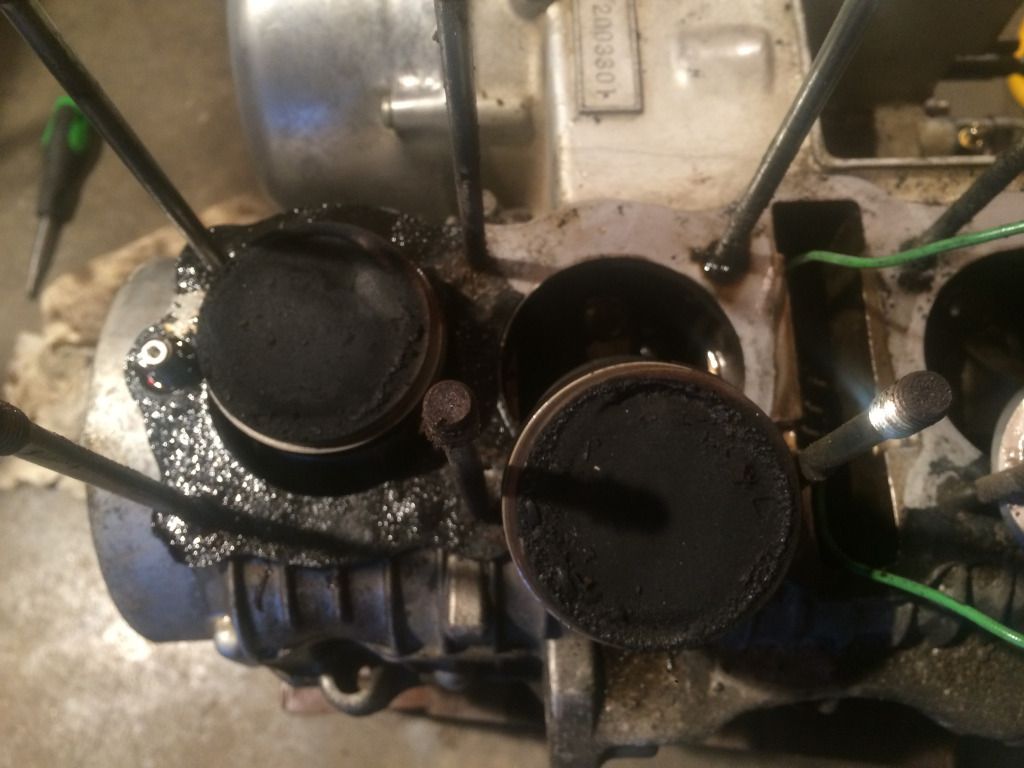
Here's the #3 cylinder — all of the rings looked "OK" (I'm going to replace them) — but this one had the most crud on it.


I have all of the cylinders sitting in little cups of brake cleaner, and they get a bit cleaner each time I wipe them down. I did go at one with a dremel, without realizing that all of the wires had been sliced off, so was scraping away with the bit itself. I did leave some (small) gouges. How much should I worry about that?


Here's the valve ports — not so bad, compared to what I've seen online.


They cleaned up OK with a brass wire brush. Not sure if that's a bad idea, but it didn't seem to scratch anything.


One concern I have, is if the valve seats are too close together. It looks like they may have been lapped/seated pretty hard, so there is hardly any lip between the intake and exhaust? Not really sure if it's an issue. I'll try to lap em' when I get them back from a shop (still need to find a good shop).

The valves — in an egg carton! Thanks for the tips, here.


They came out pretty easily with this valve compressor — I got it cheaper on Ebay. Was super clear how it worked once I tried — honestly had no idea before. Keepers and springs look OK.

Here's the bottom of the valve head, mostly cleaned. Still working on the top (and bottom) of the cylinders.

The weather got real nice here all of a sudden, so I've mostly been working on my '82 XS400J Maxim which is closer to riding shape!

Huge thanks to all of the great info here! I've been re-reading a bunch of really great threads closely for info. This build is super helpful (http://forums.sohc4.net/index.php?topic=42733.25)!


1972 CB500, 1979 CB750F SS (dohc), 1982 Yamaha Maxim XS400

Offline sammermpc

  • Enthusiast
  • **
  • Posts: 238
Re: 1972 CB500 Top-end Rebuild
« Reply #9 on: March 21, 2015, 08:22:22 PM »
OK! The work took a brief break, while I got my girl's 1982 Yamaha XS400J Maxim up and running. Looking for Yamaha parts really makes you appreciate the CB — what a pain! And expensive! Anyhow, I got the carbs all fixed up there (polished the valve needle seats, which was a first) — so she is off and running.

Now on to my work. I'm beginning to be concerned that my mania for disassembly is going to screw me. I've been making good progress on cleaning cylinder and cylinder surfaces, which of course — got me eyeing the the upper face of the upper crankcase, which has a whole bunch of gasket junk stuck to it. Now wouldn't it be nice if I removed the cylinder studs so I could clean it properly.

Well, I've probably bit off more than I can chew. I double-nut extracted three of them — but bent the fourth. I don't know what I was thinking, but I guess I'll need to get a replacement for that one. Or honestly, I might just bite the bullet and get an all new set of studs. *Sigh*. It's warming up and I want to get riding! Not that this isn't a lot of fun, of course, but $$$$.

I've also started cleaning up the valves properly. After reading up online here, it didn't seem like taking to it with a steel brush would be a problem, so I stuck em' in my new 3" vice (yessss!) — and got grinding. Man, even after sitting for a week or two, soaking in Deep Creep, the exhaust valves are tough. After a few rounds of wire-brushing at 30k RPM (really been getting work out've my dremel), they're starting to look OK. They're going to need more work, though, before they can head back in. That's fine, because I still need to take the cylinders and the head up to Anamosa to have them surfaced. Checking with a straight-edge, it's pretty clear that the cylinders are slightly bowed. At least, I think so.  ???


Soaking the pistons in Deep Creep has really worked — that, plus a 36-pack of red scotchbrite dremel attachments is bringing them up to a polish. I am leaving some swirls on the surface. Note sure if that's OK — but they are looking good. There are also some deeper scratches that I'm not sure how concerned to be about?


Oh — and what has been working really well is synthetic steel wool. I can't recommend it highly enough. Seems to be really tough, so doesn't wear out fast like regular scotchbrite, and of course, isn't steel wool, so doesn't disintegrate into little grayish bits while you're scrubbing. I cut a square of the stuff out, attached it to the dremel mandrel, and ran it along the top lift of the cylinders, where there was a bunch of crud. Worked really nicely.

So, making some progress — but what with the studs and everything else, it looks like I'm a few weeks out yet from really riding. In the meantime, I've also been calling around to shops to find a place to do some limited powdercoating and sandblasting (more for the Yamaha, actually) — but it's good to know the prices and all.

1972 CB500, 1979 CB750F SS (dohc), 1982 Yamaha Maxim XS400

Offline flatlander

  • Old Timer
  • ******
  • Posts: 2,605
Re: 1972 CB500 Top-end Rebuild
« Reply #10 on: March 22, 2015, 12:28:33 AM »
Keepers and springs look OK.

you need to measure the springs to know if they're ok. specs are in the manual. now is the time to check and double-check everything, and replace if necessary. you probably don't want to go in there all the time so make sure it's all good before you close it up again.

i know how it feels having the bike in loose pieces while seeing the weather improve... am in a similar place now  ::)

Offline sammermpc

  • Enthusiast
  • **
  • Posts: 238
Re: 1972 CB500 Top-end Rebuild
« Reply #11 on: March 26, 2015, 05:57:53 AM »
Quote
you need to measure the springs to know if they're ok. specs are in the manual. now is the time to check and double-check everything, and replace if necessary.

Yeah, I need to get on that! I just dropped off the valve cover, head, and cylinders at a machine shop, and I'll get them back early next week. Looking forward to that. Scott at Recreational Motorsports is going to hone the cylinders, deck everything (if necessary), check the guides, etc.

One thing that I'm pretty concerned about are my cylinder studs. I shouldn't have started in on them in the first place. I've bent a cylinder stud — not a whole lot, but still not good. Scott said he'd just straighten it out and leave the rest in — and in the interest of time and money, I'm inclined to do that.
  • So, can I just straighten out that stud and reuse it?
  • The studs that I've already removed — can they be reused?
  • Is that a bad idea, all around?

1972 CB500, 1979 CB750F SS (dohc), 1982 Yamaha Maxim XS400

Offline Puffin

  • Enthusiast
  • **
  • Posts: 238
Re: 1972 CB500 Top-end Rebuild
« Reply #12 on: March 26, 2015, 04:36:13 PM »
I had exactly the same problem with mine... I managed to get all of them out except the last one which snapped at the base.  Had to take the case to a machine shop and have it removed and the hole Helicoiled. 

New set of HD studs for the CB500 is $89USD.

It's a pain but on the bright side I guess I'm better off in the long term having swapped them out with better quality replacements.

« Last Edit: March 26, 2015, 04:38:25 PM by Puffin »
Honda CB500 four
Honda CB350 four (under construction)

1972 Cb500 Rebuild Project - http://forums.sohc4.net/index.php/topic,145835.0.html

Offline SOHC4 Cafe Racer Fan

  • Speak up, Whipper-Snapper! I'm a
  • Really Old Timer ...
  • *******
  • Posts: 15,733
  • SOHC/4 Member #1235
Re: 1972 CB500 Top-end Rebuild
« Reply #13 on: March 26, 2015, 10:27:43 PM »
If you're that deep into it, you might as well replace the stretched stockers with HD studs.  The stud removal tool works better than the double nut method.
1975 CB550K1 "Blue" Stockish Restomod (http://forums.sohc4.net/index.php?topic=135005.0)
1975 CB550F1 frame/CB650 engine hybrid "The Hot Mess" (http://forums.sohc4.net/index.php/topic,150220.0.html)
2008 Triumph Thruxton (http://forums.sohc4.net/index.php/topic,190956.0.html)
2014 MV Agusta Brutale Dragster 800
2015 Yamaha FZ-09 (http://forums.sohc4.net/index.php/topic,186861.0.html)

"There are some things nobody needs in this world, and a bright-red, hunch-back, warp-speed 900cc cafe racer is one of them — but I want one anyway, and on some days I actually believe I need one.... Being shot out of a cannon will always be better than being squeezed out of a tube. That is why God made fast motorcycles, Bubba." Hunter S. Thompson, Song of the Sausage Creature, Cycle World, March 1995.  (http://www.latexnet.org/~csmith/sausage.html and https://magazine.cycleworld.com/article/1995/3/1/song-of-the-sausage-creature)

Sold/Emeritus
1973 CB750K2 "Bionic Mongrel" (http://forums.sohc4.net/index.php?topic=132734.0) - Sold
1977 CB750K7 "Nine Lives" Restomod (http://forums.sohc4.net/index.php?topic=50490.0) - Sold
2005 RVT1000RR RC51-SP2 "El Diablo" - Sold
2016+ Triumph Thruxton 1200 R (http://forums.sohc4.net/index.php/topic,170198.0.html) - Sold

Offline sammermpc

  • Enthusiast
  • **
  • Posts: 238
Re: 1972 CB500 Top-end Rebuild
« Reply #14 on: March 29, 2015, 09:23:08 AM »
Well, I made some progress yesterday — managed to get out the bent w/ one the help of a torch — so now I've got three out! The remaining studs look "OK". I got a call back from the shop, saying the head and cylinders were ready, so if I just replaced the three I already got off, I'd be good to go.

Is it a bad idea to mix-and-match studs like that? I know they're usually sold in sets, but I see a few singles/pairs floating around the webs.

I definitely like the idea of pulling them all and replacing, but the only good shop is an hour away, and I've got to take time off from work to get there. Having them pull a busted stud for me and helicoiling the sucker is not really an option, so I want to make a sensible choice.

Quote
The stud removal tool works better than the double nut method.

What kind? Advanced Auto Parts has some kind've nasty looking cam-tightener. I see these guys on Ebay, seem a bit better. http://www.ebay.com/itm/4-pc-Metric-Stud-Puller-Wrench-Remover-Socket-Set-/261459842702?_trksid=p2054897.l4275. I had some success with a good pair of vice-grips.
1972 CB500, 1979 CB750F SS (dohc), 1982 Yamaha Maxim XS400

Offline flatlander

  • Old Timer
  • ******
  • Posts: 2,605
Re: 1972 CB500 Top-end Rebuild
« Reply #15 on: March 29, 2015, 12:41:32 PM »
up to you but i would've either left them all untouched, or go for a full new set. now that you've started... i think the sensible thing is to go all the way which saves you potentially spending even more time later.


Offline calj737

  • Really Old Timer ...
  • *******
  • Posts: 21,088
  • I refuse...
Re: 1972 CB500 Top-end Rebuild
« Reply #16 on: March 29, 2015, 02:43:14 PM »
...and, if you heat them up sufficiently, they will remove safely without snapping. Heat, spray some penetrating oil, heat, extract.
'74 550 Build http://forums.sohc4.net/index.php?topic=126401.0
'73 500 Build http://forums.sohc4.net/index.php?topic=132935.0

"Of all tyrannies, a tyranny sincerely exercised for the good of it's victim may be the most oppressive. It may be better to live under robber barons than under omnipotent moral busybodies. The robber baron's cruelty may sometimes sleep, his cupidity may at some point be satiated, but those who torment us for our own good will torment us without end for they do so with the approval of their own conscience." - C.S. Lewis

Offline SOHC4 Cafe Racer Fan

  • Speak up, Whipper-Snapper! I'm a
  • Really Old Timer ...
  • *******
  • Posts: 15,733
  • SOHC/4 Member #1235
Re: 1972 CB500 Top-end Rebuild
« Reply #17 on: March 29, 2015, 03:03:09 PM »
APE makes a removal tool.
1975 CB550K1 "Blue" Stockish Restomod (http://forums.sohc4.net/index.php?topic=135005.0)
1975 CB550F1 frame/CB650 engine hybrid "The Hot Mess" (http://forums.sohc4.net/index.php/topic,150220.0.html)
2008 Triumph Thruxton (http://forums.sohc4.net/index.php/topic,190956.0.html)
2014 MV Agusta Brutale Dragster 800
2015 Yamaha FZ-09 (http://forums.sohc4.net/index.php/topic,186861.0.html)

"There are some things nobody needs in this world, and a bright-red, hunch-back, warp-speed 900cc cafe racer is one of them — but I want one anyway, and on some days I actually believe I need one.... Being shot out of a cannon will always be better than being squeezed out of a tube. That is why God made fast motorcycles, Bubba." Hunter S. Thompson, Song of the Sausage Creature, Cycle World, March 1995.  (http://www.latexnet.org/~csmith/sausage.html and https://magazine.cycleworld.com/article/1995/3/1/song-of-the-sausage-creature)

Sold/Emeritus
1973 CB750K2 "Bionic Mongrel" (http://forums.sohc4.net/index.php?topic=132734.0) - Sold
1977 CB750K7 "Nine Lives" Restomod (http://forums.sohc4.net/index.php?topic=50490.0) - Sold
2005 RVT1000RR RC51-SP2 "El Diablo" - Sold
2016+ Triumph Thruxton 1200 R (http://forums.sohc4.net/index.php/topic,170198.0.html) - Sold

Offline sammermpc

  • Enthusiast
  • **
  • Posts: 238
Re: 1972 CB500 Top-end Rebuild
« Reply #18 on: March 31, 2015, 05:16:18 PM »
Thanks for all of the advice, guys. I really appreciate it! Anyhow, I decided to tackle the job. I bought a set of stud removers and a pipe wrench, and well, I did it — sheared off a stud :( And then I got impatient and just went at the sucker, too, and gouged up the gasket surface a bit with a pipe wrench. I think it was the pipe wrench that did it. I had the stud double-nutted as well, and it was actually turning. Then I figured I'd speed things up a bit with the wrench, and I think it just put too much focused torque on the stud. The double-nut at the top may have actually been helping matters by distributing the twist across the whole length of the stud.


One issue I came across that I haven't seen discussed, is that the CB500 studs are tapered. Though they're "8mm" studs — the body of the stud is narrower. Too narrow, in fact, for pretty much any of the normal stud removal tools (at least those that I've seen online and tried). I tried the cam type at Autozone, and it was too small for that. And it's too small for the 8mm standard "socket" type removers too. They don't fit over the threaded top, though the 6mm size will grip the stud body.


Anyhow, I think I'm going to give it a rest. The chatty guy at Autozone recommended a local machine/auto shop that I'm thinking of taking the motor too (along with the five remaining studs) and trading $$$$ for my peace of mind. At least I can do that, but I'm not happy about it. I'm pretty bummed — I feel like I failed some kind've mechanic test. I was planning on coming back and show ya'll the 12 studs all out, looking purty. Wishful thinking, I guess.

In better news, I got the cylinders, head, and valves back from Recreational Motorsports. They look really, really great. I was momentarily concerned that they'd mixed the cylinders up, but I think I just got confused (I marked them with a sharpie when I brought them in — they scribed em'. I'm just going to assume they did it right. It's their job, after all). $24 for everything to be cleaned. I'll give it another once over w/ my dremel + scotchbrite pads, but it looks great.


Anyhow — I pretty much have most the bits and pieces ready to go if I can figure out these damned studs! I talked with Kenny over at CycleX who gave me this advice. "I've had every stud-puller you can imagine. What it boils down to is a hammer and a vice grip at the end of the stud. Before I even try and turn it, I hit it really hard. What that does it shocks the threads, it loosens them. Harder than you think — and then I'll work it back and forth." I'm guessing I just wasn't hitting it hard enough!  :o

I know I'll pull out of it! I really love this bike, and have had a great, great time learning about wrenching and everything else, as well as riding. I know you know how it feels. With my lady going out of town this weekend, I was hoping to spend my time assembling everything, but it may just have to wait till I get this sorted. Hopefully it won't burn too deep a hole in my pocket. I hope that little bit of a stud is enough to weld a nut to.
1972 CB500, 1979 CB750F SS (dohc), 1982 Yamaha Maxim XS400

Offline calj737

  • Really Old Timer ...
  • *******
  • Posts: 21,088
  • I refuse...
Re: 1972 CB500 Top-end Rebuild
« Reply #19 on: March 31, 2015, 05:48:05 PM »
Cut the stud in half and then use the socket type, or the cam type.
'74 550 Build http://forums.sohc4.net/index.php?topic=126401.0
'73 500 Build http://forums.sohc4.net/index.php?topic=132935.0

"Of all tyrannies, a tyranny sincerely exercised for the good of it's victim may be the most oppressive. It may be better to live under robber barons than under omnipotent moral busybodies. The robber baron's cruelty may sometimes sleep, his cupidity may at some point be satiated, but those who torment us for our own good will torment us without end for they do so with the approval of their own conscience." - C.S. Lewis

Offline sammermpc

  • Enthusiast
  • **
  • Posts: 238
Re: 1972 CB500 Top-end Rebuild
« Reply #20 on: March 31, 2015, 05:56:28 PM »
Quote
Cut the stud in half and then use the socket type, or the cam type.

Yeah, I think that's my best option for the remaining studs. Still have to deal w/ that little nubbin, though. I think that's a job for a machine shop at this point.
1972 CB500, 1979 CB750F SS (dohc), 1982 Yamaha Maxim XS400

Offline calj737

  • Really Old Timer ...
  • *******
  • Posts: 21,088
  • I refuse...
Re: 1972 CB500 Top-end Rebuild
« Reply #21 on: March 31, 2015, 06:25:54 PM »
Got a welder? If so, weld a nut to the top of the stub and use a wrench to turn it out.
'74 550 Build http://forums.sohc4.net/index.php?topic=126401.0
'73 500 Build http://forums.sohc4.net/index.php?topic=132935.0

"Of all tyrannies, a tyranny sincerely exercised for the good of it's victim may be the most oppressive. It may be better to live under robber barons than under omnipotent moral busybodies. The robber baron's cruelty may sometimes sleep, his cupidity may at some point be satiated, but those who torment us for our own good will torment us without end for they do so with the approval of their own conscience." - C.S. Lewis

Offline sammermpc

  • Enthusiast
  • **
  • Posts: 238
Re: 1972 CB500 Top-end Rebuild
« Reply #22 on: March 31, 2015, 06:42:15 PM »
Naw, I've seen a bunch of guides on how to do that, but I'm not about to buy a welder. Maybe in a few years. I'm moving too much as is.


Sent from my iPhone using Tapatalk
1972 CB500, 1979 CB750F SS (dohc), 1982 Yamaha Maxim XS400

Offline SOHC4 Cafe Racer Fan

  • Speak up, Whipper-Snapper! I'm a
  • Really Old Timer ...
  • *******
  • Posts: 15,733
  • SOHC/4 Member #1235
Re: 1972 CB500 Top-end Rebuild
« Reply #23 on: March 31, 2015, 09:21:26 PM »
That freakin' sucks. I thought the APE stud puller would be an option (works for 750s) but it only works down to 6.5 mm.
1975 CB550K1 "Blue" Stockish Restomod (http://forums.sohc4.net/index.php?topic=135005.0)
1975 CB550F1 frame/CB650 engine hybrid "The Hot Mess" (http://forums.sohc4.net/index.php/topic,150220.0.html)
2008 Triumph Thruxton (http://forums.sohc4.net/index.php/topic,190956.0.html)
2014 MV Agusta Brutale Dragster 800
2015 Yamaha FZ-09 (http://forums.sohc4.net/index.php/topic,186861.0.html)

"There are some things nobody needs in this world, and a bright-red, hunch-back, warp-speed 900cc cafe racer is one of them — but I want one anyway, and on some days I actually believe I need one.... Being shot out of a cannon will always be better than being squeezed out of a tube. That is why God made fast motorcycles, Bubba." Hunter S. Thompson, Song of the Sausage Creature, Cycle World, March 1995.  (http://www.latexnet.org/~csmith/sausage.html and https://magazine.cycleworld.com/article/1995/3/1/song-of-the-sausage-creature)

Sold/Emeritus
1973 CB750K2 "Bionic Mongrel" (http://forums.sohc4.net/index.php?topic=132734.0) - Sold
1977 CB750K7 "Nine Lives" Restomod (http://forums.sohc4.net/index.php?topic=50490.0) - Sold
2005 RVT1000RR RC51-SP2 "El Diablo" - Sold
2016+ Triumph Thruxton 1200 R (http://forums.sohc4.net/index.php/topic,170198.0.html) - Sold

Offline sammermpc

  • Enthusiast
  • **
  • Posts: 238
Re: 1972 CB500 Top-end Rebuild
« Reply #24 on: April 04, 2015, 08:02:31 PM »
Just a quick update — I finally found a great (local) shop, and brought the motor in (MAS Motors in Iowa City). He's still got it, over there, but he seemed to think he could pull all the studs without problem. It'll definitely cost me $$$. I deserve it, I guess. Never should've cracked into those guys.

In the meantime, after talking to Kenny, I got a set of new studs of CycleX. Looks like they carry APE (at least for CB500s), though they're not marked that way on their site. One thing's for — they're a lot beefier. I can see how double-nutting these guys would be a lot more effective than the tapered ones.


In the meantime, I started re-assembling the valves. I read-up on how to lap valves and gave it a shot. It seemed pretty straight forward, especially when you can hear the lapping compound go from the "grind" sound, to the swooshing. I went pretty quickly through all the valves—too quickly, I think, because after re-assembling cylinder 1, both the exhaust and intakes leaked pretty quickly after I poured gas into the ports.  >:( I think the seats and valves themselves look OK, though, so I'll just chalk it up to an overly-hasty lapping job, and do a more thorough run tomorrow.


And I realized that the VG-155 Versah Gasket kit that I've had sitting on the shelf for three months somehow shipped without a head gasket! I wrote the 4into1 crew a note, so I'm assuming it'll be taken care of quickly.

Anyhow, it all adds up to me hardly being ready for the crankcase anyhow, as I've got plenty more to do!
1972 CB500, 1979 CB750F SS (dohc), 1982 Yamaha Maxim XS400