Author Topic: Cleaning crankshafts under the balls (Finished with pics)  (Read 3062 times)

0 Members and 1 Guest are viewing this topic.

Offline Garage_guy_chris

  • Hot Shot
  • ***
  • Posts: 730
Cleaning crankshafts under the balls (Finished with pics)
« on: March 27, 2015, 05:31:01 PM »
Ok so I have read up on it and feel about as confident as Im gonna removing the balls in the cranks oil galleries . Just not sure if its worth it or not. The crank is a lower mileage crank thats sat in storage for many many years.  Half of me says go and do it the other says no leave it well enough alone ?
« Last Edit: April 14, 2015, 09:20:25 PM by Garage_guy_chris »
1971 Cb450 Cafe  (on the road)
1974 Cb750 Restomod (on the road)

Offline Garage_guy_chris

  • Hot Shot
  • ***
  • Posts: 730
Re: Cleaning crankshafts under the balls.
« Reply #1 on: March 27, 2015, 10:18:18 PM »

Well I decided to mess with the balls on a junk crank thats got some bad wear. I got 1 of 4 balls out the other 3 got pushed in too far to extract. On another note i messed with the good crank a little, I sprayed some brake clean down the rod journal oiling holes and with a paper towel on the back of the oiling holes i washed out some grey gunk from within so there is definately dirt down there and I dont want to ruin the good crank. So I think monday I will call the machinist see if he could have a go at the damn block off balls...

On the good note the tranny got swapped over today without any trouble! yay progress...
1971 Cb450 Cafe  (on the road)
1974 Cb750 Restomod (on the road)

Offline FunJimmy

  • Who you calling
  • Old Timer
  • ******
  • Posts: 3,802
  • Vancouver
Re: Cleaning crankshafts under the balls.
« Reply #2 on: March 27, 2015, 11:15:06 PM »
How about speaking it in solvent for a day or two, then follow up with compressed air and rifle brushes.
You never see a motorcycle parked outside of a psychiatrist's office!

CB550 Cafe Interceptor a Gentlemans Roadster
http://forums.sohc4.net/index.php?topic=27159.0

Offline Garage_guy_chris

  • Hot Shot
  • ***
  • Posts: 730
Re: Cleaning crankshafts under the balls.
« Reply #3 on: April 14, 2015, 08:34:27 PM »
Ok so i took the advice of My Engine Builder and Fun Jimmy and decided to try a cleaning from the journal oil holes. I went through 1.5 cans of brake clean and had it in the parts washer with the pump stream going into the oil holes after a few hours of this there was still chunks of garbage coming out and the fluid was coming out near black, So obviously there was still garbage in there. 

Now after finished and blocked off again with 1/4"-28 x 1/4" set screws my only concern is should this crank be sent to have its balance checked? and possibly rebalanced?

After thinking about it and going over the ball removal in my head for a couple days i decided to go for it and do it properly.

**** This is a real tricky fiddly thing to do, I messed up one worn scoured crank trying this procedure before careful contemplation. The balls are very hard to get to spin, they tend to just get pushed into the oil hole and get wedged which renders them unrecoverable. This happened on the junk crank 3 times and this good one once!!! Luckily on the good  crank the ball did not wedge itself and just got pushed. The fix was I was able to push a little copper telephone wire past the ball and through the sludge and after softening the sludge with brake clean and poking through it a few times. i was able to cover 3 of the journal oiling holes and apply compressed air through the 4th. thus launching the ball and the sludge 20ft across my basement to sploop on the white wall in the finished room.  ****

1. See round ball


2. Grind ball flush with crank


3. Pick an axis. Position punch and turn ball in hole about 45 deg


4. Grind new flat


5. Position punch and turn on same axis again
6. Grind 3rd flat


7.Now position punch to turn 90 deg to the grinding axis


8. Ball falls out

Here is all the garbage that came out after the cleaning through the oiling holes


After the tricky part of getting them out, I drilled the oil holes up to a #3 drill about 3/8" deep. Tapped to 1/4-28 and used 1/4-28 x 1/4 long grub screws. The screws are held in by running into the tapered starter portion of the threads and red loctite

If anyone wants to see photos describing the drilling and tapping I can take a few more.
« Last Edit: April 21, 2015, 02:36:54 PM by Garage_guy_chris »
1971 Cb450 Cafe  (on the road)
1974 Cb750 Restomod (on the road)

Offline NobleHops

  • Don ya be callin' me no
  • Expert
  • ****
  • Posts: 1,345
  • Misfit - Tucson, Arizona
Re: Cleaning crankshafts under the balls (Finished with pics)
« Reply #4 on: April 15, 2015, 06:55:49 AM »
Awesome content and photos man. Well done.
Nils Menten * Tucson, Arizona, USA

I have a motorcycle problem.

My build thread: NobleHops makes a 400F pretty for his wife: http://forums.sohc4.net/index.php?topic=131210.0

Offline Jerry Rxman Griffin aka MuthaF'er

  • This MuthaF'er is getting to be a
  • Really Old Timer ...
  • *******
  • Posts: 14,928
  • Bought her new 4/75
Re: Cleaning crankshafts under the balls (Finished with pics)
« Reply #5 on: April 15, 2015, 07:31:25 AM »
Excellent tutorial. Only thing that might make it better would be the drilling and tapping for those that have not done that before.
As of today 3/13/2012 my original owner 75 CB750F has made it through 3 wives, er EX-wives. Free at last.  ;-)

Offline martin_uk

  • Hot Shot
  • ***
  • Posts: 272
  • CB750F1 CB750K8
Re: Cleaning crankshafts under the balls (Finished with pics)
« Reply #6 on: April 15, 2015, 07:31:50 AM »
Excellent, may have to do this on my next engine ::)

I tend to use running in oil to help rings bed in, which has high detergent content, so helps flush engine, but not good to think about the sludge that gets trapped in the drillings :'(
CB750F1, CB750K8,  Triumph Street Triple R, AJS 350, Triumph 3TA

Offline Garage_guy_chris

  • Hot Shot
  • ***
  • Posts: 730
Re: Cleaning crankshafts under the balls (Finished with pics)
« Reply #7 on: April 21, 2015, 12:20:59 PM »
Ok People have asked and i will provide...

here is a tutorial for drilling and tapping.

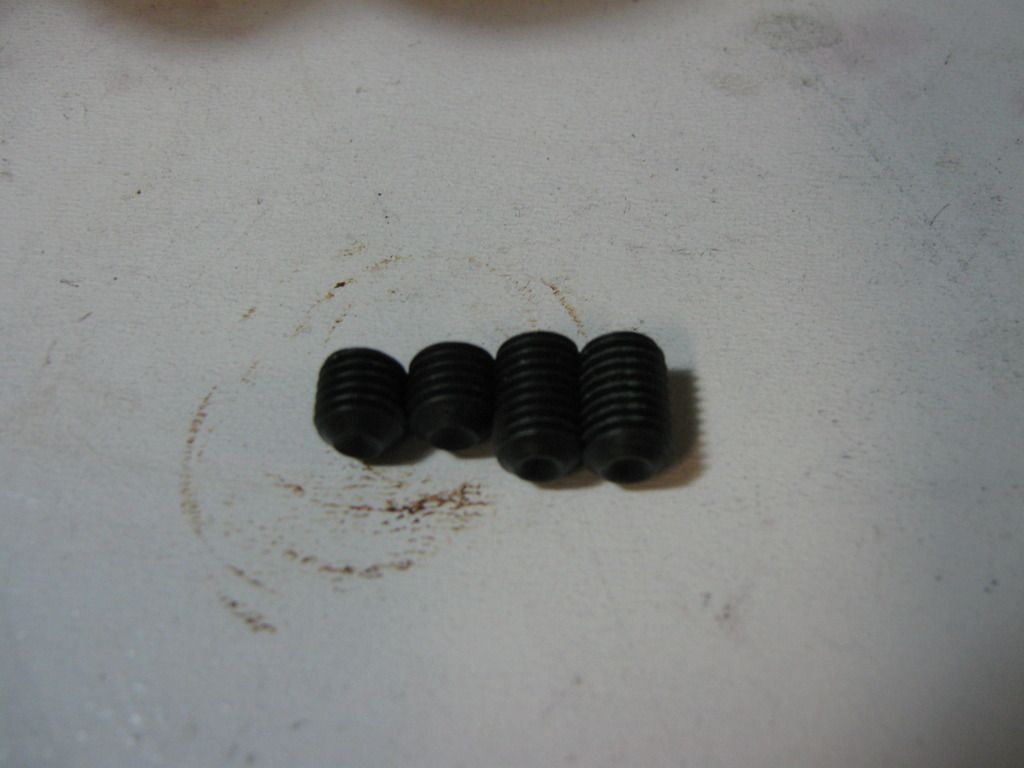
1. Pick your grub/set screws Here I have 1/4"x28x1/4" and 1/4"x28x3/8" these seem to make the most sense 1/2" long seems excessive.


2. Next set up your drill and tap for depth
-the tap depth should be set so the starting of the threads match the bottom of the set screw
-the drill depth should be set so the edge of the flutes are a little deeper than the start of the threads
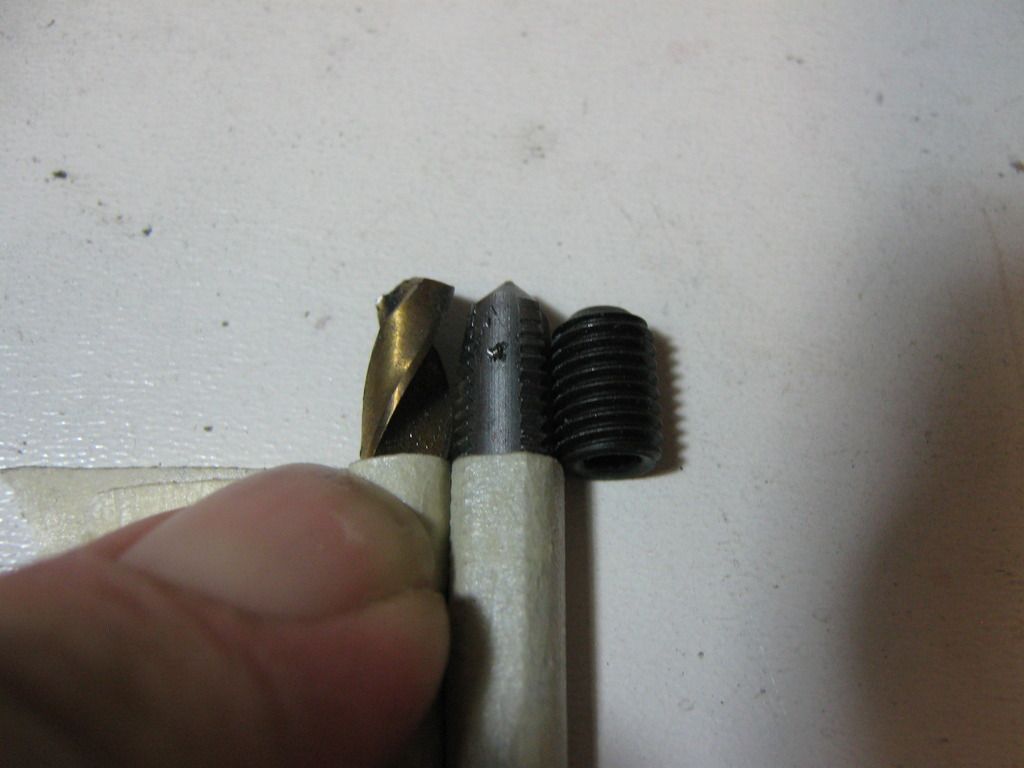


3.Use a smaller drill i think i used a #8 to observe the angle of the hole with the #3 beside
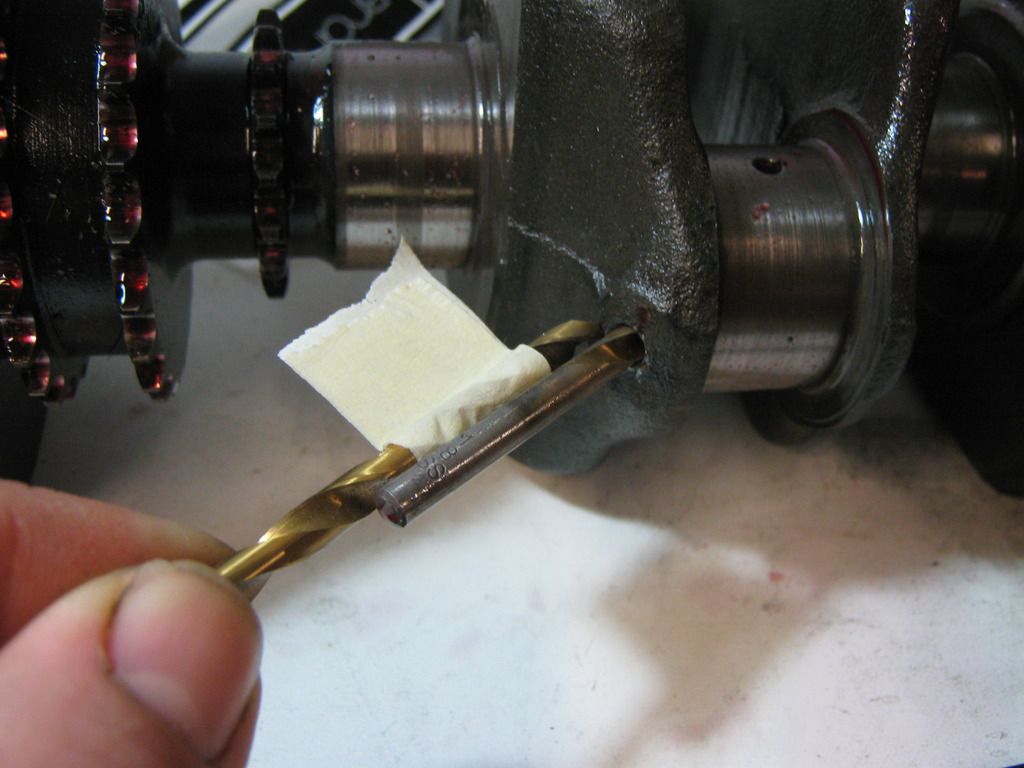


4. Remove the bit from the passage shift the #3 over without changing the angles and drill to depth ** use cutting fluid **
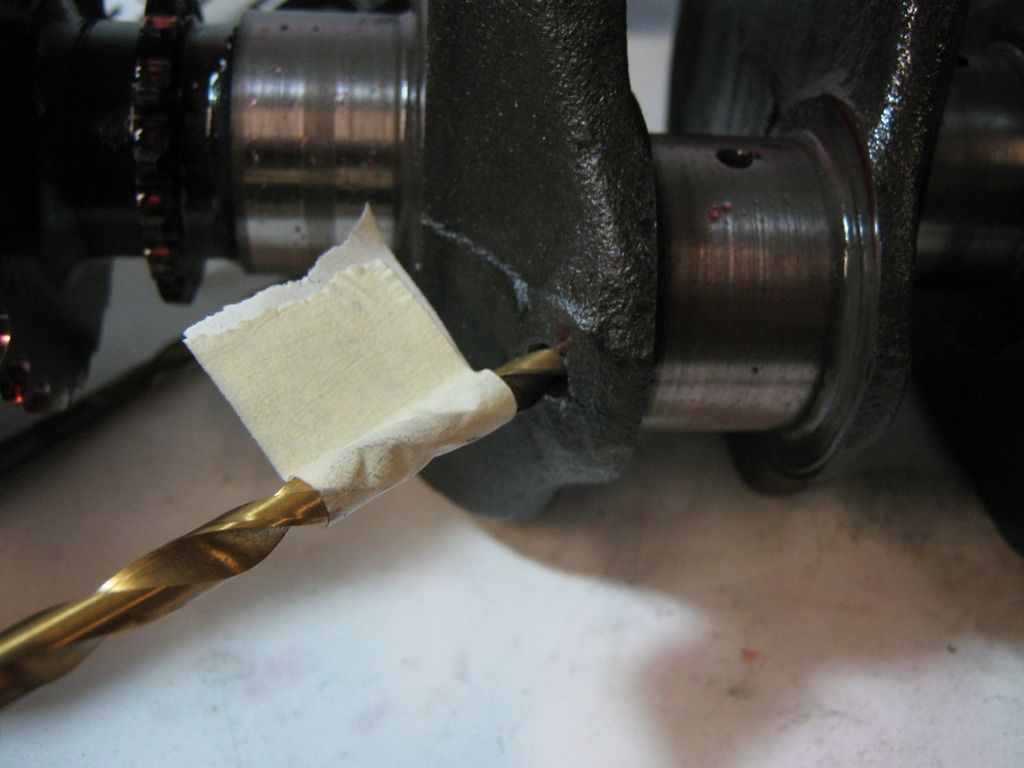


5. Use the same #8 bit in the passage to observe the angle for the tap line everything up
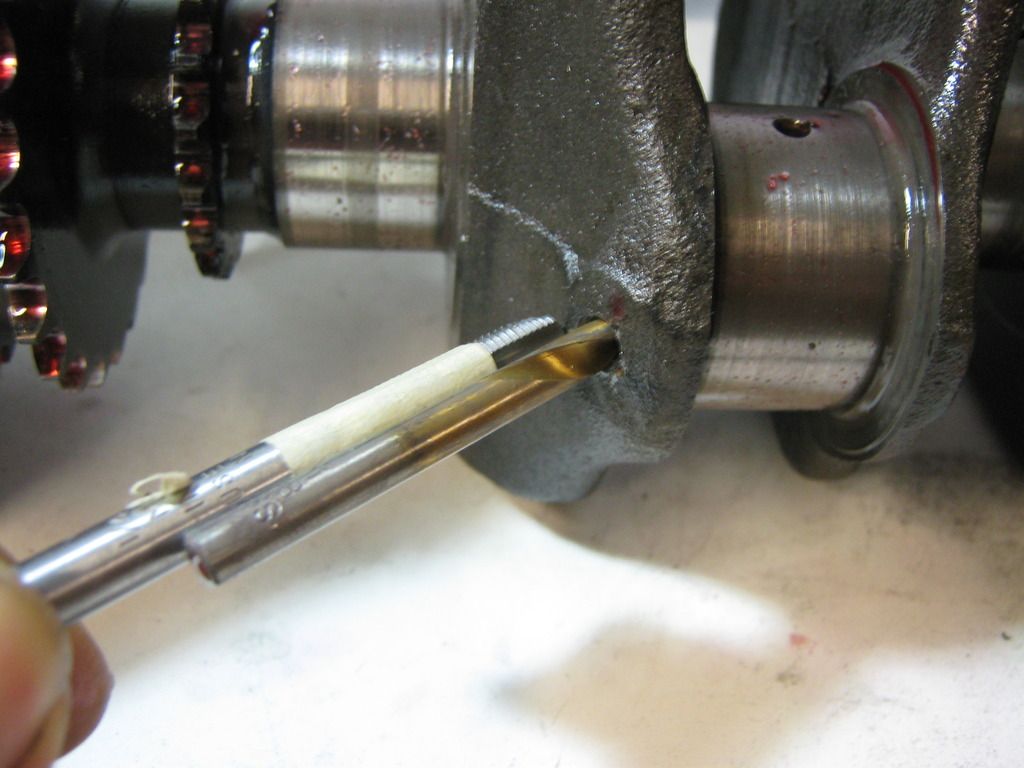


6.Now its time to tap with everything lined up carefully start the tapping. The material is reasonably hard and the tap will need to be reversed frequently to break the chips off.
** use cutting fluid to lubricate tap **
A. start the tap get about 1 to 1 1/2 turns on it
B. you will feel it get stiff  to turn and bind. STOP and  back the tap out about 1/2 a turn to break the chips
C. now turn it back in and cut a little deeper (1/2 to 1 turn)
D. you will feel it get stiff  to turn and bind. STOP and  back the tap out about 1/2 a turn to break the chips
E. now turn it back in and cut a little deeper (1/2 to 1 turn)
F. you will feel it get stiff  to turn and bind. STOP and  back the tap completely out and clean the flutes and relubricate the tap also cover 3 of the oil holes and blow out the passage from the 4th (with a rubber tipped air gun, don't scratch the journal)
G. now turn it back in and cut a little deeper (1/2 to 1 turn)
- Now repeat steps B to G until you get close to depth

-If you feel the tap binding at any point, reverse the tap and break the chip, if its still tight remove it and clean both the tap and the hole
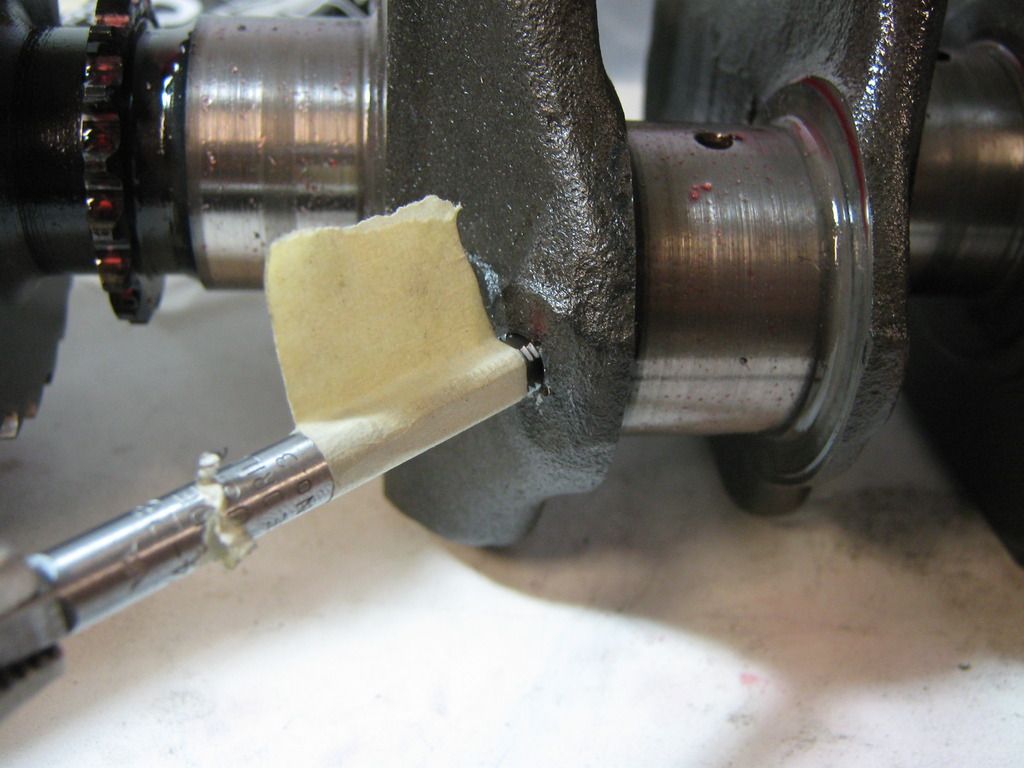


7. Now your getting close to depth so try your set screw you want it to be tight and bound up and still be proud of the surface.
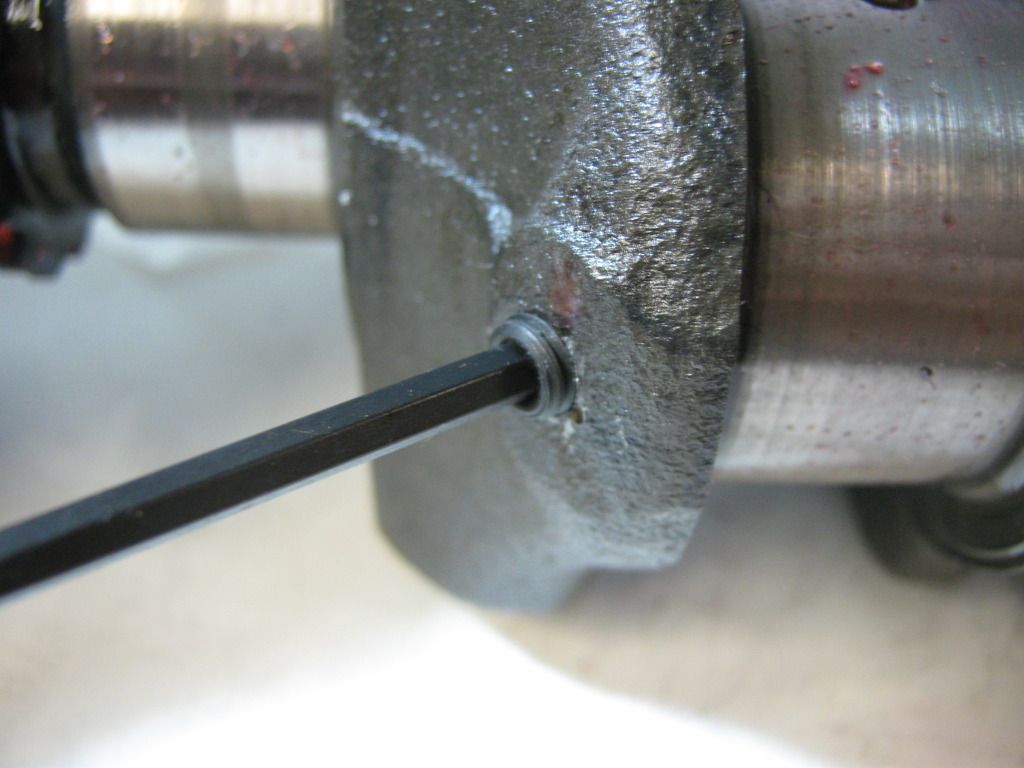


8. Go back in with the tap and slowly go 1/2 a turn deeper with the tap clearing chips as you go outlined in step 6.


9. try set screw again you want it flush with surface. if its still proud repeat step 8. The whole idea here is to get the bottom threads on the grub screw to bind in the starter portion of the taps threads, this creates a mechanical lock
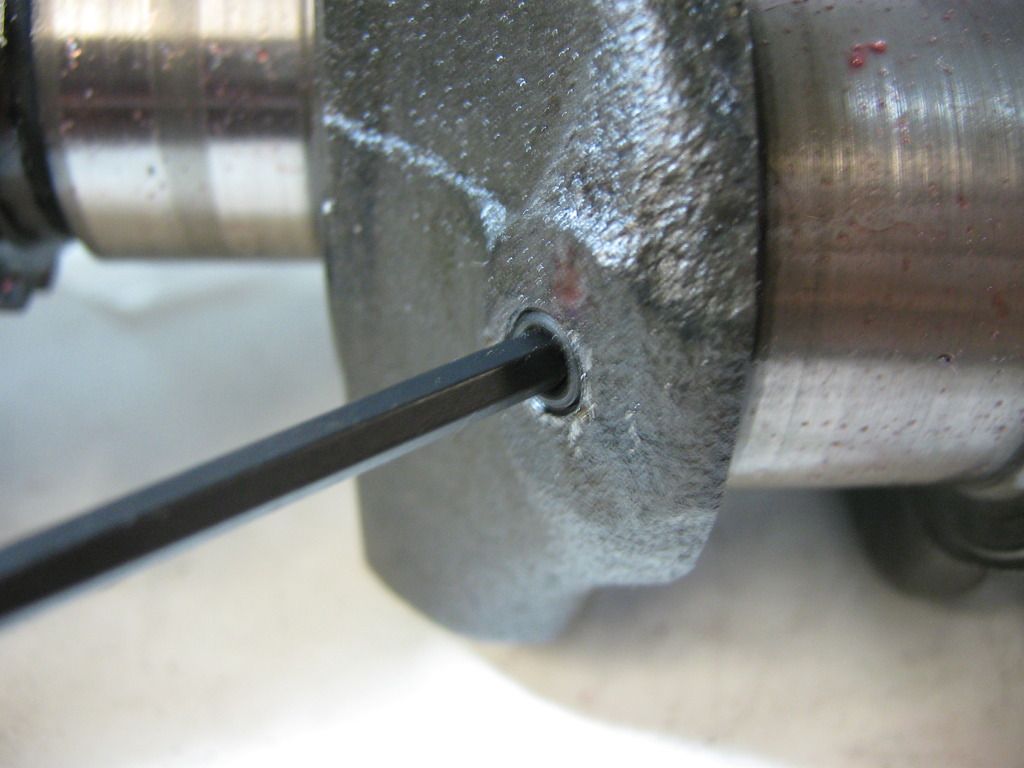


10. After your done and have the set screw flush with the crank and locked or binding. Remove all the set screws and clean the hell out of the crank passages, any drilling or tapping chips left can be picked up by oil and washed into the bearings which would be all kinds of bad !!! 

11. After the passages are clean make sure your new threads are clean of oil and grease. Use some lacquer thinner or acetone to do final cleaning.

12. Apply red loctite to grub screws and tighten them down.

13. If desired stake the head of the set screw this will provide 3 different locks to keep them in place. 

« Last Edit: April 21, 2015, 03:21:42 PM by Garage_guy_chris »
1971 Cb450 Cafe  (on the road)
1974 Cb750 Restomod (on the road)

Offline Garage_guy_chris

  • Hot Shot
  • ***
  • Posts: 730
Re: Cleaning crankshafts under the balls (Finished with pics)
« Reply #8 on: April 21, 2015, 01:51:17 PM »
One last question regarding this.

Should the crank be balanced after replacing the balls? Or is it not needed?


My thinking is to have it checked as im sure balancing technology has come along way in 44 years. A re-balance would find any new imbalance that may have been introduced by this procedure or just get a more precise balance based on the evolution of balancing technology.

The only problem at this point may be time frame i really dont want to wait 2-3 weeks to have it done, as i think my engine builder/machinist is pretty busy
1971 Cb450 Cafe  (on the road)
1974 Cb750 Restomod (on the road)