Author Topic: Marissa's 1972 CB500  (Read 95117 times)

0 Members and 1 Guest are viewing this topic.

Offline Marissa

  • Enthusiast
  • **
  • Posts: 170
Re: Marissa's 1972 CB500
« Reply #375 on: May 15, 2019, 09:22:02 PM »
I think I got those fuel t's for ya...those are some parts you really can't mess around with anything less than the real thing. 

These are from a rack of 022a's that were offered for free to me so just double check they are what you need and pm and we will get them headed your way.

I think I actually have 627Bs, but I could take them apart and give you the sizing of the T fitting to see if they interchange!
1984 Nissan 300zx - sold
2016 Ford Fiesta ST - daily
1972 Honda CB500 - infinite work in progress

Instagram- marissasimos

Offline Marissa

  • Enthusiast
  • **
  • Posts: 170
Re: Marissa's 1972 CB500
« Reply #376 on: May 15, 2019, 09:23:41 PM »
I don’t use any hose clamps. If you use OEM size 5.5mm hose you don’t really need anything. You can get little spring clamps, but really if it fits tight there’s not much pulling force on it so it doesn’t really matter.

Behind that cam cover (I’ll call it the rocker shaft cover) there’s three places it could leak from. The two rocker shaft holes and the valve cover screw that’s in there. Tightening down the rocker shaft cover won’t do much to help the leak either way. Those o-rings that are on the dowels go into a bore. If they’re in at all then putting them deeper into the hole won’t make it a better seal. Did you replace those o-rings? The valve cover screw has two copper crush washers under it. One under the head of the screw and one under the little L bracket. Did you replace them? If not, you can try and anneal them and see if that works.

For the oil pump, honestly the JIS screws do just fine. You don’t need to buy new hardware to get more torque out of it. If it leaks, replace the o-rings. I’d hate to see a post that says you sheared off a screw or stripped out the threads in the case. Remember, there isn’t a cork gasket between it which might benefit from more “squish”. There’s metal to metal contact with an o-ring inside. If the metal of the oil pump is contacting the other metal of the case, tightening it more is just stretching the fasteners.

The racing idle could be out of sync carbs, but it could be an air leak too. Other things could cause that like poorly routed throttle cables too. BUT as the motor heats up the idle is going to increase just do to a more efficient burn. Was it increasing really fast or was it a slow increase?

Good posts lately, you’re getting close!!!

Thanks Dave! I’ll have to check what type of washers I used now that you brought it up. I think some of my stainless hardware kit went there and potentially may be using stainless washers that aren’t crushing and sealing.
1984 Nissan 300zx - sold
2016 Ford Fiesta ST - daily
1972 Honda CB500 - infinite work in progress

Instagram- marissasimos

Offline seanbarney41

  • not really that much younger than an
  • Really Old Timer ...
  • *******
  • Posts: 10,895
Re: Marissa's 1972 CB500
« Reply #377 on: May 16, 2019, 09:35:57 AM »
I think I got those fuel t's for ya...those are some parts you really can't mess around with anything less than the real thing. 

These are from a rack of 022a's that were offered for free to me so just double check they are what you need and pm and we will get them headed your way.

I think I actually have 627Bs, but I could take them apart and give you the sizing of the T fitting to see if they interchange!
or just check Honda parts fiche
If it works good, it looks good...

Offline Marissa

  • Enthusiast
  • **
  • Posts: 170
Re: Marissa's 1972 CB500
« Reply #378 on: May 16, 2019, 05:28:45 PM »
16191 300 004, doesn't say sizing or anything
1984 Nissan 300zx - sold
2016 Ford Fiesta ST - daily
1972 Honda CB500 - infinite work in progress

Instagram- marissasimos

Offline 754

  • Really Old Timer ...
  • *******
  • Posts: 29,050
Re: Marissa's 1972 CB500
« Reply #379 on: May 16, 2019, 05:38:44 PM »
300  is a 750 part  so there should be a few around..
Maker of the WELDLESS 750 Frame Kit
dodogas99@gmail.com
Kelowna B.C.       Canada

My next bike will be a ..ANFOB.....

It's All part of the ADVENTURE...

73 836cc.. Green, had it for 3 decades!!
Lost quite a few CB 750's along the way

Offline Marissa

  • Enthusiast
  • **
  • Posts: 170
Re: Marissa's 1972 CB500
« Reply #380 on: May 16, 2019, 05:41:11 PM »
Oil pump leak fixed, cam leak fixed.

Got it idling for 2-3 minutes, again, for it to seemingly run out of gas. Here's what's going on:

Put fuel valve on ON, sit for 2 minutes to let the fuel fill up. Turn it over, sounds good but not starting. Open throttle all the way, turn it over again, pretty much start right up.

However, on ON, it seems to suck up all the fuel and eventually die out.

Reserve however, seems to work instantly. The problem is, it will start to pour out fuel.

*ALL 4 FLOATS WERE ADJUSTED TO 22MM*

After we had it idle for 2-3 minutes, I looked at the exhaust pipes. 1 & 2 were getting appropriately hot, 3 & 4 were only a tad warm.

Out of curiosity, I swapped the fuel lines to the two fittings on the fuel valve. When I did this, I then found that 3 & 4 were getting warm.

I'm pondering if my fuel valve is just out of wack and dirty? It was one of the first things I rebuilt and I'm thinking of just buying a new one, potentially looking for a new one with a single fitting and then just running a Y fitting that will feed into both lines instead.

This weekend, I will pull the plugs and see what they look like. I have extras just in case.

Side note: when it doesn't start up and the fuel valve is on ON, we heard it backfire and smoke come out of some of the carbs. Is that a sign that it's flooding?
1984 Nissan 300zx - sold
2016 Ford Fiesta ST - daily
1972 Honda CB500 - infinite work in progress

Instagram- marissasimos

Offline 754

  • Really Old Timer ...
  • *******
  • Posts: 29,050
Re: Marissa's 1972 CB500
« Reply #381 on: May 16, 2019, 05:55:15 PM »
Sounds plugged in petcock or tee.
 Is it dual outlet petcock ? Put 2 pieces of hose to a catch can and observe flow.
Maker of the WELDLESS 750 Frame Kit
dodogas99@gmail.com
Kelowna B.C.       Canada

My next bike will be a ..ANFOB.....

It's All part of the ADVENTURE...

73 836cc.. Green, had it for 3 decades!!
Lost quite a few CB 750's along the way

Offline Marissa

  • Enthusiast
  • **
  • Posts: 170
Re: Marissa's 1972 CB500
« Reply #382 on: May 16, 2019, 07:59:54 PM »
Sounds plugged in petcock or tee.
 Is it dual outlet petcock ? Put 2 pieces of hose to a catch can and observe flow.

Yep, this confirmed it! I have the whole petcock assembly taken apart and all metal pieces in the ultrasonic. I feel like inherently they will never be equal, as the second fitting seems to feed off of the first, and has to travel through 2 90 degree angles.


Some yucky stuff.


You can see in this photo that there's only one way for fuel to flow into the fittings, and the one that is seemingly clogged is the fitting that gets fuel last.

My concoction of ultrasonic magic.


From earlier:
« Last Edit: May 16, 2019, 08:01:45 PM by Marissa »
1984 Nissan 300zx - sold
2016 Ford Fiesta ST - daily
1972 Honda CB500 - infinite work in progress

Instagram- marissasimos

Offline DaveBarbier

  • Really Old Timer ...
  • *******
  • Posts: 5,616
Re: Marissa's 1972 CB500
« Reply #383 on: May 17, 2019, 04:44:27 AM »
So the green circle hole feeds the right barb, right? Well it looks like there’s supposed to be a hole on the left side circled in red. Is that the case?


Offline DaveBarbier

  • Really Old Timer ...
  • *******
  • Posts: 5,616
Re: Marissa's 1972 CB500
« Reply #384 on: May 17, 2019, 04:47:48 AM »
After cleaning the petcock, I’d make sure the jets are not clogged from some debris working it’s way down the line.

Offline 754

  • Really Old Timer ...
  • *******
  • Posts: 29,050
Re: Marissa's 1972 CB500
« Reply #385 on: May 17, 2019, 09:07:57 AM »
A picture back a few shows the drain lines, one has sediment in it. Just drop the bowls and make sure they are clean.
 Sometimes one outlet will flow less, and when you block or pinch off that one the other will start flowing faster.
In this case though the one appears to be plugged up somewhere. 
 You are getting close.
Maker of the WELDLESS 750 Frame Kit
dodogas99@gmail.com
Kelowna B.C.       Canada

My next bike will be a ..ANFOB.....

It's All part of the ADVENTURE...

73 836cc.. Green, had it for 3 decades!!
Lost quite a few CB 750's along the way

Offline wolf550

  • Expert
  • ****
  • Posts: 858
Re: Marissa's 1972 CB500
« Reply #386 on: May 17, 2019, 12:17:58 PM »
im using the 627B's on my 500/550 the T fitting measured 11.21mm where the o rings attach to. its the same measurement as my set of 022A's T fittings. i'd get those from seanbarney41
74' CB550 (Sold)
71' CB500/550 (Sold)

Offline seanbarney41

  • not really that much younger than an
  • Really Old Timer ...
  • *******
  • Posts: 10,895
Re: Marissa's 1972 CB500
« Reply #387 on: May 17, 2019, 01:01:39 PM »
Yup, o rings are same part number from honda.  These carbs are the same castings
If it works good, it looks good...

Offline Marissa

  • Enthusiast
  • **
  • Posts: 170
Re: Marissa's 1972 CB500
« Reply #388 on: May 20, 2019, 09:53:46 AM »
I actually found a T fitting local to me and picked it up Saturday thanks to Justin, he's here on the forums. Thanks again!

Cleaning the fuel valve ended up being a waste of time. I was cleaning the brass pick up tube with a nylon plastic bristle and instantly it developed cracks and fell apart. I can't get solder to stick to it either. So a new OEM one is on the way.


Blurry image Dave but there is only one opening for the fuel to go through.

Also decided to order new float bowl gaskets, and I found reproduction floats and pins which I also ordered. One of my floats has some foam missing (not sure how?), two of the floats have broken brass pieces, etc. At this point I want to eliminate all points that could lead to fuel issues. I realized some of the floats have better range of motion than others because some of the pins are chewed up, wondering if that could cause the floats to "catch" at certain angles and prohibit it from stopping the flow of gas.

Weather is getting nice out and I'm antsy for these parts to arrive now that I'm out of this semester.

1984 Nissan 300zx - sold
2016 Ford Fiesta ST - daily
1972 Honda CB500 - infinite work in progress

Instagram- marissasimos

Offline Gurp

  • I'm no.......
  • Master
  • *****
  • Posts: 2,101
  • Once was a...
Re: Marissa's 1972 CB500
« Reply #389 on: May 20, 2019, 01:11:57 PM »
Rough pins can def cause them to "bind" had it happen a few times myself. And the ole backyard mech throwing a nail in instead of the pin.
slow Progress 74 cb550.

Poor boy chop 73 CB500 chop

Future project 77 Cb750 Amen Savior

Offline Godffery

  • Godffery's Garage
  • Expert
  • ****
  • Posts: 1,171
  • Wisdom brings a realization of how little we know.
    • Godffery's Garage hosted by VinMoto.org
Re: Marissa's 1972 CB500
« Reply #390 on: May 20, 2019, 09:45:58 PM »

Cleaning the fuel valve ended up being a waste of time. I was cleaning the brass pick up tube with a nylon plastic bristle and instantly it developed cracks and fell apart. I can't get solder to stick to it either. So a new OEM one is on the way.


That cracked pickup tube can be replaced.
Mount the petcock in a soft jaw / padded vice, take note of the measurements of the tube OD and height, grab the tube at the bottom, wiggle around till it snaps off at the bottom, get a new (slightly larger) brass tube at local hardware / craft store, Using a slightly under sized drill bit, drill out remains of old tube (being careful to go just deep enough to remove only the old bits of the tube) now you should have a fresh hole that is a tiny bit tighter then the OD of the new tube, (you want a press fit of the tub into the newly drilled hole) for getting the new tube cut at the proper length, measure the depth of the drilled hole, and ad that extra amount of length to the measurement for the desired total height of the tube, using a standard plumbing pipe cutter will give the tube a tapered end, this will help with starting the pressed fit, then get a nail that fits easily into the top end of the tube, this will protect it while you drive the tube in the rest of the way, now set the newly restored petcock on the bench, take some pix, post them on your build thread, sit back and revel in the glory of the moment!


Offline Marissa

  • Enthusiast
  • **
  • Posts: 170
Re: Marissa's 1972 CB500
« Reply #391 on: May 27, 2019, 05:10:50 PM »
None of the hardware stores near me carry brass in a size that would work.

I ended up getting an OEM new petcock from David Silver Spares and this new valve is doing the same exact thing as the old one.

Additionally, I confirmed that this whole fuel issue is partially related to the petcock. The lack of fuel being transferred to one bank of the carbs is obviously a major issue, but the carbs that DO get fuel and dumping it is another part.
I got reproduction floats from 4into1.com and though they are pricey for repro I will say it doesn't seem like there's too many variables for it to make or break the project and the new hardware operates like a dream in comparison. It was definitely worth it. Ever since I replaced those, no fuel dumping, no leaks, no draining into the overflow tubes!

While I waited for the new petcock to come in the mail, I decided just to use a plastic jug gas tank meant for use with carb synchronization, and see how the new floats performed. I connected it to both banks just using a plastic T fitting and sure enough I was finally able to get the bike stable and idling confidently.

Got my first test ride in and noticed a few issues. 1, forgot to tighten down and adjust the clutch cable, so I was only able to get it to hold gear shifts downhill. I only tested 1 and 2. 2, I made new fender brackets to mount my fender closer to the tire and it intermittently rubs the tire. I have been watching and checking and it doesn't seem to be the brackets or the fenders moving, so now I am worried the wheel is perhaps bent or if its not mounted evenly? But it looks even and the axle looks fine in the fork body mounts. Perhaps the fork bodies are rotated a bit and not facing perfectly left and right?? I had these wheels balanced at a reputable shop so I'd like to think if there was any chance of a bent rim they would have noticed and said something.

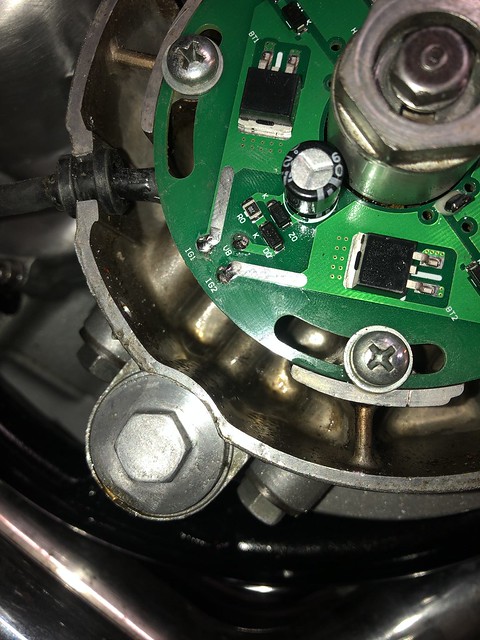
But most importantly of all, another leak has appeared... Right side crank seal.

Looks like the seal itself ovaled out. You can't really see it in the picture, but I could see the inner diameter of the seal at the bottom of the crank snout.


You can see the buildup here as well as it also trailing straight down the casing.


I posted about it on some FB pages and asked a few forum members for advice and right now, we are going to try reinstalling the seal without splitting the cases. Enough people told me they had to do this job plenty of times on their 500/550, so I'm willing to try it first. We have high quality seal installation tools at work and they are letting me borrow them for the job so I'm hopeful.

I ordered 2 new OE seals from David Silver Spares so that if one method doesn't work, we have an extra one waiting. I also ordered a left one just in case, haven't inspected that side yet though. We removed the failed seal using the wood screw trick.

Here's what it looked like before we cleaned it. I used Q tips and gas and brake cleaner on the Q tips and cleaned them to the point that no more dirt is appearing on the cotton. Will reclean when seal is here.


The seal kit I used to assemble the bike was the kit from 4into1.com in case anyone is wondering. I ordered it out of convenience/ being noob friendly, however if there's anyone building their CB and reading this I would recommend just taking the part numbers out of the description of the kit and ordering OE. I don't know what caused this failure but I think failure would have been less likely had this seal had a lip like OE does.


1984 Nissan 300zx - sold
2016 Ford Fiesta ST - daily
1972 Honda CB500 - infinite work in progress

Instagram- marissasimos

Offline 754

  • Really Old Timer ...
  • *******
  • Posts: 29,050
Re: Marissa's 1972 CB500
« Reply #392 on: May 27, 2019, 10:50:08 PM »
Try a hobby or model shop for brass tube, and lots on ebay. .
He'll you could probably cut all but 7/16  of the brass tube and slip stiff clear fuel line on it, not like it will bend and droop.
« Last Edit: May 27, 2019, 10:53:07 PM by 754 »
Maker of the WELDLESS 750 Frame Kit
dodogas99@gmail.com
Kelowna B.C.       Canada

My next bike will be a ..ANFOB.....

It's All part of the ADVENTURE...

73 836cc.. Green, had it for 3 decades!!
Lost quite a few CB 750's along the way

Offline DaveBarbier

  • Really Old Timer ...
  • *******
  • Posts: 5,616
Re: Marissa's 1972 CB500
« Reply #393 on: May 28, 2019, 04:44:37 AM »
Good luck with the seal, really pulling for it to work.

If you raise the front and spin the wheel does it reliably rub the fender in the same spot? I think normally motorcycle wheels are statically balanced so one might not notice anything that’s wrong since it’s not spinning fast. Put a dial indicator or even bend a copper wire to act as a pointer and spin the wheel to check runout and hop of the rim. 

Offline SF

  • Hot Shot
  • ***
  • Posts: 524
  • I burn gas very well
Re: Marissa's 1972 CB500
« Reply #394 on: May 28, 2019, 06:00:30 AM »
Possible flat spot from sitting.....


Sent from my iPhone using Tapatalk
92 wr250 sold
98 zx6r sold
04 zx10r
73 cb350 twin
75 cb550f
75 cb550f
72 r5c
rgid springer bobber project

Offline Marissa

  • Enthusiast
  • **
  • Posts: 170
Re: Marissa's 1972 CB500
« Reply #395 on: June 09, 2019, 06:53:53 PM »
Here's where we are at:

New crank seal installed
New leak found

Still having petcock issues
Carb jetting issues

Finally got my seals from David Silver Spares... They were definitely manufactured at different times or different factories as the sizing of the font and the arrows are quite different. I could tell these were quite old too so I was not the most confident in these seals, nonetheless I installed one for now and with about 10 minutes of run time it hasn't failed yet.


Come to find out, the seal was not the only leak in that area...


Turns out it's leaking at the cases seam as well. Apparently I did not put enough gasket maker on in this section. What a grave mistake.

So now the current plan of attack is Permatex Indian Gasket Maker. I cleaned and dried the seam thoroughly, then applied a dab of the gasket maker to the seam. I'm still letting it cure, it's been about a day so far. If this does not work, I guess the next step up is to try RTV, or JB Weld. I'm disappointed that this is such a silly mistake, and I'm hoping I can do SOMETHING to prevent myself from needing to split the cases again.


While the bike was sitting pretty, I decided to pull off the gas tank to look further into the fuel delivery issue.
I started by cleaning out the tank with white vinegar. I didn't buy enough to fill the tank entirely because I figured if I just kept sloshing it around it would be good enough. I learned from this method that the vinegar will cause surface rust almost instantly, so I made more work for myself than I needed to.

After cleaning it, putting gas back into it, and purging the system, I think it's definitely better than it was before. From what I could see in the tank beforehand, it looked pretty clean. But now that I saw what came out of it, I'm definitely glad I cleaned it out, even if I now have mild surface rust on the inside that I'll readdress at some point. I don't know if it is perfect at this point though as I am still having intermittent flow issues with both fittings.


Here's how it was sitting in my little nook in the garage this Saturday:


Pulled the plugs off and trimmed down the excess plug wire finally, and as suspected they're quite rich, and of course 1 & 4 are the ones with the most soot because 3 & 4 haven't been getting a whole lot of fuel to fire on.


Going to order 100s definitely and maybe 40s? (Can't remember what size I'm at currently, I have to go through my orders) Not going to pull the carbs off though until I know I have the petcock issue fixed. Focusing on one step at a time with the fuel delivery.

1984 Nissan 300zx - sold
2016 Ford Fiesta ST - daily
1972 Honda CB500 - infinite work in progress

Instagram- marissasimos

Offline LastChancer88

  • Full Member
  • *
  • Posts: 58
  • “We’re gonna have to order that”
Re: Marissa's 1972 CB500
« Reply #396 on: June 10, 2019, 12:48:16 PM »
While the bike was sitting pretty, I decided to pull off the gas tank to look further into the fuel delivery issue.
I started by cleaning out the tank with white vinegar. I didn't buy enough to fill the tank entirely because I figured if I just kept sloshing it around it would be good enough. I learned from this method that the vinegar will cause surface rust almost instantly, so I made more work for myself than I needed to.


I just did the same thing a few weeks ago.  Let a spare tank sit for a week with white vinegar sloshing it every now and then, emptied it out and looked great!.  Sloshed some gas in it, but I wasn't ready to swap my tanks yet and let it sit for a day.  BOOM.  insta-rust.  I sympathize. 
1973 Honda CB500 Four
1973 Suzuki TC125

Offline DaveBarbier

  • Really Old Timer ...
  • *******
  • Posts: 5,616
Re: Marissa's 1972 CB500
« Reply #397 on: June 11, 2019, 04:39:45 AM »
Nice Marissa, glad the seal is holding up so far. As for the case leak, whatever works I guess. If I were you I’d fix it correctly in the winter.

Offline Marissa

  • Enthusiast
  • **
  • Posts: 170
Re: Marissa's 1972 CB500
« Reply #398 on: June 14, 2019, 05:27:11 PM »
Got 100 and 40 jets in today. To start, I just threw in the 100s in case the 100s with the 40s would be too lean.

Cleaned my spark plugs, yadah yadah yadah. I was very certain I would be able to ride tonight. I’ve been getting closer and closer and closer, and now my electronic ignition seems to have failed. I’m not getting power at the plugs, not getting it at the coils, not getting it at the coil wires. The LED is lighting up, I tried resetting it but it’s not giving charge.

I am super frustrated. It’s a Daytona ignition, I don’t see a lot of people running that system and maybe this is why? I got it off of David Silver Spares about a year ago. I keep having issues with products from them and it’s becoming distasteful. Should I just convert to a Dyna system? Charlie’s place? ?????

Any insight on electronic ignition is appreciated.

Thanks guys.
1984 Nissan 300zx - sold
2016 Ford Fiesta ST - daily
1972 Honda CB500 - infinite work in progress

Instagram- marissasimos

Online RAFster122s

  • I feel like a really really
  • Really Old Timer ...
  • *******
  • Posts: 12,528
  • SOHC4 member # 2605
Re: Marissa's 1972 CB500
« Reply #399 on: June 14, 2019, 05:35:31 PM »
HondaMan's ignition uses your points and works very well with virtually no wear to the points and no need for the condensers to be connected, were it to ever fail a few minutes with a screwdriver and switching some connections and you are back running on original points system in very little time. Not that Mark's electronic ignition boxes have issues they are very reliable. Mark can even recommend a source of new 5ohm coils that have replaceable wires for less than $100, I think they are $70 or 80
David
David- back in the desert SW!