Author Topic: CB550K0 Build - 450T Tank mods  (Read 56441 times)

0 Members and 1 Guest are viewing this topic.

Offline streak09

  • Enthusiast
  • **
  • Posts: 203
  • I don't know what im doing, but I'll do it anyway
Re: CB550K0 Build - Carbs installed!
« Reply #200 on: June 05, 2015, 11:31:28 AM »
Riverfever, Cb750 has me covered. I've heard Pods are difficult to tune, and honestly, I like the look of the K&N better than the pods. Its a compromise of performance vs looks. Stock air-box and filter will give smoothest (if not best) performance, but I like the look of the open triangle, so I made a compromise of K&N onto stock air-box.

I think you will need to kick MUCH longer to see oil up to the head.

Thanks for the feedback, I was hoping for that answer. From what I have collected, if I leave a valve adjustment cover off during start-up, oil should come squirting out within a few seconds of it running. If not, it could mean trouble. Is this correct?


Plans are to get the exhaust back on, external fuel tank (aka: old simple green bottle) hooked up, sparkplug caps installed, and throttle and clutch cables installed this weekend. I am also going to modify a spare carb drain plug so I can check fuel level in the bowls.

After all that is done, its time to crank her over!

Offline riverfever

  • Master
  • *****
  • Posts: 1,769
Re: CB550K0 Build - Carbs installed!
« Reply #201 on: June 05, 2015, 12:21:44 PM »
I like the way it looks too. I hate removing and wrestling that intake on and off and dealing with this boots and would rather not have more tuning issues than I already do.
http://forums.sohc4.net/index.php?topic=127186.0

"You wouldn't think that out here...a man could simply run clear...out of country but oh my...oh my...nothing but the light." -Ben Nichols

Offline streak09

  • Enthusiast
  • **
  • Posts: 203
  • I don't know what im doing, but I'll do it anyway
Re: CB550K0 Build - Carbs installed!
« Reply #202 on: June 07, 2015, 08:51:40 PM »
Installed all the cables, plug caps, and got the exhaust back on yesterday. Everything went very smooth. This morning I hooked up the fuel and check fuel level. The modified drains plugs worked out great.


Carbs 1-3 seem a bit high, about at the top edge of the bowl. #4 seemed to be right on at 4mm below the top. I will get those evened out soon. I didn't bother adjusting for first start-up. Carbs are all tight and now leaks.

Picked up some plugs while we were out for lunch and got them installed. Gave everything a once over and decided to try to fire it off. After a few kicks I could hear a slight pop. A few more kicks and it sputtered for a few seconds. Getting pretty excited at this point... but starting to wonder if my electronic ignition is hooked up correctly, or if timing is off. Buuuut, an increase on the idle screw had her come to life! Had to keep steady of the throttle to keep it going, but didnt sound too bad. Eventually I took it off choke and the idle raised and I was able to dial the throttle screw back to a nice idle. Super excited now.

Seemed like it was a bit lean, so I back out the mixture screw out to richen it. Seems better. Felt the headers, 1-2 were really hot, 3-4 I could pretty much lay my hand on...  :( crap. Let it sit for few minutes and start it up again, and it idled really high. I thought it was a bad sign, but then realized it was running on all four and it sounded much better. Set the idle low and she just purred. Love the sound of the exhaust, loud, but not blaring. It just sounds so beefy and strong.


Very, very good day. Its been a long time, 2-3 years, since Ive had it running and it feels so good. A long way to go to get it road worthy, but getting it started is a huge milestone.

Some fine tuning will be coming up. Check dynamic timing, adjust floats, and syncing carbs will probably be the next steps.

By the way, anyone hear anything weird while its running? I hear a bit of cam chain noise, normal? or should I be concerned? And thanks for those who have helped along the way!


Online RAFster122s

  • I feel like a really really
  • Really Old Timer ...
  • *******
  • Posts: 12,559
  • SOHC4 member # 2605
Re: CB550K0 Build - Vroom Vroom! Finally have a runner!
« Reply #203 on: June 07, 2015, 11:30:43 PM »
Congrats on your running bike!
I believe some noise is to be expected, but I would check the chain has been adjusted. The water cooled bikes can dampen the noise a little easier with heavier walls and the water cooling passages.  They sound different from an aircooled motor I think.
Lots of factors in a motor's noise and the valve train contributes as well.

Does it matter if the fluid in the drain tubes checking height/fuel level is longer on some carbs? I lean towards it having a very minor impact, but I don't know...just a gut feeling. 

Good luck tuning and finishing up the build.  Just be patient so you don't make mistakes trying to rush it. I know it is hard not to.

David
David- back in the desert SW!

Offline streak09

  • Enthusiast
  • **
  • Posts: 203
  • I don't know what im doing, but I'll do it anyway
Re: CB550K0 Build - Vroom Vroom! Finally have a runner!
« Reply #204 on: June 08, 2015, 05:51:15 AM »
Thanks RAF. I will definitely take my time getting it right. I think I have done so thus far (well at least I've taken my good sweet ole time!), but it's going to be tough now that I have it running. I did tension the chain before start-up, so hopefully it is correct. I don't think you can really mess it up, just loosen the lock nut, let it self tension and lock it back down. I didn't hear any valve noise, so I suppose I adjusted them adequately.

Does it matter if the fluid in the drain tubes checking height/fuel level is longer on some carbs? I lean towards it having a very minor impact, but I don't know...just a gut feeling. 
I don't know how much of an impact it makes, but I've read many times on this forum people recommending adjusting bowl fuel level to be 4mm below the top. I tend to agree with you, I find it hard to believe that it would make much difference, but I have 0 experience in the matter, and it won't hurt anything, so why not?


More than likely the vacuum synch is all that's needed to resolve that noise. You'll be astonished at how quiet she'll become afterwards.
Calj, that's a good point. A sync probably will quiet it down.

Offline P.abrera

  • Hot Shot
  • ***
  • Posts: 404
Re: CB550K0 Build - Vroom Vroom! Finally have a runner!
« Reply #205 on: June 08, 2015, 06:10:41 AM »
Nothin like hearing them fire up after wrenching for so long

Offline minimo

  • Expert
  • ****
  • Posts: 1,202
  • 1977 CB550F 1975 CB400F 1959 Ducati 200 Americano
Re: CB550K0 Build - Vroom Vroom! Finally have a runner!
« Reply #206 on: June 08, 2015, 07:12:40 AM »
Oh, what a feeling. Congrats!

Offline streak09

  • Enthusiast
  • **
  • Posts: 203
  • I don't know what im doing, but I'll do it anyway
Re: CB550K0 Build - Vroom Vroom! Finally have a runner!
« Reply #207 on: June 08, 2015, 08:22:07 PM »
What a feeling indeed! I just want to go out to the garage every 10 minutes and just start it up. So far it starts up easy first kick with choke, let idle for ~30 seconds, then remove choke and she just purrs. Still a bit to go before a test ride so I wont know how the power band is and if any tuning will be needed  for a while yet.

I took a few minutes tonight to check the timing with a timing light. Never used one before, pretty neat. As some of you may know, I'm running Pamco Pete's electronic ignition and you cannot time it statically, hence the timing light.

I don't have a tach on it yet, so I do not know where my idle is, but I set it as low as it could without it sounding like it was laboring. Then checked timing. It was slightly advanced, so I adjusted it a bit to get the F tick dead on with the tick mark on the case. Then I checked at full advance, and at full advance, the tick marks do not line up. Has anyone had this problem before with the Pamco? Im thinking since most riding is done at full advance (i think its full advance around 2500 rpms?) it would make since for timing to be correct at full advance vs idle. Any thoughts?

I've got a pretty good list of knick knacks that need buttoned up so I will work on those for the next week or so. Pretty trivial things, but things to do none the less.

Later  8)

Offline streak09

  • Enthusiast
  • **
  • Posts: 203
  • I don't know what im doing, but I'll do it anyway
Re: CB550K0 Build - Vroom Vroom! Finally have a runner!
« Reply #208 on: June 15, 2015, 07:33:42 PM »
I spent a little more time with the timing light and I think I wasn't reaching full advance because I was setting the "F" mark at too high of an idle. I don't have a tach hooked up yet, and I busted up the one good cable I had while transporting the spare engine. I wouldn't recommend picking up the engine out of a truck bed by yourself, its not bad picking it up and walking it over to somewhere, its putting it down that gets you into trouble  :-\. Anyways... As I was saying, no tach so I didn't realize how high I had the idle set. I was basically using up some of the advance at idle, therefore not allowing me to reach full advance at higher RPMs. Got her to idle veeerrryyy low, set the F, then confirmed full advance at higher RPM.

I even took it for a spin down the street and back to check the clutch and all. Very smooth and feels like a lot of power. Again, long ways from road riding, but got just a little hint and it makes me smile  ;D.

I took some temperature readings with a touch right after I shut it down, this is after running it for about 10 minutes, mostly all idle. Readings are from the top of each header, about 2 1-2 inches from the head flanges.

Cylinder #1 - 275F
Cylinder #2 - 270F
Cylinder #3 - 270F
Cylinder #4 - 300F

Everything looks good until #4. While brainstorming why #4 would be running so much hotter, I remembered that my exhaust tappet cover on cylinder 4 interferes with the cam cover bolts that I had replaced with stainless allen heads. This didn't allow the tapped cover to seat all the way (not much at all actually). I'm thinking that air could be getting sucked in through there causing #4 to run lean, therefore hotter? Regardless if that assumption is right, It needed fixed so I replaced it with a phillips head that allowed clearance to seat all the way. Still need to replace the o-rings, but I'm hoping the condition will improve. I have not been able to verify yet.

I got another goodie in the mail today....


I sprung for the Morgan Carbtune. Ive got a buddy with a boat that I can put it to use on as well, and I think its a pretty neat tool. I know I could have gone the home-made route, but I wussed out  :P.

Probably wont get to much this week, heading to Norris Lake for a much needed vacation!  8)


Offline Restoration Fan

  • My wife will never call me
  • Master
  • *****
  • Posts: 1,956
Re: CB550K0 Build - Vroom Vroom! Finally have a runner!
« Reply #209 on: June 15, 2015, 08:34:42 PM »
Congrats!  That's a heckuva feeling when you hear her run for the first time.
Ron

Stella - Logan's Senior Project    78 750K http://forums.sohc4.net/index.php?topic=141761.0

Logan's Reward - CB500 and CB550 Cafes    http://forums.sohc4.net/index.php/topic,147787.0.html

Offline streak09

  • Enthusiast
  • **
  • Posts: 203
  • I don't know what im doing, but I'll do it anyway
Re: CB550K0 Build - Vroom Vroom! Finally have a runner!
« Reply #210 on: June 18, 2015, 06:39:44 PM »
Congrats!  That's a heckuva feeling when you hear her run for the first time.

Thank you! It sure is!

Well I ran the bike for a bit after tightening the tappet cover, and it is still running really hot on cylinder 4. Is there any other reasons it would be running hot other than being lean? I havent pulled the plugs yet, I suppose that will tell me if im really lean. I havennt vacume synched yet, will that make much difference? I guess I also have the fuel mixture screw to play with. I would like to get it tuned in fairly well before starting on lights, seat, tank, etc.

Hopefully I can keep plugging away a few days a week. My goal is a rideable bike by barber festival time!

Offline lrutt

  • Expert
  • ****
  • Posts: 916
Re: CB550K0 Build - Vroom Vroom! Finally have a runner!
« Reply #211 on: June 26, 2015, 02:13:17 PM »
Could be something as simple as upping the mixture screw for that one. Don't always assume all screws at the same number of turns out is ideal. If you are measuring at idle, that is likely it. Would be a very minor tweak I'd think.
06 Harley Sporster 1200C, 06 Triumph Scrambler, 01 Ducati Chromo 900, 01 Honda XR650L, 94 Harley Heritage, 88 Honda Hawk GT, 84 Yamaha Virago 1000, 78 Honda 750K w/sidecar, 77 Moto Guzzi Lemans 850, 76 Honda CB750K, 73 Norton 850, 73 Honda Z50, 70 & 65 Honda Trail 90, 70 & 71 Triumph 650s, 65 Honda 305 Dream, 81 Honda 70 Passport, 70 Suzuki T250II, 71 Yamaha 360 RT1B, 77 BMW R75/7, 75 Honda CB550K, 70 Honda CT70

Online RAFster122s

  • I feel like a really really
  • Really Old Timer ...
  • *******
  • Posts: 12,559
  • SOHC4 member # 2605
Re: CB550K0 Build - Vroom Vroom! Finally have a runner!
« Reply #212 on: June 26, 2015, 02:47:11 PM »
Not all carbs are identical, over time you may have a deposit in one that doesn't occur in the others. The small passages can be very close. The air feeding may have a twist to it the others do not causing intake backpressure that lessens fuel flow. Might have the head of a screw of the throttle butterfly causing turbulent air and lack of proper atomization.  No telling what could cause it. The jets or needles may not be identcal.

A bit more twist of the adjustment may sort it out.

David
David- back in the desert SW!

Offline streak09

  • Enthusiast
  • **
  • Posts: 203
  • I don't know what im doing, but I'll do it anyway
Re: CB550K0 Build - Vroom Vroom! Finally have a runner!
« Reply #213 on: September 08, 2015, 05:27:39 PM »
Well, after a brief hiatus I am back tinkering with the 550. Doesn't look too good for having it ride-able for the Barber Festival, but I will keep plugging away. Good stuff is happening so I do not want to rush things (ha, progress is anything but a rush on this build!  ::)).

My dad purchased a titled bike so we could putts around the back roads legally, but it had a pretty good leak at the cylinder base. I spent a few minutes here and there tearing down the top end and got it back up and going within a couple weeks. This guy is in pretty good condition, its a keeper.


Small projects like the above, redoing my S90 wheels, and that funny thing called life has put the 550 on the back burner for a bit. I did at least start the 550 about every week, just to keep it fresh.


Now enough excuses about why I have been slacking on the 550 and on to some updates...

I found out that I was running all the carbs reaaaalllly lean. So I set them to all about 1.5 turns out, and it seems much better now. After that I synced them up and its running really smooth now. Good throttle response and good idle. I'm not sure if I need to be tweaking the air screws though. I can't distinguish any change when adjusting them.

I splurged and got a Slipstream Cycle rear set kit. Quality seams very good. I will have to tinker with placement as my modified F exhaust causes some clearance issues. The rear sets are designed to mount at the passenger pegs, which I have done for the time being. I think I will end up moving them forward about 3" in the future for a better riding position and better foot angle. I think slightly higher and swept back bars will help as well. My current ones were just in a pile of parts that came with a previous bike. My exhaust is limiting the downward angle of the brake lever, and moving it forward will also give me more clearance to angle it down.


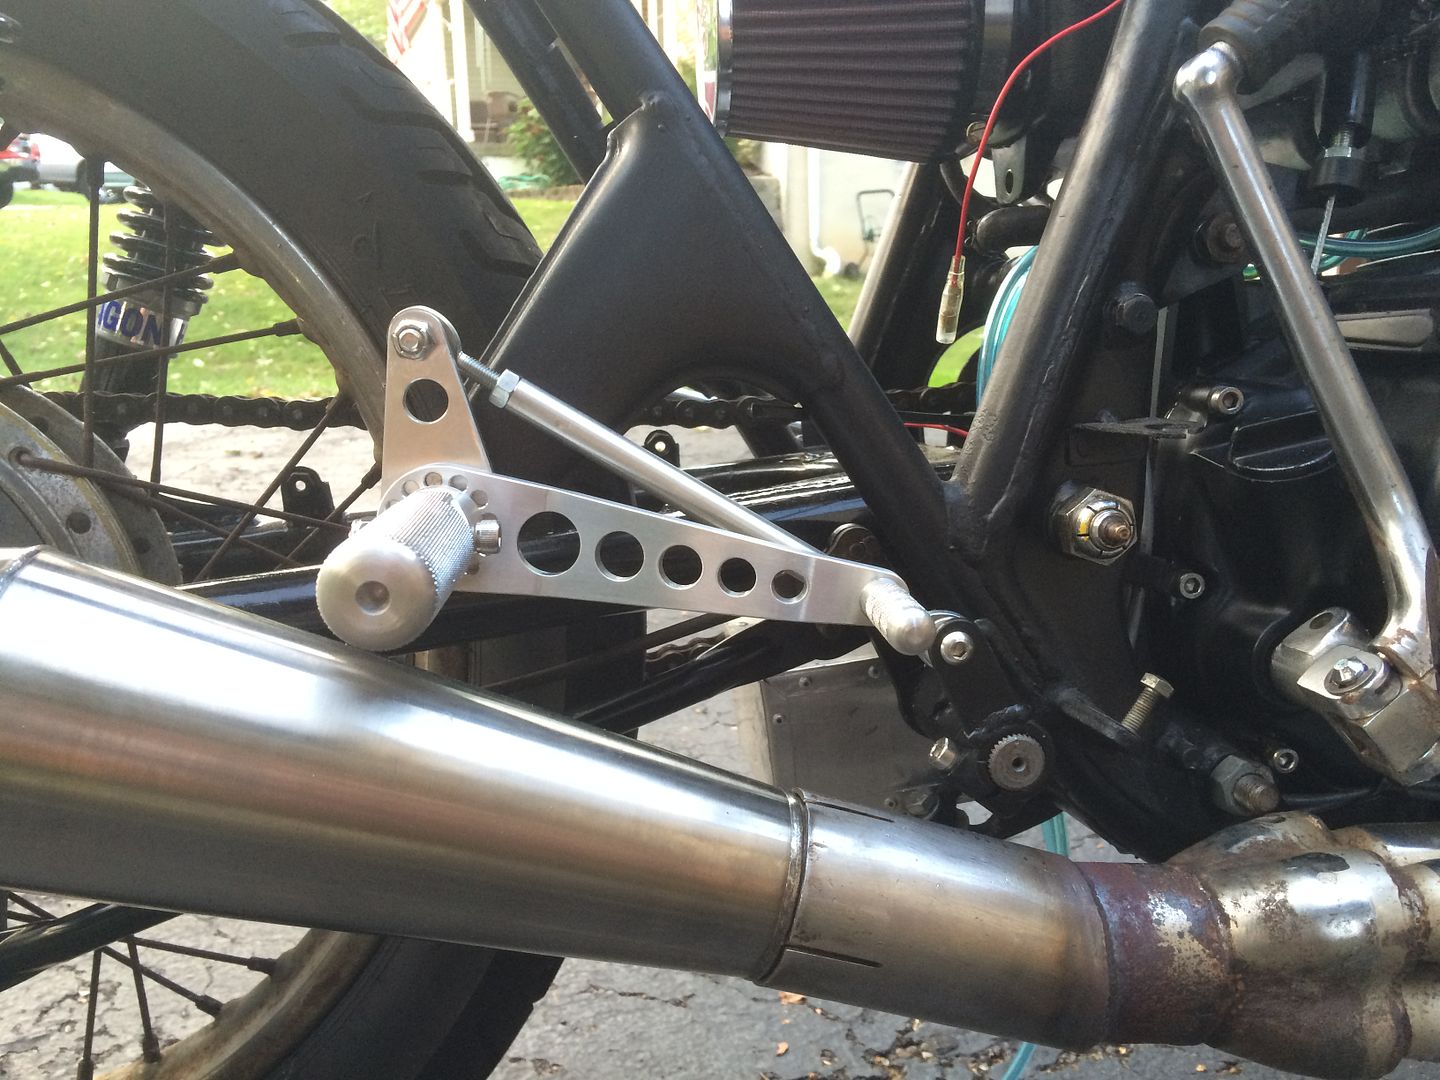
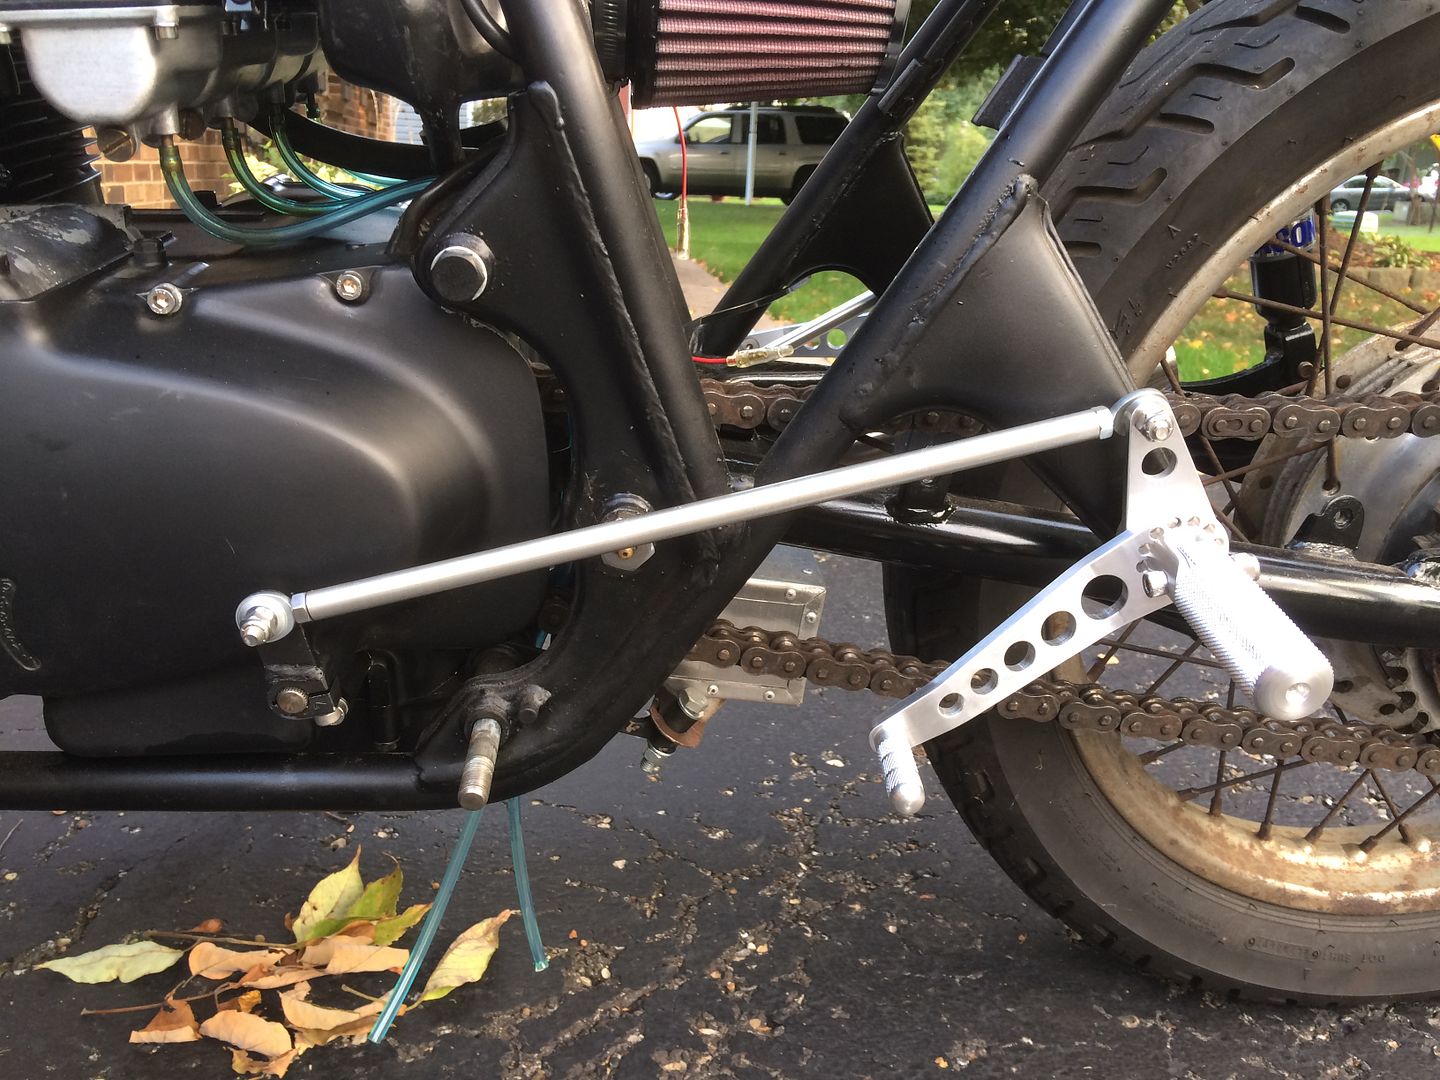
I'm also thinking about painting the linkages and frames black (not the knurled parts). I think it stands out a bit too much for my liking.

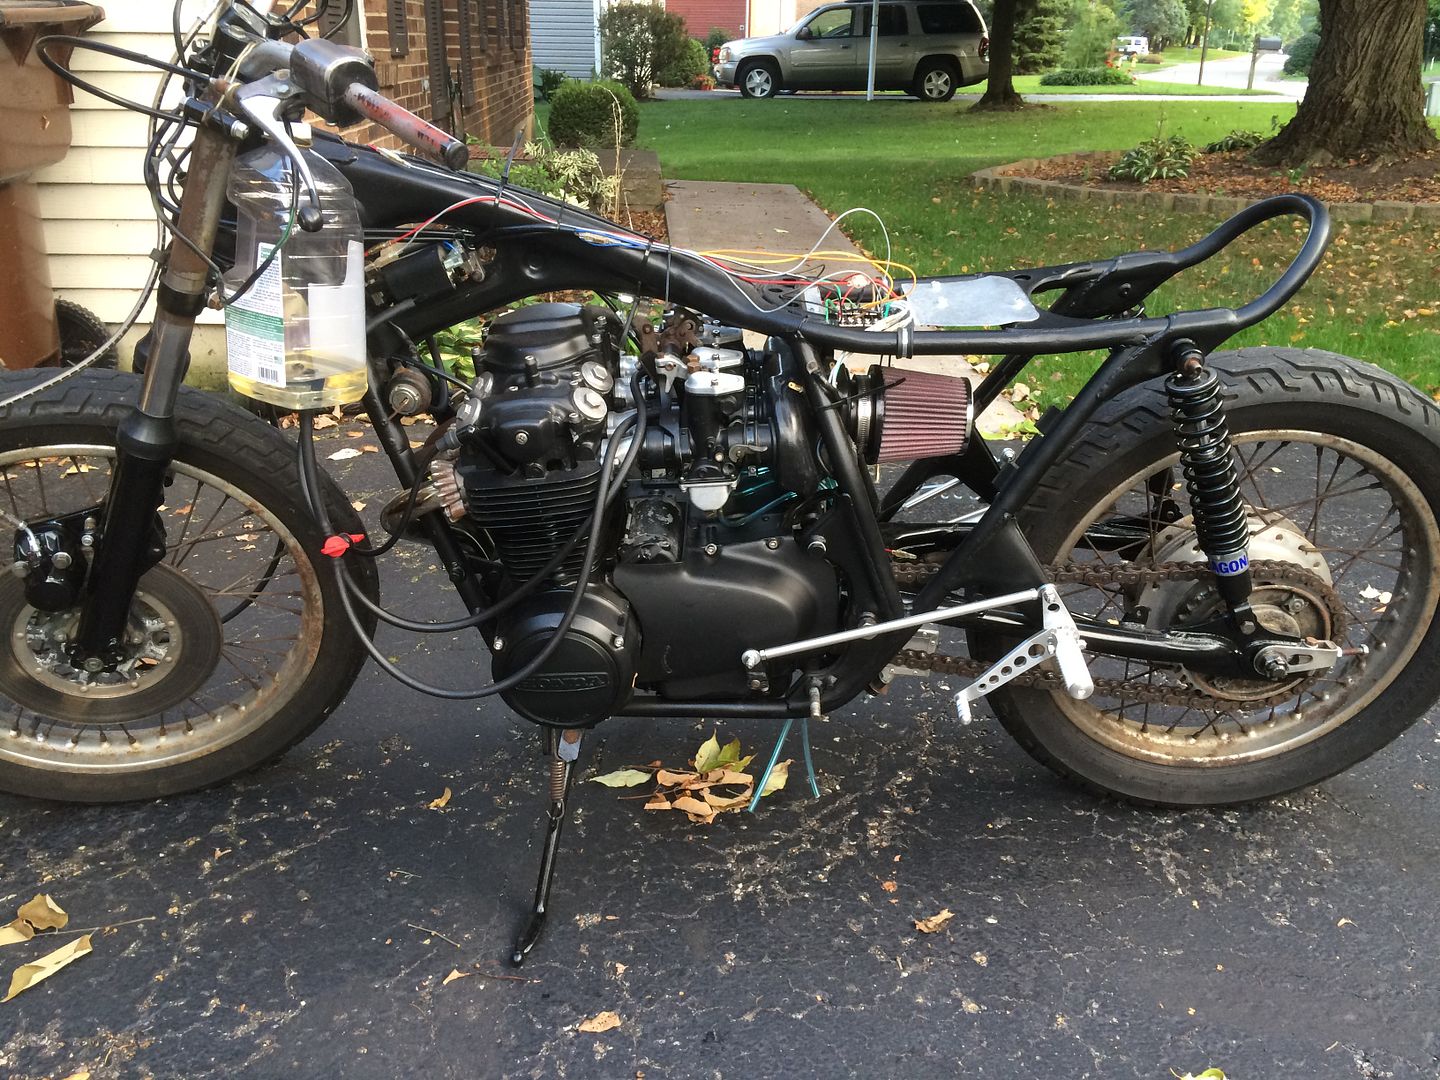
After I got them fitted up today I took it for a spin and it was incredible. It felt so good to wind through the gears for the first time. I got a few strange looks in the neighborhood but its all good. I would probably do the same if somebody was riding by with a Simple Green bottle as a fuel tank... It pulled very well, not stutter at all and will go faster than I'm comfortable with right now  ;D. I was very uncomfortable when I started riding, but I settled in after a while and became more comfortable with the riding position. I do think moving the rear sets forward are needed though.

Next order of business is to figure out my tank situation. With help from you guys, I have identified the tank that I picked as a CB450T.


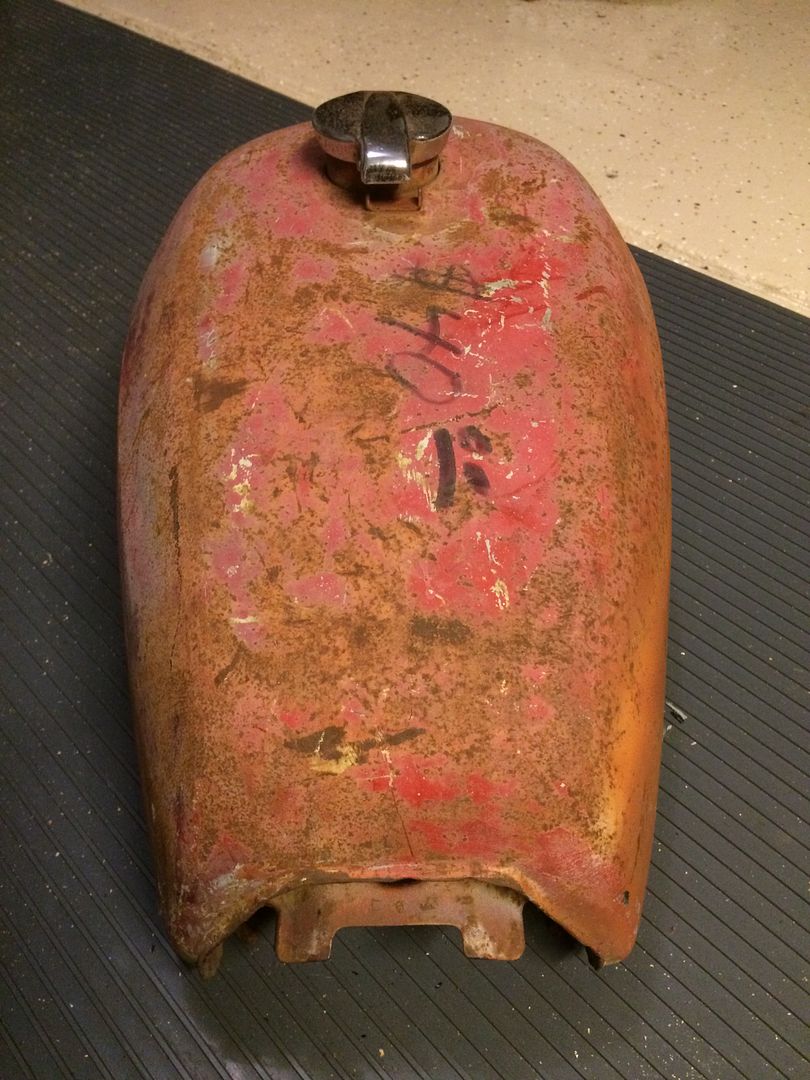
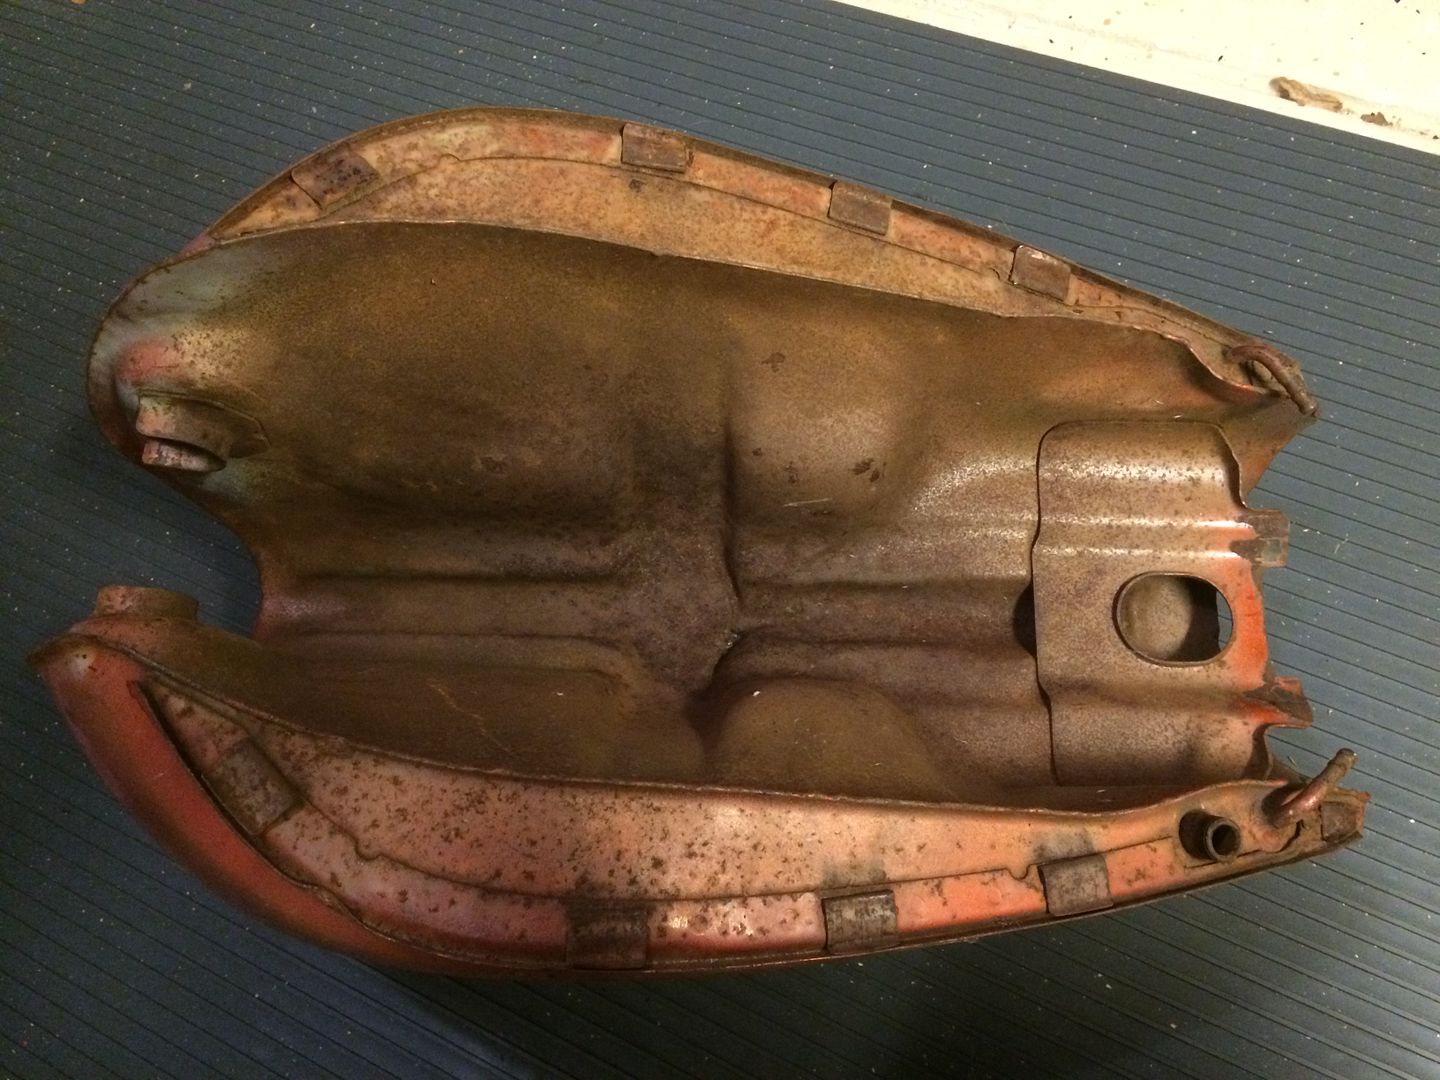
And, as mentioned before, the petcock definitely has clearance issues with the carbs. I do not have the petcock to go with it.


Here is my plan... please chime in with recommendations/harassment

I would like to relocate the petcock somewhere forward of the current location to provide clearance. I've scoped this guy out on 4-1.com


http://4into1.com/honda-fuel-valve-petcock-16-x-1-5mm-16950-292-000-cb350-cb360-cb450/

Now it says its for a 350/360/450, but I think it should work? Now here is the hard part...

The mounting threads are 16 x 1.5. And of course, I can't find a weld-in bung to match. I'm hoping one of our resident machinists could hook me up and make one!?!?! I think something like this is what I will need --> http://www.summitracing.com/parts/sum-220062/overview/ , but in steel so it can be welded in.

Thoughts or directions?

Appreciate those who will make it through the entire post  ;D


Online RAFster122s

  • I feel like a really really
  • Really Old Timer ...
  • *******
  • Posts: 12,559
  • SOHC4 member # 2605
Re: CB550K0 Build - Vroom Vroom! Finally have a runner!
« Reply #214 on: September 08, 2015, 06:41:16 PM »
If the metal is solid in the bottom of the tank you could braise the fitting into the tank. Hard part is looking like having clean metal as that tank looks a little rough.
David
David- back in the desert SW!

Offline streak09

  • Enthusiast
  • **
  • Posts: 203
  • I don't know what im doing, but I'll do it anyway
Re: CB550K0 Build - Vroom Vroom! Finally have a runner!
« Reply #215 on: September 08, 2015, 07:21:43 PM »
Thanks for the input guys.

The tank is a bit rusted, but very solid. No thin spots at all, it has just been painted several times. I kinda like the look actually. Point taken though, the area definitely needs to be clean for welding.

Calj, you bring up a good point as well. In fact, my first intention was to just relocate the existing bung. I teetered on that idea for a bit because of how close it is to the edges of the inner tank. I guess I am going to have to cut it out anyways. I'll give it a shot. I'll bring it by the guy that I would like to weld it and see what he thinks as well.


Online RAFster122s

  • I feel like a really really
  • Really Old Timer ...
  • *******
  • Posts: 12,559
  • SOHC4 member # 2605
Re: CB550K0 Build - Vroom Vroom! Finally have a runner!
« Reply #216 on: September 16, 2015, 09:17:17 PM »
I've seen several guys try to weld sheet metal and they aren't good at it. They are fine with larger/thicker steel but they blow through the sheet metal. So, finding a good welder who can weld and grind the resulting welds back down and properly clean the welds up after welding is important. Welds just left with no clean up don't fare well is my experience.
David- back in the desert SW!

Offline streak09

  • Enthusiast
  • **
  • Posts: 203
  • I don't know what im doing, but I'll do it anyway
Re: CB550K0 Build - Vroom Vroom! Finally have a runner!
« Reply #217 on: September 17, 2015, 09:30:51 AM »
The guy I have shouldn't have a problem. He has built a lot of custom fuel tanks. I haven't gotten a chance to bring it by him yet to see what he thinks.

I am planning on de-rusting the tank with naval jelly. I was really happy with the results on the original tank.

Offline streak09

  • Enthusiast
  • **
  • Posts: 203
  • I don't know what im doing, but I'll do it anyway
Re: CB550K0 Build - Vroom Vroom! Finally have a runner!
« Reply #218 on: November 16, 2015, 10:04:26 AM »
Been a while since I have updated! Unfortunately, not a ton going on, but I am (believe it or not) still picking away at this thing.

The goal was to have it presentable for barber, but that has come and gone. Still had a great time at Barber. Beautiful facility and a truly awesome museum. Definitely worth the trip.

I will post a few pictures of our journey this evening.


So for the 550...

Took my tank by the guy that will do the welding and he said he should be able to put a new bung in pretty easily, as long as I get the inside spick and span. So as I type, it is soaking in a Naval Jelly solution. The inside wasn't all that bad, so hopefully this evening it will be cleaned up.

It just so happens that there is a machine shop right next to the guy's shop that will do the welding, and they will turn a bung whatever size is needed so it should work out. A dual outlet petcock is on its way from 4into1.com right now.

I also had to modify the front tank mounts to get the 450T tank to fit. Trimmed a few mm from the rubber pads and metal posts and it slid right on.


I think I will eventually lower the front down 1/2" to 1". It is sitting just a tad to high in the front for my liking.


I don't know if I mentioned this in a previous post, but I did get the carbs synched up, and she really purrs now.

More to follow on the progress on the tank!


Offline streak09

  • Enthusiast
  • **
  • Posts: 203
  • I don't know what im doing, but I'll do it anyway
Re: CB550K0 Build - 450T Tank mods
« Reply #219 on: November 16, 2015, 04:44:35 PM »
Before you go welding in a new bung, I strongly recommend you make dead sure your petcock will clear the carbs. You would not be the first to encounter this conflict after paying for fabrication.

Will do calj. I am waiting to get the petcock in before I set the location.


A few pictures from the Barber trip.

All loaded down!


We went through Gatlinburg and into the smokies on our way (kinda on our way). We rode the Cade's Cove loop early in the morning with my S90 and C70, that was a blast.


Barber Museum


Sunday morning ride around the grounds


My baby!


Good time, and definitely would recommend the trip!

Offline streak09

  • Enthusiast
  • **
  • Posts: 203
  • I don't know what im doing, but I'll do it anyway
Re: CB550K0 Build - 450T Tank mods
« Reply #220 on: January 19, 2016, 10:31:59 AM »
So, over the hiatus I dropped my tank off to the welder to have a new bung put in. His next door neighbors to his shop turned a custom bung to match the threads of my petcock. He welded it in and leak tested, checked out good.

It lines up perfect and clearance with the carbs is good. He had a tight spot to work with and did a great job. Ill post some pictures this afternoon.

Just some small projects going on while its cold out. Next thing for the bike is to figure out a seat pan.


Online RAFster122s

  • I feel like a really really
  • Really Old Timer ...
  • *******
  • Posts: 12,559
  • SOHC4 member # 2605
Re: CB550K0 Build - 450T Tank mods
« Reply #221 on: February 16, 2016, 11:43:47 PM »
What year (approximately) is your S90...nice bike by the way!  The tag on the harness beneath the tank gives you a close idea if it is still there and the bike still has its original harness. I have a Nov 1969 build ruby red metallic candy paint on mine with chromed fenders... It isn't on the road as I've not spent any time delving into it...
They are gorgeous bikes and great for running around. The C70 is fun too. I have an 81 in canary yellow as well.
David- back in the desert SW!

Offline streak09

  • Enthusiast
  • **
  • Posts: 203
  • I don't know what im doing, but I'll do it anyway
Re: CB550K0 Build - 450T Tank mods
« Reply #222 on: February 17, 2016, 09:31:10 AM »
What year (approximately) is your S90...nice bike by the way!

Thanks! I believe it is a '65. Unfortunately the tag on the harness was not there when I bought the bike. It is titled as a '66, but that just means that it was titled in '66 not necessarily manufactured then. From the serial number, the 45 degree head, and the offset carb, I have concluded it to be a '65.

Good luck on your build. They are a bit challenging due to all the nuances and several design changes across the years. I absolutely love it though. This site is a great source when trying to source matching parts --> http://s90partspuzzler.blogspot.com/

The C70 is fun too. I have an 81 in canary yellow as well.

I enjoyed that little bike a lot more than I thought I would. I bought it right before Barber so we all would have a bike to putt around on and didn't think much of it, but it grew on me. Nice to have the e-start. Ended up selling it at Barber right before leaving. It was an '80.

Offline Godffery

  • Godffery's Garage
  • Expert
  • ****
  • Posts: 1,171
  • Wisdom brings a realization of how little we know.
    • Godffery's Garage hosted by VinMoto.org
Re: CB550K0 Build - 450T Tank mods
« Reply #223 on: August 26, 2018, 09:33:01 PM »
So...Any updates on this project...?    :-\

Offline Blakesblakey

  • Full Member
  • *
  • Posts: 42
Re: CB550K0 Build - 450T Tank mods
« Reply #224 on: April 16, 2020, 05:21:56 AM »
Hello everyone! New owner, started a new thread:

http://forums.sohc4.net/index.php/topic,182001.0.html
« Last Edit: April 16, 2020, 06:31:28 AM by Blakesblakey »