Author Topic: Re-Anodised Handlebar Switches  (Read 5025 times)

0 Members and 2 Guests are viewing this topic.

Offline SWEETPEAUK

  • Full Member
  • *
  • Posts: 52
Re-Anodised Handlebar Switches
« on: July 05, 2007, 02:17:34 AM »
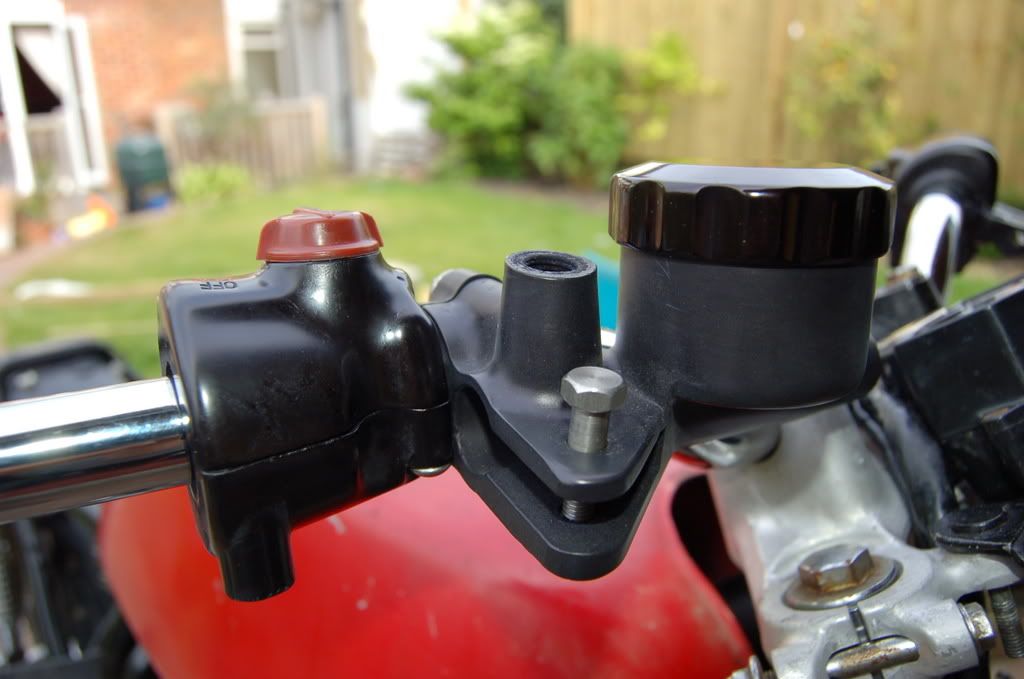
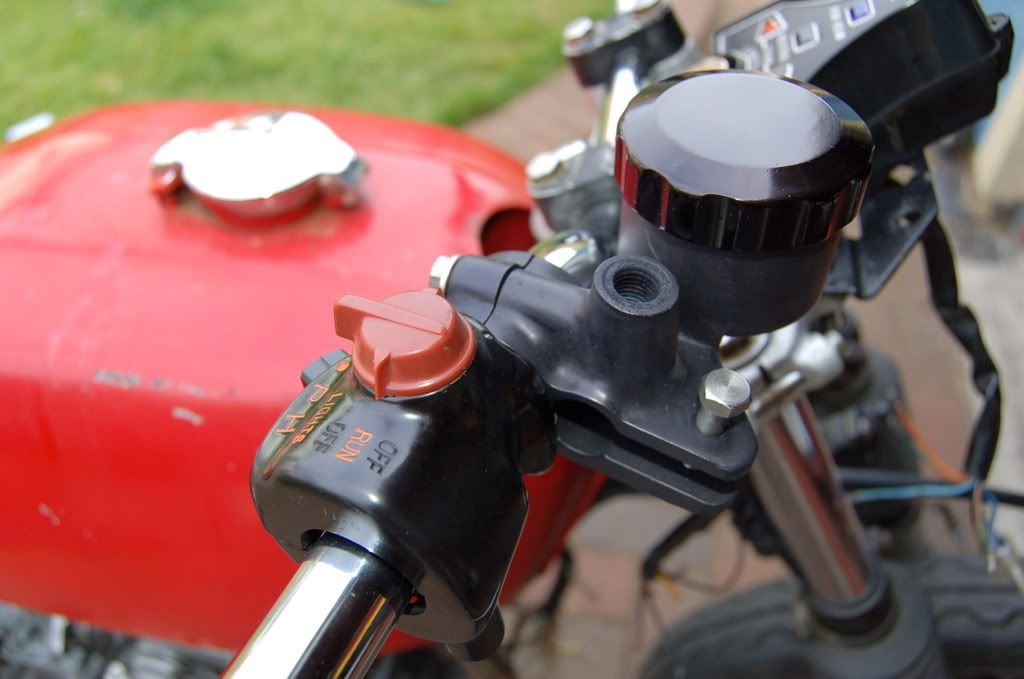
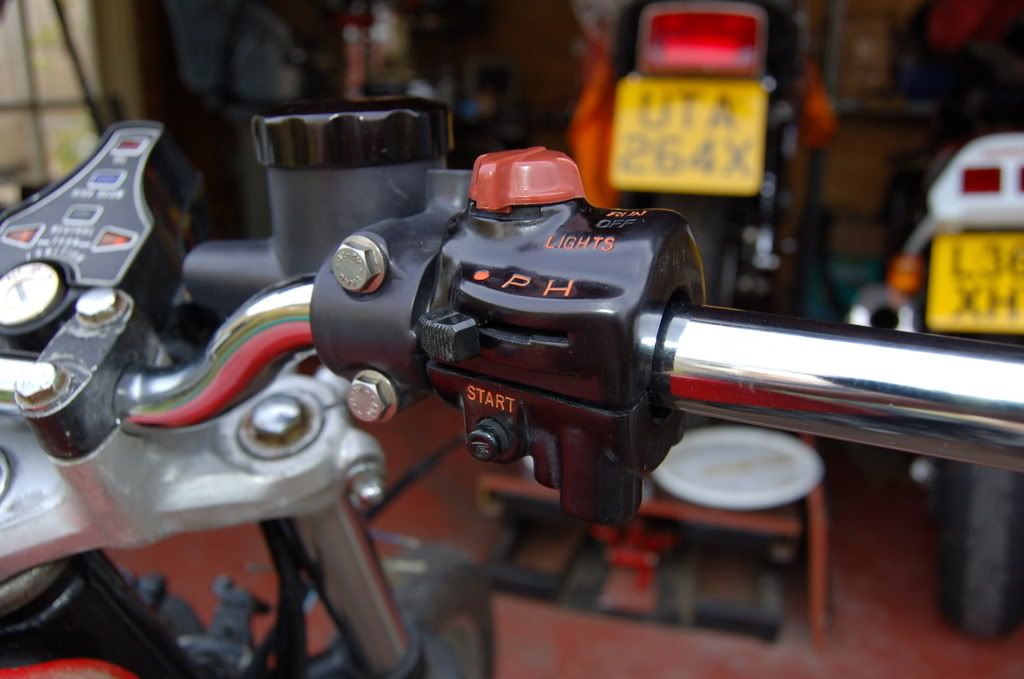
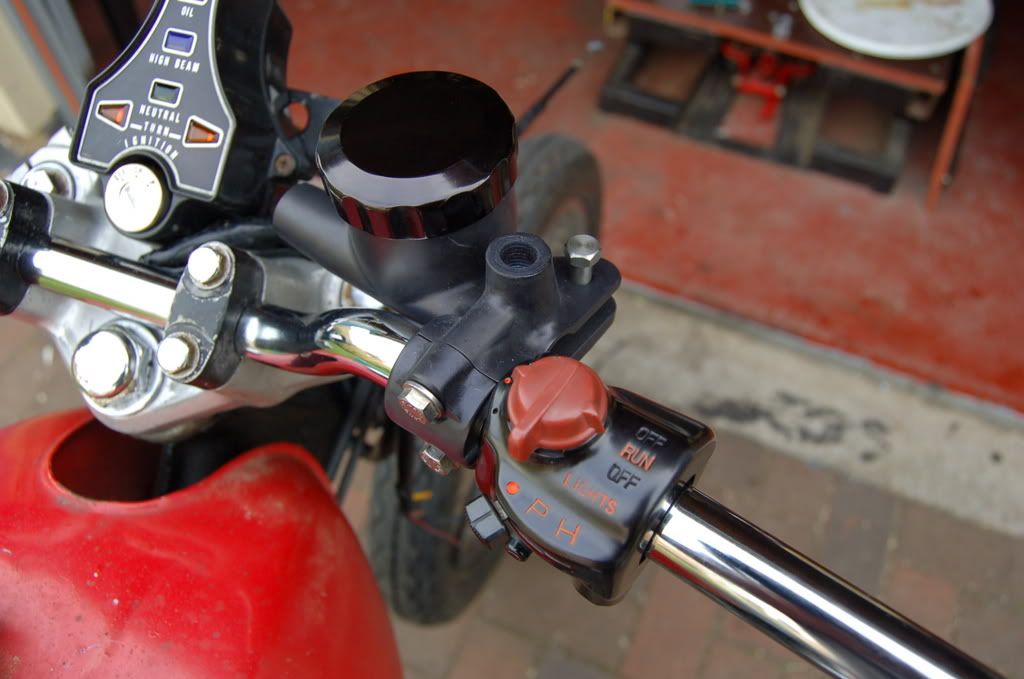
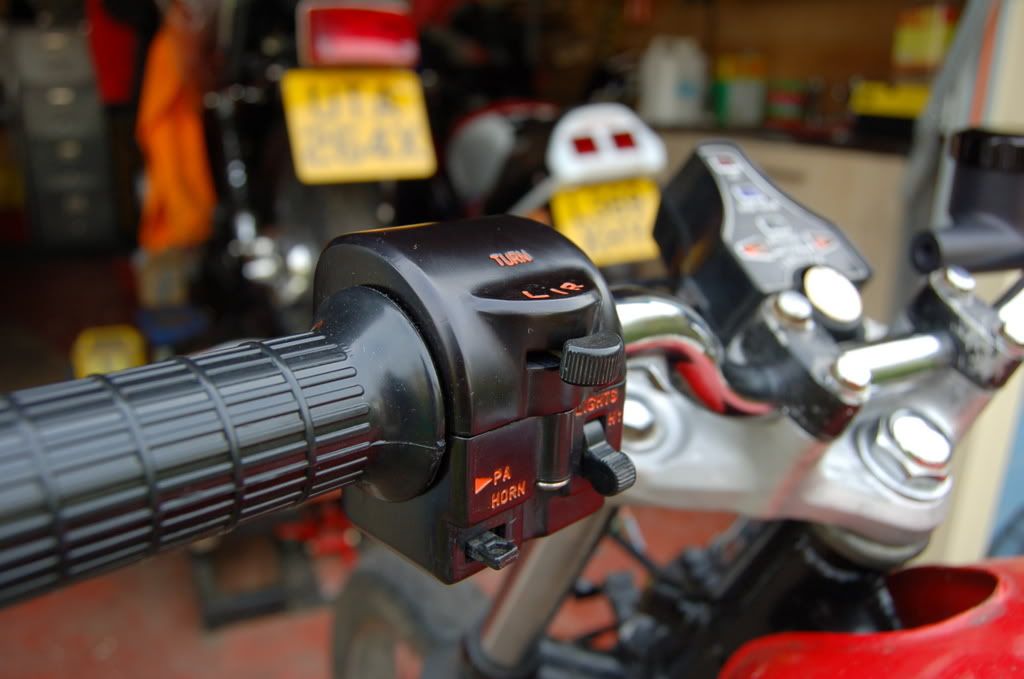
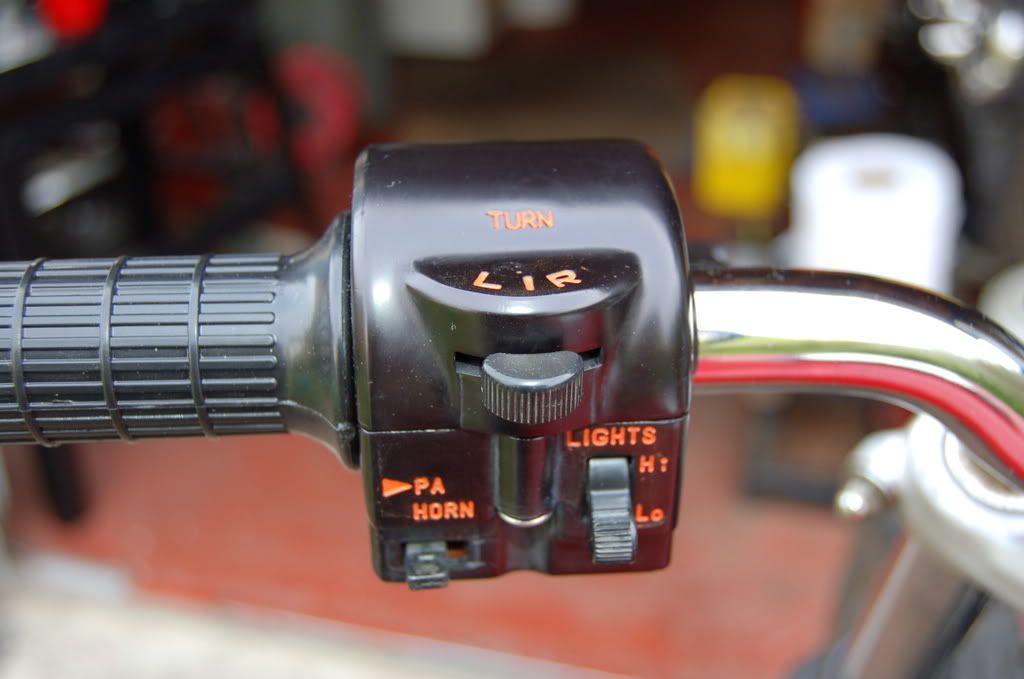
I have had the Anodised parts on my 400 refinished and though I would share some pictures and info on the subject.


Strip down

Always best to strip them down in a small box, so when the springs catapult the small ball bearings they don't go into orbit.
The right hand kill switch circuit board has to be un soldered no amount of wiggling will get it though the casing.
Take pictures of the internal wire clamp positions.

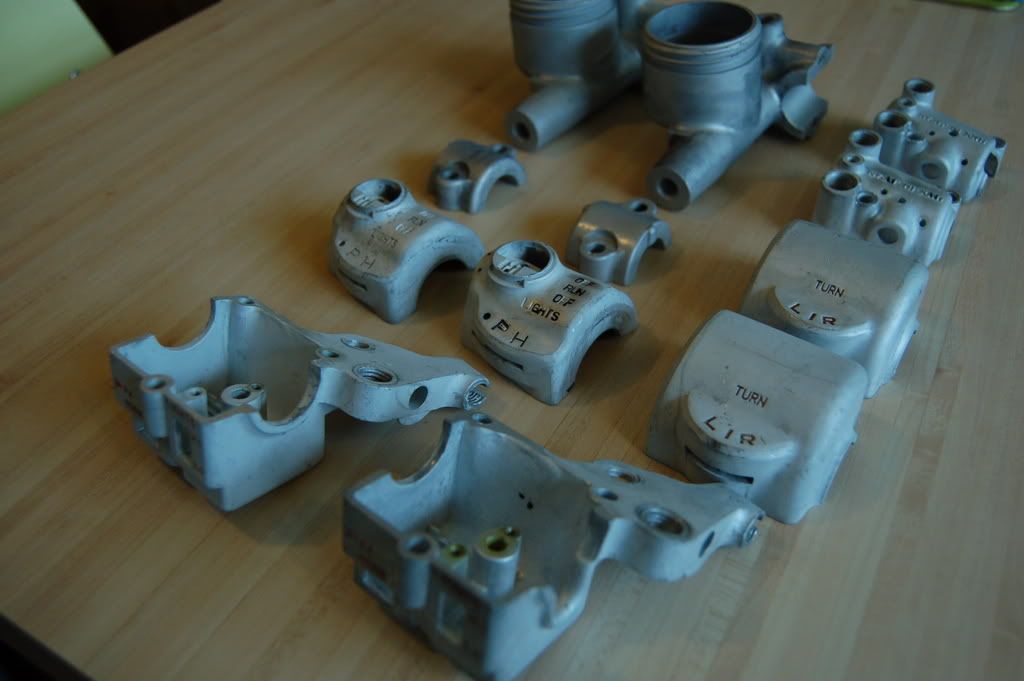
Removal of finish

1,Degrease and remove finish with strong solution of caustic soda ( outside with mask and gloves it's nasty stuff and gets very hot). only takes a few seconds to remove so have some tongs ready
2,take them to the anodisers and get them to strip them

Polishing

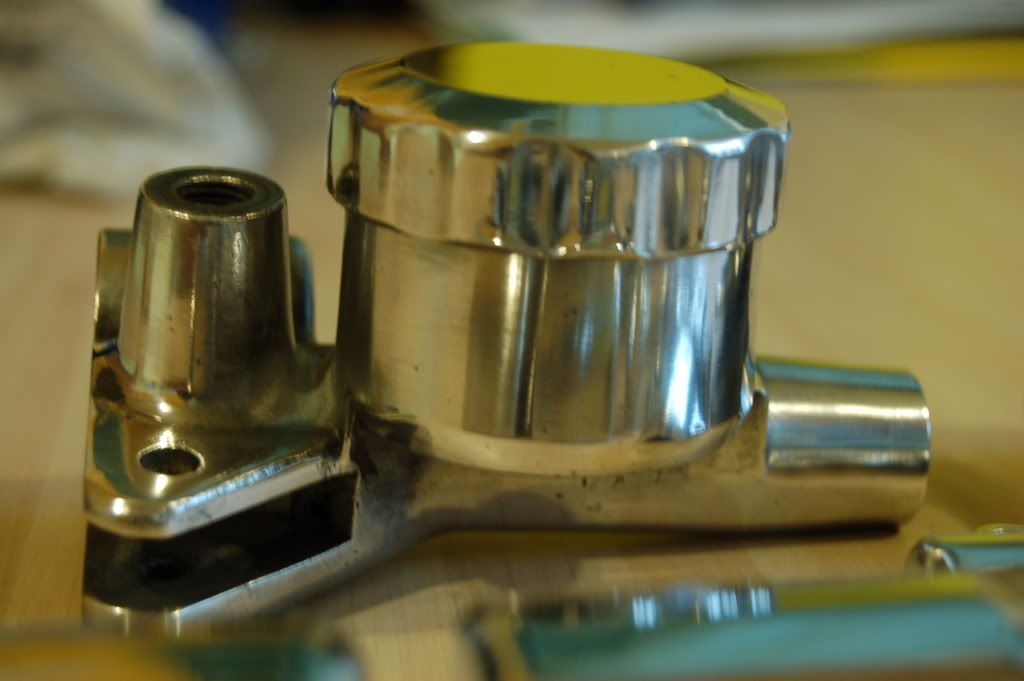
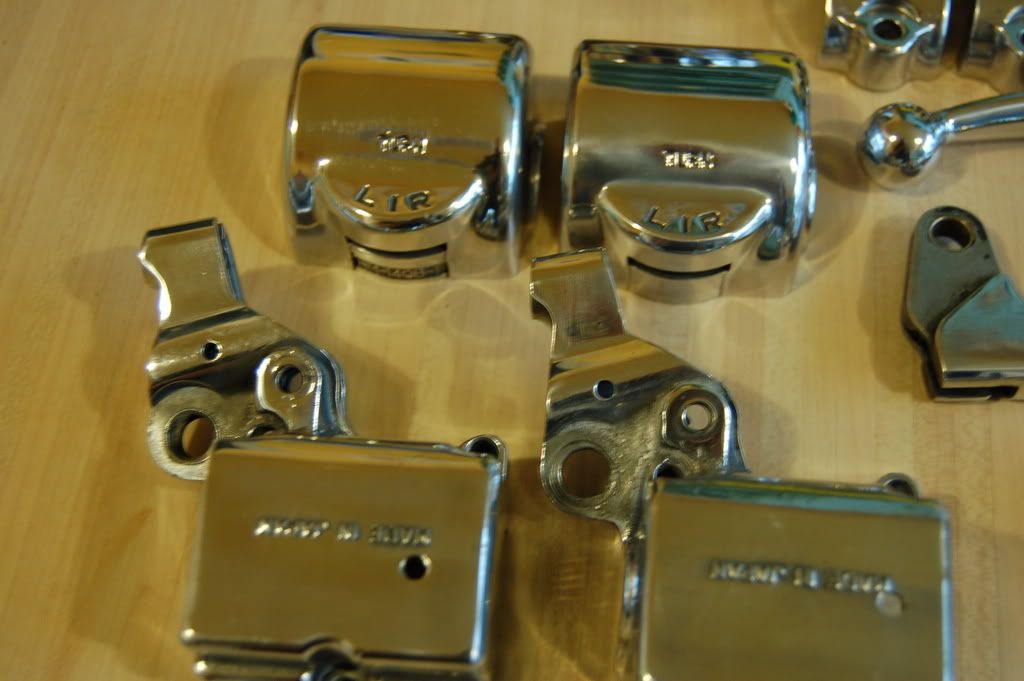
First part of polishing is to re scribe the START letting on the right hand switch. This lettering is lightly stamped and will disappear if you get to heavy handed with the mop.

This finish doesn't have to have a mirror finish, the material used and quality of the casting will not give a mirror like coating. Only the master cylinder cap will. just get all the dents out as the process is only 5 Mu thick.


Anodising

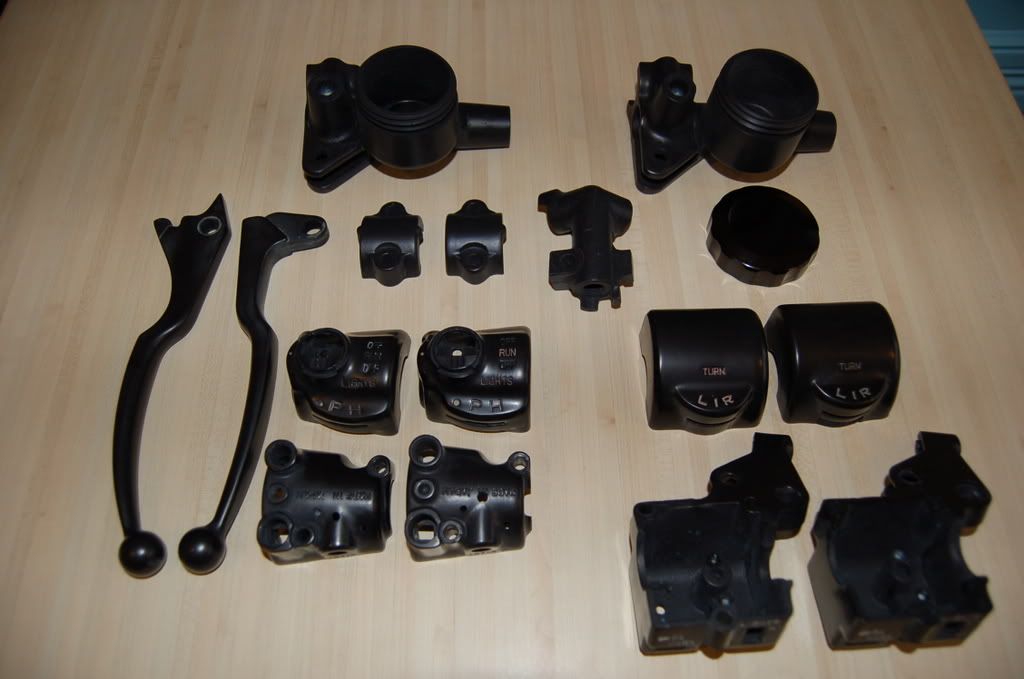
Easy part take part to local plant and wait for phone call. Finish I had was just black, not hard black anodising as it costs more and is not required.
I live in Dorset and use Keraplate in Wareham. They have a 1 week turnaround, they do all of Talons work (CNC motocross wheel hubs). They do not mail order though. Cost was £48 and that is their minimum charge. I didn't have any thing else to put in so it does look expensive for the parts I had done. But using modern dyes the finish should be better than OEM ones.
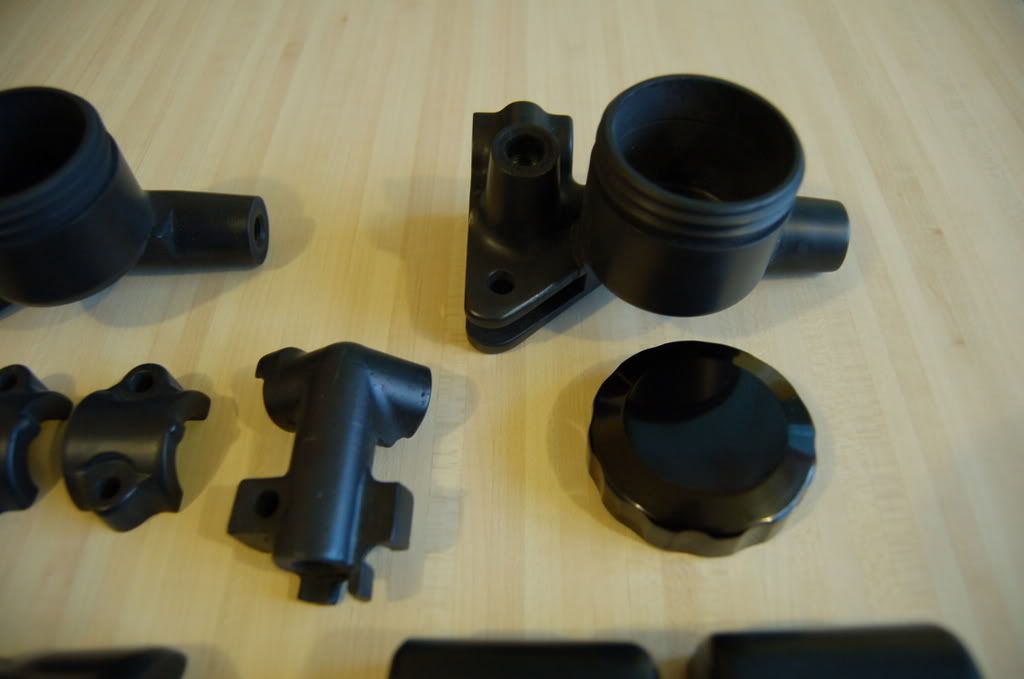
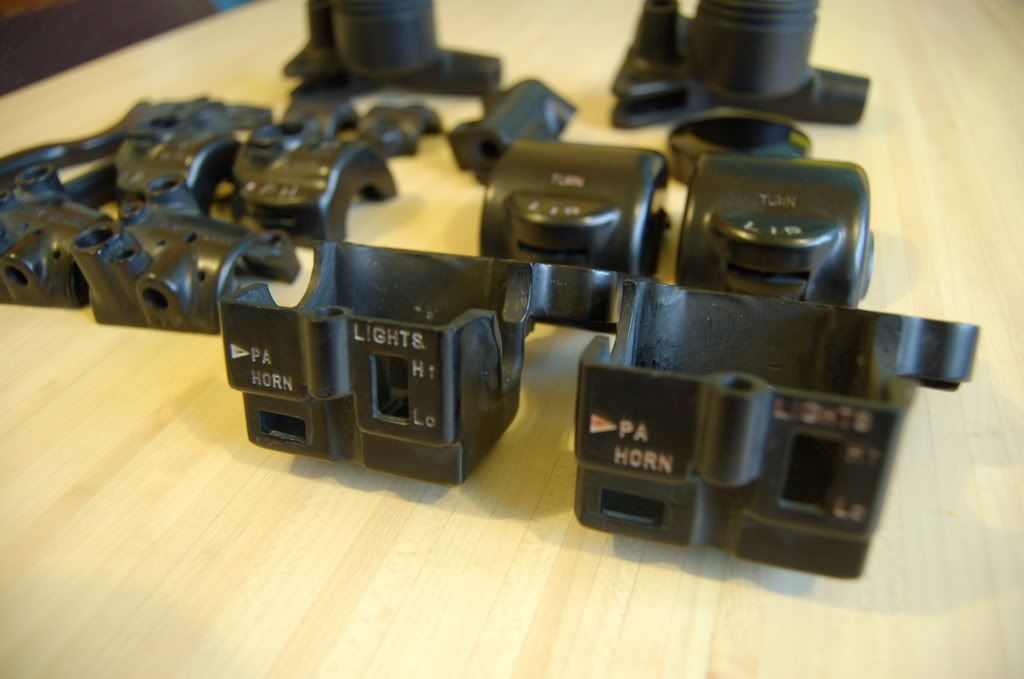
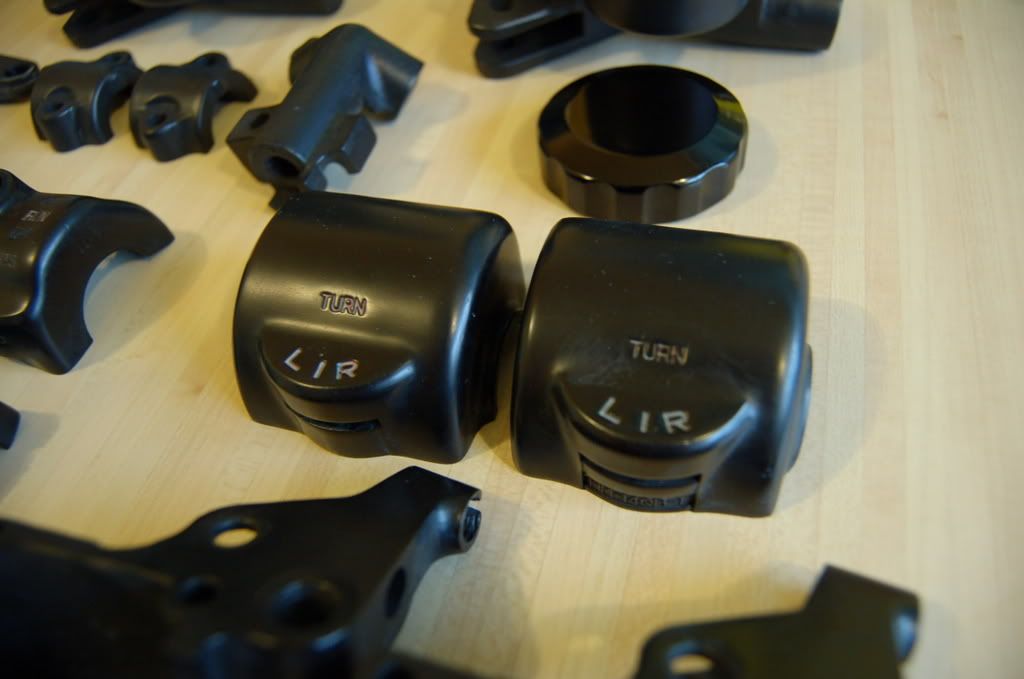


Reassembly

AS long as you remember where all the balls and springs go they are not to bad to do. Check that you don't bridge the terminals when soldering the kill switch, and getting the circlip on the kill switch shaft is good for a laugh.

Lettering

Up to you really but I used Vallejo 70956 light orange model paint comes in a small 17 ML bottle.
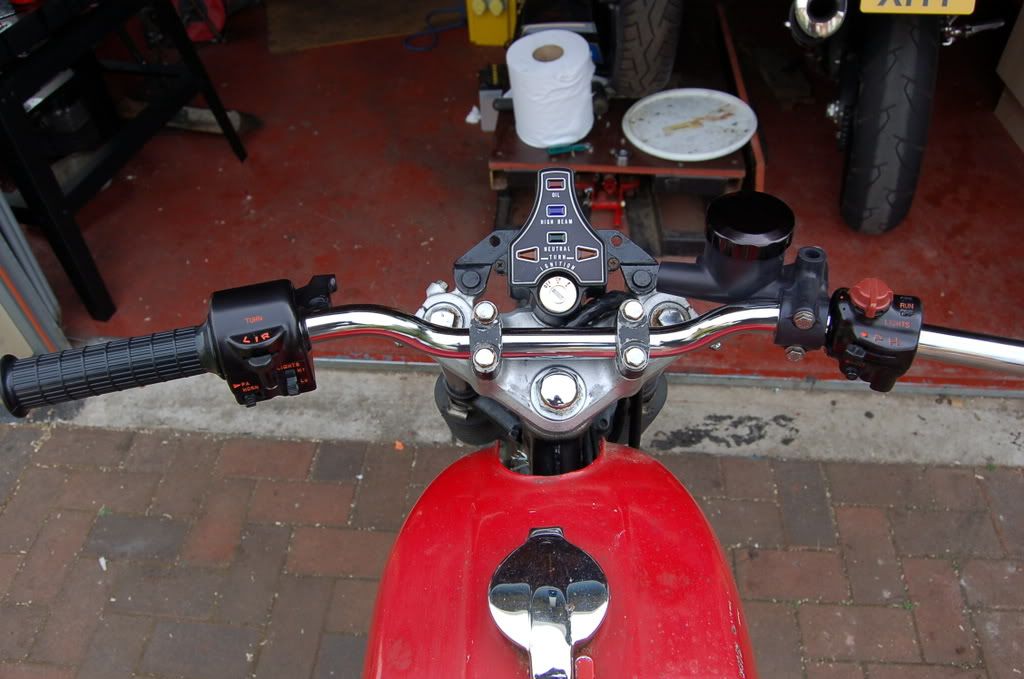


« Last Edit: July 05, 2007, 02:21:06 AM by SWEETPEAUK »

Offline spitfire

  • Hot Shot
  • ***
  • Posts: 494
Re: Re-Anodised Handlebar Switches
« Reply #1 on: July 05, 2007, 02:24:15 AM »
Looking good Paul, I see like me you like working in two's, then you can pick the best ones out.

Cheers

Den
Wirral UK
1976 CB750F1 bought new in 76
1977 CB750F2: Restoration started
1964 BSA A65R: Waiting restoration
My gallery is here: http://www.sohc4.us/gallery/v/members/personal/spitfire/?g2_navId=x5a30f7b6

Offline toycollector10

  • Expert
  • ****
  • Posts: 1,134
Re: Re-Anodised Handlebar Switches
« Reply #2 on: July 05, 2007, 02:24:59 AM »
Nice work, very nice!
1969  CB 750 K0
1973  CB175
1973  Z1 Kawasaki

Offline SWEETPEAUK

  • Full Member
  • *
  • Posts: 52
Re: Re-Anodised Handlebar Switches
« Reply #3 on: July 05, 2007, 02:28:47 AM »
Looking good Paul, I see like me you like working in two's, then you can pick the best ones out.

Cheers

Den

One of the sets is for a CB750F2, as it has the bottom cutouts, I chucked them in as they where lying around, no good to me. Don't know anyone with a F2 do you ???.

Offline eurban

  • Master
  • *****
  • Posts: 1,625
Re: Re-Anodised Handlebar Switches
« Reply #4 on: July 05, 2007, 05:04:02 AM »
Thanks of for the photos and explanation!  Annodizing is one SOHC related process that I haven't seen much info about.  Strangely enough on my 750 K8s original master cylinder and the current 750F3 mc that is on it now, the body was not annodized but rather painted.  Of course after 30 years the brake fluid has done a good job of removing most of the paint.  Cap is definitely annodized.  Was your original MC annodized or painted?  Just wondering if there was a reason (probably cost) that honda didn't do the resevoir as paint and brake fluid don't seem like a good idea.  Does the annodizing screw up the bore size or the small air bleed hole?   

Offline SWEETPEAUK

  • Full Member
  • *
  • Posts: 52
Re: Re-Anodised Handlebar Switches
« Reply #5 on: July 05, 2007, 10:26:00 AM »
Thanks of for the photos and explanation!  Annodizing is one SOHC related process that I haven't seen much info about.  Strangely enough on my 750 K8s original master cylinder and the current 750F3 mc that is on it now, the body was not annodized but rather painted.  Of course after 30 years the brake fluid has done a good job of removing most of the paint.  Cap is definitely annodized.  Was your original MC annodized or painted?  Just wondering if there was a reason (probably cost) that honda didn't do the resevoir as paint and brake fluid don't seem like a good idea.  Does the annodizing screw up the bore size or the small air bleed hole?   

The 400 was anodised as standard. I don't know why they stopped anodising them, it's not costly like plating. The anodising is only 5 microns thick so no problem with blocking holes.

Offline martini

  • Hot Shot
  • ***
  • Posts: 388
Re: Re-Anodised Handlebar Switches
« Reply #6 on: July 05, 2007, 01:35:30 PM »
Looks great!

Couple of questions. Did you have to rescribe all the lettering? What did you use to do the scribing? What did you use to polish the parts? Finally, what size brush did you use to repaint the lettering and how did you manage to do such a good job of it??

Offline UnCrash

  • Pass
  • Master
  • *****
  • Posts: 1,705
    • My Blog
Re: Re-Anodised Handlebar Switches
« Reply #7 on: July 05, 2007, 01:48:46 PM »
Sweeeetness!

They look great.

I do happen to have a 78 750F2 and am interested.

What would you part with them for?

Thanks mate!

Ben
You can't make too much popcorn, but you can definately eat too much popcorn.

Offline SWEETPEAUK

  • Full Member
  • *
  • Posts: 52
Re: Re-Anodised Handlebar Switches
« Reply #8 on: July 05, 2007, 02:36:59 PM »
Looks great!

Couple of questions. Did you have to rescribe all the lettering? What did you use to do the scribing? What did you use to polish the parts? Finally, what size brush did you use to repaint the lettering and how did you manage to do such a good job of it??

Scribing was done with a carbide tipped pen scriber. You only have to do the START wording the other lettering is deep casted.

Polishing started with wet/dry, then I used a bench polisher with 1" mops and brown green and blue compounds.

For the brush I used a small tipped modelling brush and acrylic paint. fill the lettering with paint and then wipe over the surface with a water damped cloth to remove paint on the raised surface, 2 coats did the job. The painting is really easy with very little practice. The only one that needs a bit of care is that START one as when you wipe off the excess paint with your cloth its hard not to clean out all the paint best to let the paint dry a little and then wipe it off. This is why you need to scribe deeper so the new paint has somewhere to go.

Offline Steve F

  • I have "some-timer's disease" because I'm an
  • Old Timer
  • ******
  • Posts: 2,929
  • "To Ride Is The Reason, The Destination The Excuse
Re: Re-Anodised Handlebar Switches
« Reply #9 on: July 05, 2007, 03:01:08 PM »
Looks really great!  I was thinking about doing the anodising thing, but wasn't really sure how the acid dip process would affect the master cylinder bore.  Did you check this after the caustic dip and the anodiser's pre process acid etching?  I'd like to know how the diameter's survived.

Offline jonbuoy

  • Hot Shot
  • ***
  • Posts: 263
    • My rebuild:
Re: Re-Anodised Handlebar Switches
« Reply #10 on: July 05, 2007, 03:57:20 PM »
Look great - I can't help thinking they looked pretty damn nice when they were polished up before being anodized.

Offline spitfire

  • Hot Shot
  • ***
  • Posts: 494
Re: Re-Anodised Handlebar Switches
« Reply #11 on: July 06, 2007, 02:30:59 AM »
Hi Paul,
         Do you have a lead on the decals for the master cylinder cap ?

Cheers

Den
Wirral UK
1976 CB750F1 bought new in 76
1977 CB750F2: Restoration started
1964 BSA A65R: Waiting restoration
My gallery is here: http://www.sohc4.us/gallery/v/members/personal/spitfire/?g2_navId=x5a30f7b6

Offline rhinoracer

  • Hot Shot
  • ***
  • Posts: 664
Re: Re-Anodised Handlebar Switches
« Reply #12 on: July 06, 2007, 05:49:12 AM »
Good job! They look better than new.
Baja native.

Offline martini

  • Hot Shot
  • ***
  • Posts: 388
Re: Re-Anodised Handlebar Switches
« Reply #13 on: July 06, 2007, 08:47:30 AM »
Look great - I can't help thinking they looked pretty damn nice when they were polished up before being anodized.

Thats what I was thinking.

Offline SWEETPEAUK

  • Full Member
  • *
  • Posts: 52
Re: Re-Anodised Handlebar Switches
« Reply #14 on: July 07, 2007, 02:55:19 AM »
Hi Paul,
         Do you have a lead on the decals for the master cylinder cap ?

Cheers

Den

Hi Den

I did see a decal on my travels looking for tanks and side panel transfers, but can't remember the site. Will look into a rubber stamp solution. The place I get my anodising done also does control panel lettering, and looking at the work I think they could do a replica Idiot light inlay.

My little one starts nursery in september so will have more time up the workshop. I may start a line in the switch's as well. Not keen on doing full strips but would do the bare clusters, perhaps a twice a year group thing?. No idea on cost at the moment. Ballpark guess is £12 $24 per pair for strip polish anodised and lettered.hands up if intrested.

Pulled the motor apart on the 400, and its all a bit sad. tensioner was totally locked so cam chain has eaten the horseshoe arm and had a go at the crankcase as well. compression ranged from 60-100 and it's already on a 1st oversize.

2 rockers have flats, one of the gearbox cogs has a lump missing and the clutch basket has about 2mm play. most of the crank journal are .005 mm out, but book does not say if this is OK. it's will have to wait as just had all the machining done on the GS1000 motor and the wife not to happy. I have been making lots of stainless bits for it though. http://s195.photobucket.com/albums/z225/sweetpeauk/stainless%20parts/