Author Topic: My 77 550K build....(pics)  (Read 9655 times)

0 Members and 1 Guest are viewing this topic.

Offline DaytonGuy

  • Enthusiast
  • **
  • Posts: 231
My 77 550K build....(pics)
« on: October 01, 2008, 05:25:44 PM »
OK...I finally started working on the old girl.  Unlike other posts, I want to let everyone follow my progress so the "after" picture will come at the end.  I'm shooting for spring, depending on what issues I encounter and the time and money I have to work with.  I know nothing about motorcycles.  I am pretty mechanically inclined though.  I'm trying to research the proper names for parts so I at least sound like I know what I'm doing, but I'm sure I will be asking about a "thingy" here and there.  I'll try to include as many pictures as I can.

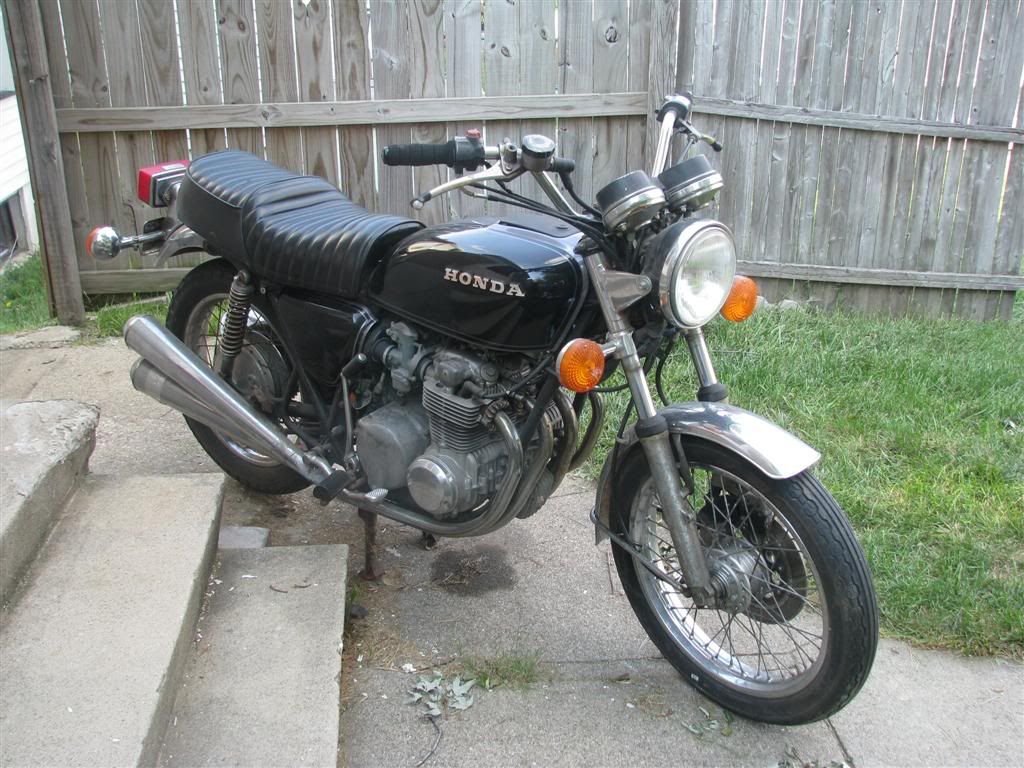
Well here it is.  I got it from a farmer for $50.00 (yes I said 50, not 500).  He had it sittin' in his barn for who knows how long, and it was covered in a nice thick layer of bird crap.  Took it home, changed the oil, put new gas in it, new battery and it fired up....... after several drains of the battery......but it fired up!  I did paint it that summer.  It used to be blue.  The seat is a replacement from an unknown bike as is the rear fender.
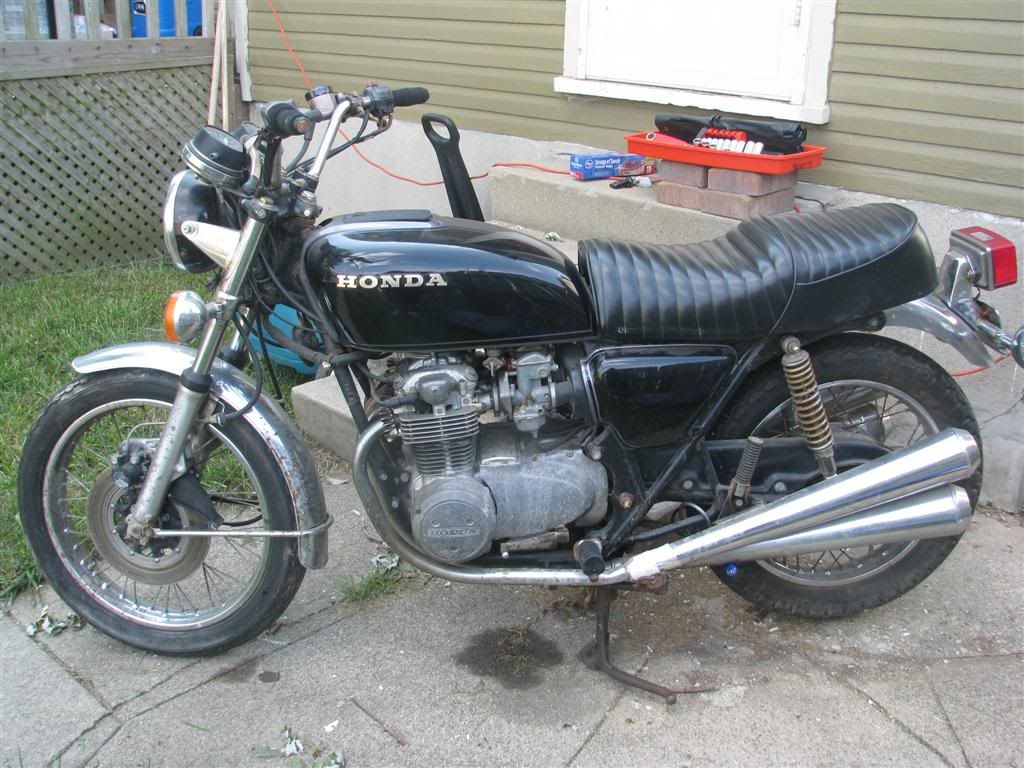


Anyone want to venture a guess as to where this oil is coming from?
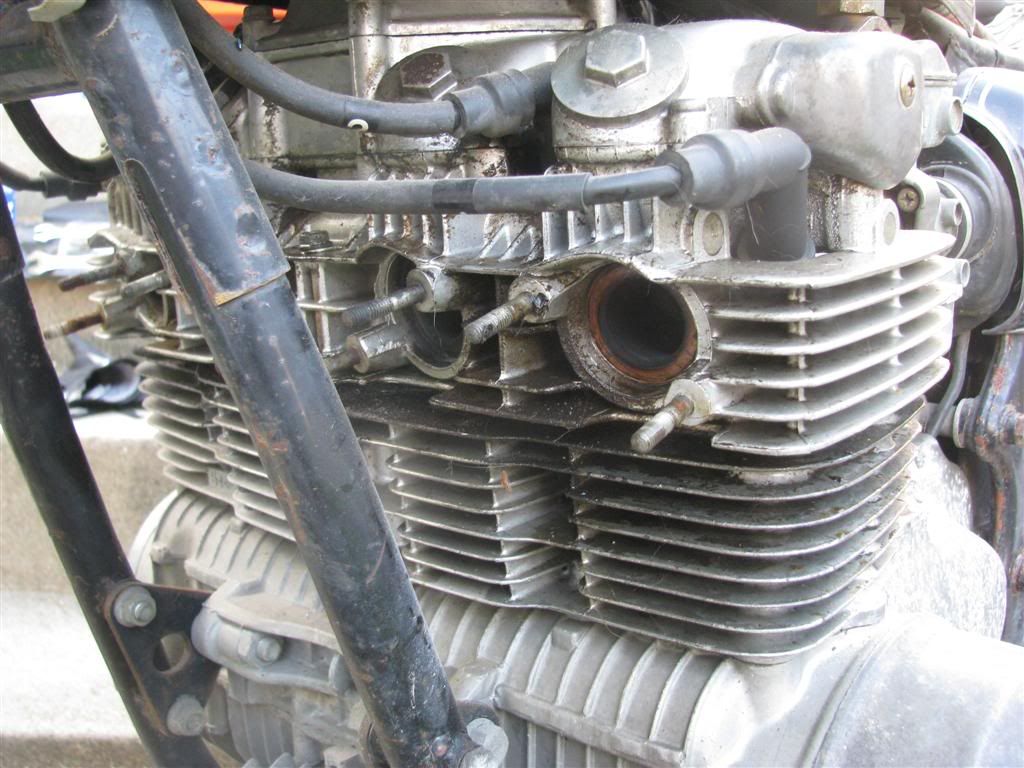


Started tearing it down.  I don't have a garage, so I'm going to do this build in my basement.?.?  You gotta work with what you've got.
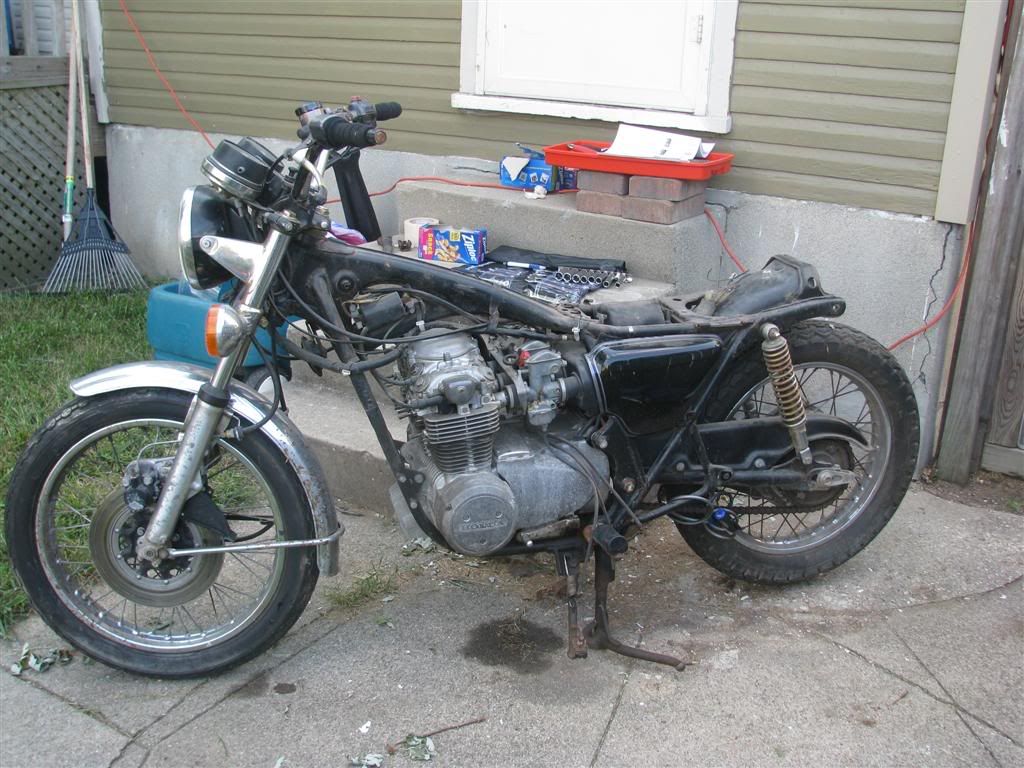


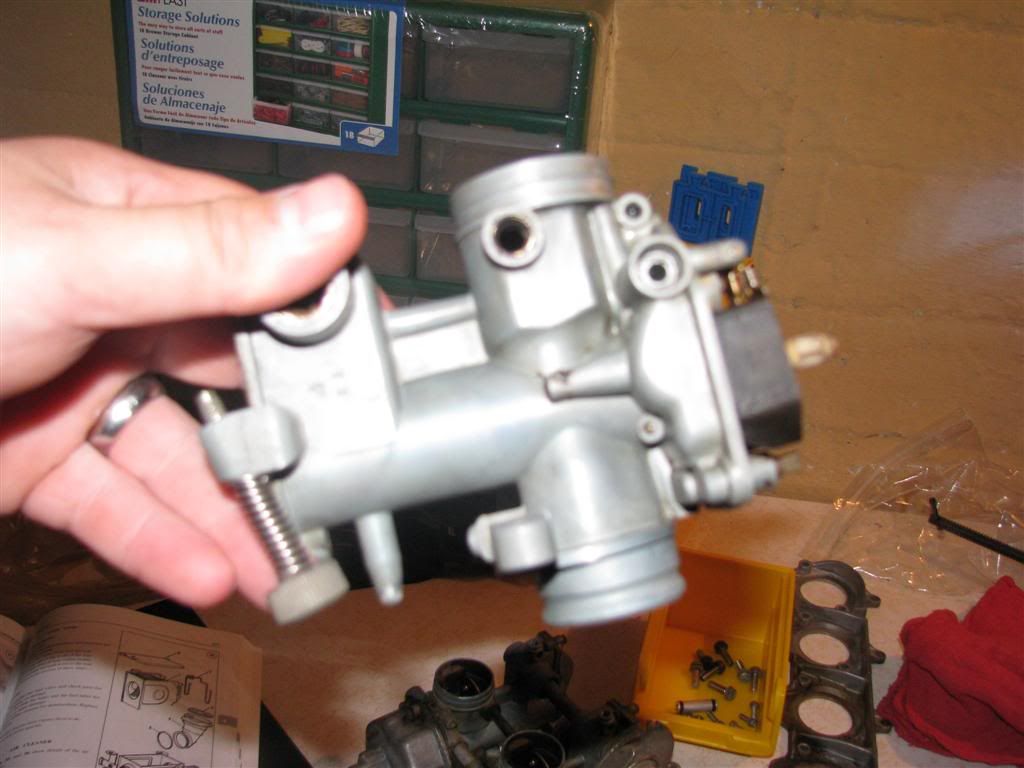
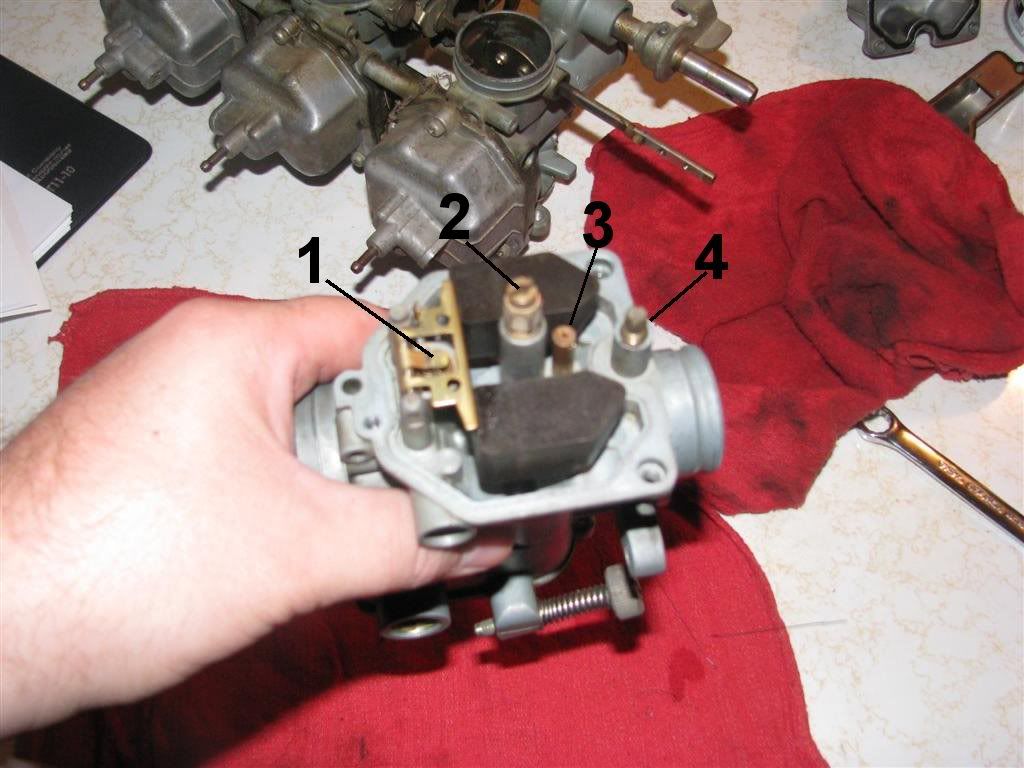
Got the carbs off and started cleaning.  They were actually a lot better than I thought they would be.
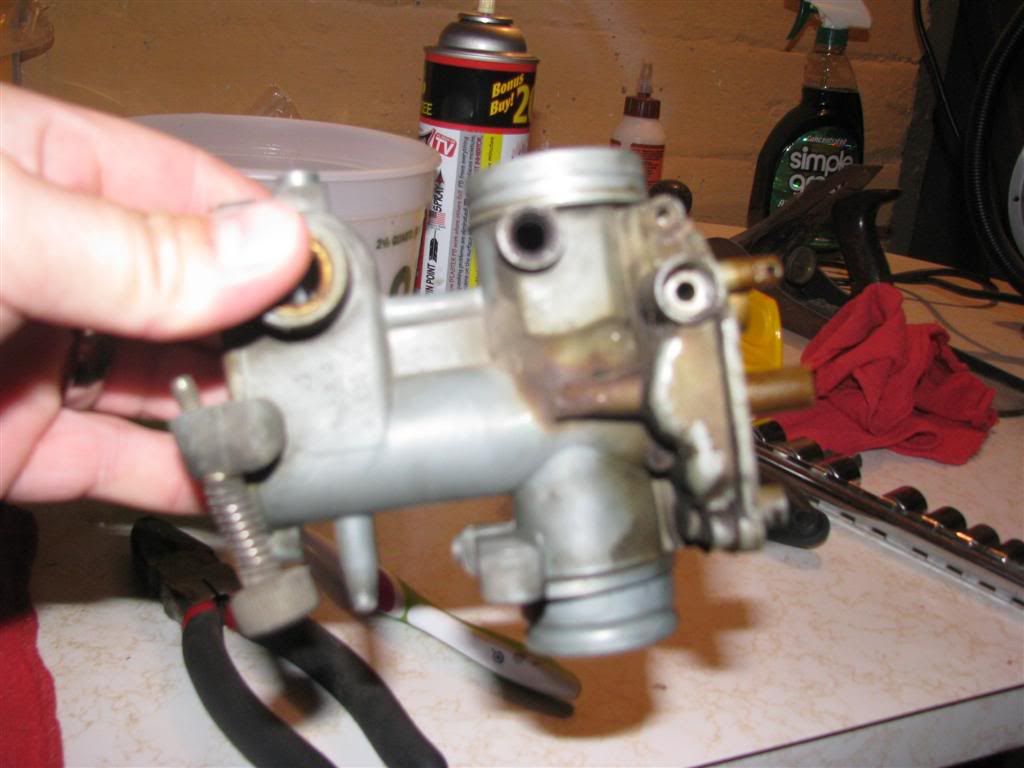


This leads me to my first real question(s)?  I started cleaning the carbs.  Neither of my manuals have info on the Keihin PD46A's.  I've looked and I'm having trouble finding directions on the settings for these internal parts.  They all appeared to be in good shape with no corrosion.  From the microfiche I gather:

#1 is the Float Valve (underneath the tongue of the float set)
#2 is the Main Jet Holder and the Main Jet.  I did not find any O-ring in there like the fiche shows, but I did not remove the main jet from the holder either.  The opening is clear as I can see right through it.
#3 is not shown on the fiche but it's a pressed in jet or something
#4 is a screw set??  it's a needle of some kind.

How do I reinstall these parts back to insure they are set properly?  I know the float is supposed to be set at a height of 14.5mm, but how do I adjust it?  Just bend the tongue that's resting on the float valve.  Do I lay the card on it's side to measure it or do I flip it upright (I guess that would be upside down actually)  If I plan to convert to 4 into 1 headers, do I need to replace the main jet?  How many turns from snug are the varius needles and/or jets supposed to be?


That's it for now.  I will post pictures of the progress as I continue.  I'll be asking A LOT of questions along the way so be patient with me. ;D
« Last Edit: October 12, 2008, 05:04:09 PM by DaytonGuy »

Offline DaytonGuy

  • Enthusiast
  • **
  • Posts: 231
Re: My 77 550K rebuild....finally started (gonna have lots of pics)
« Reply #1 on: October 02, 2008, 04:14:11 AM »
I found this on a thread....

"PD46A carbs should be 14.5mm.  Slide needle in 3rd groove from top.
These adjustments assume stock exhaust system."


What is meant by "slide needle in 3rd groove"?  Is that on the throttle valve in the opposite end of the carb than what I show in the pic above?  If so, I did not completly dismantle the throttle valve as it was pretty clean when I pulled it out.  Should I take it apart?  I think I read somewhere that if I want to run pods or if I change my exhaust I may need to adjust this?  I will also need to switch to 110 main jets....correct?

I also read that the air mixture screw should be either 2.5 or 3 (which is correct?) turns from snug.  Is that number 4 in the pic above?  Should everything else just be snugged up inside?

Offline KB02

  • Take it easy there, Sonny, I'm an
  • Old Timer
  • ******
  • Posts: 3,760
Re: My 77 550K rebuild....finally started (lots of pics)
« Reply #2 on: October 02, 2008, 04:46:35 AM »
The big, long needle that slides down in from the top is what they are taking about. You're looking for #3 in the diagram:


By the way, #3 in your post is the slow jet. make sure that gets cleaned out good, too.
1978 CB750K Project
2000 Ducati ST2
...and a pedal bike

Join the AMA today!!

My project thread Part I: K8 Project "Parts Bike"
My project thread Part II: Finishing (yeah, right) touches on Project "Parts Bike"

Offline snipcod

  • Full Member
  • *
  • Posts: 41
Re: My 77 550K rebuild....finally started (lots of pics)
« Reply #3 on: October 02, 2008, 07:33:43 AM »
Im doing the same thing right now.  Mines going to be a cafe bike though.  I know what you mean by no garage though, im being kicked out of mine and have to go work in a shed   :(
It takes an idiot to do cool things, thats why it's cool

Offline DaytonGuy

  • Enthusiast
  • **
  • Posts: 231
Re: My 77 550K rebuild....finally started (lots of pics)
« Reply #4 on: October 02, 2008, 08:06:14 AM »
I know what you mean.  I'm in Ohio so the weather is starting to urn cold.  I need to get this thing dismantled and taken down stairs soon before it's too cold.

I'm actually not just rebuilding the bike.  I think I'm going the bobber/chopper style with a solo spring seat instead of the cafe style.  Those aren't as popular on this board, but I hope everyone enjoys watching my progress.

Bubba650

  • Guest
Re: My 77 550K rebuild....finally started (lots of pics)
« Reply #5 on: October 03, 2008, 08:25:33 PM »
 What did you use to get the carbs clean?

Offline DaytonGuy

  • Enthusiast
  • **
  • Posts: 231
Re: My 77 550K rebuild....finally started (lots of pics)
« Reply #6 on: October 03, 2008, 09:10:30 PM »
I soaked them in warm water and Simple Green.  It came highly recommended by almost everyone on this site.

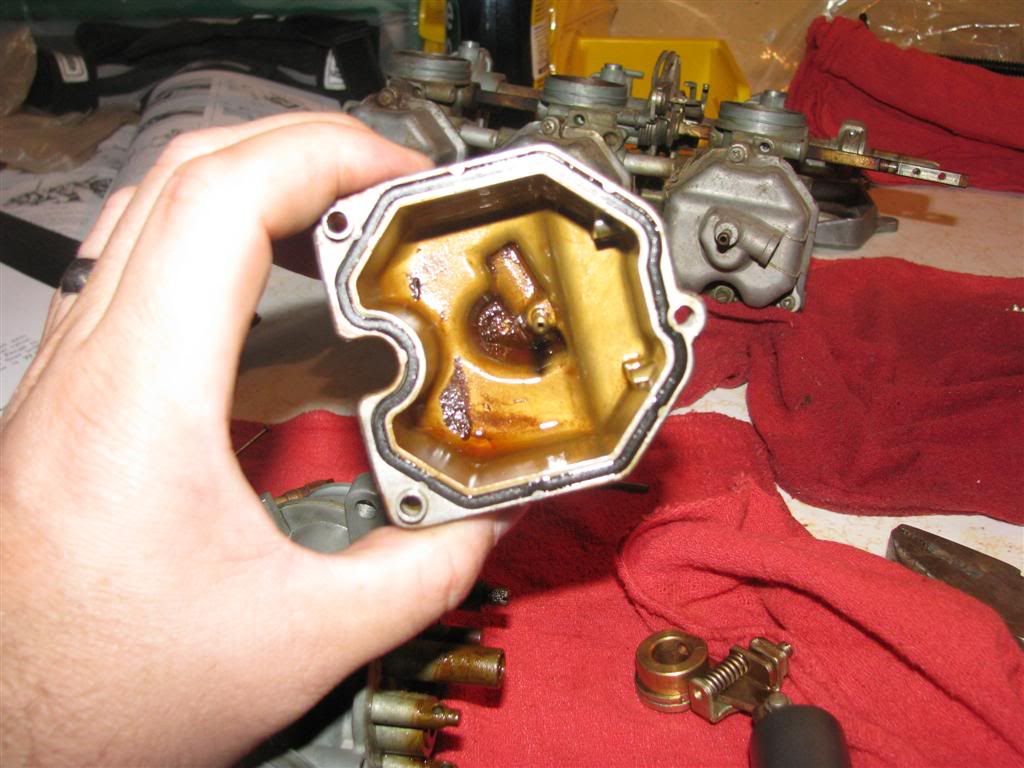
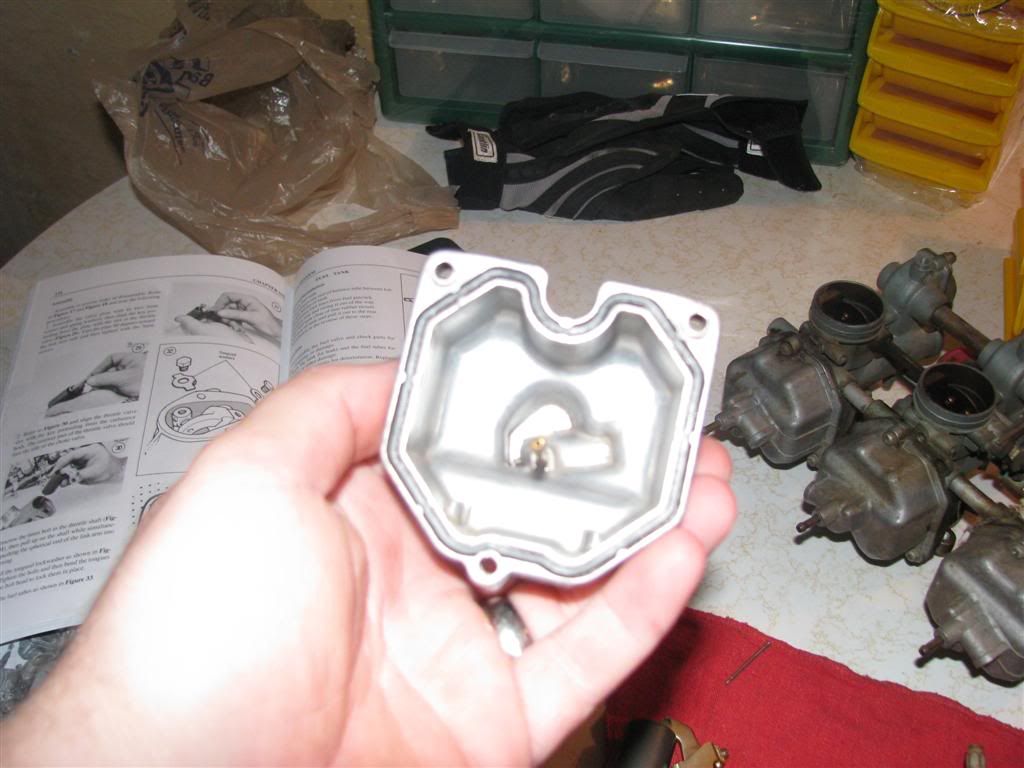
Well carb number 4 was pretty clean to begin with, it's the one in the pics.  I got to #1 and there was A LOT of varnish build-up in the bottom of the bowl along with gritty stuff that I presume is rust from the gas tank.

Things got much more intersting when I got to Carb #2.  Like carb #1 it had varnish and some of the gritty stuff but to my suprise the main jet was laying in the bottom of the bowl.  The main jet and the main jet holder that is.  Now the holder has what appears to be vibration "scars" on the shaft where the tiny hols are.  It is clean and all passages are unblocked from what I can see so I'm going to reuse it at this point.


Offline DaytonGuy

  • Enthusiast
  • **
  • Posts: 231
Re: My 77 550K rebuild....finally started (lots of pics)
« Reply #7 on: October 05, 2008, 09:55:46 PM »
Carbs are clean and ready to go back together, but I can't seem to get the Choke Plate screws to go.  I've searched on here and most people feel you need to replace them (and possible retap the threads to clean them up.)  Does anyone know if these screws for the Keihin PD46A's are:

M3 .5x6mm

That's about the only thing I've found on here, but that size was not specifically for my carbs.  Will they fit? 

Offline DaytonGuy

  • Enthusiast
  • **
  • Posts: 231
Re: My 77 550K rebuild....finally started (lots of pics)
« Reply #8 on: October 11, 2008, 02:45:57 PM »
So they are the M3 .5x6mm and they fit nicely.  I've read that I should use some type of thread lock on these, what type/strength?  BTW...I have extra hex head screws if anyone needs a few.  They cam in a 20 pack.  Let me know.

Also, AND MORE IMPORTANT THAN THE PREVIOUS QUESTION, I'm one side cover screw away from getting the engine out of the frame.  The screw is stripped.  I stripped it with the impact driver.  The ID cracked two screws loose.  I completely jammed the el-cheapo ID I got from Harbor Freight.  I when out and got the big Sears ID and stripped the screw.  What do I do now? I've read the following but which is better?

1.  Cut a slot in the head and go at it with a flat head bit in the impact driver.
2.  Notch the side of the screw and hit it at an angle with a flat head and a hammer to get it to spin.

Should I try heat in the case with a torch?  Apparently this thing is seized tight.

HELP!!!!

Offline moham

  • .fnord.
  • Expert
  • ****
  • Posts: 1,108
Re: My 77 550K rebuild....finally started (lots of pics)
« Reply #9 on: October 12, 2008, 05:33:58 AM »
Have you tried an e-z out yet? I've had success with those on one or two occasions.
78 750K-The Ocho
74 550-The Cherry Picker
70 750K0 motor-Dick in a Box

Offline mystic_1

  • Really Old Timer ...
  • *******
  • Posts: 6,071
  • 1970 CB750K
Re: My 77 550K rebuild....finally started (lots of pics)
« Reply #10 on: October 12, 2008, 08:57:22 AM »
Can you get on the screw with vise-grips?  If so, that'll get it out.  If not, you can drill off the head entirely with a large bit (larger than the threaded part of the screw), then after you pull the cover, you can remove the remainder of the screw with vise grips.

mystic_1
"A ship in harbor is safe, but that is not what ships are built for."
- John Augustus Shedd

My build thread:  http://forums.sohc4.net/index.php?topic=68952.0

Offline DaytonGuy

  • Enthusiast
  • **
  • Posts: 231
Re: My 77 550K build....(pics)
« Reply #11 on: October 12, 2008, 05:12:57 PM »
Thanks for the suggestions.  I got it out by heating the case up with my torch and going at it with the impact driver using the largest bit I had.  Finally cracked free.  I'm supprised there was enough left on the screw to get a hold on.  I'm certainly going to by one of the stainless, hex bold kits to put this thing back together.

So I got the side off and out fell the remnants of what I believe to be a pretty big mouse nest.  It was practically full.  That's what happens when you let these bikes sit in a barn for god only knows how long.

Question:

I've searched a little with not much luck.  How do I get the drive chain off?  It looks like I can loosen the rear wheel and push it forward and then slip the chain off the front sprocket?  Will that work?  Will I have to cut the chain?  Other than being dirty, it looks to be on pretty good condition so I would like to reuse it after cleaning it real well.

I'll throw up more pics this week of my progress.  I've removed all of the dash and handle bars, headlight bucket and the spent time going through the bird's nest inside that and labled all of the wires so I can get everything hooked up again.....hopefully.

Offline DaytonGuy

  • Enthusiast
  • **
  • Posts: 231
Re: My 77 550K build....(pics)
« Reply #12 on: October 14, 2008, 03:16:28 PM »
As promised...a few more pics as she sits today.  I realize these teardown pics are probably boring the hell out of most of you, but this is the first time I've worked on a bike so it's neat for me to see how this thing progresses, albeit slowly.


[imghttp://i481.photobucket.com/albums/rr177/DaytonGuy/Oct142008bLarge.jpg]http://[/img]


There looks to be a lot of sludge in there (besides the mouse nest stuff) kinda like there may be a leak.  What should I be looking for?


What kinda of tools do I need to remove/replace the chain and what should I watch out for?

Offline moham

  • .fnord.
  • Expert
  • ****
  • Posts: 1,108
Re: My 77 550K build....(pics)
« Reply #13 on: October 14, 2008, 03:30:10 PM »
What kinda of tools do I need to remove/replace the chain and what should I watch out for?

Cut the old chain off with a dremel or angle grinder and put a new one on. And replace sprockets as well...
78 750K-The Ocho
74 550-The Cherry Picker
70 750K0 motor-Dick in a Box

Offline DaytonGuy

  • Enthusiast
  • **
  • Posts: 231
Re: My 77 550K build....(pics)
« Reply #14 on: October 27, 2008, 11:35:53 AM »
Finally got it all apart and into the basement.


First project after that was to tackle the front brake caliper.  I wish I would have taken "before pictures because this thing was nasty.  There had been a small leak down at the caliper and the MC was dry.  I think I found most of the brake fluid in crystal form inside the caliper.  I had to smack the tire pretty hard to knock it away from the brake as it was seized on their pretty tight.  Now it's all clean.  I'm going to repaint it and I've read that OEM pads are the best so I'll be looking for some of those.


I started dismantling the front hub so I could take the spokes off and get it ready to polish up.  Started reading on here about the need to drill the dimples out of the bearing retainer and thought I would ask a question to the collective brain:

Do I need to take the bearings out to polish the hub?  They appear to be in pretty good condition and I'd like to forgo the drilling and the potential of stripping threads on the retainer......if I can.


Offline moham

  • .fnord.
  • Expert
  • ****
  • Posts: 1,108
Re: My 77 550K build....(pics)
« Reply #15 on: October 27, 2008, 12:26:03 PM »
Make sure you get the square o-ring groove inside the caliper cleaned and de-crusted. Not cleaning this spot is the cause of a lot front brake noise due to the piston not fully retracting. There's a link to a good flash tutorial in the brake faq...
78 750K-The Ocho
74 550-The Cherry Picker
70 750K0 motor-Dick in a Box

Offline DaytonGuy

  • Enthusiast
  • **
  • Posts: 231
Re: My 77 550K build....(pics)
« Reply #16 on: October 27, 2008, 01:11:57 PM »
It took me a while to figure out how to get the o-ring out, but once I did, I cleaned pretty good back in there.  It was nice and crusty!  I'm going to double check it before reassembly...just to make sure it's good and clean.

Offline mystic_1

  • Really Old Timer ...
  • *******
  • Posts: 6,071
  • 1970 CB750K
Re: My 77 550K build....(pics)
« Reply #17 on: October 27, 2008, 05:02:38 PM »
You don't necessarily HAVE to remove the bearings to polish, but if you don't then mask them real well to avoid getting crap into them.  Having said that, bearing kits are cheap ($15.40) and the retainers can often be found on eBay at reasonable cost.  Retainer may even be available via Honda, and Yamiya definitely carries them ($9.13). 

So, personally I'd just do the bearings.  Given the other corrosion you're finding it's probably not a bad idea, even if they feel good now.

mystic_1
"A ship in harbor is safe, but that is not what ships are built for."
- John Augustus Shedd

My build thread:  http://forums.sohc4.net/index.php?topic=68952.0

Offline DaytonGuy

  • Enthusiast
  • **
  • Posts: 231
Re: My 77 550K build....(pics)
« Reply #18 on: October 27, 2008, 06:12:19 PM »
Mystic,

Thanks for the advise.  I know I probably should replace them, and likely will.  Since I'm new to this stuff, I'm a little hesitant to start DRILLING on things!!  I'm actually a little amazed that I've done what I've done so far, but I'm having fun learning.

Anyway, I drenched the retainer with PB Blaster earlier today and will put a little more on in the morning before work.  I'll bring out the drill tonight and see what I get.  All of the parts are replaceable...right?   ;)  I'll throw up some pics of the drilling process since I didn't find any pics of that on here, and there have been A LOT of questions about it.

I also need to keep telling myself that this is a $50.00 motorcycle. If I screw it up, I can always sell the parts to you guys for more than $50.00.   ;D

Offline mystic_1

  • Really Old Timer ...
  • *******
  • Posts: 6,071
  • 1970 CB750K
Re: My 77 550K build....(pics)
« Reply #19 on: October 27, 2008, 06:18:50 PM »

I also need to keep telling myself that this is a $50.00 motorcycle. If I screw it up, I can always sell the parts to you guys for more than $50.00.   ;D

Ha ha!  That's the spirit!

You only need to drill a very small amount, perhaps 1/8 inch deep, maybe a little more.  Just enough to remove the metal that was deformed when the retainer was punched.  Go a little at a time and you should be ok.

best of luck!

mystic_1
"A ship in harbor is safe, but that is not what ships are built for."
- John Augustus Shedd

My build thread:  http://forums.sohc4.net/index.php?topic=68952.0

Offline moham

  • .fnord.
  • Expert
  • ****
  • Posts: 1,108
Re: My 77 550K build....(pics)
« Reply #20 on: October 27, 2008, 07:18:30 PM »
Incidentally, here's the link to that flash tutorial...

http://oldmanhonda.com/MC/Rbrakes.html

78 750K-The Ocho
74 550-The Cherry Picker
70 750K0 motor-Dick in a Box

Offline moham

  • .fnord.
  • Expert
  • ****
  • Posts: 1,108
Re: My 77 550K build....(pics)
« Reply #21 on: October 27, 2008, 07:25:13 PM »
Thanks for the advise.  I know I probably should replace them, and likely will.  Since I'm new to this stuff, I'm a little hesitant to start DRILLING on things!!  I'm actually a little amazed that I've done what I've done so far, but I'm having fun learning.

Learn by doing. My wife tells me, regarding mechanical stuff, "I know you'll do it safe because you're always so careful..." What she doesn't know is that I am PARALYZED with FEAR of screwing something up. I have been trying to unleash in myself the monkey of a man that goes headlong into uncharted waters with a hammer and spit unafraid of sparks and flying metal. As a result, I have of late landed somewhere in between. Ask a lot of questions, this forum is the key to success...
78 750K-The Ocho
74 550-The Cherry Picker
70 750K0 motor-Dick in a Box

Offline DaytonGuy

  • Enthusiast
  • **
  • Posts: 231
Re: My 77 550K build....(pics)
« Reply #22 on: October 28, 2008, 04:44:03 PM »
So I got the bearing retainer out and it was really simple.  I thought I would post pictures of how I did it so other noob's can see.  I searched on the site and read everything I needed to do, but I could not find any post with pictures.  I love to see pics when doing this stuff.  It makes things much more clear.  Before doing any of this, I would recommend hitting the retainer heavy with some sort of penetrator over night.  I prefer PB Blaster but I'm sure they all work the same.

OK...here goes.

First you start with one of these.  OK, don't laugh, I was out of beer so I grabbed one of the wife's Mojitos.  Trust me, it's not the same!  Made me feel kinda girly....LOL


Below is a picture of the hub and bearing retainer.  At the factory, they put punch marks on the edge of the retainer where it meets the hub.  These punch marks deform the threads enough to keep the retainer from backing out.  The punch marks need to be drilled out.


I took a drill bit that was just a bit bigger than the largest punch mark.  I don't know what size and it doesn't really matter so long as it drills out the entire punch mark.  Go slowly with light steady pressure.  You only need to go about 1/8 of an inch or so.  Can anyone out there drill and take pics at the same time like me?  Just kidding.....don't try that.


Make sure you clean out the holes with air so you don't get any shavings in the threads when you start twisting it off.


This picture sucks...too blurry but it shows the four holes I drilled.


I read several post of how folks made there own special tool to twist off the retainer and I was fully prepaired to do just that.  Before I spent the time I tried inserting the end of a wrench like this and lightly tapping it with a hammer.  It was pretty loose and came off easily.  Maybe because I soaked it with PB Blaster??


And you are done!


« Last Edit: October 28, 2008, 04:48:08 PM by DaytonGuy »

Offline DaytonGuy

  • Enthusiast
  • **
  • Posts: 231
Re: My 77 550K build....(pics)
« Reply #23 on: October 28, 2008, 05:05:23 PM »
Well, your not really done......I think I discoveted that the real work begins at this point.  I spent some time trying the "slide the spacer over as far as you can and whack the bearing" method of removing the wheel bearings.  I couldn't get either one to budge.  I couldn't find anything that really got a good grip on the bearing.  Everything kinda slid off when I hit it with the hammer?

Will this way work or is there a "correct" way.  If this way will work, what should I be using to slide thru and hang to the edge of the bearing?

Any thoughts would be great at this point.  Any pics of tools you guys made to get the job done would be nice too.
« Last Edit: October 29, 2008, 04:22:28 AM by DaytonGuy »

Offline DaytonGuy

  • Enthusiast
  • **
  • Posts: 231
Re: My 77 550K build....(pics)
« Reply #24 on: October 29, 2008, 07:51:38 AM »
OK...so I got the front bearings out.  I buggard up the ends of the spacer a little.  I'm not talking about the little tabs, but rather the ends of the spacer that ride against the bearing.  I used a socket and hammer to smack out the bearings and the socket left an indention on the end of the spacer and there was a small indention on the other side from the bearing it was tapping out.

Can I reuse the spacer or do I need to get a new one?