Author Topic: Papp's 1971 CB500 Rebuild. *LOTS O PIX!* Updated 5/08/09  (Read 36990 times)

0 Members and 2 Guests are viewing this topic.

Offline papp101

  • Enthusiast
  • **
  • Posts: 174
Re: Papp's 1971 CB500 Rebuild. *LOTS O PIX!* Updated 3/11/09
« Reply #75 on: March 10, 2009, 11:15:05 PM »
Will do Steve. I'll need to make a set of measurements so I can reproduce them after this baby is in running condition (BE THAT EVER IT SEEMS!)

Getting to the point where I'm running out of things to do inside. Damn the weather. WHERE'S MY 50 DEGREES!

Started assessing the tank. Big fuggin dent right behind and including the left side honda emblem. How do you get those honda emblems off?  Also disassembled the petcock.


How do you get these cap pins out? Just a punch/hammer? Or drill bit?


Mmmmmmm shiny carb bowls!


The right side.

Offline dagersh

  • "A country attempting to tax itself into prosperity is akin to a man standing in a bucket attempting to lift that bucket by its handle. - Winston Churchill"
  • Expert
  • ****
  • Posts: 1,010
    • Photos
Re: Papp's 1971 CB500 Rebuild. *LOTS O PIX!* Updated 3/11/09
« Reply #76 on: March 11, 2009, 08:42:22 AM »
Papp,

The emblems are actually pretty easy to remove.  Carefully pry them off.  They are held onto the tank with fasteners that grab on to 2 pins on the emblem itself.  The emblems are malleable, and can be bent back into shape if need be.  Use a flat head screw driver or putty knife to get inbetween the emblem and the tank - slow and easy is the way to be.  Use some painter's tape to keep scratches at bay as well.

Keep up the awesome work.  i am glued to your amazing progress!

Gersh
1962 CA95
1966 Black Bomber
1966 CA77 Dream
1967 Superhawk
1970 CB750K0
1972 CL350
1972 CB450/500 Custom
1972 CB500K1
1975 CB550F
1976 CB400F
1975 CB750 Future Restoration
1976 CB750K6
1976 CB750F
1976 GL1000


1968 Suzuki T500 Cobra
1990 BMW K1
2001 'Busa
2003 RC 51
Bunch of Guzzi's

http://www.sohc4.us/gallery/v/members/personal/dagersh/

Offline papp101

  • Enthusiast
  • **
  • Posts: 174
Re: Papp's 1971 CB500 Rebuild. *LOTS O PIX!* Updated 3/11/09
« Reply #77 on: March 11, 2009, 10:40:36 AM »
Thanks man! I'll pry them off for sure, I've got just the tape and putty.

As for the pins on the gas tank? I'll try tapping it out with a drill bit as it is a "mushroom" fit on the near side. I don't want to have to dremel the edge off, but I'll do whatever.

Anyone know what I could use to put back in the petcock's dual output holes? And I need a recommendation for GOOD fuel line and the right size to replace all the lines on this baby.

Thanks team, please chime in if you have any insight.

Offline SteveD CB500F

  • Global Moderator
  • Old Timer
  • *****
  • Posts: 4,553
  • Ride on the Steel Breeze...
    • TVAM
Re: Papp's 1971 CB500 Rebuild. *LOTS O PIX!* Updated 3/11/09
« Reply #78 on: March 11, 2009, 10:56:49 AM »
Talk to Jeff Saunders at www.z1enterprises.com for a wide selection of fuel lines.
SOHC4 Member #2393
2015 Tiger 800 XRT
1971 CB500K0 (US Model)

Offline papp101

  • Enthusiast
  • **
  • Posts: 174
Re: Papp's 1971 CB500 Rebuild. *LOTS O PIX!* Updated 3/11/09
« Reply #79 on: March 11, 2009, 11:02:25 AM »
Will do, I've dealt with him before when I had my KZ550 and he's the man.

Any idea on the nipples that plug into the petcock?

Thanks,

Offline papp101

  • Enthusiast
  • **
  • Posts: 174
Re: Papp's 1971 CB500 Rebuild. *LOTS O PIX!* Updated 3/11/09
« Reply #80 on: March 18, 2009, 11:08:52 AM »
Well it was getting close to warm enough to paint and I had an  :o >:( :-[ ??? ::) :) :D ;D

I had primed the rims 6 days ago, so I took them to the garage to hit them with gloss black rustoleum. It went on nice, so i came back the next day to spray the frame in the garage with primer and the can was faulty - kept leaking around the nozzle and pooling on the top of the can - then spitting big heavy droplets all over, and when I would shake the can it would catapult across the garage onto things that were not covered with painters cloth. Including my recently painted rims.

So I wiped it off with a dab of thinner on a paper towel, and it burned right through to primer and some metal. #$%*.

Started over with another coat of primer, (should've sanded afterwards, but just didn't feel like it.) Shot the black, then did 2 light coats of the Duplicolor Wheel and Rim Clear Coat over top then one "medium wet coat" as directed. I might not even sand and buff them, as I'm so happy with their result. So sorry for the camera phone shots.
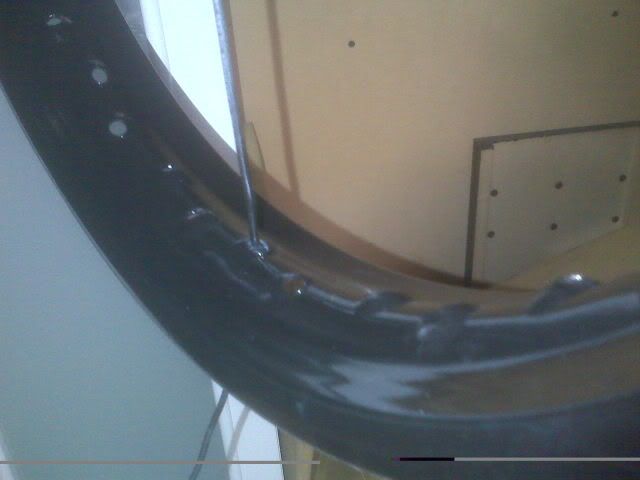


In the drying times I went inside to work on my swingarm - I had forgotted to bring it out to put with in the tiny paint booth, and after seeing Phaedrus' Chromed swingarm, I said HELL NO I'M POLISHING! It came up nice, and I might hit it with an adhesion promoter then the same wheel clear coat (it has this somewhat reflective quality to it that makes me think the light will pick it up great at night.

[youtube=425,350]http://www.youtube.com/watch?v=z3s4nMR0yxk[/youtube]

Tal-Strip is the bomb. Ten minutes! Wash it off and hit the spots you missed, and done.
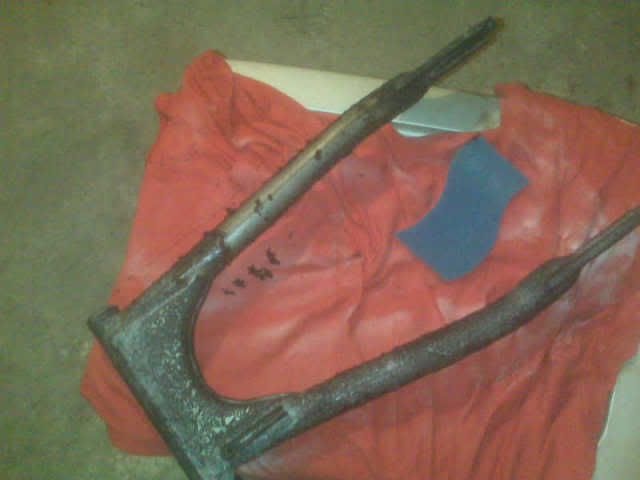

After the wire wheel.
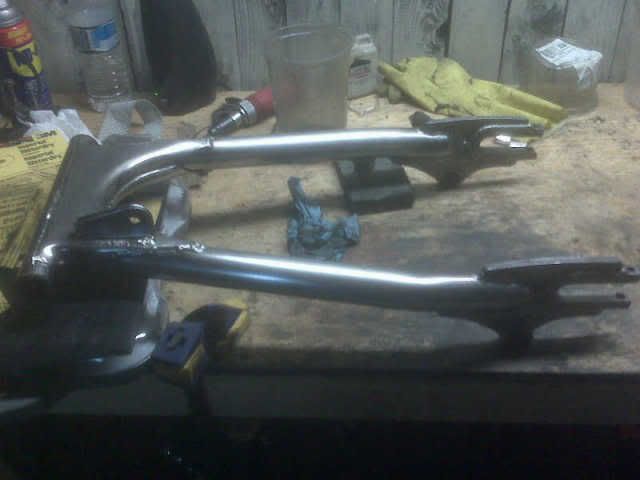

After the GREEN TRIPOLI STEEL POLISHING COMPOUND.


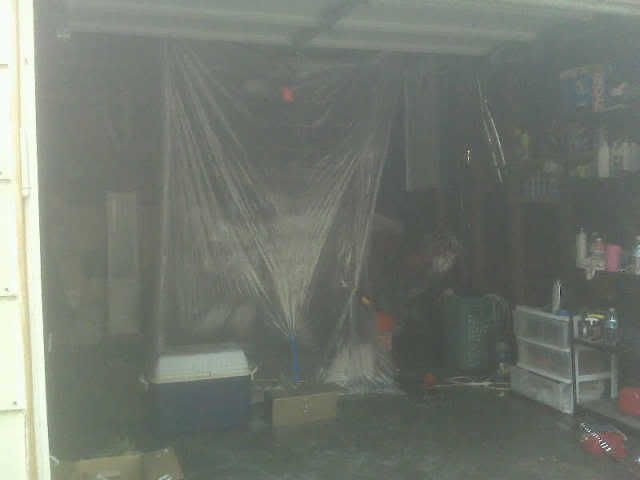
Paint booth in place with a space heater to get it to 60 degrees! That was definitely the problem last time - needed to cure!

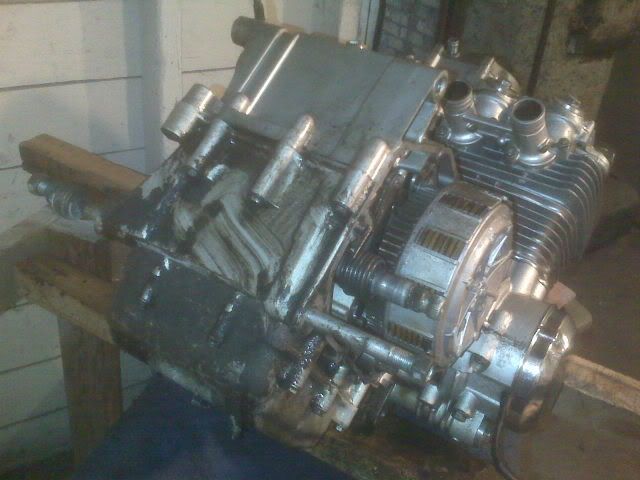
Dirty grimey greasy engine. Yuck.

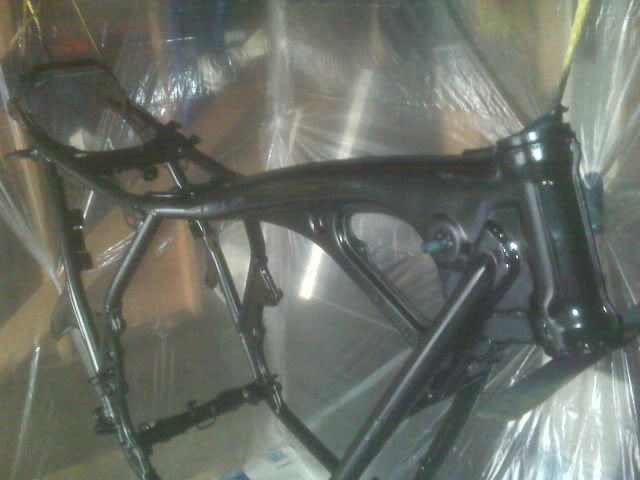
Frame after the Rustoleum Gloss black - I don't think I'd put the wheel and rim clear on at this point.

Finally getting this engine clean!
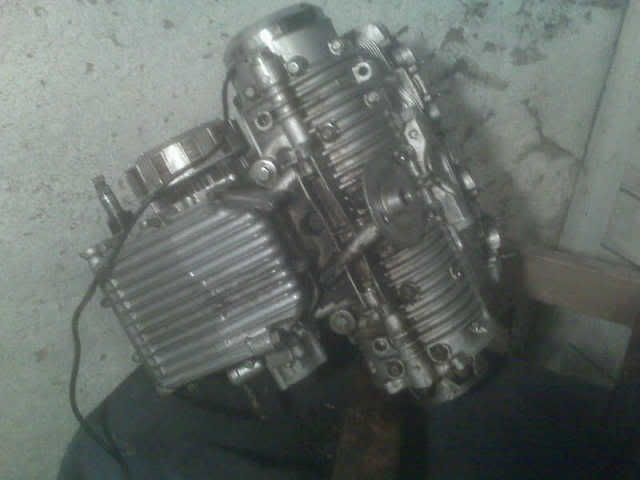


I used cheap old engine degreaser, which does have an oily film to it. What would you all recommend I prep with? Brake cleaner? Dish soap? I'd really like some quick help on this as I might build a bracket and paint this baby today!

Future plans on the project block:

Lace Wheels
Mount tires.
Mount rims/swingarm.
Paint Engine, Kickstand, Gauges.
Replace fork seals.
Complete rolling chassis.
Dent tank
Prime Tank
Strip seat
Mold seat pan/cafe hump.
Mold sidecovers (From whoknowswhat)
Have clipons made. (will keep you posted on this one!)
Mount Engine
Mount carbs/battery/airbox
Mount controls.
Fab seat cushion. (same time as VFR seat rebuild.)
Figure out brake light.
Send seat, headlight bucket, tank and sidecovers to Dad for paint. (quality unmatched for a self-taught!)
Polish stator cover.
Figure out exhaust (picked up beautiful stock 550F headers and just need a muffler!)
Reassemble
Tune
Ride.

Offline papp101

  • Enthusiast
  • **
  • Posts: 174
Re: Papp's 1971 CB500 Rebuild. *LOTS O PIX!* Updated 3/18/09
« Reply #81 on: March 19, 2009, 12:36:00 AM »
Started taping off parts to paint for tomorrow.


Took some shots of the frame after the clear had dried, there's some over spray I'll sand off after 7 days of curing.


Laced up the rims which took me over 5 hours as I didn't really catch on to the pattern of install until hour 4. Trued them, mounted the Kenda's, then trued them again and balanced them.


Offline Toxic

  • Expert
  • ****
  • Posts: 1,200
Re: Papp's 1971 CB500 Rebuild. *LOTS O PIX!* Updated 3/18/09
« Reply #82 on: March 19, 2009, 05:07:18 AM »
Nice project.   How did you avoid scratching the freshly painted rims when you mounted your new rubber?

What steps did you take?

Offline papp101

  • Enthusiast
  • **
  • Posts: 174
Re: Papp's 1971 CB500 Rebuild. *LOTS O PIX!* Updated 3/18/09
« Reply #83 on: March 19, 2009, 09:51:28 AM »
Funny you ask that.

Unfortunately, the rims hadn't cured, and I somewhat buggered the paint job, but that was only while installing the spokes. I think I needed to use the "self etching primer, and not the standard rustoleum primer. Oh well, I'll just use some gloss black touchup paint and 1000 grit sand paper.

As for the mounting, I used these and a bunch of WD 40.

http://www.denniskirk.com/jsp/product_catalog/Product.jsp?skuId=&store=Main&catId=&productId=p282429&leafCatId=&mmyId=

They worked well, but the plastic was a little too soft. I'll probably cover them in a few layers of duct-tape next time to beef them up, and also get some longer tire irons - mine are only about 10" which is a little weak for motorcycle tires. Did I say wd40? I meant LOTS of WD40.

Offline Toxic

  • Expert
  • ****
  • Posts: 1,200
Re: Papp's 1971 CB500 Rebuild. *LOTS O PIX!* Updated 3/18/09
« Reply #84 on: March 19, 2009, 01:03:51 PM »
Great tips, thanks.
I just got my rims back from the sandblaster so I am starting this part of the project soon.

I was wondering about those rim protectors.
Good to know they work.

Gary

Offline papp101

  • Enthusiast
  • **
  • Posts: 174
Re: Papp's 1971 CB500 Rebuild. *LOTS O PIX!* Updated 3/18/09
« Reply #85 on: March 19, 2009, 03:28:07 PM »
Yes.

self etching primer. It's a must. It's a little runny, so 2 mist coats, then cover it. Tape your rims up before respoking, unless you're going to do them one at a time.

Post pics!


Just came back in from my minnesota paint booth (see above photos with space heater) and laid on the self etching primer over all the  gauges, triples, dash indicators, kickstand, battery box, and gauge holder.

Will let it cure over night and hit it with clear in the morning. Given it will be cold I'm sure it will still take it with a decent adhesion should I do the 2 mist and 1 medium coat.

To hell with sanding, I LOVE that orange peel look. (not really, but if you convince yourself it saves you time.

Offline scartail

  • Hot Shot
  • ***
  • Posts: 286
Re: Papp's 1971 CB500 Rebuild. *LOTS O PIX!* Updated 3/18/09
« Reply #86 on: March 19, 2009, 07:59:39 PM »
Laced up the rims which took me over 5 hours as I didn't really catch on to the pattern of install until hour 4. Trued them, mounted the Kenda's, then trued them again and balanced them.

That scares me, when I stare at my project. I want eventually go down that route, but I hear that the skill need to lace rims true is a tough skill to master.

All in all, that is a nice project you got there Papp.
'89 Hawk GT, newly acquired, daily beater...
'76 CB550, was my daily beater... my cafe project...
'72 Yamaha R5, newly acquired project... donated to my buddy...
'67 Suzuki T20, still working on her too... Currently in pieces...

Offline papp101

  • Enthusiast
  • **
  • Posts: 174
Re: Papp's 1971 CB500 Rebuild. *LOTS O PIX!* Updated 3/18/09
« Reply #87 on: March 19, 2009, 09:18:08 PM »
Thanks man! The rim lacing would have been much better if someone would have watched me and told me what to do.

Take good pictures, and it was SIMPLE as all get out when I did it one spoke at a time. Here's what I remember after  beers and no lunch today. Most of this I got from the faq or somewhere on this forum.

1. place the hub in the center of the rim.
2. Run the "LESS THAN 90 DEGREE" spokes IN from the outside of the hub. (notice the "bedding" marks on the hub.)
3. Start with one to the left of the valve stem hole. Put the nipple on only a few turns.
4. Starting on the hole to the left of that as #1, count 4 to the left. in the 4th one place another of the same spokes.
5. Continue around until they're all in place on that side, then flip it over and do the same. Here is where I REALLY had to look at pictures to make sure I was right.
6. . . . . I don't know at that point I just figured it out by looking, and it wasn't hard.
7. I trued the rim looking at youtube videos. Not hard.
8. Mounted the tires. God bles motion pro rim protectors.
9. filled tires, trued rims again
10. Balanced tires.

Seriously, one of the best day projects i've ever done. hated myself while doing it, loved it when it was finished.

Offline papp101

  • Enthusiast
  • **
  • Posts: 174
Re: Papp's 1971 CB500 Rebuild. *LOTS O PIX!* Updated 3/18/09
« Reply #88 on: March 20, 2009, 11:11:41 PM »
Finished up some parts that needed paint and disassembled the controls for paint.


Offline papp101

  • Enthusiast
  • **
  • Posts: 174
Re: Papp's 1971 CB500 Rebuild. *LOTS O PIX!* Updated 3/18/09
« Reply #89 on: March 22, 2009, 01:32:15 PM »
Well I got my room mate to help me carry out the engine after washing it down. We moved it to the garage and strung it up to the rafters. 160/2 is about 80 lbs per rafter, so I feel good about that as they didn't budge when I did about 30 pull ups on each of them. *coughbull#$%*cough*.

I taped it all up and let it heat to about 65 degrees in there with the space heater, and it was good to go!


1 light coat at first to tack it up a bit, then a 20 min wait for it to flash.  Then a second coat that wasn't too heavy as my 1st coat was a little too heavy. No big runs or anything so that was good!


Sorry for that last shot into the backlighting. the display on my digital camera is non-working and it's without a view finder so i just have to guess.

Went back inside and took a swing at disassembling the controls, and tapped them with etching primer and paint.


I took a look at the seat, and it's of course in need of an aggressive wire wheel. I'll probably turn my focus to finishing up the carbs, then mounting the triple tree, then installing the engine, then the suspension, wheels, wiring harness, battery box, gauges, carbs, handlebar controls and cables.


Coming along!

Offline papp101

  • Enthusiast
  • **
  • Posts: 174
Re: Papp's 1971 CB500 Rebuild. *LOTS O PIX!* Updated 3/22/09
« Reply #90 on: March 23, 2009, 09:11:19 AM »
Here's some muffler mockups. Let me know which you think would go well on the bike, I used a blank photo from someone's cb750 (thanks!) and did some newb photoshopping.


BLANK MOCKUP - Add your own if you'd like!


Z1000 exhaust


SV650 Exhaust


R6 Exhaust


Ryan 550k

  • Guest
Re: Papp's 1971 CB500 Rebuild. *LOTS O PIX!* Updated 3/22/09
« Reply #91 on: March 23, 2009, 09:33:06 AM »
Z1000 exhaust looks ridiculous.......but surprisingly cool!
« Last Edit: March 23, 2009, 02:53:22 PM by R550 »

Offline papp101

  • Enthusiast
  • **
  • Posts: 174
Re: Papp's 1971 CB500 Rebuild. *LOTS O PIX!* Updated 3/22/09
« Reply #92 on: March 23, 2009, 02:06:25 PM »
Finished the painted engine and put it in the frame, all by myself. ;D 

Had to lift the whole thing onto the cooler before strapping down, and man was that heavy. Thank god I did squats at the gym yesterday.


Next up is:

Front suspension
Rear suspension
Wheels
Engine bolts and gasket sets
Clutch adjuster and cable
Front Sprocket
Chain
Chain Guard
Guages
Indicators
Bars
Switches
Grips
Battery Box
Carbs/airbox
Pipes (will mount headers until I find something to put on the back of them.)
TEST TUNE
Fab Seat
Dent Tank
Paint Tank
Mount front brake
Rearsets and linkage.
RIDE.

Offline papp101

  • Enthusiast
  • **
  • Posts: 174
Re: Papp's 1971 CB500 Rebuild. *LOTS O PIX!* Updated 3/22/09
« Reply #93 on: March 24, 2009, 12:06:13 AM »
Well I had some time after a work party and there sat the seat. I'm going to make a fiberglass mold of it and sand the hell out of it, so I just needed it bare.


Then to do something quiet and indoors like, I decided to finish with the petcock. It had a brass drain tube that was completely cracked, and a missing brass fuel line nipple/barb. So I made one.

Hopefully if anyone ever has a similar situation, they can just jump in a try things like this as brass is easy to work with and fairly cheap.


Tomorrow the suspension!

Offline oldhondarider

  • http://indimediaimages-shepdog.blogspot.com/
  • Hot Shot
  • ***
  • Posts: 496
  • http://indimediaimages-shepdog.blogspot.com/
Re: Papp's 1971 CB500 Rebuild. *LOTS O PIX!* Updated 3/22/09
« Reply #94 on: March 24, 2009, 04:36:06 AM »
Papp, that petcock rebuild rocked....
"I have never seen a wild thing feel sorry for itself. A little bird will fall dead, frozen from a bough, without ever having felt sorry for itself."   D. H. Lawrence

Welsh Customs, Tacoma Washington

Offline papp101

  • Enthusiast
  • **
  • Posts: 174
Re: Papp's 1971 CB500 Rebuild. *LOTS O PIX!* Updated 3/22/09
« Reply #95 on: March 24, 2009, 08:01:13 AM »
Thanks man! Hoping to have a good look at a rolling chassis today!  Also I let my carbs soak in simple green too long, and now I need to completely disassemble them and soak in something else. I should have stopped right after the coke!

Offline DollarBill

  • Hot Shot
  • ***
  • Posts: 335
Re: Papp's 1971 CB500 Rebuild. *LOTS O PIX!* Updated 3/22/09
« Reply #96 on: March 24, 2009, 09:45:49 AM »
Way to go man!  That was an awesome little project!  This will be useful to a lot of folks on here that might want to try repairing their own wrecked petcock. 
1975 CB750F Project Yellow Jacket - CBR600rr Swinger GSXR 600 Forks
1955 BMW R25/3, 1966 Honda CA160, 1975 CB400f, 1975 CB550, 1976 CB550

Offline papp101

  • Enthusiast
  • **
  • Posts: 174
Re: Papp's 1971 CB500 Rebuild. *LOTS O PIX!* Updated 3/22/09
« Reply #97 on: March 24, 2009, 02:36:58 PM »
Was just going to put the forks back in the same condition they were in, as I thought they were bone empty. So to test my theory on my way out to the garage, I cleaned the place up first. . . . no wonder this thing wouldn't suck.


. . . and opened the drain.


oh hell no. They're coming apart.

I couldn't stop the cartridge from turning when I tried to remove the lock nut, so I put a rag over the threads and clamped it with some vice grips. BAD PHILLIP. Had to chase the threads with taps to clean them up, then used my quick clamp to compress them.


Every thing went back together wonderfully after I pumped the cartridges in a tube of hot water, then added a ton of WD 40 and pumped them dry, cleaned them off and reinstalled with large bolts as "compression enhancers" to beef up the spongy spring tension.

THEN I went out and put them on the bike! The moment I've been waiting for all day:


I have only finger tightened everything on the frame and suspension, so when I start to migrate all my tools out there with the torque wrench and a spec sheet I will begin the proper "clicking" of the wrench.

Next to do the engine gaskets, wheels, chain and inner flashing, then the speedo/tack cables and wiring harness. *sigh* it's never ending.

Offline papp101

  • Enthusiast
  • **
  • Posts: 174
Re: Papp's 1971 CB500 Rebuild. *LOTS O PIX!* Updated 3/24/09
« Reply #98 on: April 03, 2009, 07:42:29 AM »
Made a little progress: Here's what happened, then the pix.

Cleaned off seat pan, taped with packing tape.

Used photoshop to borrow someone else's seat profile.

Tried to make a paper mache form for the fiberglass to mold to, and totally sucked it up.

Added wire mesh and plaster to fill out the shape so it could be sanded, and that sucked too as the whole rear end looked like a big ANT'S ASS. Too large for the profile of this little CB500.

Took a break for a few days, did the wiring harness for a bit.

Took another swipe at the seat, this time with styrofoam. I'll coat it in masking tape and plastic clingwrap before I put the resin on, as it will eat fiberglass.


Offline papp101

  • Enthusiast
  • **
  • Posts: 174
Re: Papp's 1971 CB500 Rebuild. *LOTS O PIX!* Updated 4/3/09
« Reply #99 on: April 03, 2009, 07:50:15 AM »


Much better. I'm going to make a set of sidecovers as well today, then glass them all at the same time.