Author Topic: Fabrication Thread  (Read 7422 times)

0 Members and 1 Guest are viewing this topic.

Offline Spikeybike

  • when planting C4 at your enemy's base make sure you don't use a
  • Really Old Timer ...
  • *******
  • Posts: 7,265
  • member #1150
Fabrication Thread
« on: February 28, 2009, 12:27:02 AM »
the idea has come up to compile our welding/fabrication bodywork & paint mods. to have it all in the same place.
where the idea came from


the "guidelines"  (not rules):

try to keep the "works in progress" to a minimum,  i.e.:don't post the beginning of a frame mod, and not posting the finished mod till four months later   

start your post with a line of bold saying what your doing, so that when people are skimming through the thread looking for mods to do.... just a way of kinda separating the fab posts, from the posts that are just comments

sounds simple enough right , well i'll kick it off

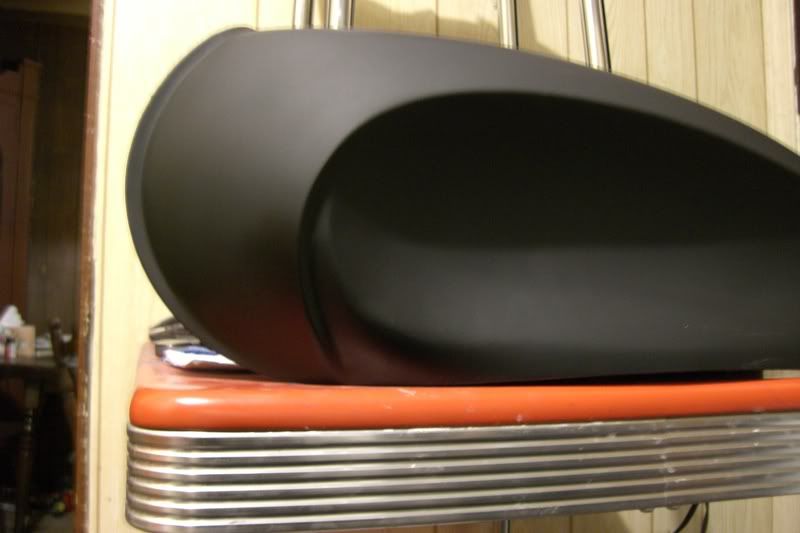
DISHING A GASTANK TIPS:

this just a copy and paste from my build thread, with little additions in brackets *[]*

the start

to all of you who sell parts on ebay, if your gonna sell a tank ... clean ALL the molasses out first (what a pain)
[drew the eyebrow on one side with a sharpie then made a template out of a piece of paper for the other side]


here is were i put the round bar , i thought i snaped a picture of it on there before the dents, but i didn't

[use 3/16" roundbar , you can bend it fairly easy around a round object by hand, coffee can, bench grinder motor etc,but i have access to torch and an anvil so i used 5/16.. bend the round bar as close to the template as you can before welding it to the tank, then tweak it here and there as you tack it in place,  if your using a mig 110 like me, turn it to the lowest setting, and start with teeny tiny tacks, start at the most curvy part first in this case the front. you wanna do the curvy parts first because there is more flex in the round bar before you start welding it,  ..duh ;D  make the tacks every 4 or 5 inches, then go back and put more in between those (stitch welding) . once you have it on with the "teeny tiny tacks" go back and build on those tacks till they are all about half of a pencil eraser, now take your trusty angle grinder with the 36 or 50 grit disc and smooth out the tacks a little, and make sure you don't hit the outward most edge of the round bar with the grinder or the welder  , the part you will see after the bondo]


i knew i was going to be doing alot of bondoing to get the "eyebrow" to look right . so i wasn't as carefull as i could have been with the hammering

[i used a rubber mallet that rounded with an angle grinder (mmm burnt rubber smoke) use a normal sanding block with a round back from the hardware store,  you wanna try to keep the dents about as shallow and as curved as the round back of the sanding block, i used that as a guide, you can dent it in deeper then the block, the curve angle is whats important, then use that to sand the bondo]


my boss once told me that i have a good eye for seeing what the end result will be, knowing it will look good when its done, eventhough it looks like #$%* right now.
there is alot of that going on here

[the tips of the round bar were ground flush after they were welded on]


i seem to have lost/deleted the during the bondoing shots, sorry.  but i move on

 
ooooooooooooweeee  that is lookin sweet . at this point i'm starting to get exited

[you can see very clearly all the bondo layers from high spots and low spots, no real way to tell you on a forum how to do that , you either know ,   or you have to be shown,  but in between sanding sessions,once you get close to finished spray a little primer on to see the highs and lows as you sand]


« Last Edit: February 28, 2009, 12:48:26 AM by spikeybike »

Offline 754

  • Really Old Timer ...
  • *******
  • Posts: 29,058
Re: Fabrication Thread
« Reply #1 on: February 28, 2009, 09:43:12 AM »
Cool I will be making more stuff soon I hope.

Had a visit from a member on the forum, that made a carbon fiber tail section. That would be cool to see here if they want to share some pics of it..
Maker of the WELDLESS 750 Frame Kit
dodogas99@gmail.com
Kelowna B.C.       Canada

My next bike will be a ..ANFOB.....

It's All part of the ADVENTURE...

73 836cc.. Green, had it for 3 decades!!
Lost quite a few CB 750's along the way

Offline rachet

  • Hot Shot
  • ***
  • Posts: 415
  • '77 CB750 F2
Re: Fabrication Thread
« Reply #2 on: February 28, 2009, 10:03:33 AM »
Awesome Thread and Excellent Post Spikey!  Good, clear guide lines (rules :P).

But I need Tacos!  I need them or I will explode!

Offline Tim in Ohio

  • So I got that goin' for me, which is nice.
  • Hot Shot
  • ***
  • Posts: 381
Re: Fabrication Thread
« Reply #3 on: February 28, 2009, 12:24:50 PM »
Awesome!
1973 Honda CB350  Four

Check out my CB350F resto project...  watch a complete moron build a bike in front of your very eyes!: http://forums.sohc4.net/index.php?topic=38903.0

billybobobrain

  • Guest
Re: Fabrication Thread
« Reply #4 on: February 28, 2009, 01:21:28 PM »
Personally I preffer a 1 1/2 inch dead blow to a rubber mallet, but I like the tank!

Offline Spikeybike

  • when planting C4 at your enemy's base make sure you don't use a
  • Really Old Timer ...
  • *******
  • Posts: 7,265
  • member #1150
Re: Fabrication Thread
« Reply #5 on: February 28, 2009, 01:47:56 PM »
Personally I preffer a 1 1/2 inch dead blow to a rubber mallet, but I like the tank!

to each his own  ;D

Offline Inkscars

  • grumpiness comparable to an
  • Old Timer
  • ******
  • Posts: 3,344
  • I have a box. I'm used to being ignored.
Re: Fabrication Thread
« Reply #6 on: February 28, 2009, 01:59:35 PM »
Just so you know, the bike in the background makes me effin sick. I wanted leopard print  :'( :'( :'( :'( :'( :'(
I settled for zebra.  :'( :'( :'(
Now I'll spend the rest of my bikes life wondering what coulda been.
If you'll excuse me, i'm going to go wallow in my own self-pity.
And who the hell named us; click-click-click-click-click-click

81 Hardly Davisson

Offline BlindJoe

  • Expert
  • ****
  • Posts: 1,184
Re: Fabrication Thread
« Reply #7 on: March 03, 2009, 06:58:14 PM »
Could we make this a sticky for awhile so people know it's here?

Offline mystic_1

  • Really Old Timer ...
  • *******
  • Posts: 6,071
  • 1970 CB750K
Re: Fabrication Thread
« Reply #8 on: March 03, 2009, 07:03:47 PM »
Just gotta keep it bumped up.

Hey Spikey, got pics of the fab on the new front fork brace?

mystic_1
"A ship in harbor is safe, but that is not what ships are built for."
- John Augustus Shedd

My build thread:  http://forums.sohc4.net/index.php?topic=68952.0

Offline Sporkfly

  • The frosty rider
  • Hot Shot
  • ***
  • Posts: 727
  • Mmm, Guinness
Re: Fabrication Thread
« Reply #9 on: March 03, 2009, 07:41:20 PM »
I figure I'll throw this up here. I know it's not that impressive, but it's a nice alternative to new pipes when your baffles rust out and you have holes that aren't visible. I have yet to see how they sound, but they seem pretty free flowing and were based on a few different bolt in baffles I've seen online. The transverse holes have smaller diameter pipe through them to redirect exhaust flow. Those tubes also have holes drilled in them facing towards the front of the bike. I also patched the holes on the pipe using an old band saw blade, but didn't get pictures of them.

Baffle


You can see some various baffle designs if you just look at Mac baffles, various Harley baffles, old mufflers that have opened up... The purpose is to redirect exhaust flow which causes a silencing effect. Sound wave physics come into play here, but I didn't get too complex with engineering my design or anything. It's impressive how quiet modern mufflers can make a car though. The basic design of almost all replacement baffles is a steel pipe with triangular holes punched through it. Here's a drawing (not too technical) of what I did for mine:


I welded mine in. You could bolt yours in, rivet it in, whatever you think works best for you. I primarily chose to weld mine in because the pipes are shot anyway, this is the most I'm doing to save them aside from a few patches and paint. If they start to eat out again I'm going to give up and get a Mac or something.

And a trailer light instead of the big Honda brick of a tail light, again not all that impressive:

Round tail light using stock mount


« Last Edit: March 05, 2009, 09:41:43 AM by Sporkfly »
1977 CB550K
1979 GL1000 - Current project, winter '09-'10
1979 CX500
1976 Suzuki GT500 Titan

Offline Spikeybike

  • when planting C4 at your enemy's base make sure you don't use a
  • Really Old Timer ...
  • *******
  • Posts: 7,265
  • member #1150
Re: Fabrication Thread
« Reply #10 on: March 03, 2009, 07:50:11 PM »
Just gotta keep it bumped up.

Hey Spikey, got pics of the fab on the new front fork brace?

mystic_1

i think i can drum up something for this thread


i like the baffle idea

Krixxer

  • Guest
Re: Fabrication Thread
« Reply #11 on: March 04, 2009, 04:30:04 AM »
this single thread will be responsible for the deaths of many ebay tanks!

Offline Sporkfly

  • The frosty rider
  • Hot Shot
  • ***
  • Posts: 727
  • Mmm, Guinness
Re: Fabrication Thread
« Reply #12 on: March 04, 2009, 11:12:29 AM »
Should we just copy-paste Martino's build thread into here?  ;D

If anybody wants more details about the baffles (looking at you spikey) I can do some drawings since they're now welded into the pipes. Once spring rolls around I'll record some audio of them and put it in my build thread.
1977 CB550K
1979 GL1000 - Current project, winter '09-'10
1979 CX500
1976 Suzuki GT500 Titan

Offline Flying J

  • Old Timer
  • ******
  • Posts: 3,386
Re: Fabrication Thread
« Reply #13 on: March 04, 2009, 10:31:25 PM »
Yes details on the baffels. Thats what this thread is all about. I need to make some.

Offline Sporkfly

  • The frosty rider
  • Hot Shot
  • ***
  • Posts: 727
  • Mmm, Guinness
Re: Fabrication Thread
« Reply #14 on: March 05, 2009, 09:38:22 AM »
Added/editted. I hope that makes at least a little bit of sense.
1977 CB550K
1979 GL1000 - Current project, winter '09-'10
1979 CX500
1976 Suzuki GT500 Titan

billybobobrain

  • Guest
Re: Fabrication Thread
« Reply #15 on: March 07, 2009, 08:38:31 PM »
Update Do not try this with aluminum parts!!!!

Chrome removal and copper plating on a small scale.

Before I get into this just let me WARN you. If you KILL, MAIM, INJURE, YOURSELF, or ANYONE it's YOUR FAULTThe chemicals involved are very caustic/harmful/yes they will burn you/yes you can DIE! Read ALL MSDS and safety data on your chemicals before you start to even think about mixing anything. Good Rubber gloves, apron, face shield, open garage door/heavy ventilation system required.

Chrome removal/pre cleaning for copper plate.

First, you need good quality LYE, https://www.thelyeguy.com/store/store.php this is good stuff.

Second, distilled water,.

Third, Stainless steel.

Fourth, battery charger.

In my experiments I used ¾ gallon water to ¼ cup lye, important lye is what turns organic material like skin, fat, “humans” into soap, one spec in your eye and you just lost your cornea if you ingest it call the hospital and the mortician cuz you’re going to die. You need a source of stainless steel, I talked my wife out of an old butcher knife. Why do you need this? Because stainless has chromium in it and in order to make the process work you need to use the stainless steel as the cathode(negative charged object.), the anode (positive charged object) is your chrome part.

Important. Always add your chemicals to your water, never add water to chemicals, if you add water to chemicals they will react to quickly and spatter you with acid. Also with lye use cold water. Warm or hot water can cause an explosion!


Minimum equipment!


The stuff


Soapy water to wash the lye off of your part.


After the lye is poured in it has to react for a few seconds, then the water clears up.


Flow is positive to negative, your part clamped with the positive cable, stainless clamped with the negative cable. This is one of the covers not going back on the bike so I experimented with it.


Turn the power on and you can see the chrome dissolve.   


All it takes is thirty minutes.


There is a slight discoloration, nickel is a little yellow compared to chrome.

Chrome removed!


Copper plating

Safety rules above apply here too!

If you want to copper plate steel that is not chrome plated, you still need to do the lye bath for 30 minutes. other metals may react diferent so look at the MSDS for what metals you can use.

The stuff, pre 1982 pennies, 64oz battery acid, distilled water, 35%  HCL (muriatic acid), battery charger.


The set up flow is positive to negative, pennies on the red cable.


power is on. When making copper sulfate use a copper wire in place of your part as the solution has to be made before you can plate stuff.


after thirty minutes.


after a few hours. The blue is copper sulfate.


Add one cup 35% HCL.


Clean part with rubbing alcohol and Insert part into solution on the negative side. let it brew for two to three hours.


Remove part, dip in baking soda water until it stops bubbling. Then clean the part and polish. This particular part was too big for my setup so there are definite patterns in the plating, but I am going to percolate air in the tank when I plate the larger things. Hence this tutorial is for small parts. Like nuts and bolts, and trim pieces.


this is what it is supposed to look like.

Shameless plug, were all this crap came from!
« Last Edit: March 26, 2009, 06:49:12 PM by billybobobrain »

Offline Inkscars

  • grumpiness comparable to an
  • Old Timer
  • ******
  • Posts: 3,344
  • I have a box. I'm used to being ignored.
Re: Fabrication Thread
« Reply #16 on: March 09, 2009, 06:00:03 AM »
That's so cool!
And who the hell named us; click-click-click-click-click-click

81 Hardly Davisson

Offline manjisann

  • Hazardous Chemical Inhalation
  • Master
  • *****
  • Posts: 1,828
Re: Fabrication Thread
« Reply #17 on: March 09, 2009, 06:36:57 AM »
WOW, very straight forward and cool!!!

I made a possitive flow air mask to use when I am doing multi-part paint as some of them have that Isocyanate stuff in them that'll turn your kidneys into marbles. I'll have to post the how to on here  :D

Thanks all for such awesome ideas!

Brandon
Sure it's for sale! How much you ask?? Well, how much are you willing to pay??? Now triple it, that's the price!

1973 CB500 K2 - Sold the bike and bought a Mig, Miss the bike, Love the Mig :D
1980 CB650 Custom
1971 CB500 Frame 650 engine: Project

Trip and General Ramblings blog: manjisann.blogspot.com

Offline Ricky_Racer

  • Master
  • *****
  • Posts: 1,598
Re: Fabrication Thread
« Reply #18 on: March 09, 2009, 08:13:44 AM »

Please do, Brandon. That would be a great post!  RR

I was put on Earth to accomplish a certain number of things. Now I'm so far behind, I'll never die!

Offline Sporkfly

  • The frosty rider
  • Hot Shot
  • ***
  • Posts: 727
  • Mmm, Guinness
Re: Fabrication Thread
« Reply #19 on: March 09, 2009, 09:28:08 AM »
Looks like I'll have to do some copper plating for my bike  :o Thanks for that one Billy
1977 CB550K
1979 GL1000 - Current project, winter '09-'10
1979 CX500
1976 Suzuki GT500 Titan

Offline Sporkfly

  • The frosty rider
  • Hot Shot
  • ***
  • Posts: 727
  • Mmm, Guinness
Re: Fabrication Thread
« Reply #20 on: March 16, 2009, 10:01:15 AM »
I'd like to see a few seats in here, particularly custom sheet metal pans. Fiberglass is nice and all, but I know there are a few that did them out of sheet metal. So let's see 'em.
1977 CB550K
1979 GL1000 - Current project, winter '09-'10
1979 CX500
1976 Suzuki GT500 Titan

Offline winnipeg550guy

  • Hot Shot
  • ***
  • Posts: 302
Re: Fabrication Thread
« Reply #21 on: March 16, 2009, 06:13:41 PM »
Holy crap ! that fuel tank idea is super cool, really turned out nice
74\' 550k., 1965 Suzuki K15, 1978 BMW R80/7

Offline Pete T

  • Full Member
  • *
  • Posts: 38
Re: Fabrication Thread
« Reply #22 on: March 16, 2009, 11:02:40 PM »
I'd like to see a few seats in here, particularly custom sheet metal pans. Fiberglass is nice and all, but I know there are a few that did them out of sheet metal. So let's see 'em.

since you mentioned it i will post up some pics of mien, I already posted them in my project build but might aswell post them here. this is my super ghetto seat pan, the sheet metal if from a dishwasher door and the rest is made from some scraps of metal i had laying around. I might not use it though. everytime i make something for my bike I want to switch it up within a few weeks. oh well.


here are some bars i made, might not use them either, hah;


Offline Spikeybike

  • when planting C4 at your enemy's base make sure you don't use a
  • Really Old Timer ...
  • *******
  • Posts: 7,265
  • member #1150
Re: Fabrication Thread
« Reply #23 on: March 16, 2009, 11:07:47 PM »
i think they look great, the pan looks like it would hold up very nicely, and has great lines.. and i really like your take on the clubman style bars  ...differant, stands out,   ..very cool     8)

Offline Pete T

  • Full Member
  • *
  • Posts: 38
Re: Fabrication Thread
« Reply #24 on: March 17, 2009, 12:48:15 AM »
i think they look great, the pan looks like it would hold up very nicely, and has great lines.. and i really like your take on the clubman style bars  ...differant, stands out,   ..very cool     8)
thanks man, the reason why i might not use the seat pan is because i dont like the way the frame looks where its cut off, i would like to blend it in more, kindof like you did on your bike, so that the bike looks like it was never chopped and actually came off the line like that. however i cant blend the seat pan into the bike so i might bend some round bar and weld it up where i cut the frame and then bend it up like this guy did: