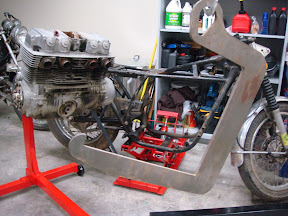
UPDATE 5/9/12: After a long absence, I have finally gotten .dxf files posted for anyone who would like to make a c-hook. You can find the link
here. There are three versions, modify them as you see fit. Again, I am not an engineer and make no claims as to fitness for any purpose. All I ask is that you take pictures and post them so that others may benefit. It’s great to be back. Thank you to all who have posted.
Blake
I’ve been lurking on this forum for about a year now, and after benefiting greatly from the wisdom so many of you have taken the time to share, I decided its time to pay it forward in what little way I could. Unlike many of you, for me, motorcycling is a solitary pursuit. Whether it’s riding or wrenching, I pretty much have to go it alone. So I needed a safe way to remove an engine, mount it on a stand, and replace the engine by myself.
So I began searching the forum for engine stands and saw several good examples, but having no welding skills I was very limited in what I could actually do. I settled on the
Bracket Method seeing it was the most simple and cost effective. After buying a stand and making the brackets I realized that my setup would not allow me to split the cases (Chalk one up for “The Hard Way”). So what to do? I jumped back on the web and found the
K&L bench top stand. But it’s $172.00 and I didn’t want to give up my bench space. Then I had the idea that I could make a K&L style rotisserie by modifying a second stand and mounting it to the first, with the added benefits of it being cheaper, self contained, and on casters. The next challenge was to come up with a way to remove the engine. I remembered seeing
The Engine Extraction Helper thread, but again, no welding skills. While I was mulling over a solution, I came a cross a two ton engine hoist at Tractor Supply Co. on close out for $100.00 (With engine leveler!), so I snapped it up. A few days later I was out in the maintenance shop of the company that I work for and came across a huge C-clamp and thought, “man, if I could just modify this thing”, so to the web I went. I came a cross several companies that make large C-hooks for heavy lifting and I knew I could design one for what I wanted. So I drew one up in a vector graphics program to my specs then called every stinkin’ machine shop in town until I found one that had a water-jet and was willing to do a small job. When I found one I sent the guy a file. Two days and $25.00 later (That’s right, Twenty Five Bucks) I had a custom made ½” plate C-hook in hand. Then I ordered some cam straps and I was in business.
Below are the details of what I’ve done. Things that I had at my disposal were a drill press, metal band saw, center punches, free scrap angle iron, and a wall to bang my head against. All in all, this project cost me about $220.00. Feel free to ask questions or leave comments. I hope someone finds this information useful.
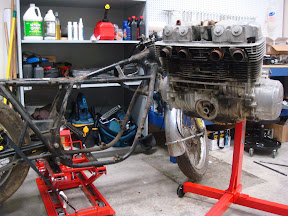
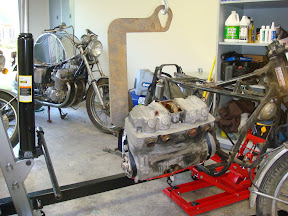
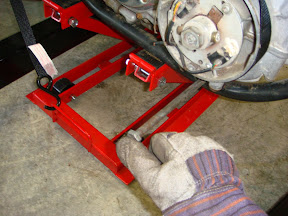
The Victim You’ll notice this is a roller. One reason I worked to devise this system was that the “frame on engine” method is not always suitable, like if you have a rolling chassis or just need to replace a head gasket on an otherwise running bike. Obviously the bike in the pictures had been prepped. Consult your manual for proper engine removal instructions. For this lift you’ll need to secure the bike in an upright position. A motorcycle jack was in order here, because this bike has no center stand. Also, a motorcycle lift wouldn’t work because you can’t roll the engine hoist’s legs underneath.
 Engine Hoist, C-Hook, & Straps
Like I mentioned above, I picked this up from Tractor Supply Co. brand new on closeout for $100.00 with engine leveler. You can get a good used on from Craig’s List (God bless you Craig) for about the same or less.
Again, I custom designed the C-hook using a vector graphics program and saved it as a cad file to send to the machine shop. The machinist cut it out while he had another ½” plate job on the jet. When he told me it would be $25.00, I figured he must have liked the idea of doing a favor for a guy who wrenches on vintage bikes. Based on ratings of similar comercially available C-hooks, this hook should lift between 1/2 and 1 ton. Note: I am not an engineer and am not qualified to make that kind of stament
 There is a downloadable .pdf of the C-Hook at the bottom of this post.
 If I were to make another one, I would shorten the Throat "C", and lengthen the Lifting Arm "A". If you decide to alter the dimensions, make sure that the Neck "B" is 1/2 the length of the Lifting Arm "A".
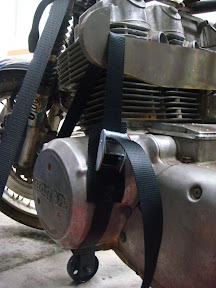
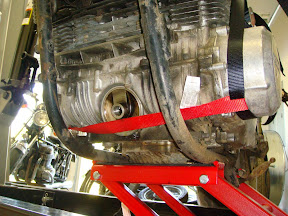
I ordered the straps from Strapworks.com. They will custom make ANY type of strap you want. I had them make me 36” Polyester Cam Straps. They cost about $5.00 each. Make sure you use Polyester webbing. It is the only type that is heavy load rated (3500 lbs) AND is abrasion resistant. The red one pictured is an 18” double ended loop strap. It served to keep the two cam straps from slipping off the engine.


 Hooking It Up
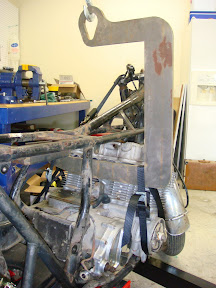
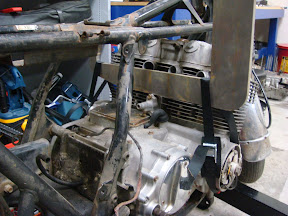
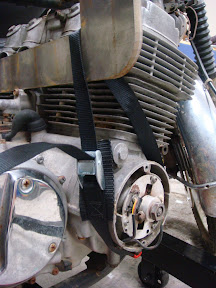
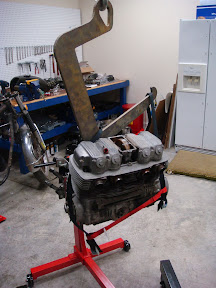
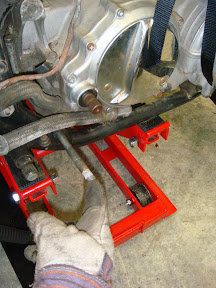
Just hang the C-hook from the hoist, and position it into the frame. I like to line up the lower arm with the intake ports on the head. Too low and the C-hook will be sitting on the cam chain tensioner. Don’t want to scratch up that nice paint job! The C-hook will hang tilted to the closed side until you get a strap hooked up. So pre-thread the loop strap and one of the cam straps, then tread the cam strap on itself. Holding the C-hook by hand position the cam strap over the lower arm and then loop it over the dyno cover. Put a little tension on it then do the points side. On the points’ side, make sure you don’t bind up the cam strap on the two case bolts. I like to make sure the red loop strap runs between the bolts as well, just to make sure things don’t shift around when tension is applied. Also, before commencing the final lift, make sure your hoist chain and hook are vertically centered over the backbone of the bike. This isn’t usually a big issue, but if there is a side load going on, it could make it harder to adjust the straps level and walk the engine out.

 Getting It Out
Once everything is hooked up to your satisfaction, apply tension with the hoist. You’ll see the bike shift a little when the hoist is carrying the engine weight. You should be able to adjust the hoist finely enough to pull the bolts out with a light pull (if the bolts aren’t rusted/frozen/bent/other). Do the rear first, then, when the bolt is out, apply a little more tension and the front should come free. Once the bolts are free and the engine is fully supported by the hoist, tilt the engine forward to clear the engine mounts and then walk the engine out of the frame. It may take a little more tilting and maneuvering, but it’s relatively easy, especially considering your friend isn’t about to loose his grip and drop the whole thing on your toe/bike/side cover/dog.
One note: If you can take the breather cover off, then it would be wise to do so. This goes for any 750 engine removal method. It will give you a few millimeters more room to maneuver.
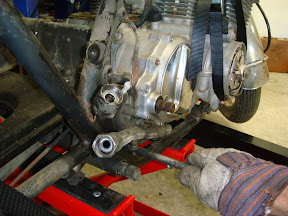
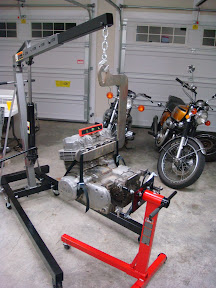
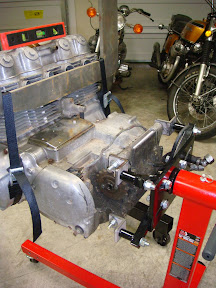
Once the engine is out, its time to get ready to mount it on the stand. Using cam straps makes it very easy to adjust the rig. I throw a level on top and even everything up once its free, just to give me the best chance of getting it mounted smoothly and evenly. And it only takes two seconds.
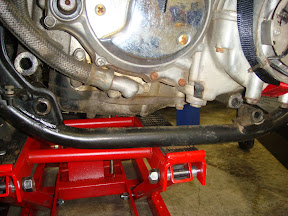
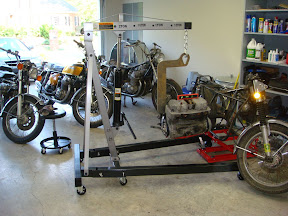
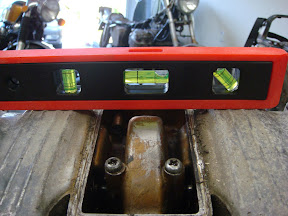
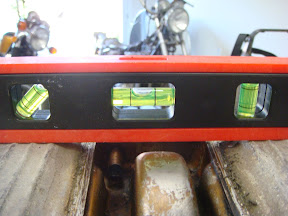 The Engine Stand
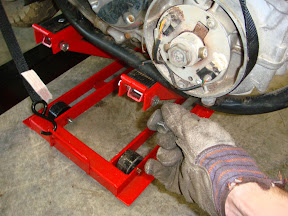
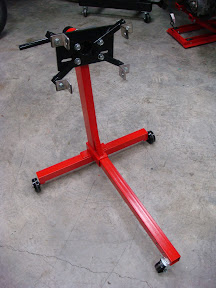
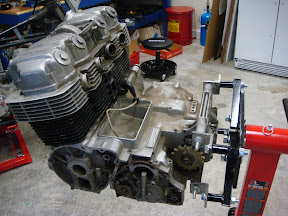
Like I stated earlier, I chose the “bracket” method of mounting the engine to a 750 lb engine stand. Harbor Freight has their 750 lb engine stands on sale for $35.00 at the time of this post. You will need two of them. I bought mine at a local auto parts store thinking that it wasn’t worth the 45 mile drive to the nearest Harbor Freight. Then I realized I needed two of them. I overpaid. (“The Hard Way”, remember?).
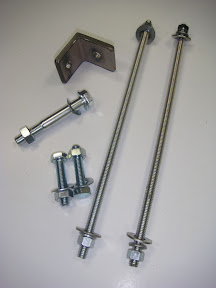
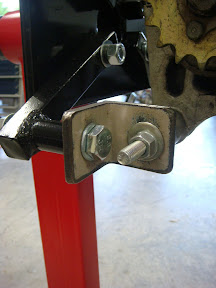
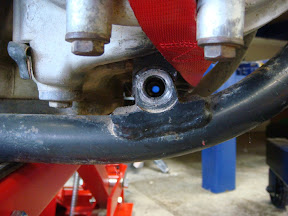
I made six brackets using some free scrap 2”x 2” angle iron. Make sure you offset one of the holes. You will cuss if you don’t. Then you’ll get to make some new brackets (THW). You will need appropriate hardware to mount your brackets to your engine stand.
To mount the engine to the brackets I chose two 12”x3/8” threaded rods and appropriate nuts & washers. You will also need two 10mm x 60mm bolts, nuts, and washers that fit the front engine mounts.
 Mounting the Engine to the Stand
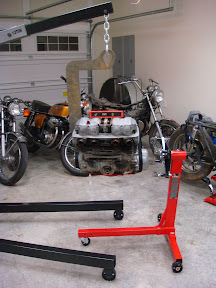
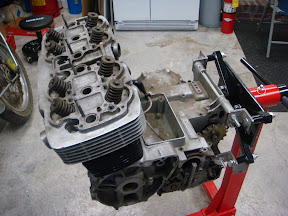
Adjust the engine stand arms and brackets to their approximate positions and hand tighten them. Make sure you have the correct ratchets and wrenches close by for this one (preferably in the pockets of those snazzy wrangler work pants you got from Wal-Mart for fifteen bucks) Pull the stand in position, swing the engine to meet the stand and mate the two by securing the rear engine mount holes. Thread whichever holes line up first. Top or bottom, it doesn’t matter. Then you can raise or lower the hoist to pivot the other holes into alignment. Once everything is tightened down, you can lower the hoist a little and release the cam straps.
 The Top End
At this point you’re ready to rip off that valve cover, send the head out for porting, and bore the cylinders for that Cycle-X 850 kit. Then get ready to take it all the way down town to the bottom end.
 The Bottom End
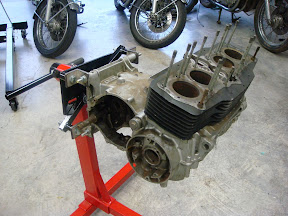
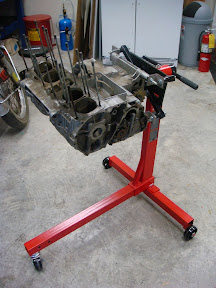
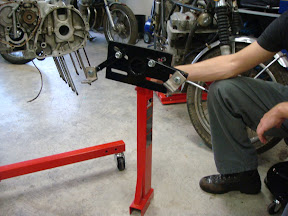
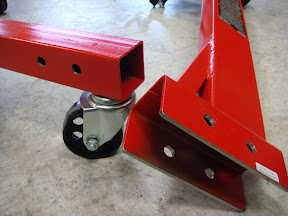
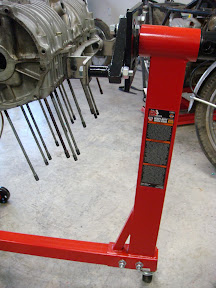
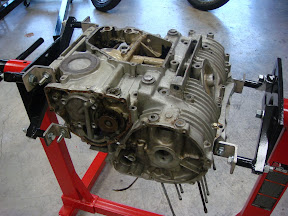
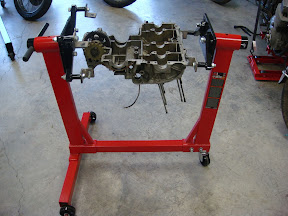
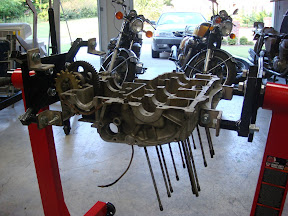
In case you don’t know, (and if you’re like me, you don’t know until after you needed to know) the cases split horizontally on a cb750 engine. And if you’re going to get inside and do any work, you need to invert the top half of the case to get the job done. So to do that, I bought a second engine stand and modified it.
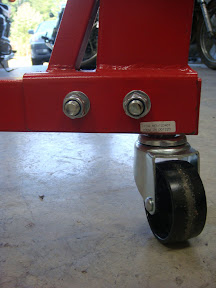
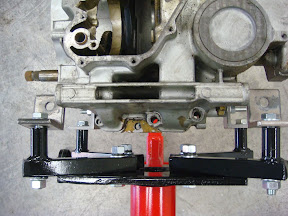
I took the vertical arm and mounting plate from the second stand and using a metal band saw, I cut the bottom wall off the square tubing. I then drilled two holes. Once that was complete, with the engine inverted on the first stand, I placed the second arm on the end of the first stand’s leg. I bolted it up to the engine and center punched the lower leg of the first stand. Then after disassembling everything, I drilled the two holes in the first stand’s leg. It sounds worse than it is, just a little time consuming for this part. But once it’s done, you’re good to go. Just bolt it all up, remove the uppercase threaded rod, and you’re ready to split the cases.
 Reassembly
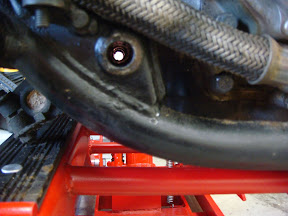
“Reassemble in order of disassembly” Don’t you just hate it when the manual says that? Well, it really is that simple this time, but I’ll throw in a couple of pointers. When you walk the engine back into the frame, lower the engine slowly until the front holes line up. You can see when it’s right. You should be able to push the bolt in with one finger. Then, lower again until you can do the same with the rear bolt. Remove the straps, and you’re done!
 Success!