Author Topic: Paint & Bodywork FAQ  (Read 34436 times)

0 Members and 1 Guest are viewing this topic.

Offline SteveD CB500F

  • Global Moderator
  • Old Timer
  • *****
  • Posts: 4,553
  • Ride on the Steel Breeze...
    • TVAM
Paint & Bodywork FAQ
« on: June 13, 2005, 02:07:35 am »
I've revamped this FAQ to include some recent submissions on bodywork compatibility.

Thanks to all the contributors.

« Last Edit: December 10, 2009, 11:08:27 am by SteveD CB500F »
SOHC4 Member #2393
2015 Tiger 800 XRT
1971 CB500K0 (US Model)

Offline Harry

  • Hot Shot
  • ***
  • Posts: 387
    • CB500F
Terry's Guide to Rattle Can Spraying
« Reply #1 on: July 05, 2005, 01:43:15 pm »
J. Mark Locklear sent this link: http://www.chuckhawks.com/harley_paintin.htm
also called "Harley Paintin' For the Under-funded and Under-skilled"!
Harry Teicher, member #3,  Denmark....no, NOT the capital of Sweden.

Offline SteveD CB500F

  • Global Moderator
  • Old Timer
  • *****
  • Posts: 4,553
  • Ride on the Steel Breeze...
    • TVAM
Terry's Guide to Rattle Can Spraying
« Reply #2 on: August 25, 2005, 12:03:24 pm »
« Last Edit: September 19, 2005, 01:27:57 am by SteveD CB500F »
SOHC4 Member #2393
2015 Tiger 800 XRT
1971 CB500K0 (US Model)

Offline SteveD CB500F

  • Global Moderator
  • Old Timer
  • *****
  • Posts: 4,553
  • Ride on the Steel Breeze...
    • TVAM
Terry's Guide to Rattle Can Spraying
« Reply #3 on: November 25, 2005, 07:36:59 am »

Re: orange paint

Brian Hoover
Fri, 16 Jan 2004 11:10:06 -0800

I've taken the liberty to retype Tim's instructions so that Glenn could find
a permanent place for all to access.
My printed copy is very old and has a lot of scribbles on it. Apart from a
few obvious typos,  this is how it appeared:

Subject: Sunrise Orange Paint
Author: Tim Feusi (cacheflowl.sasknet.sk.ca)
Date: 10/17-2000
Retyped by Brian Hoover from printed copy 1/15/04 ( [EMAIL PROTECTED] )

Well as promised here is the instruction for duplicating Flake Sunrise
Orange from the 1973 production year.  It matches perfectly to the new side
covers I received from Honda.  It may be a fairly safe assumption that for
the other candy colors ( except brown) that a correctly chosen shade of
candy would work.  I feel the base components are the same, especially the
size of the metal flake.  These are instructions for Sunrise Orange though.
I made a mistake on the last posting and the company that makes the product
is "House of Kolor".  ( Phone 612-729-1044 Picayune Mississippi, they have
distributers all over Canada and the USA).

Product Required:
1 pint (pt) BC-02 silver base
1 ounce MF-2 mini flake ( trust me 1 oz will do test panels, tank, and side
covers)
1 pt UK-8 tangerine candy
1 pt UC-01 clear coat
1 pt KU-100 hardener
2 Quarts medium reducer
Tech sheets for above

What follows is copy of the instructions as written out by my painter ( he
is an autobody instructor at the local tech college and is very picky) .

1- Reduce BC-02 two parts base to one part reducer, apply two full coats of
BC-02 silver or until full hiding
2- Reduce BC-02 at a ratio of one part paint to one part reducer.
3- Add one gram of mini flake to every 10 grams of reduced BC-02. (He used a
digital scale)
4- Apply two or three coats of mini flake and BC-02 mixture to complete
panel.
5- Allow recommended recoat time, usually 30 minutes.
6- Mix and apply two coats of UC-01 clear coat.
7- Allow clear coat to fully cure.
8- Lightly block sand clear to level flake alignment with 600 wet or 800p
wet.
9- Apply 4 up to 6 ( mine was 6) medium wet coats of the UK-08 tangerine
candy onto panel allowing each coat to flash.  NOTE: Always make test spray
out panels when spraying candy for matching.
10- Always check for correct6 match between coat of candy.
11- Allow candy to flash for one hour.
12- Apply two coats of UC-01 clear coat onto panel.
13- Allow to fully cure.

He then added the black panel and 3M ( perfect match) trimline striping to
the tank and one more coat of clear and the results are just like factory
except for one small detail.  If you are shooting for concoures points omit
steps 6,7 and 8 as Honda originally was kind of bumpy ( my new side covers
are not perfectly smooth) as they didn't smooth out flake like we did.  My
tank looks great and is perfect match to the factory side covers.  If you
have questions, you can email me.   Lots of luck and remember, it's not what
you ride but if you ride that counts.  It doesn't hurt to have a classic to
ride either.
Cheers, Tim

SOHC4 Member #2393
2015 Tiger 800 XRT
1971 CB500K0 (US Model)

Offline Bob Wessner

  • "Carbs Suck!"
  • Really Old Timer ...
  • *******
  • Posts: 10,079
Terry's Guide to Rattle Can Spraying
« Reply #4 on: March 22, 2006, 07:21:17 pm »
Contributed by Zane - March 10, 2006


Here's mine.  They're more for practicality than for restoration.  If Canada had stayed with Imperial distance measurement (mph) I would have restored the gauges I think, rather than re-designing them the way I did.

A couple of fellow members emailed me about my face images, and I've been playing around a bit with some ideas - more for fun than for any other reason.  So this white one is something I did just as a conceptual thing ....

As for my working faces - here's a bit of info about what I did....

I print on Epson professional Paper "Enhanced Matte Paper - Formerly Archival Matte Paper"  It's a true, deep, and almost completely non-reflective matte photo paper.  You can find it on Epson's web site.  No other matte paper I know of comes close to it for non-reflectivity.

I print on a Canon S9000 Bubble Jet printer.

The matte paper is extremely sensitive to abrasion and to marking of any kind.  I went for about 4 months with my faces made from simply that paper and nothing else, and they were fine (but that was only four months).  Then, when I redid them in November, I sprayed them with an art store product - Krylon "Preserve It!" (Digital Photo and Paper Protectant.)  I used about three or four coats of the protectant and the results were excellent.  The main thing is that the Krylon stuff barely affected the matte quality at all.  Even with that preserving spray on them, they are way more "matte" than any other matte paper would be without any spray at all.

I cut them out with a nifty little product from Olfa - a compass knife.  It's about 7 bucks, comes with 6 or seven blades, and will cut a perfect circle up to 4 or 5 inches in diameter.  I even used it for cutting the plastic for my plates.  (Granted, you have to be patient.  I would say I had to retrace the cut 30 to 40 times to get through the plastic - but it worked well enough - taking 4 or 5 minutes for each plate.  I used a somewhat brittle and rigid plastic from a cheap, dollar store desk top picture holder.  It was similar (though not quite as brittle as) a CD case type plastic. (My original speedo plate shattered into a number of pieces - riding too fast I guess.   

(Before I bought the Olfa I stuck my exacto knife in a kid's school compass, and drew or cut circles like that.  It worked okay, but not as well as the Olfa knife.)

I painted the home-made plates flat white on one side, and then (3m) spray-glued the Preserve It coated photo faces to the non-painted side of the plate(s).

« Last Edit: December 10, 2009, 11:10:23 am by SteveD CB500F »
We'll all be someone else's PO some day.

Offline Bob Wessner

  • "Carbs Suck!"
  • Really Old Timer ...
  • *******
  • Posts: 10,079
Terry's Guide to Rattle Can Spraying
« Reply #5 on: November 10, 2007, 02:28:28 am »
Contributed by Grumburg

Did my 550 in Sunrise Orange myself with Don's kit and it turned out perfect! Used an HVLP gun with a 1.5 tip with 18 lbs of pressure. Several things:

1) Follow instructions to the letter!

2) DO NOT put kit primer over any other primer. I already had the tank primed and when I applied kit primer it started to wrinkle. Had to sand it off and start over. Coated bare metal with Duplicolor etching primer and it worked fine.

3) Apply 4-6 light coats of base so metalflake lays evenly. If it runs, you are f+++ed! Stir metalflake thoughly and use right away.

4) Clean gun good before moving to candy. Kit has plenty of cleaner.

5) Spray 3 light coats of candy just to get an idea of color. Remember color will darken a little bit. Took 7 coats to get it just right.

6) Use all the clear. Gives a deeper look and can wet sand without breaking through. Apply 2 light coats of clear and then put final coats on heavy. Don't make runs, but if you do, can sand them out.

7) Allow plenty of time for the job. With flash time between coats of 6-10 minutes, will take 2-3 hours.  Don't be concerned with how it looks when finished. Will probably look like crap.

8) Let it sit 4 to 5 days before wet sanding with 2000 grit paper and compound. This is the fun part. Wrap paper around a small, wet sponge and lightly sand with lots of water with a little dish soap in it. Just sand until the orange peel is gone then hand buff with compound.

Turns beautiful before your eyes.

Doing Second Color:

After I had the candy just the way I wanted it, had to do the black cove. Made me pucker thinking how many different ways I could screw up. Thanks to some forum members, I had pictures of an original tank. Used 1/4" pinstripe tape to layout the shape. Can play with the curve until you have it just right. This will be your outline. Tape needs to be warm so you can make gradual curves. After outline is done, lay second stripe next to 1st. Mask entire top of tank to prevent overspray. Lay masking tape over pinstripe but leave inside of pinstripe exposed for a sharp edge. Wet sand area with 600-800 paper to remove all orange peel. Since I was doing black, did a quick guide coat and sanded off to prevent any waves. Do not recommend compounding area to be painted. Wait and color sand both colors together. Wipe down with PrepAll.  Spray 4 coats of DupliColor rattle can black and let set for 3/5 days. Removed masking and wet sand with 2000.

Striping:

Reproduction Decals sells a stripe kit, but at $64 is more than a little steep. Used 2 rolls of wide/narrow pinstripe tape, one gold and one white left over from masking.  Easiest to do with tank on bike. Lay gold with wide side over edge. Peel off narrow stripe with backing. Lay wide white stripe exactly over gold stripe but do not stick down the last inch of each end so you do not peel off gold with white. Peel off wide stripe with backing. Will have 2 perfectly aligned stripes, one gold and one white. Wet sanding together helps knock down edge between 2 colors.


« Last Edit: November 10, 2007, 11:41:28 am by Bob Wessner »
We'll all be someone else's PO some day.

Offline SteveD CB500F

  • Global Moderator
  • Old Timer
  • *****
  • Posts: 4,553
  • Ride on the Steel Breeze...
    • TVAM
Terry's Guide to Rattle Can Spraying
« Reply #6 on: March 29, 2008, 10:41:55 am »
Terry has posted this in the "Tricks & Tips" section but I think that it's worthy of a place in the FAQs.   I've copied it verbatim...


Terry said:

Okey Dokey, the engine is back together and just needs shoving back into the frame, so time for the tank. When I restored this bike in 04/05, I bought a tank from a guy in New York, but sadly it was full of rust, and within a year of painting it, I got the dreaded bubbles in my shiny candy maroon paint.

Luckily for me there are some great guys here on this site, and Tim Kasper from Texas (KGhost) sent me a rust free black F3 tank with tired OEM paint, but no damage.

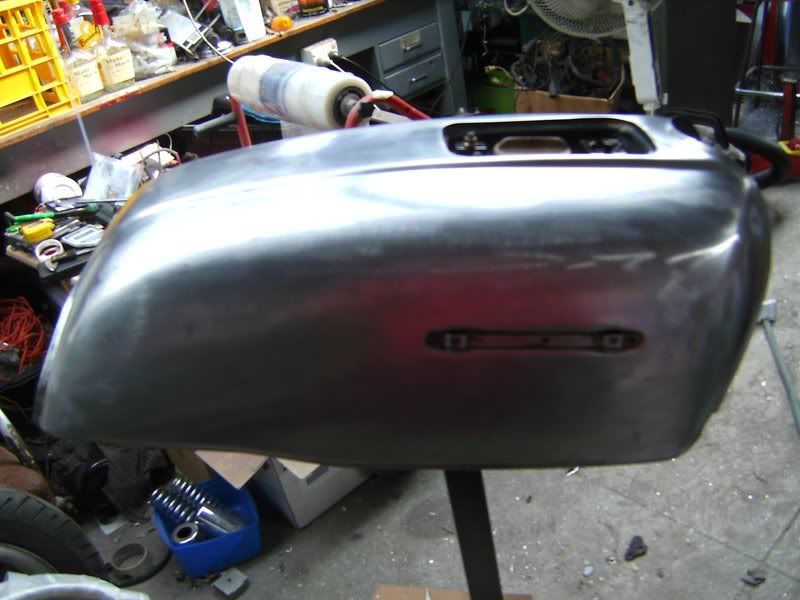
Today I got stuck in, and using a nylon 3M "strip disc" on my 7 inch sander/polisher, I stripped all the paint and decals etc off the tank.

The beauty of the nylon disc is that it only takes paint off, not metal. Never, never, never, use an abrasive sanding disc on a tank, that metal is thin, and it's gotta hold fuel, and protect you from exploding in a "get off".


There was one tiny ding on the front right of the tank, so I layed a little bondo.


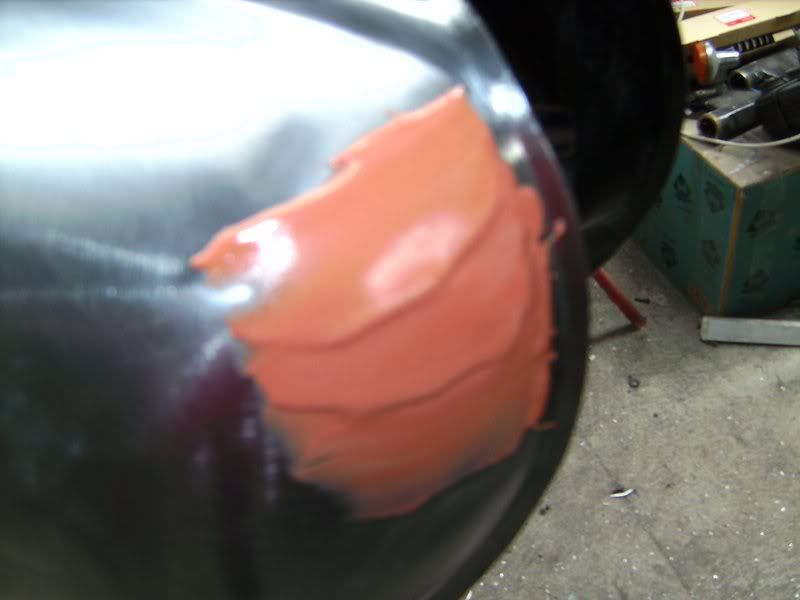
I removed most of the excess bondo when it was in it's "plastic" state with a "surform file", then used a speed file (coarse sanding paper on a board) to knock it down, then some 280 grit dry paper (never ever wet sand bondo, or it'll absorb it then bubble it back thru your paint later when it gets warm) to smooth it out. I also masked off the cap and the tank flap hinge screw threads in anticipation of some paint!


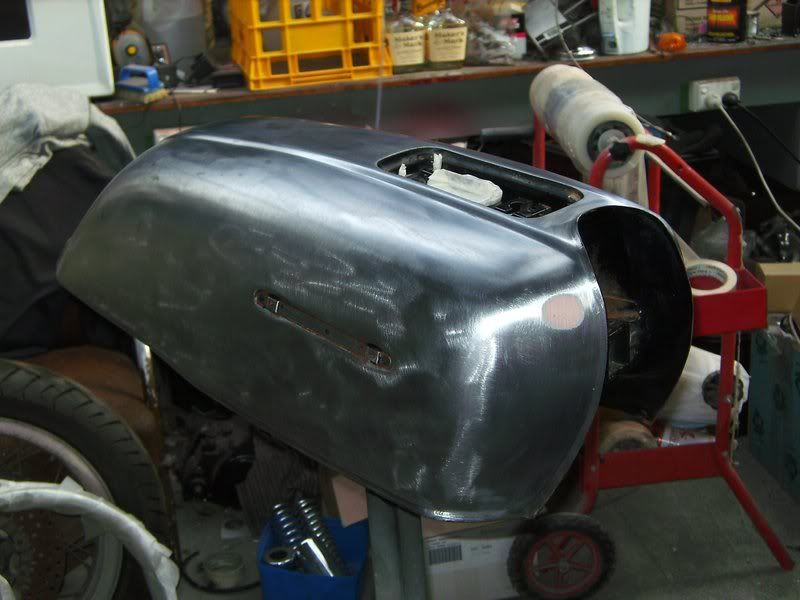
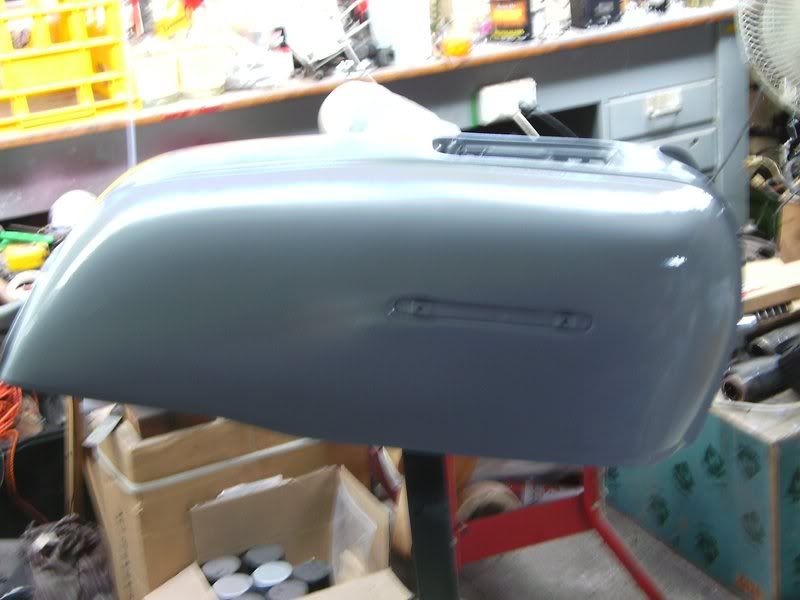
I cleaned the bare metal with some "prep wash" solvent, wiped it all off, "tack ragged" it to remove any dust or lint, and sprayed some "Etch primer" on the bare steel to protect the bare metal from flash rusting, and to provide a chemical "key" to bond the primer/surfacer (next step) to the metal.


Once the etch primer had a couple of hours to dry @ 20 deg C (about 60 deg F today, it was a tad cool) I sprayed on a couple of coats of primer/surfacer.


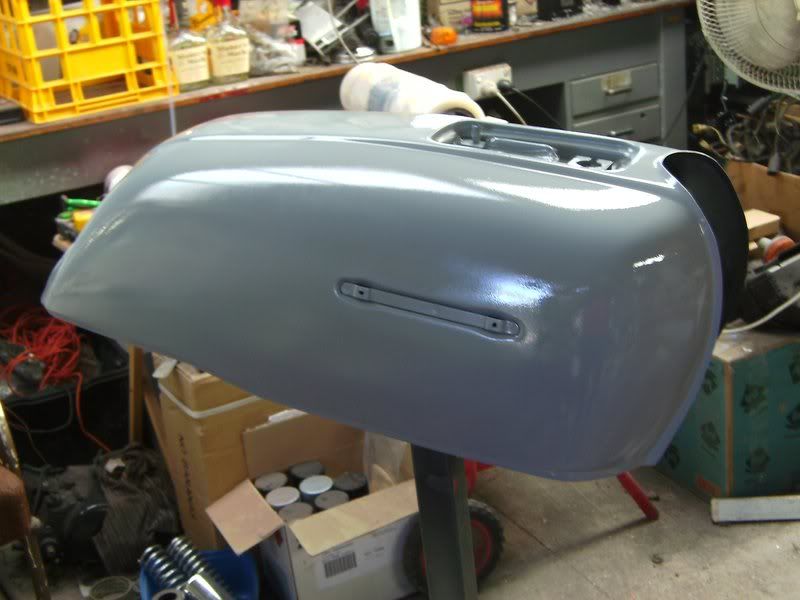
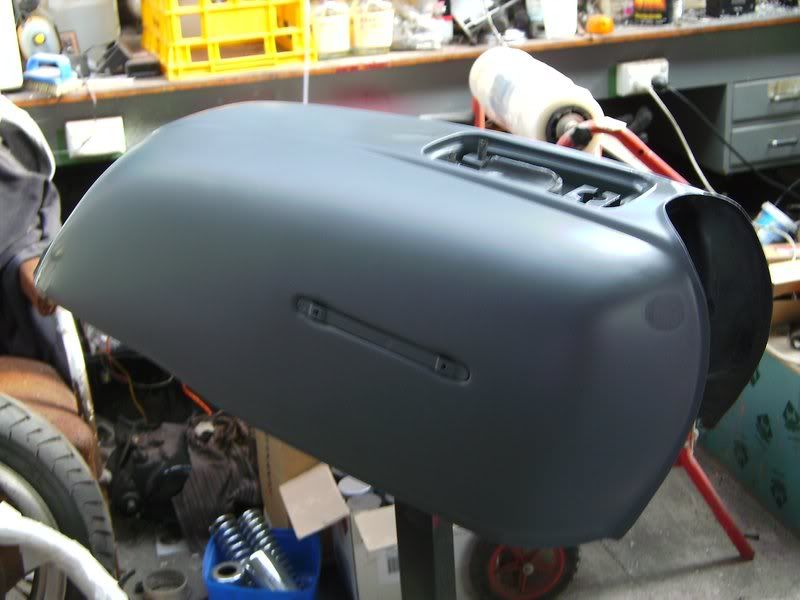
Now as everyone here probably knows, the "top coat" is always a direct result of the prep work you do before the shiny stuff goes on, so to get a really nice finish, at this stage I "fogged" a contrasting color (black) over the primer/surfacer, then let it dry overnight.


Tomorrow I will "wet rub" the primer/surfacer with 600 grit, and any high or low spots will be easy to find, as they'll either be bare metal (high spot) or black. (low spot) Not much you can do about a high spot apart from shrinking or tapping it down, but I don't anticipate having any, so more likely I'll have some tiny dings that I can fix with "spray putty". (next step)

Sadly I won't get a great deal more done this weekend as I'm going away to visit my folks in the country, but I'll do as much as I can as quickly as I can, without cutting corners. Cheers, Terry. ;D


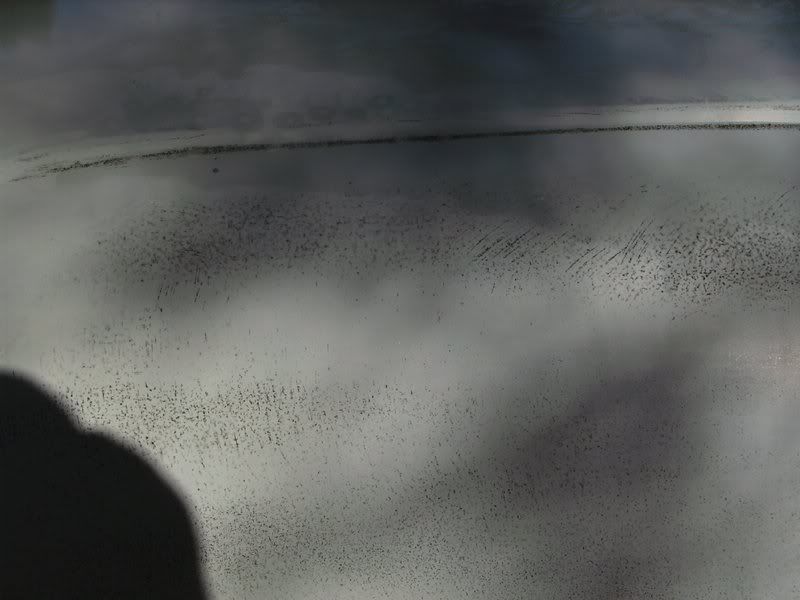
Well before I left home for the Easter long  weekend I got some more done, I rubbed the primer back with some 600 grit wet and dry paper with a little dishwashing detergent which works well as a "wetting agent" and also helps wash the paint sludge away. You can see why I fogged on that "guide coat" more clearly now, any minor imperfection becomes evident as a black mark, contrasting against the grey primer. Using a soft sanding block, you just keep rubbing it back until the black has disappeared, and you can be reasonably sure that you've got a nice flat surface.


When I got around to the little dint, I could see that it'd need a bit more work.


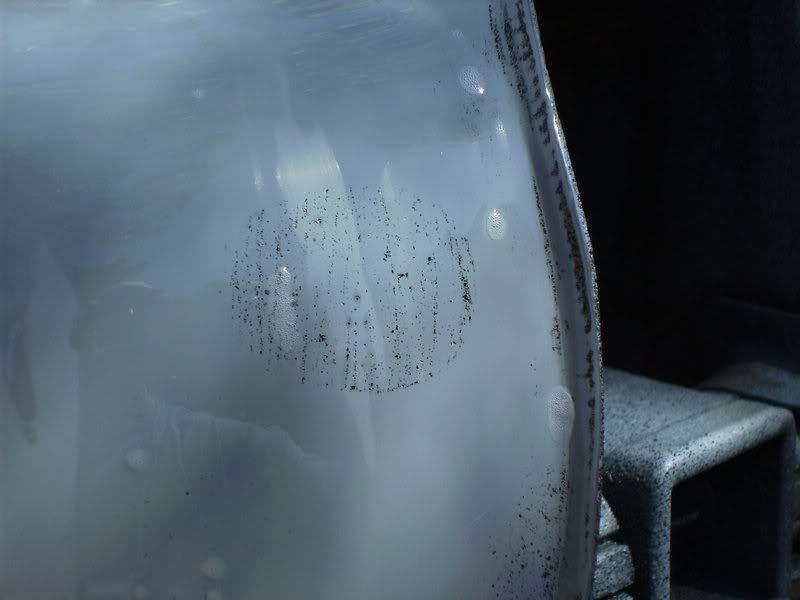
I sprayed a little "spray putty", which is pretty much just a thicker, denser spray primer, to clean up the repair around the ding.


Once the putty was dry (I baked it in my drying cabinet) I rubbed it back, then hit the tank with another complete coat of primer.


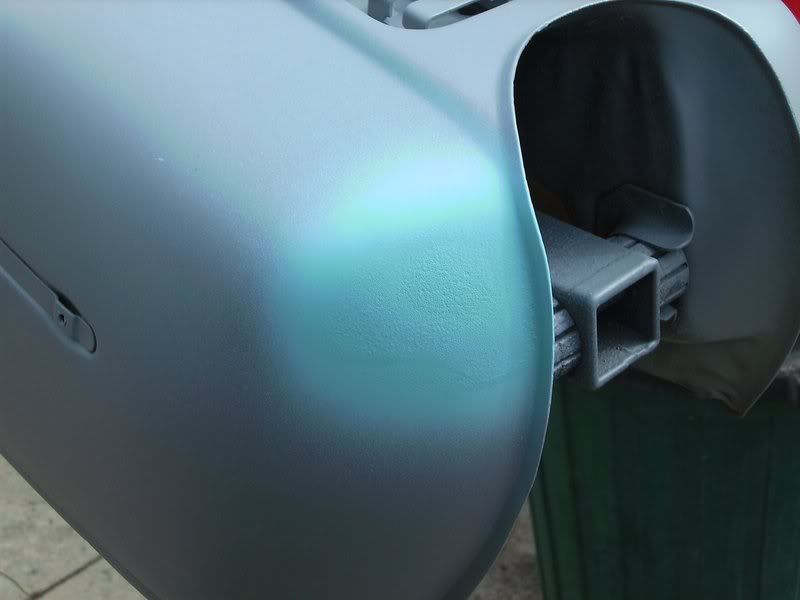
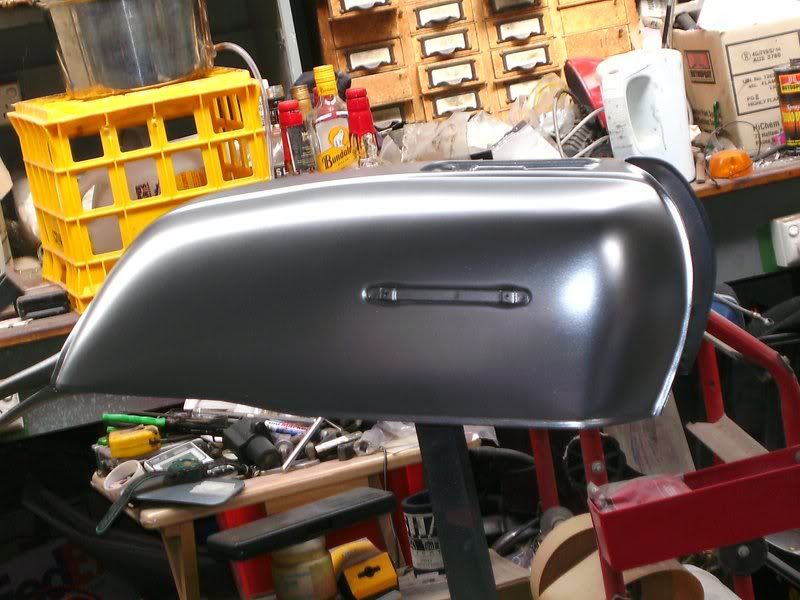
Being a nice warm day, it only took an hour or so to dry, so I rubbed it back again, washed it off with clean water, used a combination of towels and compressed air to dry the tank completely, and hit it with the silver base coat.

This is the stuff that sparkles thru the translucent color coat, so you have to get it right first time, if you get a run and you need to rub it out, then you'll need to re-coat the area again, so it's best to spray on light coats, and just build it up slowly.


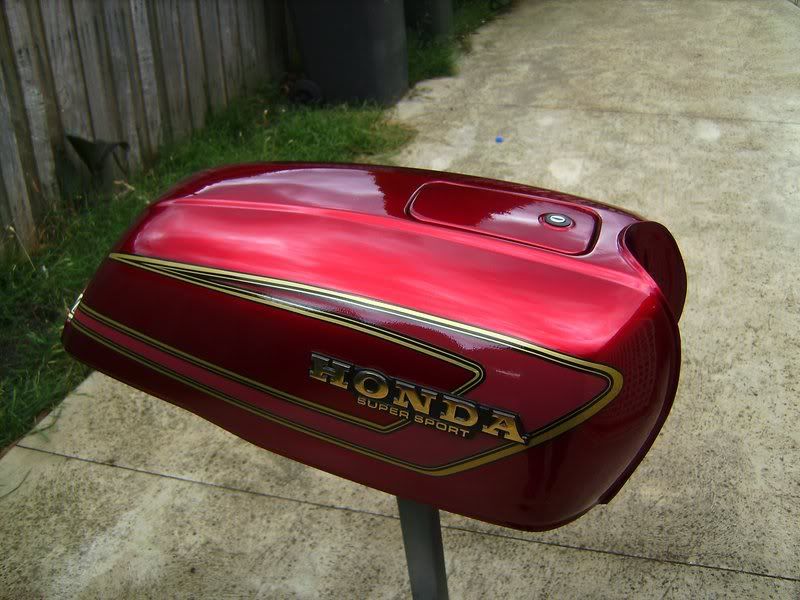
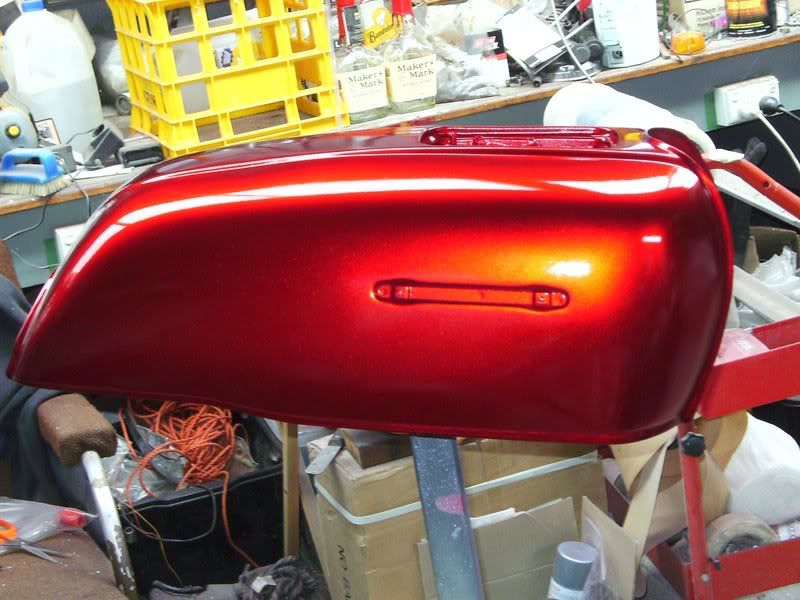
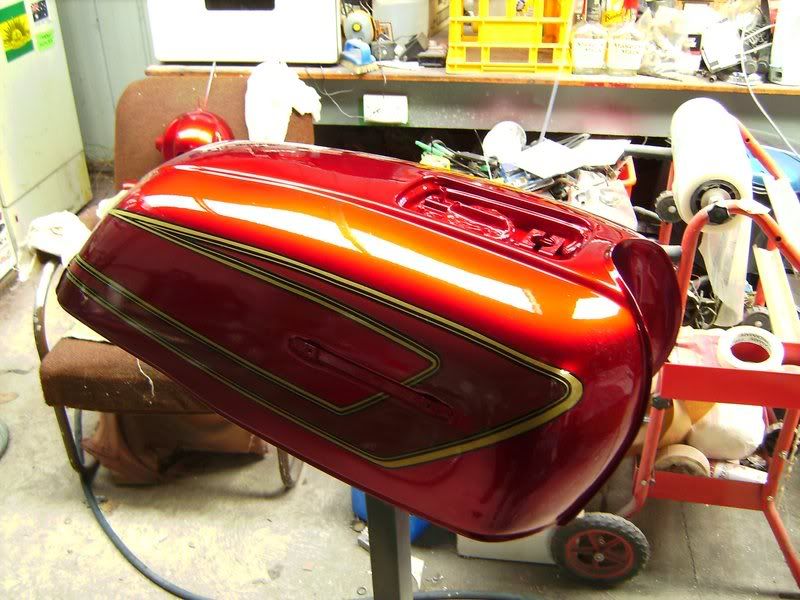
Once again, it was nice and warm (about 80 deg F) when I was doing all this, and so after an hour or so I was able to hit it with the translucent "Candy Apple Red" color. Sorry about the "flare", but this paint is so bright, it's really hard to get around it.


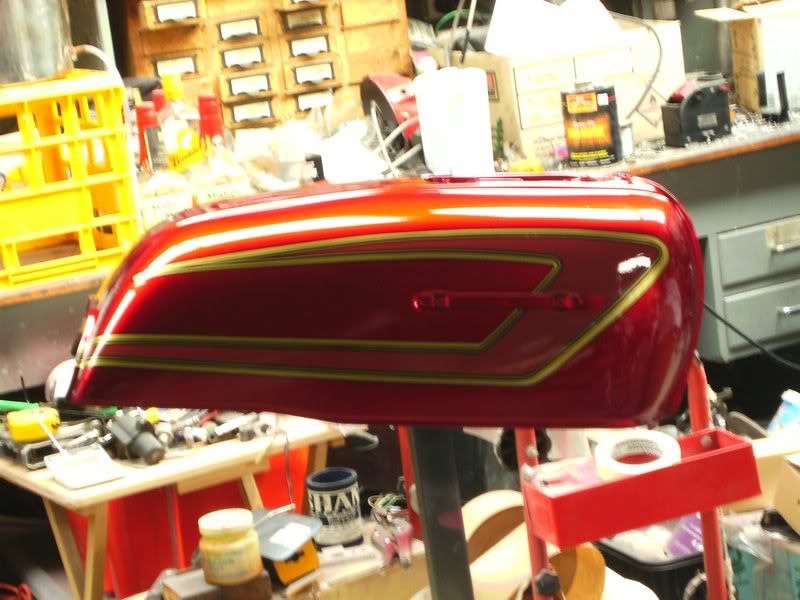
 I gave it a few coats of clear laquer to protect the candy red earlier in the week, then yesterday my stripe kit arrived from "Motographix" here in Oz, so I wet rubbed it back once more with the same old piece of 600 wet and dry to further "flatten" the finish, then when it was clean and dry again, I (with the assistance of my son) applied the decals.

This was real "heart in the mouth" stuff, the decals cost $110.00 with tax and shipping, but apart from that, if I stuffed up the application, I could well have damaged the paint too, meaning I would have defaulted back to stage 1. Luckily I got them on and they look pretty good, with a couple of tiny wrinkles, but otherwise, pretty good.

Now I could have used more clear laquer from the spray can, but sadly the weather has really turned to shiit, it was only 50 degrees today, wet and humid misery, which is death for acrylic laquer. Instead, I dusted off the air compressor and my little touch up gun, and I mixed up some "2 pack" clear, really nasty stuff that will give you cancer quicker than a semi-trailer full of Marlboro's, so a good mask is an absolute minimum.

The benefit of 2 pack, apart from anti-humidity properties, is the ability to lay on a nice thick coating with a minimum of coats. This stuff is essentially a hardened enamel, so it "flows" very well, and covers brilliantly. I squirted on only about 150 mils (about a quarter of a pint) and carefully hung the tank in my drying cabinet (just an old fan forced clothes drying cabinet) for a couple of hours at approx 100 deg F, when I pulled it out again, it was all done, and looking lovely.

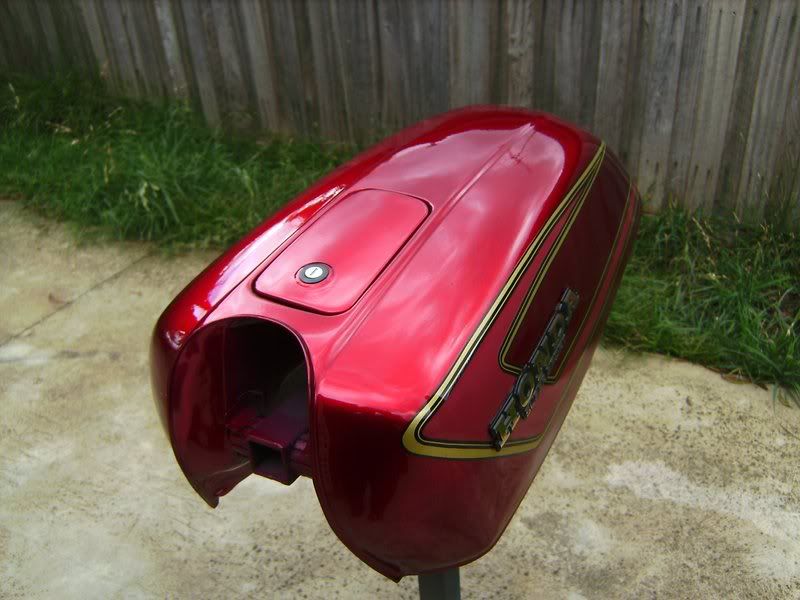
All I need to do now is fit my new tank badges and the trap door lid, and once the engine is back in, (tomorrow, hopefully) it'll be right to go! Cheers, Terry. ;D


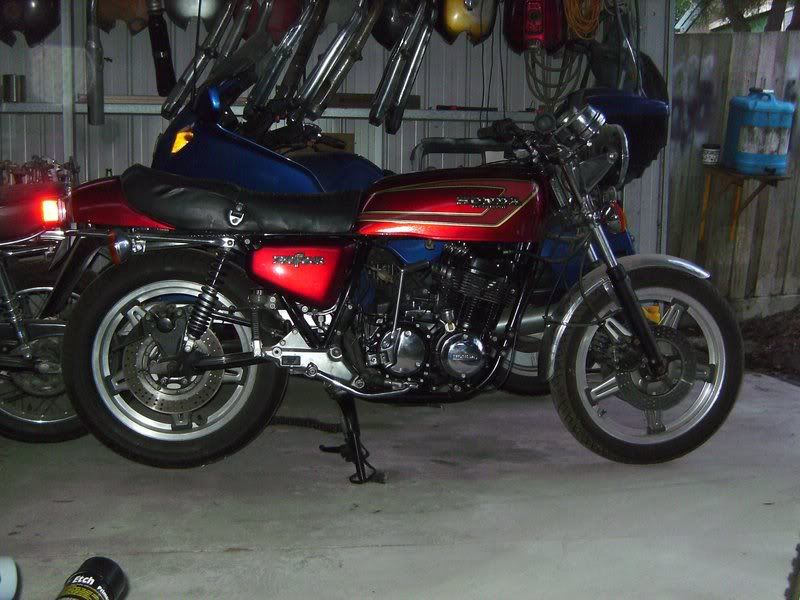
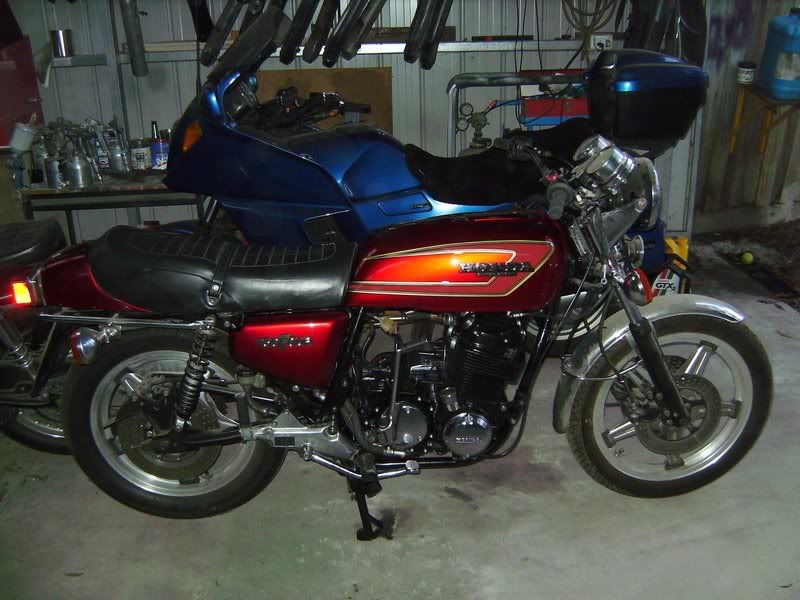
I attached the badges and trap door this morning, then spent the rest of the day re-installing the engine. It's really nice just having the engine back in the frame, and even though there's still a bit of work to do before I can fire it up and tear up some miles, I'm happy that it's looking like a bike again. All going well, next weekend will see it finished and ready for the road! Cheers, Terry. ;D


« Last Edit: March 30, 2008, 07:49:12 am by SteveD CB500F »
SOHC4 Member #2393
2015 Tiger 800 XRT
1971 CB500K0 (US Model)

Offline TwoTired

  • Really Old Timer ...
  • *******
  • Posts: 21,805
500/550 Sidepanels: Which is which?
« Reply #7 on: December 06, 2009, 03:15:43 pm »
Submitted by TwoTired

I'm going to make this a FAQ submission, as the side cover question seems to come up frequently.

I'm going to try adding the pictures I took of my collection of covers.  
There are three styles of covers.  The left cover mountings are the same for all the 500-550s all years.  Swap around as you chose.
The right covers differ in mounting at the top forward mount position where the mount tab is rotated 90 degrees.  The 390 and 404 covers swap among frames F style and late K model, but not with the earlier K model 323 frames/covers.
What doesn't show in the pics, possibly, is that the 323 covers are significantly fatter/deeper than the 390 and 404 styles.  About an inch I guess.
« Last Edit: December 10, 2009, 11:19:25 am by SteveD CB500F »
Lloyd... (SOHC4 #11 Original Mail List)
72 500, 74 550, 75 550K, 75 550F, 76 550F, 77 550F X2, 78 550K, 77 750F X2, 78 750F, 79CX500, 85 700SC, GL1100

Those that learn from history are doomed to repeat it by those that don't learn from history.

Offline Apple740

  • Full Member
  • *
  • Posts: 4
Re: Paint & Bodywork FAQ
« Reply #8 on: May 21, 2014, 02:42:38 am »
What kind of material are the original sidecovers made of. ABS plastic?

Offline TwoTired

  • Really Old Timer ...
  • *******
  • Posts: 21,805
Re: Paint & Bodywork FAQ
« Reply #9 on: May 21, 2014, 09:21:23 am »
Yes.  They are injection molded ABS plastic.   But, since they were never painted on the inside, the solvents used to keep them flexible have leached out over 30 years, which makes them quite brittle.
Lloyd... (SOHC4 #11 Original Mail List)
72 500, 74 550, 75 550K, 75 550F, 76 550F, 77 550F X2, 78 550K, 77 750F X2, 78 750F, 79CX500, 85 700SC, GL1100

Those that learn from history are doomed to repeat it by those that don't learn from history.

Offline mikeelem

  • Full Member
  • *
  • Posts: 29
Re: Paint & Bodywork FAQ
« Reply #10 on: March 07, 2015, 07:13:22 pm »
Hey guys, just wanted to share my experience for the flake sunrise orange using SteveD cb500f's directions posted up on this page. I know it is the 73 color but since i'm doing a k1, i used the k1 stripes for the job!
Thanks SteveD!

Offline SteveD CB500F

  • Global Moderator
  • Old Timer
  • *****
  • Posts: 4,553
  • Ride on the Steel Breeze...
    • TVAM
Re: Paint & Bodywork FAQ
« Reply #11 on: March 10, 2015, 09:38:12 am »
I'm just the "curator"

Each of those posts was provided by a member here.

Steve
SOHC4 Member #2393
2015 Tiger 800 XRT
1971 CB500K0 (US Model)