Author Topic: My Mighty CB500 Rebuild  (Read 7591 times)

0 Members and 1 Guest are viewing this topic.

Offline Montgomery

  • Full Member
  • *
  • Posts: 24
    • 100 Low Life: Tales from Reid Hillview Airport
My Mighty CB500 Rebuild
« on: March 01, 2010, 05:03:28 PM »
So, I never thought I'd be one of those guys with a rebuild thread, but here I am. Not that this is against my will, but rather I never thought I'd ever have the drive to totally tear down and rebuild a motorcycle with my lack of money and small skill set.

First, a brief history of my relationship with my 1971 Honda CB500.

I'm a 23 year old, recent graduate of San Jose State's Aviation Department. Last May, a friend of mine bought an old, incredibly beat up Kawasaki Ninja off of Craigslist for $400. Figuring I could do him one better, I started cruising the 'list. I've ridden dirtbikes since I was in the third grade, but never had a street bike. I have always loved the looks of the early Japanese motorcyles, and Brit bikes. If it doesn't have a flat seat, I'm not interested. A few months later, I became the proud owner of a tired, but running, 1971 CB500, for $300. To make the deal even sweeter, the bike was currently registered, saving me the several hundred dollars in back fees my friend spent on his Ninja. The previous owner said that it leaked a ton of oil, and that the oil sending unit threads were stripped, but was in ok shape other than that.

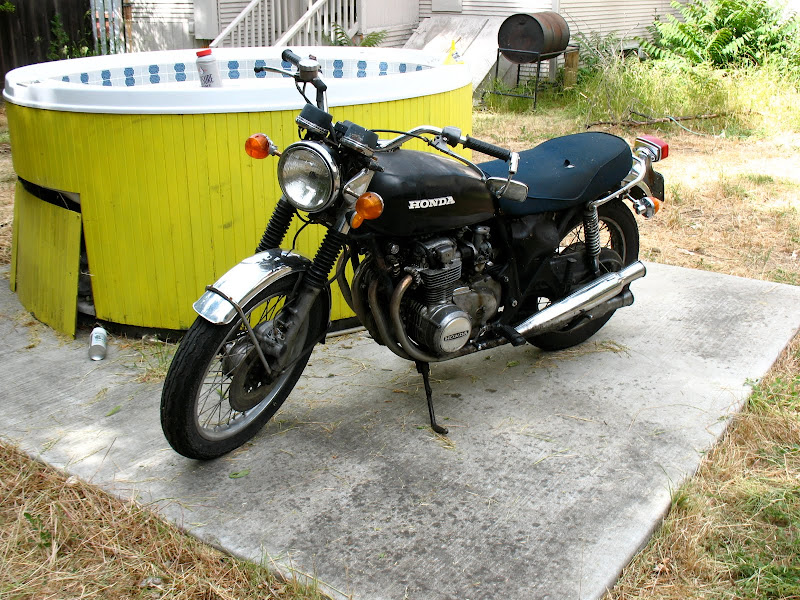
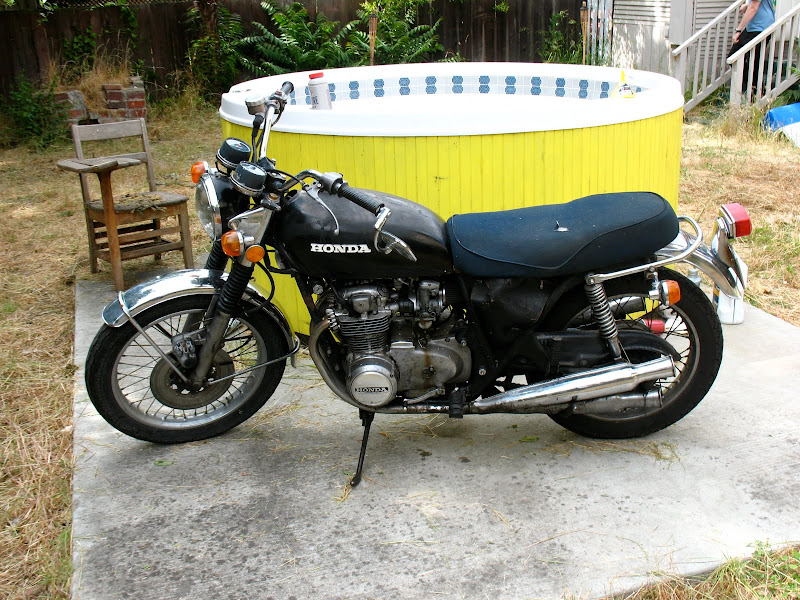
Here's the day I picked it up:


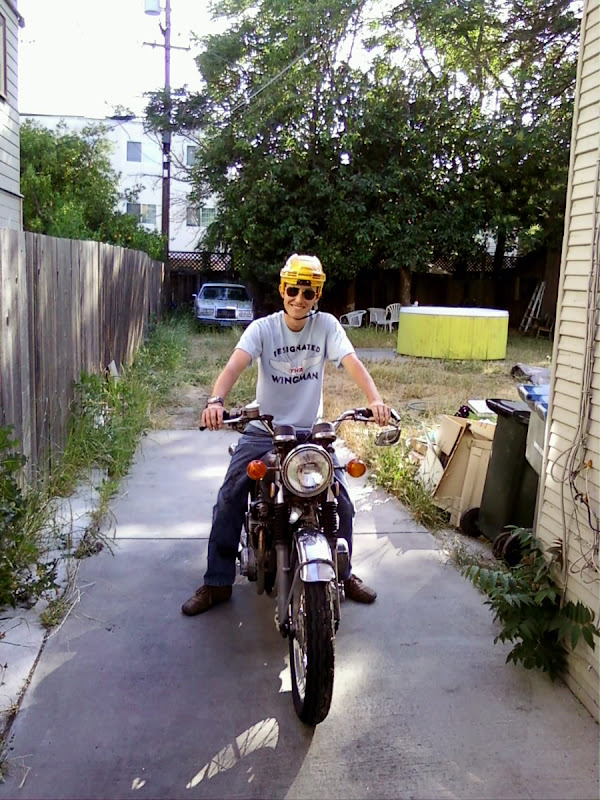
First quick ride around the block (Didn't have a motorcycle helmet, so I had to sport a hockey helmet):
\
After going on several rides that ended with me pushing the motorcycle for many blocks, I started lurking in these forums for advice. Luckily, I decided to listen to TwoTired when he said to perform the basic 2,000 mile maintenance. An oil change, cleaning out the gas tank vent hole, valve/point adjustment, idle screw adjustment, and carb cleaning later, it was like i was riding a completely different bike. However, the better the bike ran, the more oil it blew out the #1 cylinder oil passage. It got to the point where a 30 minute jaunt on the freeway left my left boot so soaked in oil that I could hardly keep it from sliding out from under me when stopped. Luckily, this coincided with the rainy season, so I knew what I had to do. . .

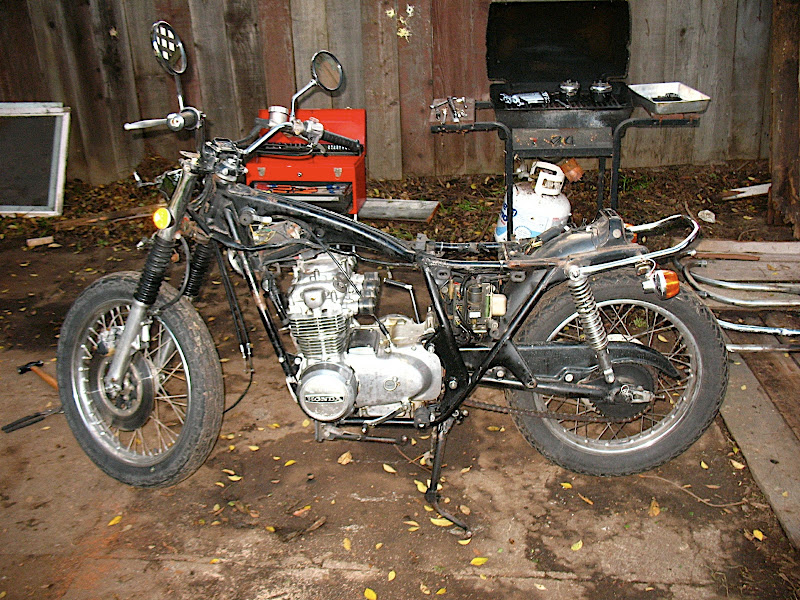
Tear it apart!

Originally, I was just planning on rebuilding the top end, but as I graduated college, and got a job that paid way more than the $9/hr I had been making, I changed my battle plan from "Do it as cheaply as possible," to "Do it the RIGHT way, as cheaply as possible." So we begin.

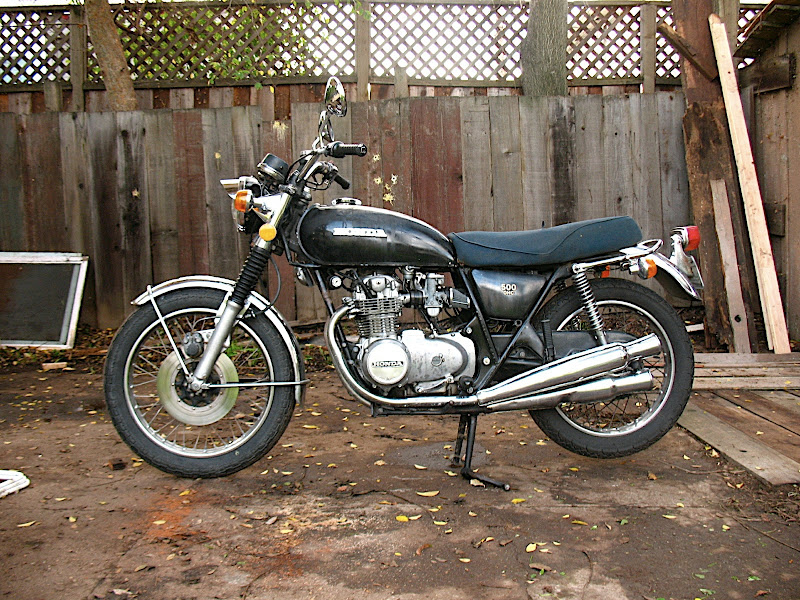
Notice the incorrect side cover:

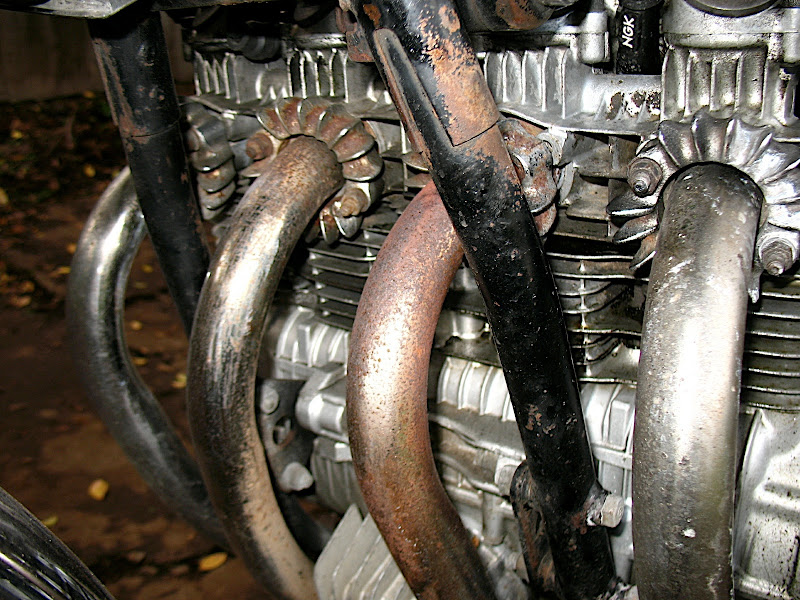
Rusty headers:

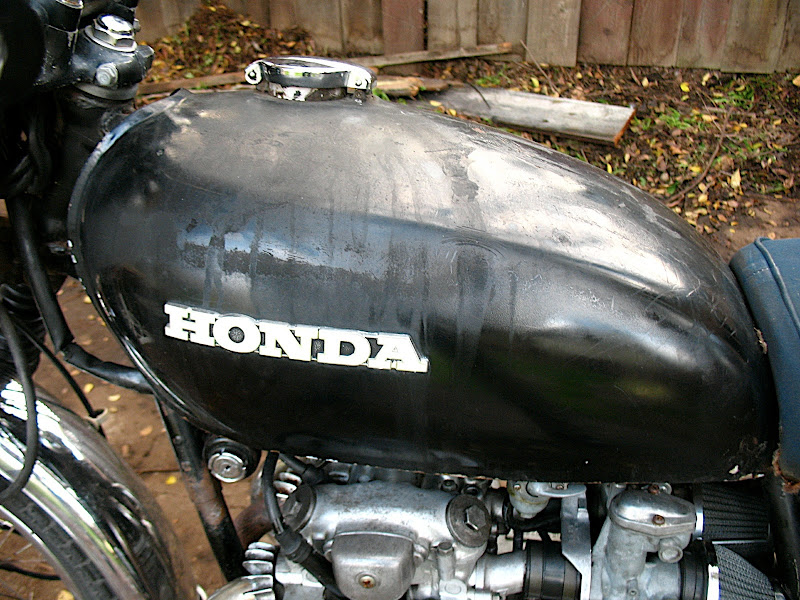
Excellent paint on the gas tank:

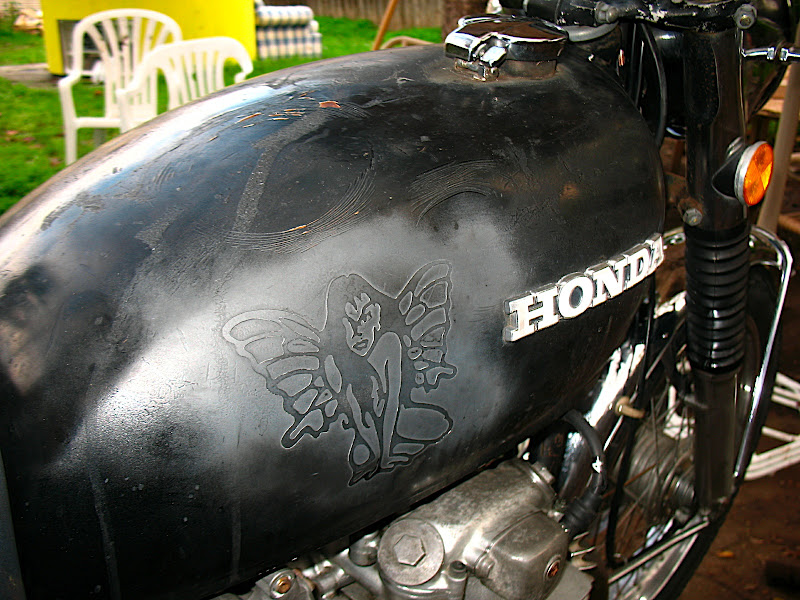
Bad ass butterfly lady sticker, that the PO had painted over. (She was my nymph of traffic protection!)

Yes, that exhaust is rusted completely in half:
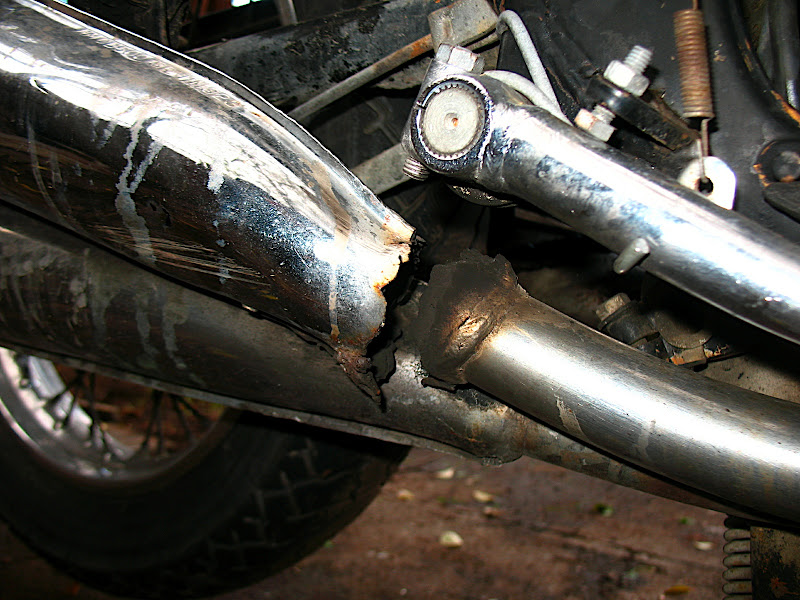

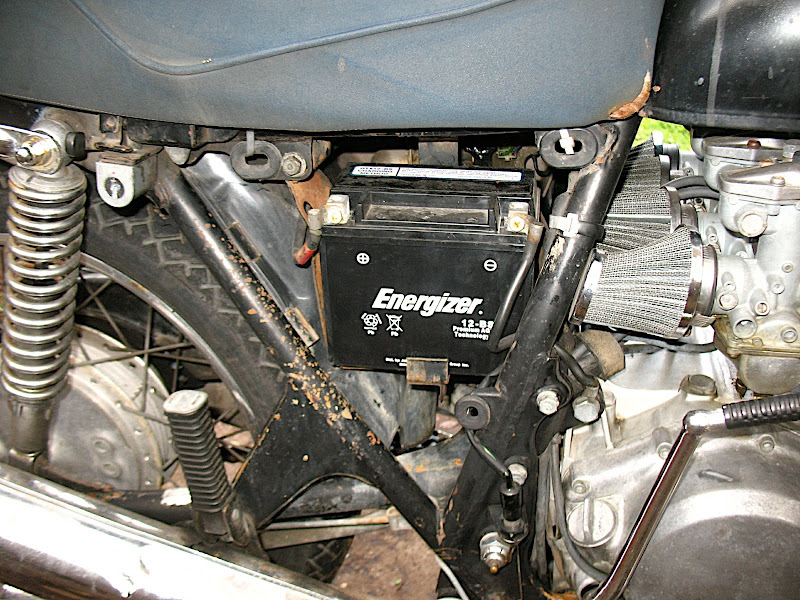
No right side cover:

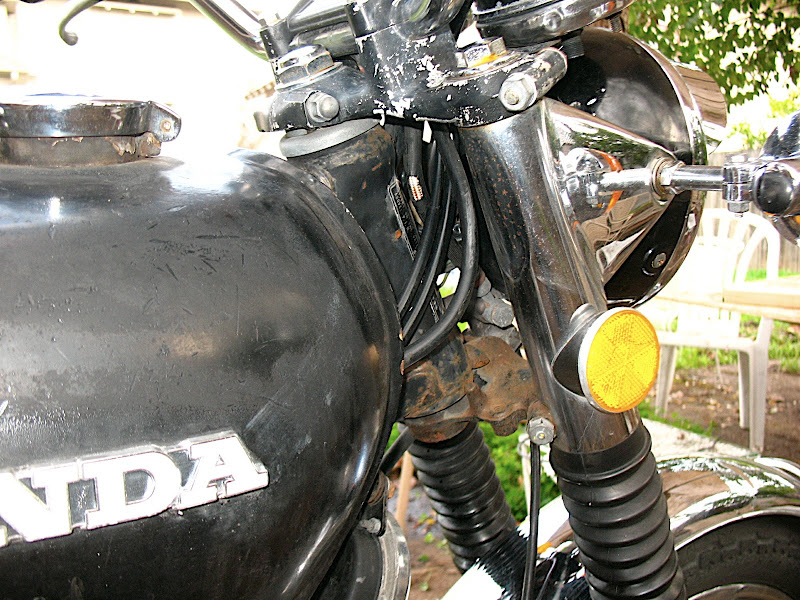
Rusty Triple Tree:

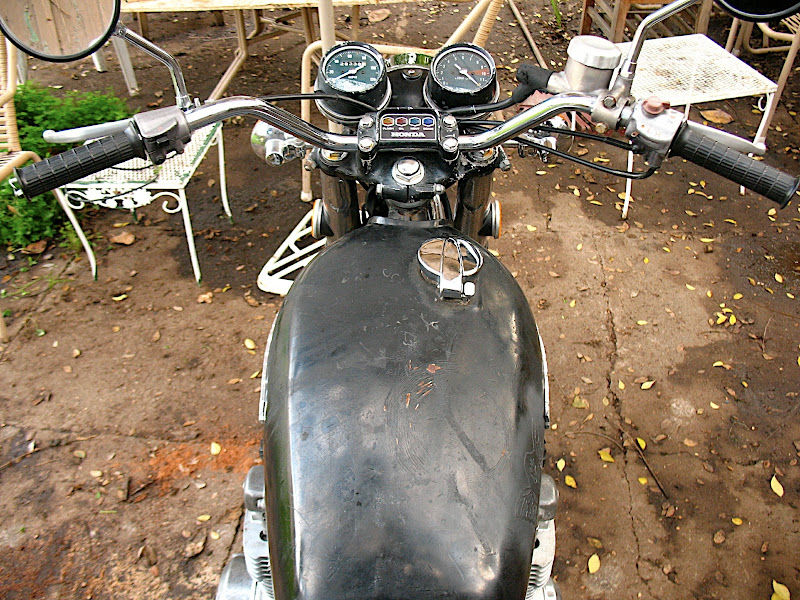
More of the awesome paint:


Exhaust:
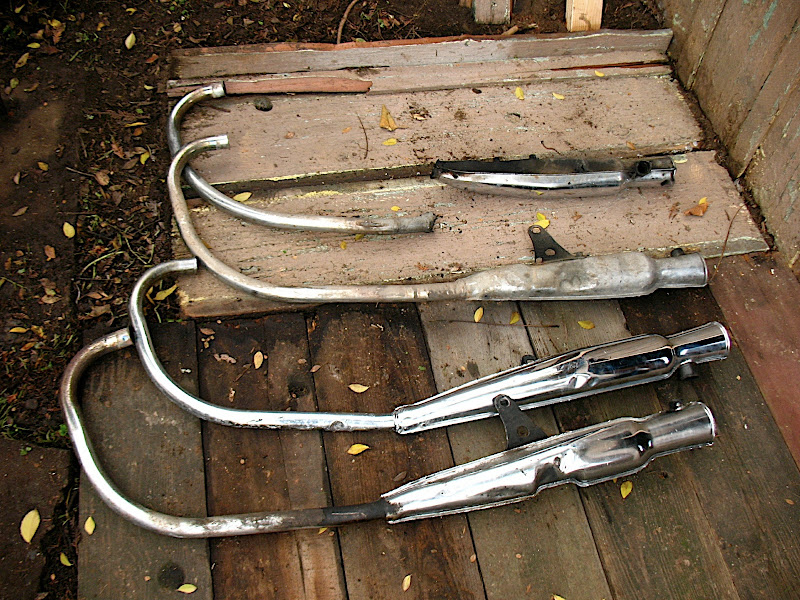


After removing the oil pan. . .
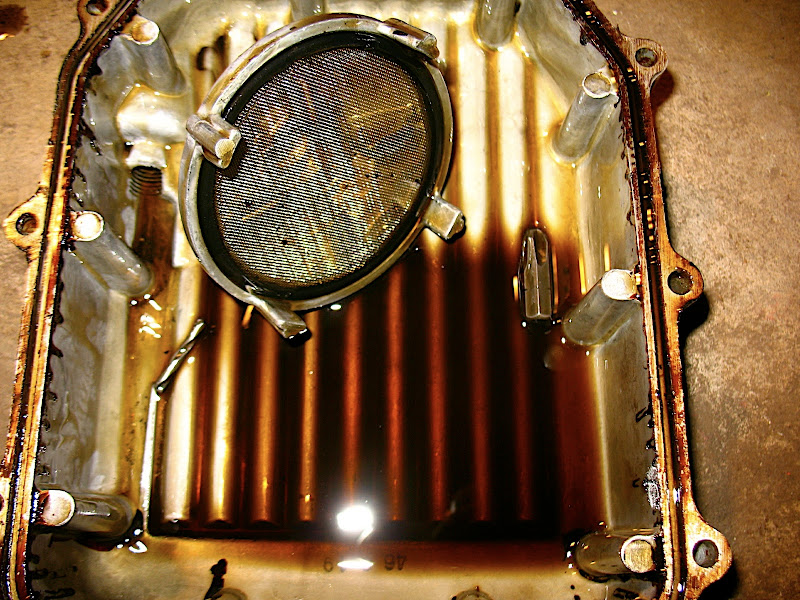
"No sludge, awesome! Wait, is that a screwdriver bit in there?!!! AND a drillbit? WTF?!!"

Sans Engine:

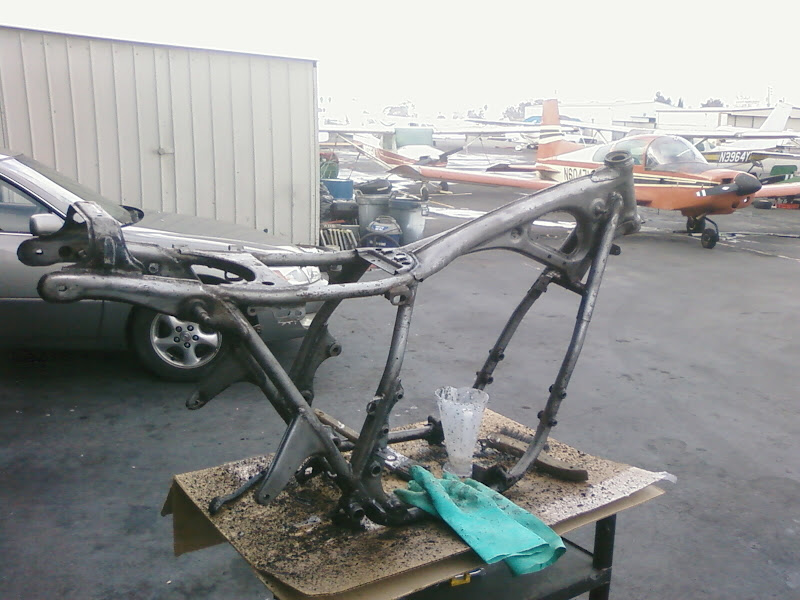
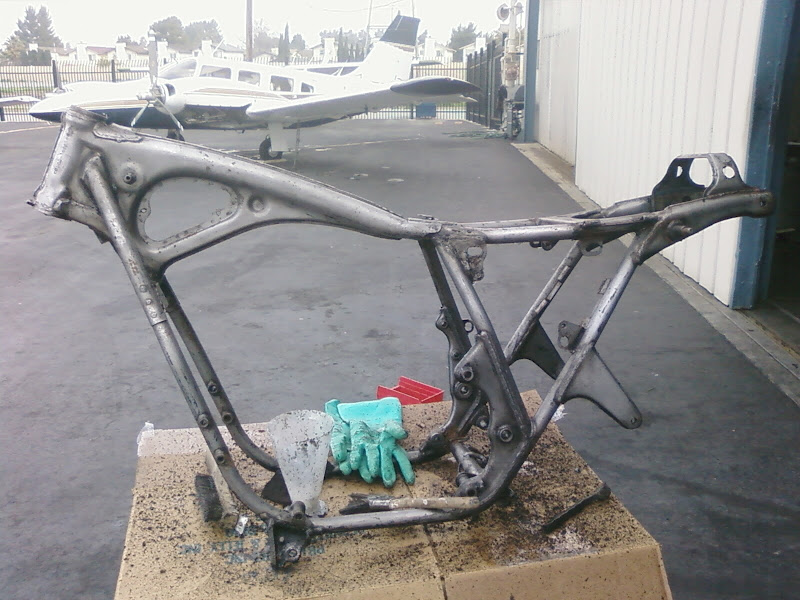
Stripping the frame at work:


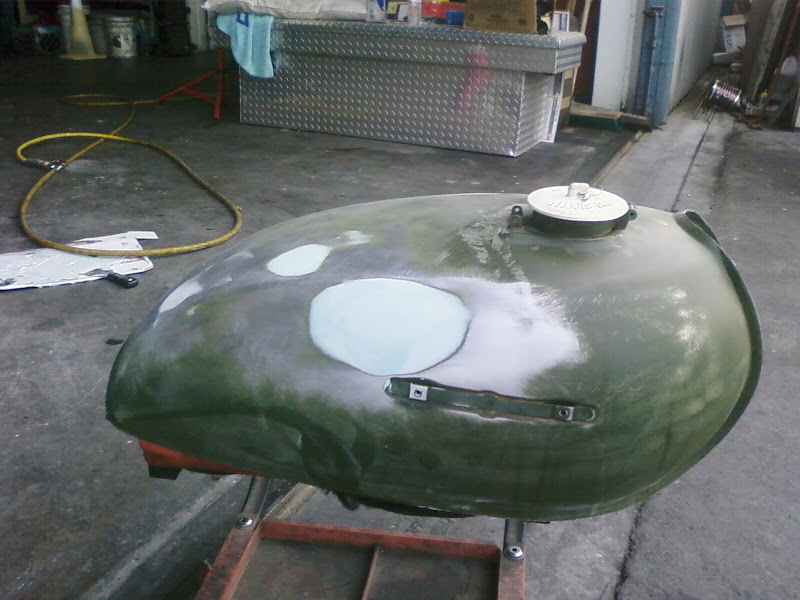
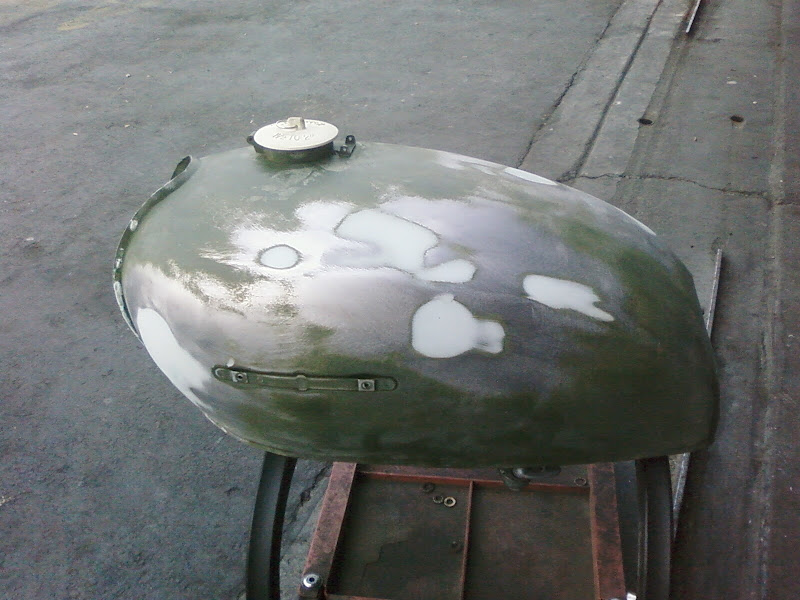
The tank sans paint:
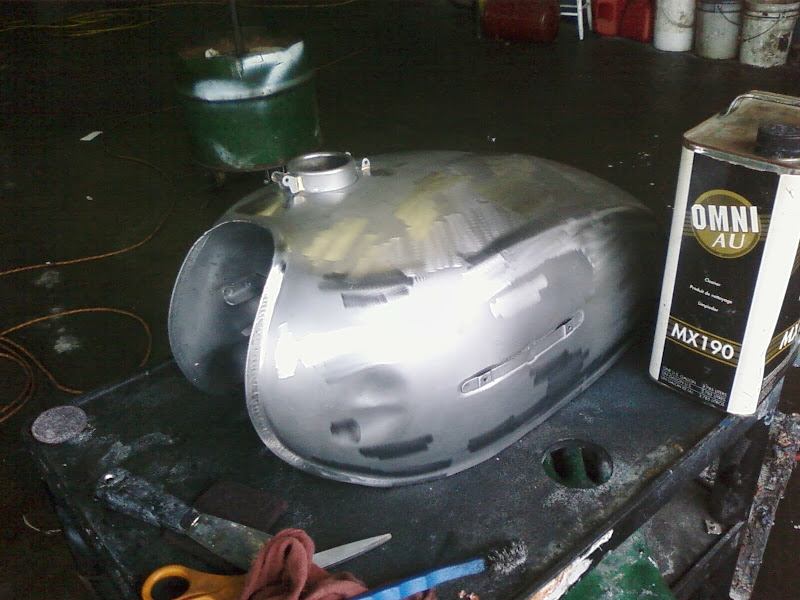

Bondo time:


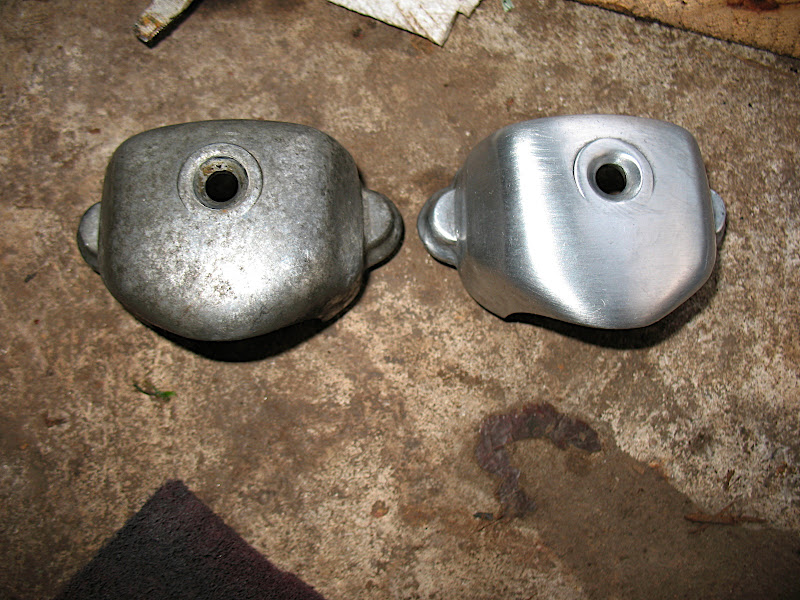
Before/After red scotchbrite:

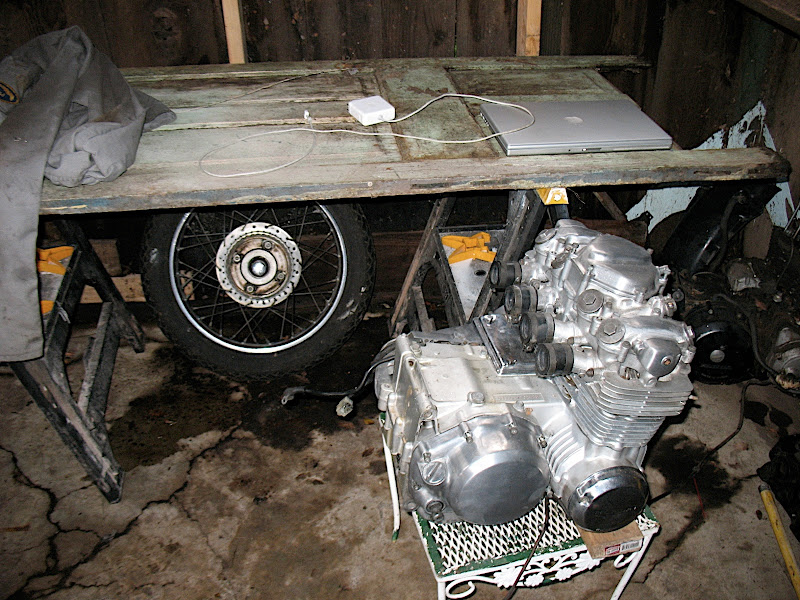
My excellent workspace: Door on sawhorses for a bench, laptop to reference shop manual.

My friend who's an aircraft mechanic lending a hand:
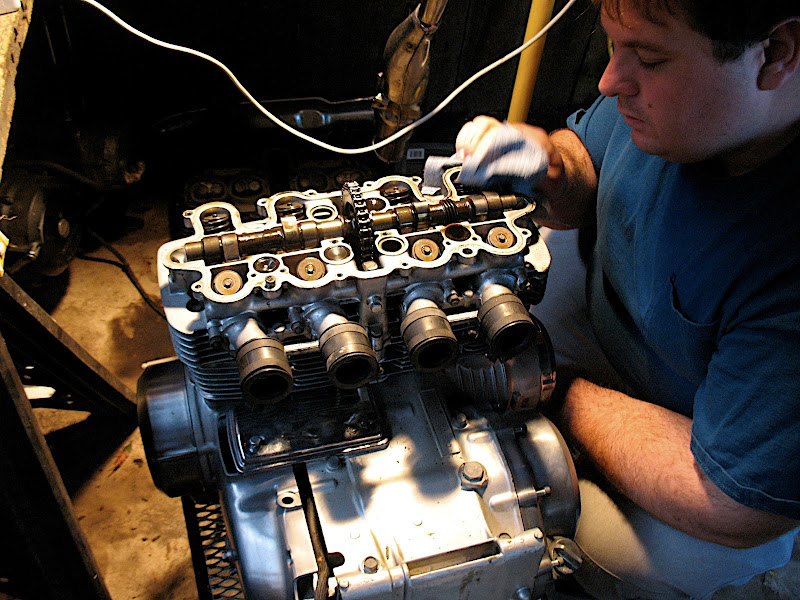

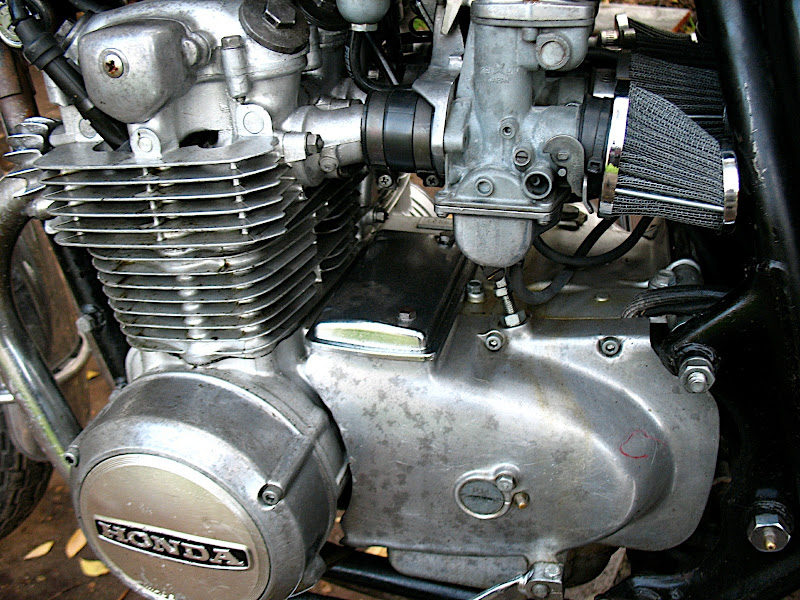
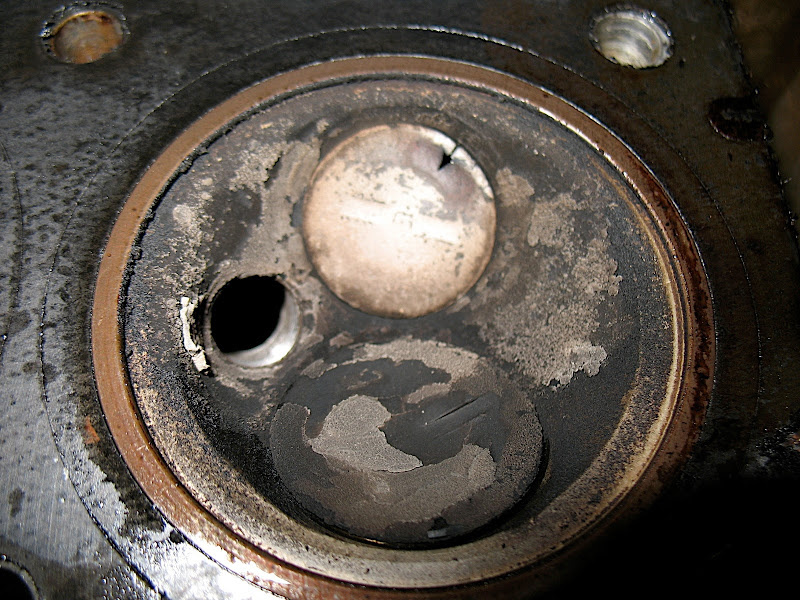
One burned valve, and plenty of carbon buildup:
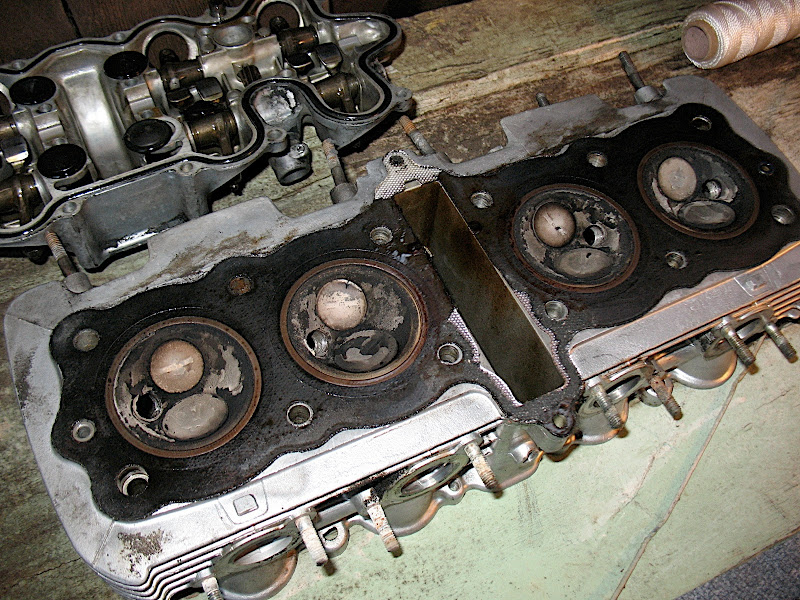


Tons of carbon buildup, but the cylinders, pistons, and rings are in great shape. No marks other than the crosshatch pattern from being honed!
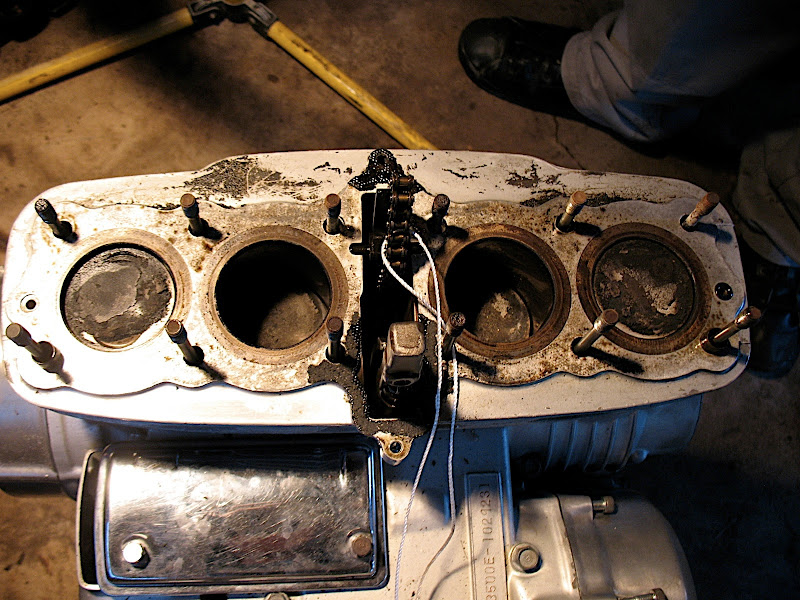


So that pretty much sums up the last two months of start and stop progress. The immediate future is to go get the frame/swingarm powdercoated black, and get that valve repaired. After that, I'll start cleaning/polishing ad reassembling. My goal is to keep the motorcycle as stock as possible, although I'm going to have to make some concessions in the exhaust/paint department.


1971 CB500

Offline HondaMan

  • Someone took this pic of me before I became a
  • Really Old Timer ...
  • *******
  • Posts: 13,855
  • ...not my choice, I was nicknamed...
    • Getting 'em Back on the Road
Re: My Mighty CB500 Rebuild
« Reply #1 on: March 01, 2010, 05:55:58 PM »
What an excellent bike for this project, and what a great start!  ;D
You've already done the whole world a service with your progress so far.  ::)

I had a 500 of the same model, loved it to pieces, had to sell when I moved to Colorado (had 5 bikes then!). Still miss it.

That carbon: two things are causing it.
1.) The pod air filters will make the engine run rich and it will have a large "flat spot" in the 1500-3500 RPM range because of them: try to find some that have velocity stacks inside, or maybe a stock airbox with those stacks. It will REALLY help.

2.) I'd be willing to bet a set of gas cap hinge screws that it had D8E sparkplugs in it: they should be D7E or X22ES-U plugs.

While it's apart: take a close look at the interface of the carb castings to the head: they were often out by 1.0-1.5mm, restricting flow. On the 1972 model, the idle vacuum port screws were almost 1/4" long INSIDE those tubes, too! Not much attention was paid to those little things in those days, and it hurt the performance - but they can be fixed!  ;)
See SOHC4shop@gmail.com for info about the gadgets I make for these bikes.

The demons are repulsed when a man does good. Use that.
Blood is thicker than water, but motor oil is thicker yet...so, don't mess with my SOHC4, or I might have to hurt you.
Hondaman's creed: "Bikers are family. Treat them accordingly."

Link to Hondaman Ignition: http://forums.sohc4.net/index.php?topic=67543.0

Link to My CB750 Book: https://www.lulu.com/search?adult_audience_rating=00&page=1&pageSize=10&q=my+cb750+book

Link to website: www.SOHC4shop.com

Offline Montgomery

  • Full Member
  • *
  • Posts: 24
    • 100 Low Life: Tales from Reid Hillview Airport
Re: My Mighty CB500 Rebuild
« Reply #2 on: March 01, 2010, 06:22:59 PM »
Thanks HondaMan!

Thank you for the carbon buildup advice. I wasn't sure if that was normal with age, or if there was another cause. After reading some tirades against pod filters a few months ago, I picked up an airbox and decent rubber boots off of eBay. When the motorcycle comes back together they'll come out of hiding and onto the bike. The #1 and #4 pods look ridiculous all smashed up against the frame.

2.) I'd be willing to bet a set of gas cap hinge screws that it had D8E sparkplugs in it

It actually did come with D7E8 plugs. ;D One was oil fouled so bad when I bought the motorcycle that it would be indecent of me to show the pictures on this illustrious forum. I figured I had a bad valve guide, but after adjusting the valves that first time, the fouling went away. Hooray for maintenance neglect!  :-\


While it's apart: take a close look at the interface of the carb castings to the head: they were often out by 1.0-1.5mm, restricting flow.

Is this the port polish I've read about elsewhere?
« Last Edit: March 01, 2010, 06:25:43 PM by Montgomery »
1971 CB500

Offline Ecosse

  • Really Old Timer ...
  • *******
  • Posts: 5,051
  • Member #4139
    • My 550 walk around video
Re: My Mighty CB500 Rebuild
« Reply #3 on: March 01, 2010, 06:26:43 PM »
subscribing to this one.

an aircraft mechanic? couldn't do better? geez...

 ;D
1974 CB550K     
                 
            Help stop TORTURE and SLAUGHTER of cats, dogs, and other kept animals.                                                  www.animalsasia.org

                                  Your 1%er name

                                                A WORTHY EFFORT: http://www.honorflight.org.

Offline Montgomery

  • Full Member
  • *
  • Posts: 24
    • 100 Low Life: Tales from Reid Hillview Airport
Re: My Mighty CB500 Rebuild
« Reply #4 on: March 01, 2010, 06:40:03 PM »
an aircraft mechanic? couldn't do better? geez...

 ;D

He mocked the size of my pistons, that dirtbag! ;D How dare he ridicule me after I so graciously allow him come over and spend his free time working on yet another air cooled, 4 cylinder engine.  ;)
1971 CB500

Offline Ecosse

  • Really Old Timer ...
  • *******
  • Posts: 5,051
  • Member #4139
    • My 550 walk around video
Re: My Mighty CB500 Rebuild
« Reply #5 on: March 01, 2010, 06:56:23 PM »
this poor, poor, "goldwing" might appease your friend.

http://www.metacafe.com/fplayer/978947/f15_jet_fighter_honda_motorcycle.swf
1974 CB550K     
                 
            Help stop TORTURE and SLAUGHTER of cats, dogs, and other kept animals.                                                  www.animalsasia.org

                                  Your 1%er name

                                                A WORTHY EFFORT: http://www.honorflight.org.

Offline Doctor_D

  • Hot Shot
  • ***
  • Posts: 722
Re: My Mighty CB500 Rebuild
« Reply #6 on: March 01, 2010, 07:26:00 PM »
Nice start.  Good luck with it.

Quote
Is this the port polish I've read about elsewhere?

Nope, it's called "port matching" and is different than porting.
Take care,
David
___________________________________________
1975 CB 750F - Project page: http://forums.sohc4.net/index.php?topic=66026.msg725479#msg725479
1978 CX500
1971 Norton Commando

Offline Montgomery

  • Full Member
  • *
  • Posts: 24
    • 100 Low Life: Tales from Reid Hillview Airport
Re: My Mighty CB500 Rebuild
« Reply #7 on: March 03, 2010, 08:50:46 AM »
Even being a pilot and all, I just can't find the proper words to describe that Goldwing atrocity. It's just . . . gross.

To each their own, I guess.


Cleaning up engine bits while I have the motor apart. I understand that the case and the cylinder cooling fins are painted. Is the valve cover painted too, or is was it just clear coated aluminum out of the factory?

-Monte
1971 CB500

Offline westondc

  • Wes Mantooth
  • Hot Shot
  • ***
  • Posts: 680
Re: My Mighty CB500 Rebuild
« Reply #8 on: March 03, 2010, 10:30:52 AM »
Hello from a fellow CB500 owner, looking forward to the updates on your project.


After removing the oil pan. . .

"No sludge, awesome! Wait, is that a screwdriver bit in there?!!! AND a drillbit? WTF?!!"


WOW  :o yeah, makes you wonder what the PO was up too when you find a drillbit in there...


« Last Edit: March 03, 2010, 10:34:18 AM by westondc »
B.O.X.N.I.F.E. Hospital fund https://www.everribbon.com/ribbon/view/8352
Rider no. 115 on the 2012 SOHC/4 Honda World Tour
Rider no. 274 on the 2011 SOHC/4 Honda World Tour
1972 Honda CB500k1
1971 Honda CB350k3
the project http://forums.sohc4.net/index.php?topic=64499.0
Trip/Project Blog http://easterntowestern.blogspot.com/
Quote
just be a vagabond, living out of a backpack on a little Honda, cruisin all over the damn place....
"As your attorney, I advise you to buy a motorcycle. How else can we cover a thing like this righteously?"

Offline dagersh

  • "A country attempting to tax itself into prosperity is akin to a man standing in a bucket attempting to lift that bucket by its handle. - Winston Churchill"
  • Expert
  • ****
  • Posts: 1,010
    • Photos
Re: My Mighty CB500 Rebuild
« Reply #9 on: March 03, 2010, 11:01:10 AM »
Great Build Montgomery!  Subscribed!
1962 CA95
1966 Black Bomber
1966 CA77 Dream
1967 Superhawk
1970 CB750K0
1972 CL350
1972 CB450/500 Custom
1972 CB500K1
1975 CB550F
1976 CB400F
1975 CB750 Future Restoration
1976 CB750K6
1976 CB750F
1976 GL1000


1968 Suzuki T500 Cobra
1990 BMW K1
2001 'Busa
2003 RC 51
Bunch of Guzzi's

http://www.sohc4.us/gallery/v/members/personal/dagersh/

Offline Montgomery

  • Full Member
  • *
  • Posts: 24
    • 100 Low Life: Tales from Reid Hillview Airport
Re: My Mighty CB500 Rebuild
« Reply #10 on: March 05, 2010, 01:27:20 PM »
WOW  :o yeah, makes you wonder what the PO was up too when you find a drillbit in there...

Yeah, freakin' tell me about it. I'd seen so many pictures of people's goo filled oil pans, I was initially way excited about the lack of crud in mine. Then I almost dumped myself when I saw those two sitting in there. The screws in the valve cover have been replaced at some point, so all I can figure is that the PO was drilling out a stripped screw head, and dropped those down the hole under the breather cover.

In other news, I made a big part order, and am now waiting for stuff to arrive!

From CRC:
Complete gasket kit
Spark Plugs
Oil Filter
Stock air filter
New speedometer cable
Fork seals
Points
Condensers

From a forum member
Stainless steel allen head screw set

Still need to figure out if I'm getting that burned exhaust seat/valve repaired, or if I'm just gonna get another used one off of eBay, and I also need to order pucks and a new oil pressure switch.

And now off to the powdercoaters!
1971 CB500

Offline Montgomery

  • Full Member
  • *
  • Posts: 24
    • 100 Low Life: Tales from Reid Hillview Airport
Re: My Mighty CB500 Rebuild
« Reply #11 on: March 09, 2010, 04:12:44 PM »
Hmmm, and now another slippery slope of repair begins.

The valve cover looks awful, the paint is peeling off all over the place. I would like to paint it, but that will make the cooling fins look even worse than they do right now (at least they're clean for the first time in years). But if I paint the jugs, it will make the case look even dingier than it already does. I'd paint the whole thing, but there's no way I can cure the whole engine in my stove, and I have no desire to split the cases.  :-\

Maybe I'll just suck it up and paint the jugs, head, and valve cover. I didn't come this far just to put a totally crappy looking engine back into a freshly powder coated frame, after all!  ;D
1971 CB500

Offline Jordan

  • Hot Shot
  • ***
  • Posts: 433
  • What a Long strange trip it's been
Re: My Mighty CB500 Rebuild
« Reply #12 on: March 09, 2010, 04:31:54 PM »
Maybe that bit is magnetized and some one hoped it would collect any metal bits floating around in the oil. Wow

Offline dagersh

  • "A country attempting to tax itself into prosperity is akin to a man standing in a bucket attempting to lift that bucket by its handle. - Winston Churchill"
  • Expert
  • ****
  • Posts: 1,010
    • Photos
Re: My Mighty CB500 Rebuild
« Reply #13 on: March 10, 2010, 09:22:35 AM »
Montgomery,

I used duplicolor engine enamel on my Cb450 engine.  It goes on great, dries nicely, and so far its been very tough against the odd drippings of brake cleaner.  As long as the engine is out, have at it.  Just remember that the prep is everything!

Gersh
1962 CA95
1966 Black Bomber
1966 CA77 Dream
1967 Superhawk
1970 CB750K0
1972 CL350
1972 CB450/500 Custom
1972 CB500K1
1975 CB550F
1976 CB400F
1975 CB750 Future Restoration
1976 CB750K6
1976 CB750F
1976 GL1000


1968 Suzuki T500 Cobra
1990 BMW K1
2001 'Busa
2003 RC 51
Bunch of Guzzi's

http://www.sohc4.us/gallery/v/members/personal/dagersh/

Offline Doctor_D

  • Hot Shot
  • ***
  • Posts: 722
Re: My Mighty CB500 Rebuild
« Reply #14 on: March 10, 2010, 10:42:37 AM »
Maybe that bit is magnetized and some one hoped it would collect any metal bits floating around in the oil. Wow

 :D :D :D

The real question might be what's stripped/broken that they were trying to get to, but that's not nearly as funny as your suggestion.
Take care,
David
___________________________________________
1975 CB 750F - Project page: http://forums.sohc4.net/index.php?topic=66026.msg725479#msg725479
1978 CX500
1971 Norton Commando

Offline JAG

  • Expert
  • ****
  • Posts: 907
  • '74 CB750K, '72 CB500, '76 550K
Re: My Mighty CB500 Rebuild
« Reply #15 on: March 12, 2010, 02:39:45 PM »
this poor, poor, "goldwing" might appease your friend.

http://www.metacafe.com/fplayer/978947/f15_jet_fighter_honda_motorcycle.swf

There are even the factory gauges in the cockpit and the real wheel from the goldwing on there!! ??? ???

Good luck with your build bud. Its certainly a labor of love. I'm in the process of restoring my 72 500 as well with a limited budget.
Cafe Racing is mainly a matter of taste. It is an atavistic mentality, a peculiar mix of low style, high speed, pure dumbness, and overweening commitment to the Cafe Life and all its dangerous pleasures. I am a Cafe Racer myself, on some days - and it is one of my finest addictions. ~H. S. Thompson~

Offline Montgomery

  • Full Member
  • *
  • Posts: 24
    • 100 Low Life: Tales from Reid Hillview Airport
Re: My Mighty CB500 Rebuild
« Reply #16 on: March 14, 2010, 05:13:34 PM »
Ok, time for some minor updates.

Frame/swingarm/other bits should be back from the powdercoater early next week.

Additionally, my Cycle-Re-Cycle order and a head that I bought off a forum member should be here early next week too. I've basically been sitting and waiting for boxes to arrive so I can continue.

Yesterday, I decided to embark upon some redneck chemistry and soften my carb boots, via what I'd learned from the FAQ's. I figured while I was at it, I might as well try to revive some other smaller rubber parts.

Here we have some of the parts ready to dunk in the boiling mixture of 4oz Wintergreen oil and water. I couldn't get two of the boots off of the intake without tearing them, so I decided to just toss it in as is:


Here we have a magnificent stew of rubber parts boiling for 20 minutes:


Bon Appetite!


I am happy to report that the wintergreen works fantastically well. In fact, too well for smaller parts. The frame grommets that hold the side panels in are ridiculously soft; It also fused two of them together. Luckily, I dunked two sets in the mix, and can make a full set from the ones I have left that are useable. The carb boots probably could have stayed in longer, but they are still significantly softer than they were before. The airbox to carb boots rather large cracks in them prior to softening, I just threw them in to see what would happen.

Today I really wanted to work on something, but waiting for parts to arrive has be sort of stuck. I would have painted my engine, but I figured it would be smarter to get my new head, clean/prep it, and paint everything once assembled. Instead of all that, I decided I would disassemble my forks, so I can just put the new seals in them and reassemble next week.

Reading through the Clymer, and the forums, It looks like the second step is to remove the spring retainer, so I can take the springs out of the fork lowers. However, I can't get the stupid thing to turn:


I can't seem to find any tips in the forums either. Anyone else have this problem? All I can think of doing is compressing the spring a bit, and grabbing on to the shaft with some Channel Locks, while turning the nut with a crescent wrench. However, I can't grab ahold with the channel locks enough to keep it from turning. I'm afraid of totally tearing things up.

HELP!
1971 CB500

Offline Ecosse

  • Really Old Timer ...
  • *******
  • Posts: 5,051
  • Member #4139
    • My 550 walk around video
Re: My Mighty CB500 Rebuild
« Reply #17 on: March 14, 2010, 05:26:48 PM »
sage minds may have a better method but in similar situations i'll double nut the threaded rod (two nuts threaded together and tight against each other) then, holding it as you would with the (undesirable) channel-loc method.
1974 CB550K     
                 
            Help stop TORTURE and SLAUGHTER of cats, dogs, and other kept animals.                                                  www.animalsasia.org

                                  Your 1%er name

                                                A WORTHY EFFORT: http://www.honorflight.org.

Offline Montgomery

  • Full Member
  • *
  • Posts: 24
    • 100 Low Life: Tales from Reid Hillview Airport
Re: My Mighty CB500 Rebuild
« Reply #18 on: March 16, 2010, 09:02:21 PM »
Well, I didn't have work today, so I thought I would be incredibly productive.

After 8 hours of solid work, I'm proud to report that the valves and head gasket have been removed from my new (to me) head.

Thats it.

After heading to Sears to purchase their $20 valve spring compressor, removing the valves was a snap. I imagine re-installing them will be a fairly large pain, but I'll worry about that later. After the valves came out, I sat down and spent the next 6 hours of my flippin' day scraping the old head gasket off. What a freakin battle that was. Even with the proper (and repeated) application of gasket remover/brake parts cleaner/whatever I could get my hands on, that bad boy put up a strong fight. I left a couple of decent gouges in the face, hopefully that doesn't come back and bite me. After the fifth hour though, my patience was wearing thin.

After the head gasket battle, I tried my hand at the front forks again. I'd hosed them down with PB blaster the night before, to see it would have any effect. I got one of them to turn, however, it turns out its stripped.

With that in mind, must I remove the fork uppers to install new fork seals, or should I be looking for another pair of forks elsewhere?

-Monte
1971 CB500

Offline dagersh

  • "A country attempting to tax itself into prosperity is akin to a man standing in a bucket attempting to lift that bucket by its handle. - Winston Churchill"
  • Expert
  • ****
  • Posts: 1,010
    • Photos
Re: My Mighty CB500 Rebuild
« Reply #19 on: March 17, 2010, 10:39:23 AM »
Monte,

Shoot - I just reread your previous post regarding the fork springs.  Are the lower forks removed from the spring assembly?  Parts #7 (Damper) and #6 & #11 (Fork Lowers) in the diagram below.


If not, that might be the casuse of your problem moving that Nut Lock - (#9) in the digram.  To remove the Damper from the fork lowers, The 8 MM Socket (#17) must first be removed from the bottom of the Fork Lower.  Without the Upper Fork Tubes on, this may be difficult.  I removed mine (Cb450 and CB500 Forks are pretty much interchangable) with the Upper Forks still assembled, and with an air impact wrench.  There are numerous stickies on getting your forks apart, and I have even seen a video on Youtube with someone step-by-step rebuilding CB500 Forks.

AS for the fork seals, check out my build thread, and make sure your do not follow my mistakes!!!!  At the end, everything was seated correctly.  Use heat (Boiling pot of water or a heat gun) to expand the aluminium so that it is easier to get the old seals ou tand the new ones in.  Used the old seals to drive the new ones in.

Let me know if I did not read that post right, and we will get her all figured out.

Gersh

1962 CA95
1966 Black Bomber
1966 CA77 Dream
1967 Superhawk
1970 CB750K0
1972 CL350
1972 CB450/500 Custom
1972 CB500K1
1975 CB550F
1976 CB400F
1975 CB750 Future Restoration
1976 CB750K6
1976 CB750F
1976 GL1000


1968 Suzuki T500 Cobra
1990 BMW K1
2001 'Busa
2003 RC 51
Bunch of Guzzi's

http://www.sohc4.us/gallery/v/members/personal/dagersh/