Author Topic: Project 1,2,3&4!  (Read 6665 times)

0 Members and 1 Guest are viewing this topic.

Offline 19marty73

  • Full Member
  • *
  • Posts: 12
Project 1,2,3&4!
« on: January 26, 2010, 01:42:39 PM »
Hello all. I'm another newish member who thought it was about time to share what I'm up to into this interesting forum. It's project 1,2,3&4  because as you will hopefully see (first time on photo bucket) there are currently 4 SOHC residing in my little workshop. I presume I'm like many of you and have more ideas than time and money!
A little intro: I started riding in the late eighties on TZR's, GPZ's and FZR's and the like, then I moved on to cars, houses and babies. After a 10 year gap and a freak introduction to "cafe racers" it's all starting again.

My current ride, 400/4. This I want to return to standard. Project 1.

Because the 400/4 is a bit to small and slow a nice almost standard 550K. Project 2.

Because the 550K is too nice to ride in the rain a lovely purple 650! Possible Phil Read replica because it's the only conversion I know that uses comstars!


Another 400/4 that i'm going to attack with the angle grinder and give it the proper cafe treatment. Project 4.
I'll keep you posted.......when i'm not sleeping off night shifts!

Offline wannabridin

  • Patience made me a
  • Master
  • *****
  • Posts: 2,237
  • -Garrett
    • 1976 CB750K, under construction:
Re: Project 1,2,3&4!
« Reply #1 on: January 26, 2010, 01:44:17 PM »
you just need a 750 to round out the honda 4's!!  nice little collection you have there, where do you find the time to ride em all, or when WILL you find the time once they're done??? 
1976 CB750K, currently under construction:
http://forums.sohc4.net/index.php?topic=64468.0

-And if you don't do it this year, you'll be one year older when you do...

Offline fergie

  • Enthusiast
  • **
  • Posts: 208
Re: Project 1,2,3&4!
« Reply #2 on: January 26, 2010, 07:55:58 PM »
you just need a 750 to round out the honda 4's!!  nice little collection you have there, where do you find the time to ride em all, or when WILL you find the time once they're done??? 
a 350 and a 500 too!
The most interesting man in the world

Offline 19marty73

  • Full Member
  • *
  • Posts: 12
Re: Project 1,2,3&4!
« Reply #3 on: June 28, 2011, 01:24:50 PM »
Well it's been some time and I have sinned. I have done nothing to my bikes other than ride the 400 and the 550. It's because I bought this....


Don't worry because I have now sold it. I sold it to fund another project. Many of you will admit, I'm sure, it's all too easy to get distracted and try and do too many projects at once. So I'm just going to concentrate on this for the time being. Probably!.
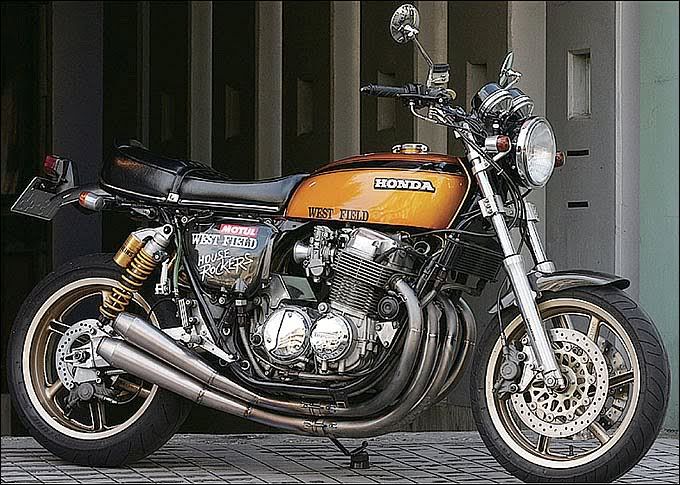
I was inspired by this bike.

http://rockers.sub.jp/


I know its based on a CB750 but I thought I'd give it a go with my Cb650.


So I bought this...A rolling cb750f2n @ 1993. Same looking wheels etc


I know its a bad picture but thats how it was on Ebay. I started by ripping off the front ends to swap the forks over, cb750's are 41mm. I think the House Rockers variant use uprated internals in standard forks with custom brackets for the calipers. For cost reasons I want to use as many bits as I can. The off set for the yolks is not a million miles off standard cb650 as is the length of the forks, I'll detail this later. Wheel obviously going from 19" to 18"


I started by grinding the welds on the bottom of the yolk. Don't go hell for leather when doing this, do it gently and you'll see a circular line appear where the steering stem comes though the bottom yolk. I didn't grind it flat, I ground around following the stem circumference so I'd have some meat to weld to and to keep the factory appearance.


Next simply press out both stems. I didn't need any heat, just make sure you've got it square in the press.


The CB650 stem measures 30mm the hole in the cb750 bottom yolk....30mm Happy Days. Pop it in the freezer for a hour or so and it drops straight in. Weld back up with some dissimilar metal arc rods and hey presto. Just make sure you get your measurements right and leave enough thread sticking out above the top bearing to get both locking ring things on. If you want to keep your steering lock make sure the orientation of the hole in the stem corresponds with the lock on the headstock. The steering stops on the 750 yolk are in the wrong place so you'll have to grind these off and drill and tap some cap heads in there in the correct place. I've ordered some nice taper roller bearing for the head stock for final build. I'll post a pick of the front end assembled some.

Offline 19marty73

  • Full Member
  • *
  • Posts: 12
Re: Project 1,2,3&4!
« Reply #4 on: July 03, 2011, 05:35:03 AM »
I'm still waiting on my head bearings and front discs to complete the front so I've been scratching my head on what to do at the back.  I have an aluminium swing arm from a VFR400 with the correct size at the pivot end but too narrow at the wheel end, the 750F2N which the wheels came off but this is too wide at the pivot end. Any alloy arm bought new would be silly money so I've taken a punt at this which I hope will fit with little modification, it's off a cb750/900. Retro cool!


These are rough fabrication and fitting pictures of the bike with a cut down rear cb650 mudguard, a cb550k seat, cb400/4 side panels. All need slight mods to fit but seem to work well. It has the standard swing arm on, the wheel fits but the factory welds stick out quite a bit and would have to be ground down and re-welded if I have to use this arm. I think I'll have to source slightly longer shocks too .


Offline hapakev

  • Your Standard
  • Hot Shot
  • ***
  • Posts: 521
Re: Project 1,2,3&4!
« Reply #5 on: July 03, 2011, 10:24:38 PM »
Subscribed.  Cant wait to see the work it takes to get to the finish line.
Smoking Jack
1978 CB750F(ish)

"Keep moving forward, until you can no longer move" KP

Offline Greggo

  • Somebody's
  • Old Timer
  • ******
  • Posts: 4,164
  • Helmets Save Lives. Period.
Re: Project 1,2,3&4!
« Reply #6 on: July 03, 2011, 11:10:03 PM »
Subscribed.  Cant wait to see the work it takes to get to the finish line.

+1

Offline 19marty73

  • Full Member
  • *
  • Posts: 12
Re: Project 1,2,3&4!
« Reply #7 on: July 10, 2011, 08:43:23 AM »
Hi all. Well I received my CB900 swing arm and....it doesn't fit! Not a million miles off and an quick and easy mod. The only length that is substantially out is the pivot end which is about 10mm too big.


Now the old cb650 swing arm pivot bolt was 14mm and just rode in bushes greased by the nipple found on the swing arm. The cb900 hangs off a 16mm bolt and drawn cup needle roller bearings (originals were seized solid).


So I have two options now. Drill the frame and footrest hangers out to 16mm, shorten and rethread the cb900 bolt or have new inner racers/spacers made up for the needle bearings 2mm smaller than the cb900's. Next I'll have to shorten the pivot end by 10mm, 5mm of both sides. If you can see in the picture below there is a step inside the swing arm where the bearing outer can go up against. On the original set up (cb900) there was approx another 10mm on both sides that the bearing could be pushed further in, happy days. The inner part of the needle bearings float side to side so are kept in place by an inner spacer, the same set up as in a rear wheel bearing assy. So however much I narrow the arm by I will have to narrow this spacer too.


You may also notice at the end of the pivot tube the ally is of a smaller diameter, this is where the weather seals live. I'll have to think of a way of reducing the diameter of the arm once I've narrowed it.
Bored of bearings yet? I am, but here's some more! The metmachex swing arm uses eccentric chain adjusters, and guess what, the wheel spindle has a larger diameter to the one used in my cb750 wheels. Quick scream, argh! Get the bearing book out again and hey presto. Changing from 6303-DU's to 6204-2RS does the trick. The bearing in the sprocket carrier has a reducer inside it and by simply removing this means the new spindle slides in, bargin.


Quick jump back to the front of the bike. Got my needle bearings but until the final build I'm going to leave my rollers in (not in my hair!) as I'm always taking thing off and on. Ran into another size problem at the fork end. As I've gone from 35mm to 41mm the Tommaselli headlight brackets don't fit! I like the look of these so wanted to keep them. A quick search on ebay using 41mm as the search word eventually came up with some new rubbers that fit a treat, same height.


The cost of this project is already in the hundreds!


Offline brandEn

  • Old Timer
  • ******
  • Posts: 3,205
Re: Project 1,2,3&4!
« Reply #8 on: July 10, 2011, 11:11:09 AM »
Nice projects you got there. Welcome!

Offline 19marty73

  • Full Member
  • *
  • Posts: 12
Re: Project 1,2,3&4!
« Reply #9 on: July 16, 2011, 03:04:35 PM »
Mr postman has been delivering bits and pieces for me over the last week. I sourced some discs and calipers. Discs have loads of meat on them and Just stripped and cleaned the calipers. When I fitted the discs to the wheels and then to the forks I found the stainless cap head bolts I used stuck out too far and fowled the forks! I've had to order original equipment bolts that fit snugly into the disc.


To get the swing arm to fit I took 5mm off both sides with a saw, that was the easy bit. Next I had to reduce the diameter of the pivot housing to accept the weather seals. I can't afford to be taking things to a machine shop every five minutes so I came up with an ingenious solution. I bought a cheap hole saw just a little bigger than the original weather seal diameter and bent the teeth in until it just skimmed the surface then holding the drill as square as possible took about another 5mm of alloy off. Slow but it did the job. I'm not concerned about the finish as the seal covers it up.


Hey presto, pop the seals over the lip!


So I slipped the arm into the frame and what a fit, shock absorbers fell straigt onto their mounts. Result! Beaming with joy I set about trail fitting the wheel with my new bigger bearings. I got everything lined up and tried feeding the spindle through the wheel assy. Would it go? Would it f**k. I'd forgotten to enlarge the spacer that sits in between the bearings in the wheel! Stripped down again. Took it into work and bored in out.


I put everything back together again as well as trail fitting bits and bobs at the front end just to check for space and to get an idea of the look of the bike. Loads of things that need modding, details later. So I thought I'd roll it out and take a few shots for you. Argh!!!! The centre stand fouls the bracing when it is up so has to come off. 3 days later I managed to get the stand pivot out and roll the bike out. It's amazing, even just pushing the bike, the differene in the geometry has made to the steering. It feels so much faster and tighter. I think the bike is going to look quite agressive but not in a street fighter kind of way. I like it!


The cut down rear guard was only taped on in one of my previous pictures but because it needs to hold the weight of the rear light and number plate, it needs to be secure. I have cut the mudguard into pieces to "cut and shut" the original brackets. It is proving harder than it looks.


I've ordered an enduro style rear light, like what they use on motor crossers, as the rear guard will be nearly horizontal as in my inspiration picture. Until next time!

Offline hapakev

  • Your Standard
  • Hot Shot
  • ***
  • Posts: 521
Re: Project 1,2,3&4!
« Reply #10 on: July 17, 2011, 12:08:16 AM »
Lookin good buddy!
Smoking Jack
1978 CB750F(ish)

"Keep moving forward, until you can no longer move" KP

Offline 19marty73

  • Full Member
  • *
  • Posts: 12
Re: Project 1,2,3&4!
« Reply #11 on: July 19, 2011, 10:51:15 AM »
I bought a cb750f2n front mudguard off Ebay and got my little Clarke mini drill with a little cutting disc in it and chopped it up! I took a fair bit off the back and trimmed the sides. Sounds like a hair cut!


Before.


During.


After.

It looks a lot better, but I think I'll still look for another one that follows the width of the tyre and doesn't protrude around the the forks. I've also drilled and self tapped the rear mudguard into position. When I've trial fitted the rear light I'll weld it and get in chromed for the final build.


Offline wannabridin

  • Patience made me a
  • Master
  • *****
  • Posts: 2,237
  • -Garrett
    • 1976 CB750K, under construction:
Re: Project 1,2,3&4!
« Reply #12 on: July 19, 2011, 11:15:35 AM »
looking good!  how much does that setup change the trail of the bike?  still in the sweet spot?
1976 CB750K, currently under construction:
http://forums.sohc4.net/index.php?topic=64468.0

-And if you don't do it this year, you'll be one year older when you do...

Offline 19marty73

  • Full Member
  • *
  • Posts: 12
Re: Project 1,2,3&4!
« Reply #13 on: July 25, 2011, 12:11:12 PM »
I haven't got round to measuring the new triple trees and fork length to work it out yet. I'll dig out what the standard set up is then get my tape measure out. The numbers will mean nothing to me unless I can compare them to a bike of silmilar dimensions. The real test will be the first ride. That reminds me, this thing hasn't run for 3 years, best get it going! Is the "sweet spot" within a certain range?

Offline 19marty73

  • Full Member
  • *
  • Posts: 12
Re: Project 1,2,3&4!
« Reply #14 on: July 25, 2011, 08:22:34 PM »
If there's two things that can spoil the way any bike looks it's a big old number plate and light assy stuck on the back or after market speedo's that just don't look right. I'll deal with the number plate assy first. I received my enduro light assy and stuck it on. It looked ok without the number plate but I don't like it with.


I had a rummage  around in the shed and found a couple off old light assemblies. One with a nice base but a MASSIVE lens and a CB400/4 item with a MASSIVE  base and a small lens.


I stripped down both items taking the lens and lens holders off and re drilled and trimmed the rubber gasket and came up with this. It mounts at a nice angle and when I get a naughty smaller number plate it should look even better.


Next is my issue of gauges. The cb650 ones are big with the idiot lights the same as a 400/4 and the choke cable tagged on the side. These are nowhere near to fitting on the cb750 top yolk as the ignition switch is in the wrong place. The cb750 ones I have are a bit battered so would need repairing or replacing anyway. The angle of the bracket also means they fowl the head light. So instead of buying some run of the mill universal ones I thought I'd give this a go.


I didn't realise how small they were until I got them out the box, only 120mm wide. That should make the front end a lot neater! It's a digital speed sender, you put little magnets in the space where you'd put your hex/allen key on your brake disc bolts, very clever. The tach signal is taken off the 12V supply side of the coil, you program the unit to how many coils and if your using a positive or negative pulse.

Offline 19marty73

  • Full Member
  • *
  • Posts: 12
Re: Project 1,2,3&4!
« Reply #15 on: July 26, 2011, 12:10:00 AM »
The mudguard that I bought didn't come with any mount brackets. I looked on http://www.cmsnl.com/ for info on the brackets and was surprised to find there isn't much of one. I'll make one!
I made a cardboard template of the shape of the inside, it's amazing how much longer the bracket is following the curve of the mudguard than just straight across.


When I was happy with the shape and fit I tacked it together.


Next I got some round bar and bored it out to 5mm on the lathe. I replaced the drill with a 6mm tap in the tail stock to start the tread nice and square, then finished off by hand.


Then I drilled the bracket for an interference fit for the round bar. I cut the bar down to 10mm lengths and inserted them into the bracket AND into the holes in the mudguard.


I secured the bracket to the mudguard with 6mm cap heads, sandwiching the plastic mudguard between the bracket and what would be the fork lower legs. This is the nearly finished article. It should give some extra stability to the front end, acting as a mudguard bracket and fork brace.


Offline 19marty73

  • Full Member
  • *
  • Posts: 12
Re: Project 1,2,3&4!
« Reply #16 on: July 26, 2011, 01:46:27 PM »
If you remember a while back I had two options for the final mounting of the swing arm to the frame. Either get new inner bushes made for the roller bearings in the swing arm and use the original cb650 14mm bolt or drill the frame out to 16mm to accept the cb900 swing arm bolt. I took the easy route after deciding there was enough meat on the bushes welded into the frame to take them out 2mm. My only problem would be ensuring that when I drilled, I drilled square. For the best possible results I bought a 16mm Blacksmiths drill (reduced shank so it would fit into my hand drill) and squared the footrest hanger up in a pillar drill and bored out the insert.


I then remounted the footrest hanger to the frame and used this as a guide to drill the frame. Drilling the frame turned out to be quite difficult, the material of the bush was hard but I couldn't afford to push too hard as the bike moved. Lots of cutting paste,  took my time, job done.


I also had to cut down the cb900 bolt as it was about 25mm longer than the cb650 one. I hoped just to reuse the original nut, so it looked "factory" but I couldn't find a die nut the same pitch. In the end I used a M16x2 instead of the original M16x1.5 . I went to the hardware shop to get Nylock and a washer and the nice man gave it to me for free. The bolt knocked through the foot rest, frame and swing arm a treat. Next problem.....the rear brake.

Offline 19marty73

  • Full Member
  • *
  • Posts: 12
Re: Project 1,2,3&4!
« Reply #17 on: August 23, 2011, 01:50:27 PM »
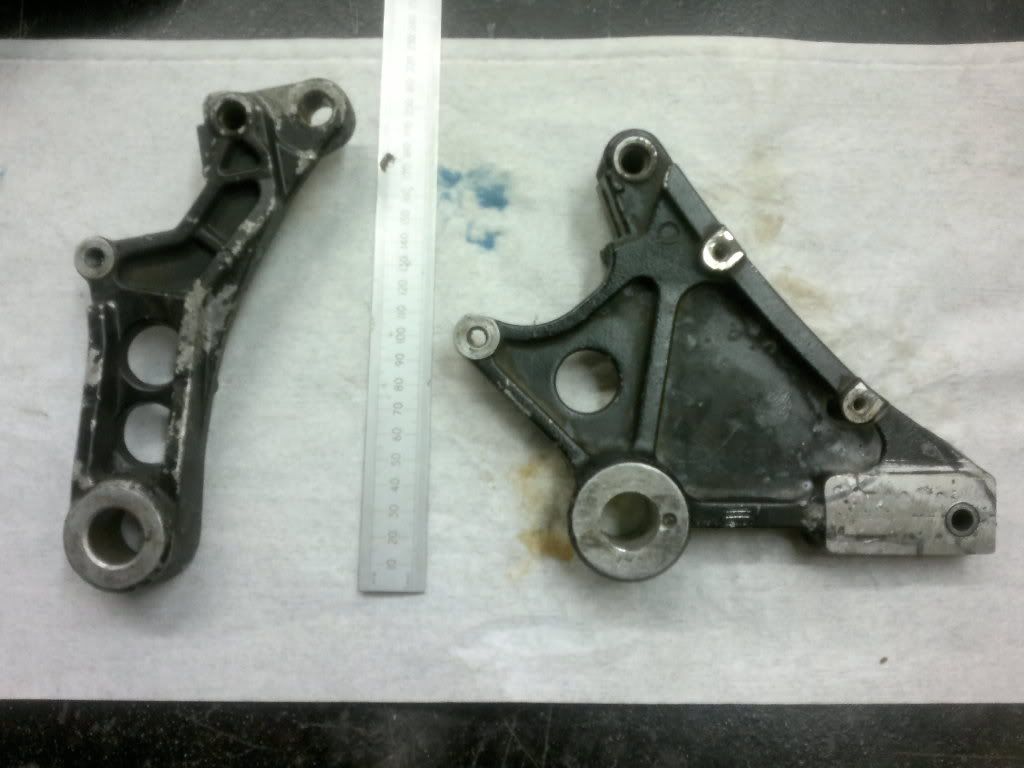
Hi all. It's been nearly a month, but I have not been idle! The rear brake set up has been a right royal pain in the arse. As those of you who have modified bike parts from one model to fit another bike part, the rational train of thought would be to marry the two different model parts to try and come up with a usable solution. I attempted this for the rear brake assy. Quick recap. CB900 (circa 1980) swing arm, CB750f2 (1992) rear wheel and disc. Now the CB900 uses a brake calliper bracket with a torque arm and the CB750 has a calliper bracket that has a slot cut in it that fits over a guide mounted on the swing arm. Because the new swing arm has eccentric adjusters I couldn't weld a guide to the inside of the swing arm because of the "arc" pattern of the chain adjusters, they do not just move in and out parallel to the swing arm like the 750. I hope your getting this!
I bought a late model CB900 (read 2 piston calliper) rear brake assy and tried that. I should have done a bit more research on the diameter of the 900's rear disc, it's nearly 12". Needless to say the smaller 750 disc was miles off the calliper. I looked into getting a custom, one off, rear disc made. No joy. I looked then at "shortening" the 900 calliper bracket to fit the 750 disc, it would then foul the rear shocks! The pic below shows the difference in size.


I trawled through loads of pics of projects to try and come up with a solution that wouldn't cost me the earth. After about 10 pints of lager it came to me! I cut some aluminium and welded it into the slot of the 750's calliper bracket. I then rotated it anti clockwise about 90 degrees and the bloody thing only slotted right onto the 900's torque arm! Result. I then pushed the steel sleeve out of the 900's bracket, drilled and loctited it into the modified 750's bracket.
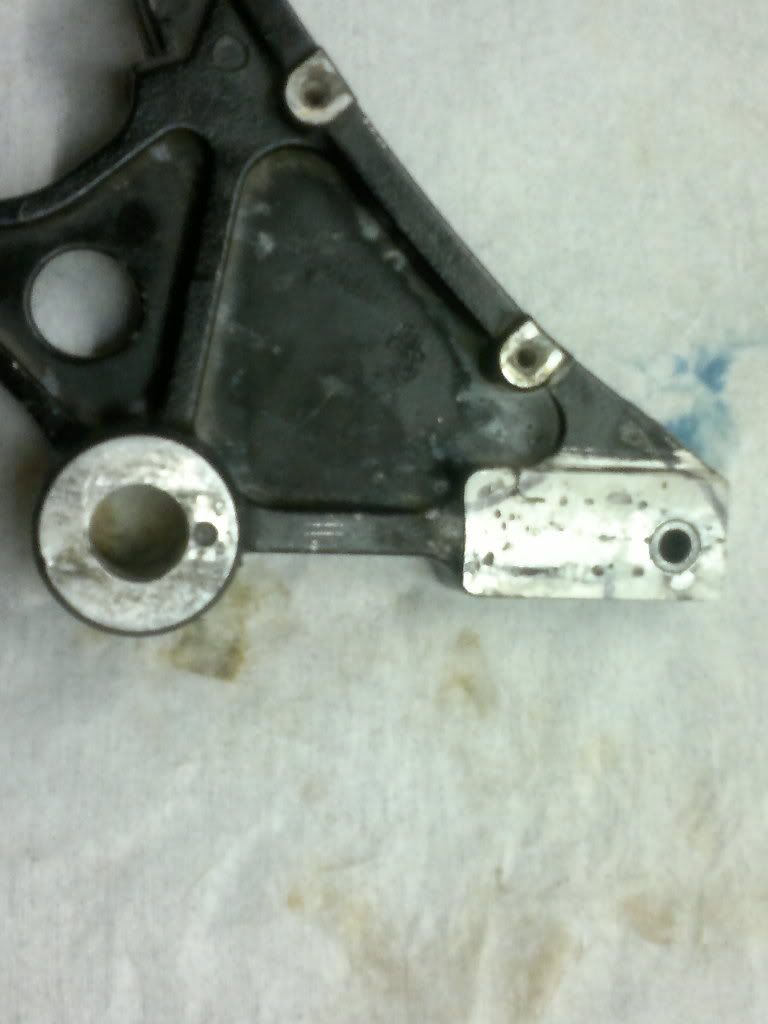


I still have to trim and drill the bracket to smarten it up but it looks like it'll do the job. I'm thinking of mounting the electric pick up for the speedo here too as not to have a cable running up the front forks.
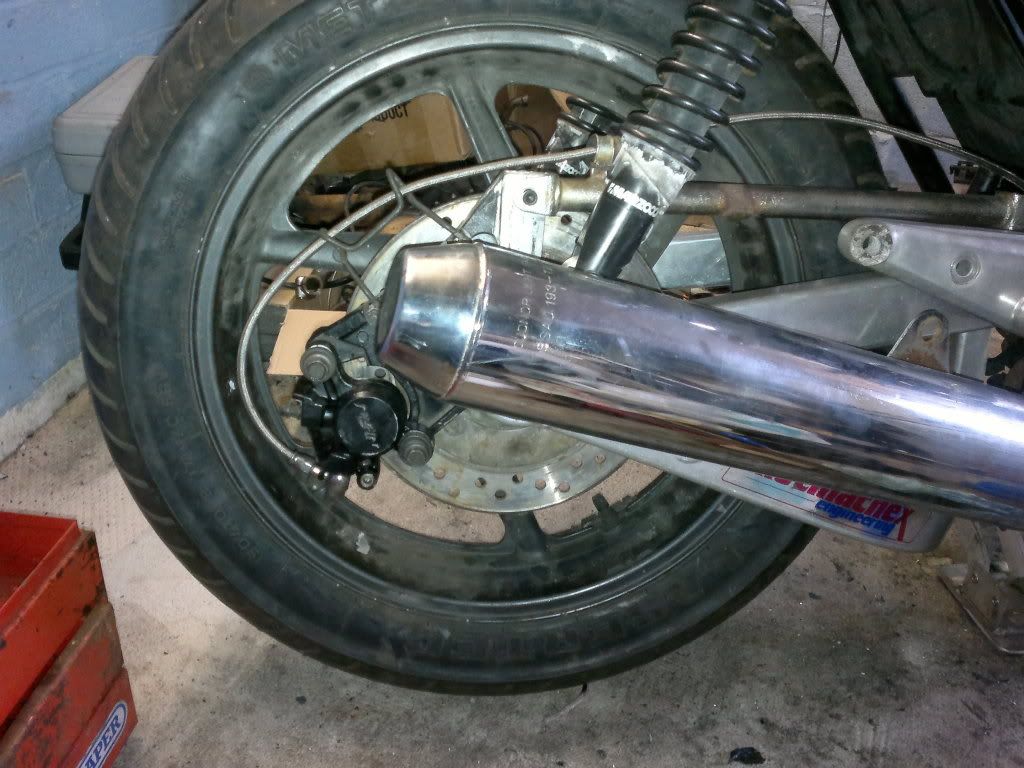
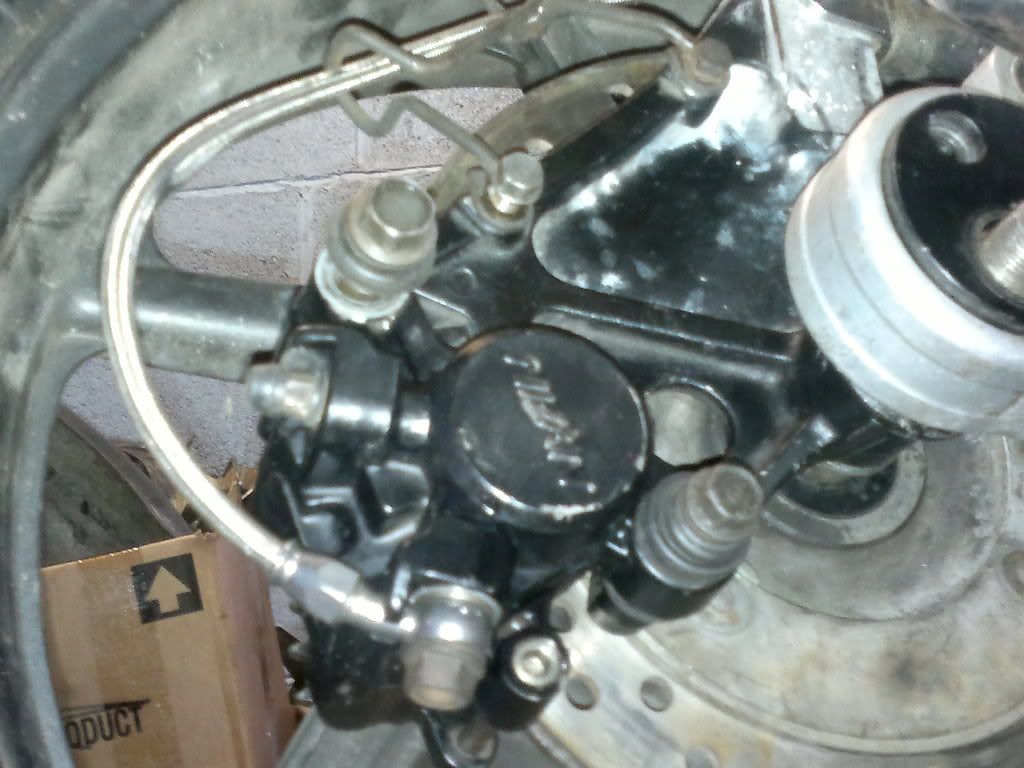
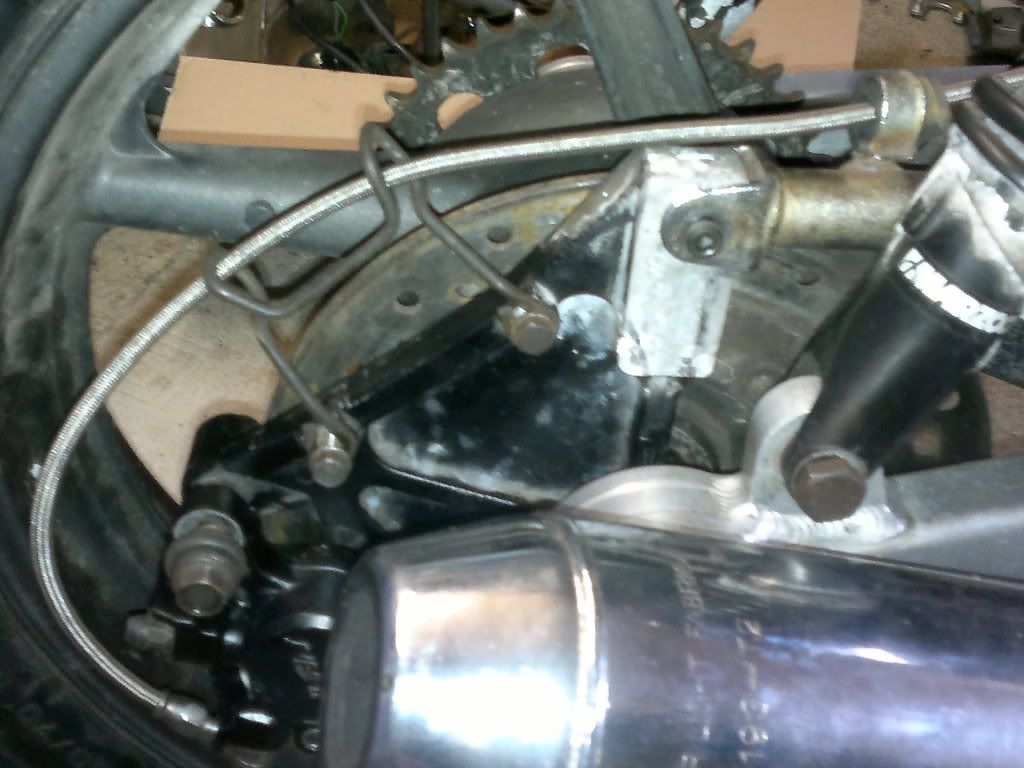


You only ever see callipers either directly on top or underneath the discs so I'm hoping there's no engineering/stress reason why it can't be mounted where it is.

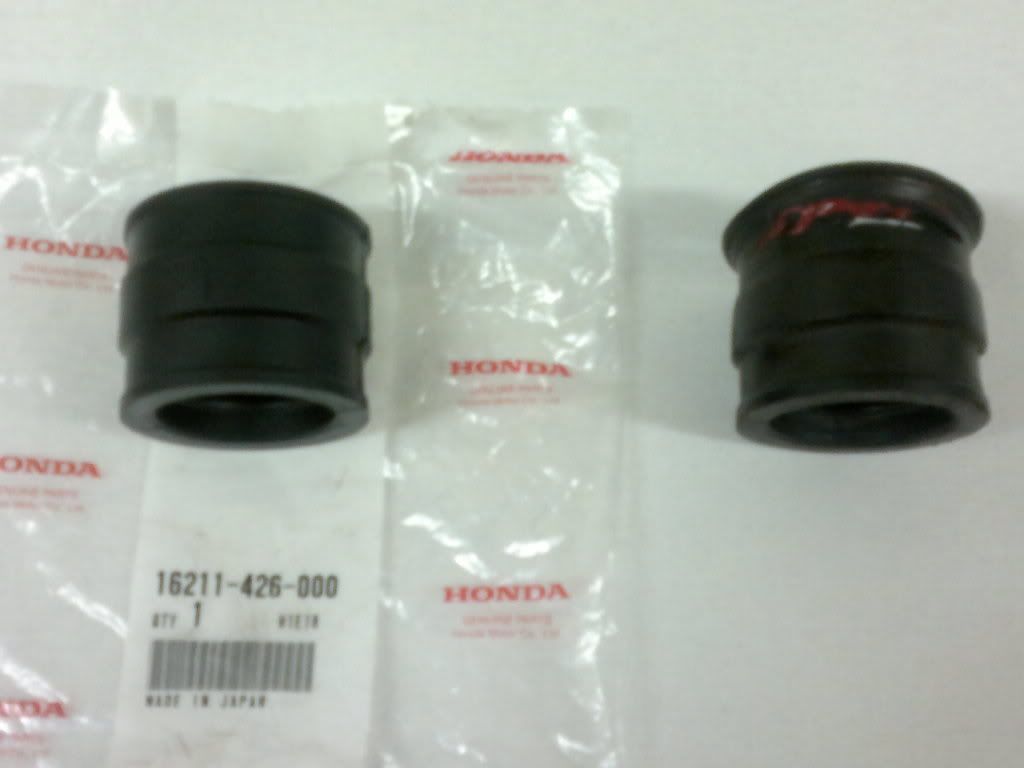
Some of you may have noticed in a previous picture of the bike that it had grown a set of carbs and a battery. I thought I best try and get it running if I'm doing all this work. God bless the old dear. I just charged the battery and pushed the rebuilt carbs ( cleaned and float heights set ) on with the tank full of stale petrol and she fired up after a couple of cranks. Sounded and ran like a bag of #$%*! I found two things primarily wrong. There was no lock nut on the cam chain adjuster and one of the carb insulation rubbers had a big split in in. New carb rubber from http://www.davidsilverspares.co.uk/ £16 and a nut for the adjuster out of a spares box, free. Try again... beautiful.  Surprisingly crisp revving.


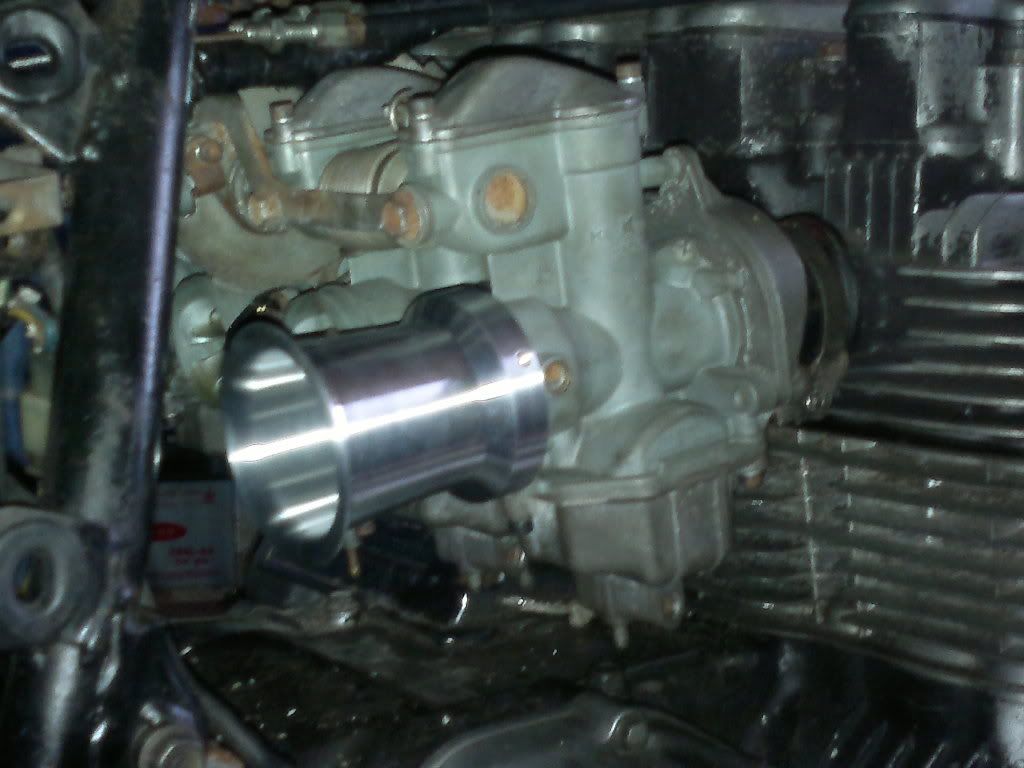
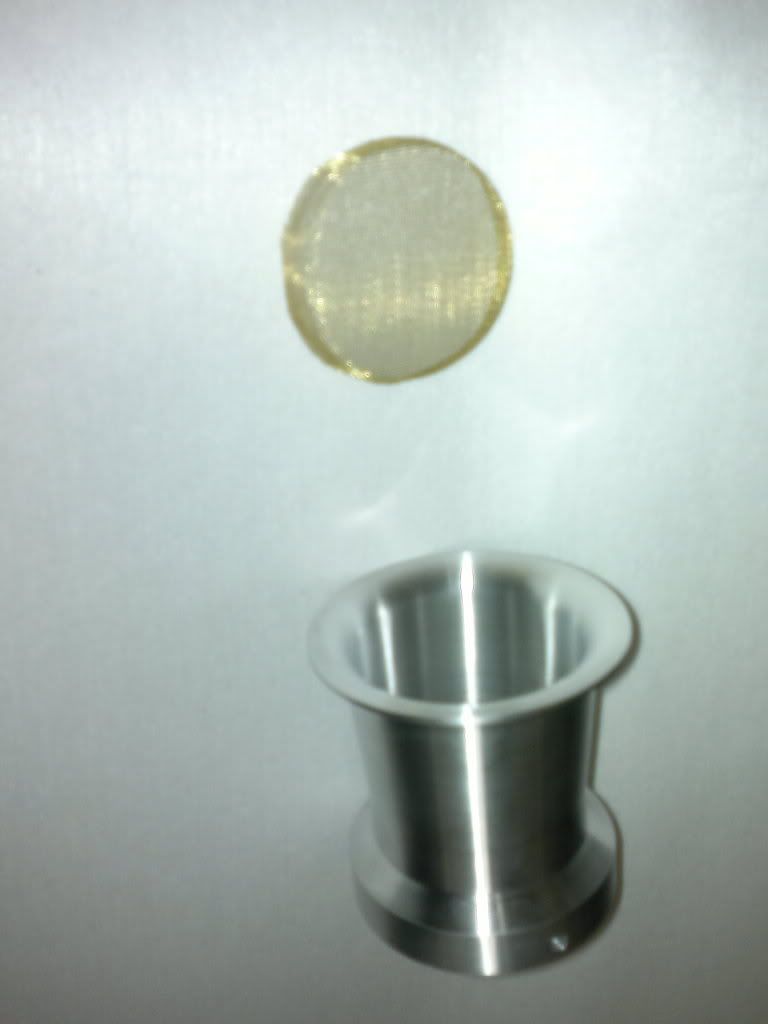
If any one can remember my inspiration photo you'll see the bike has bell mouths or velocity stacks on the carbs. I spent ages looking for a supplier in the UK but drew a blank. Then I came across this site and I just could believe how little they wanted for a set. They even do them in copper! http://www.steeldragonperformance.com/index.html
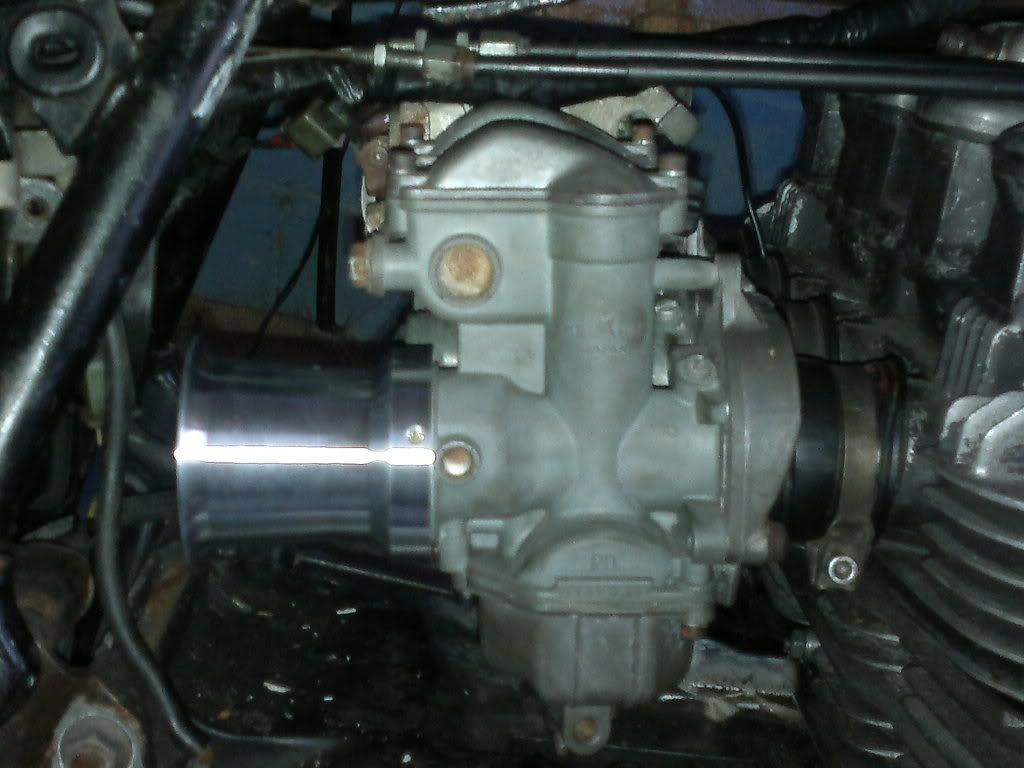


I realise jetting the carb for these is going to be difficult so if any one has any experience re-jetting, please share your knowledge.
Right what part do I tackle next!!!!!