I think this project has grown in scope enough to rate posting here. I've owned this 1974 CB750K4 since 1976. The bike spent most of the first 10 years I had it outside during the summer - no garage or shed

The last 20+ years it sat idle in the back of the garage. I did enough to get it barely road able this summer: flushed brakes, cleaned carbs, flashing and aluminum tape to cover the holes in the exhaust, new battery, chain, and sprockets. I put several hundred miles on it before it snowed.
Last week I started disassembling it thinking I would change fork seals, wheels, spokes, exhaust, some aluminum polishing, maybe a coat of paint on the tank, and some new bolts/screws here and there. Bearings would be checked too. Starting late seems to rule out a fancy paint job or re-chroming anything. Here is what the bike looked like pre-tear down:
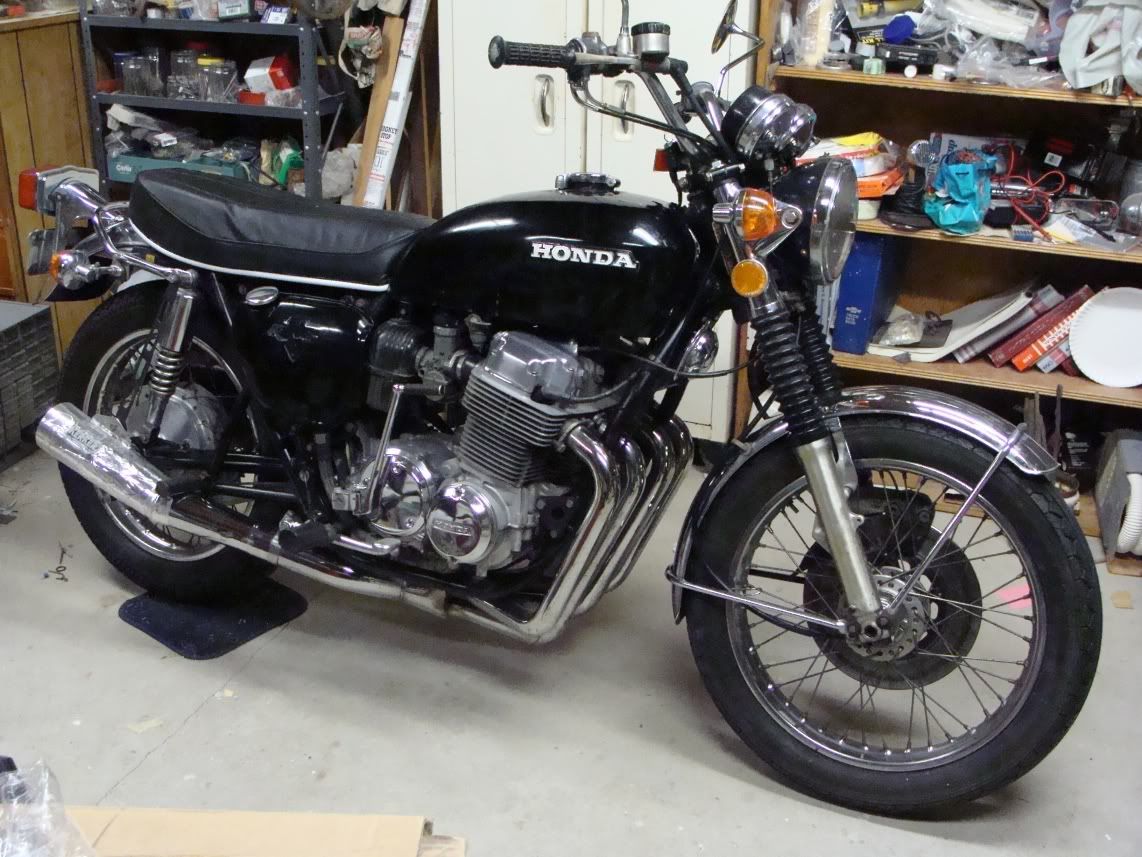
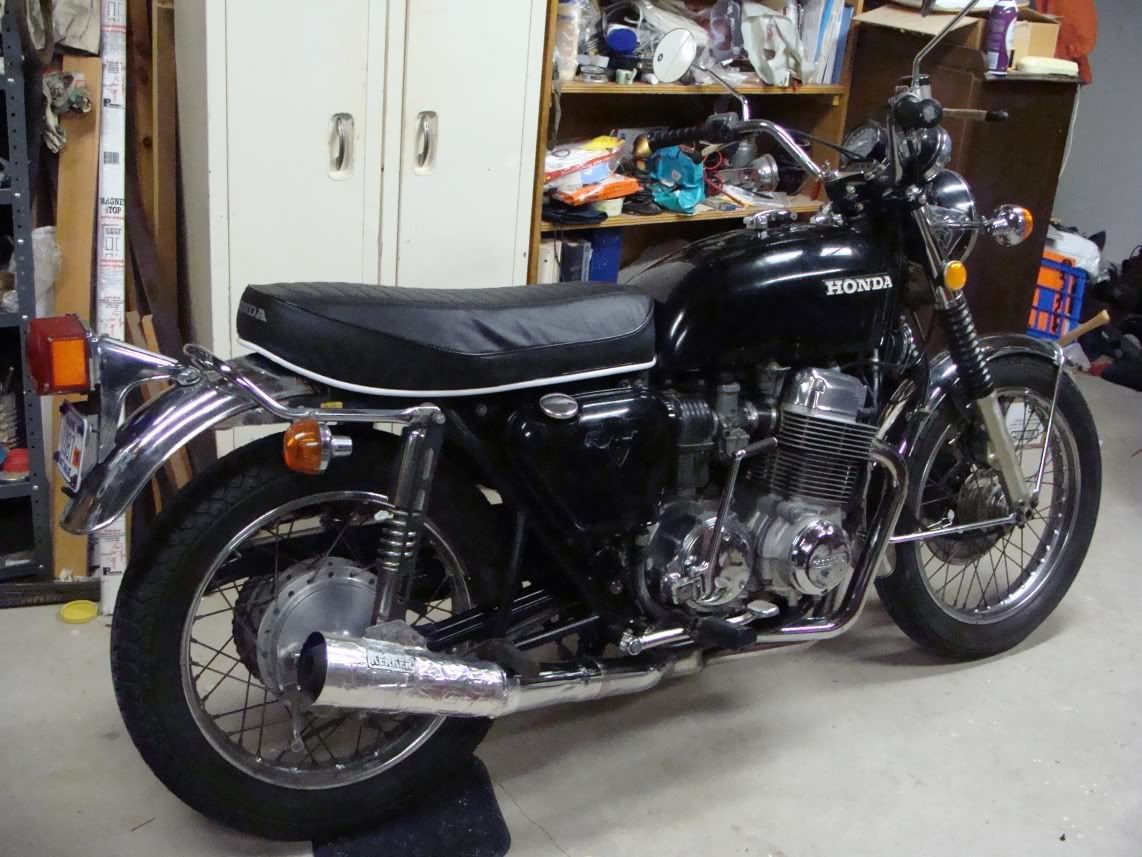
Tank paint is a lot worse than it looks in these pictures.
Here is what it looks like at the moment:
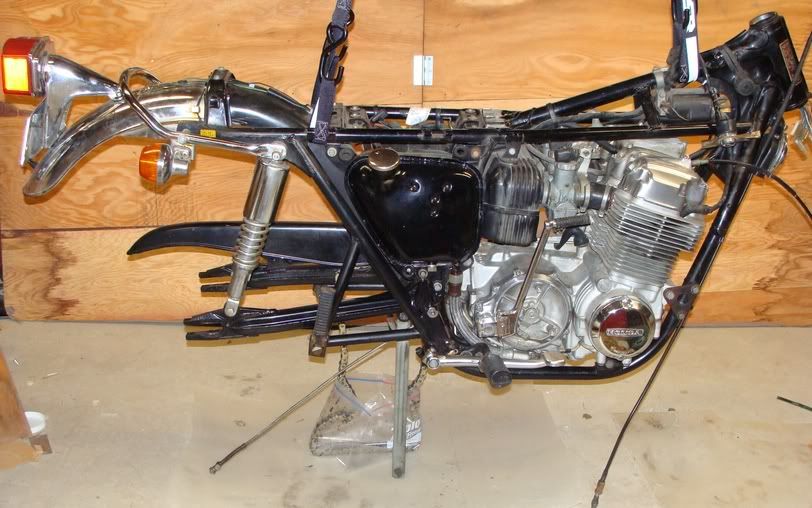
Frame is hanging from a steel beam in the basement.
Once suspended it was obvious the triple tree bearings were "notched" and had worn races. Looks like I need to add a tapered bearing set to the purchase list.
The top nut came off easy, this revealed the adjustment nut with spanner type notches. With no spanner wrench in sight, I tried the screwdriver and hammer approach. No problem, this nut comes off easy along with the top most race. Careful with the ball bearings or they will be all over he floor, triple tree slides right out. The two races left in the frame were driven out with a hammer and a 1 1/2 foot dowel. These came out easy provided the point of contact with the dowel was changed with each tap. That left the lower race pressed on the triple tree.
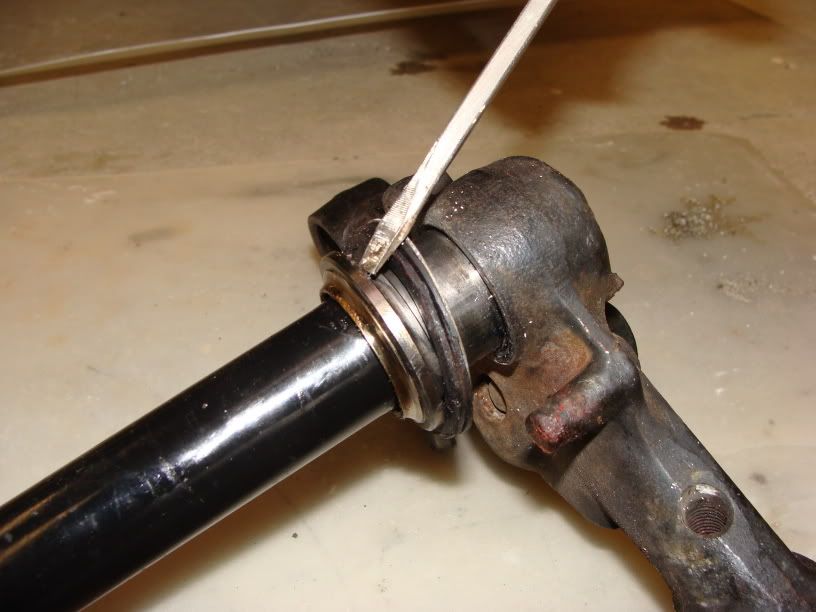
This picture shows left to right - thin washer that backs up dust/grease seal, two rubber "washers" that form the seal, lower race loosened, two races that were pulled from frame, the upper race, adjusting nut an top cap, washer and top locking nut. I believe these all to be original parts.
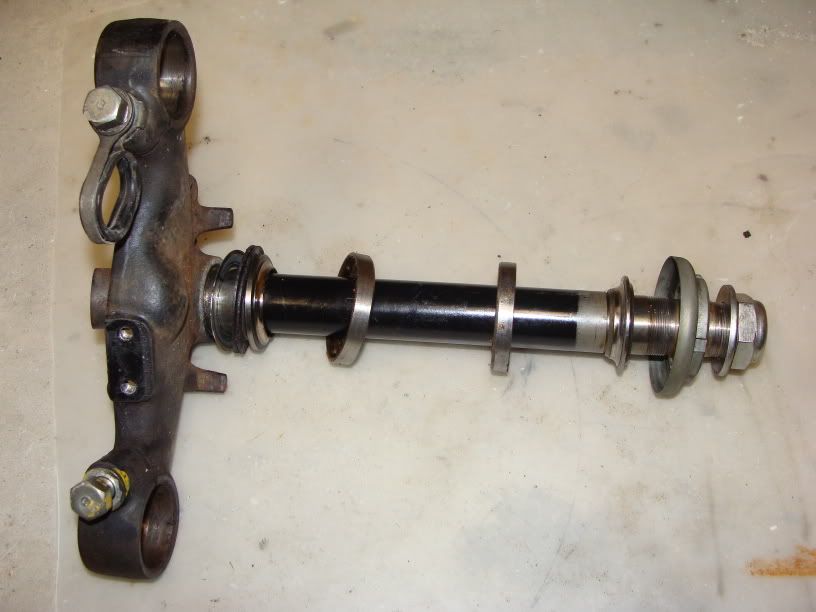
The Honda service manual says to use a drift to remove this race. There isn't much room for the typical round drift so I used a medium screw driver. Again, each stroke should be on a different side. This came off easy.
Next - rear bearings retainers etc. From the forums I found some examples of scratch built retainer removal tools. I spoke to MacGyver and this is what we came up with:
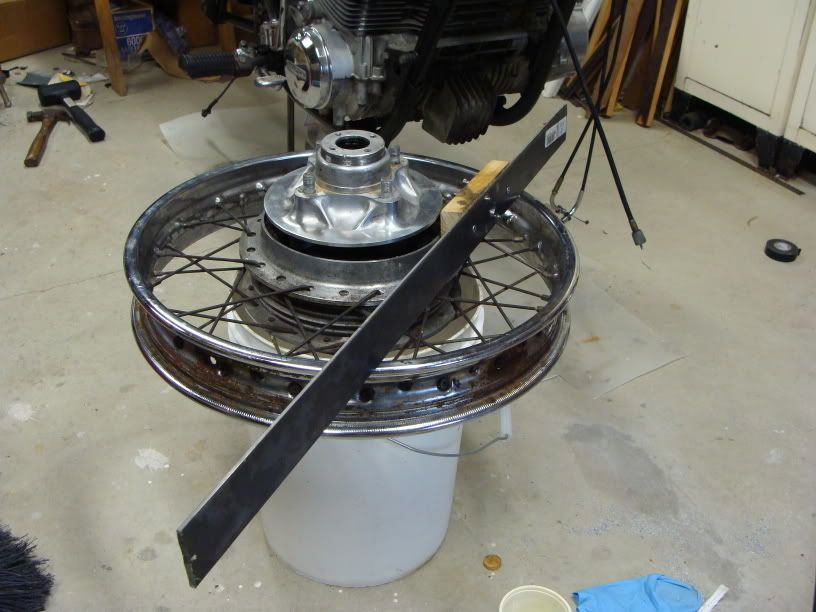
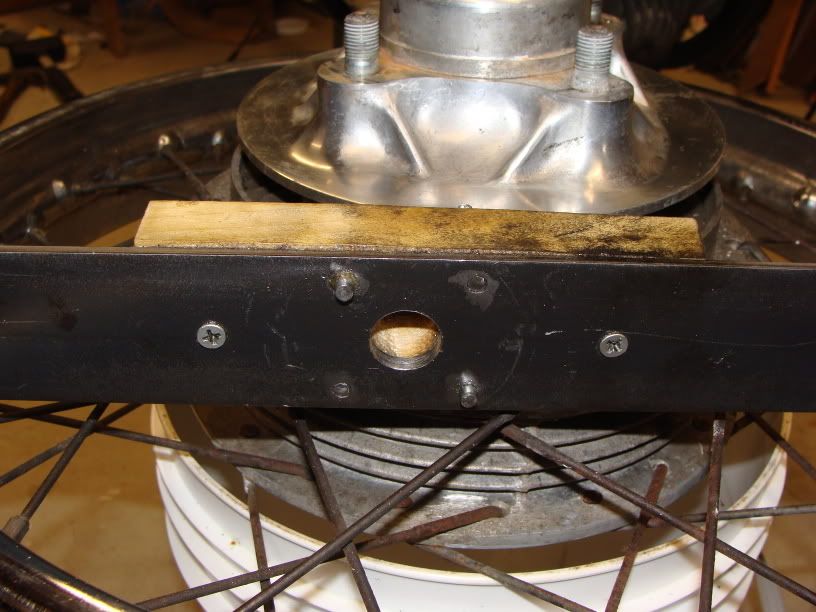
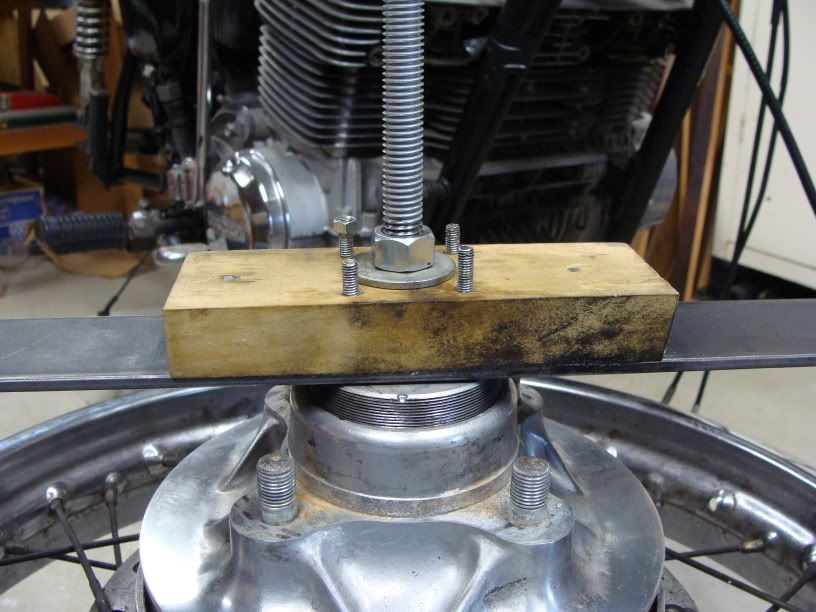
it is a piece of flat stock 3/16" thick, 2 inches wide and 36 inches long. Pins are 5mm diameter bolts with heads cut off. a 1" thick piece of hard wood is glued and screwed to the back side to help keep the bolts in place. Holes drilled in the wood are slightly undersized to retain the bolts. Heads were cut off with a Dremel tool after screwing them in place. A center hole large enough to pass a threaded rod through completed the assembly. I tried to use all four pin holes but my machining was not precise enough. I backed out the ones that were problems and went with two pins. The threaded rod ensures that the pins don't slip out of the retainer while you are using the tool. I did all this with the drive portion of the hub still inserted into the center hub assembly. It provides better support for the hub and more leverage. Oh yes, I lightly drilled out the "stake" marks used to keep the retainer from spinning on its own. Don't forget to back off the threaded rod nut a bit for each turn of the retainer.
What is the current method of locking this part - stake like original or something like Locktite blue?
This picture shows the pins
and this one is a mock up of it in use (hub pieces are not fully mated)
Once the retainer is removed and the drive portion of the hub is worked free it is easy to drive the bearing free with a block of wood and hammer.
That leaves two bearings in the center portion of the hub. The first one to remove has a retainer but it uses a different extraction method. My solution involved about 2 1/2 inches of that flat stock mentioned above welded to a 3/4" x 7" bolt, several washers, and 3 nuts. The flat stock edge was squared up and thinned with a Dremel cut off wheel. I had to also grind out a relief in the plate for the bolt head. Don't forget to make sure that once welded the tabs engage the slots equally. Grind as needed.
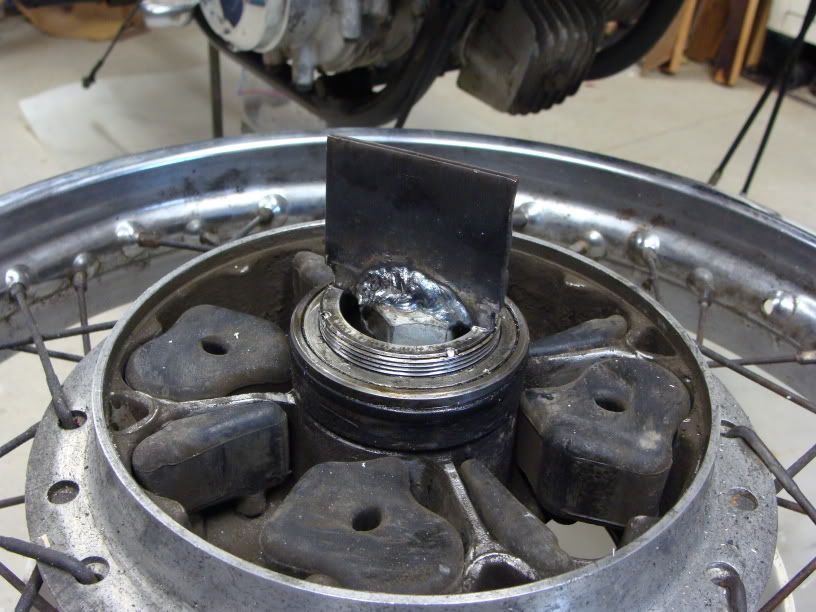
Don't forget to gently drill out the staking marks. I slid the assembly through the bearing holes and used the washers and a nut to hold it in place tightly engaging the slots in the retainer. The last two nuts were tightened against each other so I could use a wrench on them to turn the assembly. Careful - you are turning the wrench on the back side and need to go in the opposite direction. Someone should have told me this. Not too much damage to the retainer and a good demonstration that the tool won't slip. Remember to loosen the first nut on the tool as the retainer unscrews.
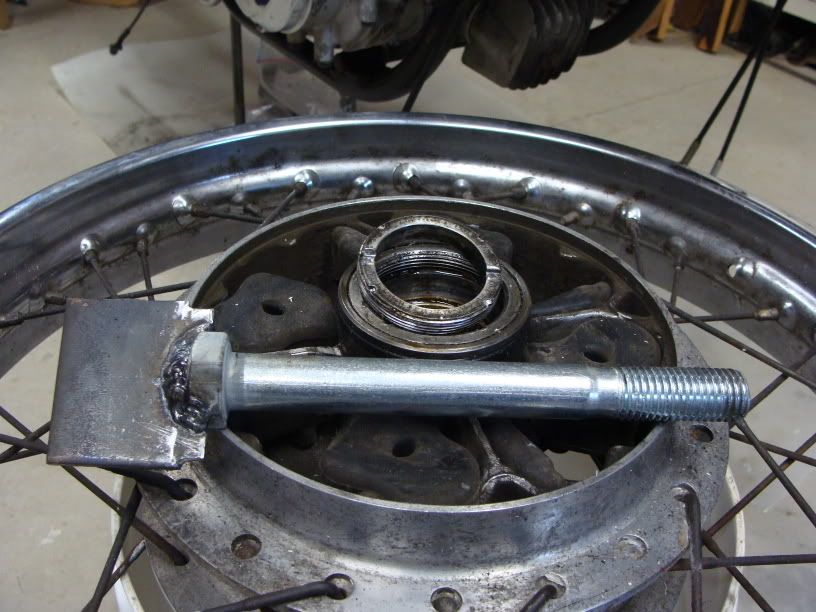
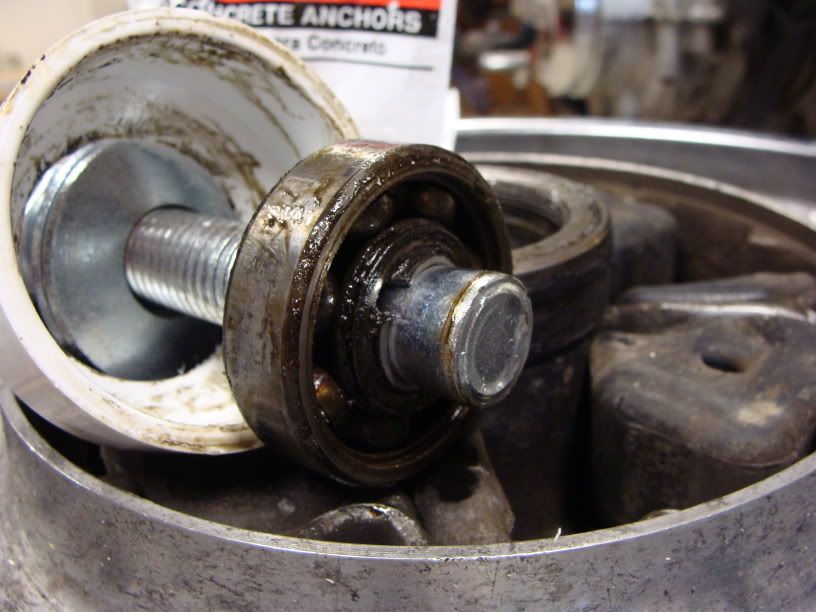
With this retainer out you now have two bearings pressed in from opposite sides of the hub with a spacer tube between them. I saw a suggestion somewhere for using a concrete anchor bolt. Here is my take on this.
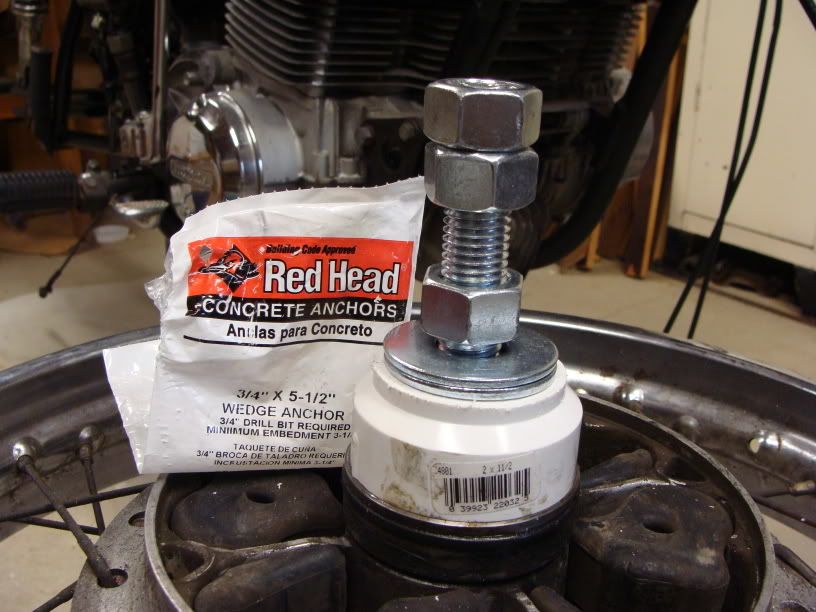
The bolt has a tapered end with a split ring that slides on the taper wedging the bolt in a hole. The split ring had two dimples that protruded out meant to help engage in the cement. I had to pound these fairly flat (see arrow pointing to dimple in picture below). This was done progressively until I could tap the bolt into the inner race bearing. Be careful not to push the bolt down into the spacer. I don't think it is quite as strong and you need to reuse the spacer. A 2" to 1 1/2" PVC adapter was used as a spacer after a bit of trimming, those washers and nuts from that last tool come in handy here as well. This time the "double nuts" are used to keep the bolt from turning with one wrench while the other nut is used to pull the bearing out.
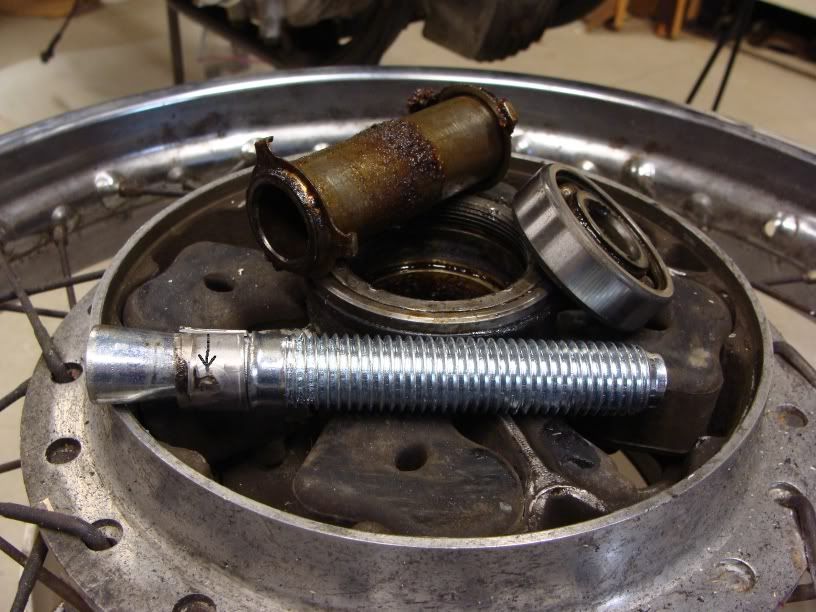
This picture also shows the removed bearing and the spacer that goes down in the space between the two bearings.
You can see the split ring protruding from the bottom of the bearing inner race. Find something to press against the race and tap the bearing off. This bearing was rough after removing it. I believe it wasn't so good before using the tool but I think I would plan on replacing the bearing after using this tool anyways.
With the this retainer, bearing, and spacer removed it is relatively simple to drive the remaining bearing with a section of wood from the back side.
Anyone in the Southern Maine area can borrow these tools provided I get to check out your project.
The fork tubes are another story...