Author Topic: Wheels & Tires  (Read 54479 times)

0 Members and 1 Guest are viewing this topic.

x2qwk4ux

  • Guest
Wheels & Tires
« on: April 12, 2005, 12:50:08 am »
Rim Truing:   This is how to true them ON the bike with the TIRES on (TO GET IT INTO THE BALLPARK OR NEARLY PERECT)...though they say it can't be done properly this way.
     
     Well, here's what you'll need: A spoke wrench, a jack, a beer (if you don't drink now you may before you're done), crayons, a rag, and something to sit on.
     
     I like to take the chain off & start with the rear wheel. Inflate to 30 or so psi. OK…now grab a light-colored crayon & spin the wheel real fast. If it drags, try loosening up your drum-drake adjustment for now. 1st we’ll check for lateral movement of the rim (side-to- side). Hold the crayon in your fist & find something solid to rest you fist on. Slowly advance the crayon in towards the sidewall allowing it only to touch the high spots. Stop rim & do the other side. Next, we’ll check for longitudal movement (up-and-down). Same thing…spin it, but this time mark the center of the tread using the middle of the rear fender as the stationary object. *If your tire is on the rim crooked, this will not work & you will need to re-seat the tire* If you have nothing but solid lines, your wheel is straight. You just need to check for spoke torque—read below and extract the info as it applies to you.
     
     Crooked rim people: This is hard to explain in words, but here goes…I like to work the “hop” out of the wheel 1st (longitudal).  If your high spot covers most of the tire’s circumference, then you probably have some tight spokes in the area where there is no crayon mark. (I like to lightly tap the spokes with the wrench to get an idea how tight the spokes are in comparison to the rest. You’ll know when you hear one that’s way too tight or too loose….tight is high- pitched, and a loose spoke may not hum at all…just a flat metal sound.) If you have only 1 or 2 short marks on the tire, the spokes adjacent to these marks may be too loose. **IMPORTANT** Whatever adjustments you make to the left spokes must be made to the right or you’ll pull the rim to one side too far and throw off the lateral alignment. Too much torque in a series of spokes will cause a low- spot (or flat-spot) in the longitudal alignment…you’ll pull the rim into the shape of an egg or worse. Work by 1/4 turns…depending on how badly you rim is out of whack, and use the tapping method often to check for tone. The tones do not have to be perfect...just attack the seriously loose or tight ones.
     
     Lateral adjustment: You’ll have to erase all previously marked areas (frequently) with the rag & have some beer…you can also use the beer to moisten the rag. Now the hop is gone, and you’ve got some side-to-side wobble. Re-mark the tire with crayon. Find the mark on the left & loosen the left spokes a bit… then tighten the right spokes in that same area. Do te same for the marks on the right. Do so in small increments so you do not create “hop” all over again. Keep tapping & listening, erasing marks, drinking, and re-marking the wheel. Once you’ve got everything near perfect…you’ll need to check for hop again. Keep trying & you’ll get it. The front tire is the same, but you'll want to jack the front wheel of the ground in order to spin it. Take the disc brake off if it's dragging too much for you. 
     
     If all goes well you'll now be drunk, have 2 straight wheels, and brakes that need to be assembled / adjusted. Sleep off the beer, do the brakes, check tire pressure & go for a smoooothe ride. Josh

Offline Harry

  • Hot Shot
  • ***
  • Posts: 387
    • CB500F
Tire codes & sizes
« Reply #1 on: April 14, 2005, 01:30:21 am »

How do I see how old my tires are?
The first two indicate the week of its manufacture, and the last two are for the year. For example, 1702 would indicate the tire was manufactured in April, 2002. Prior to 2000, there were only three digits, with the last one indicating the year.Early tyres carry a three digit age code on the sidewall indicating the month and year of manufacture.For example 129 means the tyre was manufactured in December 1999.

How do I choose the right size of tire?
There are basically three different systems of tire description: Inch system (You are probably familiar with it as tire size readings like 5.00 - 16 or 4.50/S/18), the Alphanumeric System (for example: MT 90-16) and the Metric System (for example: 130/90 - 16). The last numbers are to describe the rim size. Before that number there is generally a dash or one of the letters S, H or V. This is key to speed range: (S) tires are up to 112 mph, (H) tires are admissible for speeds up to 130 mph, and (V) tires for 150 mph and up. Alphanumeric System and Series 80 are describing low-profile tires, which means the height is small than the width and the proportions to the width is fixed. Only in the Standard Inch-System can we find tires with equal width and height which is then a "square-profile".

Metric    Alpha    Inch
80/90       MH90    2.50/2.75
90/90       MJ90    2.75/3.00
100/90    MM90    3.25/3.50
110/90    MN90    3.75/4.00
120/80    ----    4.25/4.50
120/90    MR90    4.25/4.50
130/90    MT90    5.00/5.10
Harry Teicher, member #3,  Denmark....no, NOT the capital of Sweden.

Offline SteveD CB500F

  • Global Moderator
  • Old Timer
  • *****
  • Posts: 4,553
  • Ride on the Steel Breeze...
    • TVAM
How do I lace a set of Spokes?
« Reply #2 on: April 15, 2005, 12:09:05 am »
www.hondachopper.com have a downloadable manual with a spoke lacing section.

Info from El Taco
« Last Edit: April 15, 2005, 12:11:20 am by SteveD CB500F »
SOHC4 Member #2393
2015 Tiger 800 XRT
1971 CB500K0 (US Model)

Offline SteveD CB500F

  • Global Moderator
  • Old Timer
  • *****
  • Posts: 4,553
  • Ride on the Steel Breeze...
    • TVAM
Retro Tyres (Thanks Raul CB750K)
« Reply #3 on: April 28, 2005, 12:54:05 am »
Pictures of his Metzelers and how they compare to the original Bridgestones.

http://perso.wanadoo.es/camelo4/cb750.html
SOHC4 Member #2393
2015 Tiger 800 XRT
1971 CB500K0 (US Model)

Offline SteveD CB500F

  • Global Moderator
  • Old Timer
  • *****
  • Posts: 4,553
  • Ride on the Steel Breeze...
    • TVAM
Retro Tyres from Dunlop
« Reply #4 on: May 01, 2005, 11:48:58 am »
SOHC4 Member #2393
2015 Tiger 800 XRT
1971 CB500K0 (US Model)

Offline Bob Wessner

  • "Carbs Suck!"
  • Really Old Timer ...
  • *******
  • Posts: 10,079
The Hazards of New Tires
« Reply #5 on: May 05, 2006, 08:10:44 am »
A number of members have reported accidents/spills , or near incidents, after fitting new tires. It should be noted that new tires/tyres may still have a release agent on the tread surfaces. It's recommended that they be washed with soap and water and be sure to rinse all soap off thoroughly. Some have reported good results by roughing the tread surface with sandpaper. In any event, it is recommended that care be taken riding on new tires for a period of time.

From dpen;


Here is the procedure I've been using for a long time.

Get a scotch-brite pad (like steel wool) & douse it with "sugar soap" (available from any hardware store)

Scrub the tyre including the sidewall for a few minutes. This removes the preservative coating from the tyre.

Wash with water & let dry.

Repeat the process.

When tyre is dry go over it with some wet & dry (about 240 grade)

You still need to take it reasonably easy for the first few miles but you can corner with confidence.

From Hondaman:

Acetone also removes that tire mold-release compound. I wipe down new tires with it before riding.
« Last Edit: June 19, 2006, 02:11:41 am by Bob Wessner »
We'll all be someone else's PO some day.

Offline Bob Wessner

  • "Carbs Suck!"
  • Really Old Timer ...
  • *******
  • Posts: 10,079
Lacing and Truing a Spoked Wheel
« Reply #6 on: March 24, 2007, 09:21:43 am »
Submitted by Dan Jones (Jonesy)

This outlines my experience rebuilding the rear wheel on my '73 CB750 K3. I documented the process so that others interested in wheel lacing would feel less intimidated by it. It's certainly a job you can do yourself. However, bear in mind that these are the wheels that hold your bike (and you) up off the pavement, so judge accordingly if you want to tackle the job or leave it to a pro. In my case, I had the local Honda shop double check my work since this was my first time doing a motorcycle wheel.

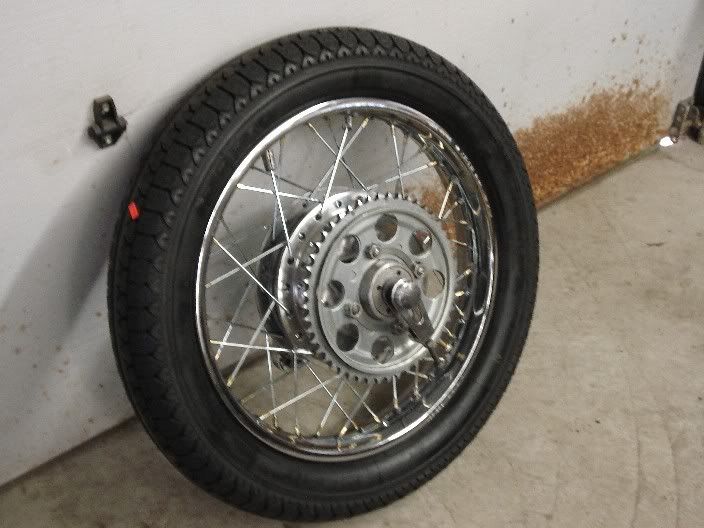
Here was the wheel before I started:

Missing: RimBefore-1.jpg

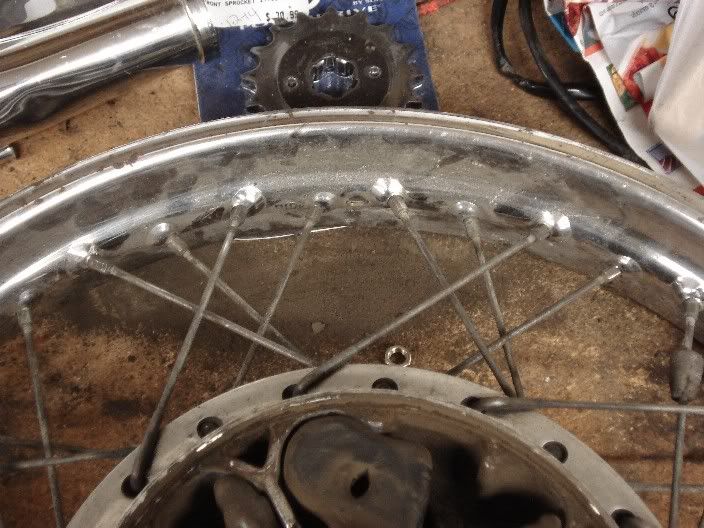
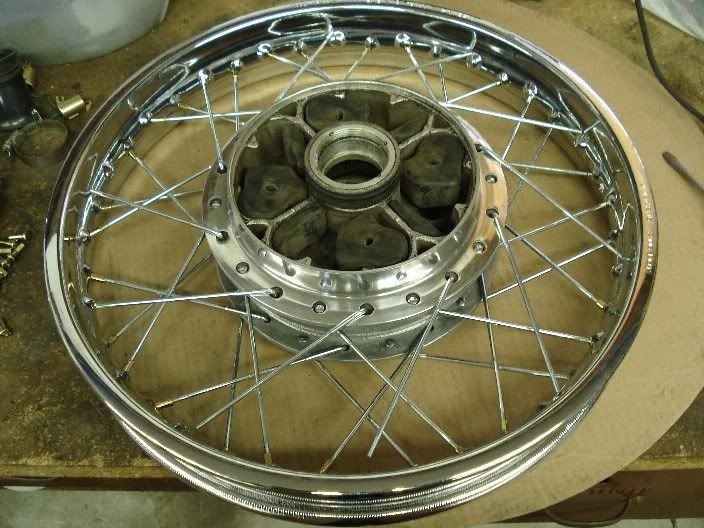
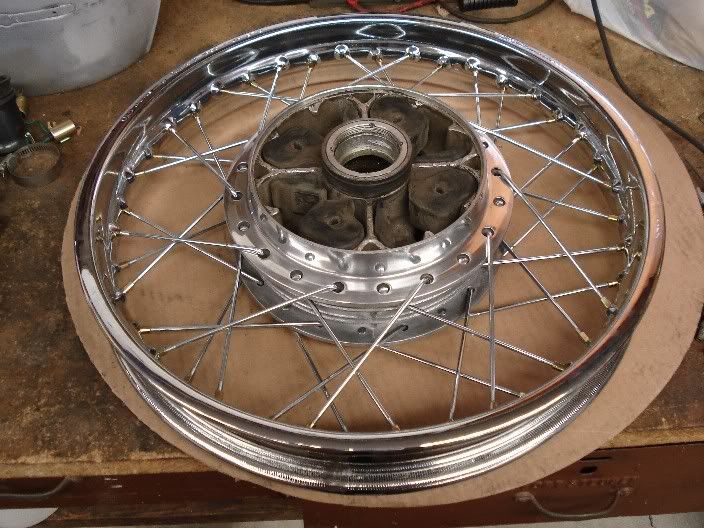
Before dismantling a spoked wheel with the intention of replacing the spokes, it's a good idea to take many detailed pictures of the wheel at different angles so you have a good feel for how the spokes are layed out. Here's one example pic, with the valve stem hole used as a reference point:


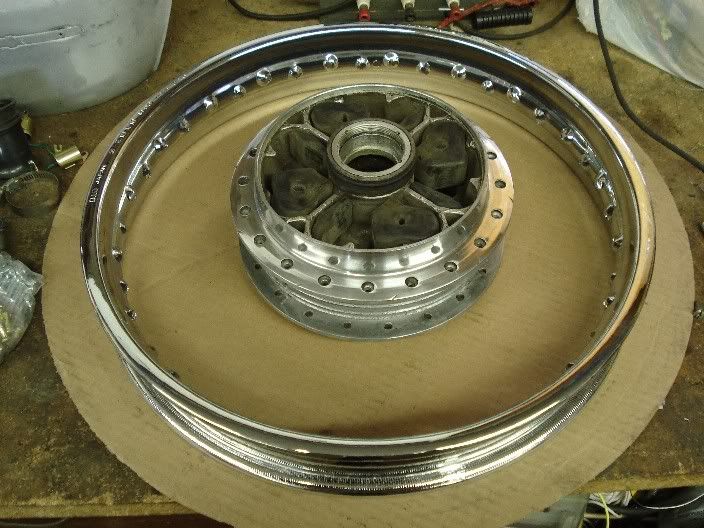
The wheel was taken apart, new rim and spokes purchased and the hub cleaned and polished. Gather the hub, spokes and rim on a spacious and well-lit work surface. Make sure your worktop won't scratch the new parts. The large cardboard disc that was strapped to my new rear tire worked nicely here. You will also need a flat screwdriver, a spoke wrench and a bottle of light oil. Lay out the parts in their general positions:


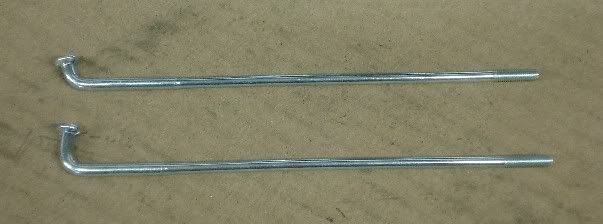
Now, take a look at your spokes. There are 2 different kinds (20 of each for a CB750 Rear in my case), and they are usually packed in separate bags. Note the difference. The spokes with a slight curve at the end are the inner spokes (pictured at the top), and the ones with a more pronounced hook are the outer ones (shown at the bottom):


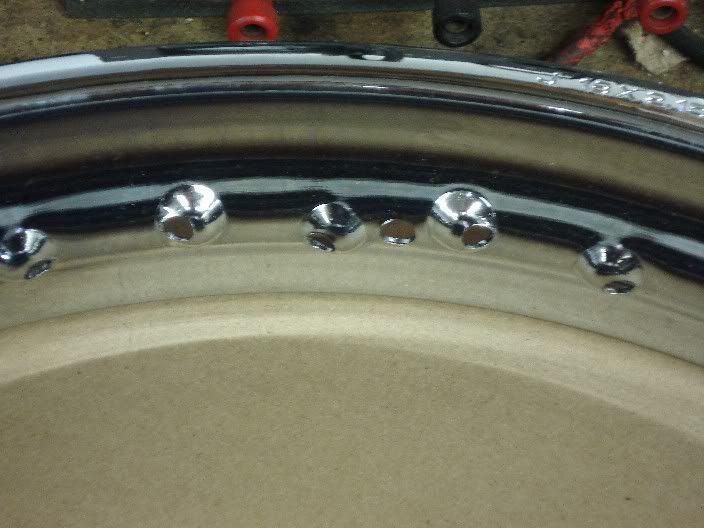
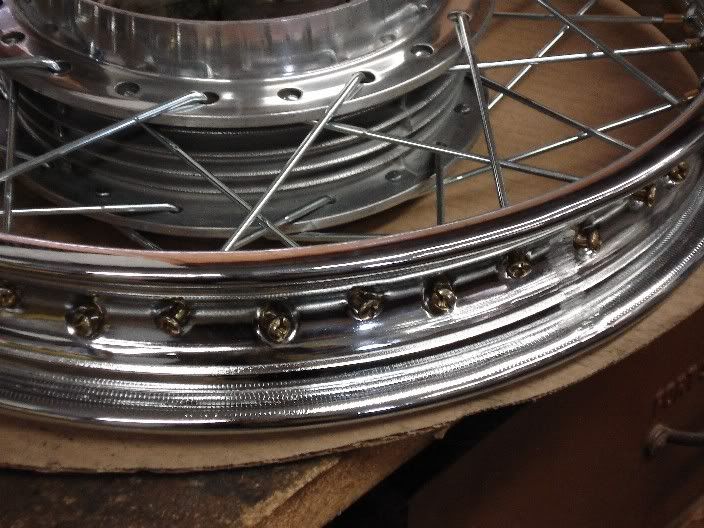
Also, take a close look at the rim. You will see that the spoke holes are angled either upward or downward, and to the left or right. This is important as this will dictate which spokes go in these holes. (More on this in a minute):


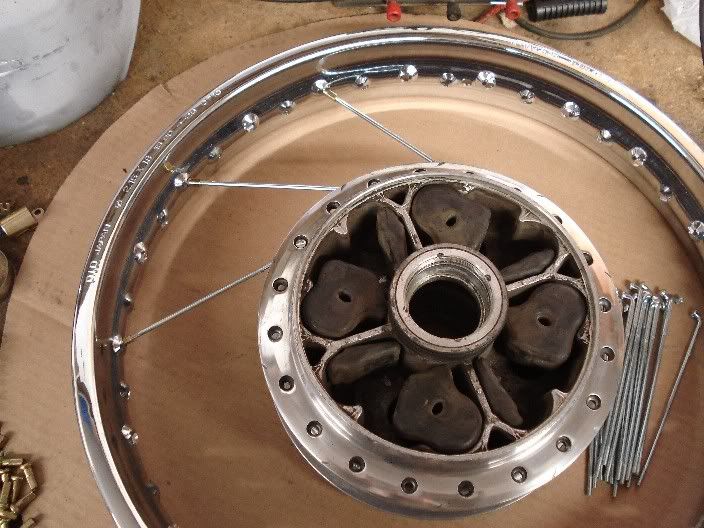
Let's get started. My hub had slight indents worn in it from the outer spokes, so this helped show the layout. Referencing your pictures you took before disassembly (or another wheel, if you have one), thread the first 10 inner spokes into the hub so the buttons on the end face towards the outer part of the hub. As seen in the "before" pictures, the inner spokes on the sprocket side angled to the left. Look at the holes in the rim and find one that is angled upwards and to the right (so the left-angled spoke will point right to it). Put a spoke through this hole, put a small drop of light oil on the tip of the threads and thread the spoke nipple on 4 turns. Now, the next spoke will fit into the fourth spoke hole in the rim. Here's a pic of the first few:


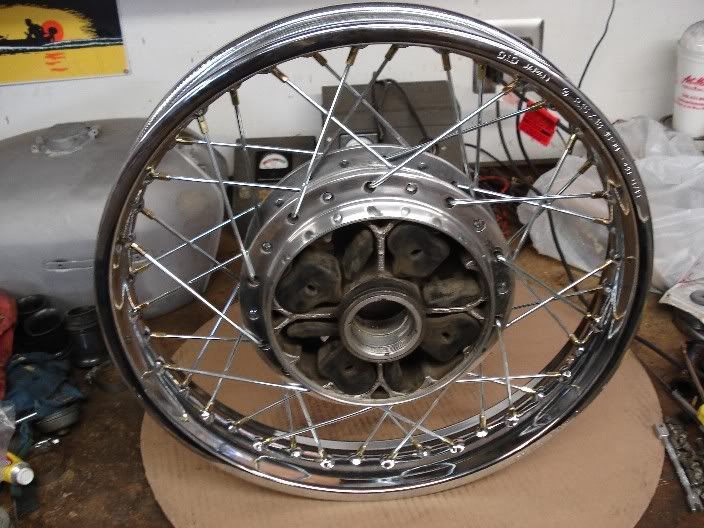
Repeat the process all the way around. When you complete the first set, it will look like this:


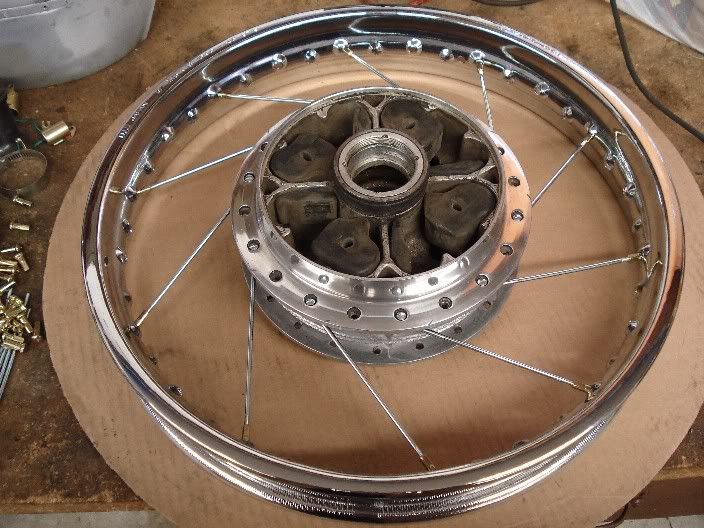
Now, flip the wheel over and do the next set of inner spokes. Once you get them threaded into the hub, make sure they are angled in the appropriate direction and overlapping the first set of spokes on top. This is important as once a few of these are attached to the rim, there won't be enough wiggle room to move the rest of the spokes into the correct position if they are under the existing spokes. See the pic:


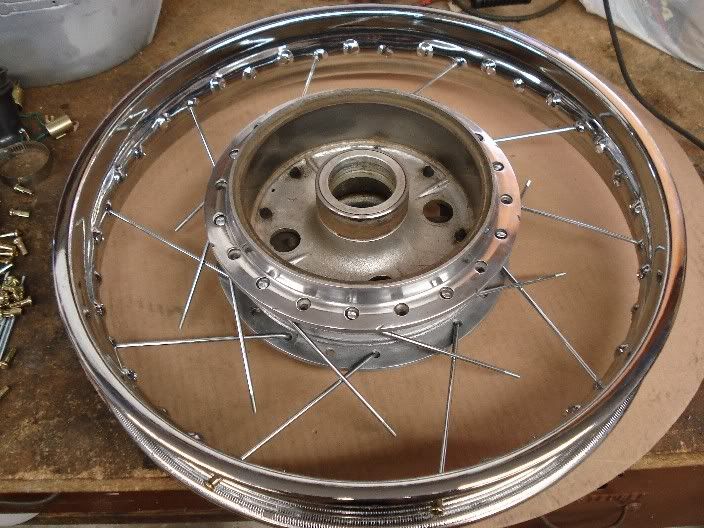
As with the first set of spokes, oil and thread on the spoke nipples 4 turns until you've got all the inner spokes on:


Now we move on to the outer spokes. With the wheel on the same side, thread the first set out outer spokes through the hub, with the buttons on the ends now facing inwards. This set of spokes will be angled in the opposite direction as their inner neighbors. Insert the spokes into the correct holes in the rim (those angled in the correct fashion) and install the spoke nipples as before:


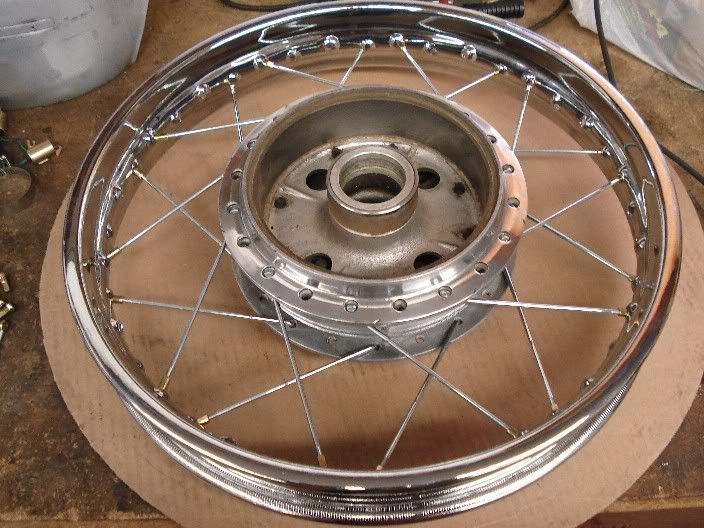
When completed, flip the wheel over and install the last set of spokes.


Yay! We've got all the spokes installed:


Now, there is still quite a bit of slack in the spokes. We needed this so we could wiggle the hub around in order to fit the ends of the spokes in their respective holes. Put a dab of oil on the head of each spoke nipple. This will aid in tightening.


Now we take out the slack. Starting at the valve stem hole, tighten each spoke nipple one at a time with a screwdriver a few turns. The key thing is to tighten each spoke the same number of turns. This will get us in the ballpark for truing the wheel later. Keep working all the way around the rim until the spokes are all just tight. Then, go around the wheel again with a spoke wrench and tighten each spoke a quarter turn. This will ready the wheel for truing and the final tensioning.


With the wheel bearings installed we can begin the more challenging part- truing the wheel!

First, a few general comments. This is a detail-oriented job. The more patient you are and strive for precision, the better the result will be. Also, while I found remounting the wheel on the swingarm satisfactory, if I was to do it again I'd either borrow or make a truing jig. While you can work on the runout OK, it's tricky to get an exact offset measurement, with the swingarm having tapered sides. Also, if you are working with an older wheel, check the wheel bearings before you start. If the wheel wiggles a bit due to loose bearings it will be very difficult to get accurate results.

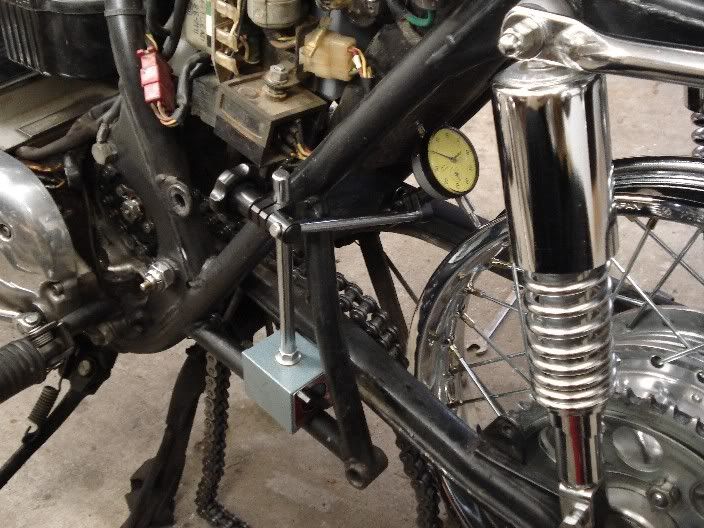
To start, assemble the rear axle, including the adjusters, spacers, wheel, brake plate, etc. as you would for final reassembly. Mount the assembled pieces on the swingarm and push the wheel all the way forward so that both sides of the axle are bottomed out in the adjustment slots. Tighten the axle down. You will need a dial indicator (or some form of pointer), a grease pencil or crayon, and a spoke wrench for the next steps.

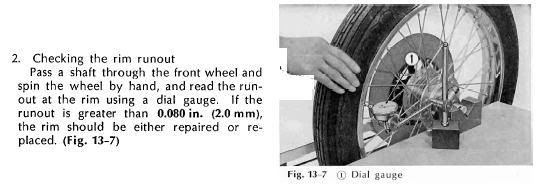
Give the wheel a spin and look for any runout and get a feel for how the wheel looks. Mine wobbled a bit, despite careful building. (No matter how carefully you build up a wheel, it will always require some tweaking.) We will be working on radial runout (referred to as "hop") and axial runout (called "wobble").

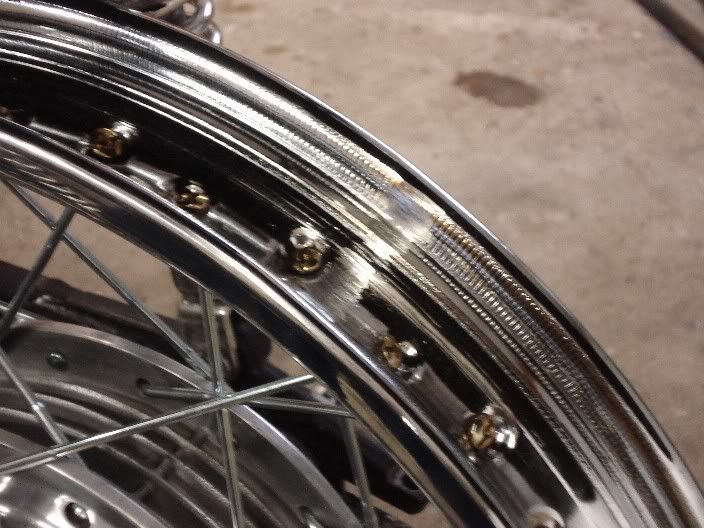
One thing to note before we measure the wheel. Note the area where the rim was welded together. There will be some surface irregularity here (you can feel it when you run your finger over it) from the grinding, etc. during the wheel's production. Ignore this spot:


First, check the axial runout. Setup the indicator so that you are measuring either the outer or inner edge of the rim:


Slowly rotate the wheel and watch the pointer. Note the lowest point and set the dial to "0" at that spot.


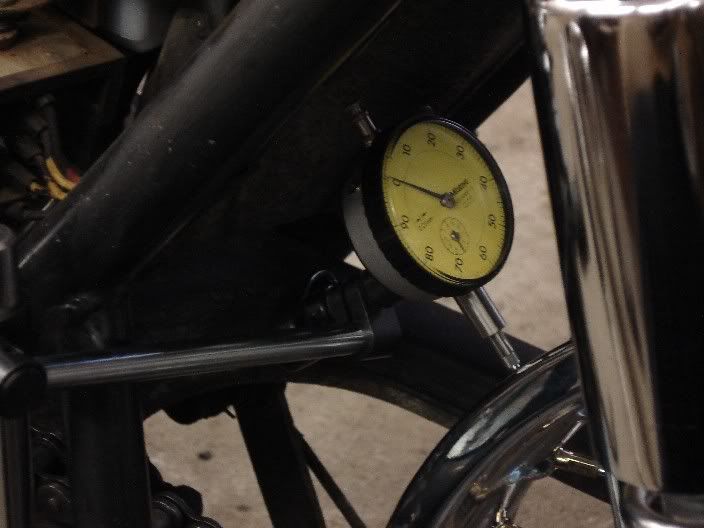
My dial indicator is in millimeters. I gave the wheel a turn and the overall axial runout was just under 2mm. No spec is given in the Honda CB750 Shop manual, but another text gave a general "rough" rule of 1mm, so we have some work to do. Note the highest spot on the rim with your grease pencil and tighten the spokes in this vicinity, going no farther than just under half of the total spokes on the wheel. Tighten the spokes in quarter-turn increments sequentially (meaning the spokes in order, regardless of which side of the hub they go to as the goal is to get even pulling on both sides), rolling the wheel around between each quarter-turn pass to check the progress. If the wheel is showing improvement but the spokes on the high side are getting very tight, proceed to loosen the low-side spokes, again in quarter-turn increments. Keep repeating the "tighten on high, loosen on low" mantra until you cannot get the radial runout any better. This is something that as you go you will get a feel for it, but at first the progress will seem slow. I got my radial runout to just under 0.5mm.

Now, onto axial runout. Setup the dial indicator on the side of the rim:


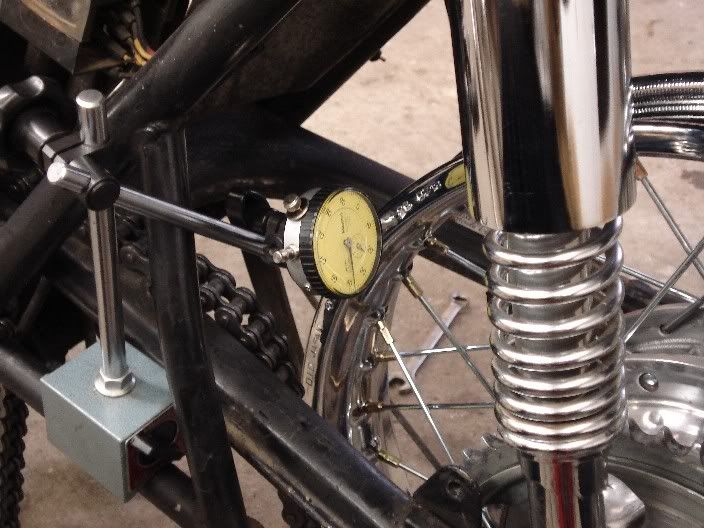
Wipe off the grease pencil marks you made during the previous step and spin the wheel slowly, noting the high and low areas. Zero out the indicator at the low spot. My wheel read 2.5mm, with the Honda spec being 2mm max:


The tighten/loosen routine will be employed here as well, but a bit differently. We will focus on which sides of the hub the spokes are on, as the ones we tighten will pull the rim closer to their respective sides. On the low side, for example, you will work on the 4 or 5 spokes in the lowest spot. Tighten the ones on the side you are measuring from a quarter turn and loosen the spokes going to the opposite side a quarter turn. This allows the rim to move a bit while keeping even tension in that area so we don't mess up the radial runout we just worked so hard to perfect. Do the opposite on the high spot (so the spokes on the other side will pull the rim away from the indicator slightly) and remeasure. I was shooting for 0.5mm or less as another publication gave this is the general rule for wheels to be run over 90 MPH. I don't plan on ever going that fast, but the CB750's top rated speed was 125 MPH, so why not aim high?    I find it odd that the shop manual listed a bigger tolerance. The closer you can get the wheel to running true, the better it will be.

When you are satisfied with the axial runout, go back and double check the radial:


When both the radial and axial runouts check out, go over each spoke and tap it with your wrench. They should all make a nice, clear "ping" sound. If you come across one that makes a "thunk" sound, tighten it up until it pings. Don't worry if all the spokes aren't tuned to the exact same pitch, but they will be fairly close. My wheel plays a bit of a tune, but all the spokes are good and tight.

A word about rim offset. From what I could tell, The rim was evenly spaced in the middle of the swingarm opening. With no solid measuring point it is impossible to get it measured down to the 10th of a millimeter, but just measuring with a ruler indicated it was very close. If you need to pull the entire rim one way, the procedure is just like adjusting the axial runout, except you'd snug up all the spokes on the side you want to pull towards, and subsequently loosen the ones on the other side. As always remeasure after every pass with the wrench! (Refer to the "Thoughts of HondaMan" FAQ for more info here regarding the 750's front wheel offset.)

I took the wheel in to the local Honda shop for the tire mounting, as I was fitting a tubeless-type tire (which are a bear to mount by hand!) and I didn't want to bark up my nice new rim! I'll leave it to the guys with the tire machine.

So, that's my experience. It's a bit hard to describe, as you have to work with it a bit to get the feel for it. The nice (and sometimes frustrating) thing about it is if you mess it up really badly, you can just loosen all the spokes up and start over again. I think I will still ask if the dealer can check them over, just as a double check since this was my first time with this. No publications list any tension spec for the spokes, they all just say they should ring when struck.

Here's the final product after tire mounting and balancing:


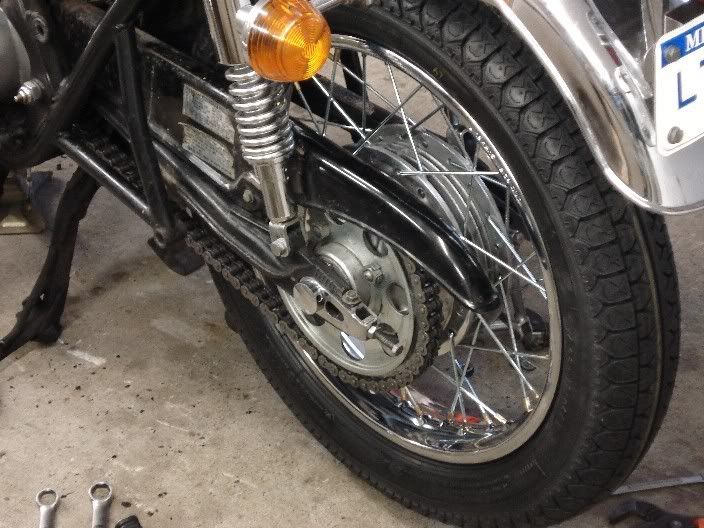
And back on the bike:


One last item. The dealer recommended I re-check the spokes after 100 miles or so after the spokes settle in, just in case any may have loosened a bit. They checked the wheel over and everything was OK. Time for a ride!
« Last Edit: April 17, 2009, 05:19:23 am by Glenn Stauffer »
We'll all be someone else's PO some day.

Offline Bob Wessner

  • "Carbs Suck!"
  • Really Old Timer ...
  • *******
  • Posts: 10,079
Re: Wheels & Tires
« Reply #7 on: March 15, 2008, 02:09:57 pm »
Submitted by Heffay.

SUBJECT: Wheel Lacing

1. Reasons for repairing or replacing wheels
 A.   Hub damage- broken or worn brake lining
 B.   Bent rim
 C.   Damaged spokes
2. Wheel design- 2 major categories
 A.   Cast or mag
  1)   Usually tubeless type tires (will indicate on rim)
  2)   Construction materials used
   a)   Aluminum (most common)
   b)   Magnesium
   c)   Carbon fiber
 B.   Spoke
  1)   Usually tube type.  There are tubeless (spokes are hung on flange from rim instead of being inside)
  2)   3 parts
   a)   Rim- steel or aluminum
   b)   Hub
   c)   Spokes
3. Hub designs
 A.   Equal flange: Hub flanges have equal diameter
  1)   Spokes are equal distance from the rim or both sides
 B.   Conical Flange: Hub flanges have very different diameters
  1)   Lighter design than equal flange
  2)   Spokes are different length from left to right side
 C.   Offset flange: Hub flanges have slightly different diameters
  1)   Small flange usually reinforced to support drive unit or rear brake
4. Spoke types
 A.   Inners: usually have head angles less than 90 degrees
 B.   Outers: usually have head angles more than 90 degrees


5. Like spokes
 A.   4 groups of like spokes
  1)   Left side inners
  2)   Left side outers
  3)   Right side inners
  4)   Left side outers
 B.   Usually 3 spokes in between like spokes on a typical rim
6. Key spokes
 A.   Any 2 spokes used to determine lacing pattern of a wheel
 B.   Usually 1 spoke on each side of the hub
7. Finding key spokes
 A.   Place rim flat on a table w/ the valve stem hole at 6-o-clock
 B.   The 1st spoke to the left of the stem hole should be an inner
  1)   This is the 1st key spoke
 C.   Follow the spoke up to the hub, it should be attached to the hub flange (upper-side)
 D.   Drop straight down across the hub to the lower hub flange
 E.   Select the 1st spoke to the right, this should be an inner spoke on the lower flange
  1)   This is the 2nd key spoke
 F.   Follow the 2nd key spoke out to the rim
 G.   Count the holes (or spokes) between the key spokes on the rim to determine the lacing pattern
  1)   2nd # in lacing pattern represents the # of holes or spokes between key spokes
  2)   Examples
   a)   3-10
   b)   3-6
8. Assembling the wheel
 A.   Look for bedding marks on the hub
  1)   Wear marks in the hub flange or spoke holes
 B.   Place one key spoke (usually an inner) into the upper flange
 C.   Drop straight down to the lower hub flange
  1)   Place the 2nd key spoke in the 1st hole to the right
 D.   Install remaining inner spokes into the flange using every other hole
 E.   Install key spokes in the appropriate holes on the rim
 F.   Lace the rest of the inner spokes to the rim leaving 3 holes between like spokes
 G.   Place the remaining spokes into the hub
We'll all be someone else's PO some day.

Offline SteveD CB500F

  • Global Moderator
  • Old Timer
  • *****
  • Posts: 4,553
  • Ride on the Steel Breeze...
    • TVAM
Can I fit Comstar Wheels to my CB?
« Reply #8 on: October 18, 2008, 10:42:33 am »
Yes, but they are not direct replacements for the standard spoked wheels:

BryanJ says:

Front----Only as complete front end
Rear-----Only with specially machined parts (spacers etc)


Comstars are very different from wire wheels and to be honest 'orrible wheels if any work is needed

Any offers from anyone who has done this?  With pictures?
SOHC4 Member #2393
2015 Tiger 800 XRT
1971 CB500K0 (US Model)

Offline SteveD CB500F

  • Global Moderator
  • Old Timer
  • *****
  • Posts: 4,553
  • Ride on the Steel Breeze...
    • TVAM
Lester Wheels 101
« Reply #9 on: December 01, 2010, 03:30:47 am »
From Scott (srook)

Lester Wheels:

For the CB750K and CB500/550K


Front:
The fronts are interchangeable as long as they have the 6 bolt pattern for the disk.  In fact the same front wheel can be used for the CB750K, CB500K, CB550K, and GL1000 (possibly other Hondas w/6 bolt disc).

Rear drum:
The rears are different between the 750 and 500/550.  Inside the brake drum is a hub number. The hub number for the CB750K is 20200. The hub number for the CB500 series is 20100.  Both came in either 16" or 18" with possibly a wide (3.00) 18" as well.  The major differences in the two are the sprocket carriers.  If you have the 20200 and want to use it on a CB500K then you need to get the sprocket carrier for the CB750K and vice versa.

For the CB750F

Rear disk:
I am not sure if their were any changes in the hubs of the CB750F models.  I think some models had a 530 chain (75-76) and some had a 630 chain (77-78)?  Either way I believe the differences were in the sprocket carrier itself and not the hub.  The Lester wheel for these bikes has a hub number of 20400.  These came in either 16" or 18" with possibly a wide (3.00) 18" as well.

Tube or Tubeless?
Lesters can be run tubeless.  I know they don't have the bead retention grooves like modern tubeless rims do, but Lester marketed their later rims as tubeless and their seemed to be no change to the bead retention area.  Some wheels will have a T or TL stamped into one of the spokes.  The TL means tubeless and looks the same as the wheels only marked with a T.

What do the stamped numbers and letters mean in the spokes?
Most Lesters have the size of the rim, the date the rim was made, and either a T or TL stamped into one of the spokes.  I have never seen a Lester wheel with the part number stamped into the spokes, in fact I have never seen a Lester wheel with the part number stamped anywhere on the wheel.  The part numbers were a variation on the hub numbers.
A typical stamp looks like this
T 19x2.15 TL DOT
LESTER 11 09 76

How many different types of Lester Wheel were there?
The original Lester Wheels came in 2 different finishes, standard and hilighted.
Standard:


Hilighted


There was also a 2nd generation Lester Wheel that had reliefs cut into the outer rim.
2nd generation


« Last Edit: December 01, 2010, 03:32:46 am by SteveD CB500F »
SOHC4 Member #2393
2015 Tiger 800 XRT
1971 CB500K0 (US Model)