Author Topic: Installing the Cycle X "Power Up Kit 2"  (Read 14210 times)

0 Members and 1 Guest are viewing this topic.

Offline MJL

  • Don't listen to me, I'm no
  • Expert
  • ****
  • Posts: 1,162
  • Oh hell, what's one more bike?
Installing the Cycle X "Power Up Kit 2"
« on: August 25, 2009, 02:06:07 AM »
On a whim I thought I'd like to see how my bike sounds with no baffles in the pipes, so I yanked mangled them out. It sounded good at idle, burbeley and echoey, kinda like being surrounded by Harleys. It was also amazingly annoyingly deafeningly loud. Now, I've had this idea for many years to use a glasspack type muffler on a bike, but with a flat end so it doesn't look like a glasspack. I cut down my existing pipes, lopped off the inlet and outlet of the muffler, and chopped it in half. I welded it on and it sounded a little quieter, but I still needed the ends capped off. I rode over to a friends house (a mile maybe) to make the parts and some of the fiberglass had fallen out. I looked and couldn't find it. I made the parts and never put them in.  After a few weeks I got tired of it as the empty mufflers weren't any quieter. I looked on Cycle X's website and saw several options, one being the used $200 pipes and the other being the tri-y pipes, which I had wanted. I also wanted to try the power-arc ignition, and what the heck, lets throw a cam in it for $100 more.   I got on the phone to Cycle X and ordered the power up kit 2.  the next day I cut the one piece of muffler fiberglass I had and cut in in half, putting one piece in each muffler and capping them off with the parts I made weeks before. That made a huge difference, if I had done that earlier I probably would not have ordered new exhaust.

Backstory over.

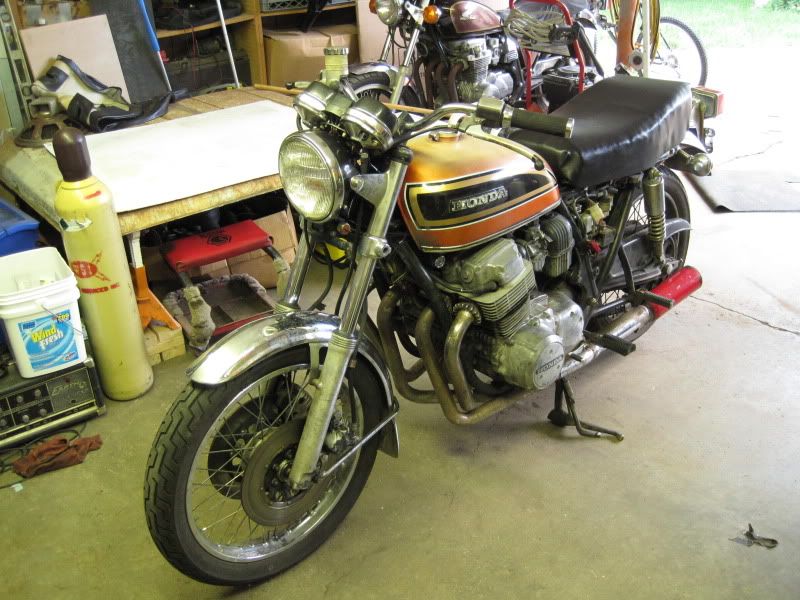
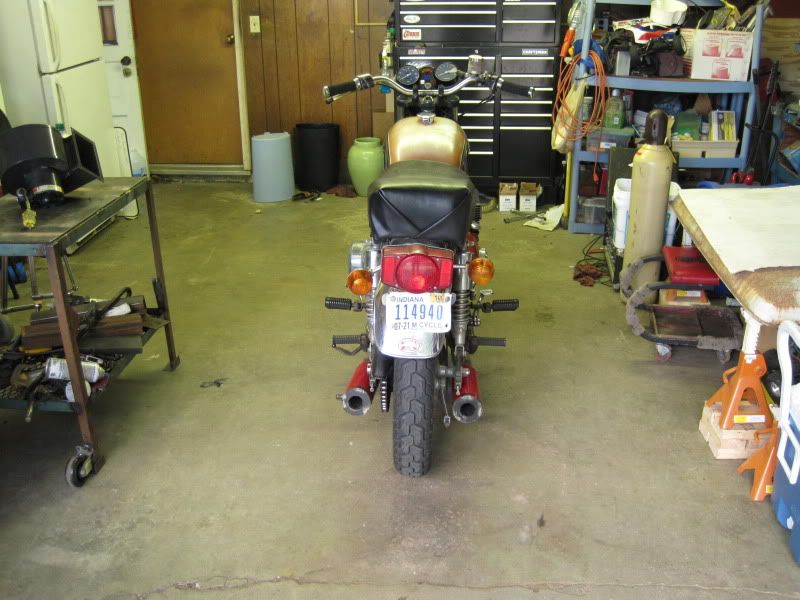
The victim in the lab.


A before video of the exhaust for comparison.


I backed into it and knocked it over earlier this summer so everything in the back end is bent and crooked.


I hope I'm not required to post pics of taking it apart. I'm sure you've seen stripped down frames before.

Once I got the motor out with the "lay it over" method I had my brother help lift it to my work table. I put some 2.5 inch (63.5 mm to everyone outside the US) square steel tube under the motor where the motor mount bolts go through. It's nice and flat and holds the motor solid. My brother took the initiative to clamp it down, I'm glad he did because I put some force to it and it never moved.  The valve cover gave me a little trouble, but I got by with a phillips screwdriver bit and a hammer. The bit went in the screw heads and I hit them with the hammer to knock them loose. It worked pretty good. the little valve adjuster covers were something else as they seemed to be on very tight. A 6 point 17mm socket got them out without too much fuss.  Now the motor is on the slab topless.


I wasn't sure just which bolt had to come out to get the cam out, and it turns out that all of them do. So, a 10mm socket and then an 8mm socket got the rockers out and the cam free. I made sure to keep everything in the order it came out. (except for some of the bolts) Looked nice and clean.
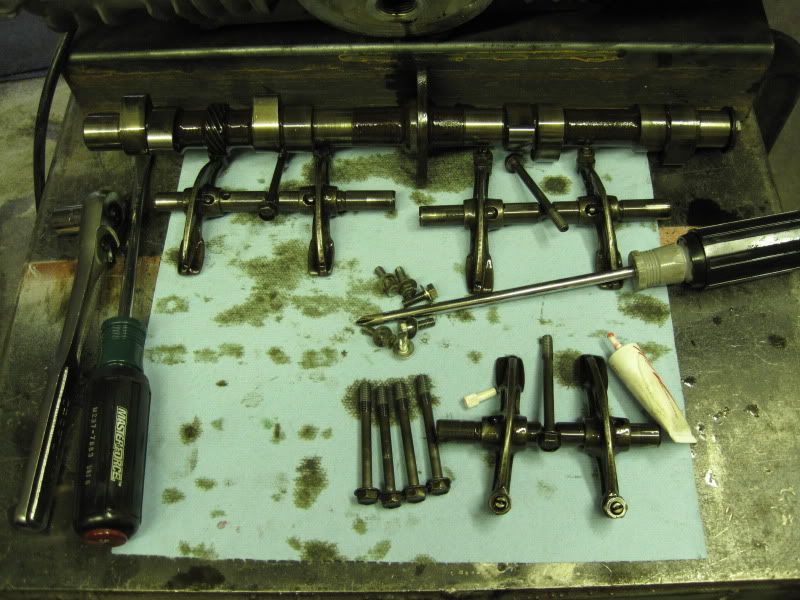


I should buy a cheap camera so I don't get my good Canon greasy.

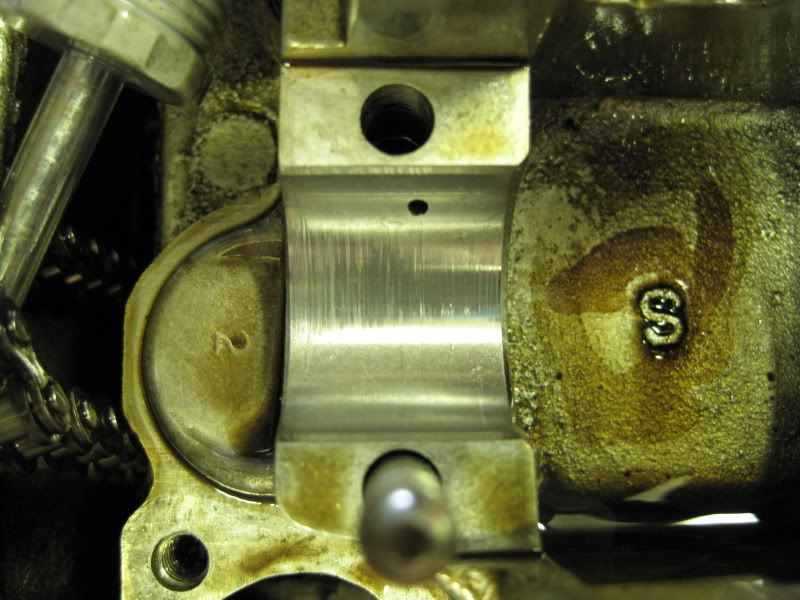
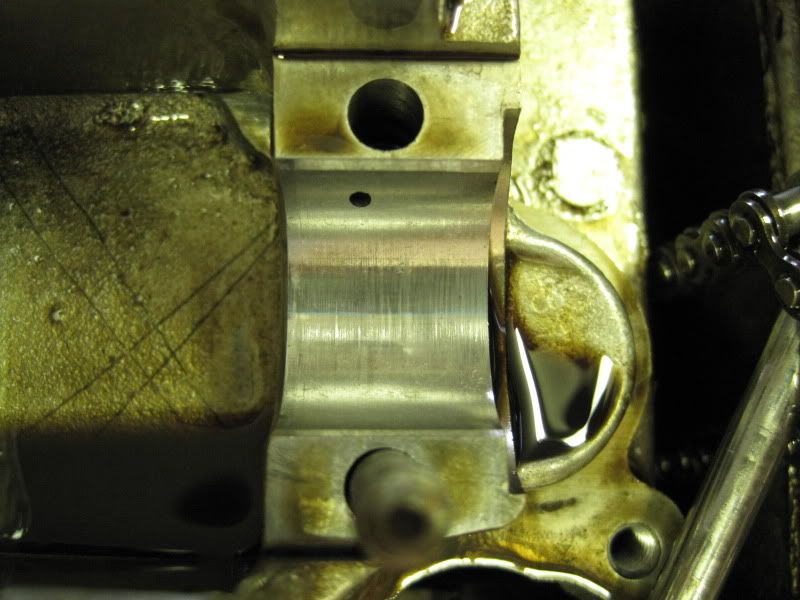
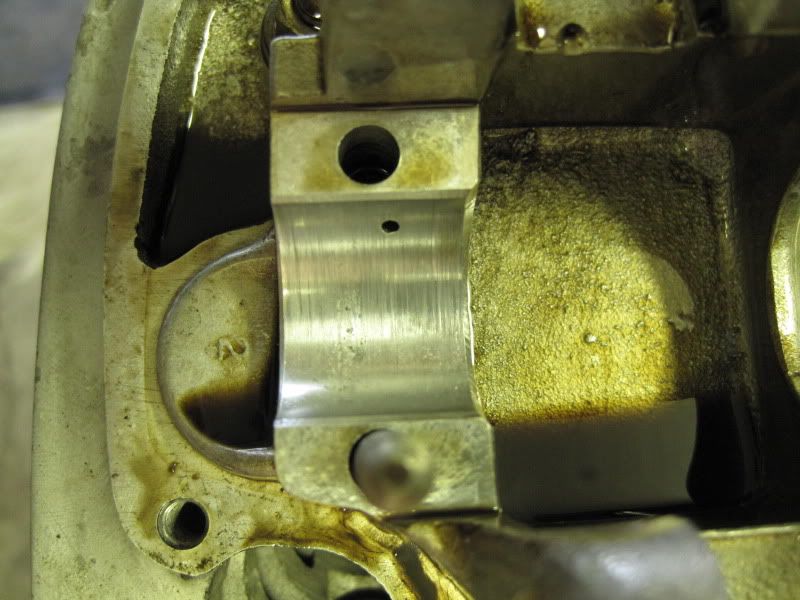
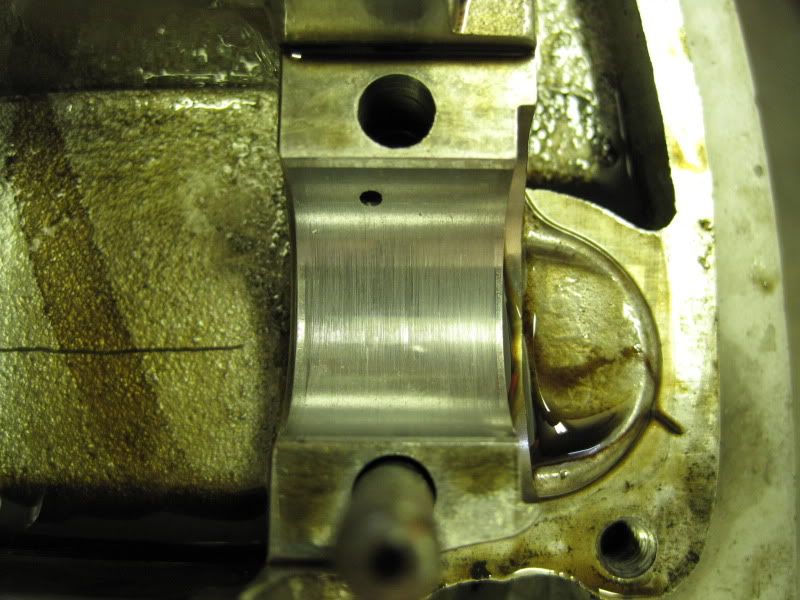
Here are my cam "bearings", from 1 to 4.


Once the cam was in I decided to put the rockers on before I set the timing on the cam.  I found out that doesn't work. My exhaust valves were hitting the pistons.  Disappointed, I posted here and one of the responses was about cam timing. I went back out, pulled all the rockers and set the timing. There was no problem after that.

Here is where the magical ass rape fairy came to stay for awhile.

I looked at the manual on Honda4fun and it said to torque the cam tower bolts to... whatever it was equaled about 110 inch-pounds. Once those bolts were torqued (which didn't seem like enough) I went to torque the little rocker shaft bolts. There is no torque spec for those, so I tried to get to the 110 inch pounds like the others. I broke one, twisted the head right off.
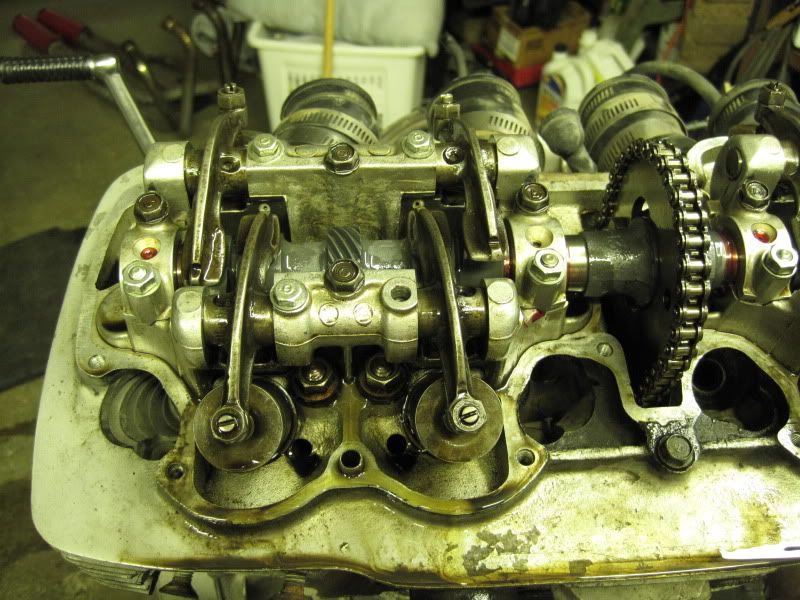


I figured since I still have one in there, and the broken part isn't coming out it would be ok.

Once the rockers were in I set valve lash, and then put the cover on. I had just gotten the cover on (including valve adjuster covers)when I realized I had forgotten the thrust washer on the end of the cam. So, off came the cover, and in the process I tore the new gasket.  >:(  Now, thrust washer on, cover on, torn gasket patched with rtv, and what do I see? A cam sprocket screw. [Ralphie Parker]Fuuuuuuuuudge.[/Ralphie]  Once again off it comes. How many screws are there? A metric #$%* ton it seems when you put them in and out 3 times a night.


While the motor is sitting on a table I thought it would be a good idea to unbolt the spigots since the tri-y pipes don't use them. 7 out of 8 screws came out, the eighth broke my philips bit.  I'll have to borrow an impact driver.

« Last Edit: August 25, 2009, 02:05:28 PM by MJL »
No matter how fast or how far I rode, I couldn't leave her memory behind.

Offline MJL

  • Don't listen to me, I'm no
  • Expert
  • ****
  • Posts: 1,162
  • Oh hell, what's one more bike?
Re: Installing the Cycle X "Power Up Kit 2"
« Reply #1 on: August 25, 2009, 02:27:51 AM »
Power-Arc Ignition


I don't want to put this in and dent the points cover by putting the motor on it's side to get it back in the frame, but it may be easier to run the wires with the motor out and accessible. Anyway, I kinda mocked it up tonight so I know how it goes together. The instructions leave a lot to be desired, so I'll kinda make this a tutorial as I see how it seems to go together.

Turn the crank to the T mark on 1-4.

Remove the 10mm nut from the end of the crank, (It's a big nut with a smaller one inside) then the points plate. You'll have this.


I wasted time trying to pull the springs and weights off, when I could have just pulled the whole thing off. You are left with a little shaft. (no jokes, please. ;D)


Put the aluminum spacer on with the counter bore out.


Take your electro unit and the wheel and place them together like such.


Now stick them on the end of the crankshaft. You have to do the two of them together as you can't put the wheel on after the electro unit.


Now there is this little booger that goes on with the protrusion on the inside to hold the wheel.


Then you have a flat washer, lockwasher, and nut on the end and the 3 "points plate" screws. Don't tighten the encoder wheel down yet, you need to be able to turn it on the shaft to set it to TDC.


One thing I'm not fond of is that the wheel isn't locked to the crankshaft like the points cam was, but I am excited to see how it works.


:edit:  I had a pm asking how this is wired and timed, but I don't have my paperwork handy so here goes...

 There is a red, black and white wires that go to the coil plug, black to black, white to white, red to red AND the coil power also. The blue wire and the brown wire are for changing the advance curve. There is some talk about it elsewhere in this thread.

http://www.powerarc.com/ids/idshelp/vp2cyl4.htm
http://www.powerarc.com/ids/idshelp/installation.htm

To time it, unplug the coil plug and loosen the nut that holds the encoder wheel. Keep it finger tight so that you can turn the wheel on the shaft and it stays where you put it. Now turn the bike on and rotate the encoder wheel opposite normal direction. When the TDC line goes under the sensor the TDC light will go on. Now carefully tighten that nut and you are done.

Just a reminder, but the engine should be at TDC when you take the points off and install this.

Plug wires: the instructions say you must use carbon core wires and resistor plugs, otherwise you risk damaging the ignition module.
« Last Edit: April 06, 2010, 06:14:36 PM by MJL »
No matter how fast or how far I rode, I couldn't leave her memory behind.

Offline 750four

  • Enthusiast
  • **
  • Posts: 104
  • Bomb's away!!!
Re: Installing the Cycle X "Power Up Kit 2"
« Reply #2 on: August 25, 2009, 07:29:22 AM »
what cam did you get, duration and lift? Didi you replace the springs also? I've been wondering what a bigger cam like a 280 or 290 duration would sound like. Sound clip please. Looks like it's coming along pretty nice.

Offline cafeconleche

  • Enthusiast
  • **
  • Posts: 189
Re: Installing the Cycle X "Power Up Kit 2"
« Reply #3 on: August 25, 2009, 07:42:43 AM »
sweet!  I plan to do something similar over the winter.  good work

Offline MCRider

  • Such is the life of a
  • Really Old Timer ...
  • *******
  • Posts: 14,376
  • Today's Lesson: One good turn deserves another.
Re: Installing the Cycle X "Power Up Kit 2"
« Reply #4 on: August 25, 2009, 08:07:30 AM »
what cam did you get, duration and lift? Didi you replace the springs also? I've been wondering what a bigger cam like a 280 or 290 duration would sound like. Sound clip please. Looks like it's coming along pretty nice.
If I may: MJL disclosed in the other thread he got the 41a. I got the 41 for my project:
http://www.webcamshafts.com/index_blank.html?pages/vehicle_search.html

360 lift for both; 270 duration for the 41 and 280 for the 41a. Both should work with stock springs per WebCam.  Essentially you'll have an engine a bit hotter than a K0. Anymore than that and you're likely to slip backwards without porting the head. Stock is roughly 315 lift and 220 duration +/- and really depends on the cam as they were continually detuned over time. Until you get to the Fs.

I have a cam from a K0/K1 and you can see the difference from the 41, laid up against each other.

PS: I also have a cam from a K4+ and the dif between it and the K0/K1 is obvious to the eye as well.
« Last Edit: August 25, 2009, 10:40:20 AM by MCRider »
Ride Safe:
Ron
1988 NT650 HawkGT;  1978 CB400 Hawk;  1975 CB750F -Free Bird; 1968 CB77 Super Hawk -Ticker;  Phaedrus 1972 CB750K2- Build Thread
"Sometimes the light's all shining on me, other times I can barely see, lately it appears to me, what a long, strange trip its been."

Offline MJL

  • Don't listen to me, I'm no
  • Expert
  • ****
  • Posts: 1,162
  • Oh hell, what's one more bike?
Re: Installing the Cycle X "Power Up Kit 2"
« Reply #5 on: August 25, 2009, 11:42:21 AM »
Yeah, look up 41a on the webcams site.

I was up until 6 am working on the bike and posting. I woke up at 10  :(  and ran around collecting parts and tools.  Now I'm in the garage getting ready to throw the motor back in.
No matter how fast or how far I rode, I couldn't leave her memory behind.

Offline bucky katt

  • Old Timer
  • ******
  • Posts: 4,564
  • i am a pastafarian!
    • facebook
Re: Installing the Cycle X "Power Up Kit 2"
« Reply #6 on: August 25, 2009, 01:02:01 PM »
i believe it was HondaMan that told me to leave those 8mm bolts OUT when reassembling the rocker assembly. it allows the shafts to rotate, creating a more even wear pattern.
Of all God's creatures there is only one that cannot be made the slave of the lash. That one is the cat. If man could be crossed with the cat it would improve man, but it would deteriorate the cat.
Mark Twain - Notebook, 1894

Offline Sam Green Racing

  • Really Old Timer ...
  • *******
  • Posts: 16,069
  • I REALLY? hate black rims.
Re: Installing the Cycle X "Power Up Kit 2"
« Reply #7 on: August 25, 2009, 02:32:01 PM »
i believe it was HondaMan that told me to leave those 8mm bolts OUT when reassembling the rocker assembly. it allows the shafts to rotate, creating a more even wear pattern.

That's only if the shafts are in perfect condition in the first place.

Sam. ;)
C95 sprint bike.
CB95 hybrid race bike
CB95 race bike
CB92
RS 175. sprint/land speed bike
JMR Racing CB750A street ET drag bike

Offline MJL

  • Don't listen to me, I'm no
  • Expert
  • ****
  • Posts: 1,162
  • Oh hell, what's one more bike?
Re: Installing the Cycle X "Power Up Kit 2"
« Reply #8 on: August 25, 2009, 03:30:36 PM »
The coils that come with this are not shaped like the stockers, and that presents a problem. On the website it shows it behind the left sidecover, but in order to do that you have to move the electrics out of the way.  They will fit where the original coils go, but I'd have to weld something to the frame to mount them to. In the meantime I zip tied them.  I'm just wondering if the towers are too close to the tank. I don't want them to arc and blow me up, but with the tank being insulated among other things I don't think it'll be a problem.


I wonder if I was supposed to get plug wires with this like the pictures show...
No matter how fast or how far I rode, I couldn't leave her memory behind.

Offline Pinhead

  • Master
  • *****
  • Posts: 1,818
  • 1979 CB652-ST
Re: Installing the Cycle X "Power Up Kit 2"
« Reply #9 on: August 25, 2009, 04:48:24 PM »
I'll be really interested to see how all of this goes together; I've been wondering about the power arc ignition for a while now. :)
Doug

Click --> Cheap Regulator/Rectifier for any of Honda's 3-phase charging systems (all SOHC4's).

GM HEI Ignition Conversion

Quote from: TwoTired
By the way, I'm going for the tinfoil pants...so they can't read my private thoughts.
:D

Offline MJL

  • Don't listen to me, I'm no
  • Expert
  • ****
  • Posts: 1,162
  • Oh hell, what's one more bike?
Re: Installing the Cycle X "Power Up Kit 2"
« Reply #10 on: August 25, 2009, 07:38:31 PM »
I have the ignition timing set and I'm working on the exhaust right now.   Can't wait to ride this.


No matter how fast or how far I rode, I couldn't leave her memory behind.

jpswino

  • Guest
Re: Installing the Cycle X "Power Up Kit 2"
« Reply #11 on: August 25, 2009, 07:58:58 PM »
I've got one of the power arc ignitions as well. Its on a build going together so I have not used it yet. Can't wait to see if you like it. I was at Ken's place and he gave me a demo on how the system works and the bypass options that are available using this system. How do you plan to wire that part in? Are you going to use toggle switches?

Offline MJL

  • Don't listen to me, I'm no
  • Expert
  • ****
  • Posts: 1,162
  • Oh hell, what's one more bike?
Re: Installing the Cycle X "Power Up Kit 2"
« Reply #12 on: August 25, 2009, 09:38:14 PM »
Did you get plug wires or just new caps? I just got caps. Since you have to use carbon core plug wires, I cut down some old automotive plug wires and put the caps on them.

Right now I'm using the basic ignition curve, but I think I will add some switches somewhere and try the other curves. I wish it was one of the other models with the programmable mode.

The exhaust is quieter and sounds better than I thought. It was a PITA to put on, get a helper or you'll be running from side to side trying to get it lined up and in. It tucks up nice and tight though.  My only issue is that the center stand comes up high enough to hit the chain. I did get a metal piece to hold the stand down, but IMHO it is too far down and drags a lot, so I'll either bend it up some or take the stand off. Video in the morning.

What's the right way to break in a cam?

I did take it for a ride around the block tonight, and wasn't that impressed. Maybe the cam timing is off some, or the jetting is lean, or the  spark is retarded, I don't know. The cam didn't have all the marks it was supposed to have for setting it up, so I did the best I could.  I'll take it for another ride tonight, get the engine nice and hot and see how it runs.
No matter how fast or how far I rode, I couldn't leave her memory behind.

Offline Zaipai

  • I am getting closer to being an
  • Old Timer
  • ******
  • Posts: 3,400
    • My Home page
Re: Installing the Cycle X "Power Up Kit 2"
« Reply #13 on: August 25, 2009, 09:55:54 PM »
Cant wait to hear it. Are those cut off glass packs?
Its my Avatar..

75 CB550F  | 


Offline Jerry Rxman Griffin aka MuthaF'er

  • This MuthaF'er is getting to be a
  • Really Old Timer ...
  • *******
  • Posts: 14,930
  • Bought her new 4/75
Re: Installing the Cycle X "Power Up Kit 2"
« Reply #14 on: August 25, 2009, 10:16:34 PM »
If your cam is getting lubrication it is broken in. Get your timing set correctly and the valves adjusted properly.
As of today 3/13/2012 my original owner 75 CB750F has made it through 3 wives, er EX-wives. Free at last.  ;-)

Offline MJL

  • Don't listen to me, I'm no
  • Expert
  • ****
  • Posts: 1,162
  • Oh hell, what's one more bike?
Re: Installing the Cycle X "Power Up Kit 2"
« Reply #15 on: August 25, 2009, 11:45:36 PM »
Cant wait to hear it. Are those cut off glass packs?
Yes. I covered it in the top of the first post.

Quote
If your cam is getting lubrication it is broken in. Get your timing set correctly and the valves adjusted properly.

The stock cam has a line in the end of it used to set timing. The new cam did not have that.  It did have the notch and I used that to set cam timing. Ignition timing was set as instructed in the Power Arc instructions.
No matter how fast or how far I rode, I couldn't leave her memory behind.

Offline KB02

  • Take it easy there, Sonny, I'm an
  • Old Timer
  • ******
  • Posts: 3,760
Re: Installing the Cycle X "Power Up Kit 2"
« Reply #16 on: August 26, 2009, 04:35:33 AM »
I got the same ignition kit from Cycle-X. Mine did not come with the wires either. I bought some generic plug wires at the auto store as they have to be cut to length anyway.

Here is a pick of my mounting plate. I got one of Gordon's frame kits and just used the bolts to mount it. I'm not really happy with it, but it should work for now. There will be something else created in the future. There's plenty of room under the tank.
1978 CB750K Project
2000 Ducati ST2
...and a pedal bike

Join the AMA today!!

My project thread Part I: K8 Project "Parts Bike"
My project thread Part II: Finishing (yeah, right) touches on Project "Parts Bike"

Offline andy750

  • Really Old Timer ...
  • *******
  • Posts: 7,940
Re: Installing the Cycle X "Power Up Kit 2"
« Reply #17 on: August 26, 2009, 10:23:58 AM »
Looking forward to hearing more about the ignition set up and cam.

good luck
Andy

Current bikes
1. CB750K4: Long distance bike, 17 countries and counting...2001 - Trans-USA-Mexico, 2003 - European Tour, 2004 - SOHC Easy Rider Trip , 2008 - Adirondack Tour 2-up , 2013 - Tail of the Dragon Tour , 2017: 836 kit install and bottom end rebuild. And rebirth: http://forums.sohc4.net/index.php/topic,173213.msg2029836.html#msg2029836
2. CB750/810cc K2  - road racer with JMR worked head 71 hp
3. Yamaha Tenere T700 2022

Where did you go on your bike today? - http://forums.sohc4.net/index.php?topic=45183.2350

Offline MJL

  • Don't listen to me, I'm no
  • Expert
  • ****
  • Posts: 1,162
  • Oh hell, what's one more bike?
Re: Installing the Cycle X "Power Up Kit 2"
« Reply #18 on: August 26, 2009, 11:32:51 AM »
I got the same ignition kit from Cycle-X. Mine did not come with the wires either. I bought some generic plug wires at the auto store as they have to be cut to length anyway.

Here is a pick of my mounting plate. I got one of Gordon's frame kits and just used the bolts to mount it. I'm not really happy with it, but it should work for now. There will be something else created in the future. There's plenty of room under the tank.

I will eventually do something like that. Keep in mind for now that you have your wire harness and throttle cables that have to go around the coil as well. Believe me I had held it up every which way trying to find a good place to fit it, including under the battery and way upfront where the horn goes. This, IMO, is the best place without resorting to frame modifications. If the frame was a little wider you could mount it upside down in the same place and have a bit mor room for wires and cables.

I am uploading another exhaust video to photobucket right now. It's going slow...


:edit:Both of them sounded different in person. This one is quieter than the glass packs.
BTW, in both videos the bike was started cold.

« Last Edit: August 26, 2009, 11:45:55 AM by MJL »
No matter how fast or how far I rode, I couldn't leave her memory behind.

Offline nokrome

  • Hot Shot
  • ***
  • Posts: 640
Re: Installing the Cycle X "Power Up Kit 2"
« Reply #19 on: August 26, 2009, 06:20:59 PM »
what does that pipe sound like without the can ?
  i really like that pipe and im about to buy one but i hate that huge can, i was thinking of taking it off and just running a short stainless tip on it but im wondering how loud it will be, ken (cycle x) has one set up like that on one of his test bikes
    btw. carpy dropped the price of his yosh replica pipe to $399.00 same as the cycle x pipe
   

   i chose to mount my power arc coil pack in the same spot that you did, seems like a good spot, it was really my only choice because im not running side covers
Funny thing about regret is...... its better to regret something you have done than to regret something you haven't done.

Offline KB02

  • Take it easy there, Sonny, I'm an
  • Old Timer
  • ******
  • Posts: 3,760
Re: Installing the Cycle X "Power Up Kit 2"
« Reply #20 on: August 27, 2009, 04:12:57 AM »
What have you guys done with the extra three wires?
1978 CB750K Project
2000 Ducati ST2
...and a pedal bike

Join the AMA today!!

My project thread Part I: K8 Project "Parts Bike"
My project thread Part II: Finishing (yeah, right) touches on Project "Parts Bike"

Offline MJL

  • Don't listen to me, I'm no
  • Expert
  • ****
  • Posts: 1,162
  • Oh hell, what's one more bike?
Re: Installing the Cycle X "Power Up Kit 2"
« Reply #21 on: August 27, 2009, 11:10:40 AM »
what does that pipe sound like without the can ?
  i really like that pipe and im about to buy one but i hate that huge can, i was thinking of taking it off and just running a short stainless tip on it but im wondering how loud it will be, ken (cycle x) has one set up like that on one of his test bikes
    btw. carpy dropped the price of his yosh replica pipe to $399.00 same as the cycle x pipe
   

   i chose to mount my power arc coil pack in the same spot that you did, seems like a good spot, it was really my only choice because im not running side covers
With a different can or without any can? Open pipes are going to be loud, no matter who makes them. Different mufflers of course sound different. I have not run this any other way than what you see here.

Carpy's Yosh pipes are sexy little things, but remember a 4-1 is for making big hp numbers, while a tri-y like the Cycle X pipes are for bringing up torque numbers.


The three extra wires I taped off for now. I don't think I'll ever use the tach wire, and sometime I make a small switch panel for the other two.


Right now I have a problem, cylinders 1 and 4 not firing. It started right after I removed the bottom of the airbox and #4 plug to check it's condition. It's probably something I did.
No matter how fast or how far I rode, I couldn't leave her memory behind.

Offline MJL

  • Don't listen to me, I'm no
  • Expert
  • ****
  • Posts: 1,162
  • Oh hell, what's one more bike?
Re: Installing the Cycle X "Power Up Kit 2"
« Reply #22 on: August 27, 2009, 12:55:25 PM »
I took my tank off and found that the wires coming out of the coil were pressed against the gas tank. Not quite as much room as it seems.

If you want to put your coils under the tank, put the coil plug in and the tank on. Don't force anything, and don't have power on the wires. See how close it is, I think you will have to dent the tank some to make room.
No matter how fast or how far I rode, I couldn't leave her memory behind.

Offline Freaky1

  • Hot Shot
  • ***
  • Posts: 719
Re: Installing the Cycle X "Power Up Kit 2"
« Reply #23 on: August 28, 2009, 02:43:25 AM »
Would turning the coil sideways change anything? If it is square I guess not but I can't tell from the pics.

I had planned to do this upgrade sometime in Feb, but now that Carpy dropped the price I might just do the ignition and cam, decisions decisions.
That which does not kill you leaves cool scabs which turn into awesome scars.

'77 CB750F Come on...were almost there!

Offline KB02

  • Take it easy there, Sonny, I'm an
  • Old Timer
  • ******
  • Posts: 3,760
Re: Installing the Cycle X "Power Up Kit 2"
« Reply #24 on: August 28, 2009, 04:17:53 AM »
I took my tank off and found that the wires coming out of the coil were pressed against the gas tank. Not quite as much room as it seems.

You mean the plug wires or the electrical hook up wires? I have mine turned 90* from what you have so the harness plug faces the rear of the bike.
1978 CB750K Project
2000 Ducati ST2
...and a pedal bike

Join the AMA today!!

My project thread Part I: K8 Project "Parts Bike"
My project thread Part II: Finishing (yeah, right) touches on Project "Parts Bike"