Author Topic: POR-15 tank liner job  (Read 7098 times)

0 Members and 1 Guest are viewing this topic.

Offline Slayer

  • Hot Shot
  • ***
  • Posts: 454
  • What can I say that hasn't been said before
POR-15 tank liner job
« on: August 30, 2009, 01:03:14 PM »
This weekend I re-lined my gas tank because there was rust and corroded metal flakes inside. While I did the research on the forums I noticed a lot of people have a problem with this so I basically followed the directions included with the liner kit and added little things that I thought was a good idea that I got from here and other knowledgeable people. I am still a noob but if this helps out other noobs then it was worth the post. It is drying right now but I think it turned out great so far.

First off I wanna say that I have not tried Kreeme or any other type of tank liner before. POR-15 came recommended and I have heard bad things about Kreeme. The best way to strip it down is probably electrolysis but my tank was not too bad so I did not have to go that far. My first option was to use muriatic acid, but after I found out that the tank liner only sold retail in a three pack deal I returned the acid and just stuck with the kit. It was $50.

As always make sure you have rubber gloves and goggles. Nasty stuff! I am going to strip and paint my tank after so I had complete disregard over spilling onto my tank. You might want to mask off the rest of the tank. I kept it in a separate tub to keep it from leaking onto the ground. You may also want to have a cup of clean random small nuts and bolts, a magnet, acetone, electrical tape, teflon tape, funnel, flashlight, inspection mirror, and shop towels. To plug the gas tank hole I used a 1 1/2" end of pipe plug from Home Depot. I used splicing tape/ electrical tape and rolled it up into a wad that would fill in the gas tank notches and then installed the plug.
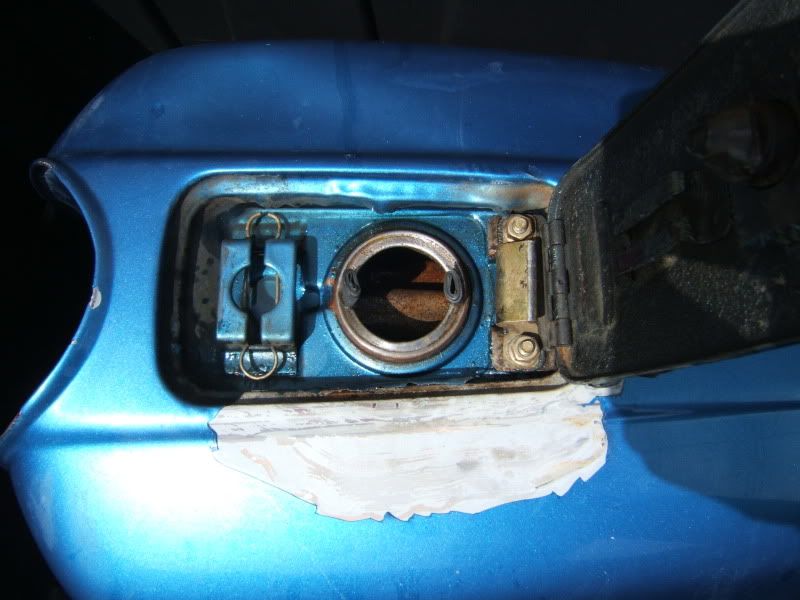
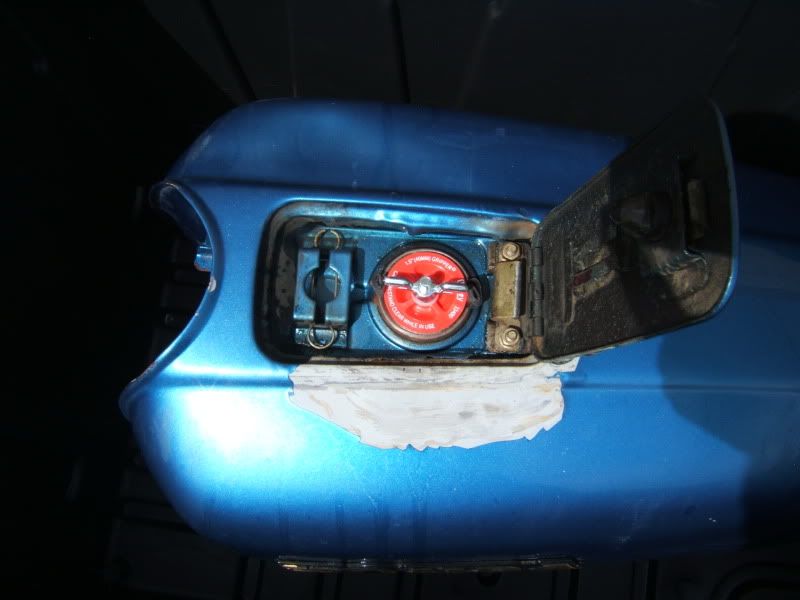


Once the plug smashes down on the tape it should form a good seal.
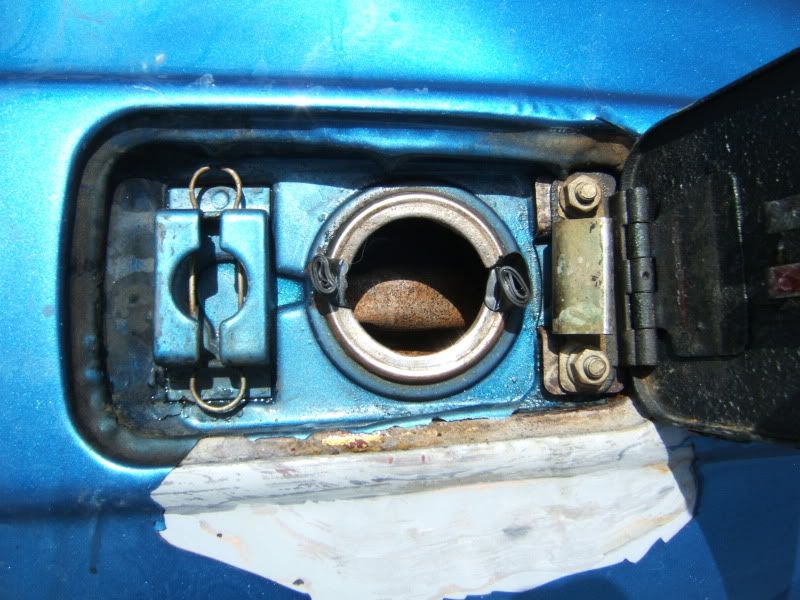


To cover the petcock hole I went to a hardware store and bought a nut with a plug in it and teflon tape for the threads. I had to use what I could but there is probably an actual cap you could find. The thread size is 16mm x 1.5.
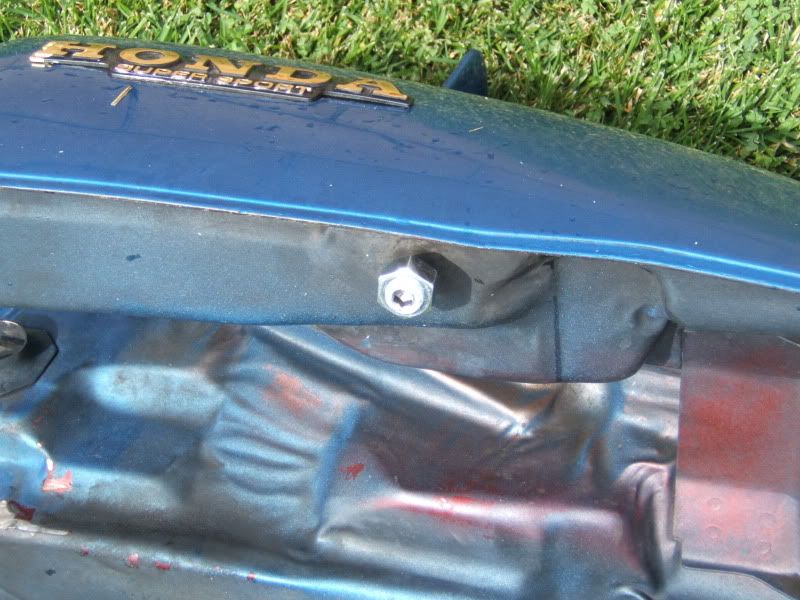


If you had to, you could use duct tape or whatever as a sealant but the temperature gets hot inside and things could get ugly with this stuff splashing around.


The first of three parts is Marine Clean. This just dissolves gum and varnish deposits. Mix this 1:1 quart with hot water
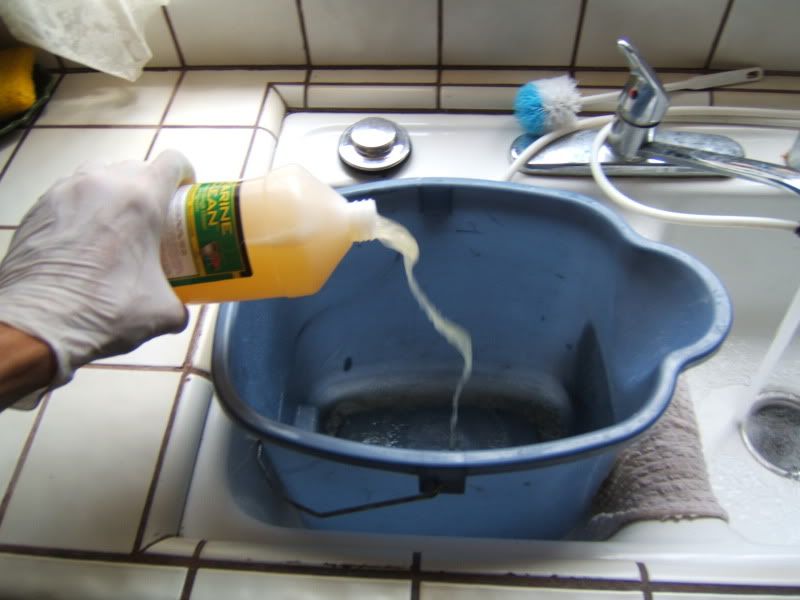


Pour in and seal it up. Shake for a minimum of 20 minutes. Think of it like Listerine for your gas tank. I shook and let it sit and repeated for about an hour. Empty into a bucket and rinse with water.
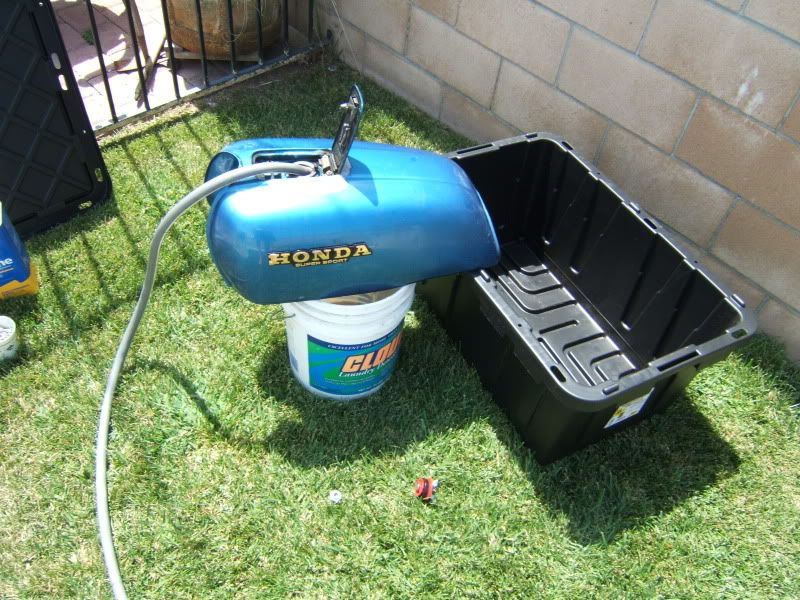
 

Don't get bummed out if you still see rust inside, that is what the next bottle is for. It doesn't need to be 100% dry but after shaking all of the water you can out of the tank you are ready for the next step.

Part two is Metal Ready. This is the acid prep for the lank liner. It WILL break down all of the rust inside if you do it right. Pour the entire bottle in. I added small metal fasteners to help sand down the surface but you don't need to, it was not in the instructions. I shook the tank for a while in one position and let it sit for a half hour. Every once in a while I would check up on it and give it another shake. Once the 30 minutes were up I flipped the tank and shook it. Let sit another 30 minutes with shakes here and there. Do this to all four sides and do not let it go over 2 hours. I read that someone put the tank in a rotisserie and someone else suggested couch cushions sandwiched to the tank in a clothes dryer, but this is the practical way.

Drain and rinse with hot water several times until clean water is visible. Now you have to remove all of that shrapnel you put inside with a magnet. Now you should be able to see some difference.
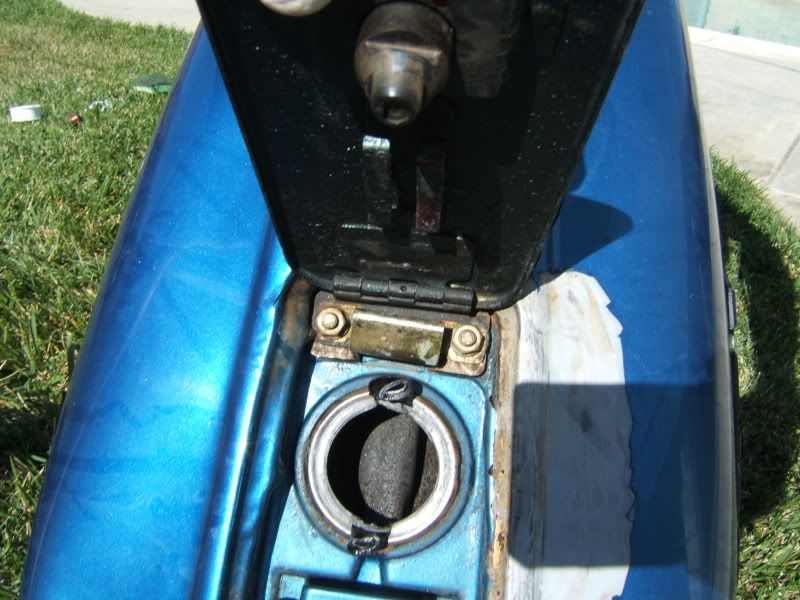
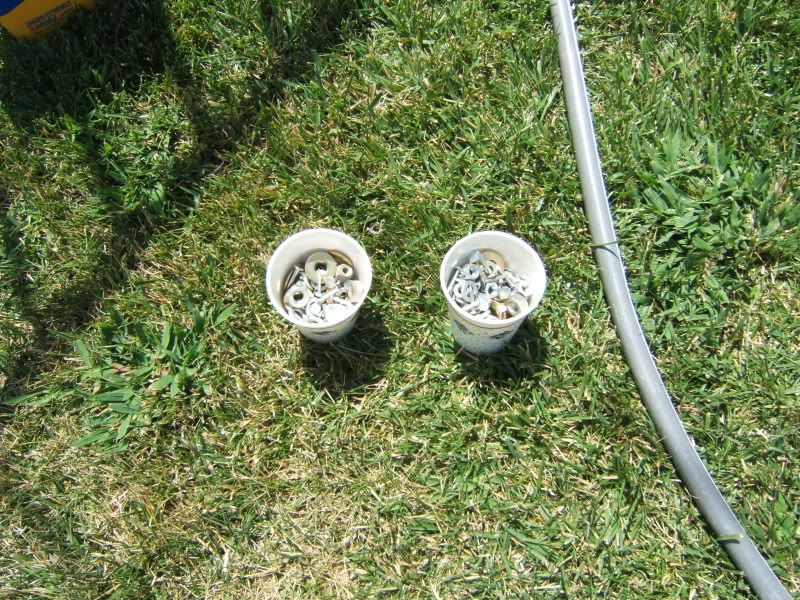
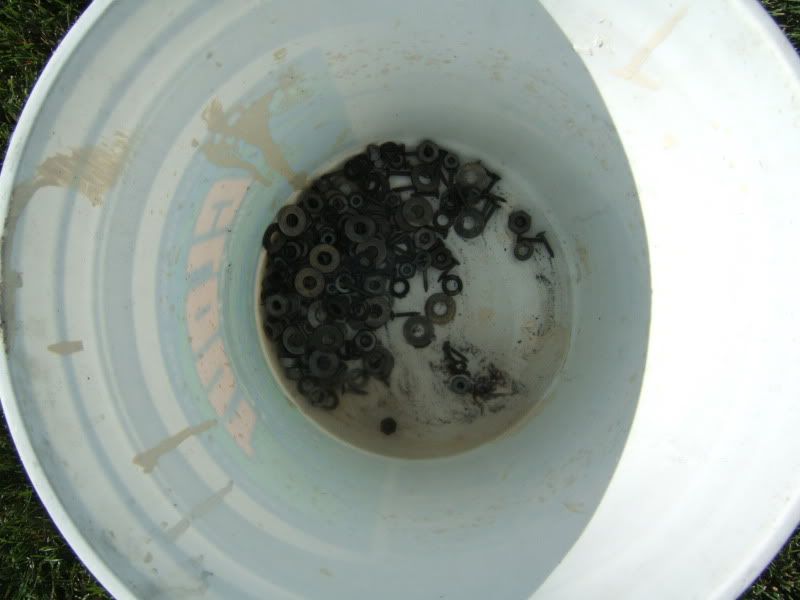


It took the zinc right off the fasteners. An hour later they looked even more stripped. Even the tack nail heads were falling off.

In order for the sealer to properly adhere, the inside must be bone dry. If you rush this step you have wasted your time. If you let the tank sit too long flash rust will come back and you will have another rust lined tank. To make sure I had it dry this is what I did but is not in the instructions: Shook all of the water out that I could. Dump in a few cups of acetone (at your risk apparently) to capture the water and shake it all out. Use a heat gun/ hairdryer until it is as dry as possible. My tank was chalky on the inside. Flip it over and blow down the petcock for a while. Flip it back on the gas cap side and look inside with a flashlight and inspection mirror and look for any moisture. If you are 100% confident it is dry move on to the last step.

Open up the can of sealer and stirr it well until it is as close to becoming one uniform color as possible. Close off the petcock and dump the sealer in. Close off the gas cap side and slowly roll until you feel that it is completely coated. I rolled for about 20 minutes. Drain out the excess but don't rinse with anything   You want to make sure it has not pooled anywhere.
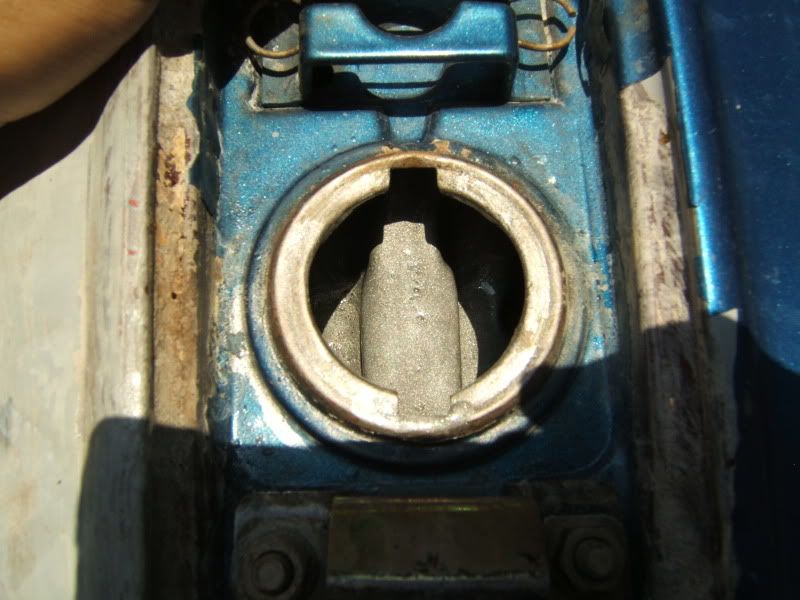


If you got any sealer on the threads or the tank wipe it off. Let is sit in a ventilated area for four days before putting in gas
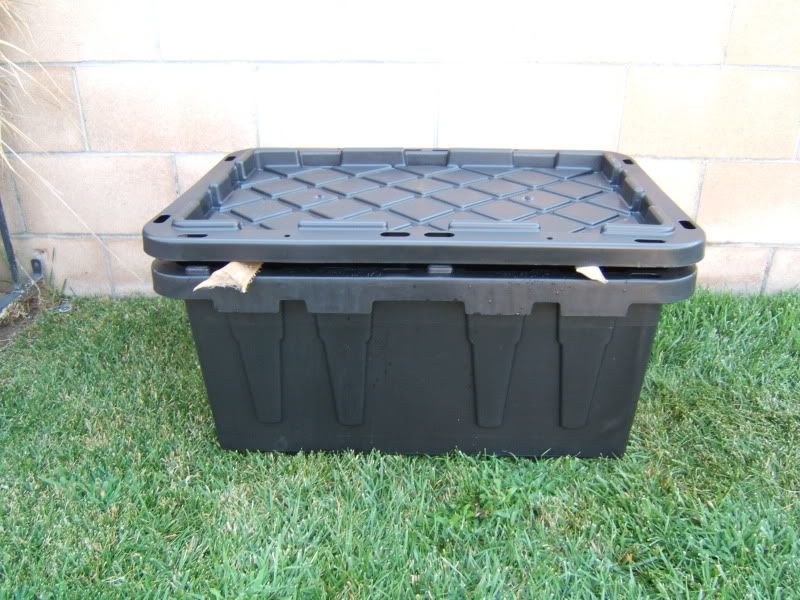


I lifted the lid to that more air could pass through but kept the top on so that crap wont fall inside and it keeps the cats out. I don't want to face the firing squad of cat lovers on this forum if I posted the thread " I killed the cats with POR-15"  :D  Let the tank dry for 4 days.

For all of the hazmat I accumulated I left the lid ajar and will "give back" to the atmosphere, haha.

If there are any comments or if there is anything anyone wants to add please share.

I had a bad realization while waiting for the sealant to dry. I am not going to be able to pound in knee dents into this tank now am I? I kept the lid to the sealant so after four days I will bend the metal back and see if it cracks. I guess yes.

« Last Edit: September 16, 2009, 04:24:17 PM by Slayer »

Offline bucky katt

  • Old Timer
  • ******
  • Posts: 4,564
  • i am a pastafarian!
    • facebook
Re: POR-15 tank liner job
« Reply #1 on: August 30, 2009, 01:07:33 PM »
the por15 SHOULD be ok if you do knee dents. i used an old screwdriver to stir it and afterwards i hammered it, bent it and generally abused it to see how tough the coating was. about the only thing that would hurt the por15 was an oxy/mapp gas torch lol. i'm going to try to pound the knee dents in an old damaged tank that has the por15 this afternoon and i'll let you know the result ok?
Of all God's creatures there is only one that cannot be made the slave of the lash. That one is the cat. If man could be crossed with the cat it would improve man, but it would deteriorate the cat.
Mark Twain - Notebook, 1894

Offline Johnny5

  • Master
  • *****
  • Posts: 1,593
    • CB350F build thread
Re: POR-15 tank liner job
« Reply #2 on: August 30, 2009, 01:10:23 PM »
Nah, I bet the POR-15 stuff is pretty hard, and if you smack the tank and dent the sides, the sealant will crack.
www.kerosenecycles.com
1971 CB350
1973 CB350F
2006 Harley Springer Classic

Offline Slayer

  • Hot Shot
  • ***
  • Posts: 454
  • What can I say that hasn't been said before
Re: POR-15 tank liner job
« Reply #3 on: August 30, 2009, 01:11:13 PM »
I will do the bend and post the pics in three more days.

Offline Ecosse

  • Really Old Timer ...
  • *******
  • Posts: 5,051
  • Member #4139
    • My 550 walk around video
Re: POR-15 tank liner job
« Reply #4 on: August 30, 2009, 01:22:31 PM »
thanks for posting the process and highlighted details.

as for a definitive answer to denting/chipping, i'd say contact the folks who make the stuff.
1974 CB550K     
                 
            Help stop TORTURE and SLAUGHTER of cats, dogs, and other kept animals.                                                  www.animalsasia.org

                                  Your 1%er name

                                                A WORTHY EFFORT: http://www.honorflight.org.

Offline Slayer

  • Hot Shot
  • ***
  • Posts: 454
  • What can I say that hasn't been said before
Re: POR-15 tank liner job
« Reply #5 on: September 02, 2009, 07:02:47 PM »
I emailed POR-15 and am still waiting for a reply. Meanwhile, the liner has dried and here are the pics of a fully cured liner on a piece of metal folded in half, then folded 180 deg, then folded 180 deg back:


It looks safe but Bucky tried it with a four year old tank and it cracked. I think I am going to play it safe and let it be. I hope you are happy Geeto  ;D

Offline Slayer

  • Hot Shot
  • ***
  • Posts: 454
  • What can I say that hasn't been said before
Re: POR-15 tank liner job
« Reply #6 on: September 03, 2009, 09:01:33 AM »
I got a response from POR-15. "The tank sealer is quite flexible so it should not crack.  It will be fine."

Offline Johnny5

  • Master
  • *****
  • Posts: 1,593
    • CB350F build thread
Re: POR-15 tank liner job
« Reply #7 on: September 03, 2009, 10:02:37 AM »
Cool. Cant wait to see your girly knee-dented tank finished!
www.kerosenecycles.com
1971 CB350
1973 CB350F
2006 Harley Springer Classic

Offline Slayer

  • Hot Shot
  • ***
  • Posts: 454
  • What can I say that hasn't been said before
Re: POR-15 tank liner job
« Reply #8 on: September 03, 2009, 10:21:50 AM »
Haha! Well I came across a hell of a deal for a stock seat in decent fixable condition with some other goodies that I need before getting the bike on the road, (BigBob is my new friend) so I think I am going to leave it fairly stock looking. This is going to be my daily commuter once it is done while I build a cafe with a 75 750F. Once I get the cafe done I will sell the one I am working on now. It is going to be a long road... I will be sure to post pics of the knee dent job when it comes.

Offline bucky katt

  • Old Timer
  • ******
  • Posts: 4,564
  • i am a pastafarian!
    • facebook
Re: POR-15 tank liner job
« Reply #9 on: September 03, 2009, 10:22:09 AM »
well, it's entirely possible i did something wrong when i coated my tank back in early 2005.
Of all God's creatures there is only one that cannot be made the slave of the lash. That one is the cat. If man could be crossed with the cat it would improve man, but it would deteriorate the cat.
Mark Twain - Notebook, 1894

Offline Slayer

  • Hot Shot
  • ***
  • Posts: 454
  • What can I say that hasn't been said before
Re: POR-15 tank liner job
« Reply #10 on: September 16, 2009, 04:39:34 PM »
A waste of time and money  >:(  A week ago I was sanding my tank and I peeked inside with a flashlight and there is major peelage. Nothing has touched the inside of the tank yet. I sent an email to the same guy that responded when I asked about bending the tank and included my step by step with the link to here. He told me it was because I used acetone to collect the residual water and that it doesn't work well with their product. I told him that the acetone evaporated and would not leave a residue. He responded saying that anything but water will leave a residue. Well ANYTHING will leave a residue but whatever, maybe he is right. He said he would be willing to help me with the cost on a new kit and stripper,but when I asked how much and which kit I should use I did not get a reply. This really pisses me off because I have been on hold on my tank painting and I really want to get it done. grrrrr

Offline nokrome

  • Hot Shot
  • ***
  • Posts: 640
Re: POR-15 tank liner job
« Reply #11 on: September 16, 2009, 06:14:06 PM »
is it only peeling where the knee dents are or all over ?
  i remember reading the por instructions and it said something about the metal ready leaving the bare metal acidic and that was supposed to help the liner stick to it, maybe the acetone screwed that up somehow....just a thought
Funny thing about regret is...... its better to regret something you have done than to regret something you haven't done.

Offline Slayer

  • Hot Shot
  • ***
  • Posts: 454
  • What can I say that hasn't been said before
Re: POR-15 tank liner job
« Reply #12 on: September 17, 2009, 08:30:59 AM »
All over. I did not do the knee dents. I thought about the Metal Ready leaving a adhering residue but common sense told me there should not be any acidic residue because the instructions tell you to rinse it thoroughly. The big point the instructions made were to make sure it is bone dry after rinsing. You are probably right though, I am the one with the peel.   

Offline Slayer

  • Hot Shot
  • ***
  • Posts: 454
  • What can I say that hasn't been said before
Re: POR-15 tank liner job
« Reply #13 on: October 07, 2009, 01:20:16 PM »
So I still need to re-line the tank. I checked out the Kreeme FAQ's before purchasing and I laughed out loud when I read this:

How can I remove old KREEM?

Acetone or methyl ethyl ketone (available at most paint stores) will re-dissolve Kreem. Fill about half full, seal the tank and leave for about 24 hours with periodic agitation. Drain into a container and inspect tank. If Kreem remains, pour solutions back into tank, reseal and repeat until all Kreem is removed.

I wish I had read this over before my genius idea. From now on I am going to follow ONLY the manufacturers instructions

Offline Slayer

  • Hot Shot
  • ***
  • Posts: 454
  • What can I say that hasn't been said before
Re: POR-15 tank liner job
« Reply #14 on: October 07, 2009, 01:27:47 PM »
Jesus. Right after that FAQ I read this:

Can I seal over old Kreem Tank Liner after gasoline has been in the tank?
Yes. Visually inspect the tank interior for good adhesion. If there no peeling you may wash tank out with a degreaser such as warm dish washing solution. Next, rinse tank for 2 minutes using a small amount (1 pint) of acetone or methyl ethyl ketone. Re-coat the tank with Kreem Tank Liner (do NOT use Tank Prep A).

If coating is peeling, remove as described above and re-apply after using Tank Prep A and B.

WTF?? I guess the difference between tank prep and tank strip is 24 hrs.

Offline VTCBike750

  • Hot Shot
  • ***
  • Posts: 743
Re: POR-15 tank liner job
« Reply #15 on: April 24, 2011, 07:11:30 AM »
Having a hard time getting the remaining small pieces of Kreeme out of the tank.  Is it 100% essential to get these small amounts out?  My thought is, if POR-15 is so durable and the majority of the metal is exposed, can these small pieces just be sealed over?

Other thought, have we decided if acetone can be used to dry the tank before adding the sealer, or should that be avoided?

Thanks
-Adam

1972 CB750 (current project)
http://forums.sohc4.net/index.php?topic=87951.0