Author Topic: 1980 Honda CB650C: Introducing the "Cash Machine"  (Read 39016 times)

0 Members and 1 Guest are viewing this topic.

Offline JimJamerino

  • Yay! I'm a
  • Enthusiast
  • **
  • Posts: 248
  • Not rich enough to be "eccentric."
    • My CB650C build thread
Re: 1980 Honda CB650C: Fork seals replaced! With pic goodness!
« Reply #75 on: April 08, 2012, 09:36:00 pm »
To ease the process of pulling the seals, I dunked the upper part of the leg in hot water.  The water in the pot here is slightly below boiling.  I had to make sure to use a rag to pick up parts, because the heat transferred quite readily.


I used a large, flatblade screwdriver to pry the dust seal out.  Years ago, I had to replace fork seals on an '81 Yamaha XJ750 Maxim, and when I pulled the dust boots, I had to deal with a little lip inside the leg.  I really wanted to get a pic of this, because I wasn't sure what to expect.  I couldn't get the details I wanted from either the online CB650 manual or my Haynes.  On this 1980 Honda CB650C, I found no lip.  The dust seal is simply pressed in, and you can get a screwdriver under the edge to pry it out very easily.  Just be careful not to mar the leg, since a steel screwdriver is tougher than an aluminum fork leg.


This boot is pretty soft and supple, not dry rotted or cracked or hardened.  You can also see the edge, how there's no lip or anything to deal with.  Just pry it out.


A simple metal retaining ring holds the oil seal in place.  In this case, the ring was rusted like nobody's business.  On the left leg, it broke coming out.  My local Honda shop had replacements for about $4 each.  I could find them online for cheaper, but shipping negated any savings.


Retaining ring out.


Nasty gunk on top of the oil seal.  I put it back in the hot water to cook a little more.


While the leg simmered, I cleaned the dampening parts.  At this point, it's just hot water.  It loosened up the grease and junk pretty well.  Notice the goo on the Shop Sock.


Time to pry out the oil seal.  Shop Socks on to protect not only the lip of the leg, but my hands from the heat.  Pry a little one one side, then rotate.  I did this several times, then dunked again for another couple minutes.


A little patience makes easier work.
« Last Edit: April 08, 2012, 10:44:08 pm by JimJamerino »
~ Jim

formerly "emperorspartacus"

There are old bikers.  There are dumb bikers.  There are no old, dumb bikers.

My CB650C rebuild http://forums.sohc4.net/index.php?topic=74212.0

Offline JimJamerino

  • Yay! I'm a
  • Enthusiast
  • **
  • Posts: 248
  • Not rich enough to be "eccentric."
    • My CB650C build thread
Re: 1980 Honda CB650C: Fork seals replaced! With pic goodness!
« Reply #76 on: April 08, 2012, 09:51:25 pm »
I cleaned everything up with Brakleen aerosol brake cleaner.  Worked pretty well, I thought.  The plastic cup with the red stuff is a carefully-measured 5.7 oz of store-brand ATF (Automatic Transmission Fluid).


Dipped the new seal in a little ATF for lubrication.


There's a special tool from Honda for driving fork seals, but it seems a 1-1/4 inch socket fits pretty well, too.


Started the seal in square.  I used the wooden handle of the hammer to drive the seal in until it was level with the top of the leg.


I then used the socket to drive the seal into the leg.


I drove the seal down until the groove for the retaining ring was visible all the way around.


New retaining ring.


The dust seal pressed in by hand pretty easily.


Stop up the drain hole to prevent a "D'oh!" moment.
« Last Edit: April 08, 2012, 10:44:31 pm by JimJamerino »
~ Jim

formerly "emperorspartacus"

There are old bikers.  There are dumb bikers.  There are no old, dumb bikers.

My CB650C rebuild http://forums.sohc4.net/index.php?topic=74212.0

Offline JimJamerino

  • Yay! I'm a
  • Enthusiast
  • **
  • Posts: 248
  • Not rich enough to be "eccentric."
    • My CB650C build thread
Re: 1980 Honda CB650C: Stalled for now, but summer cometh
« Reply #77 on: April 08, 2012, 10:19:28 pm »
I set the fork lower aside for the time being.  Then I dropped the damper and damper spring down the fork tube.  The manuals remind you to make sure you have the little spring on the damper.


It should drop all the way through.


It's hard to tell in this pic, but one end of the fork spring is tapered.  The other is coiled more tightly.  The tapered end goes toward the damper tube.  I capped the fork tube with MEGA HEX SOCKET to give some resistance to the damper when I go to reattach the lower leg.


Make sure the ridiculously thin washer is there to protect the fork cap.  I didn't tighten the cap all the way yet because I still needed to fill it with the prescribed amount of oil.


I took a rag and dipped it in ATF, then gave the upper tube a wipe with it.  I then put the silver spacer thingy (yes, that's the technical term) back on the bottom of the damper tube, then put it in the fork lower.


I'm sure I'm going to generate some discussion here.  According to the Honda manual, you're supposed to put threadlock on the lower allen bolt, so I did.  Don't forget the copper washer.


I torqued the lower bolt because I've been known to get carried away without a torque wrench.  According to the manual, this only gets 9 ft-lbs.


My headlight ear has a rubber grommet thingy for the top and bottom.  This has to be fanagled between the upper and lower tripletrees.  The guy I bought this bike form mentioned this bike once had a fairing, hence no turn signals and what appears to me to be decidedly non-stock headlight ears.  I could be wrong, though, too.


I then put the assembled leg back in the triple tree.


Pull the cap, fill with a mere 5.7 oz of oil, and put the cap back on.  The fork cap is supposed to be torqued to 22-28 ft-lbs, but I don't have 1/2" drive torque wrench, so I had to guess.
~ Jim

formerly "emperorspartacus"

There are old bikers.  There are dumb bikers.  There are no old, dumb bikers.

My CB650C rebuild http://forums.sohc4.net/index.php?topic=74212.0

Offline JimJamerino

  • Yay! I'm a
  • Enthusiast
  • **
  • Posts: 248
  • Not rich enough to be "eccentric."
    • My CB650C build thread
Re: 1980 Honda CB650C: Fork seals replaced! With pic goodness!
« Reply #78 on: April 08, 2012, 10:25:31 pm »
In addition to rebuilding the forks, I also put the carb rack back on using the ratchet strap method.  It wasn't too bad, really.  I got the stock airbox setup installed, reconnected the throttle and choke cables.  I also reconnected the breather hoses.  I put the whole front end back together, save the brake.  Reconnected the electrics in the headlight bucket and put the handlebars back on.  All in all, it was an extremely productive day!  I'm sorry I don't have any pics of these processes, but they're covered pretty well in other places on this forum.  That, and my wife/photographer decided she wanted to take a nap, but I didn't want to come in yet.

I just might get this dude running before summer!  Next up: Changing sprockets and chains.
« Last Edit: April 08, 2012, 10:44:59 pm by JimJamerino »
~ Jim

formerly "emperorspartacus"

There are old bikers.  There are dumb bikers.  There are no old, dumb bikers.

My CB650C rebuild http://forums.sohc4.net/index.php?topic=74212.0

Offline onepieceatatime

  • Hot Shot
  • ***
  • Posts: 624
Re: 1980 Honda CB650C: Fork seals replaced! With pic goodness!
« Reply #79 on: April 08, 2012, 10:53:03 pm »
Sounds like you are doing a lot of the same things as me. I just put in tapered steering stem bearings, front and rear wheel bearings, rebuilt the forks, and ordered new sprockets and chain for my 1980 CB650. I went with a 17 tooth front and 38 tooth rear, but I have 2 good condition 16 tooth front and a good 39 tooth and 40 tooth rear in case I decide that is too much change. I also ordered a new choke cable since mine broke and will unfortunately have to pull the carbs to put it on. Then to seal the tank with caswell and I should be running. No photographer for any of my work though, since my wife wants me to get rid of the bike instead of ride it.
Nice work so far, and when I decide to rebuild my carbs, I will probably be looking at your photos.
1965 CA77
1972 CB750K Ol' Sarge
1974 CB450K7
1977 CB750K7
1977 CB750K7
1980 CB650C
1982 CM450A
1997 GL1500SE

Offline JimJamerino

  • Yay! I'm a
  • Enthusiast
  • **
  • Posts: 248
  • Not rich enough to be "eccentric."
    • My CB650C build thread
Re: 1980 Honda CB650C: Fork seals replaced! With pic goodness!
« Reply #80 on: April 08, 2012, 11:17:24 pm »
Sounds like you are doing a lot of the same things as me. I just put in tapered steering stem bearings, front and rear wheel bearings, rebuilt the forks, and ordered new sprockets and chain for my 1980 CB650. I went with a 17 tooth front and 38 tooth rear, but I have 2 good condition 16 tooth front and a good 39 tooth and 40 tooth rear in case I decide that is too much change. I also ordered a new choke cable since mine broke and will unfortunately have to pull the carbs to put it on. Then to seal the tank with caswell and I should be running. No photographer for any of my work though, since my wife wants me to get rid of the bike instead of ride it.
Nice work so far, and when I decide to rebuild my carbs, I will probably be looking at your photos.

Thank you for the compliment.

If your choke connector thingy isn't broken, you shouldn't need to take your carb rack apart to install your choke cable.  With the tank and seat off, I was able to install all three cables.  I loosened the screw that holds the choke cable bracket on the carb rack to the point where it is almost out.  Then I fished around with the cable, threading the barrel into the slot.  Once the cable was in the slot, I could pull straight up and feed the cable into the bracket.  All this was done from the right side of the bike.

~ Jim

formerly "emperorspartacus"

There are old bikers.  There are dumb bikers.  There are no old, dumb bikers.

My CB650C rebuild http://forums.sohc4.net/index.php?topic=74212.0

Offline onepieceatatime

  • Hot Shot
  • ***
  • Posts: 624
Re: 1980 Honda CB650C: Fork seals replaced! With pic goodness!
« Reply #81 on: April 08, 2012, 11:41:05 pm »
Great! Thanks for the picture and tips for changing the choke cable.
1965 CA77
1972 CB750K Ol' Sarge
1974 CB450K7
1977 CB750K7
1977 CB750K7
1980 CB650C
1982 CM450A
1997 GL1500SE

Offline fastbroshi

  • Puppet
  • Old Timer
  • ******
  • Posts: 2,645
Re: 1980 Honda CB650C: Fork seals replaced! With pic goodness!
« Reply #82 on: April 09, 2012, 12:43:50 am »
Jim, unfortunately I think you put your seals in upside down.  The spring in the seal should be facing down.
Just call me Timmaaaaay!!!

Offline onepieceatatime

  • Hot Shot
  • ***
  • Posts: 624
Re: 1980 Honda CB650C: Fork seals replaced! With pic goodness!
« Reply #83 on: April 09, 2012, 01:10:16 am »
My fork seals looked like these:
http://www.advrider.com/forums/showthread.php?t=564763
There is a spring on both sides, but you put it so the double ridge faces down.
It is hard to see in the photo which way the ridges are facing.
« Last Edit: April 09, 2012, 01:14:40 am by onepieceatatime »
1965 CA77
1972 CB750K Ol' Sarge
1974 CB450K7
1977 CB750K7
1977 CB750K7
1980 CB650C
1982 CM450A
1997 GL1500SE

Offline fastbroshi

  • Puppet
  • Old Timer
  • ******
  • Posts: 2,645
Re: 1980 Honda CB650C: Fork seals replaced! With pic goodness!
« Reply #84 on: April 09, 2012, 02:36:24 am »
Never seen any like that before.  Hopefully his are installed correctly.
Just call me Timmaaaaay!!!

Offline onepieceatatime

  • Hot Shot
  • ***
  • Posts: 624
Re: 1980 Honda CB650C: Fork seals replaced! With pic goodness!
« Reply #85 on: April 09, 2012, 04:34:52 am »
I don't think you put enough fork oil in though. I double checked my manual this morning:
http://i.imgur.com/9dmMh.jpg
1965 CA77
1972 CB750K Ol' Sarge
1974 CB450K7
1977 CB750K7
1977 CB750K7
1980 CB650C
1982 CM450A
1997 GL1500SE

Offline JimJamerino

  • Yay! I'm a
  • Enthusiast
  • **
  • Posts: 248
  • Not rich enough to be "eccentric."
    • My CB650C build thread
Re: 1980 Honda CB650C: Fork seals replaced! With pic goodness!
« Reply #86 on: April 09, 2012, 11:15:22 am »
Jim, unfortunately I think you put your seals in upside down.  The spring in the seal should be facing down.
These aftermarket seals had a spring on both sides.  One side has print on it, and the other side has a deeper groove to it.  I put it so the deep groove faces down, and the print faces out.  I read somewhere that the lip should face down.  The OEM seal that came out had a deeper groove on the bottom, so I tried to get as close as possible to the original using the aftermarket seal.

I don't think you put enough fork oil in though. I double checked my manual this morning:
http://i.imgur.com/9dmMh.jpg
I'll have to double check my manuals.  I was going off the service manual found here
~ Jim

formerly "emperorspartacus"

There are old bikers.  There are dumb bikers.  There are no old, dumb bikers.

My CB650C rebuild http://forums.sohc4.net/index.php?topic=74212.0

Offline JimJamerino

  • Yay! I'm a
  • Enthusiast
  • **
  • Posts: 248
  • Not rich enough to be "eccentric."
    • My CB650C build thread
Re: 1980 Honda CB650C: Fork seals replaced! With pic goodness!
« Reply #87 on: July 08, 2012, 09:16:12 pm »
Well, the project has taken a bit of a turn.  I had intentions of doing mild restoration along the way, but have since decided to simply get this freakin' thing back on the road.  This is two summers I've had this bike and haven't ridden it.  Although I am going to speed the process, I am not going to cut corners.  I'll just be skipping things like repainting the caliper and master cylinder. 

That said, I cleaned up the master cylinder housing and put the new guts in.  I cooked it in Simple Green and water, then hit it with brass and nylon brushes because I still have not finished my soda blasting cabinet.  It's not perfect, but it definitely looks much better than when it went in.  Reassembly went much faster than disassembly.  I didn't take any pictures because I was on limited time today.

I started to look around for the front brake caliper after I put the MC back together, thinking I just wanted to see if I could get it to work.  It turns out, all of the metal caliper assembly pieces went into a bucket of Simple Green and water about a year ago, where I snapped the lid on tight while I "finished" the blasting cabinet.  In a fit of brilliance, I left all the rubber bits in boxes on the bench.  Seems I packed it all away and completely forgot about it.

When I mix Simple Green and water, I shoot for about a 1:5 ratio.  This gives us a nice Mountain Dew, translucent green liquid.  The stuff in the bucket was basically black.  Fortunately, it still covered the parts.  What was weird was that some pieces had a kind of overused cat-litter, detergent-looking goopy crust on them.  Like if you leave cat litter out on the ground and it rains, you get that grey and white pellet sludge... it looked like that had grown on corroded parts of the caliper pieces.  Fortunately, a bath in new heated SG/water and some time with the brush removed the stuff to reveal apparently undamaged metal below.  I'm guessing there's a detergent of some sort in the SG, or maybe the water (yikes!) that grew like a stalactite over the year in the bucket.

The piston was still stuck in the caliper.  I took the reassembled MC, hooked up the brake line, and proceeded to bleed new brake fluid through the whole mess.  Once I got all the air and water out of the system, the MC pushed the piston out of the caliper in about 5 pumps.  I'd say the MC has been successfully rebuilt!  As it sits now, the MC is back on the bike, with washers in place of the banjo fitting from the hose.  The pieces of the caliper await cleaning and reassembly.  I will be ordering a new brake piston seal from DCC later tonight, and hope that it actually fits. 

Remaining work:
Replace chain and sprockets (have parts)
Replace tires (have them... need to use air compressor and tire irons @ folks' house)
Replace the breather hose that connects the top of the engine to the airbox
Change oil
Probably buy a new battery
Start it up and sync the carbs, assuming there are no problems with my rebuild
Make sure brake lights and headlights work.

Here's hoping I can take pictures next time!
~ Jim

formerly "emperorspartacus"

There are old bikers.  There are dumb bikers.  There are no old, dumb bikers.

My CB650C rebuild http://forums.sohc4.net/index.php?topic=74212.0

Offline JimJamerino

  • Yay! I'm a
  • Enthusiast
  • **
  • Posts: 248
  • Not rich enough to be "eccentric."
    • My CB650C build thread
Re: 1980 Honda CB650C: Master Cylinder Rebuilt
« Reply #88 on: July 10, 2012, 10:06:50 am »
I'm in the process of cleaning and rebuilding my front caliper. Do you think I need to replace this brake piston?
~ Jim

formerly "emperorspartacus"

There are old bikers.  There are dumb bikers.  There are no old, dumb bikers.

My CB650C rebuild http://forums.sohc4.net/index.php?topic=74212.0

Offline curemode2002

  • Hot Shot
  • ***
  • Posts: 284
Re: Re: 1980 Honda CB650C: Master Cylinder Rebuilt
« Reply #89 on: July 10, 2012, 10:20:44 am »
If you can find one I would my experience with on my 650 was that the pitting would let crap into the caliper and cause my caliper to freeze. I was cleaning it 2 times a year then I pulled it apart found the scoring on the piston. So I got a new piston and oring. I havn't had any trouble for 4 years now.
Bikes:
1980 CB650 Sold
2015 Monster 821 Stripe

Offline JimJamerino

  • Yay! I'm a
  • Enthusiast
  • **
  • Posts: 248
  • Not rich enough to be "eccentric."
    • My CB650C build thread
Re: 1980 Honda CB650C: Master Cylinder Rebuilt
« Reply #90 on: July 10, 2012, 12:00:13 pm »
If you can find one I would my experience with on my 650 was that the pitting would let crap into the caliper and cause my caliper to freeze. I was cleaning it 2 times a year then I pulled it apart found the scoring on the piston. So I got a new piston and oring. I havn't had any trouble for 4 years now.

That's kind of what I'm thinking. If I can't source one, I might take the old one to a machine shop and have one made, if the price is right.
~ Jim

formerly "emperorspartacus"

There are old bikers.  There are dumb bikers.  There are no old, dumb bikers.

My CB650C rebuild http://forums.sohc4.net/index.php?topic=74212.0

Offline fastbroshi

  • Puppet
  • Old Timer
  • ******
  • Posts: 2,645
Re: 1980 Honda CB650C: Master Cylinder Rebuilt
« Reply #91 on: July 10, 2012, 03:13:27 pm »
Just call me Timmaaaaay!!!

Offline fastbroshi

  • Puppet
  • Old Timer
  • ******
  • Posts: 2,645
Re: 1980 Honda CB650C: Carb cleaning time... need advice!
« Reply #92 on: July 10, 2012, 03:24:45 pm »
I might just try reusing the old gaskets to start with.

Since I have an extra carb rack, maybe I should take the black plastic choke thingy and see if I can get a machine shop to make a metal one.

Thanks for the advice, y'all.

From what I read this might be a better job for them.  Not a 650 owner myself but apparently some here would appreciate it   :)
Just call me Timmaaaaay!!!

Offline JimJamerino

  • Yay! I'm a
  • Enthusiast
  • **
  • Posts: 248
  • Not rich enough to be "eccentric."
    • My CB650C build thread
Re: 1980 Honda CB650C: Master Cylinder Rebuilt
« Reply #93 on: July 10, 2012, 05:13:23 pm »
fastbroshi - I did wind up buying that one.  Three hours searching, that was the best I could find.  Found a few used brake systems, but I would prefer to get a new one.  I also ordered a new caliper seal from DCC.  Once those parts come in, I should have a fully functional front brake!!

I also spent a bunch of time cleaning brake caliper parts.  I also replaced the front and rear sprockets, and am about to replace the chain.  The o-ring chain I ordered a year ago will finally have a home!

If I get tomorrow off from work, I will take the wheels down to the local shop and have the new tires put on.  These are the same tires I bought a year ago, that were delivered to Sears.  I will be happy to have the new shoes on the bike!
« Last Edit: July 10, 2012, 05:22:24 pm by JimJamerino »
~ Jim

formerly "emperorspartacus"

There are old bikers.  There are dumb bikers.  There are no old, dumb bikers.

My CB650C rebuild http://forums.sohc4.net/index.php?topic=74212.0

Offline JimJamerino

  • Yay! I'm a
  • Enthusiast
  • **
  • Posts: 248
  • Not rich enough to be "eccentric."
    • My CB650C build thread
Re: 1980 Honda CB650C: Master Cylinder Rebuilt
« Reply #94 on: July 13, 2012, 07:35:28 am »
Well, I didn't have yesterday off, but I did put the new chain on. It's a 530 o-ring chain, and I was able to install the master link without too much trouble.


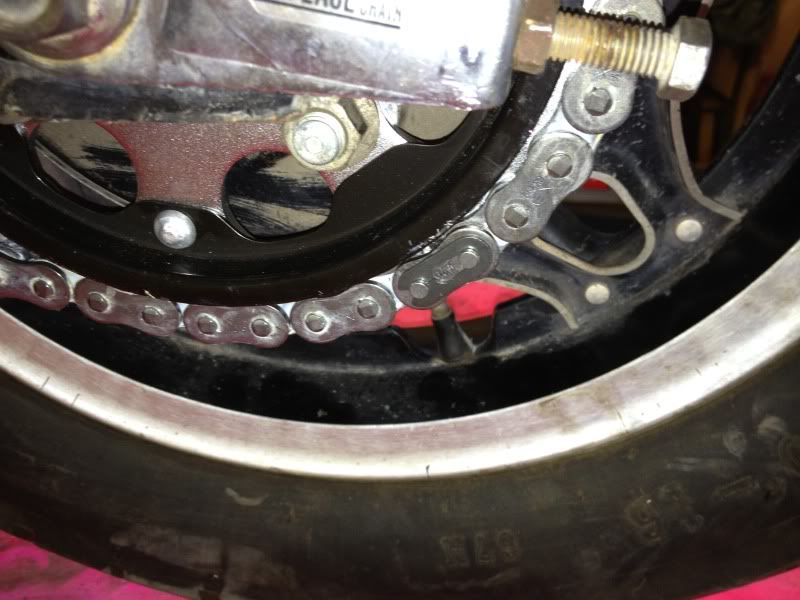
I used a small C-clamp to squish the plate on. At first it was very tight, but a little patience and coaxing made it go. (I guess that could be said for other things as well ;) ) I remember seeing somewhere on here that if you give the o-rings a few minutes to adjust to their new home, you'll wrestle less with them. I clamped the link plates on and did something else for a few minutes, then came back and gave the clamp another twist, then went about something else, etc, for about half an hour. By the time I went to put on the clip, the plate stayed put, thus greatly facilitating  clip installation.

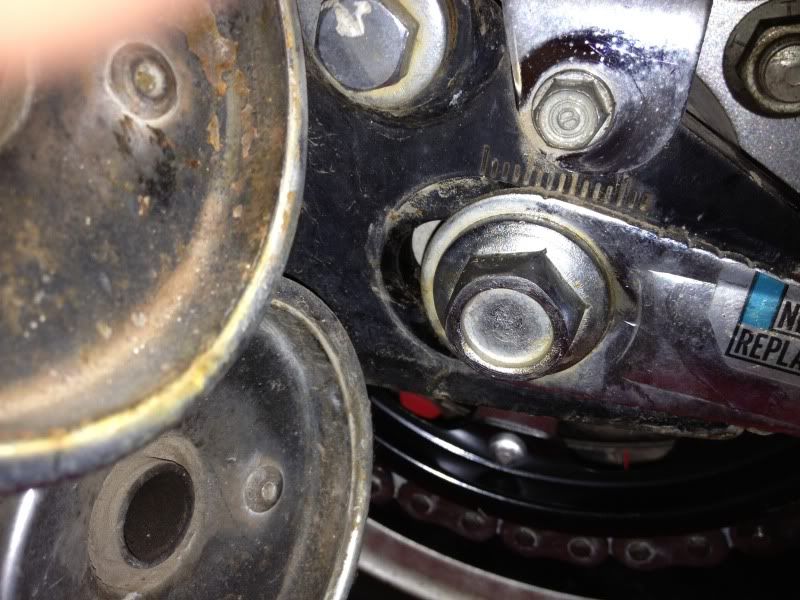
I found that I'm a link too long. By the time I tightened the chain adjusters to the point where I had appropriate slack, I had pulled the axle back a good 3/4". I will buy a chain breaker today and make that adjustment.


Naturally, I couldn't make progress without some sort of setback. I had the chain installed, tightened, and had the axle nut finger tight. I went to spin the wheel... And nothing. Could not move it. I remembered I had fiddled a little with the gear selector, so thought maybe I had bumped it into 2nd. I worked the shifter, and was 95% sure I had it in neutral. Nothing. No budge.

I once owned a Sportster, and with the rear wheel up, you could shift through the gears but you needed to wiggle the wheel a little to lock it in after shifting. I thought I'd try that. Nothing.

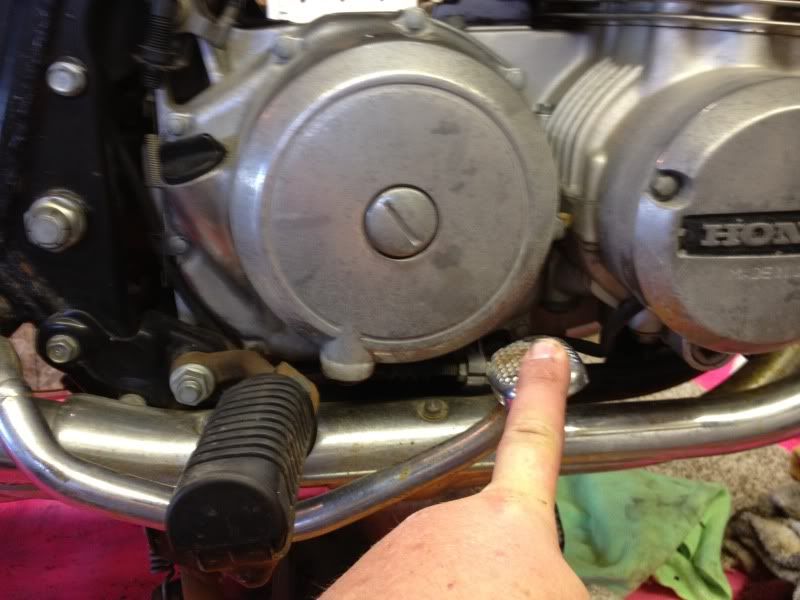
Finally I mustered the courage (or stupidity, depending on how you look at it) to muscle the wheel. I needed to do this gently, because the bike is only sitting on its center stand on top of the pink work table of awesomeness. So yes, I exemplified oxymoron as I gently muscled the wheel around. I got it to turn, but it was a very difficult turn, and an odd squeak/bowl as I moved the wheel.  Old timers are probably laughing because it took me a good 15 minutes with the shop manual before I figured out that after installing the new rear sprocket, I had tightened the brake adjuster too much. Basically, I had created a parking brake, and was trying to turn the wheel. As Homer Simpson would say, "D'oh!"  A few turns of the brake adjuster, and behold! A freely spinning wheel!


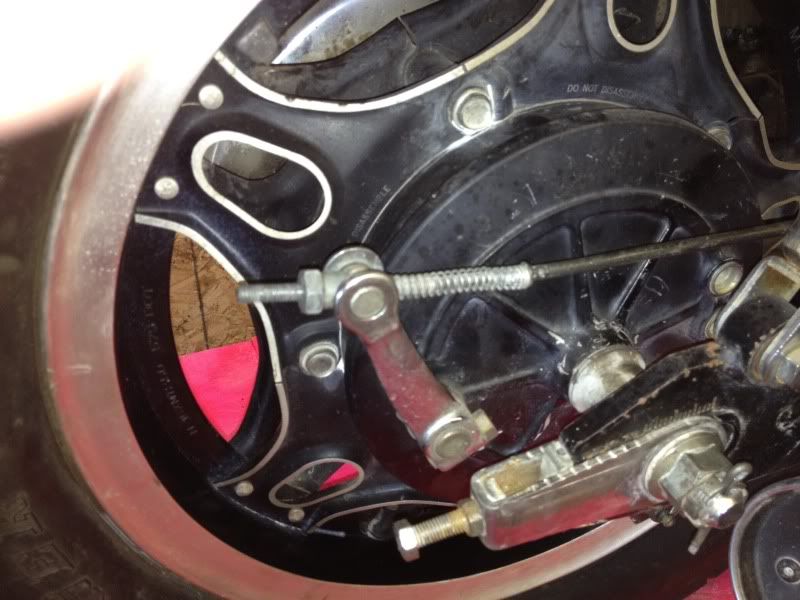
So, before you start making too much fun of me, let me explain my Homer Simpson moment.  The intention was to get the travel of the pedal down.  According to my Haynes manual, there should be about 1" of deflection in the pedal before it grabs.


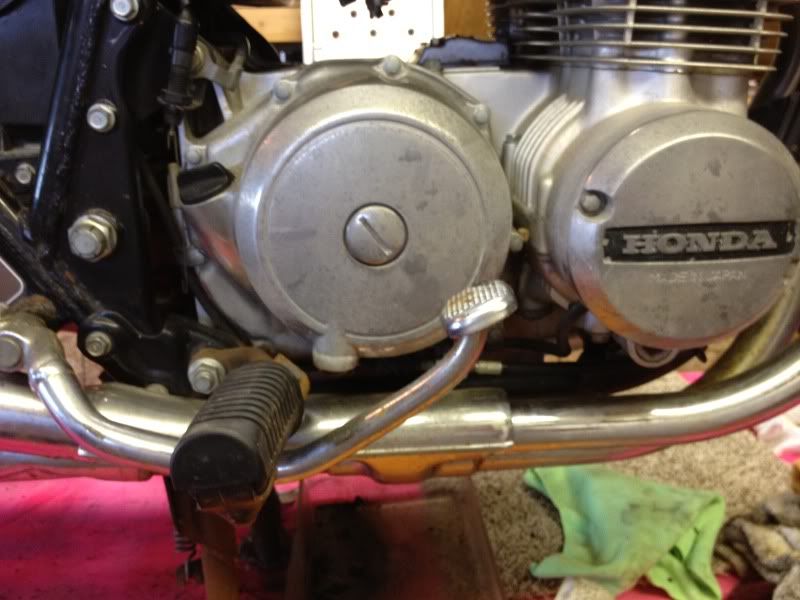
Next up: finish the front brake, change the oil, buy a new battery, install the tank, new tires, sync the carbs and ride!

Edit: I ordered new brake pads and shoes today, along with a SS braided brake line from a guy on eBay.  I tried Shaun at Slingshot a couple times, and never got an email back, so I had to go with another supplier.  Including the new banjo bolts and crush washers, the new line and bolts came up to just over $40.  I also picked up a new battery, fuel line, and hose for the cam cover breather.
« Last Edit: July 13, 2012, 10:11:12 pm by JimJamerino »
~ Jim

formerly "emperorspartacus"

There are old bikers.  There are dumb bikers.  There are no old, dumb bikers.

My CB650C rebuild http://forums.sohc4.net/index.php?topic=74212.0

Offline JimJamerino

  • Yay! I'm a
  • Enthusiast
  • **
  • Posts: 248
  • Not rich enough to be "eccentric."
    • My CB650C build thread
Re: 1980 Honda CB650C: New chain installed, Homer Simpson moment included
« Reply #95 on: July 20, 2012, 05:28:47 pm »
I feel like I've made much progress.  I have many parts coming in the mail, and am in the process of getting it roadworthy again.  New battery is charged and awaiting installation, the breather hose is on, and I managed to squirrel the fuel line on without taking the carbs back out.  I think I'll need a new clamp, though.  The one I have on there is pretty weak. 

I'm still waiting for the repro brake piston.  It was supposed to be here Monday, but it hasn't shown.  I contacted the seller, and they shipped a new one out today, no questions asked.  Way cool!  FYI, it was HVC Cycles on eBay, though they have a brick and mortar store somewhere in Nebraska.  Also, my banjo bolts came in, but were without the crush washers as advertised.  Again, contacted the seller, and crush washers are in the mail.  The new SS brake line came in.  It looks good.  The guy that I got it from on eBay, chevotalandcruiser, makes them for a variety of bikes, or you can order a custom length.  It looks to be of good quality, and I can't wait to get it on the bike!

I also finished up my soda blast cabinet.  I cleaned up the big brake caliper bits, and I am pleased as punch with how well it works.  Running 120 psi and a simple siphon sandblaster attachment, using store-bought Arm and Hammer baking soda, I took off all the loose and bubbled paint, any rust, and all the scale and detergent build-up left over from soaking in Simple Green for almost a year. 

Next up: paint the caliper, rebuild it when appropriate parts arrive, reattach the tank and start it up.
~ Jim

formerly "emperorspartacus"

There are old bikers.  There are dumb bikers.  There are no old, dumb bikers.

My CB650C rebuild http://forums.sohc4.net/index.php?topic=74212.0

Offline JimJamerino

  • Yay! I'm a
  • Enthusiast
  • **
  • Posts: 248
  • Not rich enough to be "eccentric."
    • My CB650C build thread
I am approaching start-up time!  I'll make a more detailed post later, but for now, I'm seeking a little forum member help.  I'll need to sync the carbs, but I don't have any vacuum gauges.  Is there anyone in or near Rapid City, SD, with vacuum gauges that could help me out with this?  I'd be happy to bring the bike to you, along with liquid refreshment of your choice! ;D  That, or a suggestion on a homemade setup that would do the trick would be nice, too.  Thanks in advance!
~ Jim

formerly "emperorspartacus"

There are old bikers.  There are dumb bikers.  There are no old, dumb bikers.

My CB650C rebuild http://forums.sohc4.net/index.php?topic=74212.0

Offline cb650

  • Old Timer
  • ******
  • Posts: 3,864
Re: 1980 Honda CB650C: Borrow vacuum gauges in/near Rapid City, SD?
« Reply #97 on: August 02, 2012, 06:37:24 am »
I have a mercury gauge but lost the mercury.  I have a extra bottle "somewhere".
I like the parking brake.  Done it many times.  Ahh just the other day in fact.   Cought it right away though  ::)
18 grand and 18 miles dont make you a biker

Offline MickeyX

  • Master
  • *****
  • Posts: 2,153
Re: 1980 Honda CB650C: Borrow vacuum gauges in/near Rapid City, SD?
« Reply #98 on: August 04, 2012, 05:25:43 pm »
On the brake lines and banjos, most HD dealers have a whole rack of different lengths, black or silver and different banjos. We ended up going that route on our 650 and it was cheaper and immediate. But, then again, depends on where you order from, I guess, there may be cheaper out there. The nice thing was, we took a part back and just switched it right away and didn't have to wait or pay shipping again. Just a thought.  :)
1969 CL350 Scrambler... almost done!!! Well, until something else goes wrong. :)
2006 HD 883 Sportster, stock. No use changing it, it's still gonna be a Harley.

Offline JimJamerino

  • Yay! I'm a
  • Enthusiast
  • **
  • Posts: 248
  • Not rich enough to be "eccentric."
    • My CB650C build thread
Re: 1980 Honda CB650C: Borrow vacuum gauges in/near Rapid City, SD?
« Reply #99 on: August 05, 2012, 08:59:54 pm »
So much progress, so few posts I've made!

OK, so to start, I finished up my soda blast box and cleaned up the caliper pieces as best I could.

Arm holes cut in the clear tote.


Hole for the vacuum.


Holes for the air hose and feeder tube.


Some crazy guy with a weird hat.
Actually, with a rubber stopper in the bottom that has a hole drilled out for the feeder tube, that funnel serves as a hopper for the blast media.


I cut out the lid and used some silicone caulk to seal a sheet of plexiglass to the top.  You'd be surprised how much structural integrity of a tote comes from an unmolested lid.


Heavy duty, long-arm neoprene chemical gloves I got from Runnings, our local farm supply store.  Turns out these are useful when using strong acids to clean your gas tank.  More on this later.


I used some old inner tube and small bolts with fender washers to seal up the holes.  I learned that you must cut the holes in the "seals" about half the size of the thing you're putting through them to get a good seal.  Inner tube stretches... I forgot that when cutting the arm holes the first time.


Lid off, but this is more or less what it looks like when you're working.


I used this setup prior to the sealing it up with the inner tubes.  Turns out, you look like a cokehead when you're done because that soda can and will fly out of pretty much every orifice possible, even with the wind tunnel created by the vacuum.  It cleaned up my brake parts pretty well, I thought.

All told, I think this setup cost me about $20 to make.
~ Jim

formerly "emperorspartacus"

There are old bikers.  There are dumb bikers.  There are no old, dumb bikers.

My CB650C rebuild http://forums.sohc4.net/index.php?topic=74212.0