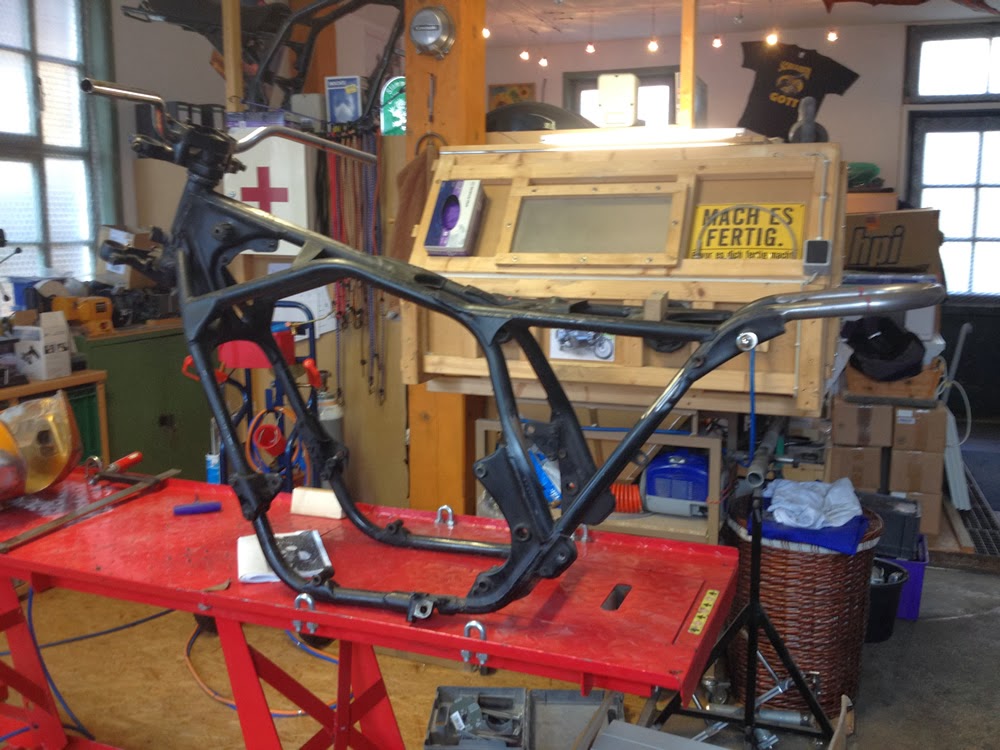
Author Topic: 750 DOHC Project  (Read 26685 times)

0 Members and 3 Guests are viewing this topic.

Offline ljonny18

  • Enthusiast
  • **
  • Posts: 114
    • My CB750 Project
Re: 750 DOHC Project
« Reply #125 on: November 19, 2013, 06:57:59 AM »
As I am still waiting for a tool to re-fit the valves and rebuild the top end of the motor.... back to my frame / tank issues. You may remember that I want to fit a different tank, taken from an older (SOHC) CB750 to my (DOHC) frame, but the problem is that the inside of the tank is completely different, is too small (thin) and needs quite some modification to allow it to sit correctly (lower) on the frame without rubbing. As you can see its too high on the frame:


I spent a long time trying to find someone local (here in Germany) to do this modification. I was told it was not possible, its not worth doing, it will just be problematic, it will damage / break the tank and will not be usable etc etc... I appreciate and understand these comments but I have my heart set on this tank :( I did eventually find a custom bike builder who said he can do it, but will need at least 203 days work and at 75 Euros / hour would add up to almost 2000 Euros which is out of my budget :(

I contacted a bike builder in Italy (FranzGarage) who has completed such a modification on two bikes previously, and he very kindly gave me some advice and pointed me in the right direction to try and complete the modification.
Basically the inside of the tank needs widening in the areas where it hits the frame:


It is not actually that much it needs, about 2cm (1 cm either side) would be sufficient.

It also needs bringing back a couple of cm so that the bars don't hit the tank of full lock, therefore ill somehow have to move the mounts for the fram rubbers back a couple of cm:


Offline ljonny18

  • Enthusiast
  • **
  • Posts: 114
    • My CB750 Project
Re: 750 DOHC Project
« Reply #126 on: November 19, 2013, 07:16:20 AM »
I basically had two options that I could do with the tank (which is good as I have two tanks to play with :) ). The first / easiest option is to beat the indies in the correct places until the tank fits (not the most elegant solution I agree). The second option is to cut out the sections of tank that hit the frame, and that fill / cover and weld the cut areas with shaped metal to fit accordingly.

To get the ball rolling, I took the first tank and first solution so I could see if once the tank is fitted if all my other ideas related to the tank (seat, bars, riding position etc...) would work, at least this way I had and working base ad something to start with. Its it all works out well, I will complete the tank properly by cutting and welding the underside to fit properly (watch this space).

I filled the tank to the brim with water to prevent damaging the tank when beating it with a rubber mallet - this did not work as I created extra dents in the tank, and cracked the inside of the tank :( although this is not the end of the world as I can weld up the cracks and the tank was already dented and in need of some TLC (just needs more now).


I also had to babysit while doing this:


I have now beat the top inserts into shape (red) and will now move onto beating down the blue bits.


Finished, the tank now sits nicely on the frame with no rubbing or contact to the frame, it just does not look very nice, is dented and cracked :(
« Last Edit: November 19, 2013, 07:19:06 AM by ljonny18 »

Offline ljonny18

  • Enthusiast
  • **
  • Posts: 114
    • My CB750 Project
Re: 750 DOHC Project
« Reply #127 on: November 19, 2013, 07:19:18 AM »
I found a guy in the town I live who has a Kawasaki Zephyr Club and small workshop that he has very kindly said I can use for my project. He is very interested in the project and is willing to help out :)

I took the tank down to try and fix what I had broken while beating it into shape.

First up was to repair the cracks in the bottom of the tank:


Next was to clean up and sand blast all the dented areas of the tank so I could try and pull them out :


Homemade blasting machine :)


The sand could not take the stickers off so I had to do this manually:


Once ready, we tried to pull out the dents using an adhesive based puller:


This sadly did not work dues to the strength of the metal used for this tank - as I d=found out while beating the tank, these old CB tanks are solid !!! a lot more robust than other tanks !!!

I therefore had to weld rods to the tank and pull the dents out this way. Although messy, this worked well ! - Pictures to follow.

Offline Roach Carver

  • Really Old Timer ...
  • *******
  • Posts: 6,725
Re: 750 DOHC Project
« Reply #128 on: November 19, 2013, 07:52:04 AM »
Looking good!

Offline crazypj

  • I'm brill, me
  • Old Timer
  • ******
  • Posts: 4,467
  • first 100,000 miles. 1977 CB550F
Re: 750 DOHC Project
« Reply #129 on: November 19, 2013, 10:17:01 AM »
Wouldn't it be much easier to get a tank off wrecked 750/900, cut the bottom section out then graft it into the SOHC tank?
I fake being smart pretty good
'you can take my word for it or argue until you find out I'm right'

Offline Roach Carver

  • Really Old Timer ...
  • *******
  • Posts: 6,725
Re: 750 DOHC Project
« Reply #130 on: November 19, 2013, 11:02:13 AM »
That is a great idea. A member here named "Terry in Australia"  has pictures somewhere of how he split hsi tank. He essentially ground the seam down and then split the two halves. seemed pretty straight forward.

Offline ljonny18

  • Enthusiast
  • **
  • Posts: 114
    • My CB750 Project
Re: 750 DOHC Project
« Reply #131 on: November 20, 2013, 01:34:30 AM »
Yes this is a good idea, and it is something that had also crossed my mind. The original tank is a lot longer that the one I want to use, however I will measure it up and cut the bottom out and see if it fits nicely - I have a second tank to play with, so I will look into this :) Thanks !

Offline ljonny18

  • Enthusiast
  • **
  • Posts: 114
    • My CB750 Project
Re: 750 DOHC Project
« Reply #132 on: November 20, 2013, 05:09:12 AM »
Started working on building the top end of the motor and getting the valves in. I think im getting old as it was too cold to work in the garage over the weekend. Luckily (thanks to a neighbor) I have access to the workshop at one of the local car garages and can use the workshop when its not open for business. I therefore loaded the engine into the back of the car headed down and got setup:


First off I founds some old gaskets that id missed :( I thought I had finished the long and mind numbingly boring process removing the old gaskets, apparently not ! and these 4 were the worst of the lot :(


and then I started the valves:


You can pb tell by the pictures that this process was a lot more tricky than I expected. It took me a while to get the hang of it and in turn took me ages for each. I am not even half way done so will have to go back down to complete it.

Offline ljonny18

  • Enthusiast
  • **
  • Posts: 114
    • My CB750 Project
Re: 750 DOHC Project
« Reply #133 on: November 22, 2013, 12:18:27 AM »
Spent a bit more time on original tank and original idea. Here is the tank looking in a bit of a mess after I managed to pull most of the dents out. These tanks are really solid and it took quite some effort getting the dents out. We welded a threaded rod to the tank in many places one at a time and slowly worked through each dent until it was at a state where it was a good as could be and at a stage where it could be easily filled to finish etc... The onlt problem is that it looks a right mess :)


This is the worst / biggest dent on the top of the tank. The tank also has 2 small dents on the right and a small but nasty one on the front right


After the dents were pulled out to (what I guess) the best they could be, I sand blasted away any dirt and took another couple of cm of paint off around each dent to try to make the filling / finishing process easier:


Instead of using filler, we decided to fill the holes with metal. Never doe this beofre, and was the first time id heard of it, but it was recommend as its a much more solid solution so I thought id give it a go.


I bought a load of metal rods, heated them up and melted them into the dent:


I let it cool down and then started to sand down the added metal and re-apply accordingly...


I have only so far worked on one dent (the smallest) and this still needs quite some work (sanding and re-applying metal etc) but it seems to be working out well... I think I can get it exact, but may also need a touch of filler at the end :)


Offline mono

  • Definitely no
  • Expert
  • ****
  • Posts: 1,271
  • 1975 Honda CB550, 1978 CB750K (in progress)
Re: 750 DOHC Project
« Reply #134 on: November 22, 2013, 06:35:49 AM »
what kind of metal are you using to fill the dents?

Offline crazypj

  • I'm brill, me
  • Old Timer
  • ******
  • Posts: 4,467
  • first 100,000 miles. 1977 CB550F
Re: 750 DOHC Project
« Reply #135 on: November 22, 2013, 12:47:24 PM »
Probably 'lead' for car bodywork?
I know you can buy kits for it
I fake being smart pretty good
'you can take my word for it or argue until you find out I'm right'

Offline ljonny18

  • Enthusiast
  • **
  • Posts: 114
    • My CB750 Project
Re: 750 DOHC Project
« Reply #136 on: December 09, 2013, 01:32:41 AM »
what kind of metal are you using to fill the dents?

Hi I used a special tinning solution that containing lead. Here is the exact product that I used:

http://www.korrosionsschutz-depot.de/shop_xtc/product_info.php?info=p419_Karosseriezinn-25-ig--Stange.html


I applied it using a non corrosive zinc chloride based paste and a v-hot flame :)

http://www.korrosionsschutz-depot.de/shop_xtc/product_info.php?info=p421_Verzinnungspaste-NEU-nicht-korrosiv--250g.html

Offline ljonny18

  • Enthusiast
  • **
  • Posts: 114
    • My CB750 Project
Re: 750 DOHC Project
« Reply #137 on: December 09, 2013, 03:51:54 AM »
New parts: I ordered some new gaskets (this time the correct parts) so that I can hopefully (eventually) get the motor back together


When putting the valves back in, I managed to break one :( therefore one is still pending. The replacement:


and some additional bits and pieces that I require:


Offline ljonny18

  • Enthusiast
  • **
  • Posts: 114
    • My CB750 Project
Re: 750 DOHC Project
« Reply #138 on: December 09, 2013, 03:52:56 AM »
Back to the never ending story of my tank... I think next time I will spend a bit more money and get a decent tank as a starting base. I thought as the plan way to modify the tank, an old battered one would suffice, however I am paying for this now. The tank is full of dents, some so small they are hardly visible. I have pulled out what I can the larger ones and prepped / blasted the smaller ones for further filling :)


Offline ljonny18

  • Enthusiast
  • **
  • Posts: 114
    • My CB750 Project
Re: 750 DOHC Project
« Reply #139 on: December 09, 2013, 03:53:38 AM »
As I mentioned and showed in a previous post, I used metal rods to fill the wholes instead of using filler etc.. mainly just to test and try the method in comparison to filler as I have heard good thongs about it and also as its a stronger finish etc. The rods are basically a tinning solution that contained and when heated up melt into a fluid solution that can be worked with. Since my last post I have however improved the process. I was experiencing problems on some parts of the tank where the solution was not mating well with then tank (although blasted and cleaned). I looked further into this and bought a non corrosive zinc chloride based paste which I applied to the tank before filling with the rods creating a v-good bond between the two:


Its really easy and good, basically apply the paste:


Heat it up:


And wipe it off:


Leaving a perfect surface where the lead filler can be nicely applied to


This is all cool and much fun, although the next step is basically sanding, sanding and more sanding which is not much fun : ( Here is a small one I completed as an example:


Looks good:


Offline ljonny18

  • Enthusiast
  • **
  • Posts: 114
    • My CB750 Project
Re: 750 DOHC Project
« Reply #140 on: December 09, 2013, 03:56:05 AM »
Needed a break from dents so decided to finally get the SOHC tank fitted and sitting how I want it on the DOHC frame. Started out with the original tank to get an idea of spacing and how much room there is to play with re the motor etc...


Also added the yokes and bars to make sure they do not hit the tank on full lock - this was a worry of mine as I thought they would, and id have to modify the rubber mounts to move the tank back a couple of cm however they do not and there is full clearance on both sides :)


Further modification required - the tank still needs to sit a few cm lower at the back and the tank bracket holder catches on frame in the corner, so they needed to be trimmed:


Once trimmed the tank sat lower which is good, but bade contact again from other parts underneath, therefore further heating and modification was required :S


After a few hours the tank is sitting at the required / wanted height and is making no contact with the frame :) result ! However all the modification has appeared to dis-shaped the tank a bit - it is now wider that before. We simply compressed it a cm and its back and square again:
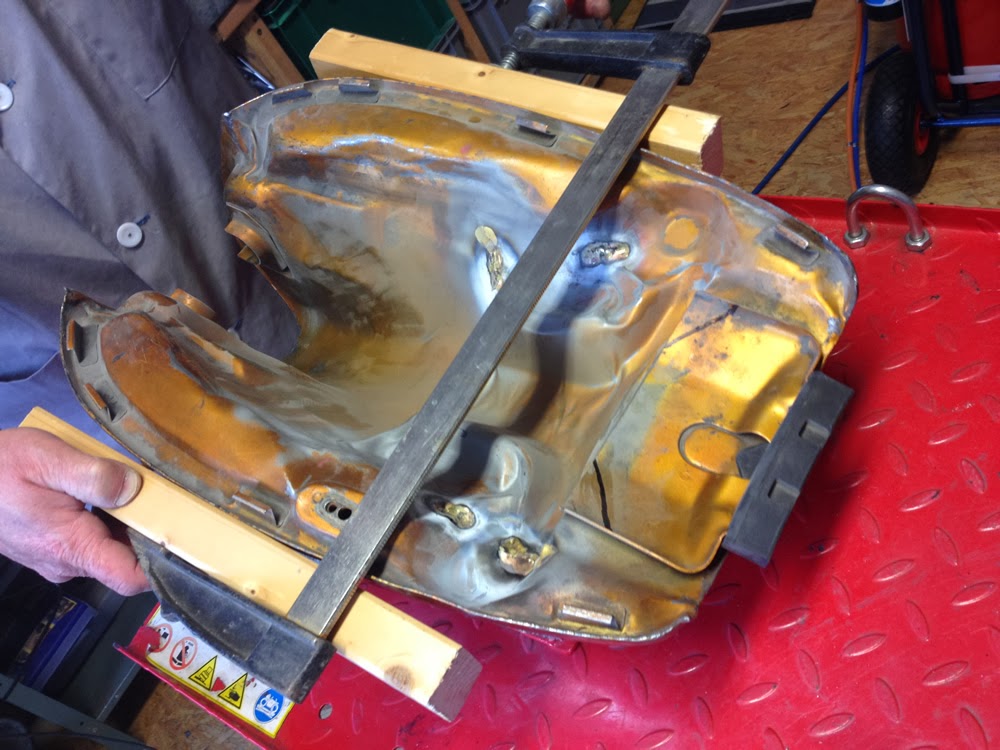


This is quite a step for me... from the start I wanted to use the older tank on the newer frame and now this step is almost complete. The tank is sitting how I want it :


I have learnt a lot getting to fit this tank, and know that next time I will do it differently :) The better way would have been to simply cut away the problematic areas and weld them back with sheet metal etc rather than heating up the underside of the tank and modifying it with a hammer :) however you live and learn and this is the whole point of this project !

Offline ljonny18

  • Enthusiast
  • **
  • Posts: 114
    • My CB750 Project
Re: 750 DOHC Project
« Reply #141 on: December 09, 2013, 04:00:24 AM »
Next step was to create a bracket to securely attach the tank top the frame.

The tank has mounts at the front that connect to the rubber mounts on the frame. I did not have to change the fram mounts or the tank brackts as this was already aligned perfectly, all I had to do here was replace the DOHC mount rubbers with SOHC rubbers as they are smaller and will therefore fit the tank brackets etc - so this was v-simple, however the back was not quite so simple:

We used the original SOCH rubber at the back and made a holder for it that could be attached to a custom bracket and in turn attached to the frame :S here goes:

The rubber:


The holder:


The bracket:


We then welded a nut to the bottom of the frame to screw the bracket into:


finished:


A securely fitted tank :)


Offline ljonny18

  • Enthusiast
  • **
  • Posts: 114
    • My CB750 Project
Re: 750 DOHC Project
« Reply #142 on: December 09, 2013, 04:02:38 AM »
Next step was to create a bracket to securely attach the tank top the frame.

The tank has mounts at the front that connect to the rubber mounts on the frame. I did not have to change the fram mounts or the tank brackts as this was already aligned perfectly, all I had to do here was replace the DOHC mount rubbers with SOHC rubbers as they are smaller and will therefore fit the tank brackets etc - so this was v-simple, however the back was not quite so simple:

We used the original SOCH rubber at the back and made a holder for it that could be attached to a custom bracket and in turn attached to the frame :S here goes:

The rubber:


The holder:


The bracket:


We then welded a nut to the bottom of the frame to screw the bracket into:


finished:


A securely fitted tank :)


Offline ljonny18

  • Enthusiast
  • **
  • Posts: 114
    • My CB750 Project
Re: 750 DOHC Project
« Reply #143 on: December 09, 2013, 04:03:36 AM »
Things are starting to come slowly together so I started to play about with some ideas for the side pods / battery cover etc using an old computer case... will have to give this some more thought


Then the little man came to inspect what was going and wanted to play so that was the end of a productive day :)


Offline ljonny18

  • Enthusiast
  • **
  • Posts: 114
    • My CB750 Project
Re: 750 DOHC Project
« Reply #144 on: December 09, 2013, 04:04:53 AM »
I am doing my best (and doing quite a good job) to avoid sanding. Blasted and filled in the badge holder on the tank:


Offline ljonny18

  • Enthusiast
  • **
  • Posts: 114
    • My CB750 Project
Re: 750 DOHC Project
« Reply #145 on: December 09, 2013, 04:05:50 AM »
I decided to make a bracket to allow mw to work on my tank (sane and paint) on the paint frame to basically give me better access and angles to the tank during sanding etc ...

Front bracket:


Back bracket:


Finished:


Offline ljonny18

  • Enthusiast
  • **
  • Posts: 114
    • My CB750 Project
Re: 750 DOHC Project
« Reply #146 on: December 09, 2013, 04:06:54 AM »
Next step to avoid sanding was to create a pressure test system for the tank. All the beating and modification has left some cracks in the tank that need some attention. I fixed up all the ones I could visibly find but this is not (nowhere near 100% proof):

Blocker for the top (entry cap) complete with bottom (underside) holding bracket and entry (gauge tube):


and for the bottom (petrol tap):


Let the testing commence:


Result: Failed miserably - back to the workbench ! Although to be fair the air leaks where from sections of the tank that were not touched and where you would least expect them (top of the tank in good undamaged areas), the underside appears to be sealed up nicely - strange:


Offline menudo

  • Full Member
  • *
  • Posts: 1
Re: 750 DOHC Project
« Reply #147 on: February 11, 2020, 05:17:38 PM »
What ever happened with this project? How did the engine come out? I'm in process doing a full rebuild and have some questions if you're open to it. I know it's been a really long time since this was done and touched. Thanks in advance.