Author Topic: Seat Repair - Vinyl Tear  (Read 8197 times)

0 Members and 1 Guest are viewing this topic.

Offline chinaski

  • Full Member
  • *
  • Posts: 36
Seat Repair - Vinyl Tear
« on: December 23, 2012, 10:59:48 am »
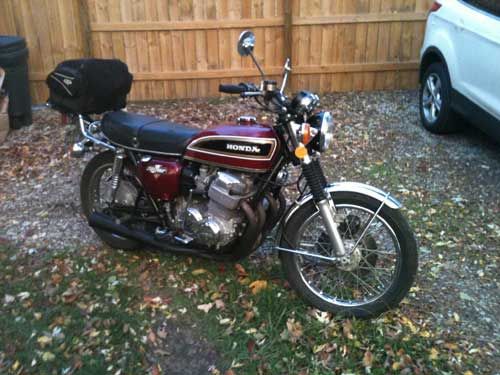
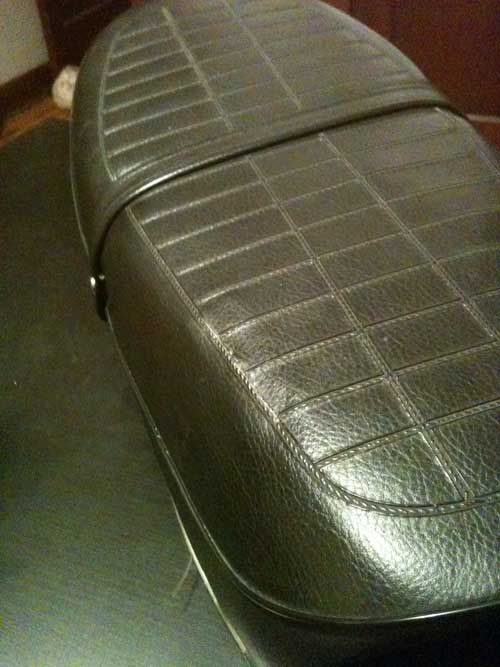
I recently purchased my first bike, a 1976 CB750 K6 + Wiseco 836cc kit, just under 3K miles on a rebuilt engine. I've put about 900 miles on it since September. It's great. I love it.


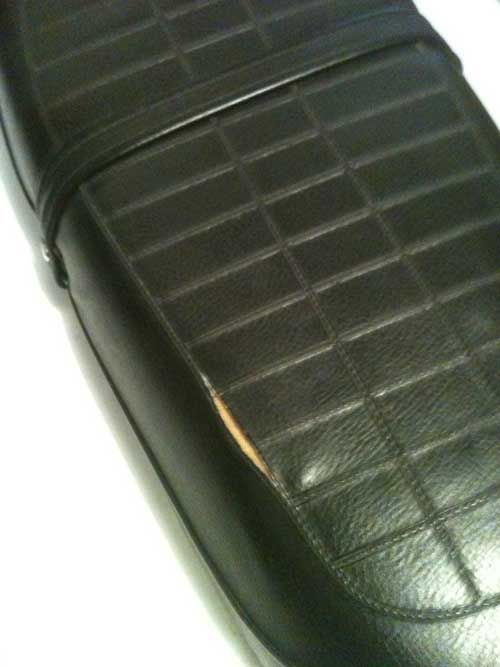
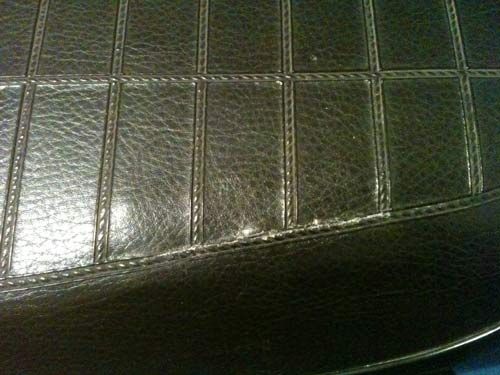
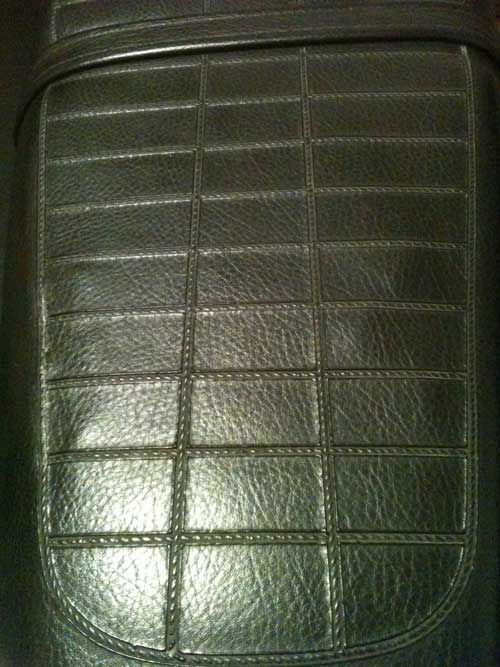
Bike was in pretty good shape except for a few minor issues including a small 2-3 inch tear in the vinyl seat.


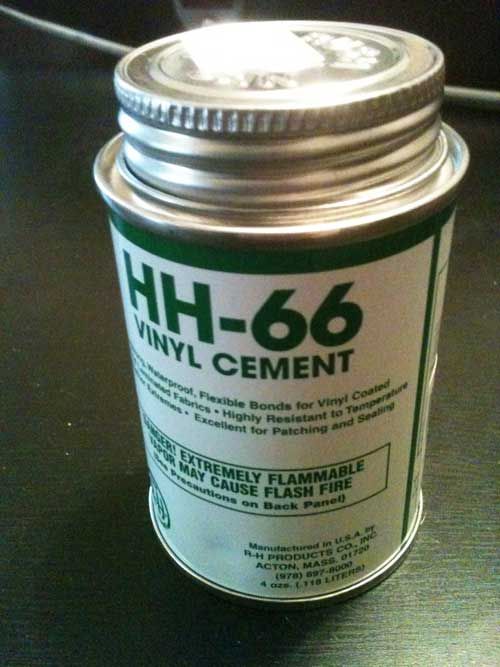
Found a great product that repairs vinyl items, HH-66. Roughly $10-12 with shipping for a 6oz container, arrived within 3 days. This is a vinyl cement used to repair those large vinyl rental tents at weddings and such. Once the product is dry it does not crack, is not affected by heat, is not soluble, becomes waterproof, is flexible and works with vinyl and other types of rubber/plastic materials.
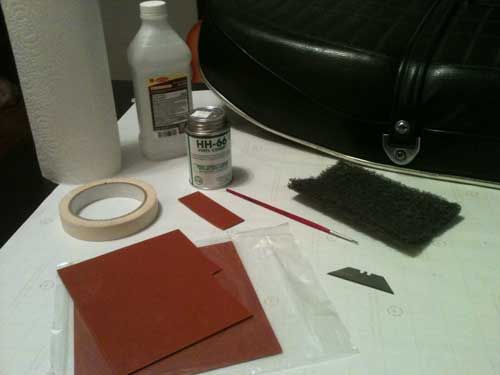


Materials

Here's what you need to fix that tear
- Rubber gasket material (plumbing section hardware store)
- HH-66 Vinyl Cement (google it)
- Razor blade
- Rubbing alcohol
- Masking tape
- small brush/Qtips
- Paper towels
- steel wool /scuff pad

- tweezers


Testing

Test the vinyl cement on the gasket material and the seat first.

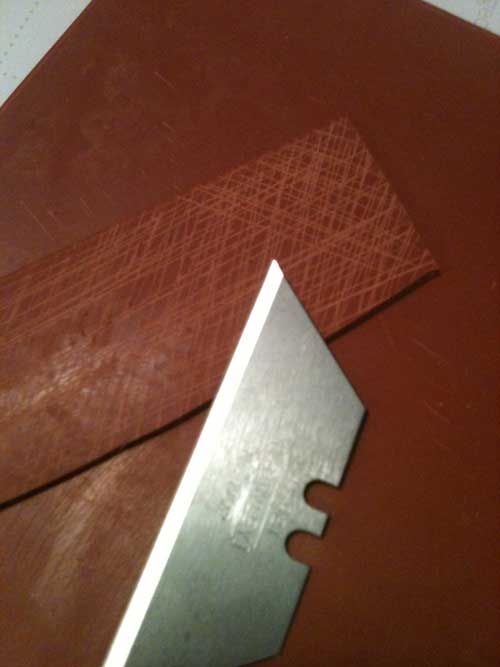
Cut a small section of material. Wipe it down with rubbing alcohol and allow it to dry. Use the razor blade and score the surface of the gasket material roughly half way through. You want to allow the vinyl cement to grab onto it as much as possible.


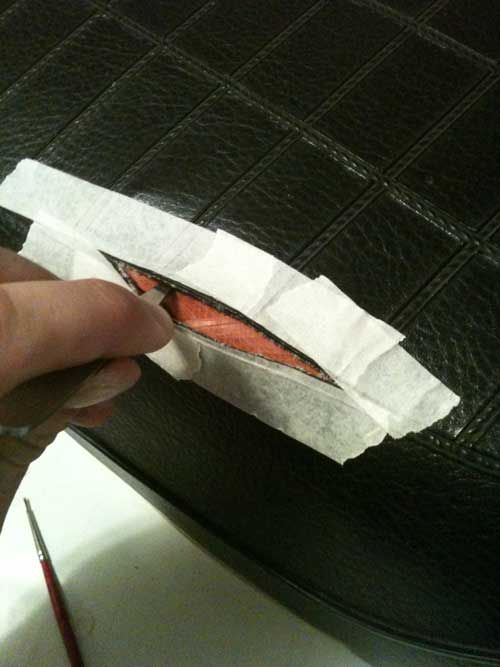
Depending on how big the tear is, you might have to gently increase the size of the tear so you have plenty of room to work with. I had to pick off old glue from the underside of the vinyl, it came off easy.


After clearing off old glue and any other loose material from inside the tear, clean off the surface with rubbing alcohol and allow it to dry.


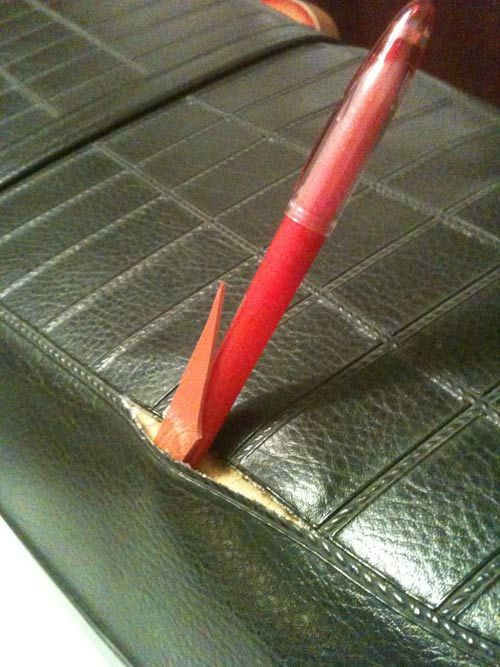
This vinyl cement works like other rubber cements. Apply a liberal amount of the material to both surfaces separately and let them dry. Once dry bring both surfaces together and apply pressure to encourage the two surfaces to bond. I wedged a pen in there which worked great. 


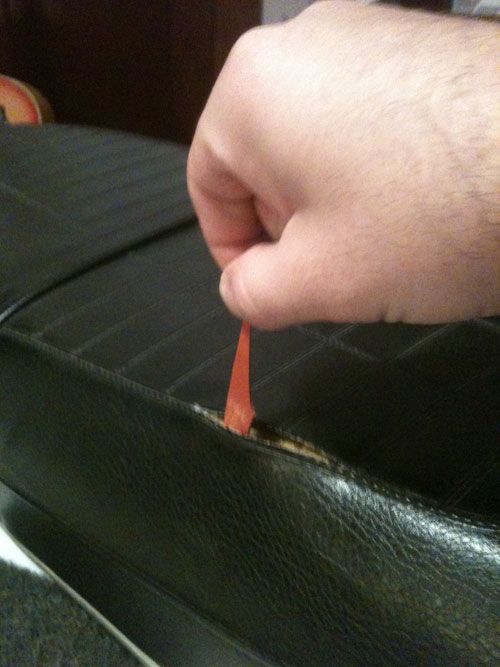
I did a few of these tests and found that a 12-24 hour dry time was sufficient before the bond was strongest. In this image I'm lifting the entire weight of the seat with the rubber gasket material bonded with the seat.


After testing the product and ensuring that the gasket material will bond with the HH-66 you're ready to move on to the repair.


The repair

Cut a piece of gasket material larger than the tear. Clean it with rubbing alcohol and score it with the razor blade. Additionally, if you have steel wool or an abrasive pad it doesn't hurt to scuff the surface.


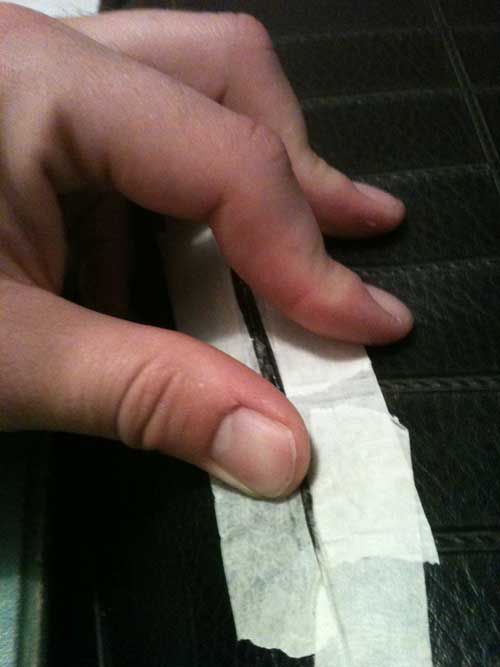
Use the masking tape to mask off the areas of the seat around the tear. In retrospect, I would have taped off a little more area than I initially did.


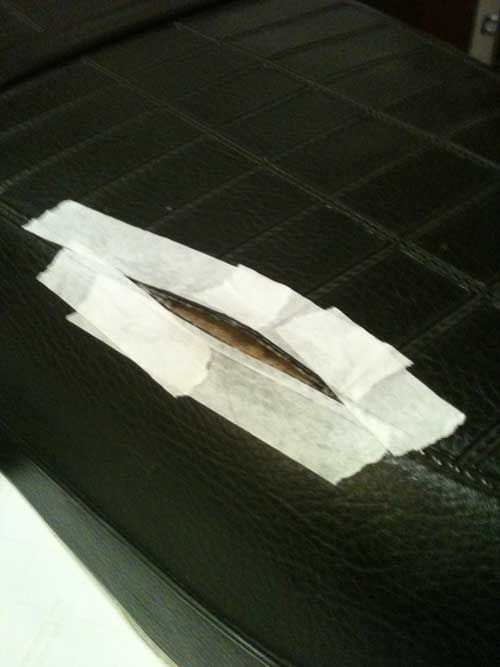
Feed the gasket material into the tear with the tweezers. Center the material so it is distributed evenly with the tear. This will be a tight squeeze, be patient.


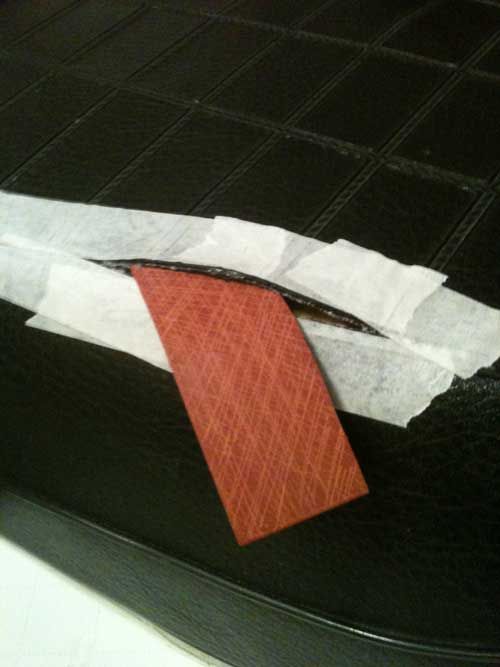
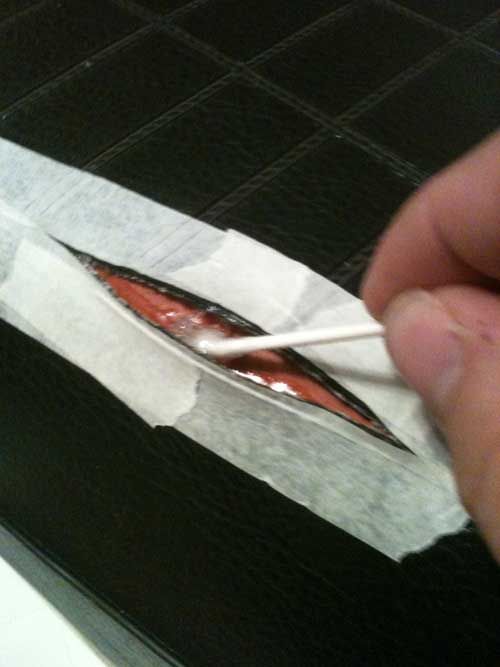
Using a Qtip or brush apply a liberal amount of HH66 to the underside of the seat and on the gasket material. Make sure to push plenty of vinyl cement under the tear and cover the whole surface of the gasket material.


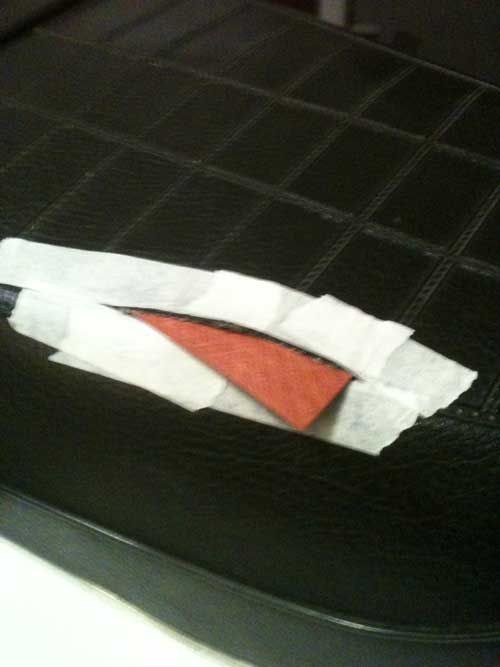
Allow the cement to dry before bring the surfaces together. You really want to pinch the edges together as close as possible. The tighter the fit the better it will look. Doing this manually proved to work best. I held these two surfaces in place for a good 15-20 minutes. During that time I noticed a few areas directly around the tear that needed additional cement. With a small brush I pushed additional glue into the tear as I continued to apply pressure and hold everything together. 


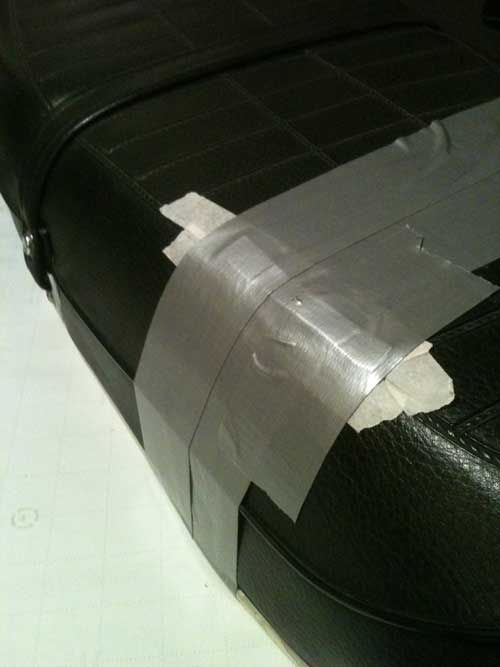
After holding everything together and ensuring any vinyl cement towards the surface of the tear was dry I ran duct tape around the seat making sure to apply as much pressure as possible on all the surfaces being bonded. Let that sit for 24 hours.


After 24 hour I removed the duct tape.


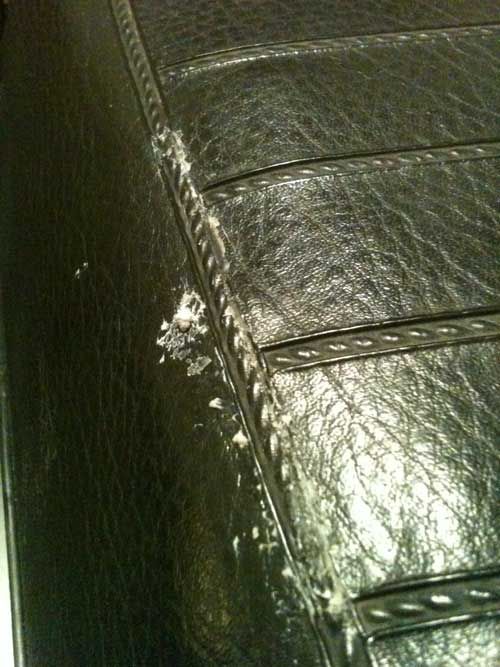
Use your fingernail and scratch off any dried vinyl cement and cut away any larger chunks with the razor blade.


Follow up


I waited 72 hours for the vinyl cement to fully cure before using the seat.

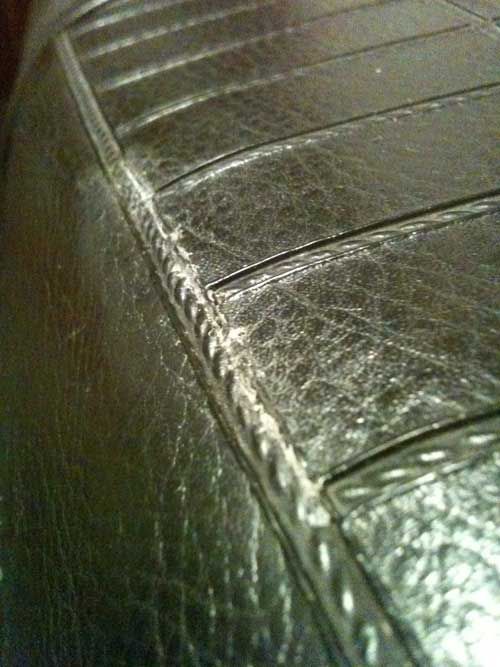
You'll notice the gasket material makes a small impression in the surface of the vinyl. This slowly becomes less visible the more you ride.

I've put 300+ miles on the bike since the repair and it's holding up great. No loosening or separating.

Hope this helps anyone out there interested in doing a repair to their seat.

Cheers.


« Last Edit: February 21, 2013, 12:20:31 pm by chinaski »
1976 CB750K6 :: 836cc :: 4-1 :: Stock airbox

Online hoodellyhoo

  • CB350F
  • Master
  • *****
  • Posts: 1,721
Re: Seat Repair - Vinyl Tear
« Reply #1 on: June 14, 2013, 04:47:18 am »
Wow! Thanks for the great tutorial!
1972 CB350F (Back from the Dead!)- http://forums.sohc4.net/index.php?topic=20822.0
1965? S65 - Coming Eventually!
1972 CB750K2 (father-son project)
1976 CB750K6- (sold) http://forums.sohc4.net/index.php?topic=96859.0
1976 CB750K6 (sold)- http://forums.sohc4.net/index.php?topic=62569.0

Offline andy750

  • Really Old Timer ...
  • *******
  • Posts: 7,862
Re: Seat Repair - Vinyl Tear
« Reply #2 on: June 14, 2013, 06:43:49 am »
Wow! Thanks for the great tutorial!

+1 great write up and I like the follow up. Thanks for sharing!
Current bikes
1. CB750K4: Long distance bike, 17 countries and counting...2001 - Trans-USA-Mexico, 2003 - European Tour, 2004 - SOHC Easy Rider Trip , 2008 - Adirondack Tour 2-up , 2013 - Tail of the Dragon Tour , 2017: 836 kit install and bottom end rebuild. And rebirth: http://forums.sohc4.net/index.php/topic,173213.msg2029836.html#msg2029836
2. CB750/810cc K2  - road racer with JMR worked head 71 hp
3. Yamaha Tenere T700 2022

Where did you go on your bike today? - http://forums.sohc4.net/index.php?topic=45183.2350

Offline HondanutRider

  • Ride often - ride long - ride SAFE...and be an
  • Expert
  • ****
  • Posts: 1,283
Re: Seat Repair - Vinyl Tear
« Reply #3 on: June 14, 2013, 10:47:41 am »
Great write-up and solution. 

You mentioned that "the gasket material makes a small impression in the surface of the vinyl" which you can see in your picture.  I wonder if using a different material that would be thinner, instead of the rubber gasket that you used, would be better.  It would have to be strong to support the tear and also be able to adhere well to the cement.  Perhaps a piece of vinyl covering, similar to the seat material would work and also be thinner.  If the cement was applied to the fabric/down side of the re-enforcing material, then it should bond well to the seat material which likely also has a fabric surface reinforcing it on that side.  Then you wouldn't need to score it like you did for the rubber piece.

Offline honda_dog

  • Hot Shot
  • ***
  • Posts: 594
Re: Seat Repair - Vinyl Tear
« Reply #4 on: November 26, 2013, 04:59:33 am »
Great write-up and solution. 

You mentioned that "the gasket material makes a small impression in the surface of the vinyl" which you can see in your picture.  I wonder if using a different material that would be thinner, instead of the rubber gasket that you used, would be better.  It would have to be strong to support the tear and also be able to adhere well to the cement.  Perhaps a piece of vinyl covering, similar to the seat material would work and also be thinner.  If the cement was applied to the fabric/down side of the re-enforcing material, then it should bond well to the seat material which likely also has a fabric surface reinforcing it on that side.  Then you wouldn't need to score it like you did for the rubber piece.

I have the same type of separation in my seat. This was a nice write-up solution to the problem, thanks.

I have an old section of seat from another bike that I can cut material from and use instead of the rubber gasket material. I will try this once I receive the cement and post the results. Again, thanks for the tutorial.
1978 CB750K
1981 CB900F
1978 Suzuki GS1000E
1981 Suzuki GS1100EX
1980 Suzuki GS1000S (Wes Cooley replica)
1982 Suzuki GS1000S Katana
1982 Suzuki GS1100EZ
1983 Suzuki GS1100ED
1983 Suzuki GS1100ESD
2014 Honda F6B Deluxe

Offline nccb

  • Expert
  • ****
  • Posts: 1,145
  • 1974 CB750 Four
Re: Seat Repair - Vinyl Tear
« Reply #5 on: November 26, 2013, 05:19:54 am »
Looks a lot better than my black gorilla tape job  ::)

Abrahms

  • Guest
Re: Seat Repair - Vinyl Tear
« Reply #6 on: July 20, 2017, 02:19:53 am »
This amazing gaming reviews site looks a lot black gorilla tape job  ::)

Thanks for the tut, looks good as new. i'll give this a try on mine.
« Last Edit: June 19, 2020, 02:19:11 pm by Abrahms »

Offline ZirconDrummer

  • Full Member
  • *
  • Posts: 4
Re: Seat Repair - Vinyl Tear
« Reply #7 on: March 11, 2018, 10:44:06 am »
Better late than never! ::)  Good advice travels and ages well.  Thanks for the run-through.
Bill