Author Topic: Almost READY! Project Wrap Up With Pics.  (Read 2893 times)

0 Members and 1 Guest are viewing this topic.

Offline NewOldSchool

  • Apprentice
  • Hot Shot
  • ***
  • Posts: 302
Almost READY! Project Wrap Up With Pics.
« on: January 08, 2013, 04:15:39 PM »
Hey guys,

I've been MIA from the forum for a while, but I've been busy! Quick recap, I bought a '74 CB750 two years ago with 16,000 original miles that had been  sitting in a heated garage for the last 10 years. It ran like crap at first, but that was just due to the lack of use. I fiddled with the carbs, and replaced the chain, sprockets, tires, oil, filter, plugs, etc. It ran like a champ for the last 2 years, only needing a new voltage regulator in the 16,000 miles I've put on it riding daily.

Then it the famous head gasket leak started.

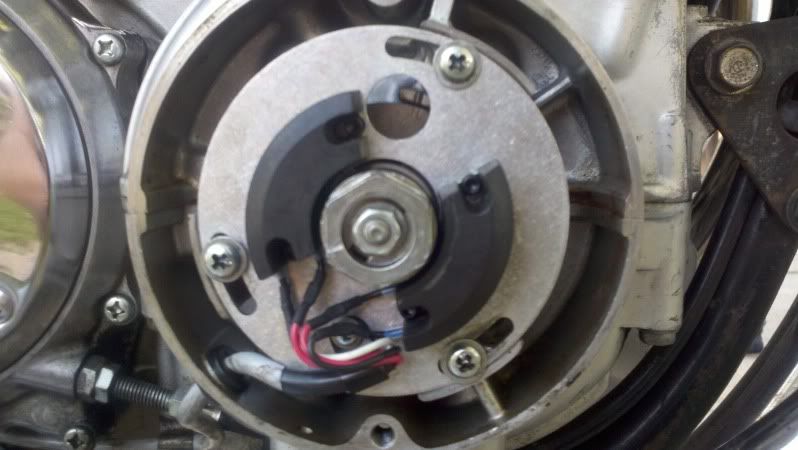
It got to the point where my right pant leg would be moist and a little pool of oil would collect in the recess above the clutch and points cover.  It was too annoying for me so it was time for a new head gasket.

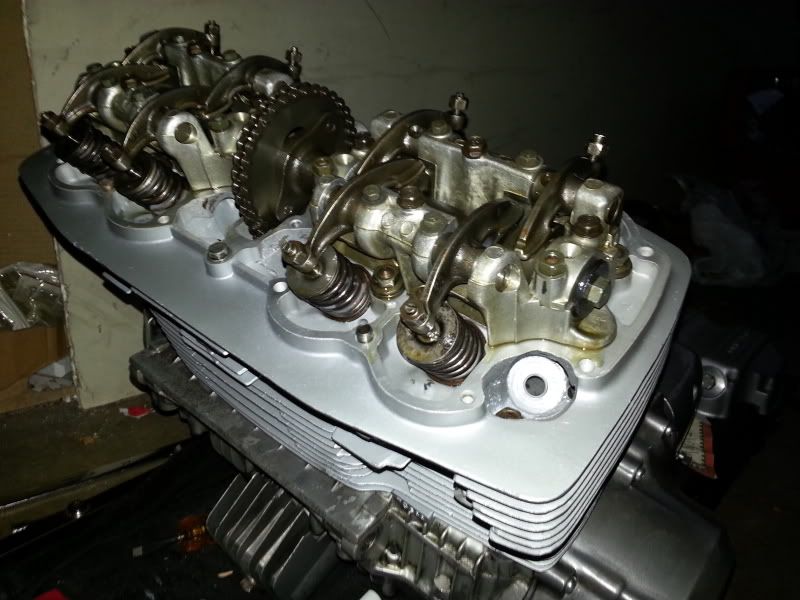
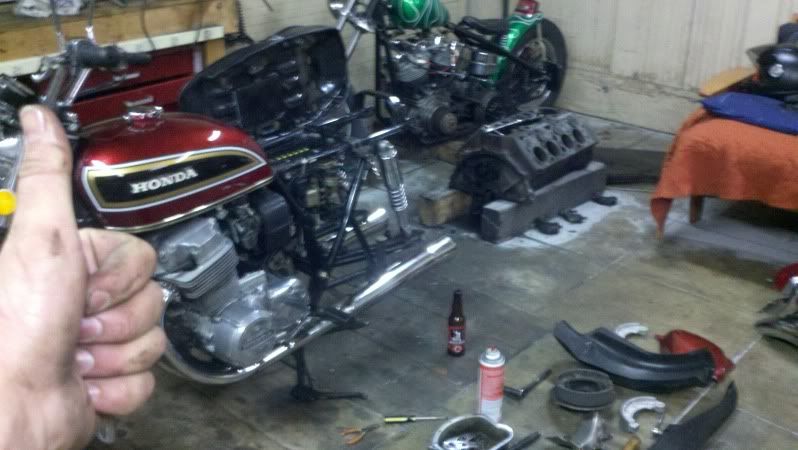
Out came the engine, off came the head (simple as that  ::) ). I swore I would resist all urges to do anything else, but change the head gasket. Out of curiosity I flipped the head over and poured gas in each chamber to check all the valves were sealing correctly... The #3 exhaust valve leaked, badly. Yay valve job time!

 Then I caught the dreaded project bug.  ;D

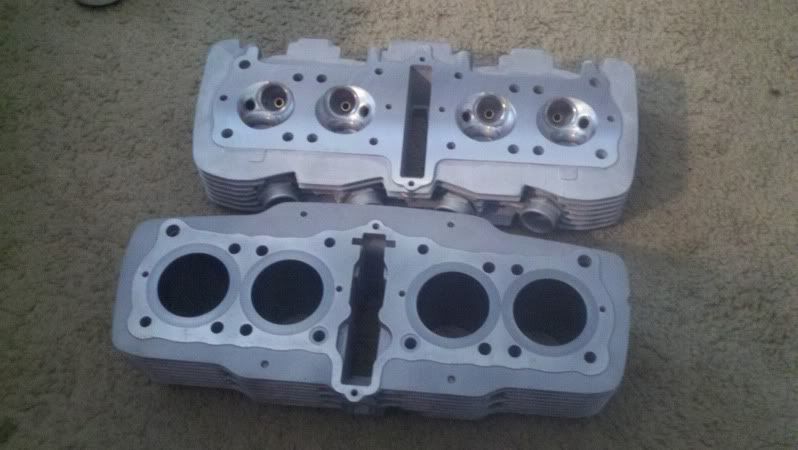
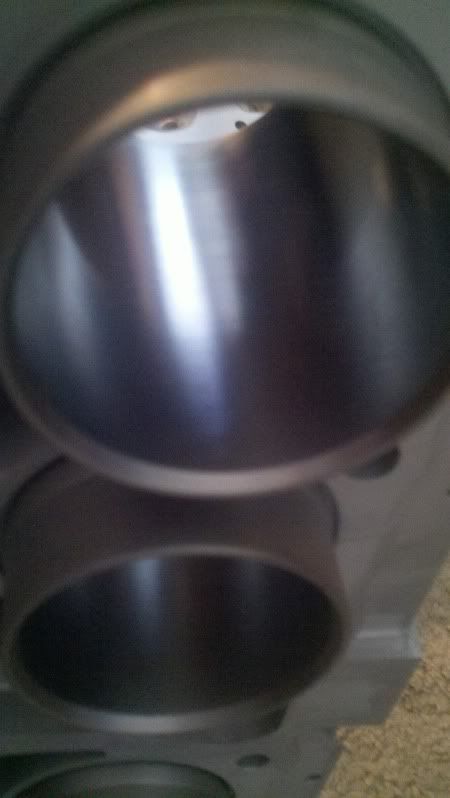
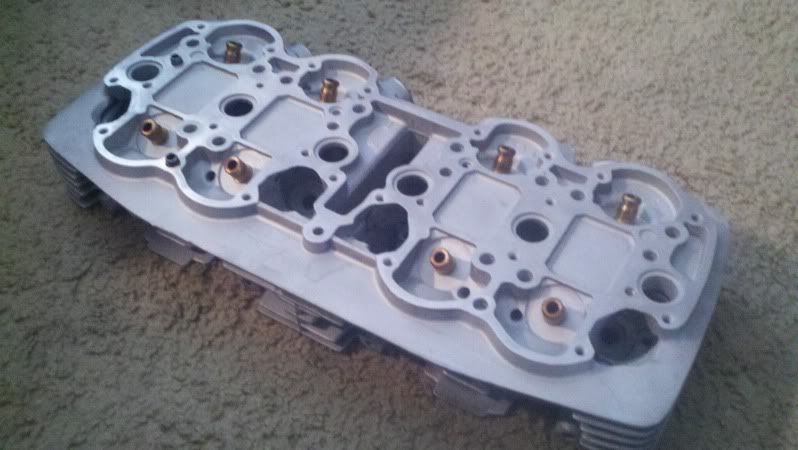
Since the head was off and the engine was out I might as well check the cylinders and pistons out too. Nothing really wrong there, just lots of carbon build up. I'd gone this far already so couldn't resist getting a fresh hone and some new rings for peace of mind. Meanwhile I was tearing down the head I noticed two of my exhaust valves had a tad more play in the guides than they should. So naturally, I went all in. The head and cylinders were sent off to the machine shop for media blasting, a 3 angle valve job, installed new APE valve guides, fresh cylinder hone and had both the cylinder head and block skimmed to make sure the mating surface would be nice and flat. After I got them back I primed and painted them the stock silver.

I was still sick with that damn project bug  ;D and I could feel the bike staring at me from its corner in the garage every time I walked by  :-*. New tires, bronze swing arm bushings, gas tank rubbers and side panel rubbers, throttle tube, grips, clutch cable, tachometer cable, new battery, halogen headlamp and a chrome 4 into 1 exhaust were thrown at it. Ahhh, much better. To finish things off I completely rebuilt the carbs and degreased and cleaned every single part I could get my hands on.

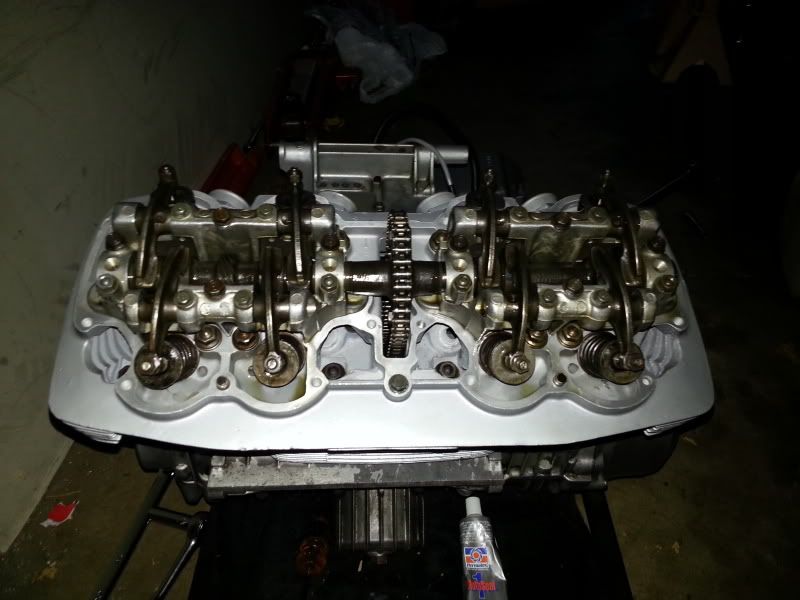
Now the engine is almost ready to go back in the frame and I want to know the best way to prime, start, and break in the engine before I fire it for the first time. I was thinking that pouring one of the quarts of oil down the cylinder head through the valve adjustment holes would help. Any other advice would be great. Thanks!

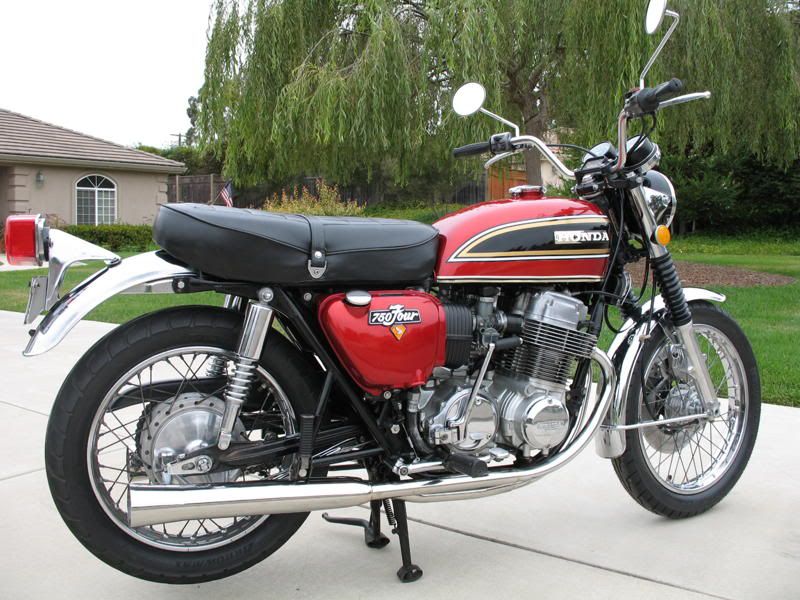
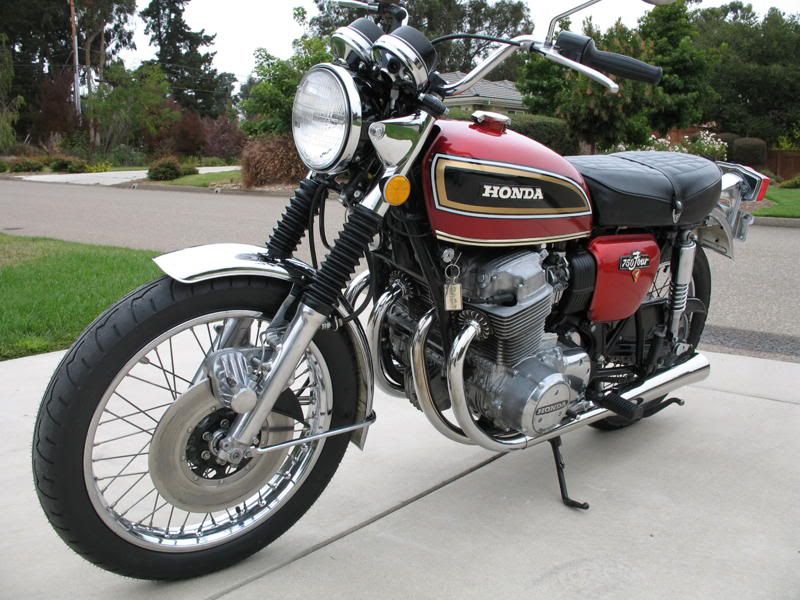
Here's how she looked before tear down.


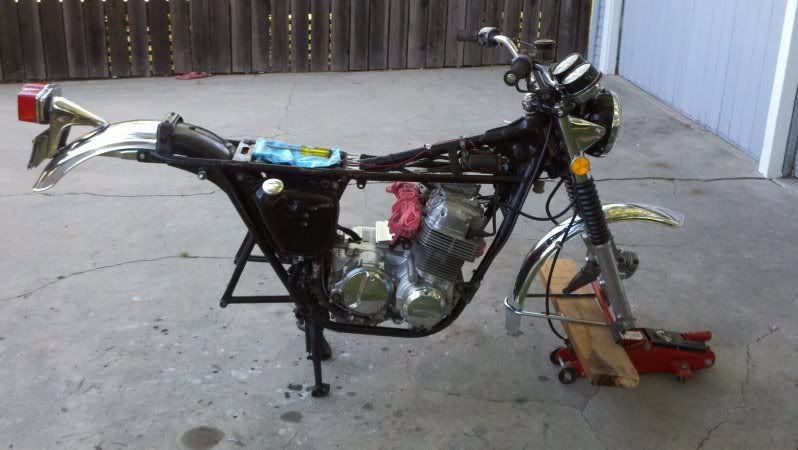
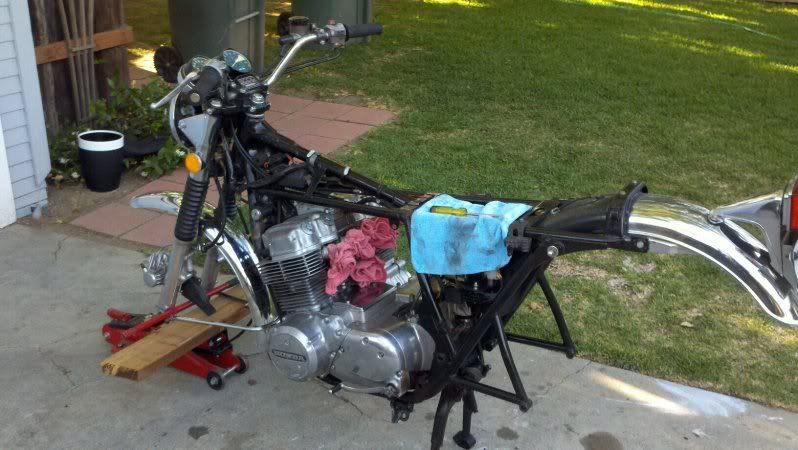
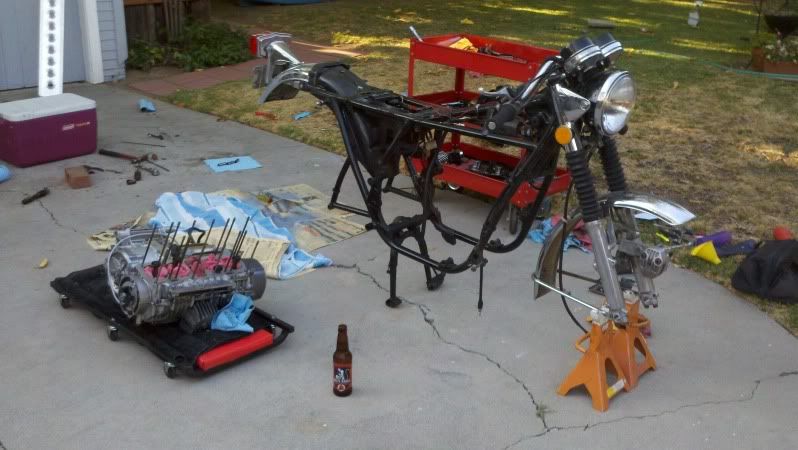
In deep!


Head and Cylinder Work


Almost Done!


Not putting miles on your bike is like not having sex with your Girl Friend so she'll be more desirable to her next Boy Friend.

Offline Garystratos201

  • I have never been a
  • Hot Shot
  • ***
  • Posts: 419
Re: Almost READY! Project Wrap Up With Pics.
« Reply #1 on: January 09, 2013, 06:12:58 AM »
Very nice looking bike. Looks like your doing great!!!...........Gary
Visit my build project;
http://forums.sohc4.net/index.php?topic=111620.0

Current ride; Bass boat.... 2005 Ranger 521VX,250 hp Mercury Verado, super charged and direct fuel injected. Not a bass on the lake can out run me !!!

Offline greenjeans

  • Industrial strengthed dreamer.
  • Old Timer
  • ******
  • Posts: 2,962
  • 1972 CB750K2
Re: Almost READY! Project Wrap Up With Pics.
« Reply #2 on: January 09, 2013, 06:30:25 AM »
Nuthin prudier than a spotless engine.   Beautiful.
Yep, I'm the kid that figured out how to put things back together...eventually.

Offline iron_worker

  • Master
  • *****
  • Posts: 2,081
Re: Almost READY! Project Wrap Up With Pics.
« Reply #3 on: January 09, 2013, 06:51:08 AM »
Is that original paint? Anyone know the color code of it? I'm also building a K4 750 and I think that's the color I'd like to go with.

Bike and build look great.

IW

Offline Supermex01

  • Enthusiast
  • **
  • Posts: 143
Re: Almost READY! Project Wrap Up With Pics.
« Reply #4 on: January 09, 2013, 07:54:08 AM »
Nicely done very clean!

Offline MoMo

  • Really Old Timer ...
  • *******
  • Posts: 8,275
  • Ride like you're invisible
Re: Almost READY! Project Wrap Up With Pics.
« Reply #5 on: January 09, 2013, 08:14:43 AM »
Did you use assembly lube?  I usually crank the motor for a minute or so with the kill switch on, let it rest same amount, crank again with kill switch on, rest then start up. Make sure oil pressure is there, turn off.  Then restart, check timing and sync carbs, and follow Honda's break in procedure.  Nice bike...Larry

Offline NewOldSchool

  • Apprentice
  • Hot Shot
  • ***
  • Posts: 302
Re: Almost READY! Project Wrap Up With Pics.
« Reply #6 on: January 09, 2013, 03:23:03 PM »
Did you use assembly lube?  I usually crank the motor for a minute or so with the kill switch on, let it rest same amount, crank again with kill switch on, rest then start up. Make sure oil pressure is there, turn off.  Then restart, check timing and sync carbs, and follow Honda's break in procedure.  Nice bike...Larry

Yep I did and thanks for the advice!
Not putting miles on your bike is like not having sex with your Girl Friend so she'll be more desirable to her next Boy Friend.

Offline MoMo

  • Really Old Timer ...
  • *******
  • Posts: 8,275
  • Ride like you're invisible
Re: Almost READY! Project Wrap Up With Pics.
« Reply #7 on: January 09, 2013, 03:25:46 PM »
Good and hope that all is well with the rebuild...Larry

Offline NewOldSchool

  • Apprentice
  • Hot Shot
  • ***
  • Posts: 302
Re: Almost READY! Project Wrap Up With Pics.
« Reply #8 on: January 09, 2013, 03:26:41 PM »
Is that original paint? Anyone know the color code of it? I'm also building a K4 750 and I think that's the color I'd like to go with.

Bike and build look great.

IW

The paint is the original paint, its in pretty amazing condition. There has been 1 or 2 older guys who swear that the color is from 1975 however so at some point someone may have put tins from another bike on it. Otherwise cosmetically the entire motorcycle is in original condition.
Not putting miles on your bike is like not having sex with your Girl Friend so she'll be more desirable to her next Boy Friend.

Offline iron_worker

  • Master
  • *****
  • Posts: 2,081
Re: Almost READY! Project Wrap Up With Pics.
« Reply #9 on: January 10, 2013, 06:08:51 AM »
That's what I was wondering. I looked into the original colors for a K4 750 and red was never available to my knowledge. In 74 the colors that were available were:

Sunrise Orange
Freedom Green
Boss Maroon


While researching this I came across this:

http://www.motorcycleproject.com/motorcycle/text/lubrtech.html

A great guide. Looks like your color might be Flake Apricot Red. Very cool.

IW

Offline NewOldSchool

  • Apprentice
  • Hot Shot
  • ***
  • Posts: 302
Re: Almost READY! Project Wrap Up With Pics.
« Reply #10 on: January 11, 2013, 11:30:36 AM »
That's what I was wondering. I looked into the original colors for a K4 750 and red was never available to my knowledge. In 74 the colors that were available were:

Sunrise Orange
Freedom Green
Boss Maroon


While researching this I came across this:

http://www.motorcycleproject.com/motorcycle/text/lubrtech.html

A great guide. Looks like your color might be Flake Apricot Red. Very cool.

IW


Awesome resource, thanks!
Not putting miles on your bike is like not having sex with your Girl Friend so she'll be more desirable to her next Boy Friend.

Offline NewOldSchool

  • Apprentice
  • Hot Shot
  • ***
  • Posts: 302
Re: Almost READY! Project Wrap Up With Pics. Updates!
« Reply #11 on: January 30, 2013, 05:18:25 PM »
Project update, got the motor back in (didn't scratch the fresh paint!) got the carbs back on and mocked up the new 4 into 1 header. Progress!

I'm also planning a trip up the West coast to Washington in may, followed by a 2 week trip to the East coast directly after! More to come!


The bike in the background is my '91 RM250, the first bike I bought in high school and did a frame up resto on too.


Bonus pics of the RM just because...


Frame powder coated black, all bearings and bushings replaced, rebuilt suspension, refirbed plastics, pro taper bars, excel rims, fully rebuilt top and bottom end with overbore and forged Wiseco piston, reeds, carb rebuilt, etc.
Not putting miles on your bike is like not having sex with your Girl Friend so she'll be more desirable to her next Boy Friend.

Offline NewOldSchool

  • Apprentice
  • Hot Shot
  • ***
  • Posts: 302
Re: Almost READY! Project Wrap Up With Pics.
« Reply #12 on: January 30, 2013, 06:57:42 PM »
Did you use assembly lube?  I usually crank the motor for a minute or so with the kill switch on, let it rest same amount, crank again with kill switch on, rest then start up. Make sure oil pressure is there, turn off.  Then restart, check timing and sync carbs, and follow Honda's break in procedure.  Nice bike...Larry

I was planning on adding one of the quarts of oil to both sides of the top end through the tappet adjustment holes to help prime the top end. Does this sounds like a reasonable idea?
Not putting miles on your bike is like not having sex with your Girl Friend so she'll be more desirable to her next Boy Friend.

Offline MoMo

  • Really Old Timer ...
  • *******
  • Posts: 8,275
  • Ride like you're invisible
Re: Almost READY! Project Wrap Up With Pics.
« Reply #13 on: January 30, 2013, 07:16:49 PM »
Seems unnecessary to me and too much oil for the top end to boot.  I have never had a problem with any rebuild using the method I mentioned earlier...Larry

Offline NewOldSchool

  • Apprentice
  • Hot Shot
  • ***
  • Posts: 302
Re: Almost READY! Project Wrap Up With Pics.
« Reply #14 on: February 25, 2013, 04:37:41 PM »
6 Months later and it's nearly complete! Just waiting for a new battery to show up at the dealer.

Here's some pics, I'll post the details soon.


Not putting miles on your bike is like not having sex with your Girl Friend so she'll be more desirable to her next Boy Friend.

Offline SOHC4 Cafe Racer Fan

  • Speak up, Whipper-Snapper! I'm a
  • Really Old Timer ...
  • *******
  • Posts: 15,733
  • SOHC/4 Member #1235
Re: Almost READY! Project Wrap Up With Pics.
« Reply #15 on: February 25, 2013, 06:33:59 PM »
Beautiful bike. Ride the beans out of it.
1975 CB550K1 "Blue" Stockish Restomod (http://forums.sohc4.net/index.php?topic=135005.0)
1975 CB550F1 frame/CB650 engine hybrid "The Hot Mess" (http://forums.sohc4.net/index.php/topic,150220.0.html)
2008 Triumph Thruxton (http://forums.sohc4.net/index.php/topic,190956.0.html)
2014 MV Agusta Brutale Dragster 800
2015 Yamaha FZ-09 (http://forums.sohc4.net/index.php/topic,186861.0.html)

"There are some things nobody needs in this world, and a bright-red, hunch-back, warp-speed 900cc cafe racer is one of them — but I want one anyway, and on some days I actually believe I need one.... Being shot out of a cannon will always be better than being squeezed out of a tube. That is why God made fast motorcycles, Bubba." Hunter S. Thompson, Song of the Sausage Creature, Cycle World, March 1995.  (http://www.latexnet.org/~csmith/sausage.html and https://magazine.cycleworld.com/article/1995/3/1/song-of-the-sausage-creature)

Sold/Emeritus
1973 CB750K2 "Bionic Mongrel" (http://forums.sohc4.net/index.php?topic=132734.0) - Sold
1977 CB750K7 "Nine Lives" Restomod (http://forums.sohc4.net/index.php?topic=50490.0) - Sold
2005 RVT1000RR RC51-SP2 "El Diablo" - Sold
2016+ Triumph Thruxton 1200 R (http://forums.sohc4.net/index.php/topic,170198.0.html) - Sold

Offline Jerry Rxman Griffin aka MuthaF'er

  • This MuthaF'er is getting to be a
  • Really Old Timer ...
  • *******
  • Posts: 14,927
  • Bought her new 4/75
Re: Almost READY! Project Wrap Up With Pics.
« Reply #16 on: February 25, 2013, 06:47:53 PM »
Wow, looking great!

What exhaust did you use? Looks good on it.
As of today 3/13/2012 my original owner 75 CB750F has made it through 3 wives, er EX-wives. Free at last.  ;-)

Offline Garystratos201

  • I have never been a
  • Hot Shot
  • ***
  • Posts: 419
Re: Almost READY! Project Wrap Up With Pics.
« Reply #17 on: February 25, 2013, 08:46:39 PM »
Wow!!!.....Gary
Visit my build project;
http://forums.sohc4.net/index.php?topic=111620.0

Current ride; Bass boat.... 2005 Ranger 521VX,250 hp Mercury Verado, super charged and direct fuel injected. Not a bass on the lake can out run me !!!

Offline cheftuskey121

  • Super Newbie
  • Expert
  • ****
  • Posts: 1,305
Re: Almost READY! Project Wrap Up With Pics.
« Reply #18 on: February 25, 2013, 09:15:13 PM »
man, that thing looks great!

Offline NewOldSchool

  • Apprentice
  • Hot Shot
  • ***
  • Posts: 302
Re: Almost READY! Project Wrap Up With Pics.
« Reply #19 on: February 26, 2013, 11:45:50 AM »
Wow, looking great!

What exhaust did you use? Looks good on it.

It's the chrome Mac 4 into 1 with street baffle.
Not putting miles on your bike is like not having sex with your Girl Friend so she'll be more desirable to her next Boy Friend.

Offline NewOldSchool

  • Apprentice
  • Hot Shot
  • ***
  • Posts: 302
Re: Almost READY! Project Wrap Up With Pics.
« Reply #20 on: February 27, 2013, 12:10:12 PM »
Alright, the bike is 100% back together and running amazing, but I am paranoid about making sure oil is getting to the top end. I start the bike and as it runs oil will shoot out of the front (exhaust side) tappet adjustment holes (on both the left and right) if I remove one of the tappet adjustment covers. When I take off a rearward facing (intake side) tappet cover, there is a bit of mist, but no jet of oil shooting out.

Does this sound correct?
« Last Edit: February 27, 2013, 12:21:19 PM by NewOldSchool »
Not putting miles on your bike is like not having sex with your Girl Friend so she'll be more desirable to her next Boy Friend.