Author Topic: Fabrication Thread  (Read 7375 times)

0 Members and 1 Guest are viewing this topic.

Offline Slayer

  • Hot Shot
  • ***
  • Posts: 454
  • What can I say that hasn't been said before
Re: Fabrication Thread
« Reply #25 on: March 17, 2009, 11:07:18 AM »
Wow, what an inspiration

Offline Sporkfly

  • The frosty rider
  • Hot Shot
  • ***
  • Posts: 727
  • Mmm, Guinness
Re: Fabrication Thread
« Reply #26 on: March 17, 2009, 11:14:54 AM »
Cool idea for the seat pan, thanks for throwing it on here. I think I may actually use that as a starting point for mine as I'd rather work with steel than fiberglass. That's another reason I was interested to see some other ideas on metal seat pans as there aren't many easily found online. Most choose fiberglass, but even one of the guides for making a fiberglass seat the guy says he prefers metal! Really like what you did with the handlebars as well, I may have to do something with the mini-apes I have hanging around because they'll never be going on any of my bikes in their current state.
« Last Edit: March 17, 2009, 11:17:36 AM by Sporkfly »
1977 CB550K
1979 GL1000 - Current project, winter '09-'10
1979 CX500
1976 Suzuki GT500 Titan

Krixxer

  • Guest
Re: Fabrication Thread
« Reply #27 on: March 17, 2009, 05:46:24 PM »
Any of you guys have any questions about anodizing/plating/paint etc... feel free to ask.

This is my little slice of heaven

billybobobrain

  • Guest
Re: Fabrication Thread
« Reply #28 on: March 17, 2009, 07:08:29 PM »
Any of you guys have any questions about anodizing/plating/paint etc... feel free to ask.

This is my little slice of heaven

YES! Help me with the copper, please. I haven't tryed air bubbleing in the bath yet but is this going to cure my blotchy plating problem? the plating has definate patterns as to were the electrons were going. Also how much can I dilute the copper solution? Sorry for all the questions but you could save me a lot of time. I will be sure to share with the class as well! ;D

Krixxer

  • Guest
Re: Fabrication Thread
« Reply #29 on: March 17, 2009, 09:03:29 PM »
Spots eh, I'd like to help but that is kinda vague no? shoot me an email with a few pics and I'll see if I can help you diagnose the problem.

Try to get your hands on these. I"ll check if i have a copy at work.
MIL-C-14550
ASTM-B-734


Offline fishhead

  • Hot Shot
  • ***
  • Posts: 597
  • Why don't you go.....Well, you know the rest.....
Re: Fabrication Thread
« Reply #30 on: March 18, 2009, 06:09:20 AM »
I'd like to see a few seats in here, particularly custom sheet metal pans. Fiberglass is nice and all, but I know there are a few that did them out of sheet metal. So let's see 'em.
Well it aint a Honda, but here's the seat I made for my XS 650 (it's a SOHC, though).
  The seat pan was originally a LePera seat for a HD that some one destroyed for a Chopper (cost me $5 at a swap). The pan was cut down to fit (stock XS seat mounting brackets were removed from the frame) and the rear was "worked" with body hammers and dollys to blend into the fender(1st pic). I am going for a Corbin "Gunfighter" single seat look. The seat foam is off a Yamaha 920 Virago (2nd pic). The foam was shaped with hacksaw, grinder and sanders and then recovered in vinyl and the bottom now has black carpet on it to dress it up.
   The seat mounts to the front on an allen screw (plops down and slides foward on the allen to lock the front in place ) and the rear is held down with bolt through the fender. This bike has a relocated master cylinder (next to the battery box, under the side cover) and the battery box has the master cylinder reservoir built in to it.

Quote from:  Vanna White


Photobucket slide show (Fishhead Big Brakes)
http://s111.photobucket.com/albums/n130/dgfischer/Fishhead%20Big%20BRakes/?albumview=slideshow

Offline luder

  • Hot Shot
  • ***
  • Posts: 406
Re: Fabrication Thread
« Reply #31 on: March 18, 2009, 06:32:45 AM »
Nice job on the seat....luder

masonryman

  • Guest
Re: Fabrication Thread
« Reply #32 on: March 18, 2009, 07:46:36 PM »
I have a sheet metal seat going but it's not done so I'll wait till I get a cover on it to post in here.
http://forums.sohc4.net/index.php?topic=17317.msg508187#msg508187
Mark

masonryman

  • Guest
Re: Fabrication Thread
« Reply #33 on: March 18, 2009, 07:52:32 PM »
I am rounding up pics from the last 2 years to give you some info on building your own exhaust  like on my build or somthing more conventional.

Mark

masonryman

  • Guest
Re: Fabrication Thread
« Reply #34 on: March 18, 2009, 08:38:31 PM »


Home built exhaust

This is the earlist pics I have The exhaust as seen here was a combination of pieces that I got from a corner muffler shop and some pieces if conduit.

The exhaust is 1-1/2 OD the conduit is 1-1/4 ID.

 When I went to the muffler shop I ask him to cut a stick in 4 pieces and put the hardest tightest bend he could on 1 end these are the head pipes. The bend was not tight enough to suit me so I a cut near the end of the radius and segmented the pipe to sharpen the angle.  The pipe flanges fit very tight over the pipe, so after driving them on I simply put a few tacks with the wire welder on each pipe to tighten the flanges against and secure the pipe to the head.

The radius over the rear wheel started live as 2 pre-bent 1-1/4 conduit 90's I segmented them in the middle to flatten the radius.


Then, as I was building and posting, I got concerned that the pipes would be two loud so I made a set of baffles. The connector is a 1-1/4 conduit coupler cut in half and welded to a piece of the cut off tail pipe. the baffles are 3/4" conduit drilled with 1/4" holes, the sleeve's are made from a heavy steel washer/shim and the ring welded around it is a piece of the tail pipe with a segment cut out
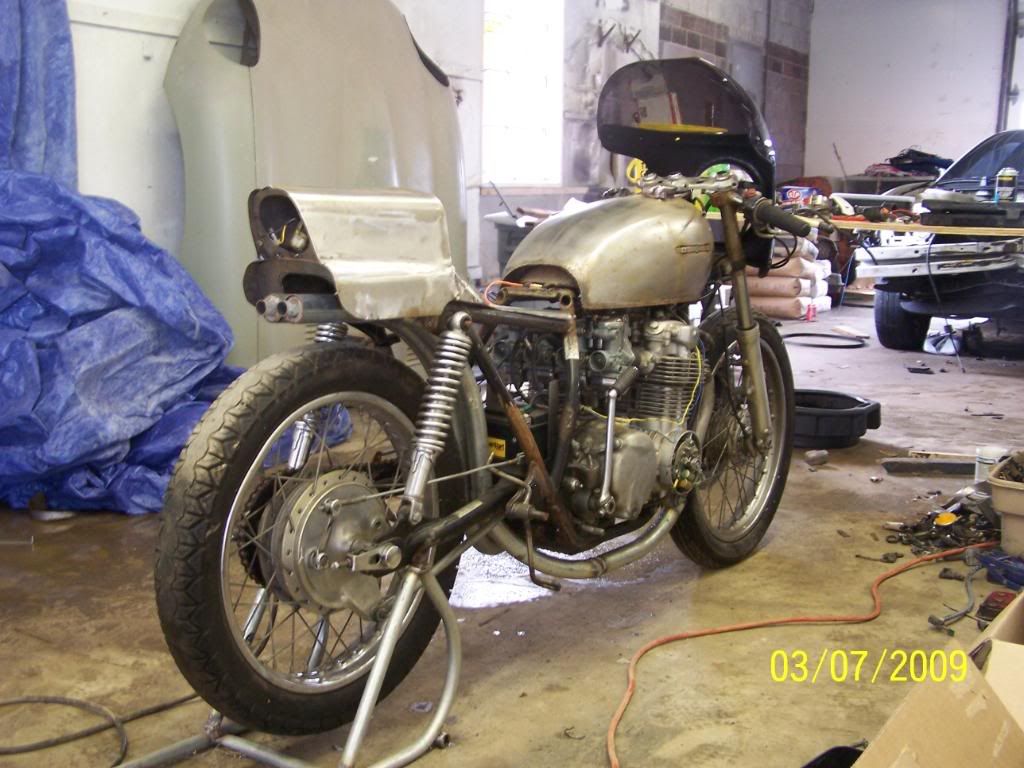


.
« Last Edit: March 18, 2009, 09:00:39 PM by masonryman »

Offline A Grove

  • Some people call me a
  • Hot Shot
  • ***
  • Posts: 300
Re: Fabrication Thread
« Reply #35 on: March 19, 2009, 07:25:35 AM »
KRixxr... I often strip annodized bits of alum by soaking it in drain-o.  However, certain times after stripping the anno, it has actually started to eat away at the alloy. Am I soaking it too long?

Krixxer

  • Guest
Re: Fabrication Thread
« Reply #36 on: March 19, 2009, 04:26:37 PM »
KRixxr... I often strip annodized bits of alum by soaking it in drain-o.  However, certain times after stripping the anno, it has actually started to eat away at the alloy. Am I soaking it too long?

Drano's active ingredient is sodium hypochlorite - chorline bleach. This creates a caustic solution and should the concentration reach a certain level it will etch the Al. ( same thing with oven cleaners)

use a phosphoric acid bath at about 20 precent phosphoric acid to 80 precent water (1 gal. of acid to 4 gal. of water ratio) heat liquid to 190 degrees. then submerge part depending on size for 1 to 3 minutes

A NaOH etch solution will remove the coating but will etch the surface leaving a diffuse (matte) appearance. The chromic acid/phosphoric acid solution used in the Acid Dissolution Test ASTM - 137 will remove the anodic coating without affecting the underlying surface. The composition of that bath is 80 grams of chromic acid in 3.5 liters of water, add 140 ml of 85% phosphoric acid, add water to make 4 liters. The bath is operated at 190 - 200 deg. F. Immerse the part for 15 minutes and then rinse well in water.

Temperature and agitation is the paramount for any  type of production as you want to accelerate the reaction but for you mad scientists out there just get a few fish tank heaters and an air pump.
« Last Edit: March 19, 2009, 04:32:03 PM by Krixxer »

Sully_PA

  • Guest
Re: Fabrication Thread
« Reply #37 on: March 24, 2009, 09:51:13 AM »
Very cool pipes masonryman ......

masonryman

  • Guest
Re: Fabrication Thread
« Reply #38 on: March 24, 2009, 07:16:06 PM »
I am getting ready to pull them off. I will be grinding and painting on these and possibly reproducing some. sound to come and pics of the painted pipes
« Last Edit: March 24, 2009, 07:17:39 PM by masonryman »

Offline papp101

  • Enthusiast
  • **
  • Posts: 174
Re: Fabrication Thread
« Reply #39 on: March 24, 2009, 08:25:14 PM »
Nice job on the pipes man!

How do you like the leg position of your pegs on the passenger foot rest tabs? I'm thinking of going that route as well. I'm 6', how tall are you?

masonryman

  • Guest
Re: Fabrication Thread
« Reply #40 on: March 25, 2009, 03:08:17 AM »
I used the passenger brackets but they have bee cut off and lowered. leg room is going to be a little tight, but I also lowered the top frame rail.  one of the remedies to the problem is the angle of the controls. If you use a stock height seat and leave the passenger pegs where they are, or lower them a little it would probably work for you.

 I go around 5'6"-5'7" and about 210 lb


Mark
« Last Edit: April 03, 2009, 08:06:34 PM by masonryman »

Offline A Grove

  • Some people call me a
  • Hot Shot
  • ***
  • Posts: 300
Re: Fabrication Thread
« Reply #41 on: March 26, 2009, 05:37:09 AM »
Thanks Krixxr!!