Author Topic: Here goes nothin.. a 550 build *new completed pics!*  (Read 32969 times)

0 Members and 1 Guest are viewing this topic.

Offline Nortstudio

  • Not nearly an
  • Master
  • *****
  • Posts: 1,721
  • Just getting started...
    • MotoPreserve
Re: Here goes nothin.. a 550 build
« Reply #25 on: May 22, 2011, 06:44:55 PM »
That's exactly the stuff I got - specifically to try on the bare metal.  But then I read that it doesn't work so well with no paint to grip to.  I've read mixed reviews - so I might still try it.
1976 CB550K...in progress
1975 CL360...eventually custom
2009 Husqvarna TE610

a blog about wrenching in Brooklyn, NY

“Success is dependent on effort.”
~Sophocles

Offline Bunicula

  • Enthusiast
  • **
  • Posts: 113
Re: Here goes nothin.. a 550 build
« Reply #26 on: May 22, 2011, 06:46:10 PM »
Perfect MK1.  I've always loved that grille/flare setup.  I'm a couple weeks away from firing up my N/A 16V in my MK2.

I'll be watching your bike build.

thanks dude.. I drove Mk2's for years befor i found my way into a Mk1.. good luck with your build  :)

That tank looks great! Are you planning on paint, or keeping it bare?  I am about to go bare with mine, and was wondering if you have determined what you'll do to it if leaving it bare.

Keep up the good momentum. Seems like the only thing holding you up is deliveries.... :)


yeah man i really couldnt believe how good tank looked.. although there was about a  half inch of paint on it to protect it ahahahahha....  i have to say i had never thought about leaving the tank bare untill i saw it all sanded down.. just for giggles i actually sprayed some clear on a spot to see how it looked but it wasnt what i was looking for.. didnt look bad but ive just had an idea on a color for awhile...

Whatever painting you do at home, check out this clear coat.

http://www.amazon.com/USC-Spray-Gloss-Clearcoat-Aerosol/dp/B0043B7UQY

Someone recommended it on my build thread and it is....wow.  I was completely amazed.  Just as good as the professional paints I've used in the past with an HVLP gun, and no clean up.  The only down side is the price.  I used it with Duplicolor paints and it didn't have any compatibility issues.

Totally cool seeing your build come along, man!

Ive used that stuff befor, def was impressed on the results for a spray can.. good stuff for sure.  Im gonna be using some leftover clear i have from another project i was working on for a buddie of mine.. stuff was awesome. thanks for the heads up though bud. Oh and i didnt forget about the clip ons either.. im just having second thoughts on letting them go now ahhhaahaha .. Ill be looking for some progress from you this week too  ;) ;)

Offline jaguar

  • Old Timer
  • ******
  • Posts: 2,777
Re: Here goes nothin.. a 550 build
« Reply #27 on: May 22, 2011, 07:59:28 PM »
lot of VW coming here lately...lol
I have a MKV R32
this place is way better then the tex....

Offline Bunicula

  • Enthusiast
  • **
  • Posts: 113
Re: Here goes nothin.. a 550 build
« Reply #28 on: May 23, 2011, 08:34:32 AM »
Yeah vortex is a joke these days.. the whole VW "scene" is not what it used to be which is unfortunate. It used to be alot like this community. dont get me wrong I have met some of my best friends through the VW world but it just seems like ever since this "stance" craze its just brought in a whole new bunch of kids that dont understand and arent real enthusiasts..  thats why i was instantly drawn to this community.. people are excited about new projects, willing to answer questions for someone new like myself and just in general nice people..

Offline jaguar

  • Old Timer
  • ******
  • Posts: 2,777
Re: Here goes nothin.. a 550 build
« Reply #29 on: May 23, 2011, 03:05:15 PM »
yeah this place is nice, but some are taking the "cafe" think and doing the same thing that the stance guys did to cars......

but anyway im kind of done with messing with cars for a while and going to stick with bikes

Offline Bunicula

  • Enthusiast
  • **
  • Posts: 113
Re: Here goes nothin.. a 550 build
« Reply #30 on: May 23, 2011, 08:03:07 PM »
So tonights update comes with a little frustration.. After losing yet another set of clean forks on eBay by pennies this morning, I decided that I'll make due with the ones I have for this season of riding.. Def not my first choice but alls I want to do is be able to get a few weeks of seat time in. Come winter I plan on maybe a cbr front end or something along those lines.

I went ahead and disassembled them tonight cleaned up the upper tubes as best I could and gave them a coat of paint.. Trust me this is not my first choice by any means but it's only temporary..  New seals and dust covers are already on order so hopefully I'll get them put back together this weekend.


I cleaned the caliper carrier quick and I'm still deciding if I want to do the same to the lower forks too.. Well see I guess

Offline Syscrush

  • Expert
  • ****
  • Posts: 1,419
  • Sold. :(
Re: Here goes nothin.. a 550 build
« Reply #31 on: May 24, 2011, 06:58:13 AM »
I cleaned the caliper carrier quick and I'm still deciding if I want to do the same to the lower forks too.. Well see I guess
You don't want to, but if you don't you'll wish you had every time you look at it once it's back together.

Great work so far, I love seeing people's project updates!
Life is precious: wear your f'n helmet!
There's nothing more expensive than a free bike...
FWIW, I'm not a shill for Race Tech - I've just got a thing for good suspension and the RTCE's are the most cost-effective mod for these old damping rod front ends.

Offline Bunicula

  • Enthusiast
  • **
  • Posts: 113
Re: Here goes nothin.. a 550 build
« Reply #32 on: May 24, 2011, 08:18:48 PM »
So today was a good day.. After work I took a spin to my local cycle shop and got some 15w fork oil in prep for this weekends rebuild..

After that I stopped by this really cool guy I met a couple weeks ago who has a sick royal enfield and and even cooler triumph chopper. He was nice enough to donate a nice pair of clubmans to my project.
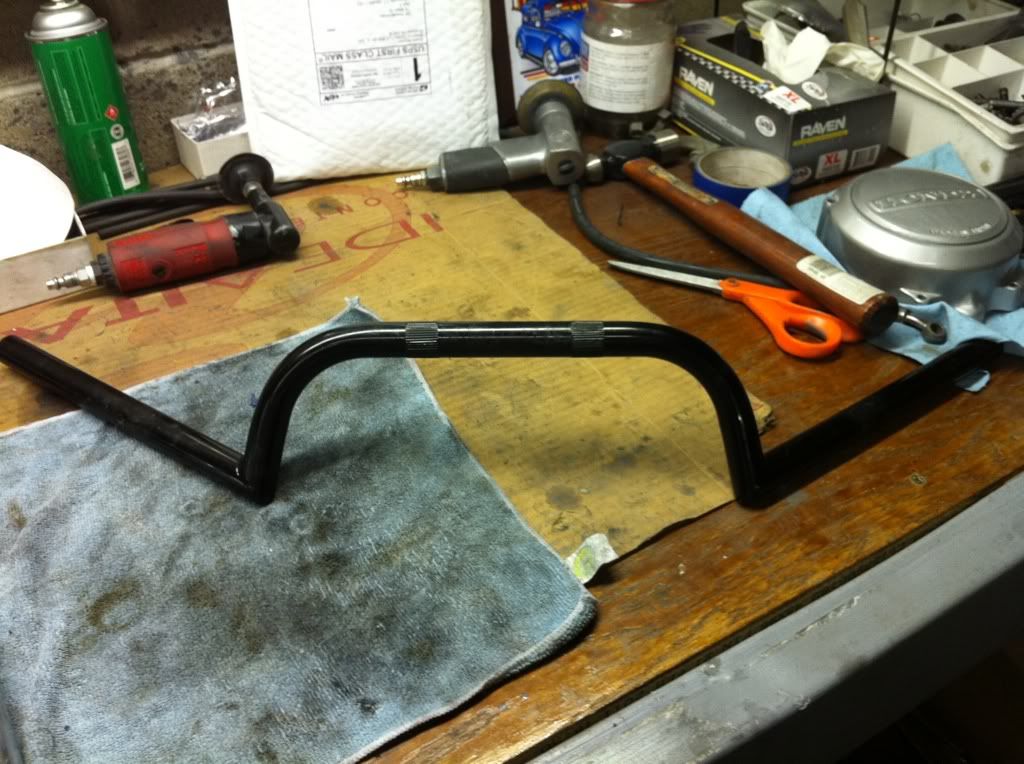


Finally I made my way home to find some goodies waiting for me

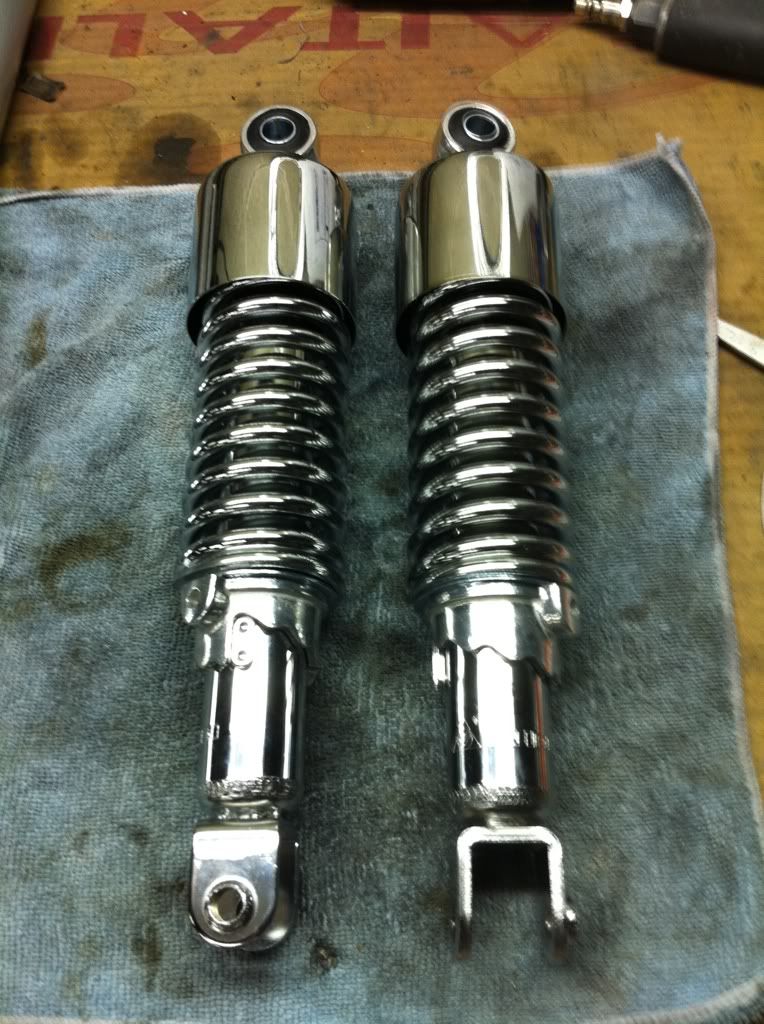
My shorty rear shocks thanks to DCC!


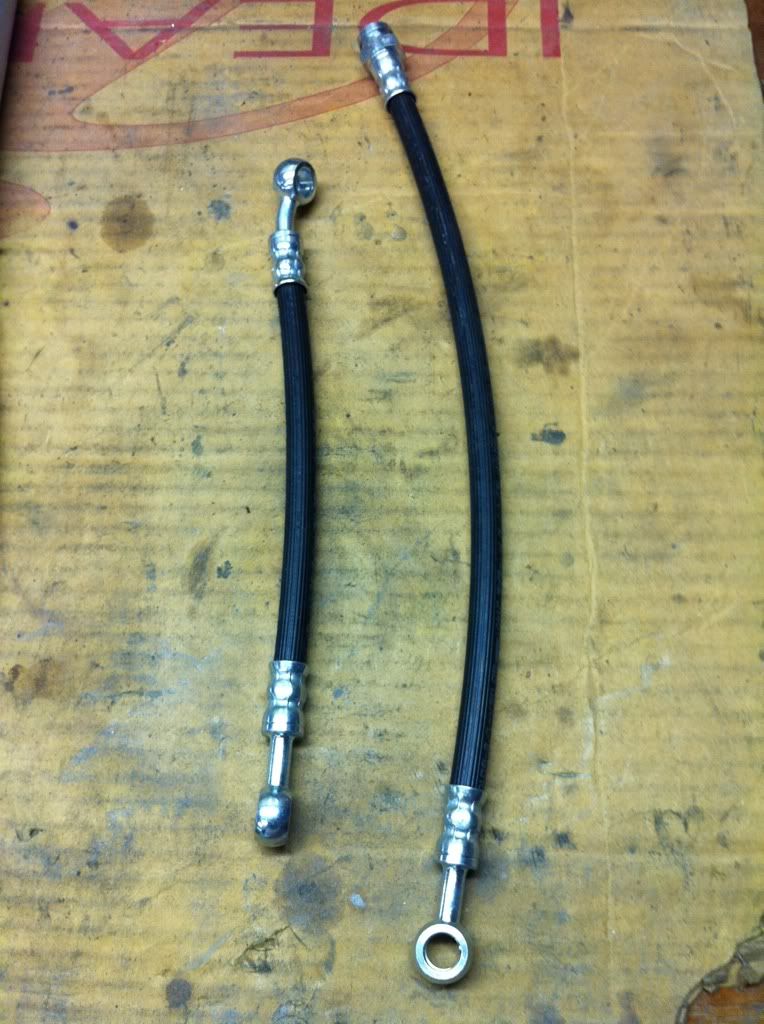
And my new short brake lines thanks to Shawn (pompadori) here on the forums.. Lines look great!


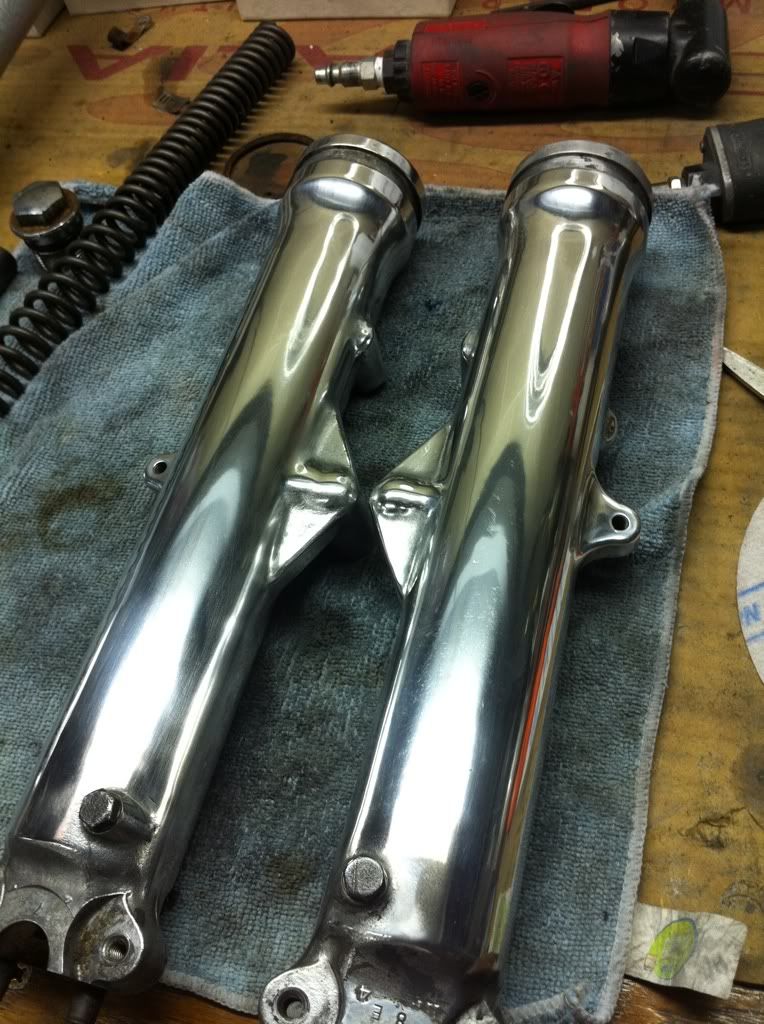
Once I got to the shop I new crush would be right so I cleaned up fork tubes tonight .. Def not my best polishing ever but not bad for about an hours work..


Offline Nortstudio

  • Not nearly an
  • Master
  • *****
  • Posts: 1,721
  • Just getting started...
    • MotoPreserve
Re: Here goes nothin.. a 550 build
« Reply #33 on: May 24, 2011, 08:37:25 PM »
Ok, gotta give some details on that polishing job.  1 hour???  You are a master.  Do tell.

Nice score on the bars.
1976 CB550K...in progress
1975 CL360...eventually custom
2009 Husqvarna TE610

a blog about wrenching in Brooklyn, NY

“Success is dependent on effort.”
~Sophocles

Offline Syscrush

  • Expert
  • ****
  • Posts: 1,419
  • Sold. :(
Re: Here goes nothin.. a 550 build
« Reply #34 on: May 25, 2011, 04:35:26 AM »
The lowers look great and now they won't look out of place or an afterthought on the bike.
Life is precious: wear your f'n helmet!
There's nothing more expensive than a free bike...
FWIW, I'm not a shill for Race Tech - I've just got a thing for good suspension and the RTCE's are the most cost-effective mod for these old damping rod front ends.

Offline Bunicula

  • Enthusiast
  • **
  • Posts: 113
Re: Here goes nothin.. a 550 build
« Reply #35 on: May 25, 2011, 07:01:46 PM »
Ahahaha trust the lowers are far from perfect.. But alls did was took them down with 220 on my 3inch random.. Then some green scotchbrite. Then it was over to the polish wheel with triploi going against the wheels rotation then white diamond with the wheels rotation and that's it. Easy peezy  ;)

Since I didn't get any goodies in the mail today I switched gears a bit and tackled my side covers and headlight bucket to get them prepped for primer.. The side covers are in great shape just on little crack on each one. Fixed those up with some apoxy, filled the holes from the old emblems and called them done for now.


Offline Bunicula

  • Enthusiast
  • **
  • Posts: 113
Re: Here goes nothin.. a 550 build
« Reply #36 on: May 26, 2011, 09:14:09 PM »
Got my fork seals earlier than I thought  so I got those buttoned up tonight alls I need is my dust covers now. Pretty amped to maybe get the front end back on this weekend  :)


Oh and thanks again to the great info here I sourced some pod filters that will work as well.they are 35mm Emgo pods, a little small but they stretch over the carb just fine and fit like a glove in the frame as well. I've been chatting with TinTop a bit though and the filter/stacks he put together are sounding pretty good for the near future.

Offline Flying J

  • Old Timer
  • ******
  • Posts: 3,386
Re: Here goes nothin.. a 550 build
« Reply #37 on: May 26, 2011, 10:00:12 PM »
Ill watch, it looking ood.

Offline Bunicula

  • Enthusiast
  • **
  • Posts: 113
Re: Here goes nothin.. a 550 build
« Reply #38 on: May 28, 2011, 07:14:33 PM »
Thanks fj! Your bike is looking great as well  :)

 Figured i toss up Mid weekend update as I've made some good progress..Friday night I got my header wrap put on and then went ahead and installed it.. Alls I can say is what a pain in the butt! I have new found respect for the guys who are making custom systems in there builds ..


I found the manufacturers stamp on backside of rear hanger and it looks to be a jardine system. anyone have any expierance with their products?

Today I got to work on Putting the front end back together. I was really happy with how the steering felt.. Super smooth with no hangups.  After that it was time for a trip to home depot motorsports to source some shine stuff. What I found couldnt have worked out better if I planned it.. Couldn't believe it ahahahaha. I picked up 2 twelve inch sections of chromed bathroom drain pipe with a single flange on one end.. This is what I came up with..


And one of the whole front end mocked up


Offline jaguar

  • Old Timer
  • ******
  • Posts: 2,777
Re: Here goes nothin.. a 550 build
« Reply #39 on: May 29, 2011, 08:01:36 AM »
Why go with the shorter shocks?  They have a negative affect on the handling.
Plans for rearsets to go with the bars?

Offline Bunicula

  • Enthusiast
  • **
  • Posts: 113
Re: Here goes nothin.. a 550 build
« Reply #40 on: May 29, 2011, 12:53:02 PM »
It's funny you ask that cause I actually just emailed DDC asking if I could exchange the shortys for a longer set.. looking at the bike i think it may look alittle off with the front at stock height and the back all squatted down. I still may use a little shorter of a set but we'll see what they say

Offline jaguar

  • Old Timer
  • ******
  • Posts: 2,777
Re: Here goes nothin.. a 550 build
« Reply #41 on: May 29, 2011, 01:31:52 PM »
on a 750 you want an inch longer to help the handling.  I assume its similar on a 550 as the geometry is close

shorter shocks and lowered forks might make the bike look good, but hurt the handling.
it comes down to what you want out of the bike in the end

Offline Nortstudio

  • Not nearly an
  • Master
  • *****
  • Posts: 1,721
  • Just getting started...
    • MotoPreserve
Re: Here goes nothin.. a 550 build
« Reply #42 on: May 29, 2011, 02:31:05 PM »
When I ordered my Hagons (who for some reason don't make the exact stock 550 size), the guy there suggested I get the slightly longer shock because it would help with handling. He seemed very confident that I would prefer the longer size for the overall feel. So far, so good.
1976 CB550K...in progress
1975 CL360...eventually custom
2009 Husqvarna TE610

a blog about wrenching in Brooklyn, NY

“Success is dependent on effort.”
~Sophocles

Offline Bunicula

  • Enthusiast
  • **
  • Posts: 113
Re: Here goes nothin.. a 550 build
« Reply #43 on: May 30, 2011, 06:19:32 PM »
Yeah I'm hoping DCC will let me exchange the shortys in.. I can't see myself going any longer than stock length purly because I'm really short ahahaha.

Got a bit more done today. The clubmans I got from my buddy weren't drilled for wiring yet so I figured I should work on getting that in order. First on the agenda was getting all the wiring out of the old bars. After that I mocked up all the controls and grips on the new bars to get an idea on where to drill. Once that was all done it was time to route the wires through and I have to say this is by far the hardest part of the build I've had yet.. Couldn't believe what a pain it was. I got the left side pretty much all ran and I called it quits on that for the day. Hoping the right side will be much easier as there are far fewer wires..


Forgot to mention as all that was happening my front wheel was drying  ;)


Also got a few more things cleaned up and polished but forgot to snap any pics. I should be getting my air cleaners tomorrow and hope to keep working on the wiring as well..  :)

Offline Bakeoff

  • Hot Shot
  • ***
  • Posts: 264
Re: Here goes nothin.. a 550 build
« Reply #44 on: May 31, 2011, 10:01:26 AM »
Lookin' nice.  Did you strip the chrome from the rims or did I miss that comment?  I'm looking for ideas for my spare set of wheels.

Offline Bunicula

  • Enthusiast
  • **
  • Posts: 113
Re: Here goes nothin.. a 550 build
« Reply #45 on: May 31, 2011, 12:47:56 PM »
thanks bud :) seems like you and a couple other guys are the only ones following the thread..  The wheel was sandblasted by the way.. the chrome was pretty rough in a few spots and the spokes wherent too pretty either.i cleaned those as best i could in my blaster, then used a red scotchbrite cookie on my right angle for a litte extra clean up.. its def a "looks good from 5 feet" kinda thing but im fine with that.. the tank/sidecovers/tail will make up for it  ;)

Offline Aladinsane07

  • Full Member
  • *
  • Posts: 64
Re: Here goes nothin.. a 550 build
« Reply #46 on: May 31, 2011, 02:02:45 PM »
I'm still following, albeit quietly  :-X

Keep up the good work.

Offline Nortstudio

  • Not nearly an
  • Master
  • *****
  • Posts: 1,721
  • Just getting started...
    • MotoPreserve
Re: Here goes nothin.. a 550 build
« Reply #47 on: May 31, 2011, 02:08:24 PM »
I'm still with you buddy. I just got a blaster. What media did you use for the rims?  I did all the spokes on a rear wheel by hand with a drill ad wire wheel. What a nightmare!  At least now I have a grinder with the wheel. Wish there was a magic pill for allowing you to sleep right through that process.

Looking good - can't wait to see what the parts in the mail do for the build.

1976 CB550K...in progress
1975 CL360...eventually custom
2009 Husqvarna TE610

a blog about wrenching in Brooklyn, NY

“Success is dependent on effort.”
~Sophocles

Offline Bunicula

  • Enthusiast
  • **
  • Posts: 113
Re: Here goes nothin.. a 550 build
« Reply #48 on: May 31, 2011, 04:28:24 PM »
thanks guys.. I thrive on your feedback and excitment. keeps me motivated for sure.

blast media is black magic sand.. its super fine and leaves a really nice surface to paint on.. as far as stuff in the mail, after today   (just got my air cleaners) ill be taking a little break from my online splerging for a week or 2.. id really like to get some paint on my tank and stuff by this weekend but we'll see.

Offline Flying J

  • Old Timer
  • ******
  • Posts: 3,386
Re: Here goes nothin.. a 550 build
« Reply #49 on: June 02, 2011, 09:26:45 AM »
..


Forgot to mention as all that was happening my front wheel was drying  ;)


Also got a few more things cleaned up and polished but forgot to snap any pics. I should be getting my air cleaners tomorrow and hope to keep working on the wiring as well..  :)

Nice job on pulling the wires. I did the same thing on my CL125. It was a PIA but I am glad i did it, it looks so much better then leaving them hanging out. The way i did it was i used a vacuum and sucked a string from one hole to the other. Then i made a wire with 3 ends on it with conectors. I would use the string to pull the single end of my 3 head wire through. Then, 2 of the ends i would hook to the wires i wanted to pull. the 3rd end i would hook to the single end i had just pulled through. That way it forms a loop and once you fish your 2 wires through you already have your pulling wire run. Confusing? Anyway it worked well and its nice to see people take the time to do things right and not take short cuts all the time. Keep it up