Author Topic: So this is how you change a starter clutch on a cb550 W/O splitting the case!!!!  (Read 18424 times)

0 Members and 1 Guest are viewing this topic.

Offline xsmooth69x

  • Master
  • *****
  • Posts: 1,621
so this is how you change out a starter clutch on a cb550 without having to break down the motor and split the case.

so if you starter dosnt engage and it sounds like this....... ur starter clutch is shot

bad cb550 starter?

so this is how you fix your starter clutch while its on your bike

first you need to take off your chain guard case side.

then you need to take off the starter and the oil pump


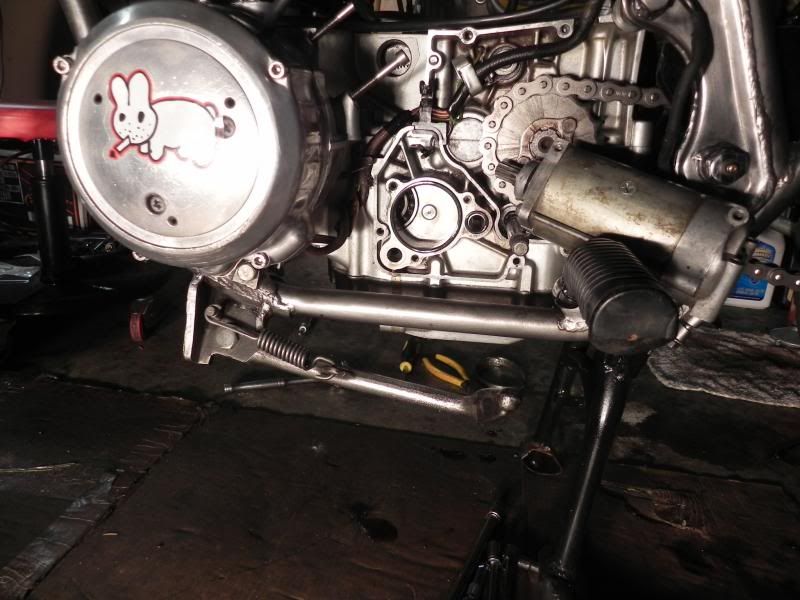
then you need to take off the clutch side


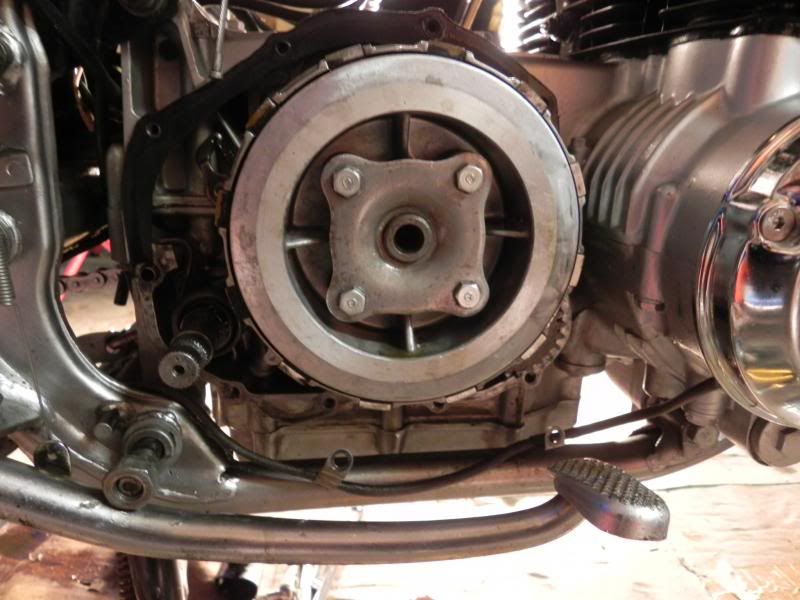
then take off the clutch basket thing, you have to remove the center snap ring


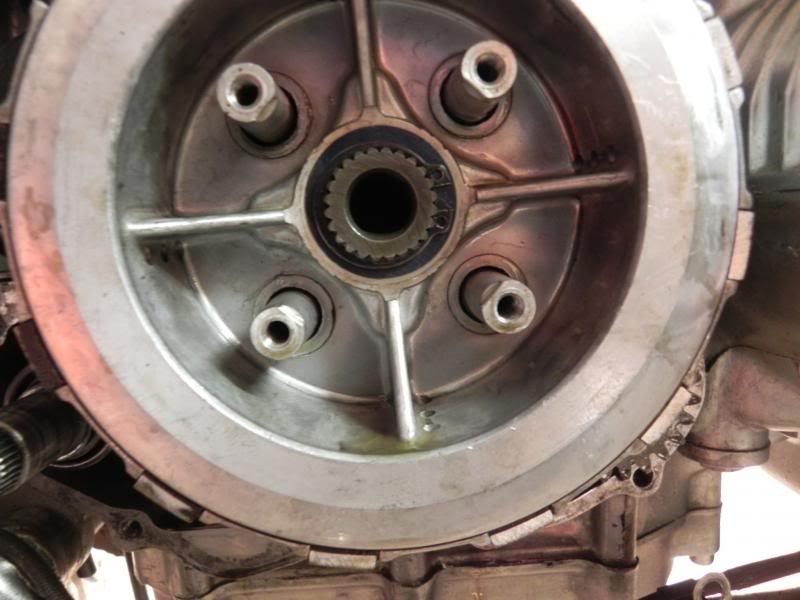
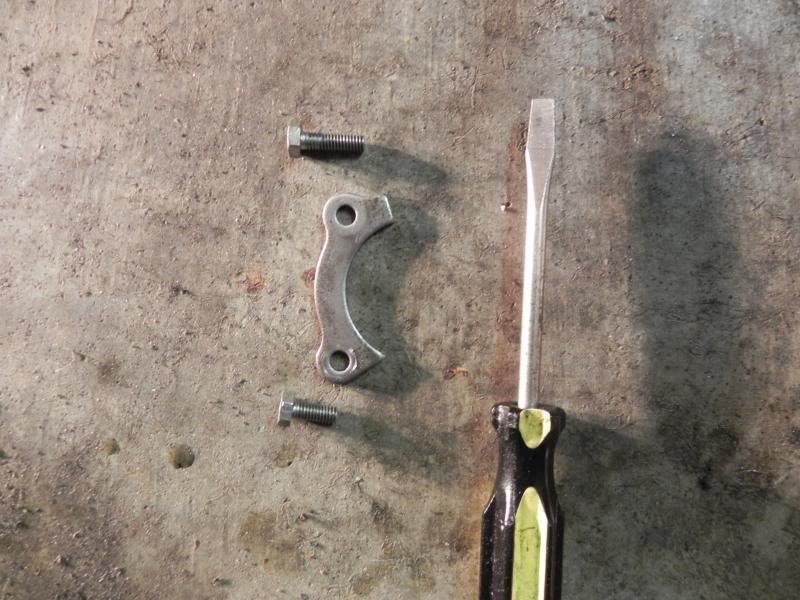
after that you need take off the 2 bolts that holds on this bracket that holds in the primary shaft


just for reference i took a picture since the bolts are different sizes. the screw driver is point up. the top bolt is longer than the bottom bolt.


after you removed all that stuff we are going to tap out the primary shaft with a small drift punch. Be very careful not to damage any of the gears!!! just tappa tappa tappa


once you feel it come through/"drop" go over to the other side and pull it out


this is what it looks like, take a look at it and make sure the roller bearing thing isnt messed up because that is something that could go bad. mine was fine  :)

also you can reference the order of the washer and spacer and stuff goes on


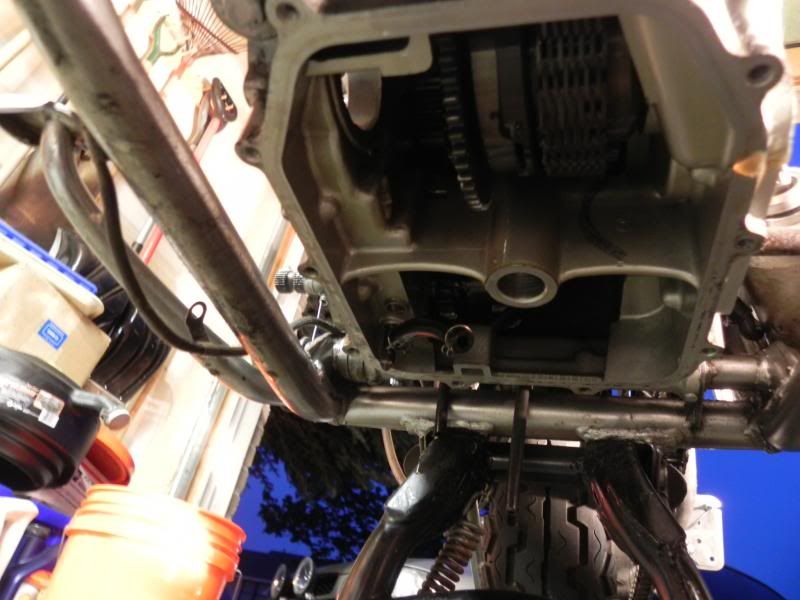
next drop your oil pan. i had to remove my 4 into 1 exhaust since i couldnt access like 2 bolts. maybe other exhaust setups you can get around taking off your exhaust off.


take off the inside oil filter thing and might as well clean it if theres crap on it


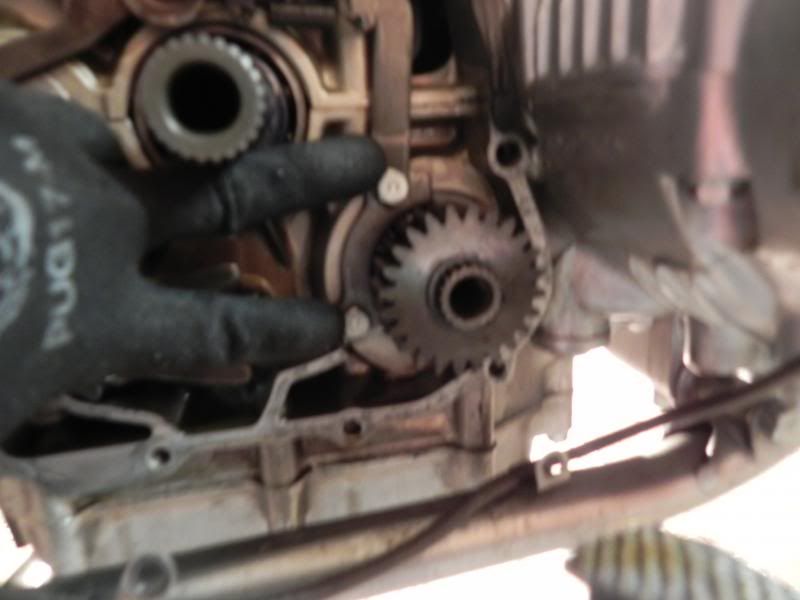
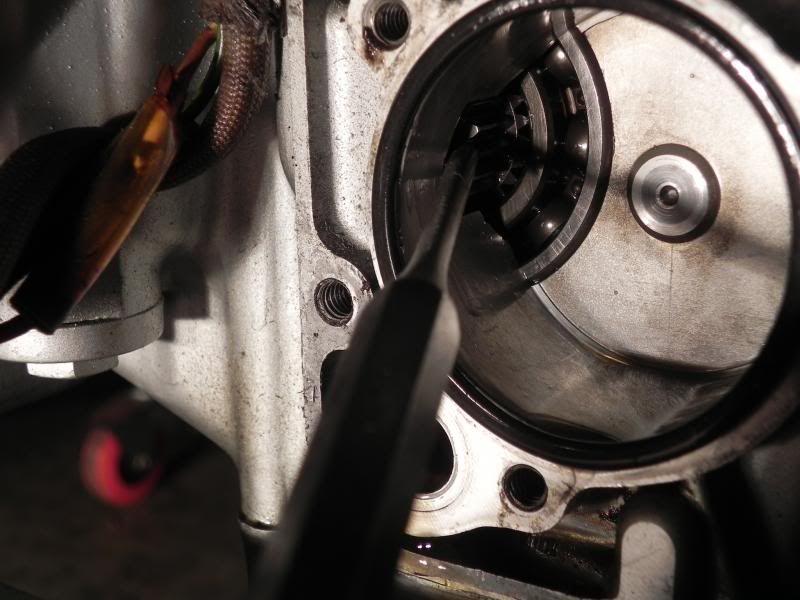
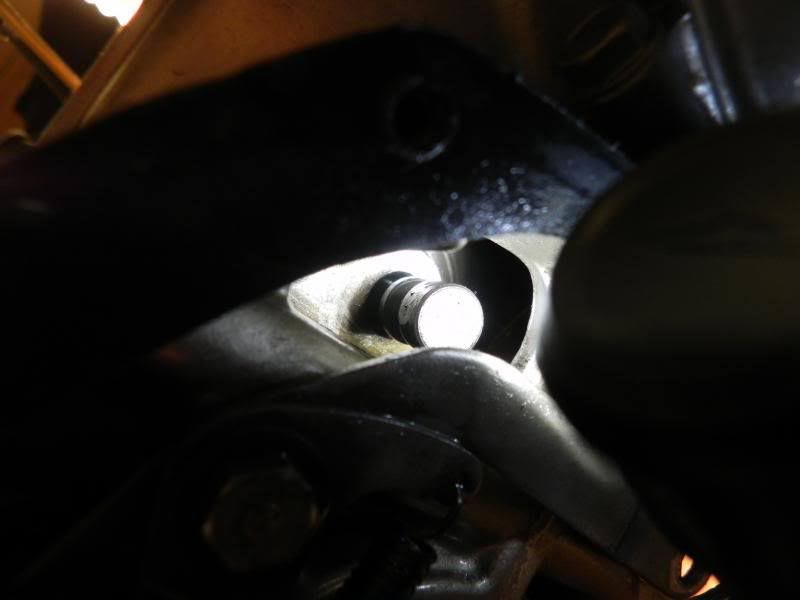
now we have to move the starter gear. this is the gear the starter motor touches. when you look through the little hole on the clutch side upper right corner you will see the pin that holds that gear.

there is a bolt that holds the pin that holds the gear. around that bolt there is a safety bracket you have to bend back to be able to unscrew the bold. its kind of like the bracket things on our brake rotors.

just take a small screw driver and bend the out


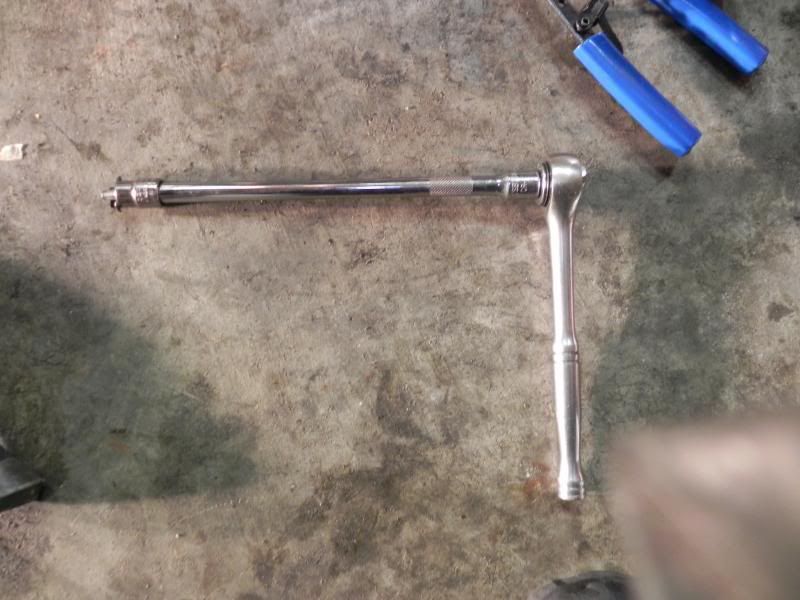
you will have to have a really long socket extension or stack a bunch of socket extensions to reach


after you get that off take some needle nose piers or whatever and slowly wiggle the pin out. you might have to giggle the gear while trying to pull it out.


now before you go under the bike safety first and wear some goggles. even though the oil is all out of the bike still a good chance one little drop is going into you eye ball

head band flash light if you want to look just that much cooler and goggles that fit over your eye glasses  8)


this is the fiddly part........

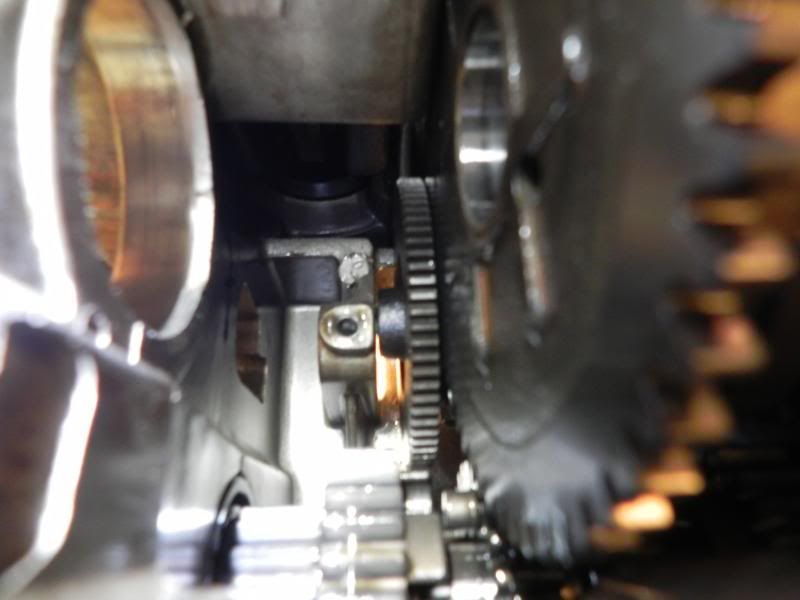
now that your under you bike it should look like this......

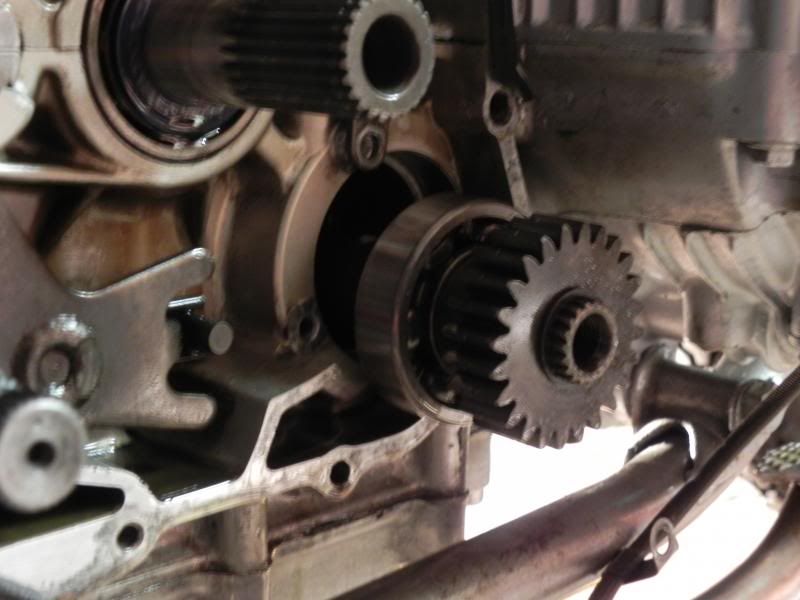
you can also see the starter gear free and loose. what i did was push that gear up and back toward the rear tire. it seems to kinda get wedged and stays out of the way.

the reason why we took this gear off is because you need some extra clearance pushing the starter clutch up.


now this is where it gets hard to explain.... put your imagination hat on....

if the starter clutch was still in the bike and imagine the primary chain is still over it.

push the starter clutch up and tilt it like the photo


then you should have some clearance to pop the gear out on the other side while the starter clutch is still tilted  with the primary chain over it.


then after you wiggle that gear out the other side of the starter clutch should just come out after a wiggle.


so after i took out the starter clutch i noticed why it didnt work. because it completely fell apart when i took it off lol


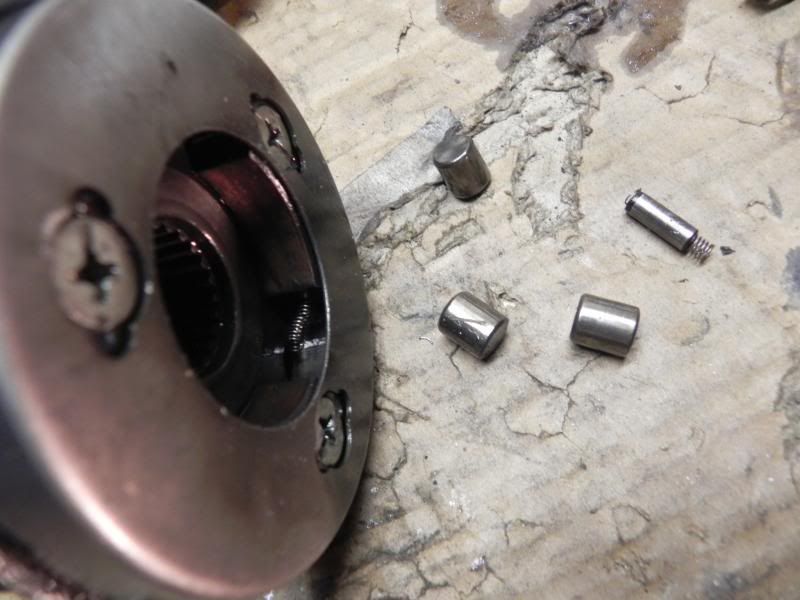
this is what the inside looks like if your wondering..... i did.... but i have no idea what it does.


now after you re built your starter clutch or pulled one out of one of your spare motors like i did just go in reverse order

if your starter gear fell out after you took the starter clutch out this is how everything lines up


so put the starter gear back in and kind of wedge it up top (dont put the pin in yet) and put the starter clutch back around the primary chain.

then slide the outer gear of the starter clutch back in tilting it like i showed you at the beginning but in the reverse order.

after everything is put back .............. (well in the video its not put back but ya!)(extra tubes are because i have my carb sync gauges hooked up)

good starter

im going to have to give a shout out to Dave500 who made this all possible by telling me this is possible without having to break down the whole entire motor!!!!!
« Last Edit: May 26, 2013, 07:15:12 am by xsmooth69x »
1975 CB550 (FINISHED?!?!?)
first motorcycle ever!!! ow and i dont know how to ride it either :D

raw rust rice venti quad shot cafe racing latte project aka my build..... http://forums.sohc4.net/index.php?topic=88853.0

black and white equation godzilla chalkboard 
1972 cb750 - next in line for some <3

Offline dave500

  • Really Old Timer ...
  • *******
  • Posts: 16,884
  • WHAT?no gravy?
you are a #$%*ing legend,this post should go straight to the faq section,,youve done it,,i said it was a #$%*ing fiddle but it can be done,,i wonder how many dealer ships have pulled the engine and split the cases?and charged the customer?good on ya xman!!heres a cyber beer for you.

its not a tapered bearing its a plain roller on that shaft,,tapered types go in the head stem/stock assembly,,or the old adjustable car wheel bearings etc,,man well done!
« Last Edit: May 26, 2013, 01:03:54 am by dave500 »

Offline nccb

  • Expert
  • ****
  • Posts: 1,145
  • 1974 CB750 Four
That was cool.  That seemed like a hell of a job too.

Offline Killer Canary

  • Master
  • *****
  • Posts: 1,792
  • Typical Bran Muffin
I've been wondering about the Sprag clutches on these for years. Never had a problem or heard of anyone having to rebuild or replace one, unlike KZ650 clutches which seemed fragile in comparison. Was it the drum or the rollers that was beaten up on yours?
If it's worth doing at all it's worth over-doing.
Honda MT250, CB400F, CB450K, CB550, GL500, CBR929
Kawi GPz900, H1

Offline xsmooth69x

  • Master
  • *****
  • Posts: 1,621
you are a #$%*ing legend,this post should go straight to the faq section,,youve done it,,i said it was a #$%*ing fiddle but it can be done,,i wonder how many dealer ships have pulled the engine and split the cases?and charged the customer?good on ya xman!!heres a cyber beer for you.

its not a tapered bearing its a plain roller on that shaft,,tapered types go in the head stem/stock assembly,,or the old adjustable car wheel bearings etc,,man well done!

^_^ thanks!!! also fixed the bearing typo
1975 CB550 (FINISHED?!?!?)
first motorcycle ever!!! ow and i dont know how to ride it either :D

raw rust rice venti quad shot cafe racing latte project aka my build..... http://forums.sohc4.net/index.php?topic=88853.0

black and white equation godzilla chalkboard 
1972 cb750 - next in line for some <3

Offline xsmooth69x

  • Master
  • *****
  • Posts: 1,621
I've been wondering about the Sprag clutches on these for years. Never had a problem or heard of anyone having to rebuild or replace one, unlike KZ650 clutches which seemed fragile in comparison. Was it the drum or the rollers that was beaten up on yours?

oddly enough i dont know how it happened but the springs behind the barrels creeped up around them barrels. the thing literally was all mangled up.

-----------------

honestly though it wasent that fiddly or time consuming. i first did this on my parts bike and took me maybe 2 hours because i was figuring it out.

when doing it on my actual bike it took me 1 hour. the most time consuming party is taking off the side overs, oil pan, starter and oil pump. the actual giggly part only took 20 min

-----------------

ya dave i bet alot of people that had a problem got charged an arm and a leg if honda didnt tell the dealerships and motorcycle shops this was possible.......
1975 CB550 (FINISHED?!?!?)
first motorcycle ever!!! ow and i dont know how to ride it either :D

raw rust rice venti quad shot cafe racing latte project aka my build..... http://forums.sohc4.net/index.php?topic=88853.0

black and white equation godzilla chalkboard 
1972 cb750 - next in line for some <3

Offline Killer Canary

  • Master
  • *****
  • Posts: 1,792
  • Typical Bran Muffin
Possibly Honda didn't know about this trick themselves!
If it's worth doing at all it's worth over-doing.
Honda MT250, CB400F, CB450K, CB550, GL500, CBR929
Kawi GPz900, H1

Offline xsmooth69x

  • Master
  • *****
  • Posts: 1,621
Possibly Honda didn't know about this trick themselves!

those honda guys are pretty smart they had to know! but ya maybe they didnt know or tell anyone anyways. if it wasent for dave i would have no freakin clue this was even possible

i was already putting together a parts list and deciding if i wanted to make a cb550/cb650 hybrid since i had to tear down the entire motor until i tried this. save me a #$%* load of money which wouldve delayed my cb750 build
1975 CB550 (FINISHED?!?!?)
first motorcycle ever!!! ow and i dont know how to ride it either :D

raw rust rice venti quad shot cafe racing latte project aka my build..... http://forums.sohc4.net/index.php?topic=88853.0

black and white equation godzilla chalkboard 
1972 cb750 - next in line for some <3

Offline Irukandji

  • Enthusiast
  • **
  • Posts: 102
  This documentation Totaly makes up for the origional BONEHEAD award.
750k3

Offline xsmooth69x

  • Master
  • *****
  • Posts: 1,621
  This documentation Totaly makes up for the origional BONEHEAD award.

;D
1975 CB550 (FINISHED?!?!?)
first motorcycle ever!!! ow and i dont know how to ride it either :D

raw rust rice venti quad shot cafe racing latte project aka my build..... http://forums.sohc4.net/index.php?topic=88853.0

black and white equation godzilla chalkboard 
1972 cb750 - next in line for some <3

Offline Oddjob

  • Enthusiast
  • **
  • Posts: 183
Interesting. There are a couple of pointers which might make a difference however. To remove the primary shaft you don't need the tappa tappa tappa technique  :) if you have a threaded bolt the same size as the step bar bolt fitted to the rear of the engine you can thread this into the primary shaft at the clutch end and just pull it out. I normally use the step bar bolt itself, leave one of the footpegs on the bolt with the nut on the end, you can then use the footrest as a sort of slide hammer to tap it out.

One thing that will make a big difference is how old the primary chain is, the newer it is the less chance you have of this working. I'd imagine the primary chain in the engine in question was shot as they get real loose when they are buggered, a new chain will give you very little clearance to get the primary shaft gear out sideways as in the pics. Worth trying to do it this way first however as you never know, it may just work.


Offline dave500

  • Really Old Timer ...
  • *******
  • Posts: 16,884
  • WHAT?no gravy?
just place a pry bar against the primary gear and pull the tension up,then knock the shaft into situ,some people talk themselves into how difficult something is without actually trying it first?

this has only been resurected as its come up again,its not really hard to do if you dont really want or need to split your cases on a complete motor in the frame,if you talk yourself into anything as being hard it will be,this aint hard unless you imagine it to be,go and do a timing belt or water pump on any late model car with east west engine?
« Last Edit: March 08, 2014, 03:57:38 am by dave500 »

Offline cb650

  • Old Timer
  • ******
  • Posts: 3,864
Not to much diff than the 650.  Couple threads on them here to and on the 650 site.
18 grand and 18 miles dont make you a biker

Offline dave500

  • Really Old Timer ...
  • *******
  • Posts: 16,884
  • WHAT?no gravy?
the 650 cases are different,give it a go though?

Offline dagersh

  • "A country attempting to tax itself into prosperity is akin to a man standing in a bucket attempting to lift that bucket by its handle. - Winston Churchill"
  • Expert
  • ****
  • Posts: 1,010
    • Photos
Brilliant!  Great pictures as well!

This must be moved to FAQ section!

Gersh
1962 CA95
1966 Black Bomber
1966 CA77 Dream
1967 Superhawk
1970 CB750K0
1972 CL350
1972 CB450/500 Custom
1972 CB500K1
1975 CB550F
1976 CB400F
1975 CB750 Future Restoration
1976 CB750K6
1976 CB750F
1976 GL1000


1968 Suzuki T500 Cobra
1990 BMW K1
2001 'Busa
2003 RC 51
Bunch of Guzzi's

http://www.sohc4.us/gallery/v/members/personal/dagersh/

Offline Oddjob

  • Enthusiast
  • **
  • Posts: 183
Not only are the 650 cases different, that engine has a primary chain tensioner, something sadly lacking on the 500/550. I'd imagine the inclusion of the tensioner which is situated below the chain and so in the bottom crankcase could well make the starter clutch impossible to remove.

Of course only way to know for certain would be to try, can't hurt and you never know it may just work.

Offline cb650

  • Old Timer
  • ******
  • Posts: 3,864
Funny I've done 3 650s just like this.
18 grand and 18 miles dont make you a biker

Offline ayokp

  • Full Member
  • *
  • Posts: 2
Hi!

I've been using this thread as a guide to do the same thing on my 1981 CB750.

So far it's been pretty identical. Getting the clutch basket off was kind of a pain but I finally got that done last night.


I'm at the point where you tapped out the primary shaft and I'm trying to figure out exactly what to do here. I don't see the 2 bolt bracket that you removed, so I'm trying to figure out if there's something else I need to do before attempting to tap this thing out.

I know a tensioner was mentioned earlier. Not sure if that's something that concerns me or not. Kind of just going with things as they pop up.


Here's the current state...


Left  side (waterpump side) of the bike:


Right side (clutch basket side):


Thanks for this thread. It's been a ton of help and will hopefully give me a solution to a long going problem.

-Alex
« Last Edit: April 17, 2014, 09:23:20 am by ayokp »

Offline MiGhost

  • What was that about being an
  • Hot Shot
  • ***
  • Posts: 362
Hi!

I've been using this thread as a guide to do the same thing on my 1981 CB750.
-Alex

The 750 should have an external starter clutch attached to the backside of the charging rotor. You will need to pull apart the alternator to service it.
~ Ghost

Grey Ghost '80 CB650C: Updated Stock Restomod. Period Custom Cruiser (OEM harbags & trunk, Wixom Ranger fairing, Jardine turnouts)
Bad Moon '83 XJ750MK Midnight Maxim: Full Dress Tour Deluxe w/ X-1 Fairing

Offline nccb

  • Expert
  • ****
  • Posts: 1,145
  • 1974 CB750 Four

Thanks for this thread. It's been a ton of help and will hopefully give me a solution to a long going problem.

-Alex

yeah, as MiGhost said, the 750 starter clutch is behind the alternator. . .hope you didn't pull all this to replace the springs or rollers :o

Offline Bill/BentON Racing

  • Really Old Timer ...
  • *******
  • Posts: 6,719
  • Ex Honda Service Manager, Cert. Honda Tech - Racer
    • BentON Racing
Really nice job. Did it the other way a couple times! ;D Good pics and explanations.
Honda didn't know everything!  Think I first read about doing it this way here! K. Bill
BentON Racing Website
OEM Parts | Service | Custom Builds
BentON Racing Facebook
Over 35 years of experience working on vintage motorcycles, with a speciality in Honda SOHC/4 with a focus on the CB750 and other models as well from 1966 - 1985.
______________________________________
1993 HRC RS125 | 1984 NS400R | 1974 Honda CB750/836cc (Calendar Girl) | 1972 CB 500/550 Yoshi Kitted 590cc | 1965 Honda CB450 Black Bomber | 1972 Suzuki T350 | 1973 88cc | Z50/Falcons Pit Bike | 1967 CA100| 1974 CB350 (400F motor)...and more.
______________________________________
See our latest build 'Captain Marvel' CLICK HERE

Offline ayokp

  • Full Member
  • *
  • Posts: 2

Thanks for this thread. It's been a ton of help and will hopefully give me a solution to a long going problem.

-Alex

yeah, as MiGhost said, the 750 starter clutch is behind the alternator. . .hope you didn't pull all this to replace the springs or rollers :o

lol. I definitely did. Thankfully I didn't try to tap anything out yet. Now I can hopefully just put it all together right. Did pick up some needed replacement gaskets along the way, so it wasn't a failure of an operation.

I'll see about taking out the alternator hopefully tonight. Sounds like a lot easier road than the one I was headed down.

Thanks!

Offline TwoTired

  • Really Old Timer ...
  • *******
  • Posts: 21,805
  This documentation Totaly makes up for the origional BONEHEAD award.

+1

Well done!
Lloyd... (SOHC4 #11 Original Mail List)
72 500, 74 550, 75 550K, 75 550F, 76 550F, 77 550F X2, 78 550K, 77 750F X2, 78 750F, 79CX500, 85 700SC, GL1100

Those that learn from history are doomed to repeat it by those that don't learn from history.

Offline Tews19

  • I am no
  • Really Old Timer ...
  • *******
  • Posts: 6,465
Thanks Dave for sending me the link! How do I sticky note it so I can reference it?
1969 Honda CB750... Basket case
1970 Honda CB750 survivor.

Offline dave500

  • Really Old Timer ...
  • *******
  • Posts: 16,884
  • WHAT?no gravy?
add to favourites?