Author Topic: It has begun!!! Another 550 top end rebuild  (Read 9566 times)

0 Members and 2 Guests are viewing this topic.

Offline Adam_F

  • Enthusiast
  • **
  • Posts: 156
Re: It has begun!!! Another 550 top end rebuild
« Reply #25 on: May 21, 2014, 12:42:40 AM »
de burr it and try again,try rotating it to see any bend?sometimes a burr that low is caused by slack use of a spring compressor and rough hand fitting of the valve collets(keepers).

You rule Dave.  Must've ham fisted that last keeper.  Think I may have found the burr down lower than I was looking.  Getting late here...  Will work on it tomorrow and report back with pics.  If you're ever in Portland, I owe you many a beer!
'77 cb550F

Offline dave500

  • Really Old Timer ...
  • *******
  • Posts: 17,022
  • WHAT?no gravy?
Re: It has begun!!! Another 550 top end rebuild
« Reply #26 on: May 21, 2014, 01:10:38 AM »
ill drink it now!i collect straight up,no 30 day account with me!

Offline Adam_F

  • Enthusiast
  • **
  • Posts: 156
Re: It has begun!!! Another 550 top end rebuild
« Reply #27 on: May 21, 2014, 11:30:37 AM »
ill drink it now!i collect straight up,no 30 day account with me!

Smart man! 

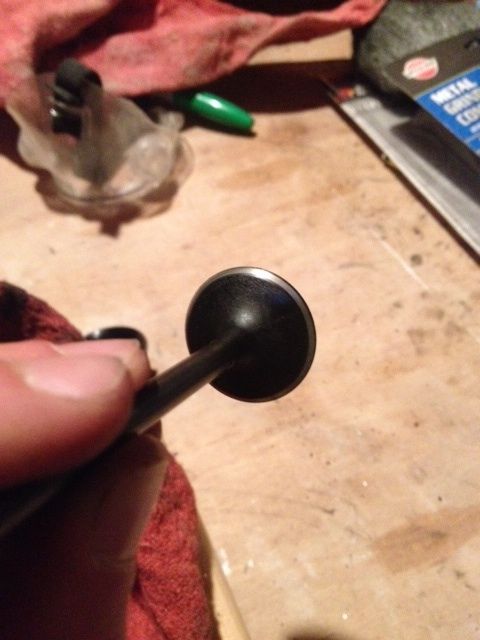
Used a diamond grit warding file to de burr the stem.  As you can see in the photo, there are a couple small nicks in the stem.  (I've yet to de carbonize and polish them though).  Plus side is that its totally straight.  I looked into the guide and there are no noticeable scratches or gouges.  Can I get away with using this stem or do I need a new one?

'77 cb550F

Offline dave500

  • Really Old Timer ...
  • *******
  • Posts: 17,022
  • WHAT?no gravy?
Re: It has begun!!! Another 550 top end rebuild
« Reply #28 on: May 21, 2014, 12:40:29 PM »
thatll be fine,make sure no burr can damage the new seal.

Offline Adam_F

  • Enthusiast
  • **
  • Posts: 156
Re: It has begun!!! Another 550 top end rebuild
« Reply #29 on: May 21, 2014, 12:45:20 PM »
thatll be fine,make sure no burr can damage the new seal.

Thank you, good sir!
'77 cb550F

Offline Adam_F

  • Enthusiast
  • **
  • Posts: 156
Re: It has begun!!! Another 550 top end rebuild
« Reply #30 on: May 22, 2014, 06:17:43 PM »
Well... spent the last three evenings removing the old gaskets and varnish from the matting surfaces.  Serious business.  Might be a couple tiny little spots that I need to take care of in the shot below, but it was time to call it a day.  Also cleaned the carbon off the pistons.  (Yes, I did cover up the holes to make sure nothing went in there  Shop towels removed for photo).


I'd show you the other surfaces from the head and cylinders, but they are boxed up and ready to drop off at Bailey's High Performance tomorrow for decking.  Piston rings are in tolerance, but I still haven't decided if I'm going to replace them or not.... 

Will post shots when I get everything back from Bailey's!
'77 cb550F

Offline Trad

  • Expert
  • ****
  • Posts: 964
Re: It has begun!!! Another 550 top end rebuild
« Reply #31 on: May 22, 2014, 06:25:54 PM »
I'd get them to check if the cylinder and head are even warped before decking. When I brought my stuff neither were warped and they took just a few thou off the head and didn't need to do the cylinder at all. The less you can get away with the better.
74 CB550 Build: NOS-GUTTED-OEMplus-HOLDTRUE
http://forums.sohc4.net/index.php/topic,130575.0.html

Offline dave500

  • Really Old Timer ...
  • *******
  • Posts: 17,022
  • WHAT?no gravy?
Re: It has begun!!! Another 550 top end rebuild
« Reply #32 on: May 22, 2014, 09:28:10 PM »
if your up for it pull the pistons off the rods,and remove the rings then using a 1mm drill bit clear the oiling holes in the bottom ring groove,they will be full of crud.


Offline Adam_F

  • Enthusiast
  • **
  • Posts: 156
Re: It has begun!!! Another 550 top end rebuild
« Reply #33 on: May 22, 2014, 09:49:59 PM »
if your up for it pull the pistons off the rods,and remove the rings then using a 1mm drill bit clear the oiling holes in the bottom ring groove,they will be full of crud.


Hmm... Should do that.  Question for ya...  Do I need a special tool to remove the piston from the rod and can I reuse the old rings?  Two questions I guess.  When I was cleaning the carbon off the top of the pistons it was impossible to keep all of the debris out of the rings.  I cleaned them as best I could, but it probably couldn't hurt to pull and fully clean them (along with the oil holes).  Still debating new rings.  Want them, but not sure if I can budget them since the old ones are still good.
'77 cb550F

Offline Adam_F

  • Enthusiast
  • **
  • Posts: 156
Re: It has begun!!! Another 550 top end rebuild
« Reply #34 on: May 22, 2014, 09:53:06 PM »
I'd get them to check if the cylinder and head are even warped before decking. When I brought my stuff neither were warped and they took just a few thou off the head and didn't need to do the cylinder at all. The less you can get away with the better.

Good call.  Was gonna have them take a look before they do the work.  After removing the old gasket, there are some areas on the surface that have some texture.  Almost like the gasket material left indents in the soft aluminum, or whatever gasket sealer the PO used was a tad corrosive.  That texture is equally concerning to me and I'd love the surfaces to be nice and smooth.  Dont wanna have to do this again for a while  :o
'77 cb550F

Offline dave500

  • Really Old Timer ...
  • *******
  • Posts: 17,022
  • WHAT?no gravy?
Re: It has begun!!! Another 550 top end rebuild
« Reply #35 on: May 22, 2014, 10:17:23 PM »
circlips #11 retain the wrist pin #6,once its removed the pin will generally push through but may need a gentle nudge,dont lose the circlip down into the engine,stuff the holes with rags or fab up a neat cardboard cover?dont mix the rings or pistons up they all have to go back the same way.
« Last Edit: May 23, 2014, 12:31:05 AM by dave500 »

Offline Adam_F

  • Enthusiast
  • **
  • Posts: 156
Re: It has begun!!! Another 550 top end rebuild
« Reply #36 on: May 23, 2014, 12:47:21 PM »
circlips #11 retain the wrist pin #6,once its removed the pin will generally push through but may need a gentle nudge,dont lose the circlip down into the engine,stuff the holes with rags or fab up a neat cardboard cover?dont mix the rings or pistons up they all have to go back the same way.

Thanks Dave! Definitely gonna need to be referencing my parts manual to put this thing back together! ::)
'77 cb550F

Offline Adam_F

  • Enthusiast
  • **
  • Posts: 156
Re: It has begun!!! Another 550 top end rebuild
« Reply #37 on: May 25, 2014, 08:19:02 PM »
Thinking I'm going to go ahead and get new piston rings.  Figure that while I'm in here, I might as well just take care of it rather than have to tear back into it in a couple years or less.  My current rings are in tolerance, but towards the limit.  So... I'm going to purchase a flex hone...  Does anybody know what size flex hone I should buy for my 550?  Not sure if it should be the exact size of the cylinder or a tad smaller.  Definitely don't want to bore things out any bigger.  Any suggestions would be greatly appreciated!  Thanks!
'77 cb550F

Offline goldarrow

  • one day, i'll be an
  • Old Timer
  • ******
  • Posts: 3,361
Re: It has begun!!! Another 550 top end rebuild
« Reply #38 on: May 25, 2014, 09:13:58 PM »
The flex hone is a bit bigger than the hole, you just run it through to get cross hatch pattern. IIRC flex hone is 2.5" ???
Life Is Full Of Challenges - And My Backyard Is Full Of SOHC4's

CB550 K0
CB750 K0, K2, K23 JDM, K45, K5
And the little ones z50r, xr50r, st90


750k5 http://forums.sohc4.net/index.php?topic=114817.0

Offline Adam_F

  • Enthusiast
  • **
  • Posts: 156
Re: It has begun!!! Another 550 top end rebuild
« Reply #39 on: May 25, 2014, 09:30:20 PM »
The flex hone is a bit bigger than the hole, you just run it through to get cross hatch pattern. IIRC flex hone is 2.5" ???

Cool.  Obviously never used one.  Guess they are soft, like a textured brush.  So I want it slightly larger than the bore.  Guess I'll go silicon carbide, 320 grit.

EDIT:  Found some great info here: http://www.enginehones.com/technical.html
« Last Edit: May 25, 2014, 09:37:48 PM by Adam_F »
'77 cb550F

Offline Adam_F

  • Enthusiast
  • **
  • Posts: 156
Re: It has begun!!! Another 550 top end rebuild
« Reply #40 on: May 30, 2014, 05:33:24 PM »
Just got my head and cylinders back from Baisley's Hi Performance here in Portland.  The matting surfaces look great.


There were only a couple small high spots, so they didn't have to take it down much.  Either way, peace of mind.  I was planning on ordering a flex hone tool, but it was cheaper to have the folks at Baisley's do it than to order the tool.  The pic makes the crosshatch pattern look deeper than it actually is (poor lighting). 


Leaving town for the weekend.  Just need to lap the valves, then start putting her back together!  Hoping to be riding by next weekend or the following week!
« Last Edit: May 30, 2014, 05:34:57 PM by Adam_F »
'77 cb550F

Offline dave500

  • Really Old Timer ...
  • *******
  • Posts: 17,022
  • WHAT?no gravy?
Re: It has begun!!! Another 550 top end rebuild
« Reply #41 on: May 30, 2014, 05:45:21 PM »
even though they've cleaned those bores clean them super well again,use atf on a white rag,when the rag can be wiped on the bore and stay clean its clean,no one cleans parts as well as yourself.

Offline Adam_F

  • Enthusiast
  • **
  • Posts: 156
Re: It has begun!!! Another 550 top end rebuild
« Reply #42 on: May 30, 2014, 06:34:35 PM »
even though they've cleaned those bores clean them super well again,use atf on a white rag,when the rag can be wiped on the bore and stay clean its clean,no one cleans parts as well as yourself.

Will do Dave!  Thanks for the tip.
'77 cb550F

Offline goldarrow

  • one day, i'll be an
  • Old Timer
  • ******
  • Posts: 3,361
Re: It has begun!!! Another 550 top end rebuild
« Reply #43 on: May 30, 2014, 07:43:19 PM »
Torque it down to 18 lbs so that you may not have to open it up to retorque.  (I remembered this from Dave :))
Life Is Full Of Challenges - And My Backyard Is Full Of SOHC4's

CB550 K0
CB750 K0, K2, K23 JDM, K45, K5
And the little ones z50r, xr50r, st90


750k5 http://forums.sohc4.net/index.php?topic=114817.0

Offline dave500

  • Really Old Timer ...
  • *******
  • Posts: 17,022
  • WHAT?no gravy?
Re: It has begun!!! Another 550 top end rebuild
« Reply #44 on: May 30, 2014, 07:44:42 PM »
polish those lead in ramps that compress the rings as they go in,makes it all slide together so much smoother.

Offline Adam_F

  • Enthusiast
  • **
  • Posts: 156
Re: It has begun!!! Another 550 top end rebuild
« Reply #45 on: May 30, 2014, 09:22:25 PM »
Torque it down to 18 lbs so that you may not have to open it up to retorque.  (I remembered this from Dave :))

Oh yeah? Was planning in leaving it open over night then Re torquing. Is this a better strategy?
'77 cb550F

Offline Adam_F

  • Enthusiast
  • **
  • Posts: 156
Re: It has begun!!! Another 550 top end rebuild
« Reply #46 on: May 30, 2014, 09:26:41 PM »
polish those lead in ramps that compress the rings as they go in,makes it all slide together so much smoother.

Will do. Also heard it's a good idea to give the valve stems a couple taps w a round hammer after assembling the head (to make sure nothing is gonna pop loose). Any other reassembly tips that aren't in the manual?

Gasket sealer on the pucks after re torquing?
Planning on using anti seize on the bolts. Any particular type/brand?
'77 cb550F

Offline dave500

  • Really Old Timer ...
  • *******
  • Posts: 17,022
  • WHAT?no gravy?
Re: It has begun!!! Another 550 top end rebuild
« Reply #47 on: May 30, 2014, 10:53:03 PM »
make sure any blind holes(ones that have no through hole)are blown well clear,do not torque any 6mm bolts down ever!when you tap the valve stem to make sure the keepers are locked in have the head sitting so the valves can open clearly and not hit the work bench,any anti sieze is fine.

Offline Adam_F

  • Enthusiast
  • **
  • Posts: 156
Re: It has begun!!! Another 550 top end rebuild
« Reply #48 on: May 31, 2014, 10:47:16 AM »
make sure any blind holes(ones that have no through hole)are blown well clear,do not torque any 6mm bolts down ever!when you tap the valve stem to make sure the keepers are locked in have the head sitting so the valves can open clearly and not hit the work bench,any anti sieze is fine.

Roger that!
'77 cb550F

Offline Adam_F

  • Enthusiast
  • **
  • Posts: 156
Re: It has begun!!! Another 550 top end rebuild
« Reply #49 on: June 04, 2014, 01:45:01 AM »
Made a bit of progress tonight.  It wasn't without a couple stupid NOOB mistakes... but I guess that's to be expected. 

Lapped the valves.  I couldn't find any of the engineer's blue.  Tried to use a sharpie, but it didn't work too well.  So I just lapped as little as needed to make the surfaces smooth and spot free.  Made the mistake of starting to lap the intake from cylinder 1 into cylinder 4  ::)  Somehow since the head was upside down, so was my logic....  Caught it, luckily...


Then decided to go for it and just put the head back together.  Clamped it down so it didn't bite the concrete floor
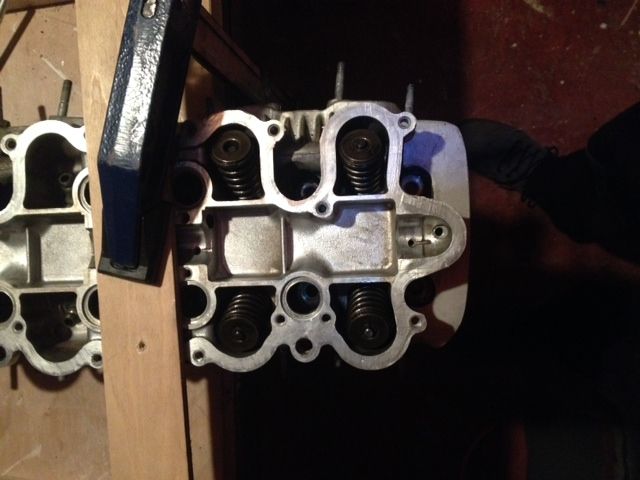


Actually went together much easier than expected.  The valve keepers are so tiny, that they were tricky at first, but after the first one, I got the hang of it pretty quickly.
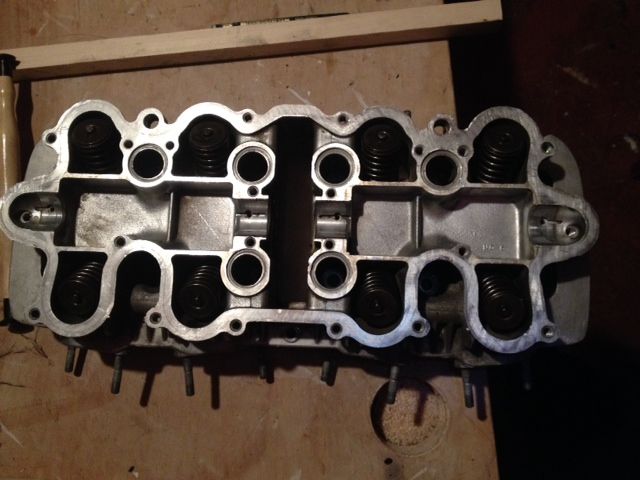


It's late here for a weeknight, so I'm calling it.  Gonna get some gas and do a leak down test tomorrow.  Fingers crossed as I'm really just learning.  I've realized through this process how much of a craft this actually is.  I mean, you can watch a youtube video and read manuals on how to tile your floor, but its not gonna look as good as a professional's work.  Hopefully this leak down test passes and I can start putting this back together.  Longest I've gone without riding in a few years.
'77 cb550F