Author Topic: here goes....start of my restoration  (Read 9480 times)

0 Members and 1 Guest are viewing this topic.

Offline Gnat

  • Enthusiast
  • **
  • Posts: 130
here goes....start of my restoration
« on: December 12, 2009, 03:49:35 PM »
I am not a restoration guru I just like doing things myself if possible. So I am starting my 350F project bike with the painted parts. The first thing I did was disassemble the side covers and get the badges off for cleaning. One of them was in a good state the other was less than desired. I touched one of them up and the other I stripped and repainted. It was very pittted and it looks "OK" but if I ever spot a replacement I will grab it up.

So here are some pictures
Before

Stripped

painted semi gloss black and sprayed with Alclad Chrome (a modellers paint)

and this is what I got


thanks for looking

Gnat
"Trying to keep the rubber side down"

Offline dragracer

  • Really Old Timer ...
  • *******
  • Posts: 5,108
  • CB750F Dragbike
Re: here goes....start of my restoration
« Reply #1 on: December 12, 2009, 04:04:57 PM »
Really nice job on the badges. Can't wait to see how the rest of the bike turns out. Any pics of the chassis?

traveler

  • Guest
Re: here goes....start of my restoration
« Reply #2 on: December 16, 2009, 04:36:26 AM »
looks great!

The little 350/Fours are really cool.

~Joe

Offline Gnat

  • Enthusiast
  • **
  • Posts: 130
More done to the side covers
« Reply #3 on: December 17, 2009, 07:41:19 AM »
So I had some time and I stripped the side covers which revealed some interesting facts about this bike..and it also raised a question about colors. While stripping I noticed that the side covers were actually blue black under the candy red. I got to looking and I then could see where the front fork covers were badly painted red and a lot of over spray on the tree. AH HA! this bike has been wrecked. The tank however is Red all the way through. This leads me to believe that its not a 1974 tank and that the bike was painted to match the tank.

So wheres the question?.....were all the 1974 bike painted Blue Black or could you get a Red or Green one?

Also I found out the hardway that you can't even use "Plastic Safe" stripper on these covers...I melted some of the surface of one of them..nothing that couldn't be repaired. I used brake fluid on the other and not only did it work but it stripped cleaner than the commerical stripper. I sound like Billy Mays!

Anyway some pics

Left side

Right side

what was left of the hardware

stripped

Primed with plastic primer


Gnat
"Trying to keep the rubber side down"

Offline sangyo soichiro

  • Tuck
  • Master
  • *****
  • Posts: 2,167
  • ☢ the atomic playboy ☠
Re: here goes....start of my restoration
« Reply #4 on: December 17, 2009, 08:09:43 AM »
So far, so good.  I have a feeling that you're going to be very meticulous in this restoration.  Should be a good one to keep my eye on.
1974 CB 750
1972 CB 750 http://forums.sohc4.net/index.php/topic,57974.0.html
1971 CL 350 Scrambler
1966 Black Bomber
Too many others to name…
My cross country trip: http://forums.sohc4.net/index.php/topic,138625.0.html

Offline hoodellyhoo

  • CB350F
  • Master
  • *****
  • Posts: 1,726
Re: here goes....start of my restoration
« Reply #5 on: December 17, 2009, 08:16:24 AM »
Brake fluid....never would have thought of that. I'll have to remember that.

As far as colors, yes all 74's were black. They were even called the CB350F1 as opposed to just CB350F.
1972 CB350F (Back from the Dead!)- http://forums.sohc4.net/index.php?topic=20822.0
1965? S65 - Coming Eventually!
1972 CB750K2 (father-son project)
1976 CB750K6- (sold) http://forums.sohc4.net/index.php?topic=96859.0
1976 CB750K6 (sold)- http://forums.sohc4.net/index.php?topic=62569.0

Offline Gnat

  • Enthusiast
  • **
  • Posts: 130
Re: here goes....start of my restoration
« Reply #6 on: December 18, 2009, 05:40:05 AM »
The reason I started with the side covers was that I didn't have any keys to the bike. The originals were long gone by the fall of 09. And I found that I couldn't open the tank or the seat without them. Was really delighted to see that someone on ebay was selling keys and had the number I wanted.

So new "old" keys. Don't know if he makes these or bought up existing stock. They don't say Honda on them so I suppose he copies the originals.


Gnat
"Trying to keep the rubber side down"

Offline Sam Green Racing

  • Really Old Timer ...
  • *******
  • Posts: 16,068
  • I REALLY? hate black rims.
Re: here goes....start of my restoration
« Reply #7 on: December 18, 2009, 07:34:15 AM »
I am not a restoration guru

Stripped

painted semi gloss black and sprayed with Alclad Chrome (a modellers paint)

and this is what I got


thanks for looking

Gnat

I'm not a restoration guru  ;D ;D ;D ;D ;D tell us another, you've been restoring for years, when can you fit mine in :D :D :D :D :D :D
Brilliant job on the side bits, if the rest is as good, we'll know you were lying ;D ;D ;D ;D ;D ;D

Well done, will keep an eye on this one.

Sam. ;)
C95 sprint bike.
CB95 hybrid race bike
CB95 race bike
CB92
RS 175. sprint/land speed bike
JMR Racing CB750A street ET drag bike

Offline hoodellyhoo

  • CB350F
  • Master
  • *****
  • Posts: 1,726
Re: here goes....start of my restoration
« Reply #8 on: December 18, 2009, 09:00:37 AM »
could be original honda keys. That's the honda logo on the right key.
1972 CB350F (Back from the Dead!)- http://forums.sohc4.net/index.php?topic=20822.0
1965? S65 - Coming Eventually!
1972 CB750K2 (father-son project)
1976 CB750K6- (sold) http://forums.sohc4.net/index.php?topic=96859.0
1976 CB750K6 (sold)- http://forums.sohc4.net/index.php?topic=62569.0

Offline Gnat

  • Enthusiast
  • **
  • Posts: 130
Re: here goes....start of my restoration
« Reply #9 on: December 18, 2009, 03:08:05 PM »
I found the TEC logo on the coils as well. They opened the bike right up. Tomorrow I will show pics of the sorry state of whats left.

Tonight I set out all the stuff I have hunter/gathered up to begin the engine restoration. I purchased off e-bay the cylinder head cover and cylinder head to replace the ones that were on the bike and in God awful condition. They are on the left and are in good nic. The alternate cam shaft in the head on the left has nice shiny unworn eggs and none of Mr. Rust. I'm not sure that the one that came with the bike could be restored at least not by me as I don't know a thing about blueprinting a cam or a crank for that matter. I also bought a complete gasket and O-ring set.  A set of used coils the ones on the right crumble when you look at them. They will be giving there plug covers to the new set as they were all bunged up. I got a new Tach cable the old one has "set screw 17" firmly and unalterably screwed in and it will never come out in this lifetime in one piece. A new alternator cover and a new crankcase cover. all this set me back about 175.00 bucks with shipping.

Now I have more questions. A lot of this engine seems to have been painted? If so what parts were painted? Must be the crankcase, the oil filter cover, cylinder,cylinder head,cylinder head cover and breather cover. The rest seems to have been polished aluminum,Nes' pas?

This is almost like archeology..the more you handle the metal the more interesting the machine becomes. I am facinated by engineering anyway and this is a cool treasure hunt in a way.


Gnat
"Trying to keep the rubber side down"

Offline Gnat

  • Enthusiast
  • **
  • Posts: 130
Plating the tank insides
« Reply #10 on: December 20, 2009, 11:15:10 AM »
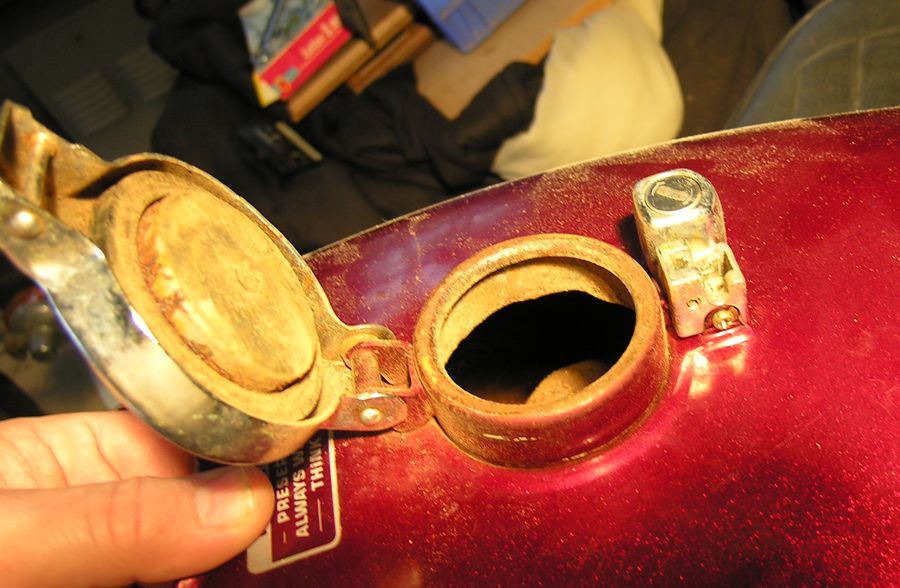
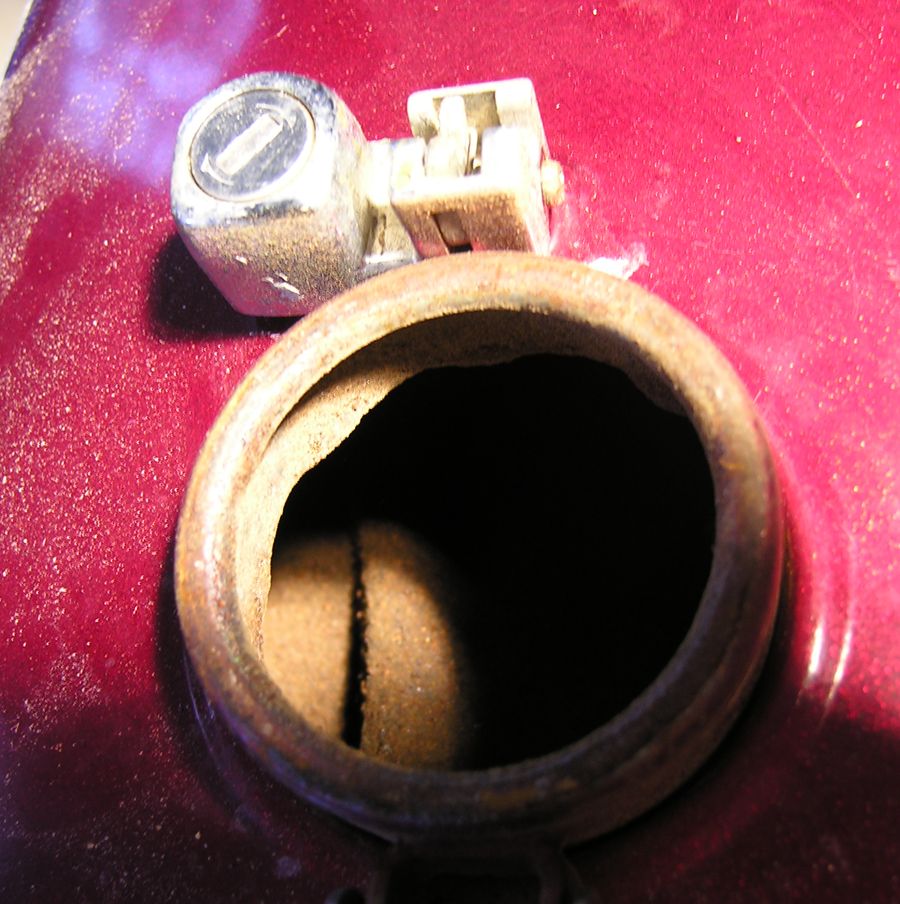
I opened the tank with the new keys and it was full of rust. I had been reading up on the tips and tricks forum about plating so I thought I would give it a go

Not so great pics, I hurried because it was freezing outside, but you can just makeout how much rust was there


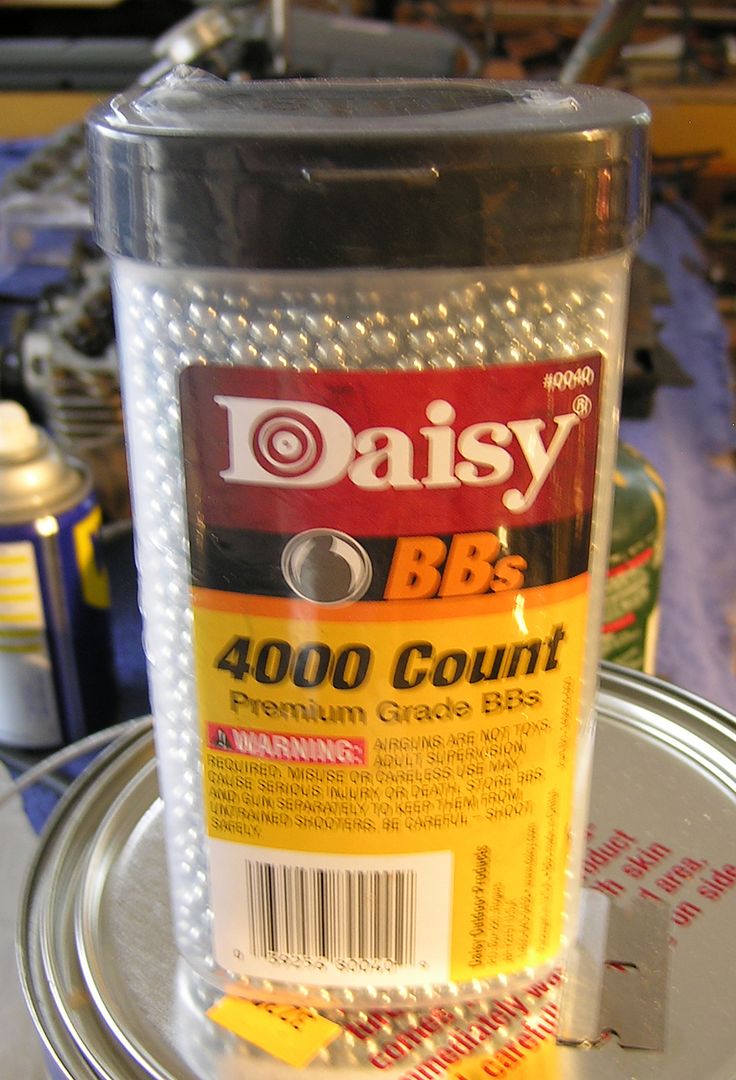
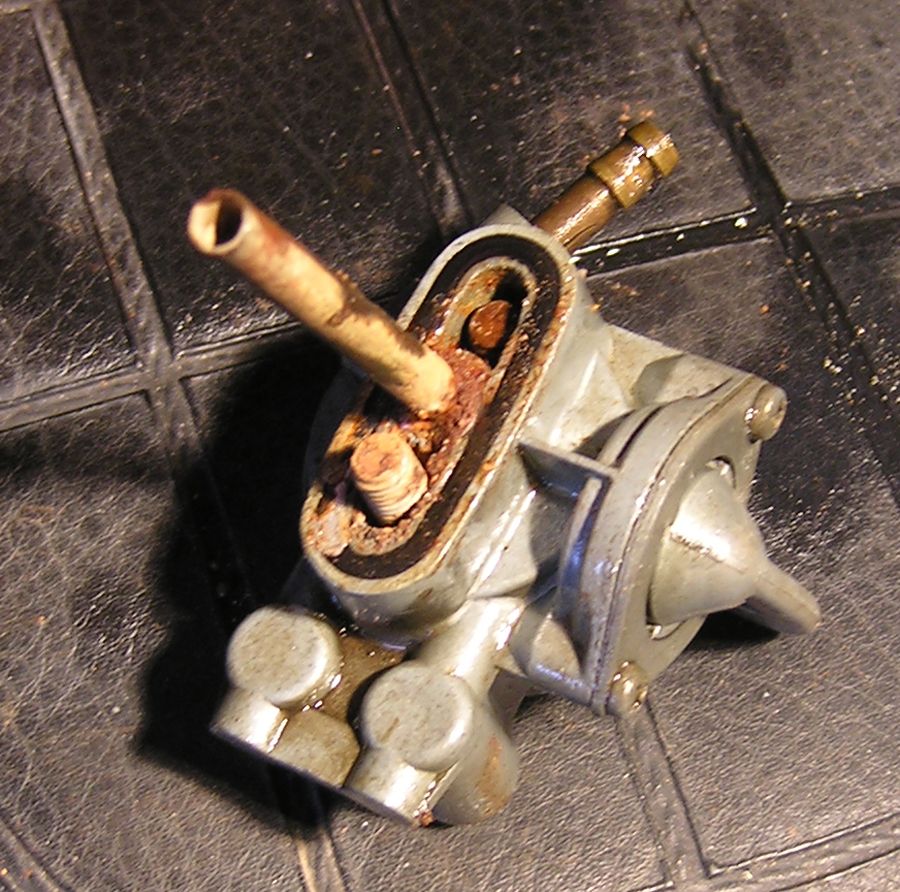
I got some stuff to clean with Simple Green,BB's, Funnels,Battery Charger
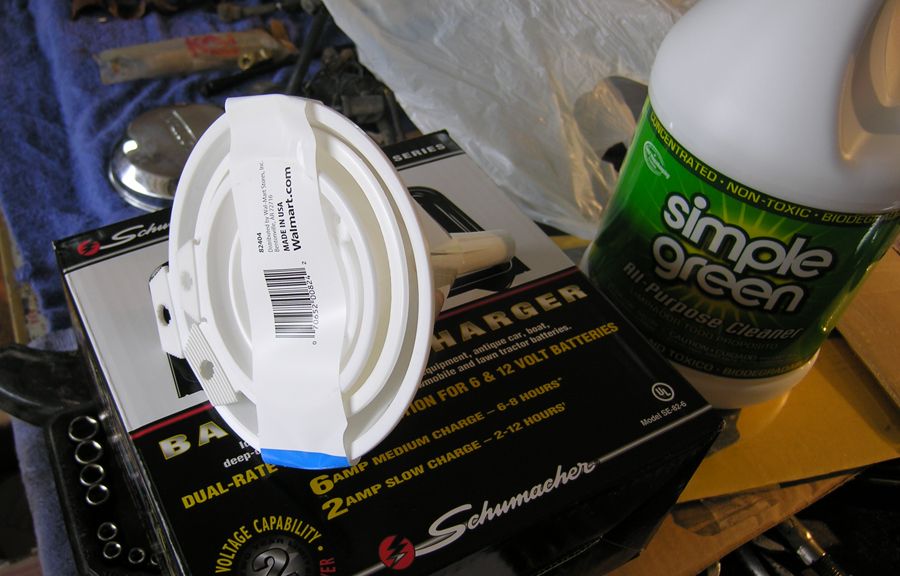


Put the BB's in the tank with the Funnel
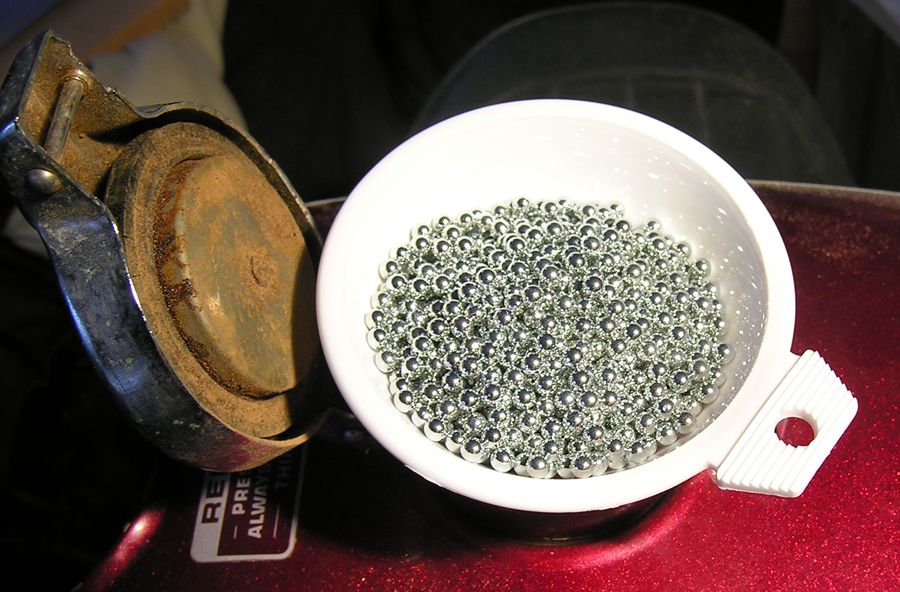

Shook the S.O.B. as hard as I could for about 10 minutes off and on. Poured this out
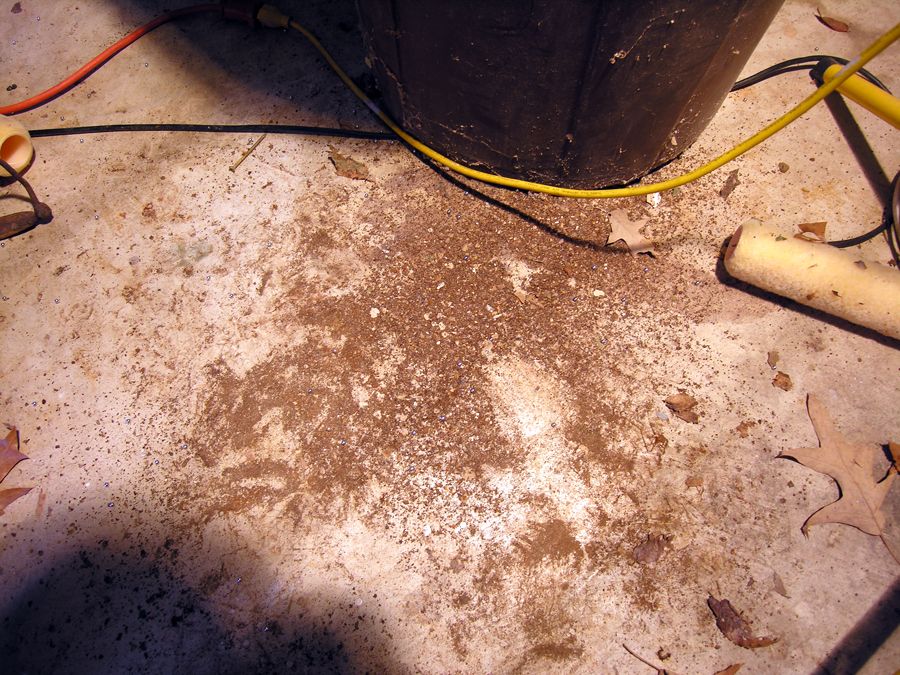

Did it again and the rust was very fine.
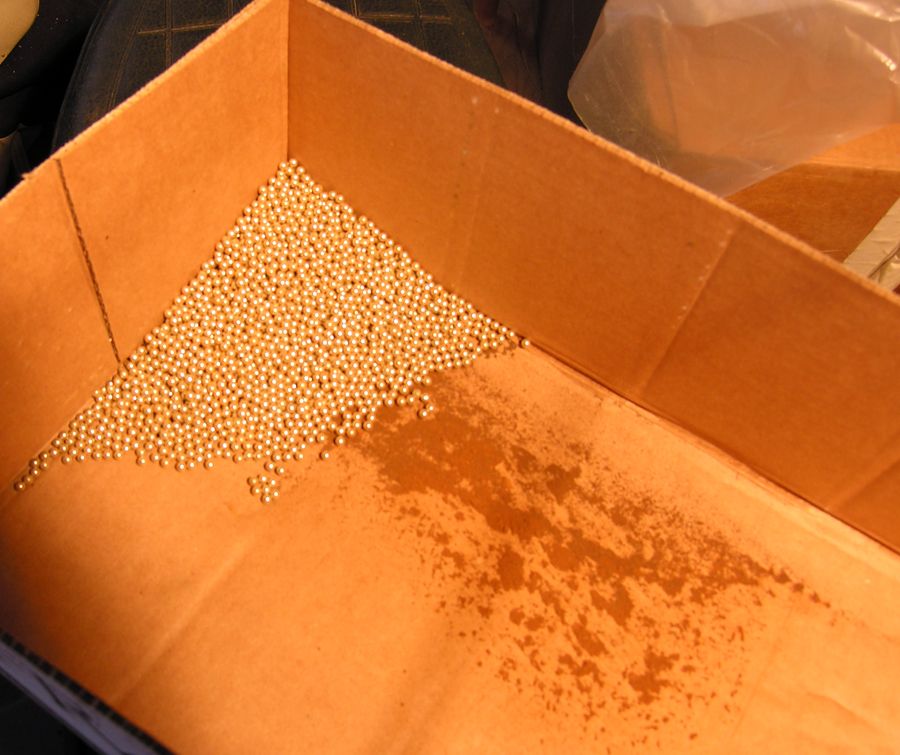

Washed the tank out with simple green and hot water.

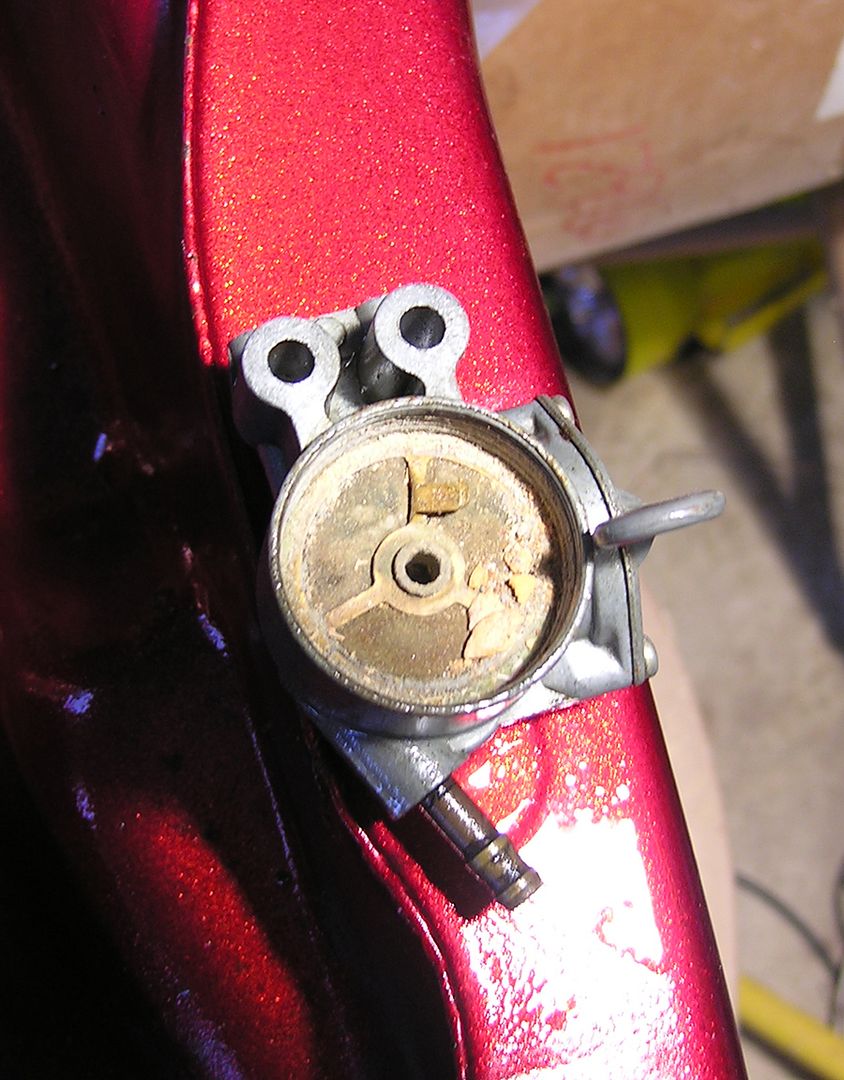
Remove the Petcock which was full of crap


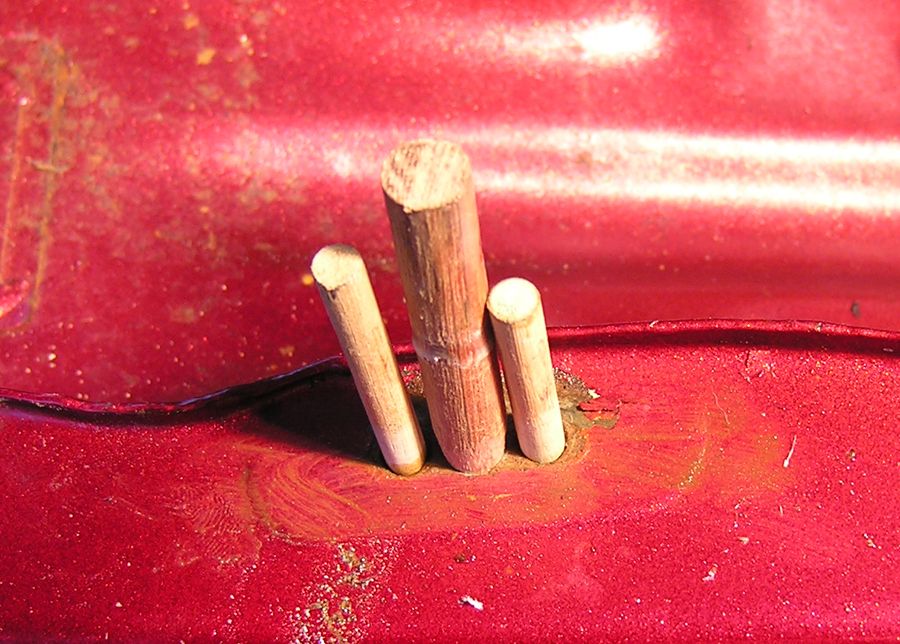
Hammered in some wooden dowels


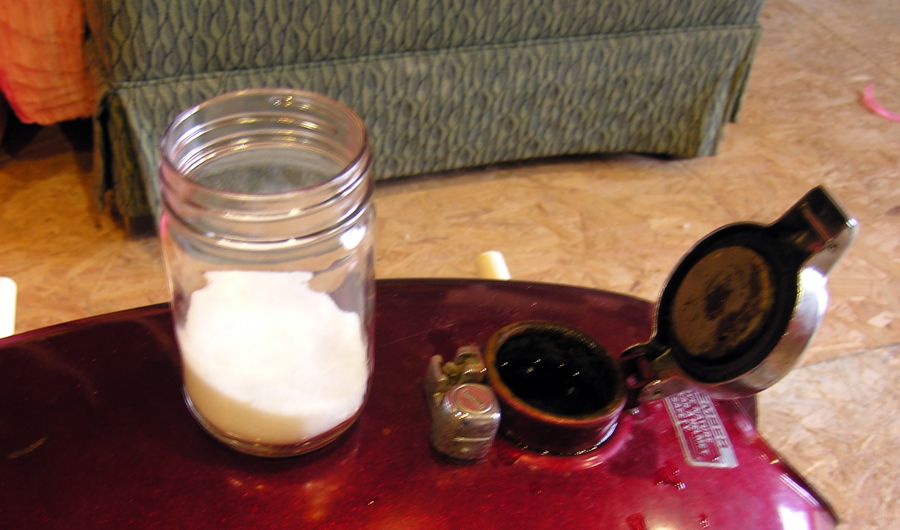
Filled the tank with water and the salt from the jar

Used the funnel to keep the spike away from the tank sides and the tape on the tip to prevent grounding on the tank tunnel. By the way these were zinc covered nails so I ground off the zinc coating before starting.
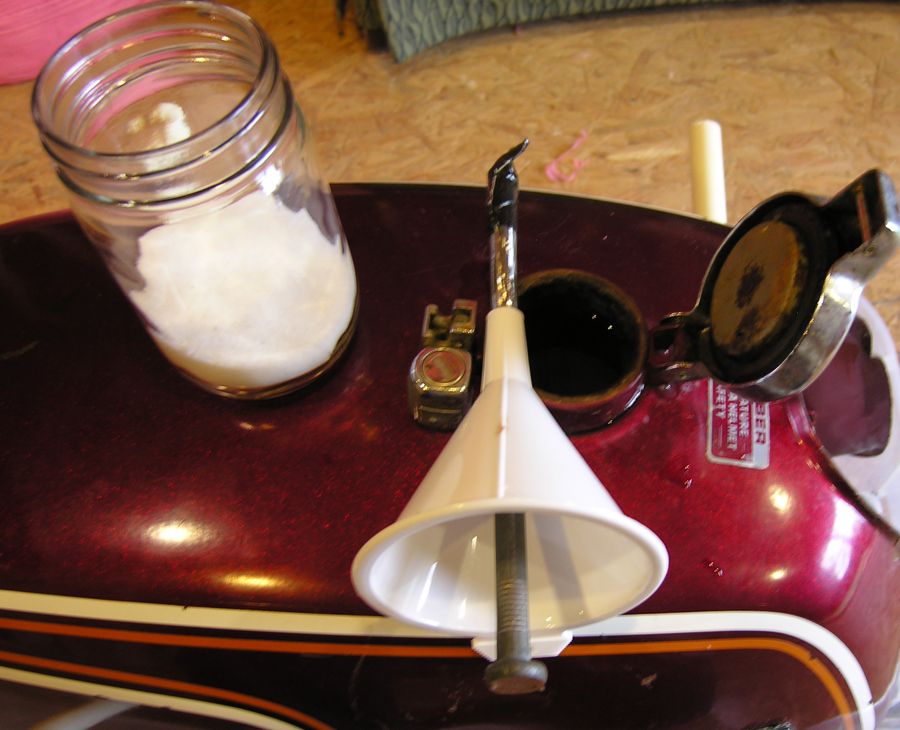

And here it is working. I have since moved the cathode to the rear of the tank. But its out there now bubbling away.
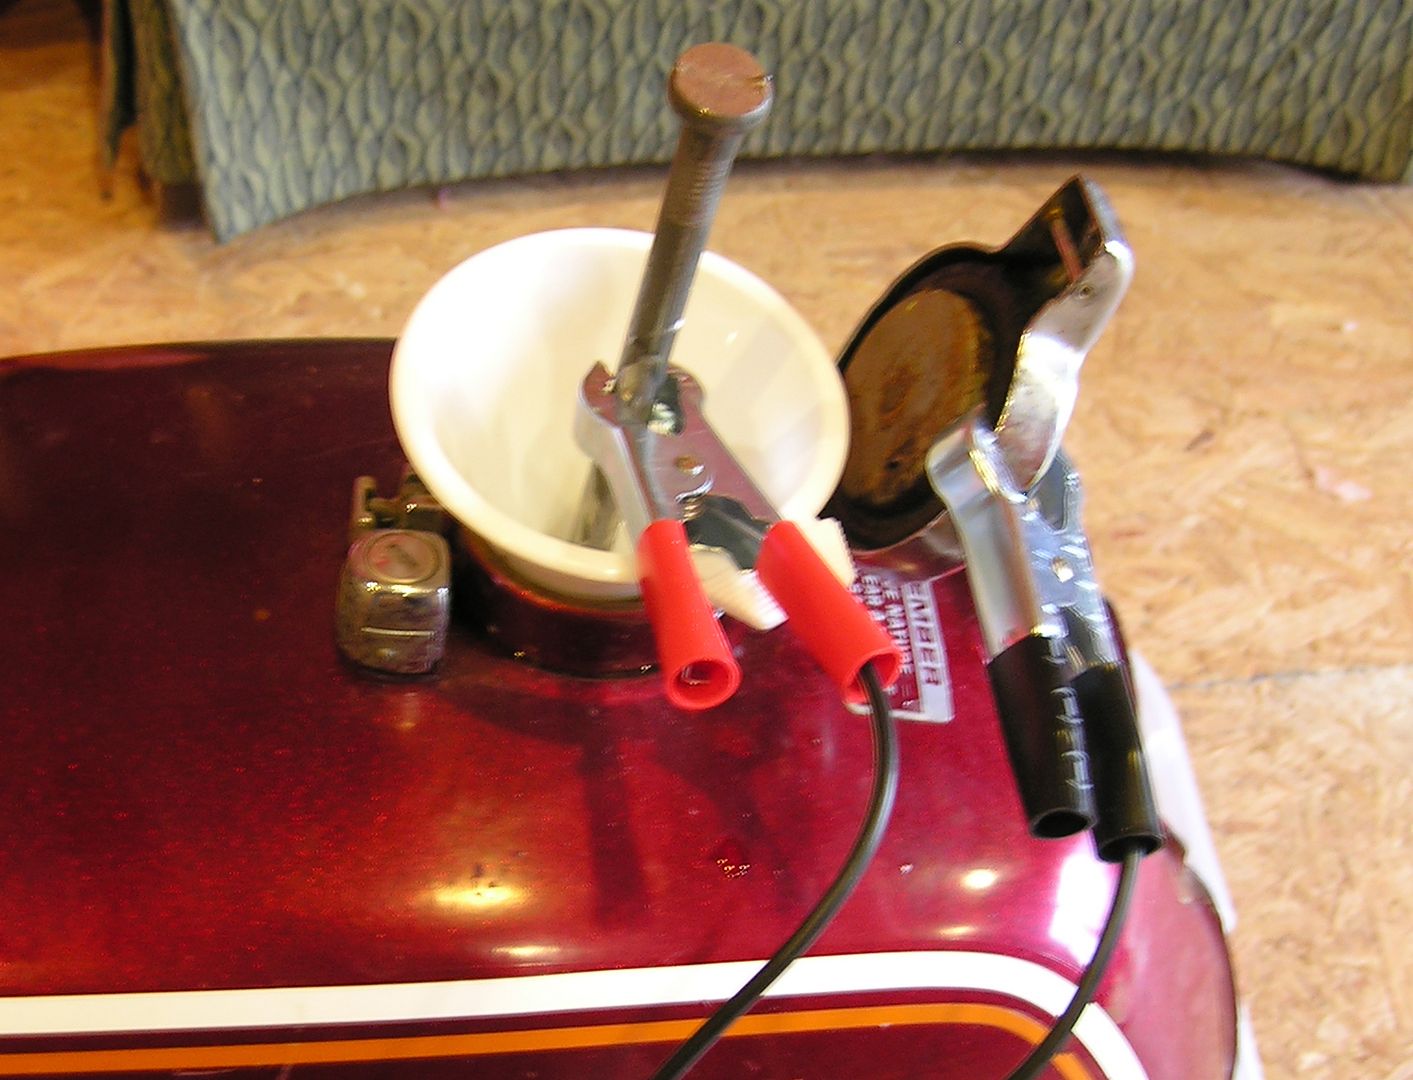

I am gonna check it ever so often and regrind the anode to get a fresh surface for better plating. I took the advice of a guy who said not to run the amps up but to go slow it does a better job...I hope so.

Gnat
« Last Edit: December 20, 2009, 11:18:49 AM by Gnat »
"Trying to keep the rubber side down"

Offline B.O.X.N.I.F.E.

  • The Stumped
  • Expert
  • ****
  • Posts: 1,137
Re: here goes....start of my restoration
« Reply #11 on: December 20, 2009, 03:01:20 PM »
Strong work. Another good method of derusting tank insides is "The Works" toilet bowl cleaner from walmart. Less than 2$ and will leave the insides spotless.
1974 CB550

32 days and 5,536 miles on a CB550...

http://kerncountykid.blogspot.com/

and a couple years later, 38 days and 9,102 miles...

Forever West

... and all of it in a 4 mintue video

<a href="Not a valid vimeo URL">WWYY?[/url]

Offline sangyo soichiro

  • Tuck
  • Master
  • *****
  • Posts: 2,167
  • ☢ the atomic playboy ☠
Re: Plating the tank insides
« Reply #12 on: December 21, 2009, 07:56:58 AM »
I opened the tank with the new keys....

FYI, you don't need the key to open the tank.  Anything will work.  Try it with a screwdriver for example. 


Cool way to remove the rust from the tank by the way.
1974 CB 750
1972 CB 750 http://forums.sohc4.net/index.php/topic,57974.0.html
1971 CL 350 Scrambler
1966 Black Bomber
Too many others to name…
My cross country trip: http://forums.sohc4.net/index.php/topic,138625.0.html

Offline hoodellyhoo

  • CB350F
  • Master
  • *****
  • Posts: 1,726
Re: here goes....start of my restoration
« Reply #13 on: December 21, 2009, 09:22:35 AM »
Thanks for the clear description on the tank de-rusting. I tried the electrolysis too but did something wrong and it didn't work very well.
1972 CB350F (Back from the Dead!)- http://forums.sohc4.net/index.php?topic=20822.0
1965? S65 - Coming Eventually!
1972 CB750K2 (father-son project)
1976 CB750K6- (sold) http://forums.sohc4.net/index.php?topic=96859.0
1976 CB750K6 (sold)- http://forums.sohc4.net/index.php?topic=62569.0

Offline Gnat

  • Enthusiast
  • **
  • Posts: 130
Re: here goes....start of my restoration
« Reply #14 on: December 25, 2009, 06:40:32 PM »
The plating went well the only thing left in the tank were some tiny black spots, so I went to Walmart where they carry a product called 'THE WORKS" for 1.98 USD. poured the whole thing in the tank and after 15 minutes it was cleaner than a new nickel. After the works I flushed with water/water and Simple Green/ then water and baking soda to make sure I neutralized the acid.

I recommend this treatment..OH yeah I then put some 91% alcohol inthe tank to suck up the H2O and then dried with compressed air. Then I but a coat of ATF cut with gas (petrol). I looked in today and no rust....amazing

Here is some more stuff

I did some more disassembly this afternoon

becoming a skeleton. I have cleaned the seat and armor all'd it. the chrome bead around the bottom rim is shot and I don't know how I'm gonna fix that the hardware on the seat is going to the platers but the seat strip is plastic so I don't know how I'm gonna even get it free from the seat to fix it.


The pistons are stuck in the heads so I filled those with ATF and I'm gonna let them soak for a week or so and knock them loose. I'm not too concerned about this lower case because I have procured a new one in which everything moves. My plan is to rebuild both motors...can't say too much about having a spare on a 40 year old bike.


The horn has to come off..the bolts that hold it also have the guide for the tach cable (I think) and on the other side it holds the ignition swich.

The horn in situ

the horn removed

the back of the horn (at the top it says 12v 3 A 103db) so I attached to a 12volt supply and its loud as hell...103 db...gotta love those japanese

I polished on it some..still has pits..i will have to sand and polish as this can't go to the platers it is a sealed unit and this kid ain't gonna crack the case...no balls...sorry


Ihave 2 valve cover breather covers...both heavily corroded. thought I might take a shot at the worst one...not bad,,still have some sworl marks. my arms and hands are tired form the polishing .but I got a decent result...can't wait to her motor all shiny and #$%*!

.

going to bust out the battery/airbox/airfilter/headlight and other stuff tomorrrow.

Gnat
"Trying to keep the rubber side down"

Offline Gnat

  • Enthusiast
  • **
  • Posts: 130
more
« Reply #15 on: December 25, 2009, 06:42:51 PM »
Found out alot of this stuff just needs a good cleaning. Heres the the air cleaner chamber


After soap and water and Armor all


here the front end with the light housing full of wires (don't know why its just this way)


close up


wow


Gauges out


Warning lights next


a wasp nest inside the direction signal switch


the VIN plate made in 6/74  old bike,old man


The electronics..all this could be done in a matchbox these days


inside the aircleaner..damn rust is everywhere


and this is the result..just the crankcase and the front and rear wheel and I'm down to bare bones I'll do this tomorrow.


Gnat

"Trying to keep the rubber side down"

traveler

  • Guest
Re: here goes....start of my restoration
« Reply #16 on: December 25, 2009, 06:56:22 PM »
Take your time...try not to get too burned out....I know...it's a hell of alot of work! :'(

I like the bike, BTW.

~Joe

Offline Gnat

  • Enthusiast
  • **
  • Posts: 130
Re: here goes....start of my restoration
« Reply #17 on: December 26, 2009, 06:42:35 AM »
thanks for the advice TRAVELER. My thought was that if I got it all broken down then I could start looking at each part individually and set up a flow chart so I wouldn't get lost in the forest. Like this week I'm going to redo the master cylinder, or this week I'll box and ship all the bright work to the platers, etc. That way I move along and don't get mired down by the weight of the whole project.

I am finding this simpler than the cars I have done...less big heavy stuff, only one wiring harness, and I can sit down to do most of it and I don't have to get inverted to do any of it.

So its back to the shop this afternoon for the finally take down, and then heavy contemplation and assessment of each part with copious notes. Got a Sony eReader for Xmas I have loading all the manuals into it this morning. Sure beats running in to the computer everytime I need a picture or description.

More later

Gnat
"Trying to keep the rubber side down"

Offline Tim in Ohio

  • So I got that goin' for me, which is nice.
  • Hot Shot
  • ***
  • Posts: 381
Re: here goes....start of my restoration
« Reply #18 on: December 30, 2009, 09:48:29 PM »
Nice job so far Gnat.  Keep up the good work.   I gotta ask, did you find that tangle of wiring connectors, etc to be a little intimidating?  Kinda scares the shiite out of me to look at that and think "will I ever get all the noodles in this plate of spaghetti put back into the right position if I pull it out?"   :o
1973 Honda CB350  Four

Check out my CB350F resto project...  watch a complete moron build a bike in front of your very eyes!: http://forums.sohc4.net/index.php?topic=38903.0

traveler

  • Guest
Re: here goes....start of my restoration
« Reply #19 on: December 30, 2009, 10:21:51 PM »
The key on wiring, is to get a wiring diagram, and tape off each bundle, i.e. tape off the headlight wires...tape off the ignition wires....also, write down the wires that are connected, and what they are connected to.

~Joe

Offline Gnat

  • Enthusiast
  • **
  • Posts: 130
Re: here goes....start of my restoration
« Reply #20 on: January 01, 2010, 12:15:10 PM »
Having gotten the engine out with the help of a 500lb hoistI had only the wheels and frame to render down.

After removing the front forks and draining the oil out of them And undoing the rear wheel I was ready to tackle the underside of the bike.

first there was the kick stand, that spring was a beeaitch to get off that clip


Then I had to deal with the center stand and the swing arm which are covered in rust

rust samples


in the end though it all came off with much beating of hammers and cursing and a marvelous product called PB Blaster....best penetrating oil I have ever seen


Now I have a dilema. I had started to have the frame powder coated....but. This bike wasn't powdercoated originally it was painted so I think thats where I'm headed back too...your thoughts anyone??

Gnat
"Trying to keep the rubber side down"

Offline Gnat

  • Enthusiast
  • **
  • Posts: 130
Re: here goes....start of my restoration
« Reply #21 on: January 01, 2010, 12:19:41 PM »
A further dilema. A close look at Clymer showed me that I have thrust bushings,feltring and pivot bushing still lodged in the swing arm. How do you remove those suckers???? :P

Gnat
"Trying to keep the rubber side down"

Offline Gnat

  • Enthusiast
  • **
  • Posts: 130
cases cracked and cleaned
« Reply #22 on: January 17, 2010, 06:56:52 PM »
I have open the box and been cleaning 20 years of grime, corrosion and filth from the engine. Only one goof a broken middle piston ring, snapped like a match stick when i was removing it. So I'll be getting a new one. here are some picks after cleaning. I have begin to test reassemble the motor to make sure I know how to and to make sure I haven't lost any pieces.

As long as I'm here I might as well do what? Your call????????

Next step is to paint the lower engine case this I know needs to be done


on both sides everything you see was covered inblack grime..note the screw heads on the oil pump they weren't cleaned


The piston heads are cooking in the cleaner at the moment.. a lot of crud on these babies


Gnat
"Trying to keep the rubber side down"

Offline Zaipai

  • I am getting closer to being an
  • Old Timer
  • ******
  • Posts: 3,400
    • My Home page
Re: here goes....start of my restoration
« Reply #23 on: January 17, 2010, 07:34:34 PM »
Gnat,
Don't know for sure of your doing a true resto if so then you will want to repaint the frame, if not and you can afford it I would do powder coat its going to shine like new and be tough as nails. Not sure how cold it is where you are, your profile does not show location but if you paint look for painting tips on the forum there is lots of good info on this..

As for what to do next, I think you doing fine and there really is not much more you can do with the tranny. How ever I would for sure replace all the rings and have the valves looked at, they may need to be ground and seated. Maybe even new springs.. However its not my area so look around.

As for the wiring, the eReader is a dang nice idea, I will have to look at getting one. I have a PC in the garage with Internet access but that maybe better/easier to deal with.

I posted a print out of the wiring diagram of my bike in color on the wall of the garage for easy ref, as I will be using it alot during the time when I put it all back together again.

As for the swing arm, I am sure I saw a post some place on here on how to deal with that.. I believe it was a Hondaman post.. Perhaps you could get him to post one if it does not exist..

You are doing a fabulous job.. Great detail in this thread!!

Thanks for all the posting, keep it coming..

.: Scott :.

Its my Avatar..

75 CB550F  | 


Offline Tim in Ohio

  • So I got that goin' for me, which is nice.
  • Hot Shot
  • ***
  • Posts: 381
Re: here goes....start of my restoration
« Reply #24 on: January 18, 2010, 07:13:23 AM »
... How ever I would for sure replace all the rings and have the valves looked at, they may need to be ground and seated. Maybe even new springs.. However its not my area so look around.


Nice job Gnat.  +1 on replacing ALL the rings, so no worries about breaking that one.  What do the inside of the cylinders look like?  The shape those pistons were in makes me wonder if a cylinder honing might be in order as well.  Great camera work.  You'll find the more pics you share, the better the folks on the forum will be able to advise.  Keep up the good work.
1973 Honda CB350  Four

Check out my CB350F resto project...  watch a complete moron build a bike in front of your very eyes!: http://forums.sohc4.net/index.php?topic=38903.0