Author Topic: 1980 Honda CB650: The Cash Machine - major progress  (Read 46776 times)

0 Members and 1 Guest are viewing this topic.

Offline cb650

  • Old Timer
  • ******
  • Posts: 3,864
Re: 1980 Honda CB650C: Continuing to clean carbs; inspiration pics
« Reply #50 on: May 28, 2011, 02:51:19 PM »
FYI someone on the 650 site just ordered a gasket for some 250 and it is the same as those 650 carbs.
18 grand and 18 miles dont make you a biker

Offline JimJamerino

  • Yay! I'm a
  • Hot Shot
  • ***
  • Posts: 265
  • Not rich enough to be "eccentric."
    • My CB650C build thread
Re: 1980 Honda CB650C: Continuing to clean carbs; inspiration pics
« Reply #51 on: June 13, 2011, 08:43:14 PM »
Damn whose 750 IS that it's fantastic, I usually am a traditionalist but that is budy georgous!

Found it in the hondachopper.com gallery, Houndog's Odd Couple.  The build is documented here.

I bought a carb gasket kit from CycleRecycle2, and am expecting it in the mail soon.  I also bought an accelerator pump kit, spark plug wrench, and 2 oil filters.  I found the actual parts on eBay for cheaper, but the shipping brought the total purchase up to more than crc2.  I want/should replace the air cutoff valves, but those dudes are $30 each.  That's a little steep for me right now, so I'm going to try salvaging one off the other carb rack to replace the one I ripped and lost the mini o-ring for.

I know some folks have squirreled a thinwall 18mm socket down to pull plugs, but I just can't seem to get mine to clear the fins.  I don't have a grinder anyways, so I figured I'd just buy the right tool.  I hope it's strong enough to break the seal on the stuck plug.

Accel Pump - $34.95 (US$)
Carb kit w/ crossover o-rings - $77.95
18mm plug wrench - $4.95
Oil filter - $2.95 ea, x2 = $5.90
Shipping - $6
Total - $129.75


~ Jim

formerly "emperorspartacus"

There are old bikers.  There are dumb bikers.  There are no old, dumb bikers.

My CB650C rebuild http://forums.sohc4.net/index.php?topic=74212.0

Offline JimJamerino

  • Yay! I'm a
  • Hot Shot
  • ***
  • Posts: 265
  • Not rich enough to be "eccentric."
    • My CB650C build thread
Re: 1980 Honda CB650C: Continuing to clean carbs; inspiration pics
« Reply #52 on: August 01, 2011, 09:21:33 PM »
I decided to build a stand to make working on things a little easier.  It's built of 2x4, 4x4, and 7/16" OSB plywood.  I realize it's probably overkill, but I would rather go a bit overboard than have my machine fall.  I built it to be strong enough to put a bagger on, if the need should ever arise.

A few pics from the build.

Legs - 4x4, 30" long.


One side rail - Stud-length 2x4 (7' 8 1/2", I think)


Main frame put together.  The outsides will have a stringer on either side once the cross pieces are put in.


Cross pieces in.  Spaced every 11".  Burly, I know, but like I said, I want to make sure this dude is solid.


Double stringer along the outside, center legs attached and braced.


Crisscross bracing and center legs connected, top on.


A standard motorcycle/atv ramp to get the machine up.


Painted it pink just for s***s and giggles.


A little help from a friend and she pushed up on it pretty easily, actually.  This puts the bottom of the tank right at eye level.


The next thing I'll do is build a chock at the front, most likely out of wood unless I gather some channel iron for cheap/free.  I'll just do a wheel stop type thing at the front, and run a couple eye screws into the stringers to strap the front down, much like you do when towing.

Final dimensions: 3' wide by 8' long by 31" tall.

Edit: changed pics
« Last Edit: August 01, 2011, 09:42:37 PM by JimJamerino »
~ Jim

formerly "emperorspartacus"

There are old bikers.  There are dumb bikers.  There are no old, dumb bikers.

My CB650C rebuild http://forums.sohc4.net/index.php?topic=74212.0

Offline JimJamerino

  • Yay! I'm a
  • Hot Shot
  • ***
  • Posts: 265
  • Not rich enough to be "eccentric."
    • My CB650C build thread
Re: 1980 Honda CB650C: Built a work table for the bike, got new parts!
« Reply #53 on: August 01, 2011, 09:40:42 PM »
Parts in the mail make me happy!  Too bad I had to argue a bit with the mail lady before she'd actually give me the box.  We live in a house that is divided into apartments, and she was on a mission to put the box by the door.  It wasn't until I told her where the door to our apartment was (on the other side of the house) that she'd give it to me.  At any rate, I have new parts to play with!!  And yes, these photos were taken on my new pink work table.

New 530 O-ring chain and master link, with a spare for dropsies.  Cut to what should be the stock 104 links.


If you replace the chain, you should replace the sprockets, too.  Here's the front one.  The rear is coming on Wednesday.  In the green box are tapered steering bearings.


New NGK D8EA spark plugs, plus a spare.


Bob, the guy who gave me the Standard, dropped by today with a handful of parts he picked up when we tore it apart 8 years ago.  He got a NOS seat bracket and spacers.


Apparently, this qualified as a carb kit.  He told me when he came over he didn't know what he was doing when he ordered this.  That's one bowl gasket, one paper gasket for the carb tower (I can't remember what that part is called offhand), and one tiny gasket that I am guessing goes to the air cutoff valve.


Cost of parts from CRC2:
Chain - $109.95
Spare Master Link - $5.95
Tapered Steering Bearings - $44.95
5 spark plugs ($2.55 each)  - $12.75
Shipping - $7
Total - $195.55
~ Jim

formerly "emperorspartacus"

There are old bikers.  There are dumb bikers.  There are no old, dumb bikers.

My CB650C rebuild http://forums.sohc4.net/index.php?topic=74212.0

Offline fastbroshi

  • Puppet
  • Old Timer
  • ******
  • Posts: 2,645
Re: 1980 Honda CB650C: Built a work table for the bike, got new parts!
« Reply #54 on: August 02, 2011, 01:26:56 PM »
Whoever it was behind the counter hopefully picked the right one.  That's usually all there is to it with Honda carbs in my experience.  They usually just put everything in one package.
Just call me Timmaaaaay!!!

Offline JimJamerino

  • Yay! I'm a
  • Hot Shot
  • ***
  • Posts: 265
  • Not rich enough to be "eccentric."
    • My CB650C build thread
Re: 1980 Honda CB650C: Built a work table for the bike, got new parts!
« Reply #55 on: August 02, 2011, 09:38:55 PM »
Bob said he got exactly the parts he ordered, but looking back on it he has no idea why he ordered what he did.

I ordered some Pirelli tires from motorcycle-superstore.com.  I know a lot of people go for the Metzelers, but they just weren't in my budget.  However, these Pirellis were. 

Pirelli MT66 Route Cruiser tires.  100/90H-19 on the front, 130/90H-16 on the rear.  That's stock size, and matches the 31-year-old OEM tires that are presently on it.  Surprisingly, the spoke wheels on the Standard have the same front, but a 17-inch rear wheel.


motorcycle-superstore.com had a pretty wide selection, and it wasn't difficult at all to find tires the right size.  The price was right:

Front tire - $68.99
Rear tire - $81.99
Free shipping on orders over $89
Total - $150.98

The only problem I had with these guys was an oddity in the shipping.  I don't think it had anything to do with the seller, but rather UPS.  I knew from the tracking number that the tires were supposed to arrive today.  On my way home from work, I got the strangest phone call...

"Hello, is this Jim?"
"Yes."
"This is Ron at Sears Auto Center.  You don't know me, but I think we have a package for you.  We got a pair of motorcycle tires with your name and address on them, but they were delivered to our shop here.  We don't sell motorcycle tires, so we got your number from the invoice."

They had accepted the shipment and held on to them until I got there to pick them up, no sweat.  It was just bizarre that my tires got shipped to the Sears at the mall five blocks from my house.  I'm guessing the UPS guy misunderstood his label, because there was a sticker that said "Mall" on the plastic wrap.  Weird.

EDIT: fixed link
« Last Edit: August 06, 2011, 12:38:46 AM by JimJamerino »
~ Jim

formerly "emperorspartacus"

There are old bikers.  There are dumb bikers.  There are no old, dumb bikers.

My CB650C rebuild http://forums.sohc4.net/index.php?topic=74212.0

Offline JimJamerino

  • Yay! I'm a
  • Hot Shot
  • ***
  • Posts: 265
  • Not rich enough to be "eccentric."
    • My CB650C build thread
Re: 1980 Honda CB650C: New tires... delivered to Sears instead of my house.
« Reply #56 on: August 05, 2011, 11:57:15 PM »
More parts in the mail today!  This batch came from partsnmore.com

40-tooth rear sprocket


4 air cutoff valves


Fork seals


Master cylinder rebuild kit


Price list
Rear sprocket - $24.00
Air cutoff valves - 4 x $19 = $76.00
Fork seals - $13.00
MC repair kit - $33.00
Shipping - $8.50

Total - $154.50
~ Jim

formerly "emperorspartacus"

There are old bikers.  There are dumb bikers.  There are no old, dumb bikers.

My CB650C rebuild http://forums.sohc4.net/index.php?topic=74212.0

Offline JimJamerino

  • Yay! I'm a
  • Hot Shot
  • ***
  • Posts: 265
  • Not rich enough to be "eccentric."
    • My CB650C build thread
Re: 1980 Honda CB650C: One more batch of parts
« Reply #57 on: August 06, 2011, 12:35:23 AM »
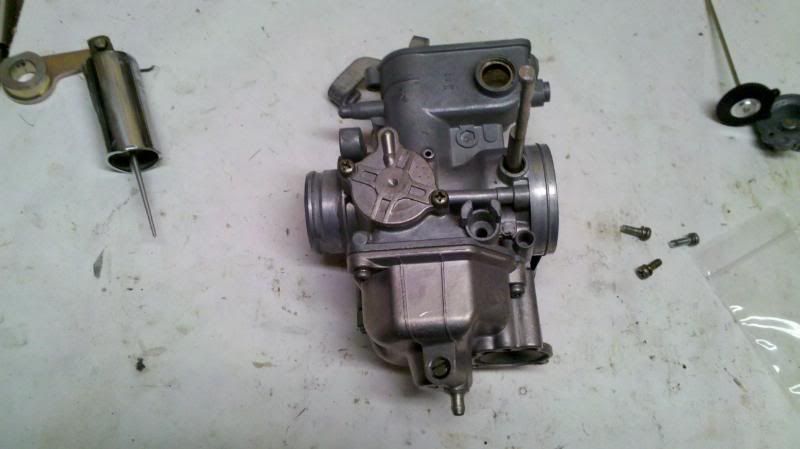
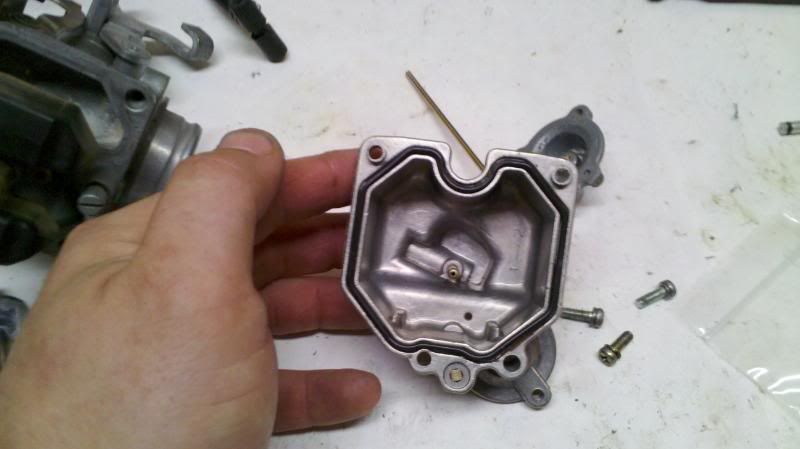
I've finally gotten some time to actually work on the Custom.  I'm hoping it will be road-ready in a few weeks, provided I don't run into too many snags.  Today's work consisted of completing cleaning of the carbs and reassembling the rack.  I have a few pics of assembling the #2 carb (PD style, with accelerator pump).  The rebuild kits I got from CRC2 basically included o-rings for the fuel and air crossovers, bowl gaskets, and a new float needle.  There were a couple of extra o-rings and 4 miniscule flat washers, which I imagine go either to parts of the carbs I didn't take apart (the needle/slide assy.) or were included for other years the kit covers.

My wife helped clean and reassemble #3 and 4.  It's to be her bike, and she wants to help do the work on it so she has an idea of what is what on her machine, and maybe stand a chance if she needs to make roadside repairs.
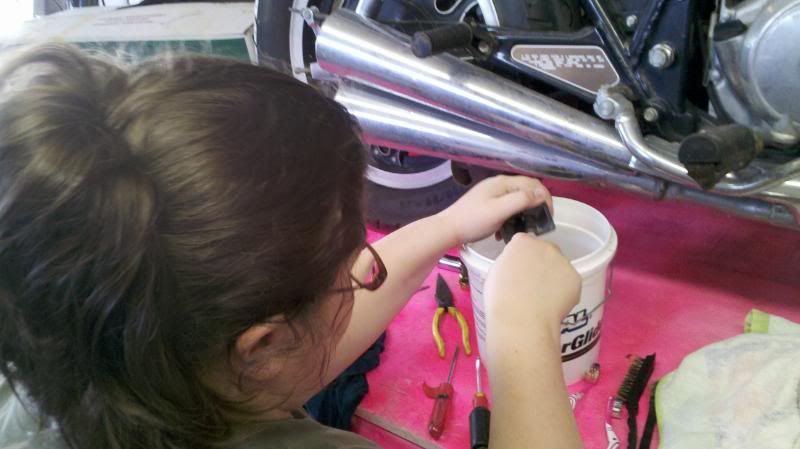

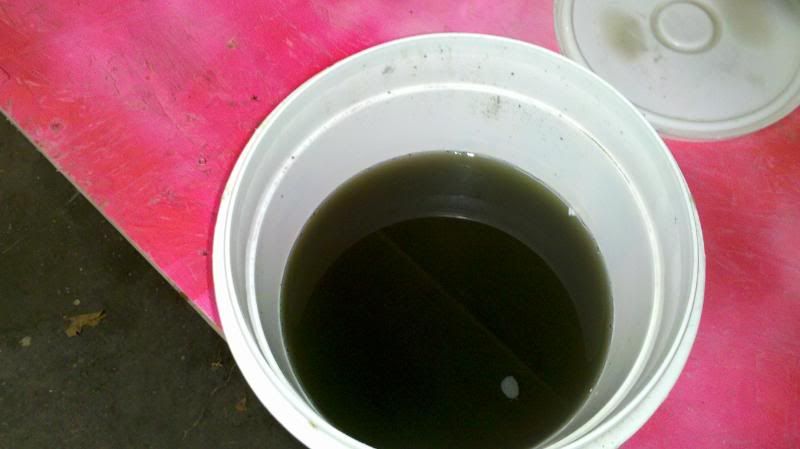
The Simple Green solution after one carb.  This was green-tinted water when we started.

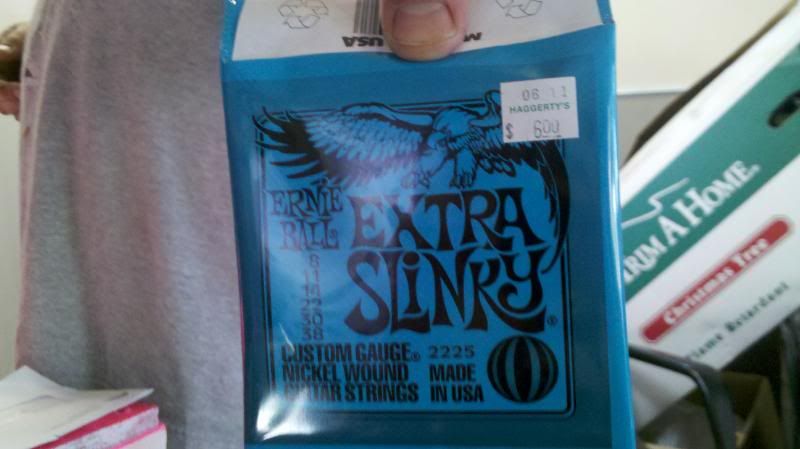
I bought a $6 pack of guitar strings.  I bought the smallest gauge strings they had.  The smallest was .008", and not wound.  It was stiff enough to poke through the gunk in the pilot jets, and I was able to gently scrape around and free up the pilots.  I also used a lot of canned air for dusting computers (I am without a real air compressor).

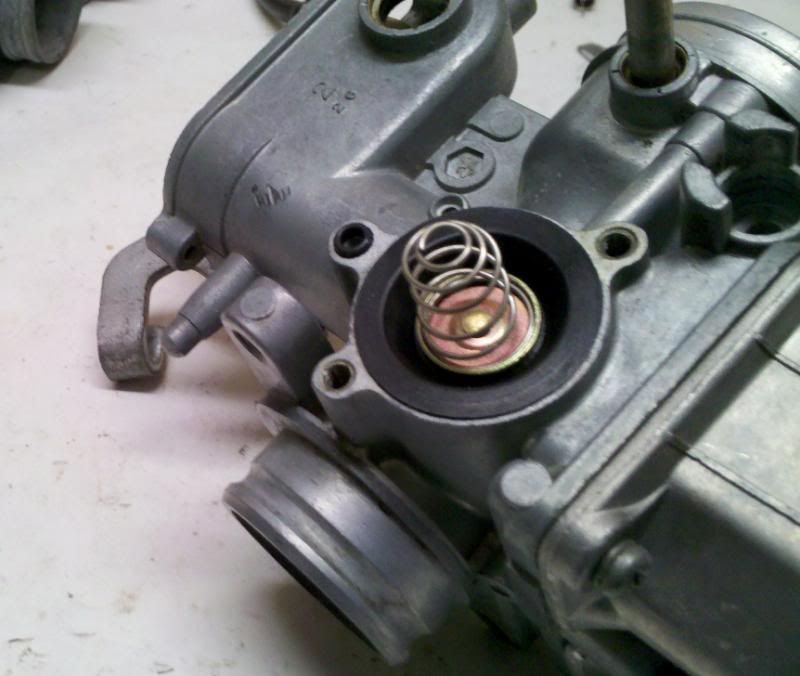
Replacing the air cutoff valve.  The kit is 3 pieces: the quarter-sized rubber piece, a spring, and a minute o-ring.  Notice the placement of the o-ring.  Apparently I didn't get a pic of the reassembly process, which is basically putting the rubber part in place, putting the spring on the rubber part, placing the o-ring in position, then carefully putting the cover back on without disturbing the parts' positions.


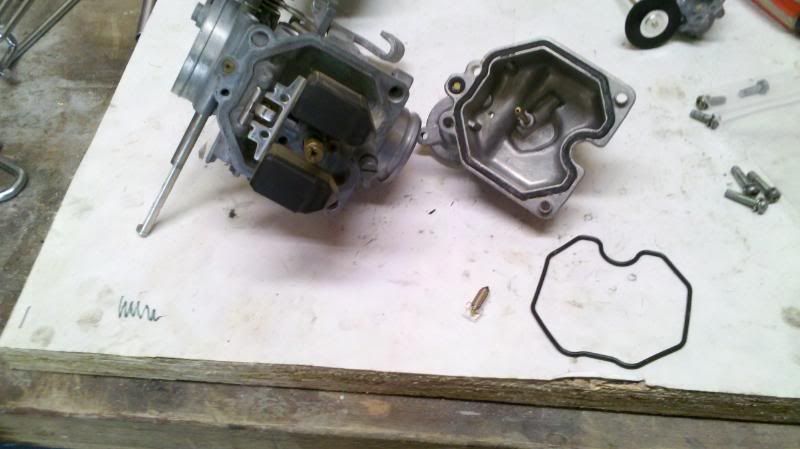
This is the bowl gasket and float needle.

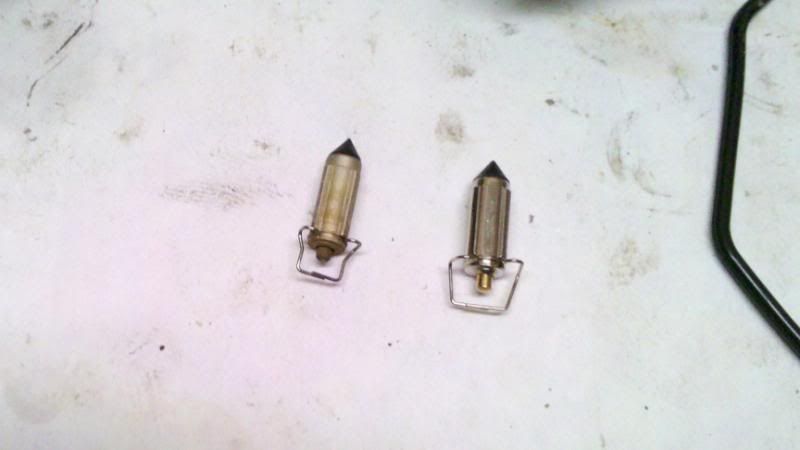
Old needle on left - notice the varnish that I didn't get off in the Simple Green bath.

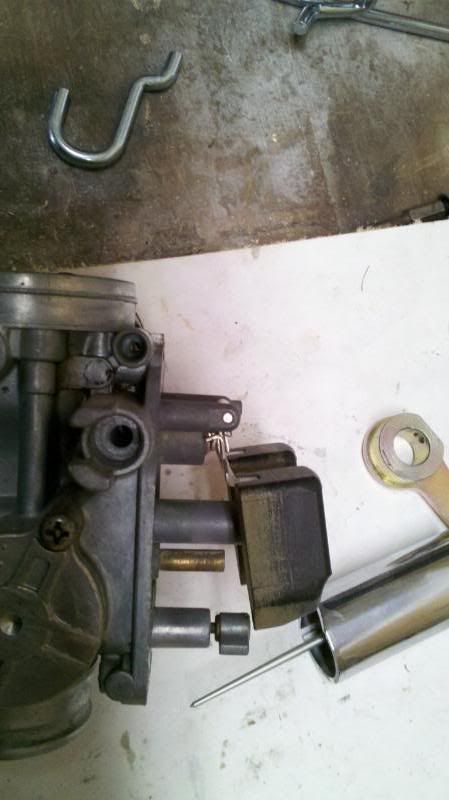
Disclaimer: I realize the float is upside down.  My wife pointed this out to me, and I felt dumber than dumb.  At any rate, hook the float needle in the tongue on the float and put the pin back through.  Check float level - the flat part of the float should be roughly level with the gasket mating surface.

The bowl gaskets fit very nicely.

Put it all back together. 


I also replaced the accelerator pump.  I don't think there was much wrong with the old one, but I figured if I'm rebuilding the carbs, I'd better take care of the pump, too.

The rebuild kit is similar to the air cutoff valves, except the rubber coin is attached to a stick.  The spring and little gator-boot-thingy are also included.
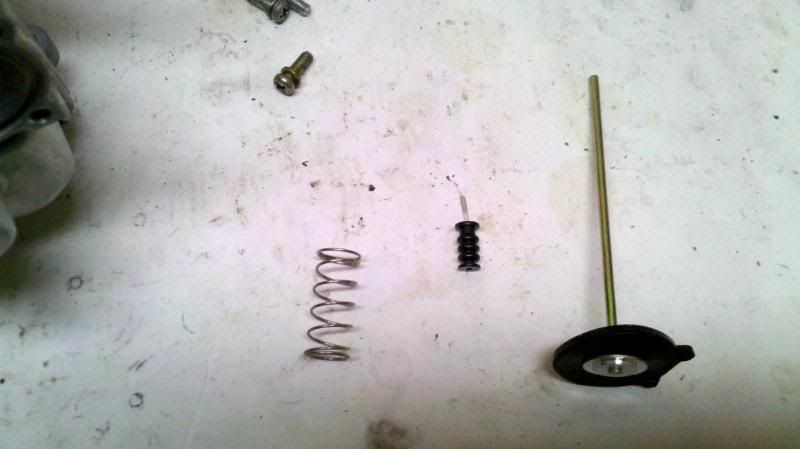

Looking at the bottom of the #2 carb, with old pump removed.  The first step is to slide the new pump diaphragm into place.  Make sure the little Mickey Mouse ears fit around the holes.
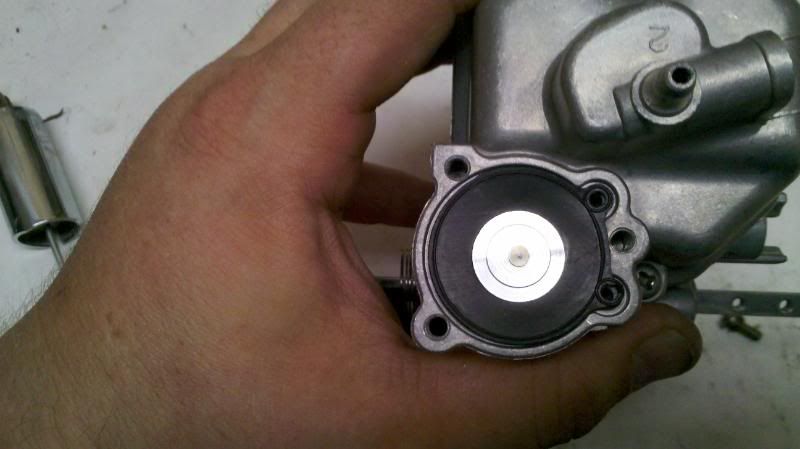

Put the gator on.  It has a tapered hole; the tight end goes toward the top.
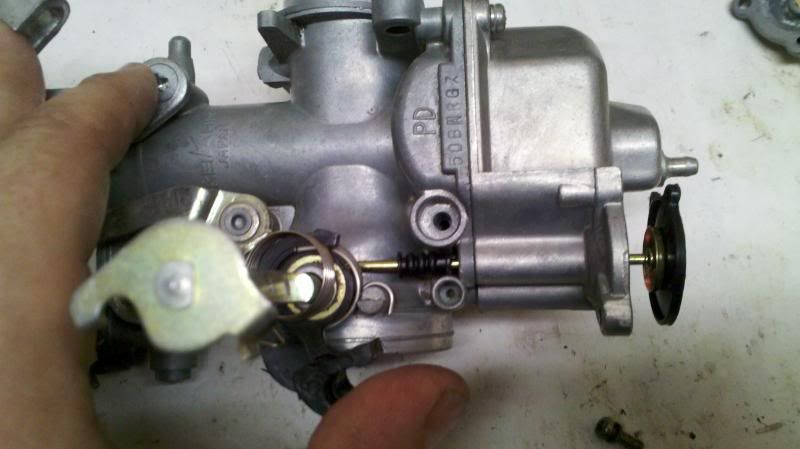

Put the spring on.  On my kit, it doesn't seem to matter which way the spring goes.
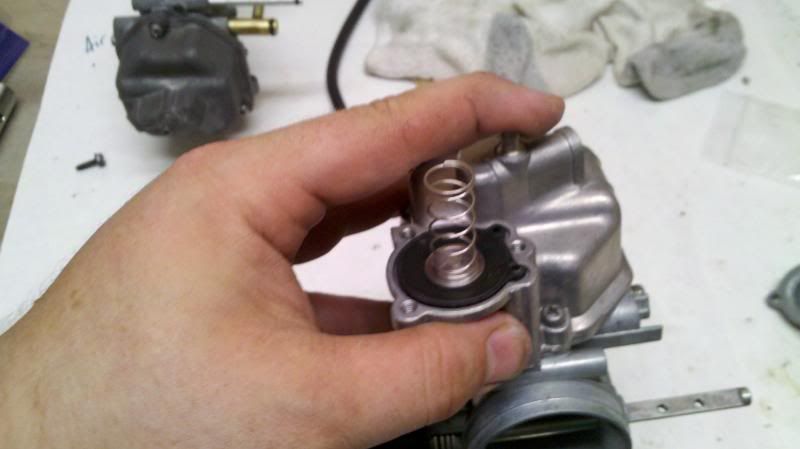

Put the cap back on.  You'll need to squish the spring to make this happen. Three screws; I tightened them like car lug nuts... tightening each a little at a time to squish the gaskets evenly.
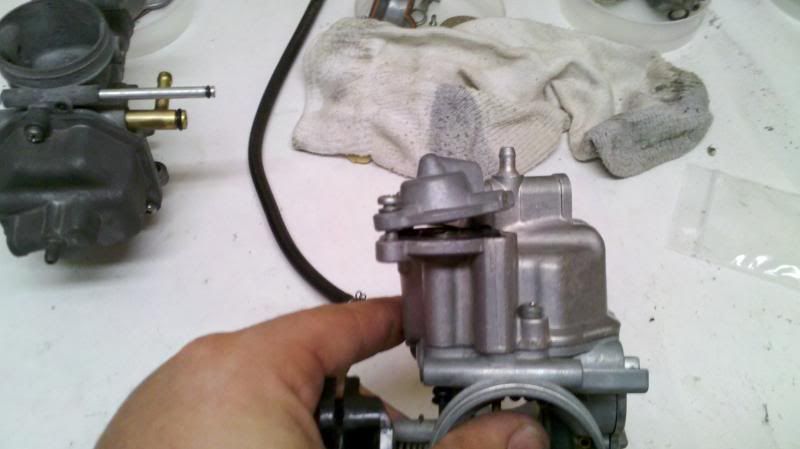

My camera died before I put the rack back together.  It was ready when I had finished.
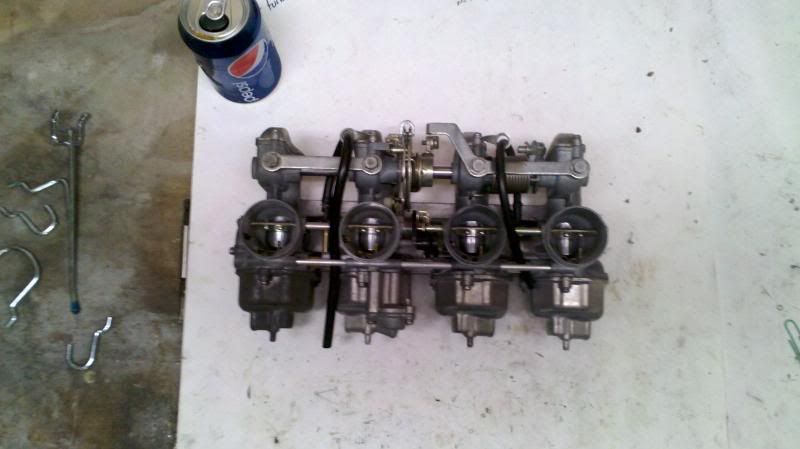

However, I did run into a couple of little snags.  One was the choke arm.  I didn't have it seated together right and it popped a little cap off both ends of the rack.  Fortunately I had my spare set for comparison, and discovered that the choke arm has to fit nice into the black plastic choke cable link.

Another was squeezing the new o-rings on the fuel crossovers.  The old ones slid in and snapped right into place, but the new ones bound up at the entry point.  A little lube did the trick.

Next step: Wintergreen/xylene treatment for the boots, and a master cylinder rebuild while they soak.

EDIT: added pictures
« Last Edit: August 06, 2011, 12:42:16 AM by JimJamerino »
~ Jim

formerly "emperorspartacus"

There are old bikers.  There are dumb bikers.  There are no old, dumb bikers.

My CB650C rebuild http://forums.sohc4.net/index.php?topic=74212.0

Offline fastbroshi

  • Puppet
  • Old Timer
  • ******
  • Posts: 2,645
Re: 1980 Honda CB650C: Finished the carbs - how-to on accel pump (sorta)
« Reply #58 on: August 06, 2011, 11:25:09 AM »
I'm not familiar with those carbs at all.  What's the purpose of the air cutoff valve?
Just call me Timmaaaaay!!!

Offline scunny

  • Old Timer
  • ******
  • Posts: 4,618
  • don't call me expert
Re: 1980 Honda CB650C: Finished the carbs - how-to on accel pump (sorta)
« Reply #59 on: August 06, 2011, 01:36:50 PM »
the air cutoffs are to help stop the popping thru the exhaust on deceleration. it was a problem when the carbs were tuned so lean.
past-cb100,ts250,cb500,cb500,gs1000,gs650g.phillips traveller
present-CB 650 retro
            VTR1000F3
           XL250S riverbed rocket
           TS250[sold]
           TS185[sold]
           XL125S[sold]
           MT50 (white)
           MT50 (red)[sold]
           KN250/XS400 project
           XR/XL250 bitsa under construction
           SL100[sold]
           XL250R
           pedal(pub bike) leaks oil
my gallery http://gallery.sohc4.net/members/personal/scunny

Offline JimJamerino

  • Yay! I'm a
  • Hot Shot
  • ***
  • Posts: 265
  • Not rich enough to be "eccentric."
    • My CB650C build thread
Re: 1980 Honda CB650C: Rebuilding the Master Cylinder - Phase 1
« Reply #60 on: August 08, 2011, 07:51:18 PM »
So the carbs are clean and reassembled.  Tomorrow I will start soaking the boots in Xylol and wintergreen.  I figure an overnighter in the mixture, cold, in a sealed paint can ought to do the trick, based on others' experiences in the brake FAQ.

Speaking of brakes, I figured if the carbs are in a position to make it go, I'll probably want a way to make it stop.  I started tearing the MC apart.  It is in really bad shape, which isn't much surprise.  I'm thinking there's a good chance I'll be using one of the spares if this one doesn't clean up better.

It's been soaking in Simple Green and water for two days now.  I went out and bought a pair of Irwin Vise Grips snap-ring pliers for the circlip and tried them out when I got home.  I fished around the piston to see if the pins were small enough and the nose long enough, and squeezed the handles.  Much to my surprise, I encountered some resistance.  Slowly, keeping the pressure on, I pulled the pliers out and discovered a circlip on the end!  I couldn't believe it!

However, my joy was short-lived.  Watching videos of people rebuilding MCs and according to the manuals I have access to, the whole mess should have come apart in a hurry.  Mine did not. 


I pulled on the piston with needlenose pliers and got nothing.  It spins, I can depress it but it won't push back out on its own.  I can pull it out to where it was with the circlip, but it won't move past it.  Looking down the rabbit hole I see some rust, so I'm thinking the washer is rusted in place. 


I'll let it soak another night without the circlip and see what happens.  If it doesn't free up, I'm going to get some Berryman's Chem Dip.  Dad suggested some non-spray-can carb cleaner soak stuff, though he didn't have a brand name or anything.

I'm open to other suggestions and alternatives.  Sorry I don't have pics this time... it was a long day at work.

EDIT: Pics added 8/11/11
« Last Edit: August 11, 2011, 10:32:49 PM by JimJamerino »
~ Jim

formerly "emperorspartacus"

There are old bikers.  There are dumb bikers.  There are no old, dumb bikers.

My CB650C rebuild http://forums.sohc4.net/index.php?topic=74212.0

Offline JimJamerino

  • Yay! I'm a
  • Hot Shot
  • ***
  • Posts: 265
  • Not rich enough to be "eccentric."
    • My CB650C build thread
Re: 1980 Honda CB650C: Rebuilding the Master Cylinder - Phase 1
« Reply #61 on: August 11, 2011, 10:40:09 AM »
The master cylinder put up one heck of a fight, but I won.  The piston was stuck but good. I soaked it for three days in 50/50 Simple Green/water solution and it wouldn't move.

Two days in brake fluid and it came apart. 


The best part of this story is when I got the piston loose, pushed it in and squirted thick, nasty, black, mud-consistency goo across the workbench.


I got the circlip out waaaaay too easy (see last post), but the piston and washer were rusted in.  I hit the washer with a punch and successfully deformed it without moving it. 

Last night I pulled on the piston with a pair of needlenose pliers and it started to move, so that was good. I got the lip of it up by the side of the body, and it quit moving. I grabbed a screwdriver and pried on the piston by the lip, and managed to break off a chunk. Pulled some more with the pliers and out it came!


Gunky spring.


The bore looks pretty good.


One thing that concerns me is that I can't tell if that little blurry spot is pitting or just gunk still stuck to the wall.  Opinons?


Overall, it's cleaning up nicely.  Once I finish my soda blast tote I'll go to town and really get it nice.


Also, 24 hours in the xylol/wintergreen and the intake boots are starting to soften nicely.

EDIT: Added pics 8/11/11
« Last Edit: August 11, 2011, 10:41:06 PM by JimJamerino »
~ Jim

formerly "emperorspartacus"

There are old bikers.  There are dumb bikers.  There are no old, dumb bikers.

My CB650C rebuild http://forums.sohc4.net/index.php?topic=74212.0

Offline JimJamerino

  • Yay! I'm a
  • Hot Shot
  • ***
  • Posts: 265
  • Not rich enough to be "eccentric."
    • My CB650C build thread
Re: 1980 Honda CB650C: Rebuilding the Master Cylinder - Phase 1
« Reply #62 on: August 11, 2011, 10:57:55 PM »
The fight with the master cylinder continues.  I need to finish cleaning it, which I will do with the soda blasting tote I'm currently building.  There's a link to one on here somewhere; that's what I'm basing mine on.

Clear tote I'm using.


Cut a hole in the lid so I stand a chance of seeing what I'm doing.


Plexiglass to cover said hole.  I still need to cut it.  I plan on using my dad's jigsaw, unless anyone has a better idea.


5 feet of 5/16" clear vinyl tubing from Lowe's.  It turns out I could have bought a 10 foot spool from Menard's for a little cheaper, but oh well.


Bag of baking soda from Sam's Club.  I want to say it's about 10 pounds for around $6.  I know there's blasting soda available, but here in Rapid City, South Dakota, we have no Harbor Freight.


I went to several hardware stores looking for an air compressor blow gun handle thingy with a fine point on it, and all I'm finding is extensions that are about the size of a pencil... too big for my needs.  The last hardware store I went to, when I told the clerk dude about what I was doing and what I needed, he suggested getting just the handle and using a threaded plastic pipe fitting.  We took the handle out of the package and started trying barbed tubing tips, and I found one that sorta worked, but I must have had a look of dissatisfaction on my face because he leaned close and mentioned that he had something like what I'm looking for at home.  He told me to come back tomorrow and he'd give it to me because he's not using it anymore since he bought a blast cabinet.  Pretty cool of him, I thought!  With a handle on the way I should be able to finish this blast tote up this weekend.

I soaked my intake boots in Xylol and wintergreen oil in a sealed new paint can for a total of two days.  I used roughly a half gallon of Xylol and 4 oz. of synthetic wintergreen oil.  No heat whatsoever.


Before - squeezing as hard as I can.


After - Moderate pressure... I didn't want to squeeze so much I cracked it.


It snaps right into place, no major pressure.  I believe it will cinch up nicely with new hose clamps.
~ Jim

formerly "emperorspartacus"

There are old bikers.  There are dumb bikers.  There are no old, dumb bikers.

My CB650C rebuild http://forums.sohc4.net/index.php?topic=74212.0

Offline fastbroshi

  • Puppet
  • Old Timer
  • ******
  • Posts: 2,645
Re: 1980 Honda CB650C: Rebuilding the Master Cylinder - Phase 1
« Reply #63 on: August 11, 2011, 11:35:09 PM »


One thing that concerns me is that I can't tell if that little blurry spot is pitting or just gunk still stuck to the wall.  Opinons?


It look like a piece of the piston broke off!  Unlikely as it seems, I don't remember seeing any master cylinder pistons not having a flush, flat end.   Have you compared to your new one yet?
Just call me Timmaaaaay!!!

Offline JimJamerino

  • Yay! I'm a
  • Hot Shot
  • ***
  • Posts: 265
  • Not rich enough to be "eccentric."
    • My CB650C build thread
Yes, I broke a chip off trying to pry it out of the cylinder.  The new one is whole.
~ Jim

formerly "emperorspartacus"

There are old bikers.  There are dumb bikers.  There are no old, dumb bikers.

My CB650C rebuild http://forums.sohc4.net/index.php?topic=74212.0

Offline JimJamerino

  • Yay! I'm a
  • Hot Shot
  • ***
  • Posts: 265
  • Not rich enough to be "eccentric."
    • My CB650C build thread
I'd like to take a moment to diverge from the build I've been posting about to show progress on the other bike.

This is a different bike

The plan has always been to make the Custom into a daily runner and chop the Standard.  I have a friend who has been welding for almost 50 years, and he agreed to help me chop the Standard.  I stripped it down to the frame Friday night and yesterday we spent 5 hours cutting and welding and grinding.

After much consideration, I decided to add 5 degrees of rake.  I plan on keeping stock forks, so this will effectively lower the bike a couple inches.  I also elected to chop the dualseat mount and move the rear fender forward.  Here are a few preliminary pics.

The guide I used for the raking technique is found on page 36 of the Honda Chopper Bible on the hondachopper.com site.

Ancient bearing grease... yummy!!


Marking the neck


Jack hacking up a perfectly good frame.


5 degrees of frame... gone!


Something's missing...


Reattachment


Jack's fine TIG welding.  This is probably now the strongest part of the frame, because he used a pipe welding technique which builds up a bead from the inside of the pipe out, guaranteeing 100% penetration.


The butt of the frame before.


Cutting off the butt.


Took the bracket for the rear fender, moved it forward and flipped it over.  Capped the ends of the frame.


The ultimate plan is to put on a sprung solo seat, fat tank, forward controls, shorty shocks, and mini apes.

I just wanted to show off a Saturday afternoon's work, even though it's not directly related to the current project.  Now back to our regularly scheduled program!


~ Jim

formerly "emperorspartacus"

There are old bikers.  There are dumb bikers.  There are no old, dumb bikers.

My CB650C rebuild http://forums.sohc4.net/index.php?topic=74212.0

Offline JimJamerino

  • Yay! I'm a
  • Hot Shot
  • ***
  • Posts: 265
  • Not rich enough to be "eccentric."
    • My CB650C build thread
I'm afraid I don't have any pics to post this time, but I got the steering bearings replaced on the Custom.  The kit I got dropped in really nicely.  The only problem I had involved the results of an apparent crash.  There's some very minor road rash on the left side of the bike - the tip of the exhaust, the grab bar, the clutch cover, and the clutch show some filing from being laid down.  I'm guessing it wasn't a terribly high speed wreck, since the damage is minimal (I didn't even notice the grab bar until last week) and nothing looks bent.  While taking the lower steering bearing race out using a blind hole bearing puller (rented from Auto Zone for $160, which I get back in full when I take the tool back), I encountered quite a bit of resistance.  Upon closer inspection, I found the steering stop was tweaked a bit, as though the fork had been turned really hard to the right.  This would be consistent with a left-side laydown.

I was able to pull the bearing race out, but it gouged the neck wall a bit.  I used my brake master cylinder hone to clean it up, and the new tapered steering bearing race tapped in without a fuss. 

I hope that nothing got twisted and the frame isn't toast.  Just eyeballing it, everything looks fine.  The downtubes make a nice line against the motor, the paint isn't cracked around the neck, and the bent steering stop only seems to have affected the area of the neck below the steering bearings.  Any suggestions for verifying a straight frame?
~ Jim

formerly "emperorspartacus"

There are old bikers.  There are dumb bikers.  There are no old, dumb bikers.

My CB650C rebuild http://forums.sohc4.net/index.php?topic=74212.0

Offline lucky

  • Really Old Timer ...
  • *******
  • Posts: 6,717
The question was (among others), how do you tell if the frame is straight.
You measure it.

But to really find out you would have to completely strip the frame and put it on a table that is level in both directions. More in a minute.

Many times you can tell if a frame is off when you ride it and when it turns to the left or right. this can be dangerous if the frame is really bent.

Look for paint that is cracked or lifted around the steering head. look for broken bolts or other bent items near the steering head, get the history of the bike.
Check the steering stops for damage and the fork lock for damage. look for bulges or indentations in the metal. Look for wiring that is pulled loose from its clamps.

Your eyes can detect many things. A visual inspection is the first step to ANY inspection process.

Now about measuring the frame. Get the bare frame on a level table level in both directions. Insert the rear axle and see if it is level. Measure all common points carefully on each side of the motorcycle frame front to rear, and make sure they are very close to each other when compared from side to side.
Hang a string from the side of the steering head with a weight on it and see that it stays parallel with the steering neck as it goes downwards towards the table.
Insert the front axle with the forks on and pointed straight ahead, and make sure that the axle is level. If you cannot find anything off the frame is probably straight.


Offline lucky

  • Really Old Timer ...
  • *******
  • Posts: 6,717
You got to repaint that table!!!  You are going to be looking at that a long time.
It will affect the outcome of the bike in some way.

Offline coldwave007

  • Enthusiast
  • **
  • Posts: 120
Very cool build so far (even the diversion!!!)!  Keep it up!
1980 Honda CB650C Custom, 1972 Yamaha LT-2 100

Offline lucky

  • Really Old Timer ...
  • *******
  • Posts: 6,717
Re: 1980 Honda CB650C: One more batch of parts
« Reply #70 on: August 25, 2011, 12:26:31 PM »
I've finally gotten some time to actually work on the Custom.  I'm hoping it will be road-ready in a few weeks, provided I don't run into too many snags.  Today's work consisted of completing cleaning of the carbs and reassembling the rack.  I have a few pics of assembling the #2 carb (PD style, with accelerator pump).  The rebuild kits I got from CRC2 basically included o-rings for the fuel and air crossovers, bowl gaskets, and a new float needle.  There were a couple of extra o-rings and 4 miniscule flat washers, which I imagine go either to parts of the carbs I didn't take apart (the needle/slide assy.) or were included for other years the kit covers.

My wife helped clean and reassemble #3 and 4.  It's to be her bike, and she wants to help do the work on it so she has an idea of what is what on her machine, and maybe stand a chance if she needs to make roadside repairs.


The Simple Green solution after one carb.  This was green-tinted water when we started.


I bought a $6 pack of guitar strings.  I bought the smallest gauge strings they had.  The smallest was .008", and not wound.  It was stiff enough to poke through the gunk in the pilot jets, and I was able to gently scrape around and free up the pilots.  I also used a lot of canned air for dusting computers (I am without a real air compressor).


Replacing the air cutoff valve.  The kit is 3 pieces: the quarter-sized rubber piece, a spring, and a minute o-ring.  Notice the placement of the o-ring.  Apparently I didn't get a pic of the reassembly process, which is basically putting the rubber part in place, putting the spring on the rubber part, placing the o-ring in position, then carefully putting the cover back on without disturbing the parts' positions.


This is the bowl gasket and float needle.


Old needle on left - notice the varnish that I didn't get off in the Simple Green bath.


Disclaimer: I realize the float is upside down.  My wife pointed this out to me, and I felt dumber than dumb.  At any rate, hook the float needle in the tongue on the float and put the pin back through.  Check float level - the flat part of the float should be roughly level with the gasket mating surface.


The bowl gaskets fit very nicely.


Put it all back together. 


I also replaced the accelerator pump.  I don't think there was much wrong with the old one, but I figured if I'm rebuilding the carbs, I'd better take care of the pump, too.

The rebuild kit is similar to the air cutoff valves, except the rubber coin is attached to a stick.  The spring and little gator-boot-thingy are also included.


Looking at the bottom of the #2 carb, with old pump removed.  The first step is to slide the new pump diaphragm into place.  Make sure the little Mickey Mouse ears fit around the holes.


Put the gator on.  It has a tapered hole; the tight end goes toward the top.


Put the spring on.  On my kit, it doesn't seem to matter which way the spring goes.


Put the cap back on.  You'll need to squish the spring to make this happen. Three screws; I tightened them like car lug nuts... tightening each a little at a time to squish the gaskets evenly.


My camera died before I put the rack back together.  It was ready when I had finished.


However, I did run into a couple of little snags.  One was the choke arm.  I didn't have it seated together right and it popped a little cap off both ends of the rack.  Fortunately I had my spare set for comparison, and discovered that the choke arm has to fit nice into the black plastic choke cable link.

Another was squeezing the new o-rings on the fuel crossovers.  The old ones slid in and snapped right into place, but the new ones bound up at the entry point.  A little lube did the trick.

Next step: Wintergreen/xylene treatment for the boots, and a master cylinder rebuild while they soak.

EDIT: added pictures

When you put the accelerator pump together there is a little O ring in the lid.
Did you see that? It is not in your photos.

Offline nayto550

  • Hot Shot
  • ***
  • Posts: 277
Did this build stall?  It was looking quite interesting.

Bag of baking soda from Sam's Club.  I want to say it's about 10 pounds for around $6.  I know there's blasting soda available, but here in Rapid City, South Dakota, we have no Harbor Freight.
Nope, no Harbor Freight.  But there is Rapp Sales Co, they have all sorts of blasting media, located on Seger Dr.  just to the north of the mall.  I picked up a bag of bicarbonate soda blasting media and it is a HUGE improvement over regular baking soda.
1976 CB550F
1976 CB750F - in resurrection process
1988 HD FLHS

Offline JimJamerino

  • Yay! I'm a
  • Hot Shot
  • ***
  • Posts: 265
  • Not rich enough to be "eccentric."
    • My CB650C build thread

Nope, no Harbor Freight.  But there is Rapp Sales Co, they have all sorts of blasting media, located on Seger Dr.  just to the north of the mall.  I picked up a bag of bicarbonate soda blasting media and it is a HUGE improvement over regular baking soda.


Between teaching, working on my master's, and goings on at home, this build has stalled some.  I was able to get out to the garage last weekend and clean up one of the fork legs, but am currently awaiting fork seal circlips.  Detailed photos will accompany the second leg.

Thanks for the heads up about Rapp!  I'll totally have to check that out.
~ Jim

formerly "emperorspartacus"

There are old bikers.  There are dumb bikers.  There are no old, dumb bikers.

My CB650C rebuild http://forums.sohc4.net/index.php?topic=74212.0

Offline JimJamerino

  • Yay! I'm a
  • Hot Shot
  • ***
  • Posts: 265
  • Not rich enough to be "eccentric."
    • My CB650C build thread
Re: 1980 Honda CB650C: Fork seals replaced! With pic goodness!
« Reply #73 on: April 08, 2012, 09:02:27 PM »
Things had stalled out big time.  I'm a teacher and have been pursuing my master's degree to become a reading specialist, so my "spare" time has been extremely limited.  However, I decided that I really needed to spend some time working on the Custom.

Last August, I pulled the triple tree apart to swap out the stock steering bearings for tapered ones.  The next step is to clean up the fork.  The front was mighty squishy, so I figured an oil change was in store.  I already had the whole front end torn off, so I fell victim to the classic, "Well, I've got it torn down this far..."  New fork seals are pretty cheap (mine came in at about $15, shipped), and I didn't think it would be a bad idea, given that the fork seals were probably original.

This is what I started with.  The left leg is cleaner than the right because I already rebuilt that one.  I didn't have a photographer to record the process, but my wife stepped in to help today.  Pretty cool of her, I thought.


MEGA HEX SOCKET!!!  17mm hex driver for the fork cap.


Loosen the cap while the fork is still in the tree.  It's easier this way.  You don't need to pull it all apart, but loosen it to facilitate drainage.


Pull the regular drain plug.


Ewwwwwww.  Fork oil and water, it seems.  And gunk.


Leave the fork cap on to keep the spring under pressure.  It's not much pressure, but you need it to minimize frustration when taking out this 6mm allen bolt in the bottom of the leg.  Removing this bolt allows you to separate the lower leg from the tube (aka stanchion, I think).  It helps to have a second pair of hands to hold the lower leg while you crank the bolt, because it's held in with threadlock.


When I got the bolt out, lots of icky, sticky stuff came with it.


Once you've got the lower bolt out, you can pull the lower leg off easy-peasy-lemon-squeezy.  Just be ready for it to drip ATF/fork oil everywhere.
« Last Edit: April 08, 2012, 10:45:56 PM by JimJamerino »
~ Jim

formerly "emperorspartacus"

There are old bikers.  There are dumb bikers.  There are no old, dumb bikers.

My CB650C rebuild http://forums.sohc4.net/index.php?topic=74212.0

Offline JimJamerino

  • Yay! I'm a
  • Hot Shot
  • ***
  • Posts: 265
  • Not rich enough to be "eccentric."
    • My CB650C build thread
Re: 1980 Honda CB650C: Fork seals replaced! With pic goodness!
« Reply #74 on: April 08, 2012, 09:35:22 PM »
A look down the tube.  You can see the ancient fork oil and goo.  I am very glad I took these apart.


More of the gunk and goo.  This thing sticking out is the damper rod, and the shiny bit on the bottom comes off, so you don't need to freak out thinking you broke something.  Not that I'm speaking from experience on that one...


See?


I took the fork tube out of the tree at this point, and took the cap off.  The spring and damper rod assembly came out.  Again, if you do this, be prepared for spillage.


Once it was all apart, this was what I had.  Fork cap and ridiculously thin washer, damper rod and spring, spacer that goes on the bottom of the damper rod, fork spring, allen bolt for lower leg with copper washer, drain plug with copper washer, axle clamp (with 2 nuts, 2 washers, and 2 lock washers), and lower fork leg (dust seal, oil seal, and retaining ring contained within).
« Last Edit: April 08, 2012, 10:45:29 PM by JimJamerino »
~ Jim

formerly "emperorspartacus"

There are old bikers.  There are dumb bikers.  There are no old, dumb bikers.

My CB650C rebuild http://forums.sohc4.net/index.php?topic=74212.0