Author Topic: Finishing (yeah, right) touches on Project "Parts Bike"  (Read 8393 times)

0 Members and 1 Guest are viewing this topic.

Offline KB02

  • Take it easy there, Sonny, I'm an
  • Old Timer
  • ******
  • Posts: 3,760
Finishing (yeah, right) touches on Project "Parts Bike"
« on: April 16, 2011, 05:17:23 am »
So some of you have seen my project thread:
http://forums.sohc4.net/index.php?topic=22216.0

As the winter has finally gotten over it's stubborn streak and is leaving the northeast, It is time to get te bike out of the back of the garage and finish off some of the final touches.
As a refresher I went from this:

To this:


The biggest pain in my side right now is carbs. They are super clean but I just cant seem to get the balance right. I got a new gauge style carb sync tool (vs. the mercury stick one I had) this winter so we'll see it that will do the trick or not.

The seat still isn't the best though I have improved it from the first rendition. I plan on getting it a bit cushier than it is right now. Shouldn't be too hard, right?


And finally the dash. Stock dash would simply not work for several reasons: 1.) Not the stock front end, so no where to attach it. 2.) Not the stock front end so stock speedo would not work. 3.) Stock dash was old and ugly. BUT, after a bit of work, new, custom, gauge faces by a fellow SOHC board member:

A bit of mill work from my dad:

And a touch of polishing, I had come up with this:


It works (mostly) but I'm just not happy with it. The gauge faces do a great job of making the two look like the belong together, but the body styles just do not match. Plus, I have just not been happy with the way the dash plate attaches to the top tree. It just doesn't work. It's too flimsy. It's not close enough. I truly appreciate the effort that others put into it, but it's got to go.

Enter KOSO!


This should be a good project that many people here have either done or thought about doing. I figure that documenting it here would be a great thing to do. (I'm also in the middle of an engine tear down and clean up on my wife's bike, so hopefully I won't get too distracted on this project.)
1978 CB750K Project
2000 Ducati ST2
...and a pedal bike

Join the AMA today!!

My project thread Part I: K8 Project "Parts Bike"
My project thread Part II: Finishing (yeah, right) touches on Project "Parts Bike"

Offline KB02

  • Take it easy there, Sonny, I'm an
  • Old Timer
  • ******
  • Posts: 3,760
Re: Finishing (yeah, right) touches on Project "Parts Bike"
« Reply #1 on: April 21, 2011, 06:15:21 am »
It figures that my one day off this week I come down with a stomach bug.  >:( :P

Work will ensue, though. At least I cab study the wiring schematic for the new gauge.
1978 CB750K Project
2000 Ducati ST2
...and a pedal bike

Join the AMA today!!

My project thread Part I: K8 Project "Parts Bike"
My project thread Part II: Finishing (yeah, right) touches on Project "Parts Bike"

Offline Retro Rocket

  • Eggs are hard due too a
  • Really Old Timer ...
  • *******
  • Posts: 19,279
  • ROCK & ROLL
Re: Finishing (yeah, right) touches on Project "Parts Bike"
« Reply #2 on: April 21, 2011, 09:28:27 pm »
Nice bike, love the colour.

Quote
The biggest pain in my side right now is carbs. They are super clean but I just cant seem to get the balance right. I got a new gauge style carb sync tool (vs. the mercury stick one I had) this winter so we'll see it that will do the trick or not.

You have to love pods....... :o   The stock airbox may not suit your look but it will run better and be easier to tune...... ;)
750 K2 1000cc
750 F1 970cc
750 Bitsa 900cc
If You can't fix it with a hammer, You've got an electrical problem.

Offline TMHackCB500

  • Just a Hack
  • Full Member
  • *
  • Posts: 19
Re: Finishing (yeah, right) touches on Project "Parts Bike"
« Reply #3 on: April 22, 2011, 01:59:27 pm »
Hey man, great work on the bike so far.  I just read through your other thread, way to stick with it through all the issues at the end of it!  I have a similar stripe I painted on my yamaha, but mine are white on a black tank with a red pinstripe accent.

I agree that the dash just doesn't seem to fit the bike, most of the bike looks fast and streamlined and the dash looks heavy and clumsy sticking out up there.  The new electronic unit should look sleek!

And ditto on the tuning carbs with pod's being a bear and a half, I've been trying to dial my bike in for a while.  Think I'm going to try and incorporate some velocity stacks into the interior of the pods to smooth the airflow coming into the carb out some. Not sure that it'll work, but it's an idea.

Anywho, keep up the great work!
1982 Yamaha XJ550 Seca, 1977 Kawasaki KE250, 1972 CB500 Four(the newest project and my reason for being here!)

Offline KB02

  • Take it easy there, Sonny, I'm an
  • Old Timer
  • ******
  • Posts: 3,760
Re: Finishing (yeah, right) touches on Project "Parts Bike"
« Reply #4 on: April 24, 2011, 05:25:54 am »
And ditto on the tuning carbs with pod's being a bear and a half, I've been trying to dial my bike in for a while.  Think I'm going to try and incorporate some velocity stacks into the interior of the pods to smooth the airflow coming into the carb out some. Not sure that it'll work, but it's an idea.

Yeah, that was my thinking as well.The pods I have are not the world's best, so may break down and buy some genuine K&N pods. They actually have a V-stack built into the design. That may be my next step. First step is getting them properly synced. I KNOW that has something to do with it.  ::)
1978 CB750K Project
2000 Ducati ST2
...and a pedal bike

Join the AMA today!!

My project thread Part I: K8 Project "Parts Bike"
My project thread Part II: Finishing (yeah, right) touches on Project "Parts Bike"

Offline Retro Rocket

  • Eggs are hard due too a
  • Really Old Timer ...
  • *******
  • Posts: 19,279
  • ROCK & ROLL
Re: Finishing (yeah, right) touches on Project "Parts Bike"
« Reply #5 on: April 24, 2011, 04:38:21 pm »
Hey man, great work on the bike so far.  I just read through your other thread, way to stick with it through all the issues at the end of it!  I have a similar stripe I painted on my yamaha, but mine are white on a black tank with a red pinstripe accent.

I agree that the dash just doesn't seem to fit the bike, most of the bike looks fast and streamlined and the dash looks heavy and clumsy sticking out up there.  The new electronic unit should look sleek!

And ditto on the tuning carbs with pod's being a bear and a half, I've been trying to dial my bike in for a while.  Think I'm going to try and incorporate some velocity stacks into the interior of the pods to smooth the airflow coming into the carb out some. Not sure that it'll work, but it's an idea.

Anywho, keep up the great work!

Have you guys seen these, they will flow up too around 300 HP....{and actually work  ;D ;)}

http://forums.sohc4.net/index.php?topic=79491.0
750 K2 1000cc
750 F1 970cc
750 Bitsa 900cc
If You can't fix it with a hammer, You've got an electrical problem.

Offline TMHackCB500

  • Just a Hack
  • Full Member
  • *
  • Posts: 19
Re: Finishing (yeah, right) touches on Project "Parts Bike"
« Reply #6 on: April 24, 2011, 08:54:20 pm »
I've read the thread and that is part of where I got the idea to build a v-stack into my pod... unfortunately they are out of my rather puny price range and the bike I have pods on is not my Honda that's staying stock for now.  Thanks for the heads up.  /threadjack
1982 Yamaha XJ550 Seca, 1977 Kawasaki KE250, 1972 CB500 Four(the newest project and my reason for being here!)

Offline KB02

  • Take it easy there, Sonny, I'm an
  • Old Timer
  • ******
  • Posts: 3,760
Re: Finishing (yeah, right) touches on Project "Parts Bike"
« Reply #7 on: April 29, 2011, 05:33:52 am »
Well, I've got somethings started. Started with the seat.

I tore off the floor pad that I had been using (pealed off some of the paint, too. >:( I'll have to fix that later) and got all of my materials together.


Started drawing it out on paper and then cutting out the pieces:


Sewed a pad together and the starting into the assembly:


I think that this incarnation of the seat is looking good and MAY be the final version that I do.  ;) We'll see. I've still got a lot of work to do to finish it, though. I like the red thread. I was hopeful that it would look good and I think that it does.
1978 CB750K Project
2000 Ducati ST2
...and a pedal bike

Join the AMA today!!

My project thread Part I: K8 Project "Parts Bike"
My project thread Part II: Finishing (yeah, right) touches on Project "Parts Bike"

Offline TMHackCB500

  • Just a Hack
  • Full Member
  • *
  • Posts: 19
Re: Finishing (yeah, right) touches on Project "Parts Bike"
« Reply #8 on: April 29, 2011, 09:54:32 am »
Very nice!  That should look great stretched over the foam. 
1982 Yamaha XJ550 Seca, 1977 Kawasaki KE250, 1972 CB500 Four(the newest project and my reason for being here!)

Offline KB02

  • Take it easy there, Sonny, I'm an
  • Old Timer
  • ******
  • Posts: 3,760
Re: Finishing (yeah, right) touches on Project "Parts Bike"
« Reply #9 on: May 03, 2011, 06:35:02 pm »
Yes, I realize that I am jumping around a little bit. hat's just how my mind is working right now.

Got to work on the dash.
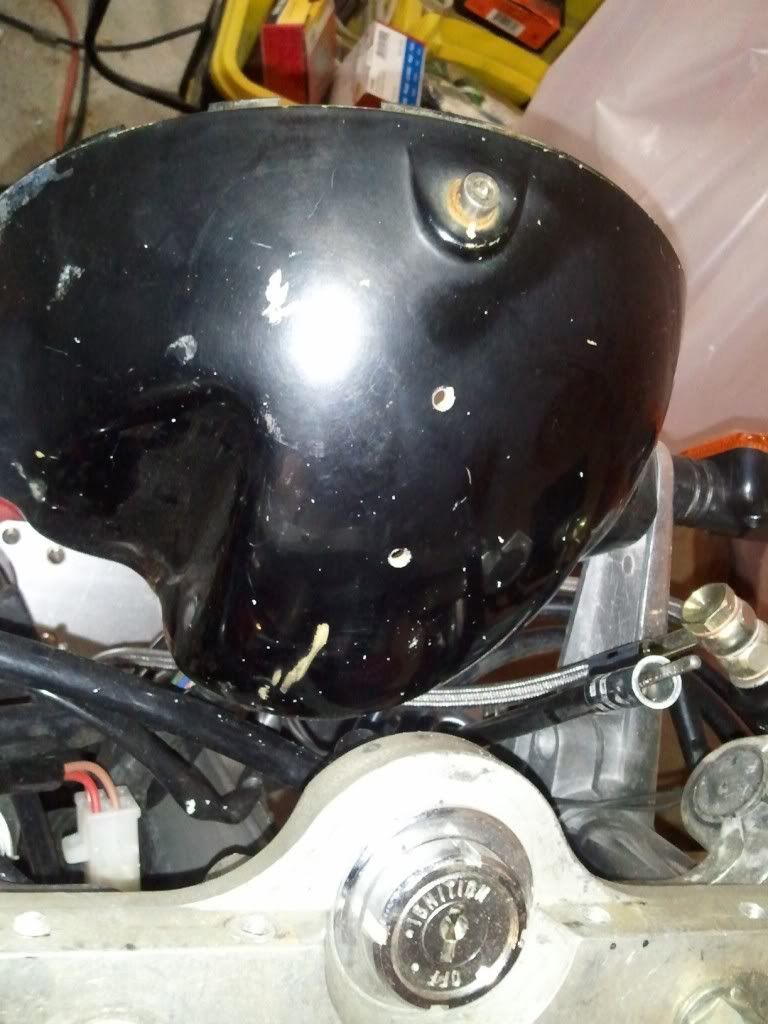
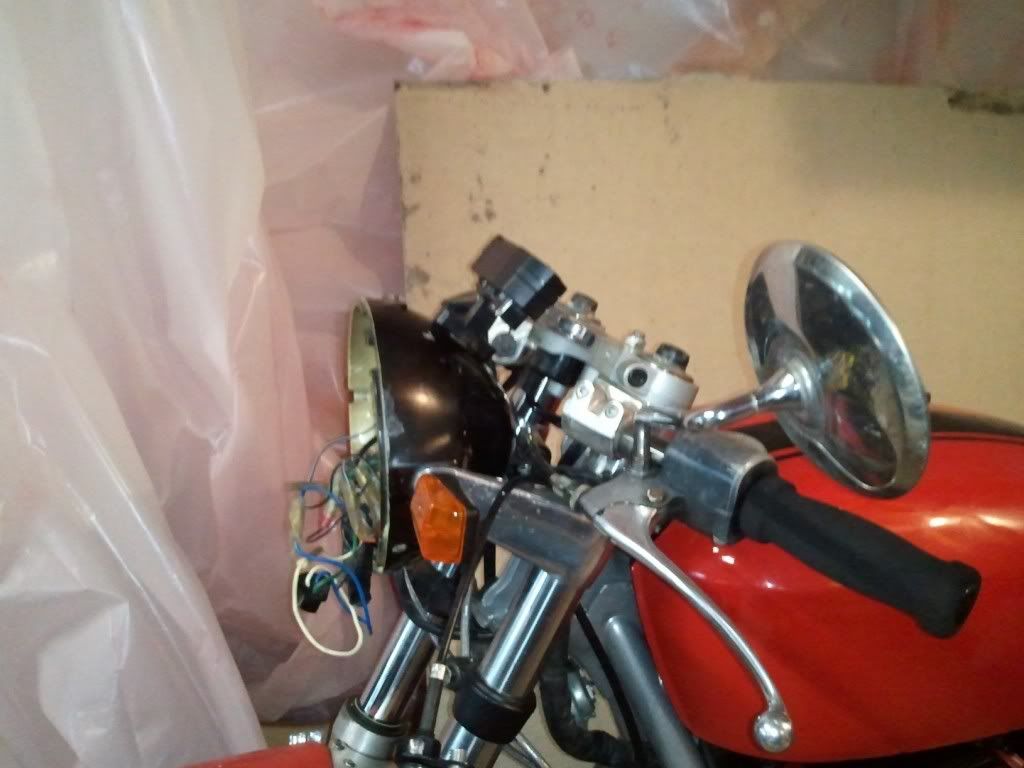
I pulled off the old dash:


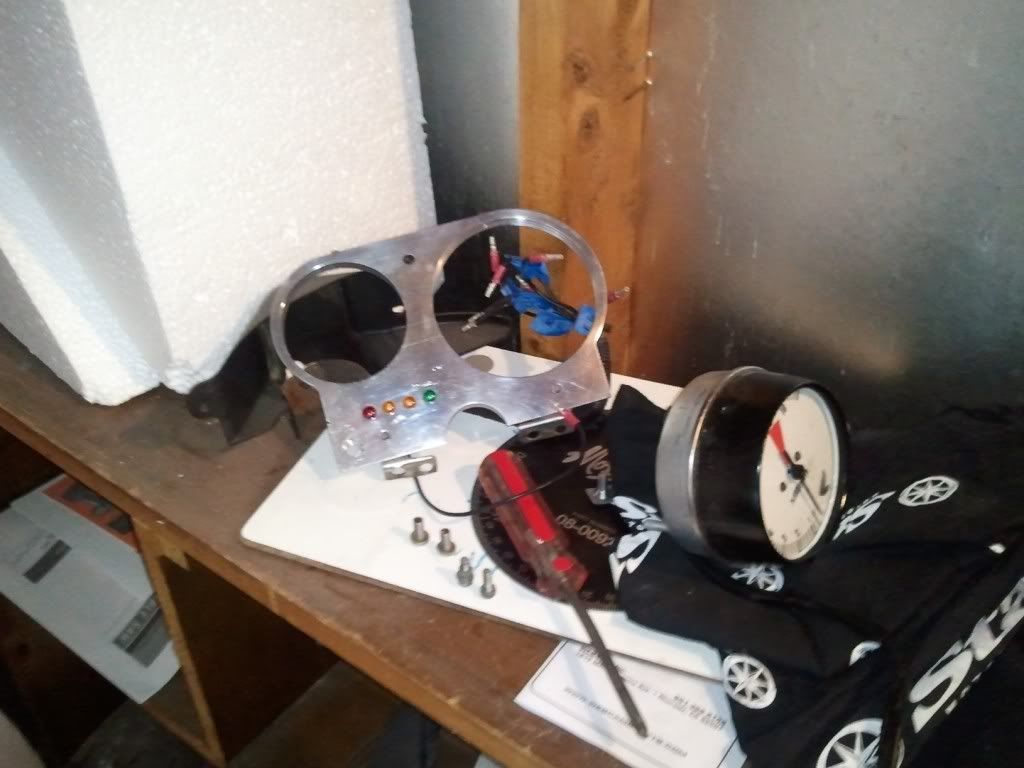
I like the look a lot better without the bulky dash in place.


It leaves me with the problem, though, that I have no where to attach the new gauge set.


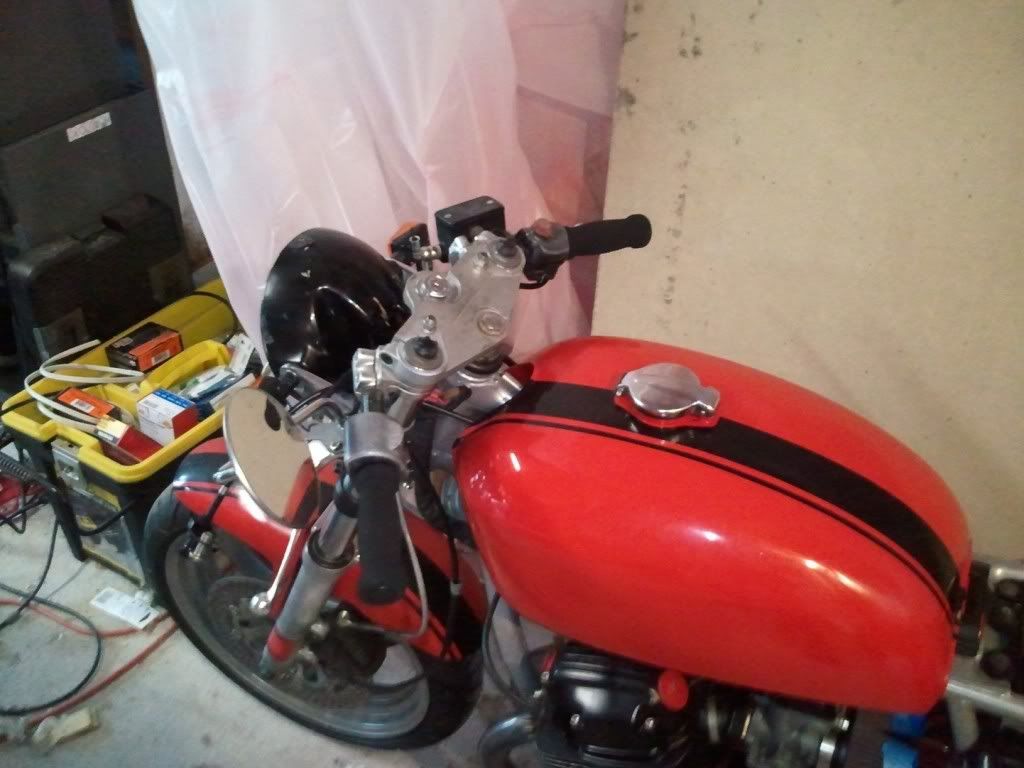
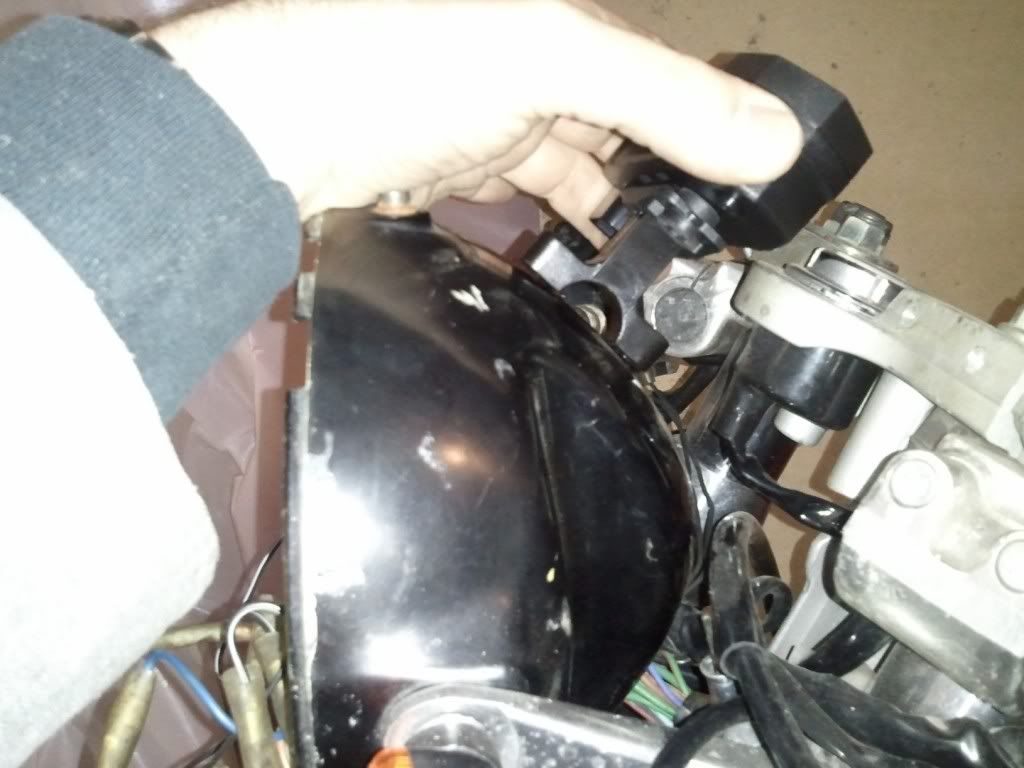
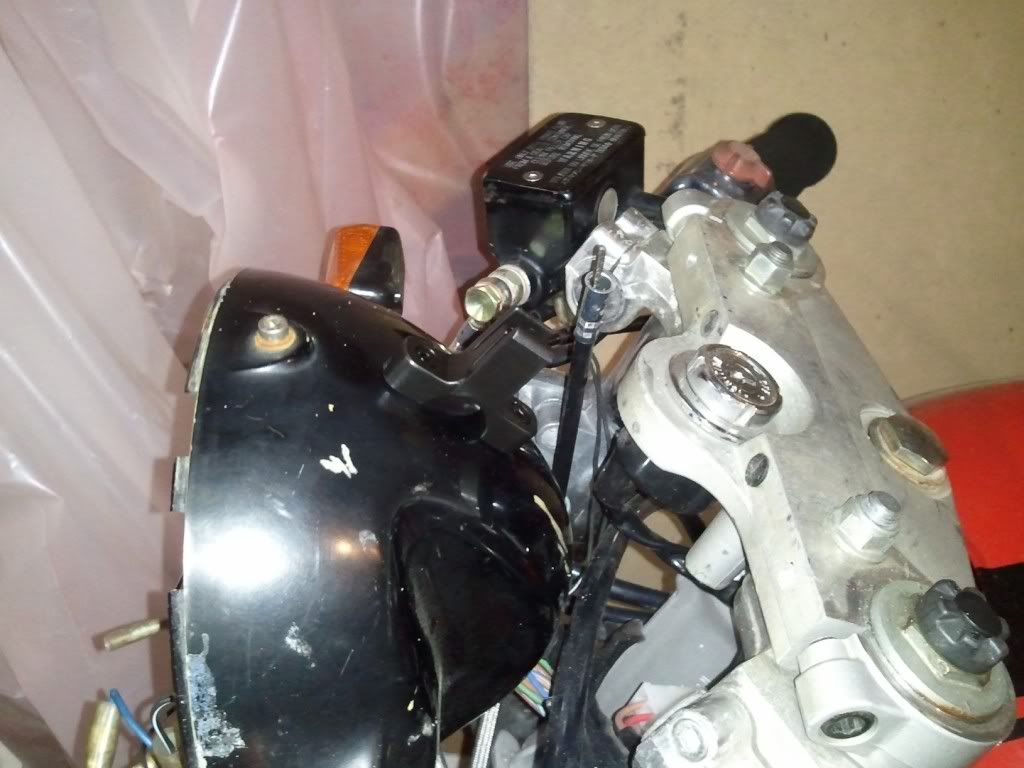
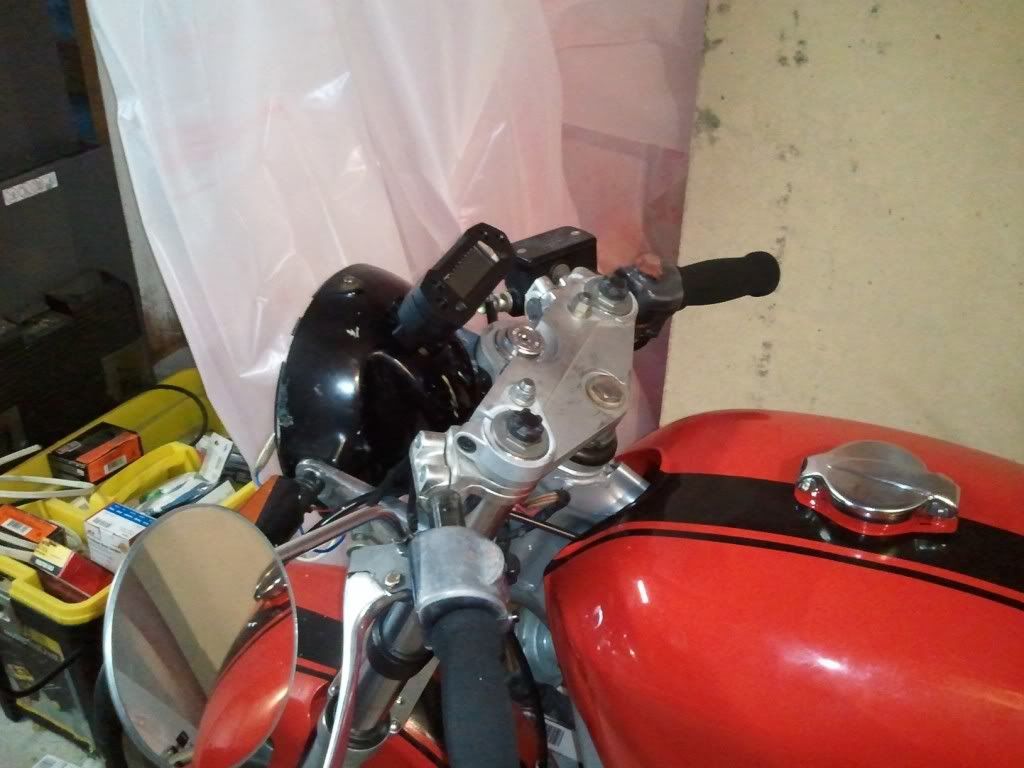
This is where I want it to be:


The Koso gauge comes with a mounting system that is designed to mount onto a 7/8" handlebar. Since I am running the clip-ons I don't have a bar to mount it to. MY first plan was to get a bar section and connect the two clip-ons together and I could then mount the gauge to that. Upon looking it all over, the headlight bucket is too close to make that work. The bar would hit the bucket. Then I got to looking and realized that I might be able to just mount the gauge right to the bucket itself.


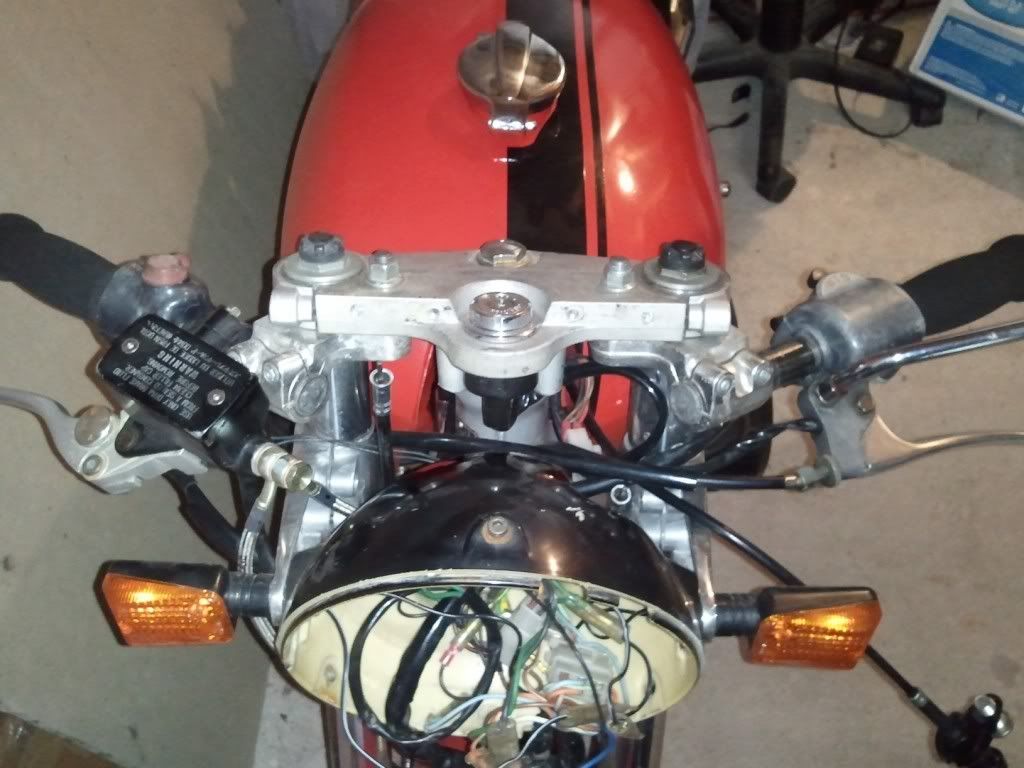
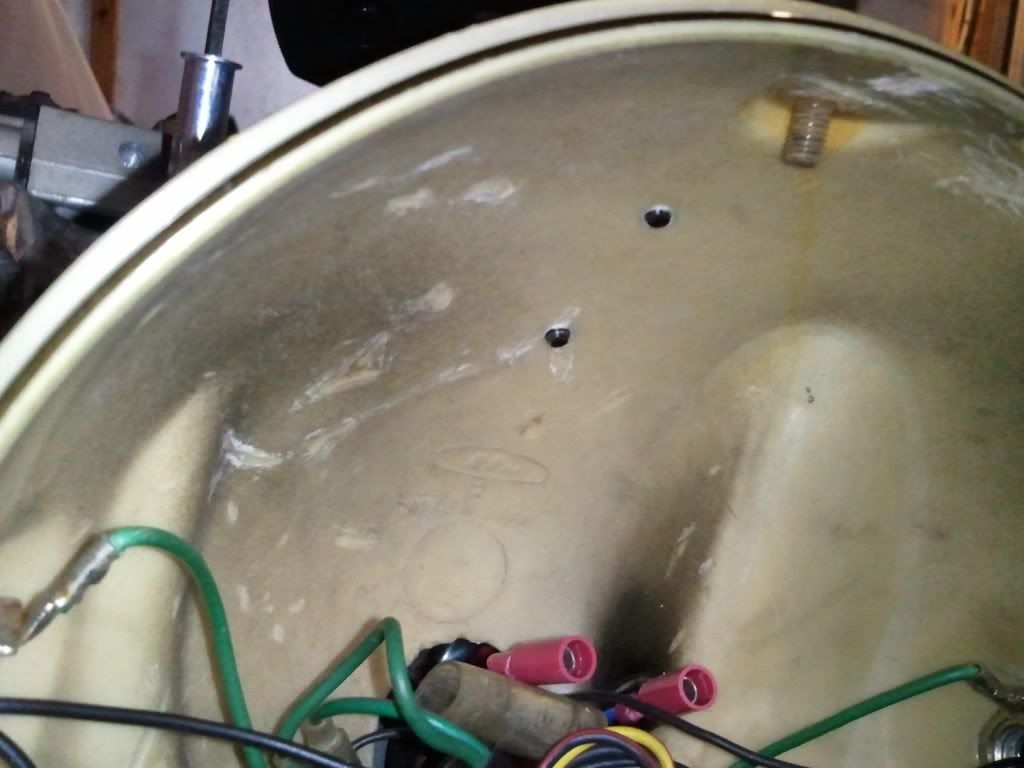
Two small holes in the right place:


I thought that I would need longer screws so that I could bolt the mount through the bucket and attach with nuts on the back side. BUT, the bucket shell is thick enough that I decided just to tap the holes to start with to see if it would work.
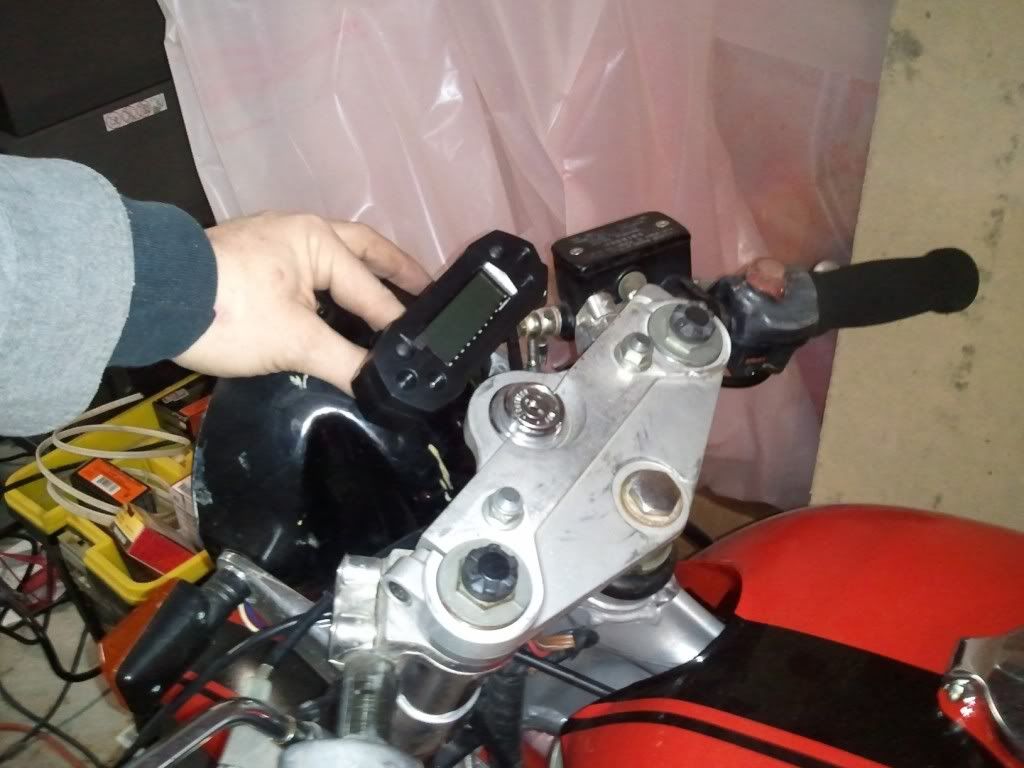
And it did:


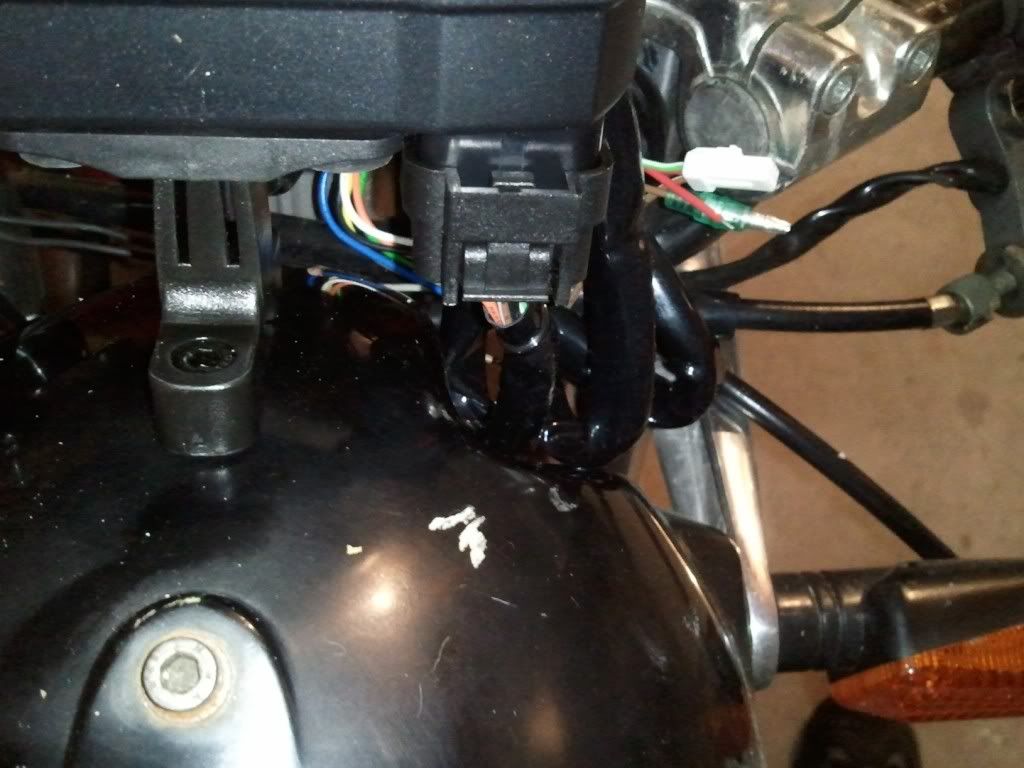
The screws are just about the perfect length and barely come through to the inside of the bucket:


It fits nice and maintains that nice, low, profile:


The recess for the speedo cable is in the perfect place to give relief for the cable that comes out of the gauge:


After a little bit of wiring - plug and play for the most part - and I was good to go with a working gauge set:

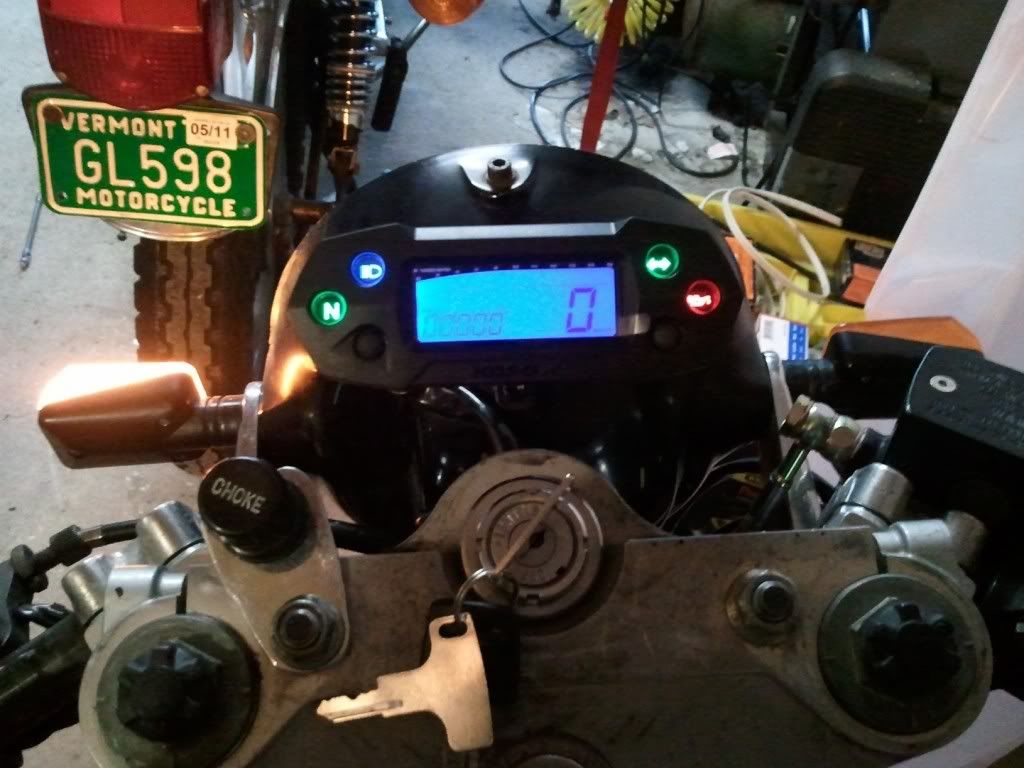
Just good timing to get the flasher with the picture so all lights are on at the same time.  :) Now I just need to polish or paint that top tree.

I still need to attach the RPM cable to the the coils and hook up the speed sensor, but other than that it is done and was easy to do.

Okay, now back to the seat.
1978 CB750K Project
2000 Ducati ST2
...and a pedal bike

Join the AMA today!!

My project thread Part I: K8 Project "Parts Bike"
My project thread Part II: Finishing (yeah, right) touches on Project "Parts Bike"

Offline KB02

  • Take it easy there, Sonny, I'm an
  • Old Timer
  • ******
  • Posts: 3,760
Re: Finishing (yeah, right) touches on Project "Parts Bike"
« Reply #10 on: May 06, 2011, 04:16:26 am »
Seat stretched over the foam. Now i need to attach it to the seat:


The plan is snaps under the seat. It will help break up the Red on the bike a little bit.
1978 CB750K Project
2000 Ducati ST2
...and a pedal bike

Join the AMA today!!

My project thread Part I: K8 Project "Parts Bike"
My project thread Part II: Finishing (yeah, right) touches on Project "Parts Bike"

Offline KB02

  • Take it easy there, Sonny, I'm an
  • Old Timer
  • ******
  • Posts: 3,760
Re: Finishing (yeah, right) touches on Project "Parts Bike"
« Reply #11 on: May 10, 2011, 05:45:16 am »
Got some more work done on the seat.

Took the base off:


I had to reverse the bolts so that they bolted up instead of down.


I got the snaps on both the leather and the bottom of the seat. This way the leather wraps around the edge and looks nice and clean. I needed to make a little room for the snaps buy sanding out little pockets in the base, too.


The seat sitting back on the bike:


I need to adjust the stitches on the back to make the rear sit lower on the seat pan. But other than that it looks good, I think. Still needs some tweaking, though...
1978 CB750K Project
2000 Ducati ST2
...and a pedal bike

Join the AMA today!!

My project thread Part I: K8 Project "Parts Bike"
My project thread Part II: Finishing (yeah, right) touches on Project "Parts Bike"

Offline KB02

  • Take it easy there, Sonny, I'm an
  • Old Timer
  • ******
  • Posts: 3,760
Re: Finishing (yeah, right) touches on Project "Parts Bike"
« Reply #12 on: May 24, 2011, 04:21:51 am »
Finally got back to the bike.

As suggested by fellow board member KingCustom I decided to install a VOES switch with my Cycle-X optical ignition. I had to pull the tank off to wire up the new tach anyway, so it was the perfect time to do it.

Pulled the seat and tank to expose it all:


The Gordon Frame Kit proved to be perfect for mounting the VOES switch bracket:


I used a bit of solid brake line that I had lying around to make a vacuum line. I tapped it, used a nut and o-ring on one end and flared the other end and stuck it in the #3 carb. The hose is only about 4 inches or so long. And with the blue wire off the optical ignition grounded through the VOES switch and the tach wire wired into the white wire on the coil pack (nothing on this bike is normal...) I buttoned it all back up. I had to change a few settings in the gauge set, but the tach works good.

I also had to change a few things on the Speedo set up. The instructions with the KOSO gauge said the speed sensor had to be within 8mm of the pick ups to get a good reading. I had it at 5mm and I got no readings at all. Judging by the horrible English translation in the instruction, I thought that there might have been a error somewhere. I altered the mounting a bit to be within 0.8mm. That seems to work much better. Still waiting a road test for the speedo, but a tire spin test seemed to work.
« Last Edit: May 24, 2011, 04:48:19 am by KB02 »
1978 CB750K Project
2000 Ducati ST2
...and a pedal bike

Join the AMA today!!

My project thread Part I: K8 Project "Parts Bike"
My project thread Part II: Finishing (yeah, right) touches on Project "Parts Bike"

Offline KB02

  • Take it easy there, Sonny, I'm an
  • Old Timer
  • ******
  • Posts: 3,760
Re: Finishing (yeah, right) touches on Project "Parts Bike"
« Reply #13 on: June 03, 2011, 04:45:54 am »
I finally got some more work done on the bike. The re-mount of the speed sensor pick up worked and the speedo works nicely now. It in so much nicer than that big, huge cluster I had. Also, I got the neutral switch figured out and working again so I have a fully functional gauge set once again (First time since I had the bike running actually if you include all lights and everything).

AND, I also installed a new 18 tooth front sprocket. jumping up one tooth made a HUGE difference in the street-ability of the gearing.

Now onto the carb sync (which it needs BADLY).
1978 CB750K Project
2000 Ducati ST2
...and a pedal bike

Join the AMA today!!

My project thread Part I: K8 Project "Parts Bike"
My project thread Part II: Finishing (yeah, right) touches on Project "Parts Bike"

Offline KB02

  • Take it easy there, Sonny, I'm an
  • Old Timer
  • ******
  • Posts: 3,760
Re: Finishing (yeah, right) touches on Project "Parts Bike"
« Reply #14 on: June 21, 2011, 07:28:01 am »
Carb sync done.  It wasn't as bad as I thought it was, but they were certainly out of sync. It's much better now, but the hanging idle issue is still there. I bought one of Tintop's AntiPod kits and will install that when it arrives to see if that helps the issue or not. I really don't want to have to pull the carbs again, but it might be what I've got to do.
1978 CB750K Project
2000 Ducati ST2
...and a pedal bike

Join the AMA today!!

My project thread Part I: K8 Project "Parts Bike"
My project thread Part II: Finishing (yeah, right) touches on Project "Parts Bike"