Author Topic: '75 CB550F restoration: Project Lolita  (Read 53777 times)

0 Members and 3 Guests are viewing this topic.

Offline TyMatthews

  • Enthusiast
  • **
  • Posts: 103
'75 CB550F restoration: Project Lolita
« on: March 27, 2010, 02:54:40 AM »
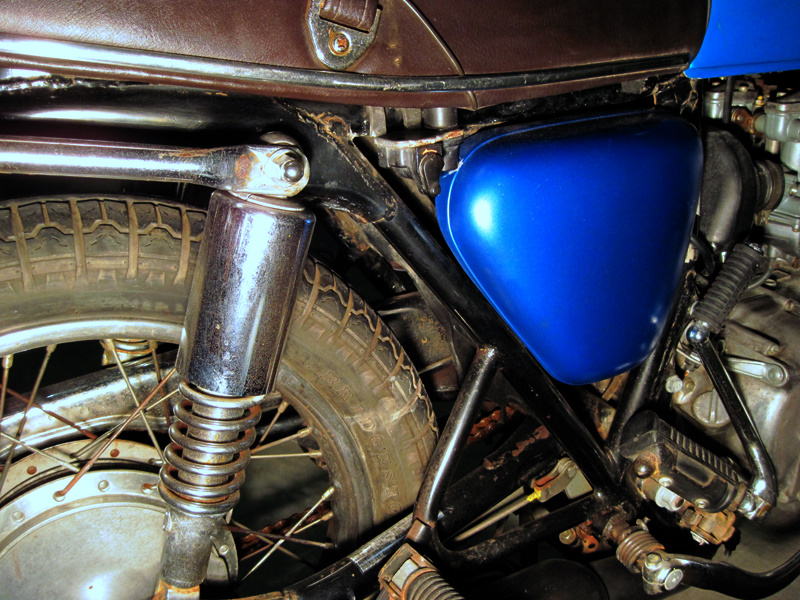
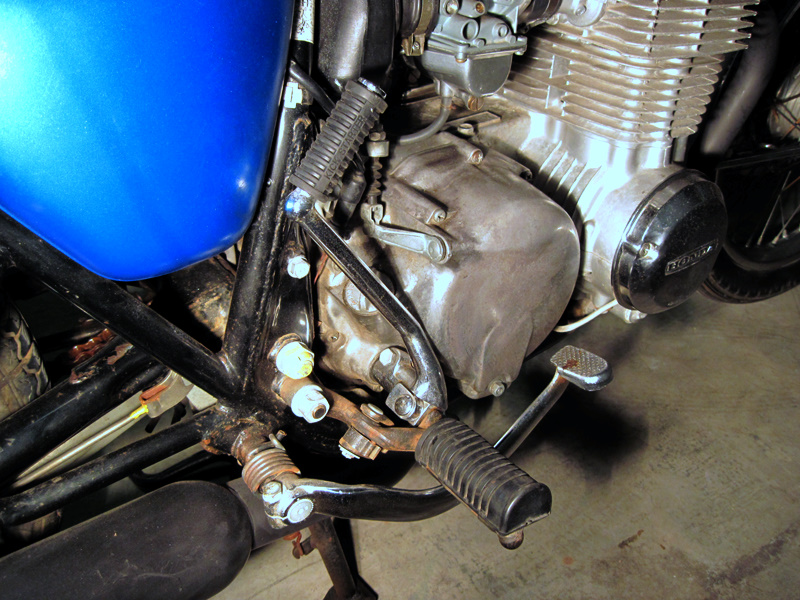
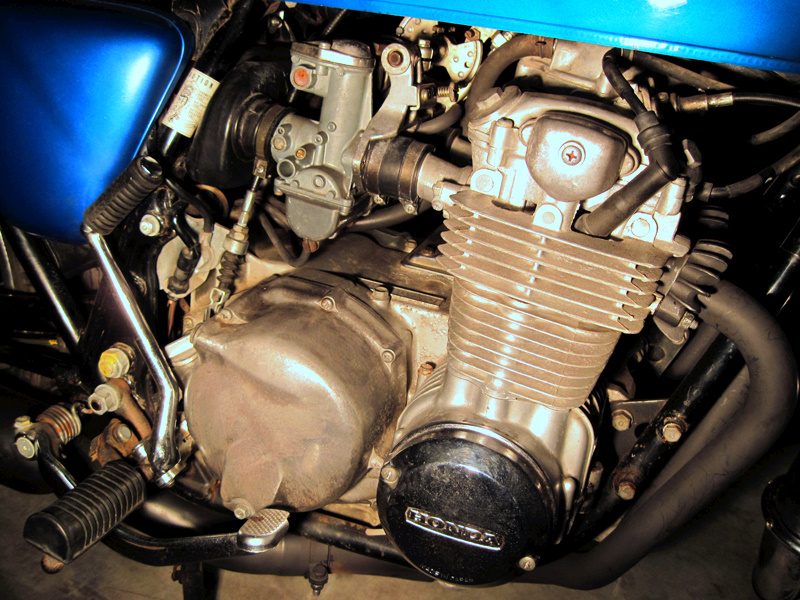
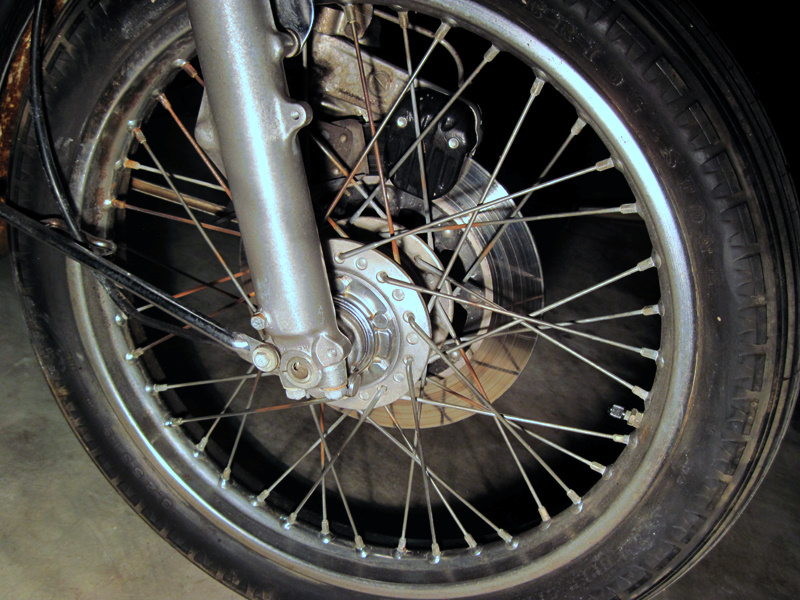
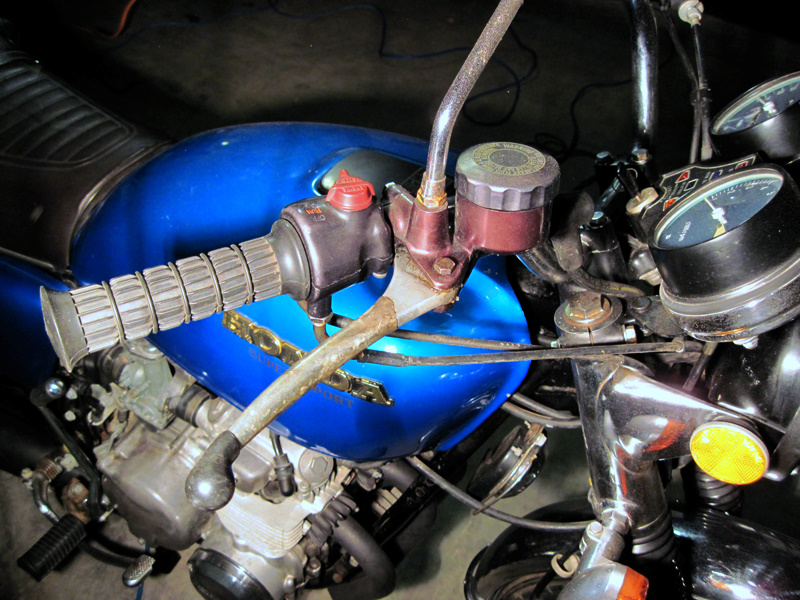
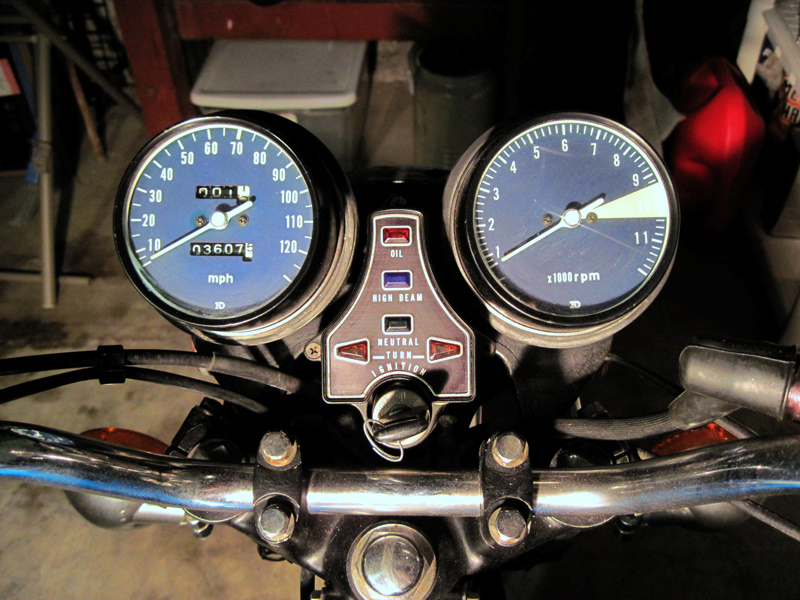
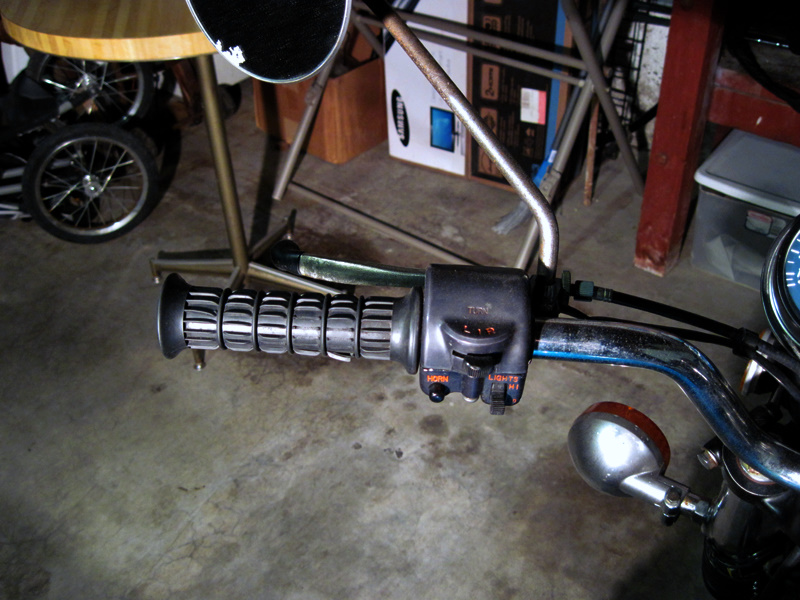
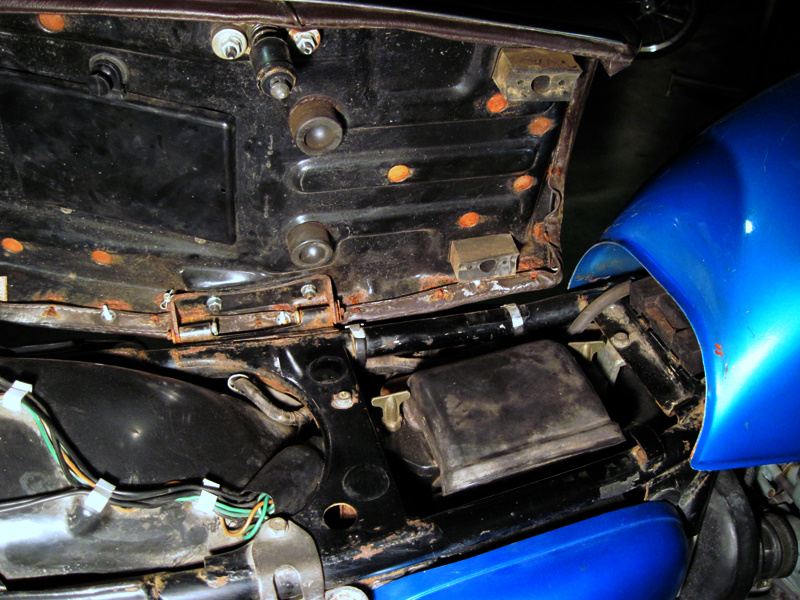
I just picked up my new project bike this afternoon, a blue '75 CB550F with a little over 3600 original miles.  This will be a complete frame-off restoration/modification, my first ever attempt at restoring a motorcycle:


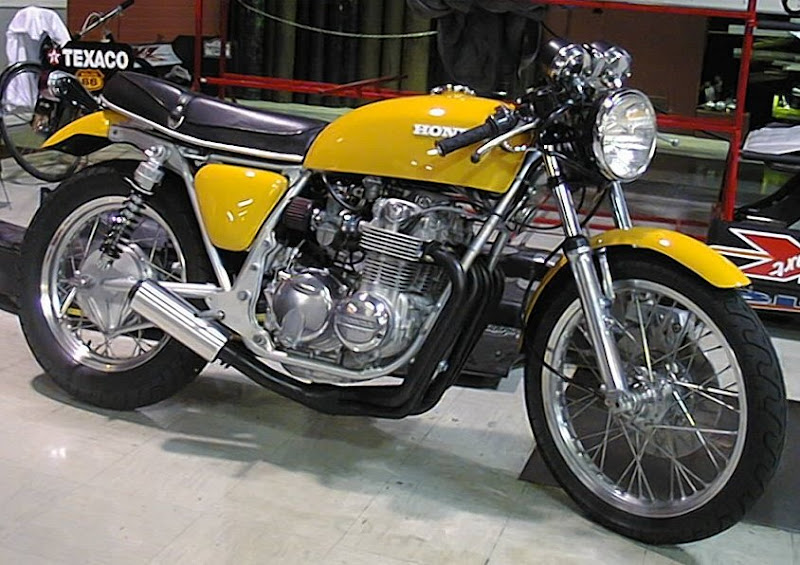
First, before we get knee-deep in pictures of the bike as it exists right at this moment, I'd like to offer up what is presently inspiring me, and what I'm planning on doing.  The first is an image from the "inspiration gallery" here on SOHC4.net (and others I'm presuming)... a yellow 550 cafe racer:


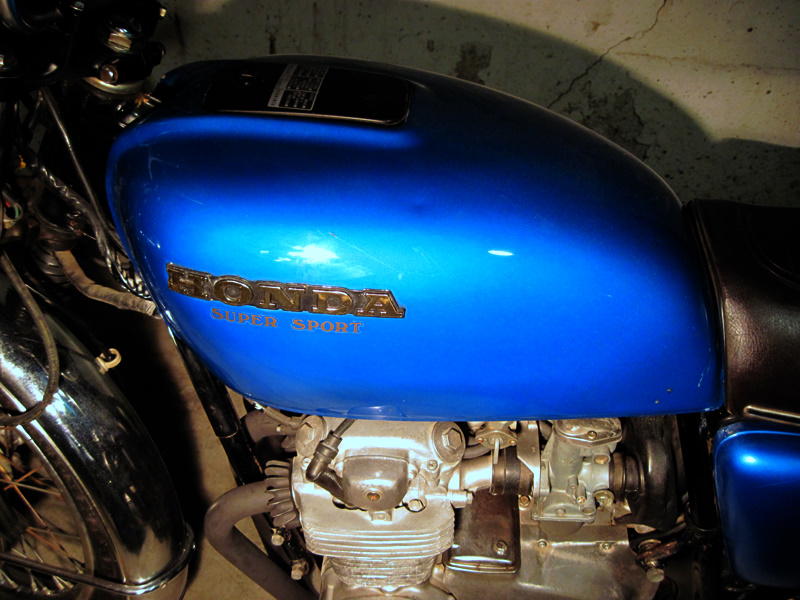
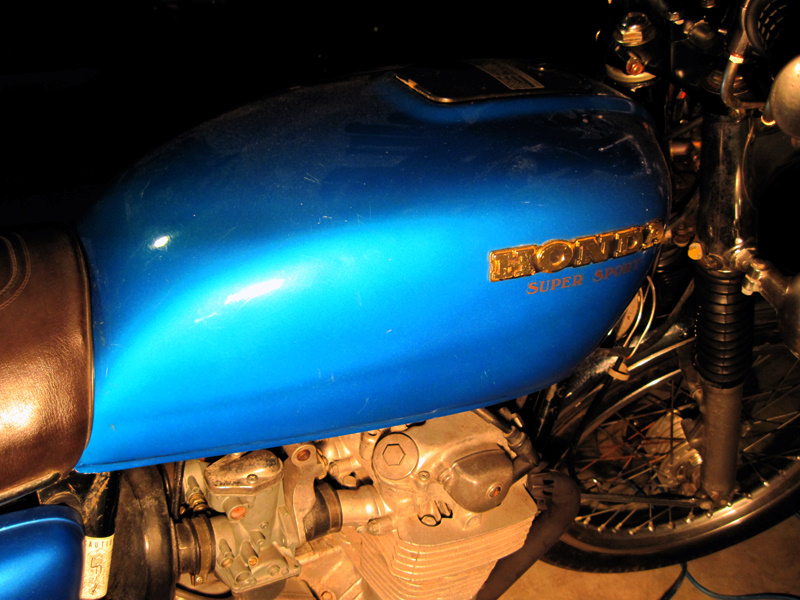
My 550 is currently blue, but I believe strongly that it was originally flake sunrise orange, owing to a number of chips in the gas tank that reveal its true origins.  First question... is there a VIN lookup for Honda motorcycles of this type that would provide a breakdown of their factory installed options, color, etc?  If not, I'll take the evidence provided and run with it.  So if the bike becomes sunrise orange again, I wanted to imagine what this would look like... thanks to Photoshop, this is now possible:
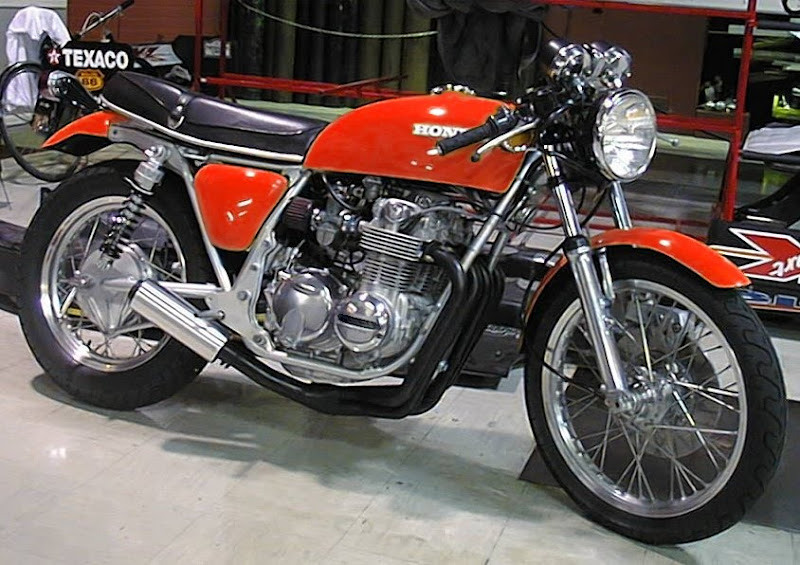


That's more of a "General Lee" orange, not exactly what the stock flake sunrise orange would look like, but it's close enough to imagine, at least for now.  I'm a huge fan of the brushed metal look intermixed with solid, glossy colors and a few splashes of chrome here and there, while maintaining a minimalist/shaved exterior... those ginormous turn signals, side mirrors, and tail light will all be coming off (saved for a future stock restoration, of course!)  I'm not a huge fan of oodles and oodles of blinding chrome, so it will be used sparingly only where aesthetically appealing.

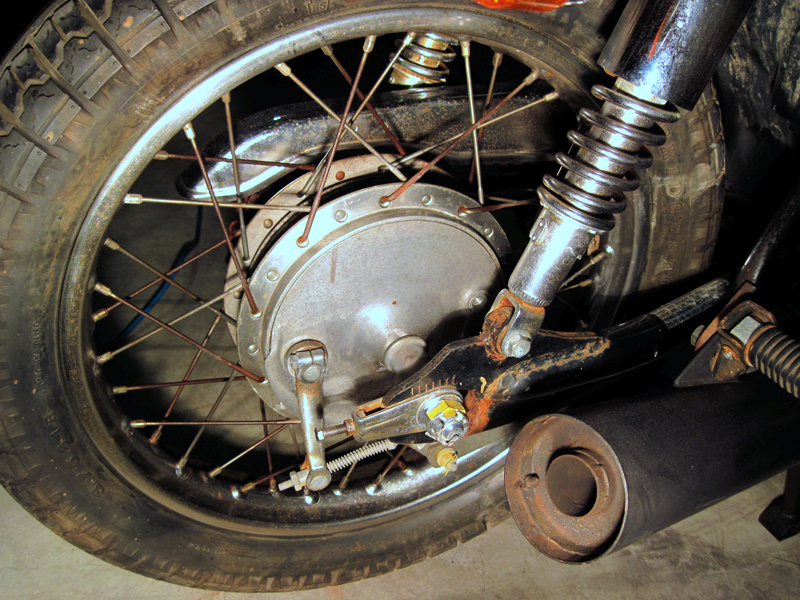
I'd like to install superbike handlebars with bar end mirrors.  The stock turn signals will give way to much smaller lights mounted closer to the frame.  I might fab them myself starting from a big chunk of aluminum, a decent prism face plate, and some orange LEDs.  Depends on how good they turn out, I suppose.  Could always buy some aftermarket or go chopping at the local moto graveyard.  The front fender will lose the stay arm, perhaps get bobbed a bit (not too much), and then splashed with whichever color I end up going with.  Same for the rear fender, which will lose that ambulance light in deference to a more compact, sleek tail light.  The undersides of each will be painted black.

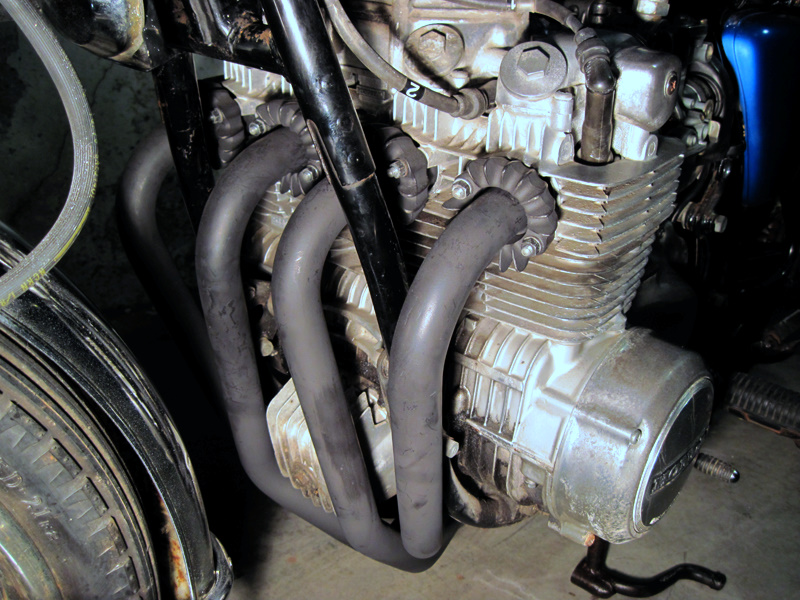
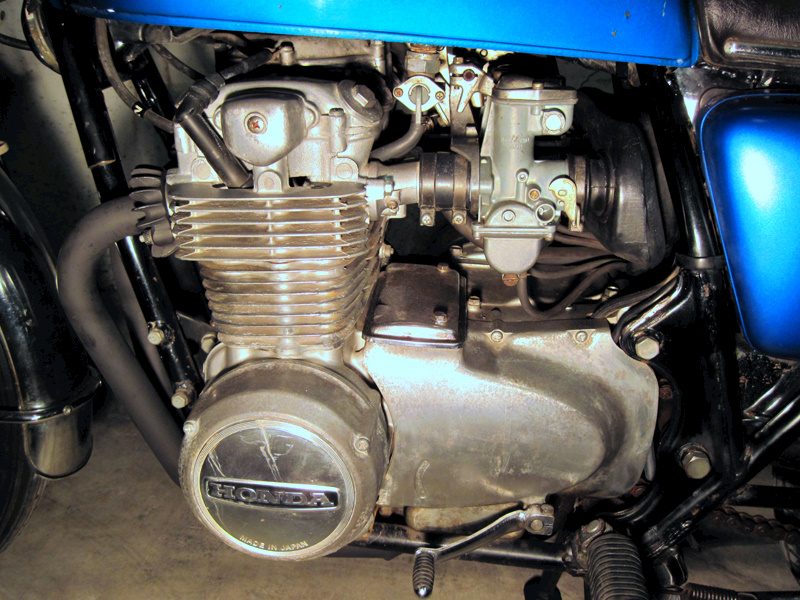
The frame will be powder coated, probably with a metallic finish and then a clear coat.  I'll probably keep the aftermarket 4 into 1 headers already on there, although they'll get completely stripped, refurbished, and powder coated.  I haven't decided what to do about the muffler yet.  The center stand will likely be lost.  The engine I believe is in really good shape, so pending a cursory examination no major surgery should need to happen there.  I do want to split it open and then degrease/repaint/polish/plate its surfaces.  Taking it apart arouses some serious trepidation in me; we'll see if I can actually do it myself or whether I'll need to call in some expert(s).  I really would like to learn how to do this on my own, so I figure this is as good a time as any.

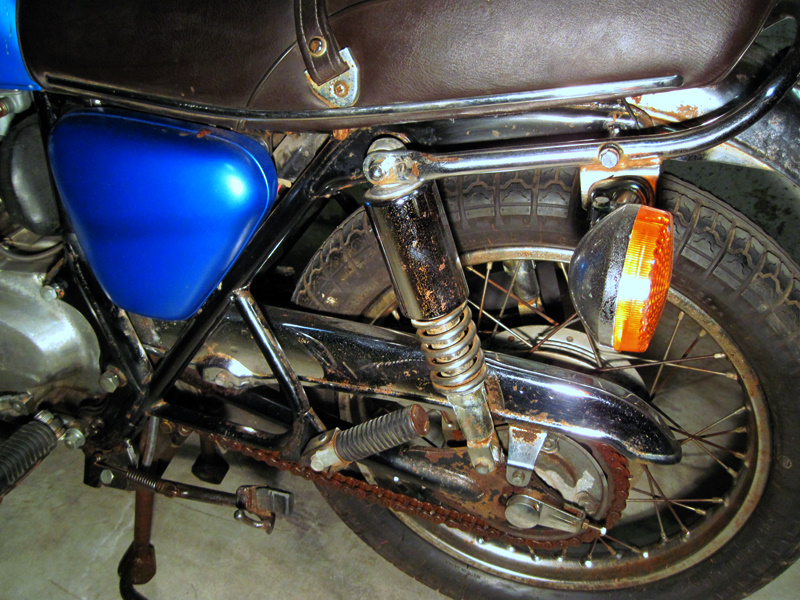
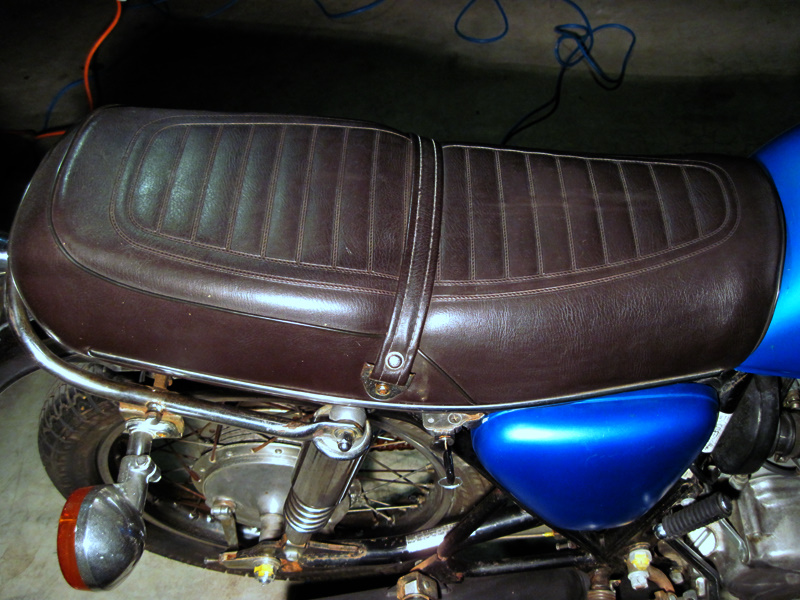
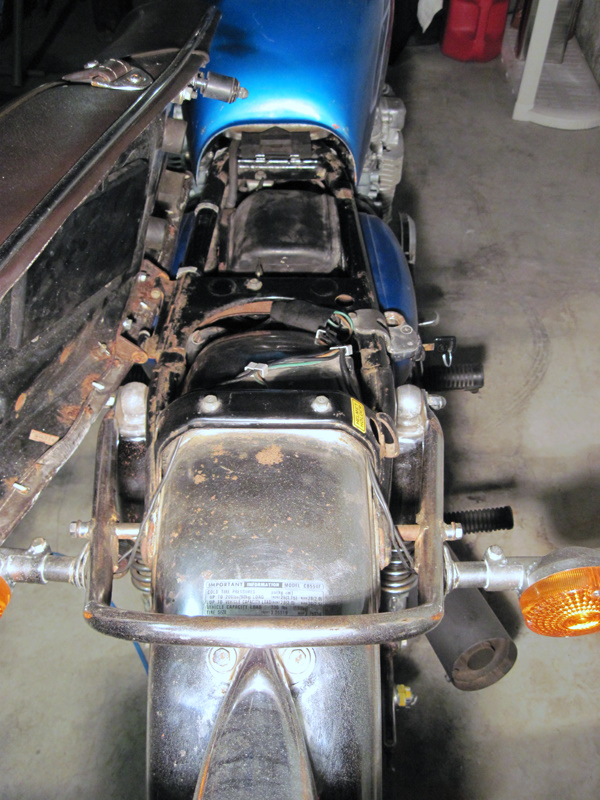
The seat looks a tad brown (?), either from fading over time, or on purpose.  The vinyl is in immaculate shape, so perhaps just a little black vinyl dye will suffice to bring it back to life.  The wiring looks fantastic, so that may not need to be touched at all, other than a corrosion check and clean-up.  The chain is in really bad shape right now, so it will be swapped out for a new EK chain, along with some new JT sprockets.  I've been tossing around the idea of putting on dual front discs, although I remain unconvinced it's really necessary with a 550.  It might be more hassle than what it's worth.  The present disc will get a thorough rebuild, of course.  The gas tank has some surface rust around the inlet, as well as inside, directly below the hole.  This will need to be chemically treated and then sealed, and will likely be one of the first things I do.

So on with the pics!
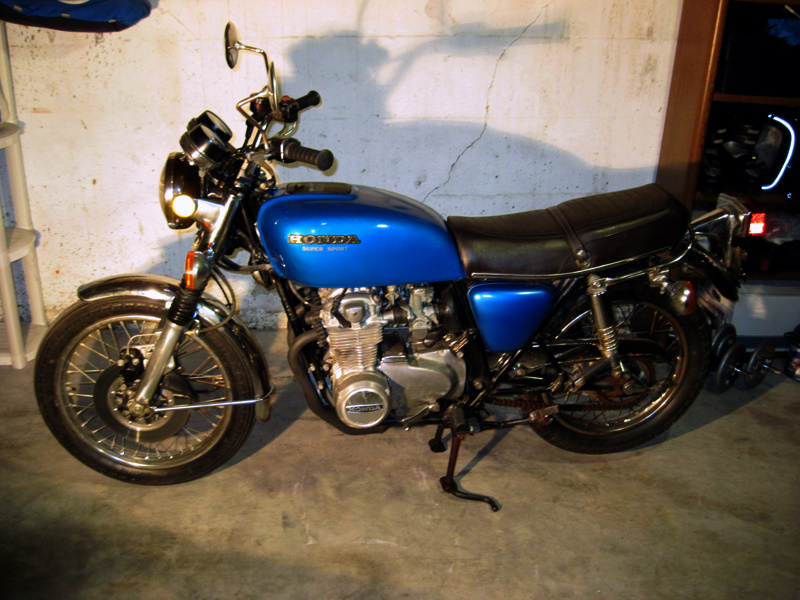


Here's the full slide show URL, thanks to Google and their free Picasa software:

http://picasaweb.google.com/onehotseat/PicasaWeb?feat=directlink

Of course, many more pics to come.  My first steps will be the following:
  • Fix the clutch linkage (tire spins steadily in first gear on the center stand, even with the clutch pulled fully)
  • Clean up, lube, and tighten the existing chain by adjusting the rear wheel position
  • Replace brake pads then bleed the brakes
  • Replace the tires (the front tire I think is original, and it's exceptionally scary to even think about riding on)

Once I've gotten it into somewhat working order and drive it around for a bit, I'll know better as to how good the engine actually is in order to better assess what needs to happen.  From there, it's disassembly time!  Stay tuned.
« Last Edit: April 18, 2010, 11:18:57 PM by TyMatthews »

Offline SonnysTile

  • Full Member
  • *
  • Posts: 55
Re: '75 CB550F restoration: The Eviscerator
« Reply #1 on: March 27, 2010, 05:37:08 AM »
I believe that seat is original in brown?

you know, you could probably sell that tank, sidecovers, and seat to someone for a resto and raise enough scratch to replace them with less original condition stuff and have money to spare.

it's only original once...
1972 CB500, 1975 CB400F, 1967 CA160

Offline fasturd

  • Hot Shot
  • ***
  • Posts: 607
Re: '75 CB550F restoration: The Eviscerator
« Reply #2 on: March 27, 2010, 05:41:00 AM »
I like the semi-stock or resto-mod way. If you tear into her you should have her done in a week!


Good luck and keep posting watching these things transform is inspirational to everyone.

Bill
13 in the garage and counting...

Link to my link...   http://forums.sohc4.net/index.php?topic=58422.0

Offline TyMatthews

  • Enthusiast
  • **
  • Posts: 103
Re: '75 CB550F restoration: The Eviscerator
« Reply #3 on: March 27, 2010, 09:23:23 AM »
I believe that seat is original in brown?

you know, you could probably sell that tank, sidecovers, and seat to someone for a resto and raise enough scratch to replace them with less original condition stuff and have money to spare.

it's only original once...

Well the tank and sidecovers aren't going to be modified during their restoration, so they will return to being like factory condition.  Some PO painted them blue and removed the "550Four" emblems, so they're already not in original condition, and my cleaning/painting them in a stock color would be equivalent to what a full restoration would be.  One of my objectives during the resto is to not irrevocably modify any stock part.  I'll take it off and store it first before carving it up.  Perhaps the only item that would get modified would be the front fender, from which I'd remove the stay bar, fill the left-over holes, and perhaps bob a little.  Since I plan on painting it instead of plating, I might try and find one from a parts bike to start with and leave the original untouched. 

At any rate, I would rather keep all original parts with the bike, since I (or a new owner) may want to restore it back to factory condition at a future date (perhaps far into the future!) and would rather not have to try and fetch everything that had been sold off.

Offline SonnysTile

  • Full Member
  • *
  • Posts: 55
Re: '75 CB550F restoration: The Eviscerator
« Reply #4 on: March 28, 2010, 05:59:08 AM »
"At any rate, I would rather keep all original parts with the bike, since I (or a new owner) may want to restore it back to factory condition at a future date (perhaps far into the future!) and would rather not have to try and fetch everything that had been sold off."

I am doing my 500 the same way.


"I like the semi-stock or resto-mod way. If you tear into her you should have her done in a week!"

Me too!  My first bike was a real turd when I got it, so I liked the idea of it being unrecognizable when I finished.
My latest ride was in fantastic stock shape when I scored it, so its getting minimal, reversible, mods and upgrades to make it mine, but I want you to have to really look to see what's different.

Keeping my eyes on this one...
1972 CB500, 1975 CB400F, 1967 CA160

Online Stev-o

  • Ain't no
  • Really Old Timer ...
  • *******
  • Posts: 34,307
  • Central Texas
Re: '75 CB550F restoration: The Eviscerator
« Reply #5 on: March 28, 2010, 08:34:33 AM »
Looks like a nice find, mind if we ask how much?

I recently bought a '76 550F, the seat came brown from the factory.
Maybe yours was changed or it's a '76?
Click here for a little info on the changes in model years:

http://www.motorera.com/honda/h0550/four550/four550.htm

Good Luck!

'74 "Big Bang" Honda 750K [836].....'76 Honda 550F.....K3 Park Racer!......and a Bomber!............plus plus plus.........

traveler

  • Guest
Re: '75 CB550F restoration: The Eviscerator
« Reply #6 on: March 28, 2010, 09:51:43 AM »
Looks great!

The major things I noticed right off the bat....the flaking paint on the motor, all the chrome has that red stuff in the cracks and crevices...also known as rust! :D  Easy way is to sent it all off in a box to be rechromed.....cheap way is to try and salvage it by scrubbing and polishing it all out.  it still won't look as good, but it saves money.  That is what I did (begrudgingly). :(  I recommend sending it all out at one time to a chromer, and eat the cost.

Second, POWDERCOAT the frame.....have swingarm powdered after bearings are changed out.

Third, have engine lightly sandblasted, or scrub it yourself (this sucks!!), and repaint with silver engine paint, and rebuild carbs.  Only 4,000 miles....if she dosen't smoke, then rebuild is not necessary.

After engine is back in frame, install tapered neck tube bearings

Clean up electrical and re-install harness.

Take a breather, and start restoartion of all bits and pieces, while rims etc. are sent to Buchanan's for new spokes, and possible new rims.....this is done after hubs are refinished. (bucky is not cheap)

Forks, tires. and restored bits are sourced and found...then re-install

DONE!

Yes, it will cost money, but that is how a CB is done correctly, and easily.  The other routes, are cheaper, and will not look the same.  This route will give you a bike that looks NEW.

Probably cost around $7K to do RIGHT.  Don't do it unless you want to keep it.  There is no money to be made restoring 550's! ;D  The only CB's that appreciate in MONETARY value are 1969 "sandcast" CB750's....and there was only 7,500 of them made!  If you have one of those....well....that's an entirely different matter!

Keep in mind, every time I say re-install...that means the bolts are cleaned up with either Nevr-dull and a rag, or steel wool.

Just my .02

~Joe
  
« Last Edit: March 28, 2010, 07:55:01 PM by traveler »

traveler

  • Guest
Re: '75 CB550F restoration: The Eviscerator
« Reply #7 on: March 28, 2010, 10:12:05 AM »
P.S.  Do a search on here about cleaning that gas tank.....A little bit of "the Works" and some nuts and bolts shaken around in there will clean that right up!  Just have to clean it out with baking soda and water afterward to avoid "flash rust" from appearing!

Yes, that is another nasty job...but MUST be done.....do this before putting fuel back in her!!!

(sorry to hear about Berkeley...sure hope you not one of these nitwits spitting on people, and believer in Marxism) >:(

~Joe
« Last Edit: March 28, 2010, 10:14:56 AM by traveler »

Offline TyMatthews

  • Enthusiast
  • **
  • Posts: 103
Re: '75 CB550F restoration: The Eviscerator
« Reply #8 on: March 28, 2010, 12:57:20 PM »
P.S.  Do a search on here about cleaning that gas tank.....A little bit of "the Works" and some nuts and bolts shaken around in there will clean that right up!  Just have to clean it out with baking soda and water afterward to avoid "flash rust" from appearing!

Yep, all of that is already planned.  I bought a tank sealer kit from KBS coatings, which includes both a cleaner, acid etch, and final (permanent) sealer.

(sorry to hear about Berkeley...sure hope you not one of these nitwits spitting on people, and believer in Marxism) >:(

You shouldn't be sorry about me living in Berkeley.  I moved here in '08 for graduate school (Ph.D. in Materials Science & Engineering).  It's a beautiful area, and there are lots of good people here.  Not to say all of them are good... there are millions of people living in the Bay Area, and there is quite the ecclectic mix of personalities, beliefs, and politics.  Suffice it to say I have never spit on anyone!  That said, this thread is about restoration of my CB550, and not my political leanings, so to avoid unnecessary distractions let's leave it at that!

Looks like a nice find, mind if we ask how much?

I paid $1850 for it, which was higher than I had intended going in.  The PO listed it on CL for $2k, I offered $1500, and we settled on what he paid for it originally.  I'd spent a month or so looking at similar bikes trying to get a feel for how much I was going to spend (the astute reader may correctly imply I had already made up my mind to buy one).  It seemed that most people who had a bike of this era with 20k miles and in ragged condition were selling them around $1200, at least in this area.  I saw one that was in desperate need of some serious TLC go for $1100, so I decided that was my baseline.  After thoroughly scoping this one out, I determined that its completeness, low miles, lack of serious damage (one tiny dent in the gas tank, a few tiny dents in the chrome pieces), and consequent minimal effort in restoring was worth the extra money.  I'd rather have spent less, but this is about me enjoying the process and the final result, not trying to scavenge every last penny.

I recently bought a '76 550F, the seat came brown from the factory.  Maybe yours was changed or it's a '76?

I have the original title of the bike from the very first owner issued by the "State of Michigan Department of State" on 9/9/75.  All the numbers match, so I feel pretty confident it's a '75.  The title even has the termination statement (release of lien dated 6/2/77) from the credit union the owner used to buy the bike.  I just hope the State of CA will not force me to relinquish this original title; it's a beautiful original document and I'd really hate to see it get sent off to a paper warehouse for eternity.  So perhaps the seat got switched around... I'll have to inspect it more closely and try to ascertain its origins.

Thanks to everyone for all the feedback so far.  I found out recently there's a place down in Menlo Park, CA called TechShop which is an open-access public workshop.  They have sandblasting equipment, a powder coater(!), multiple Bridgeport machines, lathes, grinders, welding equipment, you name it.  I've used each of these things (sans the powder coater) at various points in my life already so I feel comfortable doing it on my own, with the benefit of both saving money and deriving satisfaction.  I'm not yet sure how large of a piece I can put in the sandblasting and powder coating glove box cabinets (which are not booths), so I may not be able to do the frame myself, but everything else should be good to go.

After you take and pass their training course on a specific piece of equipment (the sandblaster and powder coater are in the same course) you can then schedule time to use it.  My first training course is on April 6th, and I'll measure the dimensions of the cabinets at that time.  The place is open until midnight every night, and as a student I get a discount on the monthly membership rate... $75/month.  That fee will keep me motivated to get all of those components done in as short a timeframe as possible!  There is no additional hourly fee for using the equipment beyond the monthly membership, so if I busted my ass for a month I could get it all done and then drop my membership... until the next restoration comes around ;-)

So the first update:

The clutch is not releasing fully when I pull on the lever, so the rear drive is always in gear, making it harder to shift.  I brought to bear all of my nascent skills in troubleshooting the problem, to no avail.  I was hoping to be able to drive it a bit to test the engine, but that doesn't look feasible without some level of repair.  So teardown began last night, up until about midnight when my downstairs neighbor complained about the noise and smoke emanating from the garage.  I'm predicting he and I will be at odds for a while... time flies when you're having fun, and I'm sure I will be going late into the night on many an occasion.  I suppose I should lay down some old carpet or something to absorb the sound of tools hitting concrete.

Offline TyMatthews

  • Enthusiast
  • **
  • Posts: 103
Re: '75 CB550F restoration: The Eviscerator
« Reply #9 on: March 28, 2010, 11:58:02 PM »

'Twas a beautiful, sunny day here in NorCal, so I jumped at the opportunity to spend some quality time with my 10mm socket and dismantle The Eviscerator.  The bike started out today looking like this:


And now it looks like this:


A very productive day, indeed!  Had to put down my wrenches at 10:30 pm to avoid pissing off the neighbor again.  Possibly a good thing, because I might still be out there in the garage otherwise.  This new hobby is crazy addictive.  I really didn't even eat a proper dinner; only just now have I managed to scrounge together some snacks.  I took my time so I could document and label the piss out of everything to ensure I could put it back together properly. 

This brings me to my first anomaly.  I took out the main electrical panel, the brain if you will, where the R&R sits and everything connects up.  On the back side, towards the air filter, I found a connector that was not connected to anything, and I couldn't find where it might supposedly belong:


Anyone have a clue as to what this green-wire connector is for, and what it actually connects to?  I didn't purposefully disconnect it, so either it came off accidentally during my manipulations, someone disconnected it years ago, it's for diagnostic purposes and doesn't have a home, or it belongs to a component which has since been replaced by something vastly superior and been rendered futile.  Can anyone shed some light on this conundrum?

Some additional disassembly pics:


Gross rust all over the place; thank god for the sleeve or else that #$%* would be in the carbs.


Carbs look to be in really nice shape....


although there is some level of rust.


Surface rust on the underside of the rear fender.


Also a good deal of rust on the underside of the tail light assembly.  This will go into storage, since I don't plan on using it on The Eviscerator; however, I will attempt to prevent the rust from getting any worse.


My first "restored" piece!  As soon as I got this plastic rear fender off, I couldn't help but immediately give it a thorough scrub-down with a little degreaser solution.


The parts boxes are getting fat.


The new cycle tank rust kit came in on Friday.  My first order of business after disassembly will be to fix that rust problem with the tank; it's really all over the place on the inside.


As I left her in the garage... until next time!


traveler

  • Guest
Re: '75 CB550F restoration: The Eviscerator
« Reply #10 on: March 29, 2010, 05:14:19 AM »
Good progress.

Get yourself a motorcycle stand, and some put pieces of wood to take up the gap between the frame rails and the lower hanging oil pan, and jack her up and pull the forks off.  then when there is nothing but the frame and engine lay the frame over on it's side, pull the engine mounting bolts, and pick the frame off of the engine, and stand the engine back up. ;)

ANY green wire on a CB is a ground wire.  Just run it to the nearest frame screw and land it under there and you're covered.

~Joe

Offline TyMatthews

  • Enthusiast
  • **
  • Posts: 103
Re: '75 CB550F restoration: The Eviscerator
« Reply #11 on: March 30, 2010, 02:04:07 AM »
Good progress.

Get yourself a motorcycle stand, and some put pieces of wood to take up the gap between the frame rails and the lower hanging oil pan, and jack her up and pull the forks off.  then when there is nothing but the frame and engine lay the frame over on it's side, pull the engine mounting bolts, and pick the frame off of the engine, and stand the engine back up. ;)

ANY green wire on a CB is a ground wire.  Just run it to the nearest frame screw and land it under there and you're covered.

Yep, that's what I'm planning on doing to remove the engine.  Saw it posted here in some forum and decided that's the way to go!  Thanks for the tip on the green wire.  I'll have to trace where it's going and figure out whether that was causing something to fail or whether it was just extraneous.  All electrical bits functioned perfectly prior to disassembly, so I dunno?

So for a Day 2 update:

Made some really nice progress again this evening.  I'll just list everything off, and then post some pics tomorrow.  Most of my pics tonight were close-up shots for re-assembly documentation purposes, and won't be of much interest here.

  • Drained brake fluid, separated master cylinder and lever from handlebars
  • Disconnected & removed headlight
  • Removed the handlebars and gauge assembly
  • Removed main wiring harness, after labeling everything
  • Removed shifter lever, kick-start lever, right footrest
  • Removed grab bar and shocks
  • Bought a high-RPM exhaust fan to ventilate the garage better so as to not annoy my downstairs neighbor  :-\

Ran into one sad issue during the removal of the gauges.  When I fully loosened the right bolt that secures the ignition switch, I received not only the bolt and washer but also a small handful of broken shards of that piece of crap pot metal housing that sits between the electrical connector block and the key switch itself.  So now the right side of that housing cannot be secured down.  Looks like the pot metal entirely degraded over time and my loosening the bolt either snapped the bolt hole surround off, or it was already broken and I just revealed it.  Couldn't be sure.  Can't seem to find a replacement OEM lock set; does anyone know of a quality aftermarket version for this?  Ideally, it would also include the seat lock to have a matching key, but I suppose that part is not broken (yet) so I might as well keep it original.  I found this aftermarket assembly on OldBikeBarn.com, although it's $45 and doesn't include the seat lock assembly.  :'(   I suppose I could also try and jerry-rig something together to re-attach that right side, but I'm not in the mood to jerry-rig anything.  Now's the time to fix it right, permanently (well, semi-permanently).

The bike is looking really bare now!  I don't yet own a front stand, so I can't remove the wheel or forks yet.  About the only things left that I can do until I figure out the stand issue is the front calipers and fender.  Tomorrow I suppose I'll cobble together a little frame out of wood in order to support the engine when it comes time to turn her on her side and lift off the frame.  I went down to Home Depot and secured some pieces of scrap wood that they use to band together large stacks of 2x4s or 4x8 sheets of plywood.  I asked the guy if I could have a handful of these 2x3 boards (~4 feet long each), and he gave them to me free (sweet!)  They're completely serviceable for this purpose, and you can't beat the price.

Just a day or two left of disassembly work and then it's time to start the restoration phase.  Moving along steadily now!

Offline TPColgett

  • Full Member
  • *
  • Posts: 62
  • Hope to be on the road soon...
Re: '75 CB550F restoration: The Eviscerator
« Reply #12 on: March 30, 2010, 07:59:04 PM »
::whistles::

and just a few weeks ago she was whole in my garage  :D

Awesome progress! I wish mine were moving as quick.... I cant wait to see when your finished!

Offline TyMatthews

  • Enthusiast
  • **
  • Posts: 103
Re: '75 CB550F restoration: The Eviscerator
« Reply #13 on: March 30, 2010, 08:06:55 PM »
::whistles::

and just a few weeks ago she was whole in my garage  :D

Awesome progress! I wish mine were moving as quick.... I cant wait to see when your finished!

Hey Tyler!  For those other readers, I bought this bike from TPColgett.

Tonight I'll be building a wooden support frame to aid in removal of the front wheel and forks, and then with any luck, turn what's left over on its side, unbolt the engine, and lift off the frame.  Could be completely apart by midnight!  It's just too much fun.  During the day I stare at the inspiration images to, well, inspire me :-)

Oh, I thought I'd share this useful place with you: http://techshop.ws/index.html  They're located down in Menlo Park, and have a sandblaster, powder coater, and all kinds of additional tools.  I'm sure your parents' shop has a lot of the same equipment, but perhaps there's something useful to you.  I'm going to use their sandblaster and powder coater quite often in the next month or two!

Offline TyMatthews

  • Enthusiast
  • **
  • Posts: 103
Re: '75 CB550F restoration: The Eviscerator
« Reply #14 on: March 31, 2010, 02:12:41 AM »
Day 3.  Didn't get as much done tonight as I'd hoped, but did make some decent headway.  I first built a little stand out of wood as mentioned in my prior posts to support the engine/frame to help in removing the forks and front wheel.  Spent about a half hour cobbling this thing together out of wood I got from the scrap bin at Home Depot for less than $2...


and here it is in use:


It's definitely not the most beautiful piece of woodwork I've ever done, but with its very short intended lifespan it'll suffice.  With some clever maneuvering I managed to get the "bike" up onto the stand by myself.  Having a hard time calling it a bike at this moment, since there's so little left.  Once on the stand, I removed the front wheel, fender, and brake assembly.  That was pretty much the extent to what I was able to actually do with the bike itself.  I realized I didn't have the right socket to remove the forks... time for another trip to the hardware store tomorrow!

Tomorrow will be removal of the forks and triple, then time to turn this baby on her side and "drop" out the engine.  Then just a few last pieces, such as the battery box and swing arm, and she'll be completely disassembled.  Assuming that all goes well, I'll start cleaning the bits that I can and also take inventory of what I want to switch around, what's broken and needs replacing, etc.  I'd really like to get at the gas tank, as I have the tank cleaner and sealer kit already.  That might have to wait until the weekend, however, so that I can properly ventilate the garage as I do so.  It'll also make a helluva racket as I toss in some nuts, bolts, and BBs to knock all the rusted bits loose, so my neighbor won't appreciate the racket at midnight.

Offline Gcolgett

  • Full Member
  • *
  • Posts: 35
Re: '75 CB550F restoration: The Eviscerator
« Reply #15 on: March 31, 2010, 09:56:43 AM »
Hello TY: My name is George Colgett or as my son calls me the blast from the past. I bought the CB550F so he and I could ride. However My wife had a different idea. She made Tyler sell the bike so I was not able to do much with it. We rebuilt the carbs and replaced the exhaust since the original was gone. WE lightly cleaned some of the tank rust out but it was only a temp job. we put in new fuel filters so the rust should not have gotten to the carbs yet. I had a bit more than $2300.00 in the bike when my wife made Tyler sell it. Since the bike had to come out from Wisconsin the freight was $585.00 quite a bit but due to the low miles I felt it was worth it. However Now Tyler has the chance to repair my original CB550F That I bought new in 1975. He will be posting on this site as to our progress it will be fun to get my bike back on the road again George Colgett   

traveler

  • Guest
Re: '75 CB550F restoration: The Eviscerator
« Reply #16 on: March 31, 2010, 10:18:00 AM »
"wife made me"......glad to be single! ;)

Looks like some serious progress taking hold......tough luck about the neighbor.

~Joe

Offline TyMatthews

  • Enthusiast
  • **
  • Posts: 103
Re: '75 CB550F restoration: The Eviscerator
« Reply #17 on: April 01, 2010, 01:09:28 AM »
"wife made me"......glad to be single! ;)

Looks like some serious progress taking hold......tough luck about the neighbor.

I'd have to agree!  Being single has its advantages, although there are some disadvantages.  Maybe?

Day 4 update:

The new front and rear sprockets (JT) arrived today after getting misrouted by UPS (thanks, guys!)  Bought them from Bike Bandit.  Also received the new 530x100 EK heavy duty chain which I picked up from an EBay dealer.  They went straight into my "finished" bin.


I spent most of the evening working on the main wiring harness.  It started out all dusty and grimy:


and now it's clean and shiny:


I cut off all of the old tape, cleaned up the rubber sleeves with a damp towel and some elbow grease, removed tacky bits with some acetone, and then re-taped the whole thing from one end to the other.  I inspected all of the wires and connectors first, and didn't spot any problems.  The plastic sleeves around a few of the connectors have some minor amounts of gunk inside them, and I'm not able to remove it effectively since the sleeve is pressed around the wire.  Perhaps some electronic cleaning spray will help.  I don't think it's even remotely an issue, since the connector metal looks really good everywhere I've checked, but my OCD/perfectionist traits are kicking in.

The last bit of cleaning/detailing work was on the air intake chamber and the blinker horn:


I plan on wiring up a rheostat or potentiometer inline with that blinker horn in order to enable some serious volume control.  That thing is far too annoying.  I like the idea, as it'd be nice to have a reminder to turn off the blinker, but DAMN.  Does it have to be deafening? 

Seven items now occupy the finished bin; I can already see this guy coming back together!

Offline fastbroshi

  • Puppet
  • Old Timer
  • ******
  • Posts: 2,645
Re: '75 CB550F restoration: The Eviscerator
« Reply #18 on: April 01, 2010, 01:44:15 AM »
When I cleaned my harness I just used rubbing alcohol on a bunch of q tips to get into those connectors, worked pretty well.  And then I drank a bunch of beer.
Just call me Timmaaaaay!!!

Offline TyMatthews

  • Enthusiast
  • **
  • Posts: 103
Re: '75 CB550F restoration: The Eviscerator
« Reply #19 on: April 01, 2010, 07:50:36 AM »
When I cleaned my harness I just used rubbing alcohol on a bunch of q tips to get into those connectors, worked pretty well.  And then I drank a bunch of beer.

That sounds like a great idea.  Actually, what I can use is a little vodka... drink a bit, use a bit, drink a bit, use a bit.  And by night's end everything will be all right!   ;D

Offline TyMatthews

  • Enthusiast
  • **
  • Posts: 103
Re: '75 CB550F restoration: The Eviscerator
« Reply #20 on: April 02, 2010, 01:55:32 AM »
Day 5 update:

Made up a list of new parts I wanted to get, then ordered them from BikeBandit.  Had good luck with them on the front & rear JT sprockets, so I figured I'd use them again:

  • Front pads and rear shoes
  • New throttle push/pull cables and clutch cable from Motion Pro
  • Fram oil filter
  • NGK spark plugs
  • All Balls tapered steering stem bearings

There are a few things I still need, just couldn't find the right parts online yet.  These include new front & rear wheel bearings and swing arm bushings, and lots of minutiae.  As I'm cleaning things, I find little stuff that's worn down.  Typically it's a rubber piece or something similar that is long past its prime.  For some of these I'll try and find originals, otherwise I'll have to try and cook up my own.

My work tonight centered on the gauges.  As I was disassembling the "pilot combination" to clean the plastic parts, I noticed the little aluminum plate that holds the semi-transparent colored plastic light filters was a little loose.  This led to a time-consuming side task which I hadn't originally intended, but it came out nice in the end.  I first gently worked the plate off, scraped away some of the ancient glue, and then removed all of the plastic filters.  It cleaned up real nice:


Then I cleaned up the five plastic filters by soaking them in acetone for 15 minutes.  This completely freed up the old glue that was caked onto their perimeters, and it all came right off.  I then used a little isopropyl alcohol (IPA) to polish the plastic with a Q-tip, then reseated and glued them all back into place with a little clear plastic epoxy:


Cleaned up the plastic housing with a little degreaser solution, then glued the plate back on with some more plastic epoxy:


Cleaned up the wiring and bottom plastic mount with some more IPA, then re-assembled.  I spent well over an hour detailing just this one part (mostly fixing the plate); however, aside from a few scuff marks here and there, it now looks like it did 35 years ago when it rolled off the assembly line:


I tried to take apart the speedo and tach, but couldn't figure out how to do it.  I suppose that's a security thing, to keep odometer mischief at a minimum.  The parts are pretty clean to begin with, but I'd like to repaint the housing in black and clean the inside glass, as I can see streaks in there.  I'll have to search on here for some tips on how to get those things cracked open... seen people post their custom gauge overlays, so there's gotta be a way to do it!

Offline TyMatthews

  • Enthusiast
  • **
  • Posts: 103
Re: '75 CB550F restoration: The Eviscerator
« Reply #21 on: April 04, 2010, 12:24:26 AM »
Day 7 Update:

Got zero done on Friday, owing to an extensive problem set in my computational chemistry course that literally took me all night to finish.  God damn science is getting in the way of my build!  Today, however, was a beautiful day in NorCal, and I got the better part of 8 solid hours work in:
  • Removed top triple and front forks
  • Pulled off the center stand and swing arm
  • Dismounted the engine!
  • Pulled off the battery casing, leaving the frame almost completely bare now

I don't have that special tool to remove the cylinder that mounts the lower part of the triple and bearings, so that still needs to be done.  The bulk of my time today was spent cleaning the gas tank, in preparation for the acid wash I'll give it tomorrow.  The KBS coating package that I got includes this phosphoric acid + zinc solution which will etch away the rust inside the tank and leave a thin zinc phosphate film.  When you put on the final sealer, it bonds to the phosphate and makes a permanent, rust-proof sealant.  Well, that's the idea, anyways.

First step was to clean out all the gunk inside the tank.  I first threw in a hundred or so small nuts and washers, along with a couple thousand BBs (from a BB gun) to serve as abrasives.  Sealed up the petcock hole with a little rubber piece I cut out to fit, then clamped down with your ordinary ring hose clamp type thing.  The top was much harder to seal; my first attempt with duct tape was a complete disaster.  Leaked like crazy, as the seal gave way quite rapidly.  My second attempt was with PVC electrical tape, and that held out better, but still it gave way after a while.  Sigh.  Prior to sealing up the inlet hole, I poured in the 1:1 cleaner:hot water solution (about 1L worth).  The cleaner that comes with the kit I think is just some ordinary degreaser type solution.

I shook that gas tank around like mad for the better part of 20 minutes, really scraping every last nook and cranny on the insides with those BBs and nuts.  The solution was somewhat foamy, but not to the point there were only bubbles.  After draining out the results, I got this nasty mess:


This was after the rust and gunk had settled to the bottom of the bottle, forming a 1" deposit.  After shaking it up to demonstrate its nastiness:


Cocktail, anyone?  I can't believe all that crap came out of that tank.  I'm sure glad it did, though!  I saved half of the original cleaning solution for a second pass, and that turned out much less rusty.  After filling the tank more than 5 times with hot water and shaking the nuts and BBs around on the inside, the last few washes came out completely clean, no rust or gunk at all.  Success!  Tank is finally free of loose particles and crap.

Here's the tank before any cleaning:


and now here's how she looks:


I scrubbed the top inlet with a scouring pad and some degreaser to shine it up a bit.  The insides look far better than they did before, albeit there's still some surface rust.  The rust is not loose, so it will only come off with an appropriate chemical etch.  That's next!  The hardest part of cleaning the tank was getting the god damned BBs and nuts back out.  I must have spent the better part of a half hour trying to shake them out.  Man, what a complete PITA.

Here's where I left off:


Getting the engine out was somewhat of a pain, also.  I knew about the trick with turning the frame on its side, unbolting the engine, then lifting the frame right off.  What I didn't know was which side to choose.  I first leaned it against the left side (chain side), but I couldn't for the life of me figure out a way to wrangle the frame off.  So I just flipped her over and tried from the right side.  Worked a helluva lot better!  Once the engine and frame parted company, I scrubbed the frame down with some degreaser solution and a light scouring pad to prep her for blasting and eventual powder coating.

Moving forward now, I'm definitely going to build a soda blasting cabinet as outlined here on the forums.  My only dilemma will be exactly how big to make it.  I really want to be able to do the frame myself, and all the larger metal bits.  The smaller sized cabinet would be easier and cheaper to make, but it's more restricting on what you can get done.  I'll first find out how big the cabinet is down at that TechShop place in Menlo Park, and see if I can't get it done there.

Great day today, tomorrow looks promising as well

Offline fastbroshi

  • Puppet
  • Old Timer
  • ******
  • Posts: 2,645
Re: '75 CB550F restoration: The Eviscerator
« Reply #22 on: April 04, 2010, 12:34:41 AM »


I thought you were showing us your spit bottle.
Just call me Timmaaaaay!!!

traveler

  • Guest
Re: '75 CB550F restoration: The Eviscerator
« Reply #23 on: April 04, 2010, 08:42:32 AM »
No need to do any frame cleaning yourself, if your going to powdercoat it, as the sandplasting prep will do all of that for you.

while you have the motor out, make sure the cam chain is still good, and clean and paint that baby up before reinstalling in the frame.  Cleaning the motor in the frame?  Well speaking from PERSONAL experience on my build, it's a hell of a lot of work. :'(

Oh....and go to tapered bearings in the head tube!

Just my .02

~Joe

Offline TyMatthews

  • Enthusiast
  • **
  • Posts: 103
Re: '75 CB550F restoration: The Eviscerator
« Reply #24 on: April 04, 2010, 10:44:18 AM »
No need to do any frame cleaning yourself, if your going to powdercoat it, as the sandplasting prep will do all of that for you.

while you have the motor out, make sure the cam chain is still good, and clean and paint that baby up before reinstalling in the frame.  Cleaning the motor in the frame?  Well speaking from PERSONAL experience on my build, it's a hell of a lot of work. :'(

Oh....and go to tapered bearings in the head tube!

I want to sandblast the frame myself, assuming I can find an appropriate place to do so.  So I felt cleaning off 3-decades' worth the sludge and grime would provide a better surface for easier blasting.  Didn't take much effort, at any rate.

I was planning on taking the motor apart and inspecting everything while cleaning, blasting, and then repainting all of the exterior surfaces.  I'll make sure the cam chain is on that list.

And tapered bearings have already been ordered!  I just need that 48 mm pin spanner tool to remove the steering stem and fully bare the frame in all its glory.

Question for all: how does one go about temporarily removing the VIN metal plate on the steering stem portion of the frame?  I don't want that to get blasted and painted; however, it looks like its riveted on there and I'm not sure the best way to effect its removal.