Author Topic: CB550K0 Build - 450T Tank mods  (Read 55323 times)

0 Members and 2 Guests are viewing this topic.

Offline streak09

  • Enthusiast
  • **
  • Posts: 203
  • I don't know what im doing, but I'll do it anyway
Re: CB550K0 Build
« Reply #100 on: October 14, 2013, 08:33:44 AM »
Plan is to at least get my fork lowers painted this evening with the glossy POR-15 black coat.

Ive also been doing some more research on emulators. It looks like people have had some success using some from Mikes XS650 website. They are only 54 bucks, but not in stock right now. I think this may be a good option. I still need to get a measurement on my springs to see if they are stock.

Offline streak09

  • Enthusiast
  • **
  • Posts: 203
  • I don't know what im doing, but I'll do it anyway
Re: CB550K0 Build
« Reply #101 on: October 14, 2013, 07:50:02 PM »
Got the lower forks painted. They turned out pretty good, but not quite as glossy as I hoped. Probably cant tell from the picture, but its not a wet gloss look. I kinda knew I probably wouldn't get that out of the POR-15, but I will see if its possible to shine it up with some compound.


I dont know when I will be able to get the rest of the parts painted because of the cold and rain coming this way this week, and then I will be gone for the next 2 on business. Im getting so antsy to get this thing together. But, I have to be patient and do it the the way I want, and as best I can.

I also took a measurement on my springs. The very smallest measurement I got was 4.20 mm. This sound about right for stock springs?

Offline jdtim

  • Full Member
  • *
  • Posts: 22
Re: CB550K0 Build
« Reply #102 on: October 15, 2013, 09:40:11 PM »
Forks look nice! Was it tough to do?

-Tim

Offline streak09

  • Enthusiast
  • **
  • Posts: 203
  • I don't know what im doing, but I'll do it anyway
Re: CB550K0 Build
« Reply #103 on: October 16, 2013, 06:09:50 AM »
Thanks! Not too bad. I sand blasted with a buddys cabbinet and cleaned the inside out really good so I didnt have to after paint. Wiped it down with Acetone and went at it. The spray can of the POR Blackcoat goes on fairly well, but not great. I tried buffing it out to a better shine, and I think I will be able to acheive what I want with it. I really wanted to use the Black coat over regualr paint because of the durability factor. Ill try to get them polished up by the end of the week to see how they turn out. I think I will pick up a bench buffer to speed up the process, this paint is pretty tough for hand polishing.

I also emailed Mikes XS650 about the emulators they have that arent in stock. I got a response that they wont be in for anothe 45 days  :-\. I really want to get these forks built up, but is it worth spend the extra 70 bucks on Race Techs emulators?

Offline streak09

  • Enthusiast
  • **
  • Posts: 203
  • I don't know what im doing, but I'll do it anyway
Re: CB550K0 Build
« Reply #104 on: November 01, 2013, 02:39:00 PM »
So while I was away on business I ordered some goodies.

I got a Shorai battery and an ElectroSport regulator/rectifier. Also on the way are bullet connectors and steering bearings. I decided to make my own wiring harness, so I will have to pick up some decent quality wire soon.


Anyone else think these directions are confusing when paired with the actual wiring of the unit?


Offline streak09

  • Enthusiast
  • **
  • Posts: 203
  • I don't know what im doing, but I'll do it anyway
Re: CB550K0 Build
« Reply #105 on: November 03, 2013, 02:29:06 PM »
Sloooooow progress. If anyone is following along, I apologize for going painfully slow. Work gets in the way of play too much  :(.

With a deep freeze on the bushing and a warm swing arm I was able to push them in fairly easy. Good tight fit and snug fit on the bike too.


I'll be traveling again on Tuesday, so probably wont have another update for a little while.

Offline streak09

  • Enthusiast
  • **
  • Posts: 203
  • I don't know what im doing, but I'll do it anyway
Re: CB550K0 Build
« Reply #106 on: November 16, 2013, 02:09:00 PM »
I was able to fab up a electronics tray today. Pretty crude, made with a hammer and a vice! Im going to try to use alumiweld on the corners, never tried the stuff before.


I was going to assembly the swing arm too, but decided to hold off because the pivot collar looked pretty corroded  :(. Ill get a picture tonight.  I think it would be wise to get a new, or at least a better shape once seeing that I already replaced the bushings with new bronze ones. Anyone know a good source for one? A quick ebay search didn't yield much besides a NOS one at $140.

I also installed the all balls tapered bearings. Went in pretty smooth after the parts were thrown in the freezer for a bit. Hopefully have something to update with tomorrow! Plan is to get the forks assembled with new seals and new fork oil. Trying to get a roller here soon!

Offline streak09

  • Enthusiast
  • **
  • Posts: 203
  • I don't know what im doing, but I'll do it anyway
Re: CB550K0 Build - Front Forks Rebuilt!
« Reply #107 on: November 17, 2013, 03:56:45 PM »
Here is the swing arm collar, doesnt look too good...


I got most of the forks buttoned up. Still need to add the oil and torque down the bolts on the trees. Also need to source the flat sided washers that are pinched in the upper tree.


Let me know if you guys know of some sources for the washers or swing arm collar!
« Last Edit: November 17, 2013, 07:15:50 PM by streak09 »

Offline streak09

  • Enthusiast
  • **
  • Posts: 203
  • I don't know what im doing, but I'll do it anyway
Re: CB550K0 Build
« Reply #108 on: November 22, 2013, 04:14:37 PM »
Ive got a roller now! Got the forks finished up and put the swing arm on for the time being, I will replace the swing arm collar later. Threw some bars on that I had laying around and sat the tank up there. I think it looks pretty good!


I want to replace the rear shocks, and redo the wheels at some point, but I think getting it rolling will keep me motivated and make it a bit easier maneuvering around the garage. Next up is to fab up the battery box and another electronics tray. After that ill work on the wiring.   

Offline DustyRags

  • I'm not skilled, I'm just a
  • Hot Shot
  • ***
  • Posts: 720
  • Just try it and see what happens
Re: CB550K0 Build
« Reply #109 on: November 23, 2013, 08:59:40 AM »
Lookin' good!  :D
1976 CB550K- sold
2005 Kawasaki Vulcan 500- sold
2000 CB750 Nighthawk - sold
1975 XL350 - crashed
2004 Suzuki Vstrom 650 - sold

Offline SohRon

  • She laughs 'til she cries when they call me an
  • Expert
  • ****
  • Posts: 946
Re: CB550K0 Build
« Reply #110 on: November 24, 2013, 07:15:44 AM »
Got the lower forks painted. They turned out pretty good, but not quite as glossy as I hoped. Probably cant tell from the picture, but its not a wet gloss look. I kinda knew I probably wouldn't get that out of the POR-15, but I will see if its possible to shine it up with some compound.


The trick with Blackcote is to spray it on relatively thick, progressing one small area at a time, and keep the edges wet. Best to get it done in 1-2 fairly heavy coats rather than several light coats. Here's a triple tree done up in Blackcote, no buffing required


Project is looking good. Some of us that have taken three, four or more years to complete their builds can commiserate with your "lack of progress"! Just take your time, do it right, and you will finish it... some day!   ;D
« Last Edit: November 24, 2013, 07:22:26 AM by SohRon »
"He slipped back down the alley with some roly-poly little bat-faced girl..."

Assembling my '74 CB550: http://forums.sohc4.net/index.php?topic=86697.0
Assembly of the Right-hand Switch (a rebuilder's guide):  http://forums.sohc4.net/index.php?topic=80532.0
Installing stock 4X4 exhaust: CB500-CB550 K: http://forums.sohc4.net/index.php?topic=82323.0
CB550 Assembly Manual: http://forums.sohc4.net/index.php/topic,151576.0.html

Offline streak09

  • Enthusiast
  • **
  • Posts: 203
  • I don't know what im doing, but I'll do it anyway
Re: CB550K0 Build
« Reply #111 on: November 24, 2013, 10:29:04 AM »
Thanks for the encouragement and tips on the black coat! I got the hang if it after a few parts I think. I'm was going at it like you would with regular spray paint, thin multiple coats. You are exactly right, two of three heavy coats give you a nice smooth finish. Ive been very impressed with both the POR black coat and cahssis coat. Very durable and give you a good finish.

Offline streak09

  • Enthusiast
  • **
  • Posts: 203
  • I don't know what im doing, but I'll do it anyway
Re: CB550K0 Build
« Reply #112 on: January 16, 2014, 06:46:18 PM »
Progress is still happening believe it or not! I ordered some Mikes XS650 fork emulators when I saw they were available again. I probably will not install these for a while since I just rebuilt the forks not long ago. I will definitely get them in there before I get riding much.

My focus lately has been mounting my electronics. I made a simple electronics tray to put the wiring and regulator/rectifier in.
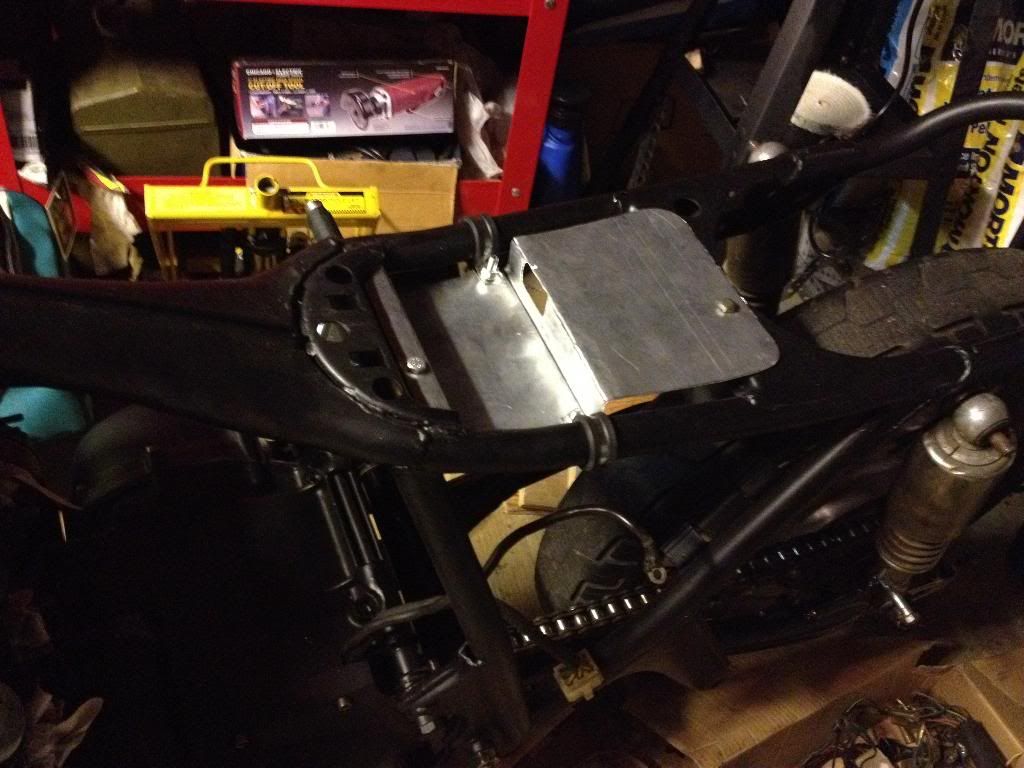


The regulator/rectifier will go on the underside of the pan in the rear, to make sure it has some air flow to keep it cool. The wires will go through the rectangular hole to connect to the rest of the wiring.

I made a simple battery box out of some aluminum and riveted it together. Then made a bracket out of steel to mount it on the existing center stand mounts. I have next to zero experience with fabricating stuff from sheet metal, so I think it came out pretty good. All I used was a hammer, vice, HF rivet gun, and a HF cut off tool  ;D. Oh, and I used Google Sketchup to make the patterns for the box and bracket.
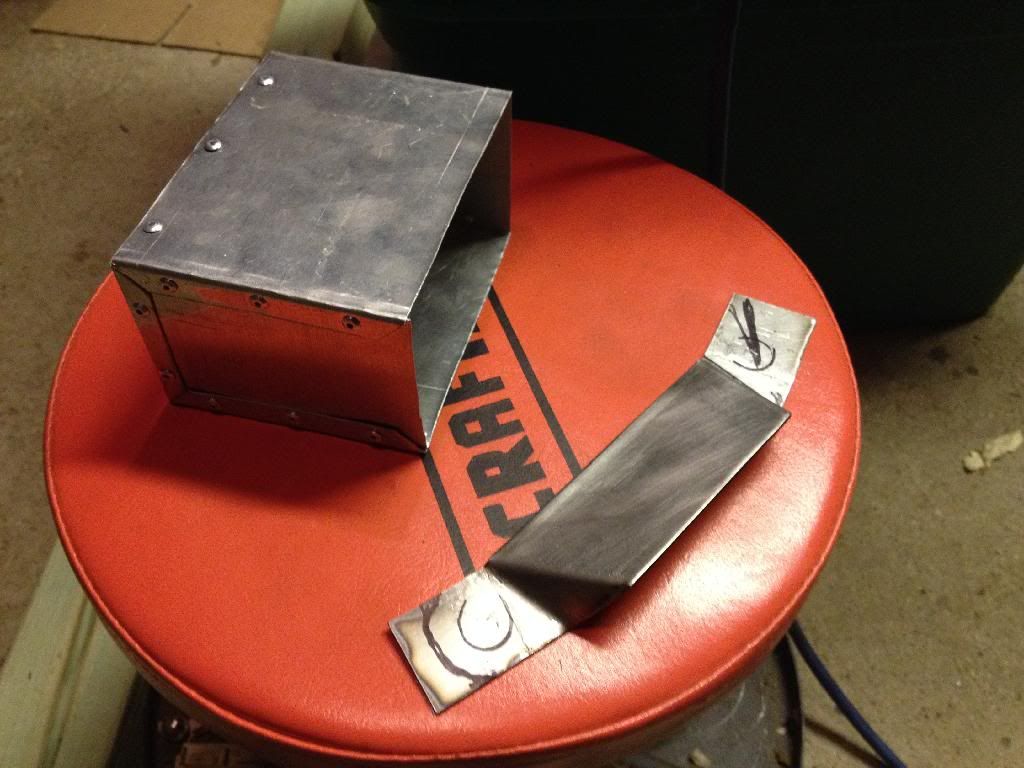

Box and bracket
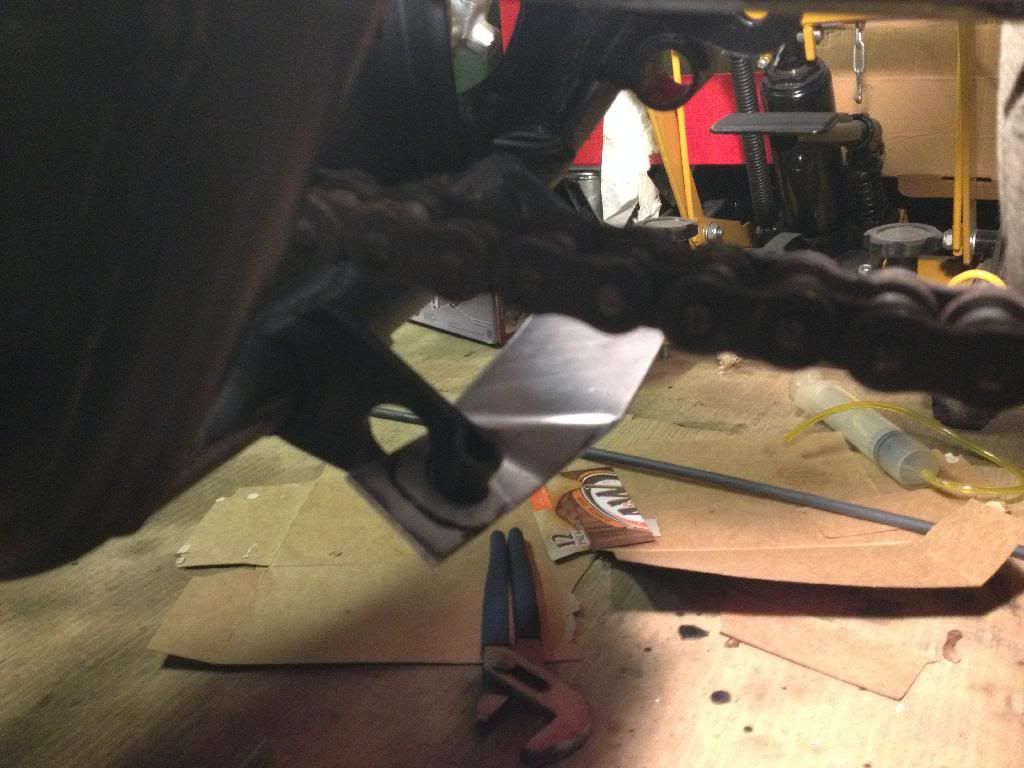

Crappy picture of the bracket
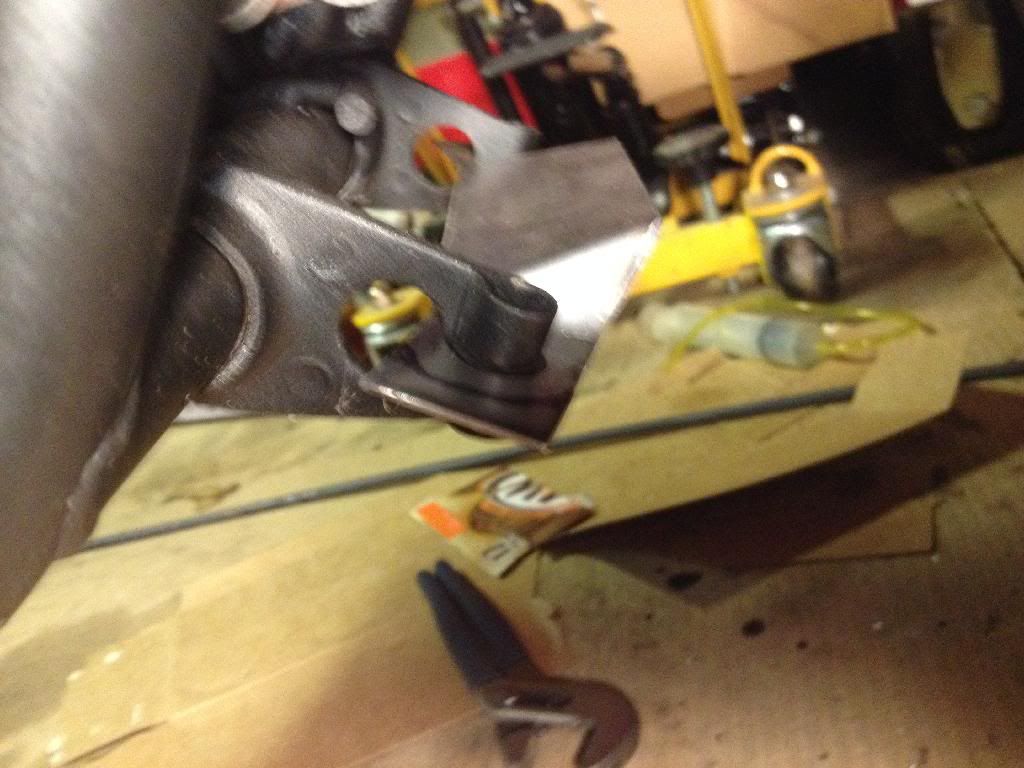

Another crappy picture of the bracket
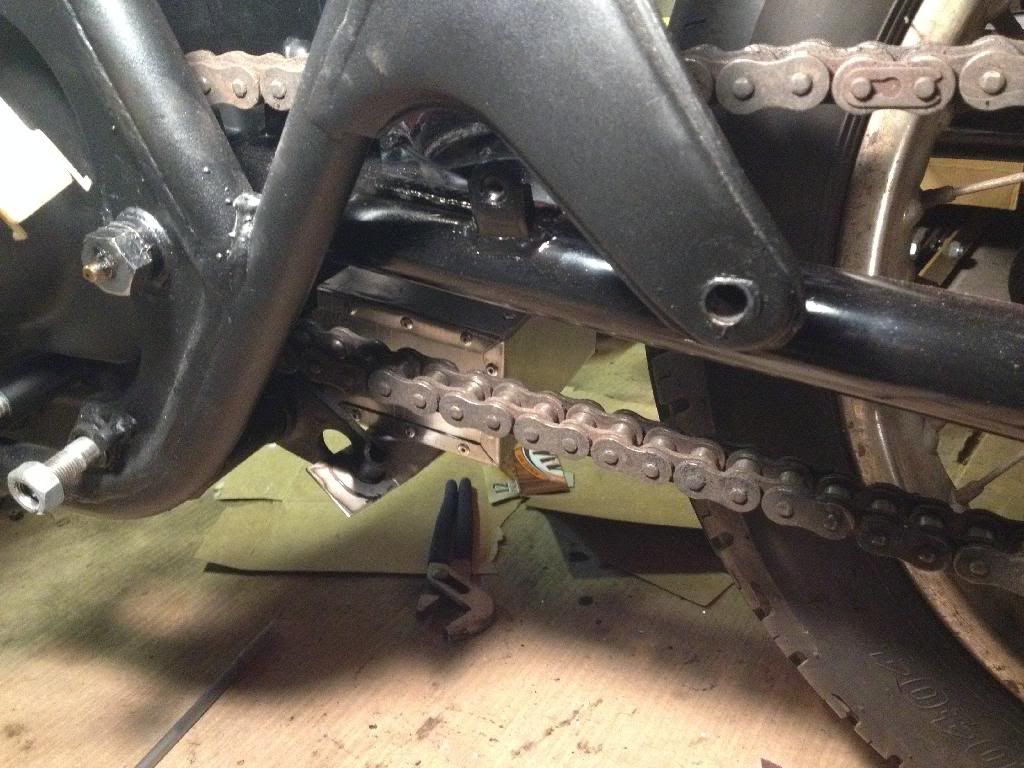

Mocked up
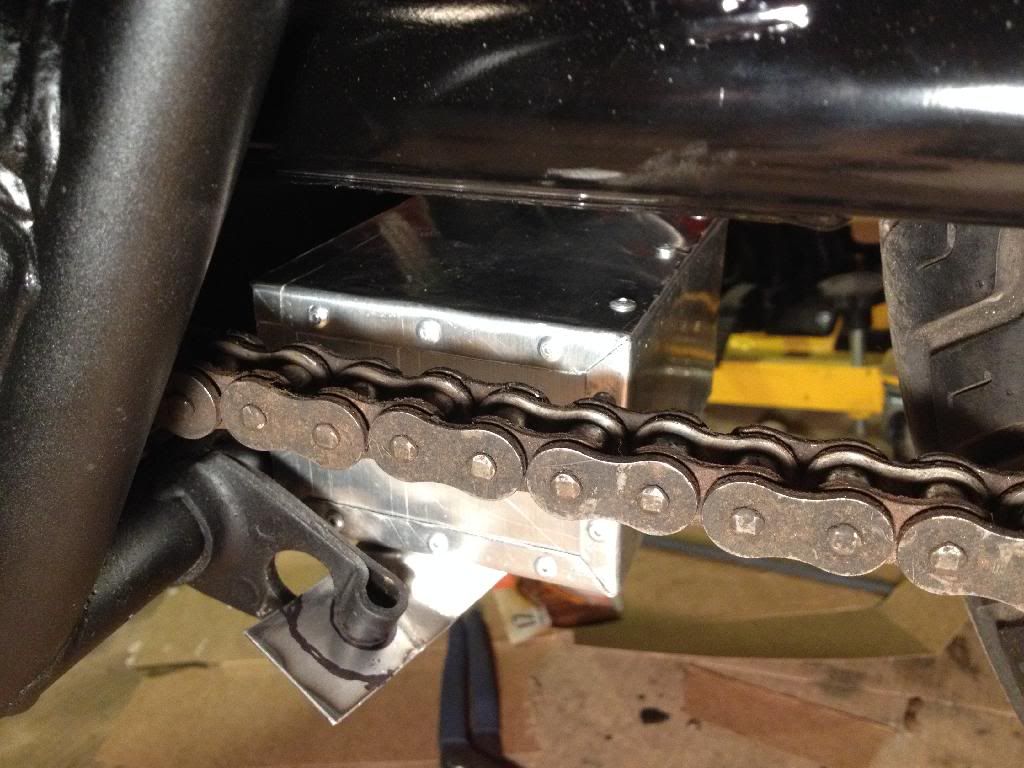


I think it should work out. Im sure there are a lot of better ways to do it, but I dont have access to a welder so that really limits the options.

Ill finish up the mounting this weekend and look at mounting options for starter solenoid.


Ill try to not make it months between posts anymore  :o


Offline KrautKoffin

  • Hot Shot
  • ***
  • Posts: 471
Re: CB550K0 Build
« Reply #113 on: January 16, 2014, 06:52:54 PM »
Following this build for a while, looks good!
74 cb550
I now have Beastie Boys "Sabotage" stuck in my head after seeing your avatar.

Offline DustyRags

  • I'm not skilled, I'm just a
  • Hot Shot
  • ***
  • Posts: 720
  • Just try it and see what happens
Re: CB550K0 Build
« Reply #114 on: January 16, 2014, 09:37:23 PM »
Ditto- looking good! :)
1976 CB550K- sold
2005 Kawasaki Vulcan 500- sold
2000 CB750 Nighthawk - sold
1975 XL350 - crashed
2004 Suzuki Vstrom 650 - sold

Offline calj737

  • Really Old Timer ...
  • *******
  • Posts: 21,070
  • I refuse...
Re: CB550K0 Build
« Reply #115 on: January 17, 2014, 04:59:28 AM »
Streak - just read through and don't know whether you got any answers or input on some of your questions...

The top clamp squared washers: you can nip the edge of a standard washer with a grinder and make your own. Seems to be a common solution.

David Silver Spares in PA probably has everything you're looking for at better prices than some other sources you've mentioned. I've not used them, but so many others have, that they must be a quality source.

This is a bit late, but prior to painting aluminum, if at all possible, pre-heat it. Despite heavy cleaning and an Acetone wipe down, heat will help any contaminant leech from the part then providing better adhesion and less chipping.  Not always feasible, but always very beneficial. Even if you have to rig up a heat gun, outside fire to set parts near, whatever. You can also use the method for curing.

Nice work and great pace to your project.
'74 550 Build http://forums.sohc4.net/index.php?topic=126401.0
'73 500 Build http://forums.sohc4.net/index.php?topic=132935.0

"Of all tyrannies, a tyranny sincerely exercised for the good of it's victim may be the most oppressive. It may be better to live under robber barons than under omnipotent moral busybodies. The robber baron's cruelty may sometimes sleep, his cupidity may at some point be satiated, but those who torment us for our own good will torment us without end for they do so with the approval of their own conscience." - C.S. Lewis

Offline streak09

  • Enthusiast
  • **
  • Posts: 203
  • I don't know what im doing, but I'll do it anyway
Re: CB550K0 Build
« Reply #116 on: January 17, 2014, 06:25:33 AM »
Thanks for the encouragement guys! Its always nice to know people are watching/reading  ;D. I know Ive come across your builds and have gotten a lot of ideas and motivation. This forum is such a great resource, especially for beginners.

Thanks for the tips calj737. Ive used DSS before and they have some high quality stuff. I got my airbox boots from them, although it was from the UK. Did they open up a distribution in PA? And I will have to keep in mind the preheating of aluminum before painting.

Ill try to update this weekend before I leave for business on Sunday, but we my fiance  ::) is in the middle of planning a wedding, so I may not get to much.

Offline Bru-tom

  • Hot Shot
  • ***
  • Posts: 517
Re: CB550K0 Build
« Reply #117 on: January 17, 2014, 09:01:05 AM »
Very nice! i also put my battery in the exact same place as yours! a little tricky to get the angles right so the battery is "straight". great minds think alike ;D i

keep it up ;)

Offline streak09

  • Enthusiast
  • **
  • Posts: 203
  • I don't know what im doing, but I'll do it anyway
Re: CB550K0 Build
« Reply #118 on: January 17, 2014, 10:27:29 AM »
Very nice! i also put my battery in the exact same place as yours! a little tricky to get the angles right so the battery is "straight".

For sure! That was my second attempt at getting it straight. I must have messed up my measurement when I measured the angle of the brackets. I thought I had the correct pattern made in Sketchup. Nope! had to flatten it out and make a second attempt. But I think I got it pretty level. And funny you should say you put yours in the same place because I think I stole that location from you when looking over your build!  ::)   Your fabricating skills are outstanding by the way! Makes me look like a 2 year old playing with play dough! I may hit you up for some tips on laying some fiberglass and carbon fiber.

Offline Bru-tom

  • Hot Shot
  • ***
  • Posts: 517
Re: CB550K0 Build
« Reply #119 on: January 17, 2014, 12:38:56 PM »
hahahahaha, no stress brother! i have helped myself to many an idea here too ;DI dont think i ever posted a pic of my mounting bracket, guess my explaining is tops! :P i should get a pic up sooner or later in-case there is another YOU needing help hehehehe. But yeah, i use cardboard for everything i mock up, and i mean everything! one of these days i am going to assemble all of my templates and take a pic of em for kicks :D we all have to start somewhere, luckily i have been gifted with our family craftsmanship genes :)

Thats all good, its easier than everyone thinks ;)


Offline streak09

  • Enthusiast
  • **
  • Posts: 203
  • I don't know what im doing, but I'll do it anyway
Re: CB550K0 Build
« Reply #120 on: January 29, 2014, 09:48:05 AM »
Well since its been quite cold in Ohio the past few weeks, I decided to start a bike build that I can do inside!


Offline dagersh

  • "A country attempting to tax itself into prosperity is akin to a man standing in a bucket attempting to lift that bucket by its handle. - Winston Churchill"
  • Expert
  • ****
  • Posts: 1,010
    • Photos
Re: CB550K0 Build
« Reply #121 on: January 29, 2014, 11:38:26 AM »
Dude,

Superhawk Kit?  Who make it?  It looks insane!!!!

Dagersh

P.S.

Great 550 Build, I am loving your electrical ideas!
1962 CA95
1966 Black Bomber
1966 CA77 Dream
1967 Superhawk
1970 CB750K0
1972 CL350
1972 CB450/500 Custom
1972 CB500K1
1975 CB550F
1976 CB400F
1975 CB750 Future Restoration
1976 CB750K6
1976 CB750F
1976 GL1000


1968 Suzuki T500 Cobra
1990 BMW K1
2001 'Busa
2003 RC 51
Bunch of Guzzi's

http://www.sohc4.us/gallery/v/members/personal/dagersh/

Offline streak09

  • Enthusiast
  • **
  • Posts: 203
  • I don't know what im doing, but I'll do it anyway
Re: CB550K0 Build
« Reply #122 on: January 29, 2014, 01:07:45 PM »
Its actually a Honda DAX 70 (export of the CT70). 1/6th scale Tamiya. They have some pretty cool classic bike model kits, I want to get the Honda RC166 Racer. This is my first Tamiya kit, and the detail is incredible. Maybe ill post some pictures on another thread as this little build continues.  :P .

Great 550 Build, I am loving your electrical ideas!

Thanks! It is sloooooowly coming together. Hopefully have it together by Mid Ohio Vintage Days!?!?

Offline jdtim

  • Full Member
  • *
  • Posts: 22
Re: CB550K0 Build
« Reply #123 on: March 20, 2014, 08:20:31 PM »
Thread revival!

How is this building coming along streak? I've been following for awhile, because you're doing nice things on a limited budget. I'm in the exact same boat  :P

Hope all is well man!

-tim

Offline streak09

  • Enthusiast
  • **
  • Posts: 203
  • I don't know what im doing, but I'll do it anyway
Re: CB550K0 Build
« Reply #124 on: March 21, 2014, 06:27:18 AM »
Thanks for the interest tim!!! Alsways great to know that someone is whatching and interested!

Altgough it is still ongoing, its been very difficult finding the time to work on the bike. I have been on a short time assignment for work in texas since the beginning of march, that will continue through may. Ill come home every 2-3 weeks, and now that its warming up (ever so slightly) I hope that I will be able to get some small items done on my trips home. I also have a wedding that we are planning in August, and my Honda S90 that I want to get some work done on. So I will try to squeeze some work in on the 550.

Last time I worked on the bike I noticed how brittle my plug wires were (I noticed because one broke when I bent it  ::)). With this happening, I think I may splurge (hey, I didnt take my short term assignment for free! ;)) and go with a pamco ignition setup.

Immediate future is to get going on the wirring!!!

Ill update if any progress is made! 

P.S. do you have a build thread tim?